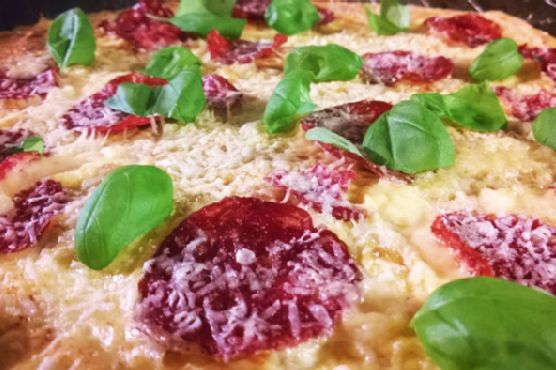
Quick N’ Easy Basil Pesto
Intro
There’s something truly magical about the aroma of fresh basil wafting through the kitchen. It takes me back to my childhood, sitting at my grandmother’s kitchen table, eagerly watching as she crafted her signature pesto. The vibrant green of the basil, the nutty aroma of the pine nuts, and the sharp, tangy scent of freshly grated parmesan — these are the sensory memories that have stayed with me. Today, I want to share a simplified version of her recipe that retains all the charm and flavor of the traditional dish, while being quick and easy enough for anyone to make. Whether you’re a seasoned cook or a kitchen novice, this Quick N’ Easy Basil Pesto is sure to become a favorite in your home, just as it has in mine.
Why You’ll Love It
Our Quick N’ Easy Basil Pesto is a delightful blend of fresh ingredients that can elevate any meal. Here are just a few reasons why you’ll fall in love with this recipe:
- Simple and Fast: With just a handful of ingredients and a few minutes, you can whip up a batch of homemade pesto.
- Versatile: Use it as a pasta sauce, a sandwich spread, or a topping for grilled meats and veggies.
- Rich in Flavor: Each bite delivers a burst of fresh, nutty, and cheesy goodness.
- Customizable: Easily tweak the ingredients to suit your taste or dietary needs.
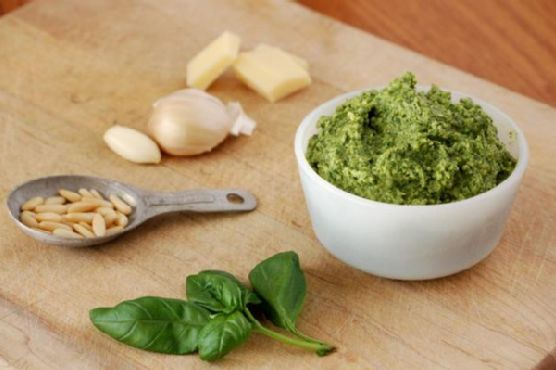
Ingredients
- 2 cups fresh basil leaves, packed
- 1/2 cup olive oil, plus more if needed
- 1/3 cup pine nuts
- 2 cloves garlic
- 1/2 cup freshly grated parmesan cheese
Instructions
- Begin by washing and drying the basil leaves thoroughly.
- In a food processor, add the basil leaves, pine nuts, and garlic. Pulse a few times until coarsely chopped.
- With the processor running, slowly drizzle in the olive oil until the mixture is smooth and creamy.
- Add the parmesan cheese and pulse until well combined. Check the consistency; if it’s too thick, gradually add more olive oil until you achieve the desired texture.
- Taste and adjust seasoning if necessary. Remember, fresh pesto is best enjoyed within 24 hours.
- For longer storage, scoop the pesto into muffin cups lined with plastic wrap and freeze for future use.
Tips
To ensure your pesto is perfect every time, consider these tips:
- Quality Ingredients: Use the freshest basil and highest quality olive oil you can find for the best flavor.
- Toasting Nuts: Lightly toasting the pine nuts before adding them to the processor enhances their flavor.
- Consistent Texture: Add olive oil slowly to control the texture of your pesto. You can always add more, but you can’t take it out!
Variations & Substitutions
One of the joys of making pesto is its flexibility. Here are some ideas to switch things up:
- Nut Alternatives: Swap pine nuts for walnuts, almonds, or even sunflower seeds for a different flavor profile.
- Cheese Options: Try Pecorino Romano or a vegan parmesan for a unique twist.
- Herbal Variations: Substitute part of the basil with spinach, arugula, or parsley for a diverse taste.
Storage
Fresh pesto is best enjoyed within 24 hours for optimal flavor. If you need to store it longer, here are some options:
- Refrigeration: Keep it in an airtight container with a thin layer of olive oil on top to prevent browning. It should last for up to a week.
- Freezing: Freeze in muffin cups lined with plastic wrap for individual portions. Once frozen, transfer them to a zip-lock bag. They can last in the freezer for up to three months.
FAQ
Can I make pesto without a food processor?
Absolutely! If you don’t have a food processor, a blender can work as an alternative. You can also use a mortar and pestle for a more traditional approach, though it will take more time and effort.
Is there a way to make this recipe vegan?
Yes, you can make a vegan version by substituting the parmesan cheese with nutritional yeast or a vegan cheese alternative. This will still give you that cheesy flavor without using dairy.
Nutrition
This recipe is nutrient-dense, providing healthy fats from the olive oil and pine nuts, vitamins from the basil, and protein from the cheese. It’s a great choice for those looking to add more wholesome ingredients to their diet without sacrificing flavor.
Conclusion
Making your own basil pesto is a rewarding experience, connecting you to the vibrant flavors of fresh ingredients and the timeless traditions of Italian cooking. Whether you’re using it to dress up a pasta dish, spread on a sandwich, or as a dip, this Quick N’ Easy Basil Pesto is sure to become a staple in your culinary repertoire. So why not gather your ingredients, and embark on a delicious journey of flavor and nostalgia, just like the one I enjoyed with my grandmother so many years ago.
Related update: Quick N' Easy Basil Pesto