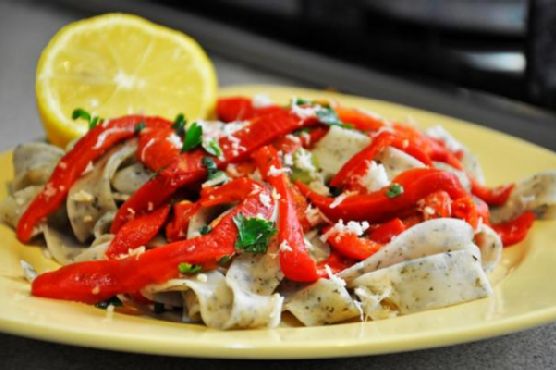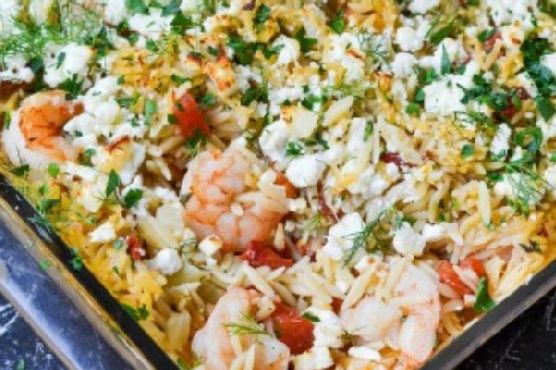
Shrimp & Orzo | Made by Meaghan Moineau
Title: "Savoring Tradition: Shrimp & Orzo Delight with a Nostalgic Twist"Description:
Embark on a culinary journey with our delectable Shrimp & Orzo recipe, a dish that beautifully marries the vibrant flavors of the Mediterranean with the comforting warmth of home-cooked meals. This main dish, rated a 7 out of 10 on the difficulty scale, is perfect for a cozy family dinner or a casual get-together with friends. Follow along as we not only guide you through creating this sumptuous dish but also share a cherished family memory that brings this recipe to life.
---
A Nostalgic Journey Through Shrimp & Orzo
Every family has a dish that stirs up a fond memory, and for mine, it’s the delightful Shrimp & Orzo. This dish isn’t just a meal; it’s a tapestry of flavors woven with the threads of family tradition and love.
I vividly remember the first time my grandmother introduced this recipe to our family table. It was a balmy summer evening, one of those nights where the air was thick with the scent of blooming jasmine and the distant sound of cicadas. Our family gathered in her sun-dappled kitchen, a place that felt like the heart of our home. The faint sizzle of olive oil hitting the hot Dutch oven announced the beginning of our culinary adventure.
As my grandmother stirred the diced onion and fennel bulb, she regaled us with stories from her childhood, tales of seaside summers where shrimp were abundant and laughter even more so. Those evenings were always special, the kitchen alive with laughter, the clinking of glasses, and the anticipation of yet another unforgettable meal.
---
Recipe: Shrimp & Orzo
Ingredients:
- 1 can diced tomatoes
- 1/2 cup dry white wine
- 1 fennel bulb, diced
- 1/2 cup crumbled feta cheese
- 2 tablespoons fresh parsley, divided
- 4 cloves of garlic, minced
- Lemon wedges for serving
- 2 cups low sodium chicken broth
- 2 tablespoons olive oil
- 1 diced onion
- 1 teaspoon dried oregano
- 1 1/2 cups orzo pasta
- 1/4 teaspoon crushed red pepper flakes
- Salt & pepper to taste
- 1 pound large shrimp, peeled and deveined
- 1/2 cup water
Instructions:
1. Preheat your oven to 400 degrees F. Season the shrimp with salt and pepper, then refrigerate until ready to use. Grease a 13x9-inch baking dish.
2. Heat the olive oil in a large Dutch oven over medium-high heat until shimmering. Add the onion, fennel bulb, and 1/2 teaspoon salt. Cook, stirring frequently, until the vegetables are softened and starting to brown around the edges, about 10 minutes.
3. Stir in the minced garlic and crushed red pepper flakes, and cook until the garlic becomes very fragrant, about 30 seconds.
4. Add the orzo to the vegetables, stirring to coat with oil. Continue cooking, stirring frequently, for about 4 minutes, until the orzo has a toasty aroma.
5. Pour in the white wine, cooking and stirring constantly, until the liquid evaporates, about 1 minute.
6. Add the chicken broth, water, and 1/4 teaspoon salt. Bring to a boil, then reduce the heat and simmer until the orzo is almost tender, about 12 minutes, stirring frequently to prevent sticking.
7. Remove from heat and stir in the shrimp, tomatoes, oregano, and 1 tablespoon of parsley.
8. Transfer the mixture to the prepared baking dish and sprinkle with feta cheese.
9. Bake for about 20 minutes, until the shrimp is cooked through and the feta is lightly browned.
10. Before serving, sprinkle with the remaining parsley and the reserved fennel fronds. Serve with lemon wedges.
---
Creating Shrimp & Orzo is more than just assembling ingredients; it's about reliving cherished memories and crafting new ones. Each bite is a tribute to family, tradition, and the joy of sharing a meal with the ones you love. So, gather around the table, share stories, and savor the exquisite flavors of this timeless dish.