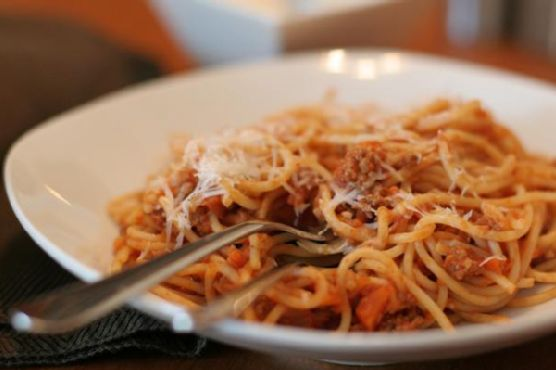
Authentic Bolognese Sauce
Intro
There’s something deeply comforting about a simmering pot of Bolognese sauce on the stove, its rich aromas filling the kitchen and evoking memories of family dinners. Growing up, weekends were synonymous with my grandmother’s Bolognese—an authentic recipe passed down through generations. I fondly recall sitting at the kitchen table, my eyes barely peeking over the edge, watching her expertly chop vegetables and stir the sauce with love and dedication. Today, I’m thrilled to share this cherished recipe with you, hoping it brings warmth to your table and creates new memories with your loved ones.
Why You’ll Love It
This Authentic Bolognese Sauce is a labor of love, but it’s worth every minute of simmering. Here’s why you’ll adore making and eating this classic Italian sauce:
- Rich Flavor: The combination of pancetta, beef, and aromatic vegetables creates a depth of flavor that is both hearty and inviting.
- Versatile: While traditionally served with tagliatelle, this sauce pairs beautifully with any pasta, lasagna, or even as a topping for polenta.
- Family Tradition: It’s a recipe that invites you to slow down, enjoy the cooking process, and share a meal steeped in cultural heritage.
Ingredients
- 1 carrot, diced
- 1 celery stalk, diced
- 1/2 cup dry white wine
- 2 garlic cloves, minced
- 1 pound regular ground beef
- 2 tablespoons olive oil
- 1 diced onion
- 4 ounces pancetta, diced
- 1/2 teaspoon pepper
- 1 teaspoon salt
- 2 tablespoons tomato paste
- 1 cup whole milk
Instructions
- In a large skillet, heat the olive oil over medium heat.
- Add the pancetta, onion, carrot, celery, and garlic. Cook until the vegetables are soft, about 10-15 minutes, stirring occasionally.
- Add the ground beef to the skillet. Cook until it is no longer pink, breaking it up with a wooden spoon as it cooks.
- Stir in the dry white wine, allowing it to simmer for about 2 minutes.
- Add the whole milk and tomato paste, stirring well to combine.
- Season with salt and pepper to taste.
- Reduce the heat to low and let the sauce simmer uncovered for 1 hour, or until most of the liquid has been absorbed, stirring occasionally.
- Once the sauce has thickened, taste and adjust seasoning if necessary before serving.
Tips
- Take your time: This sauce benefits from a slow simmer, allowing the flavors to meld beautifully. Resist the urge to rush.
- Quality ingredients: Use the best quality ingredients you can find, especially when it comes to the wine and beef.
- Stir occasionally: Make sure to stir the sauce every now and then to prevent it from sticking to the bottom of the skillet.
Variations & Substitutions
While this recipe strives to stay true to its authentic roots, there are always ways to make it your own:
- Vegetarian Bolognese: Substitute the beef and pancetta with lentils and mushrooms for a hearty vegetarian version.
- Different Meats: Feel free to use a mix of ground pork and beef for a slightly different flavor profile.
- Herbs and Spices: Add a bay leaf or a pinch of nutmeg for additional depth.
Storage
Allow the Bolognese sauce to cool completely before storing. Transfer it to an airtight container and refrigerate for up to 3 days. For longer storage, freeze the sauce in airtight containers or freezer bags for up to 3 months. Thaw in the refrigerator overnight before reheating.
FAQ
Can I make this sauce ahead of time?
Absolutely! In fact, Bolognese sauce often tastes even better the next day as the flavors have time to develop further. Simply reheat gently on the stove before serving.
What type of pasta pairs best with Bolognese sauce?
Traditionally, Bolognese sauce is served with tagliatelle, a wide, flat pasta that holds the sauce beautifully. However, it also pairs well with pappardelle, fettuccine, or any pasta you have on hand.
Can I use red wine instead of white?
While white wine is traditional in Bolognese, red wine can be used for a slightly different, richer flavor. Just ensure it’s a dry variety to maintain the sauce’s balance.
Nutrition
This recipe serves approximately 6 people. Each serving contains:
- Calories: 320
- Protein: 20g
- Carbohydrates: 12g
- Fat: 22g
- Fiber: 2g
Conclusion
Authentic Bolognese Sauce is more than just a meal—it’s a celebration of tradition, flavor, and the joy of cooking. Whether you’re recreating cherished family memories or crafting new ones, this dish brings warmth and togetherness to any table. I hope this recipe becomes a beloved staple in your home, infusing your kitchen with the same love and care my grandmother infused into hers. Buon appetito!
Related update: Authentic Bolognese Sauce
Related update: Chimichurri Skirt Steak with Grilled Asparagus
Related update: Walnut Pesto