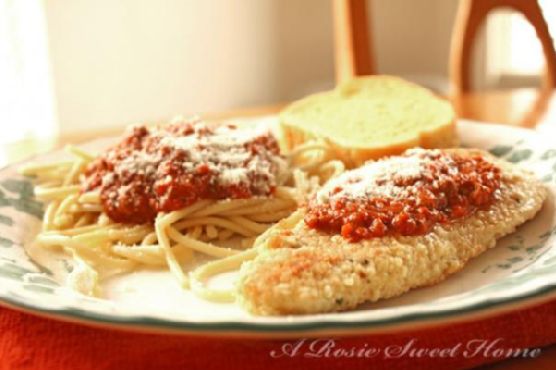
Easy Baked Parmesan Chicken | Made by Meaghan Moineau
Title: A Taste of Home: Easy Baked Parmesan ChickenDescription: Discover the comforting flavors of Easy Baked Parmesan Chicken, a dish that brings warmth to your dining table and heart. With its simple preparation and rich taste, this main dish is perfect for busy weeknights or a cozy family dinner. Let the aroma of Italian spices and melted cheese fill your home as you create a meal that's sure to become a family favorite.
---
When it comes to creating meals that evoke warm memories and bring families together, few dishes do it as beautifully as the Easy Baked Parmesan Chicken. This dish is a savory symphony of flavors, combining tender chicken, crispy bread crumbs, and a rich medley of cheeses, all embraced by a hearty pasta sauce. Not only is it a delight to the palate, but it also holds a special place in my heart, reminding me of cherished family gatherings from my childhood.
Ingredients:
- 4 skinless, boneless chicken breast halves
- 1 egg, beaten
- 1 cup Italian bread crumbs
- 1 jar pasta sauce
- 1 cup shredded mozzarella cheese
- 1/2 cup grated Parmesan cheese
Instructions:
1. Preheat your oven to 400 degrees Fahrenheit.
2. Dip each chicken breast half into the beaten egg, ensuring it's fully coated.
3. Dredge the egg-coated chicken in the Italian bread crumbs, pressing gently to adhere.
4. Arrange the breaded chicken breasts in a 13 x 9-inch baking dish.
5. Bake uncovered in the preheated oven for 20 minutes.
6. Remove the dish from the oven and pour the pasta sauce over the chicken.
7. Sprinkle the mozzarella and Parmesan cheeses generously over the sauce-covered chicken.
8. Return the dish to the oven and bake for an additional 10 minutes, or until the chicken reaches an internal temperature of 170 degrees and is no longer pink.
9. Serve immediately, either on its own or over a bed of pasta for a complete meal.
Difficulty: 3/10
Classification: Main Dish
A Nostalgic Family Memory:
As I prepare this dish, I am transported back to my grandmother's cozy kitchen, where the aroma of her famous Baked Parmesan Chicken filled the air. Every Sunday, our family gathered around her large, wooden dining table, eagerly awaiting the meal that was always the highlight of the week. I remember watching in awe as she deftly coated each piece of chicken, her hands moving rhythmically as she hummed a familiar tune.
This dish was more than just a meal; it was a tradition. Each bite was a reminder of the laughter and love that filled the room, the stories shared, and the bonds strengthened. Even now, as an adult, I find myself recreating this recipe for my own family, hoping to pass down not just the taste, but the sentiment of those cherished Sunday afternoons.
Cooking the Easy Baked Parmesan Chicken is more than just about following a recipe; it's about reliving those memories and creating new ones. Whether you're serving it to friends or family, this dish is sure to warm their hearts and become a beloved tradition in your own home.