Salmon Caesar Salad | Made by Meaghan Moineau

Salmon Caesar Salad | Made by Meaghan Moineau

**Title: "Savor the Memories: A Family Tradition with Salmon Caesar Salad"**


**Description:**


Dive into a delightful blend of flavors with our Salmon Caesar Salad, a dish that not only tantalizes the taste buds but also brings back treasured family memories. Perfect as a main dish, this recipe is easy to prepare and offers a healthy twist on a classic favorite. Join us as we explore the simplicity of bringing together fresh ingredients and cherished moments in the kitchen.


---


### A Nostalgic Flavor Journey: Salmon Caesar Salad


As the aroma of sizzling salmon fills the kitchen, I'm instantly transported back to Sunday afternoons spent in my grandmother's sunlit dining room. It was there, amidst the laughter and stories shared across generations, that our family tradition of Salmon Caesar Salad was born.


My grandmother, a woman of simple tastes yet an extraordinary cook, had a knack for transforming humble ingredients into culinary masterpieces. Her version of Salmon Caesar Salad was no exception, a dish that became a staple at every family gathering.


#### The Heart of the Recipe


The magic begins with fresh, succulent salmon fillets, seasoned gently with salt and a sprinkle of paprika. As they sear in a hot skillet, the kitchen fills with a warm, inviting aroma, reminiscent of those cherished Sundays. The light seasoning allows the natural flavors of the salmon to shine, while a dash of freshly squeezed lemon juice adds a refreshing zing.


The salad itself is a crisp medley of romaine lettuce tossed in a light Caesar dressing. The crunch of the lettuce paired with the creamy dressing creates a perfect base for the star of the dish. Topped with shredded Parmesan cheese and slivered almonds, each bite offers a delightful contrast in textures and flavors.


#### Bringing it All Together


Once the salmon is perfectly cooked to your liking—I prefer mine slightly undercooked for a tender, melt-in-your-mouth experience—it's time to assemble the dish. In a large bowl, mix the romaine lettuce with the Caesar dressing before spreading it out on a large plate. Layer the salmon slices on top, each piece a testament to the careful preparation and love poured into the dish. A final sprinkle of black pepper and a touch more lemon juice complete the masterpiece, ready to be shared with loved ones.


#### A Family Tradition


Every time I prepare this dish, I'm reminded of the joy and warmth of family gatherings. The simplicity of the ingredients mirrors the uncomplicated happiness we found in each other’s company. Sharing this meal is more than just satisfying hunger; it's about preserving a legacy of love, laughter, and delicious food.


#### Recipe Details


- **Difficulty:** 3/10


- **Classification:** Main Dish


Whether you're a seasoned chef or a beginner in the kitchen, this Salmon Caesar Salad is a delightful way to bring a touch of nostalgia and a burst of flavor to your table. It's a dish that celebrates the beauty of simplicity and the joy of shared moments, one forkful at a time.


---


Embrace the tradition, savor the memories, and enjoy the delicious harmony of flavors with your own family. This Salmon Caesar Salad is more than just a recipe—it's a gateway to cherished memories and new traditions.

Read more about Appetizers

Read more about Main Dishes

Read more about Desserts

PB Cup Stuffed Brownie Bites | Made by Meaghan Moineau

PB Cup Stuffed Brownie Bites | Made by Meaghan Moineau

**Title: Sweet Nostalgia: Indulge in PB Cup Stuffed Brownie Bites**


**Description: Discover the joy of baking with our delightful PB Cup Stuffed Brownie Bites! This easy-to-follow, mouthwatering dessert blends rich cocoa and creamy peanut butter for an irresistible treat that evokes cherished family memories.**


---


There's something about the aroma of freshly baked brownies that instantly transports me back to my grandmother's cozy kitchen. As a child, I remember spending countless weekends at her house, where the air was always thick with the scent of sugar and cocoa. My grandmother, with her flour-dusted apron and warm smile, had a knack for turning simple ingredients into extraordinary treats. One of my fondest memories was the day she introduced me to her unique twist on a classic brownie – the PB Cup Stuffed Brownie Bites.


**A Perfect Blend of Flavors**


These decadent bites are the epitome of comfort food, combining the rich, fudgy texture of a brownie with the creamy, nutty goodness of Reese's peanut butter cups. The secret lies in the simplicity of the ingredients, each playing a crucial role in creating a symphony of flavors:


- **Granulated Sugar**: Adds sweetness and enhances the cocoa flavor.


- **Flour**: Provides structure and stability.


- **Eggs**: Bind the ingredients, creating a moist, chewy texture.


- **Salt**: Balances the sweetness and enhances the chocolatey notes.


- **Vegetable Oil**: Keeps the brownies moist and tender.


- **Vanilla Extract**: Adds depth and warmth to the flavor profile.


- **Cocoa Powder**: The star of the show, imparting a rich, chocolatey essence.


- **Semi-Sweet Chocolate Chips**: Offer bursts of chocolate in every bite.


- **Reese's Peanut Butter Cups**: The pièce de résistance, adding a delightful surprise in the center.


**Step-by-Step Guide to Culinary Bliss**


1. **Mixing the Magic**: Begin by whisking together the granulated sugar, flour, eggs, salt, vegetable oil, vanilla, and cocoa powder until well combined. The transformation starts here, as these humble ingredients meld together to create a rich, chocolatey batter.


2. **Stir in the Surprise**: Gently fold in the semi-sweet chocolate chips, taking care not to overmix. This step ensures that each bite is studded with pockets of melted chocolate.


3. **Prepare and Preheat**: Lightly spray a mini muffin pan with cooking spray and preheat your oven to 350°F. This sets the stage for the magic to happen.


4. **Fill and Bake**: Scoop the batter into the prepared pan, filling each slot about three-quarters of the way up. This allows room for the brownie bites to rise and accommodate the peanut butter cup. Bake for 8-10 minutes, or until a toothpick inserted comes out almost clean. Remember, it's okay if they're slightly underdone – this is what makes them gooey and irresistible.


5. **The Grand Finale**: Once the brownies are baked, gently push a Reese's peanut butter cup into the center of each. The warmth of the brownie will slightly melt the peanut butter cup, creating a creamy center. Allow them to set in the pan for a couple of minutes before transferring them to a cooling rack.


**A Sweet Symphony of Memories**


Every time I take a bite of these PB Cup Stuffed Brownie Bites, I'm reminded of those cherished afternoons in my grandmother's kitchen. The laughter, the stories shared, and the sheer joy of creating something delicious together. These little treats are more than just a dessert; they are a testament to the power of food to connect us with our past and create new memories with our loved ones.


**Difficulty Rating: 3/10**


**Classification: Dessert**


Whether you're an experienced baker or a novice in the kitchen, this recipe is a delightful way to indulge in a bit of nostalgia while creating new moments of joy. So, preheat that oven, gather your ingredients, and let the sweet symphony of PB Cup Stuffed Brownie Bites fill your home with warmth and happiness.

Read more about Appetizers

Read more about Main Dishes

Read more about Desserts

Chicken Adobo & Coconut Ginger Rice | Made by Meaghan Moineau

Chicken Adobo & Coconut Ginger Rice | Made by Meaghan Moineau

# Savoring Memories: Chicken Adobo & Coconut Ginger Rice


## A Culinary Journey Through Time and Flavor


**Description:** Dive into a world where tangy meets savory, and a hint of sweetness dances on your palate. This Chicken Adobo & Coconut Ginger Rice recipe not only promises a symphony of flavors but also brings forth a nostalgic story of family, love, and tradition. Perfect for any dinner occasion, this dish is a main course masterpiece, rated at a moderate difficulty level of 5 out of 10.


---


### A Dish Steeped in Tradition


Whenever I think of Chicken Adobo & Coconut Ginger Rice, I am transported back to my grandmother's cozy kitchen, where the aroma of garlic sizzling in oil melded with the tangy scent of vinegar, creating a comforting embrace. This dish was more than just a meal; it was a ritual that brought our family together every Sunday afternoon.


#### Ingredients:


- 1/2 cup low sodium soy sauce


- 1/2 cup apple cider vinegar


- 4 cloves garlic, minced


- 1 tablespoon peppercorns


- 2 tablespoons brown sugar


- 3 bay leaves


- 6 bone-in chicken thighs


- 2 tablespoons grapeseed oil


- 1 cup chicken broth


- 1 tablespoon cornstarch


- 1/4 cup water


- Kosher salt to taste


- 3 cups water


- 1 1/2 cups rice


- 2 tablespoons fresh ginger, grated


- 1/2 cup sweetened shredded coconut


- 2 scallions, thinly sliced


- 2 tablespoons parsley, chopped


#### Instructions:


1. **Marinate the Chicken:** In a large bowl or flat dish, combine soy sauce, vinegar, garlic, peppercorns, brown sugar, and bay leaves. Add the chicken thighs, ensuring they are well-coated. Marinate for at least an hour, or for a deeper flavor, let them soak overnight.


2. **Brown the Chicken:** Heat grapeseed oil in a pan over medium heat. Once hot, remove the chicken from the marinade and brown each side for 2-3 minutes. Set the chicken aside.


3. **Cook the Sauce:** Pour the marinade into the pan along with chicken broth. Bring to a boil, then add the chicken back in. Cover and cook for 10 minutes.


4. **Thicken the Sauce:** Mix cornstarch with 1/4 cup water. Add this slurry to the pan, turning the chicken pieces over. Cover and cook until the chicken is fully cooked, about 6-9 minutes.


5. **Prepare the Rice:** In a separate pot, bring 3 cups of water to a boil with a pinch of salt. Add the rice and cook as per package instructions. Once cooked, fluff the rice and toss with scallions, parsley, ginger, and coconut.


6. **Serve:** Plate the rice, place the chicken on top, and drizzle with the rich adobo sauce.


### A Family Memory


As a child, I would often sit at the kitchen table, watching my grandmother move with grace and precision, her hands a blur of seasoned expertise. The kitchen was filled with laughter, stories, and the promise of something delicious. When the Chicken Adobo was finally ready, it was more than just food; it was a testament to the love and care my grandmother poured into every meal.


This dish was always the highlight of our gatherings, a symbol of unity and warmth. The blend of flavors in the adobo, with its savory garlic and vinegar base, complemented the subtle sweetness of the coconut-infused rice perfectly. Each bite was a reminder of home, family, and the simple joys of life.


### Conclusion


Chicken Adobo & Coconut Ginger Rice is more than just a meal; it is an experience, a journey into a world of rich, comforting flavors that tell a story of family and tradition. Whether you're looking to recreate a cherished memory or start a new one, this dish is sure to bring warmth and joy to your table.


---


Enjoy this nostalgic culinary adventure and let every bite transport you back to the heartwarming memories of family and togetherness.

Read more about Appetizers

Read more about Main Dishes

Read more about Desserts

Goat Cheese, Fig And Proscuitto Crostini | Made by Meaghan Moineau

Goat Cheese, Fig And Proscuitto Crostini | Made by Meaghan Moineau

**Title: Elegance on a Cracker: Goat Cheese, Fig, and Prosciutto Crostini**


**Description:** Dive into a symphony of flavors with our Goat Cheese, Fig, and Prosciutto Crostini recipe. This simple yet sophisticated appetizer brings together creamy goat cheese, sweet fig jam, and savory prosciutto on a crisp cracker. Perfect for any gathering, this dish is a delightful nod to cherished family memories and culinary traditions.


---


When it comes to crafting the perfect appetizer, simplicity and elegance often go hand in hand. Our Goat Cheese, Fig, and Prosciutto Crostini exemplify this concept beautifully. With just a handful of ingredients, you can create an appetizer that looks stunning and tastes even better. This dish holds a special place in my heart, as it brings back fond memories of family gatherings filled with laughter and love.


**Ingredients:**


- Biscuit-type crackers


- Fig jam


- Prosciutto


- Goat cheese


- White peppercorns, cracked


**Instructions:**


1. Preheat your oven to 350°F (175°C).


2. Spread 1 teaspoon of fig jam on each cracker, ensuring even coverage for a balanced sweetness.


3. Gently place a small piece of prosciutto atop each cracker, allowing the savory richness to complement the sweet fig jam.


4. Slice the goat cheese into rounds and place one slice on each prepared cracker.


5. Arrange the crostini on sheet trays, ensuring they have enough space to bake evenly.


6. Bake in the oven for 10-12 minutes, or until the edges of the cheese start to brown.


7. Remove from the oven, and while still warm, top each crostini with a sprinkle of cracked white pepper for an added touch of subtle heat.


**Nostalgic Family Memory:**


Growing up, my family had a tradition of hosting Sunday brunches, where the kitchen became a bustling hub of activity and delicious aromas. My grandmother, the heart of our culinary adventures, would often prepare her signature Goat Cheese, Fig, and Prosciutto Crostini. I remember sitting at the kitchen table, watching her work her magic, fascinated by how a few simple ingredients could transform into something so extraordinary.


The crostini were always the first to disappear from the table, eagerly devoured by family and friends alike. Each bite reminded us of the warmth of togetherness and the joy of sharing good food. To this day, whenever I prepare this dish, I am transported back to those cherished Sundays, surrounded by the laughter of loved ones and the comforting smells of home.


**Difficulty Rating: 3/10**


This recipe is perfect for both novice cooks and seasoned chefs alike, with its straightforward preparation and delightful results.


**Classification: Appetizer**


Whether you're hosting a formal dinner party or a casual get-together, these Goat Cheese, Fig, and Prosciutto Crostini are sure to impress your guests. Enjoy this elegant appetizer, and perhaps it will inspire you to create new memories and traditions of your own.

Read more about Appetizers

Read more about Main Dishes

Read more about Desserts

Peaches And Cream Oatmeal | Made by Meaghan Moineau

Peaches And Cream Oatmeal | Made by Meaghan Moineau

**Title: A Warm Hug in a Bowl: Nostalgic Peaches and Cream Oatmeal**


**Description: Discover the comforting embrace of our Peaches and Cream Oatmeal, a delightful breakfast treat that brings the warmth of home to your table. With simple ingredients and easy preparation, this dish captures the essence of family memories and cozy mornings.**


---


There's something profoundly comforting about a bowl of warm oatmeal, and when it comes with the sweet embrace of peaches and cream, it becomes much more than just a meal—it becomes a memory. Our Peaches and Cream Oatmeal is not only a delightful start to your day but also a nostalgic journey back to family breakfasts and cozy kitchen moments.


**Ingredients:**


- 1 cup frozen peaches


- 1/2 cup cooking oats


- 1 cup non-fat milk


- 2 tablespoons low-fat cream cheese


- 1 tablespoon agave syrup


- 1/2 teaspoon cinnamon


**Instructions:**


1. Begin by microwaving the frozen peaches for 30 seconds to thaw them just enough to release their sweet aroma.


2. In a microwave-safe bowl, add the oats, non-fat milk, and softened peaches.


3. Top it off with dollops of low-fat cream cheese, a drizzle of agave syrup, and a sprinkle of cinnamon.


4. Microwave the mixture for 1 minute until everything is warm and melded together.


5. Give it a good stir to combine all the flavors, and enjoy the creamy, peachy goodness!


**Nostalgic Family Memory:**


Every time I prepare this Peaches and Cream Oatmeal, I'm transported back to my grandmother's kitchen. It was a small, sunlit room that smelled perpetually of fresh fruit and baked goods. As a child, I spent countless mornings perched on a stool, watching her work her magic with simple ingredients. My favorite was always her peach oatmeal, which she lovingly prepared with fresh peaches plucked from the old tree in her backyard.


I remember the ritual vividly: she would slice the peaches with careful precision, their sweet scent filling the air. She'd tell stories of her own childhood, of how her mother had taught her to cook during long summer days. As I helped stir the oatmeal, she'd remind me that the secret ingredient was always a pinch of cinnamon and a lot of love.


Even now, as I recreate this dish with frozen peaches and modern conveniences like microwaves, I can feel her presence in the warmth of the bowl. It's a testament to how food can connect us across time, linking generations through shared flavors and cherished traditions.


**Difficulty Rating: 3/10**


**Classification: Main Dish**


Whether you're enjoying this dish on a lazy weekend morning or as a quick weekday breakfast, Peaches and Cream Oatmeal is a heartwarming experience. It's a simple recipe that brings a touch of nostalgia to your day, making it more than just a meal—it's a cherished memory in every spoonful.

Read more about Appetizers

Read more about Main Dishes

Read more about Desserts

Not Momofuku Ginger Scallion Noodles | Made by Meaghan Moineau

Not Momofuku Ginger Scallion Noodles | Made by Meaghan Moineau

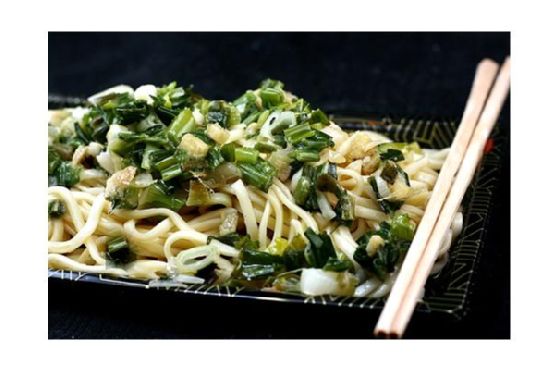
**Title: A Taste of Nostalgia: Not Momofuku Ginger Scallion Noodles**


**Description:** Dive into the comforting embrace of Not Momofuku Ginger Scallion Noodles, a delightful dish packed with vibrant flavors and warm memories. This recipe is your gateway to a symphony of taste and nostalgia, blending simple ingredients into a soul-soothing experience. Perfect for a cozy dinner, this dish will transport you back to cherished family gatherings, making it a must-try for any home cook.


---


**Blog Post:**


There's something magical about a recipe that evokes cherished memories with every bite. For me, Not Momofuku Ginger Scallion Noodles is more than just a dish; it's a bridge to my past, a flavorful reminder of family gatherings filled with laughter, love, and of course, delightful aromas wafting from the kitchen.


**Ingredients:**


- Soba noodles


- 1/4 cup grapeseed oil


- 2 cups green onions, finely chopped


- 2 tablespoons ginger, minced


- 4 cloves garlic, minced


- 2 shallots, thinly sliced


- 2 tablespoons fish sauce


- 1 tablespoon sesame seed oil


- 1 tablespoon rice wine vinegar


- 2 tablespoons wheat-free tamari sauce


- 1 tablespoon honey


- 1 red chile pepper, crushed


- Himalayan salt, to taste


**Instructions:**


1. Heat the grapeseed oil in a saucepan over high heat until shimmering and hot, but not smoking. This is where the magic begins.


2. Carefully add the green onions, ginger, garlic, and shallots to the pan. Watch as the ingredients sizzle and the aroma fills your kitchen, instantly transforming the space into a fragrant haven. The onions will wilt and turn a vibrant green almost immediately.


3. Remove the pan from the heat and stir the mixture with a wooden spoon. Feel the warmth of the moment as you add the fish sauce, sesame seed oil, rice wine vinegar, tamari sauce, honey, crushed red chile pepper, and Himalayan salt. Allow the sauce to sit for 15 minutes, letting the flavors meld together.


4. Toss with your favorite noodles. While I used fresh Chinese egg noodles for a traditional touch, soba noodles offer a splendid alternative, absorbing the sauce beautifully.


**A Nostalgic Connection:**


This dish always takes me back to my grandmother's kitchen. As a child, I spent countless weekends there, perched on a stool, watching her deftly chop green onions and ginger while regaling me with stories of her own childhood. She had a way of making the simplest ingredients sing, turning every meal into an event. The aroma of sizzling onions and ginger would fill the house, drawing everyone to the kitchen like moths to a flame. Every bite of her noodles was a testament to her love; a warm, comforting embrace on a plate.


**Difficulty Rating: 3/10**


Classified as a **Main Dish**, Not Momofuku Ginger Scallion Noodles is surprisingly straightforward to prepare, making it an ideal choice for both novice cooks and seasoned chefs alike. Its simplicity is its strength, allowing each ingredient to shine while wrapping you in a blanket of nostalgia and flavor.


---


There's an undeniable comfort in recreating a recipe that has stood the test of time in your family. Not Momofuku Ginger Scallion Noodles is more than just a meal; it's a journey back to those precious moments spent with loved ones. Whether you're cooking for a crowd or just for yourself, this dish is sure to bring a smile to your face and warmth to your heart. So, gather your ingredients, ignite your stove, and let the magic of nostalgia fill your kitchen once more.

Read more about Appetizers

Read more about Main Dishes

Read more about Desserts

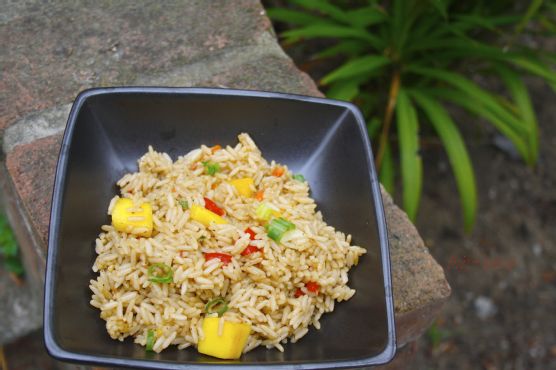
Mango Fried Rice | Made by Meaghan Moineau

Mango Fried Rice | Made by Meaghan Moineau

**Title: Tropical Delight: Mango Fried Rice That Takes You Back Home**


**Description:** Dive into the vibrant fusion of flavors with our Mango Fried Rice recipe, a tropical twist on a classic dish that’s sure to awaken your taste buds. This delightful main dish combines the sweetness of mango with the rich flavors of chicken stock and the spicy kick of scotch bonnet peppers, promising a culinary journey that’s both comforting and exciting. Easy to prepare with a difficulty rating of 3 out of 10, this dish is perfect for any gathering or a cozy evening at home. Discover the magic of this recipe, where every bite tells a story of warmth and family traditions.


---


**Mango Fried Rice Recipe: A Taste of Nostalgia and Tropical Bliss**


There’s something incredibly heartwarming about a dish that not only satisfies your palate but also transports you back to cherished moments from the past. For me, Mango Fried Rice is that dish—a vibrant blend of flavors that evokes memories of family gatherings under the golden glow of the afternoon sun.


**Ingredients:**


- Rice


- Chicken stock


- Seasoning cubes


- Mango, cubed


- Mixed vegetables (your choice: carrots, peas, bell peppers, etc.)


- Scotch bonnet pepper, finely chopped


**Instructions:**


1. Begin by washing your rice thoroughly. Bring it to a gentle boil on medium heat with just a little water, as you’ll continue cooking it in chicken stock later. This method ensures the rice absorbs all the delicious flavors without becoming mushy.


2. Once the rice is slightly soft and the initial water has dried up, reduce the heat. Pour in the chicken stock and cook until it’s fully absorbed and the rice is perfectly tender. If your chicken stock is freshly made, it might have some natural oils from the chicken, negating the need for additional oil.


3. Increase the heat and stir in the chopped vegetables and scotch bonnet pepper. Add your seasoning cube to enhance the flavors.


4. Finally, gently fold in the cubed mango, allowing its sweetness to seep into every grain of rice. Serve warm with any protein of your choice. Personally, I recommend pairing it with grilled chicken, but feel free to customize it to your liking.


**Nostalgic Family Memory:**


Growing up, Sundays were a time of togetherness in our household. After a long week, we would gather in the kitchen, everyone playing a part in preparing the Sunday meal. My mother, with her warm smile and gentle guidance, would often lead us in making Mango Fried Rice. I remember the anticipation as we chopped fresh mangoes, their sweet aroma filling the air and mingling with the savory scent of chicken stock simmering on the stove.


Those afternoons were filled with laughter and stories shared around the kitchen table, the kind of memories that linger long after the meal is over. It was during these times that I learned the true essence of cooking—it wasn’t just about the food; it was about the love and tradition that went into every dish.


**Conclusion:**


Mango Fried Rice is more than just a recipe; it’s a testament to the power of food to bring people together and create lasting memories. With its simple preparation and rich blend of flavors, this dish is a delightful addition to any meal, offering a touch of nostalgia with every bite. Whether you’re an experienced cook or just starting out, this recipe promises a taste of tropical bliss that’s both easy to make and a joy to share.


Rating its difficulty at 3 out of 10, this main dish is perfect for those looking to explore new flavors without the hassle. So gather your ingredients, invite your loved ones, and create your own memories with Mango Fried Rice—a dish that’s sure to become a family favorite.

Read more about Appetizers

Read more about Main Dishes

Read more about Desserts

Homemade Animal Crackers | Made by Meaghan Moineau

Homemade Animal Crackers | Made by Meaghan Moineau

**Title: "Nostalgia in Every Bite: The Delightful Joy of Homemade Animal Crackers"**


**Description: Discover the charm of baking your own animal crackers with this easy-to-follow recipe. Infused with warm spices like cinnamon and allspice, and a hint of cocoa, these crackers are a delightful treat that bring back fond family memories. Perfect for a nostalgic dessert or a whimsical snack, this recipe will transport you back to simpler times.**


---


**The Allure of Homemade Animal Crackers: A Journey Through Time**


As the aroma of cinnamon and allspice wafts through the kitchen, I'm instantly transported back to my grandmother's cozy farmhouse, where the scent of freshly baked treats was as much a part of the home as the laughter that filled the air. Among her many specialties, her homemade animal crackers were a beloved treat that turned ordinary afternoons into magical adventures.


These charming crackers, with their whimsical shapes and delightful flavors, were more than just a dessert; they were a gateway to cherished memories. As a child, I would eagerly watch my grandmother expertly roll out the dough, her hands deftly crafting each animal with a cookie cutter. It was a ritual that promised both deliciousness and delight, a tradition I now carry on in my own kitchen.


**A Recipe for Nostalgia: Homemade Animal Crackers**


**Ingredients:**


- 1 cup butter


- 1 cup brown sugar


- 1 egg


- 1 teaspoon vanilla extract


- 1 teaspoon cinnamon


- 1/2 teaspoon allspice


- 1/2 teaspoon salt


- 1 teaspoon baking powder


- 1/2 cup oats


- 2 cups flour (substitute cocoa powder for a portion to taste)


**Instructions:**


1. Begin by creaming together the butter and brown sugar until light and fluffy.


2. Add in the egg and vanilla, mixing well to combine.


3. Incorporate the cinnamon, allspice, and salt, blending the spices thoroughly.


4. Mix in the baking powder, oats, and flour. If using cocoa powder, substitute a portion of the flour with it, adjusting to your preference for a touch of chocolatey goodness.


5. Form the dough into a ball, wrap it, and store it in the fridge for at least one hour, or overnight, to let the flavors meld.


6. When ready to bake, preheat your oven to 350 degrees. Roll out the dough to 1/4" thickness, cut out animal shapes, and place them on a parchment-lined baking sheet.


7. Bake for 5-7 minutes, or until the edges are lightly golden. Let cool before enjoying.


**A Taste of Simplicity and Joy**


Making these animal crackers is a delightful experience that brings a sense of calm and joy, much like revisiting a cherished storybook from childhood. As I carefully cut out the animal shapes, I am reminded of the afternoons spent in my grandmother’s kitchen, the warmth of her smile, and the comforting sweetness of those homemade treats.


**Difficulty Rating: 4/10**


These animal crackers are simple to make, perfect for bakers of all skill levels, and can be classified as a **Dessert**. Whether you’re baking as a family activity or indulging in a solo culinary adventure, these crackers promise both deliciousness and a nostalgic trip down memory lane.


---


**Conclusion:**


Homemade animal crackers are more than just a delightful treat; they are a bridge to the past, a recipe that carries with it the warmth of family traditions and the simplicity of childhood joys. So, roll up your sleeves, gather your ingredients, and embark on a baking journey that promises not only a scrumptious outcome but also a heart filled with fond memories.

Read more about Appetizers

Read more about Main Dishes

Read more about Desserts

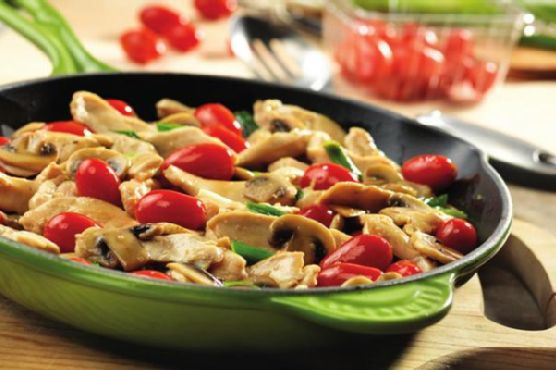
Chicken with Grape Tomatoes and Mushrooms | Made by Meaghan Moineau

Chicken with Grape Tomatoes and Mushrooms | Made by Meaghan Moineau

**Title: Savoring Memories: Chicken with Grape Tomatoes and Mushrooms**


**Description:** Dive into a heartwarming blend of flavors with our Chicken with Grape Tomatoes and Mushrooms recipe. Perfect for a cozy family dinner, this dish brings together juicy chicken, fresh mushrooms, and vibrant grape tomatoes in a delightful medley. With a touch of nostalgia, we'll whisk you away to cherished family moments while guiding you through this simple, yet satisfying main dish.


---


When I think about comfort food that warms both the heart and soul, Chicken with Grape Tomatoes and Mushrooms immediately springs to mind. This dish is not only a delightful blend of flavors but also a tapestry of fond family memories woven into each bite.


**The Ingredients that Tell a Story**


- 2 tablespoons olive oil


- 4 skinless, boneless chicken breast halves


- 8 ounces fresh mushrooms, sliced


- 2 cloves garlic, minced


- 1 pint grape tomatoes, halved


- 4 green onions, sliced


- 1 packet concentrated chicken broth


- 1/2 cup water


**A Journey Down Memory Lane**


Growing up, Sunday dinners were the highlight of my week. Our family gathered around the kitchen, the heart of our home, where laughter mingled with the aroma of delicious meals being prepared. My grandmother, the matriarch of our household, had a knack for turning simple ingredients into something magical.


One of her masterpieces was the Chicken with Grape Tomatoes and Mushrooms. I vividly remember her standing over the stove, her deft hands moving with practiced ease as she cooked. The sizzle of olive oil in the skillet was the opening note of a symphony that promised a comforting meal. The chicken, seared to a golden brown, filled the kitchen with an enticing aroma that drew us all closer.


**Cooking Instructions**


1. Begin by heating 1 tablespoon of olive oil in a 12-inch skillet over medium-high heat. Place the chicken breasts in the skillet and cook until well browned, stirring often. Once browned, remove the chicken from the skillet and set aside.


2. Add the remaining tablespoon of oil to the skillet and reduce the heat to medium. Introduce the sliced mushrooms, allowing them to cook until tender, stirring occasionally.


3. Add the minced garlic, halved grape tomatoes, and sliced green onions to the skillet. Stir for about a minute, letting the flavors meld together.


4. Return the browned chicken to the skillet. Mix in the concentrated chicken broth and water, ensuring everything is well combined. Continue cooking until the chicken is thoroughly cooked and the flavors have infused into the dish.


**A Nostalgic Note**


Every time I prepare this dish, I am transported back to those Sundays in my grandmother's kitchen. The vibrant colors of the grape tomatoes and the earthy aroma of mushrooms are not just ingredients; they are reminders of the stories and laughter shared around our family table. It's amazing how food can connect us to our past, creating a bridge to cherished memories.


**Difficulty Rating: 4/10**


This recipe is accessible for cooks of all skill levels, making it a wonderful choice for a quick yet impressive main dish. Whether you're a seasoned chef or a kitchen novice, this dish promises a rewarding experience.


As you savor each bite of Chicken with Grape Tomatoes and Mushrooms, may it bring you as much warmth and joy as it has brought to my family over the years. Enjoy this delightful main dish, and may it inspire your own cherished memories around the table.

Read more about Appetizers

Read more about Main Dishes

Read more about Desserts

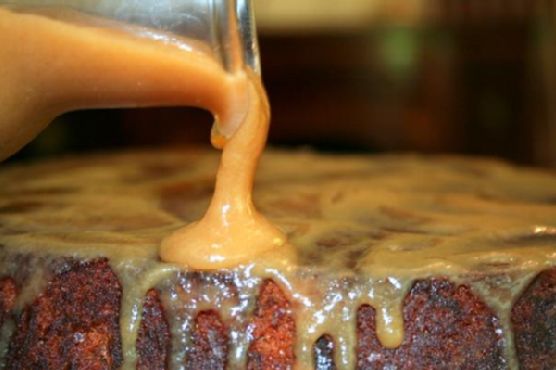
Sticky Toffee Pudding | Made by Meaghan Moineau

Sticky Toffee Pudding | Made by Meaghan Moineau

**Title: The Sweet Nostalgia of Sticky Toffee Pudding: A Family Tradition**


**Description:** Dive into the delightful warmth of Sticky Toffee Pudding, a classic dessert that bridges generations with its rich flavors and comforting texture. From its simple ingredients to its captivating taste, this recipe is a heartwarming reminder of family gatherings and cherished memories. Discover the story behind this beloved dessert and learn how to make it a staple in your own family traditions.


---


There’s something undeniably magical about Sticky Toffee Pudding. Its rich, gooey texture and sweet, caramelized aroma have the power to transport us back to simpler times. In my family, this dessert has always held a special place, particularly during the festive season.


**A Nostalgic Family Tradition**


Growing up, Sticky Toffee Pudding was the star of our holiday dinners. I remember my grandmother bustling in the kitchen, her apron dusted with flour, as she lovingly prepared this dessert. The moment the cake went into the oven, the house would fill with the heartwarming scent of dates and vanilla, a scent that signaled the start of our family’s festive celebrations.


One particular memory stands out vividly. It was a crisp winter evening, and snowflakes danced outside the window as my siblings and I gathered around the kitchen table, impatiently waiting for our grandmother to finish her culinary masterpiece. As she poured the rich toffee sauce over the freshly baked cake, she shared stories of how her own mother had made this dessert for her as a child. It was more than just a dish; it was a thread connecting our family through generations.


**Ingredients You'll Need:**


- 1 teaspoon plus 1 teaspoon baking powder


- 1 stick of butter (1/2 cup), softened


- 1/4 cup dark corn syrup


- 1 cup chopped dates


- 2 large eggs


- 1 1/2 cups all-purpose flour


- 1 cup heavy cream


- 3/4 cup light brown sugar


- 1/4 teaspoon salt


- 1 cup sugar


- 1 teaspoon vanilla extract


- 1 1/4 cups boiling water


**Instructions:**


1. Preheat your oven to 350 degrees Fahrenheit. Prepare the dates by placing them in a bowl, sprinkling them with 1 teaspoon of baking powder, and pouring boiling water over them. Stir slightly and let them soak until soft and cool.


2. In a separate bowl, combine the flour, the remaining teaspoon of baking powder, and salt. Set aside.


3. In a mixer, cream the butter and sugar until light and fluffy. Add the eggs, one at a time, mixing well after each addition. Beat in the corn syrup and vanilla extract.


4. Incorporate the date mixture and the flour mixture into the batter, mixing until just combined. Spread the batter into a greased 8-inch round or square cake pan, smoothing the top.


5. Bake in the preheated oven for 30-40 minutes, or until a tester inserted in the middle comes out with a few crumbs clinging.


6. While the cake is baking, prepare the toffee sauce. Melt the butter in a saucepan, then stir in the sugar until dissolved. Add the heavy cream and salt, simmering over medium heat until thickened and reduced to about 2 1/2 cups. Stir frequently to prevent overboiling.


7. Once the cake is done, remove it from the oven and invert it onto a plate to loosen it from the pan, then return it to the pan. Poke holes all over the cake with a skewer or fork.


8. Spoon about a cup of the sauce over the cake and leave it to soak for several hours or overnight for the best flavor. Once cooled, cover loosely with foil and refrigerate until ready to serve.


9. To serve, warm the cake gently in a low oven, if desired, but keep an eye on it to prevent burning the sauce. Invert the saucy cake onto a platter, pour about 1/2 cup more sauce over it, and let it soak in for a few minutes. Cut into wedges and serve with additional sauce on each slice.


**Difficulty Rating:** 6/10


**Classification:** Dessert


---


Sticky Toffee Pudding is more than just a dessert; it's a vessel of cherished memories and family bonds. Whether you're making it for the first time or continuing a beloved tradition, this recipe is sure to bring warmth and sweetness to your table. So gather your loved ones, share stories, and indulge in the nostalgic delight of Sticky Toffee Pudding.

Read more about Appetizers

Read more about Main Dishes

Read more about Desserts

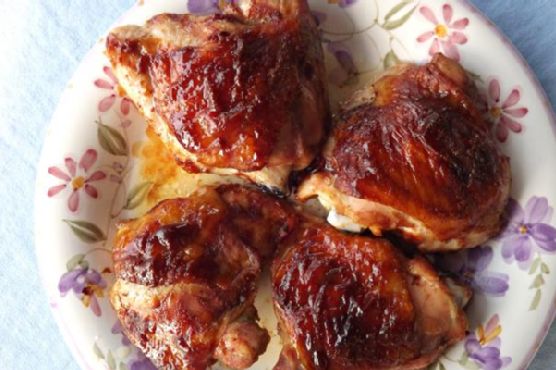
BBQ” Style Chicken Thighs | Made by Meaghan Moineau

BBQ” Style Chicken Thighs | Made by Meaghan Moineau

**Title: "Savoring Memories: BBQ-Style Chicken Thighs That Transport You Back Home"**


**Description:** Dive into a world where the tantalizing aroma of BBQ-style chicken thighs meets cherished family memories. This easy-to-follow recipe promises to be a hit at your dinner table, blending rich flavors with sentimental nostalgia. Perfect as a main dish, this recipe is rated 3 out of 10 in difficulty, making it accessible for cooks at any level.


---


When I think of comfort food, my mind immediately drifts to the warm, inviting aroma of BBQ-style chicken thighs wafting through the kitchen. This dish is more than just a meal; it’s a cherished family tradition that brings us together, evoking laughter, love, and the essence of home.


**Ingredients You’ll Need:**


- Bone-in chicken thighs


- 1 cup ketchup


- 1/4 cup soy sauce


- 2 tablespoons Worcestershire sauce


- 2 tablespoons lemon juice


- 1/4 cup brown sugar


- 1 teaspoon garlic powder


- Salt and black pepper to taste


**Instructions:**


1. **Prepare the BBQ Sauce:** In a small bowl, combine ketchup, soy sauce, Worcestershire sauce, lemon juice, brown sugar, garlic powder, salt, and black pepper. Stir until the brown sugar is fully dissolved and the mixture is smooth.


2. **Prep the Chicken:** Clean the chicken thighs and pat them dry with a paper towel. This step is crucial to ensure the sauce adheres well to the chicken.


3. **Marinate:** Place the chicken thighs in a baking dish. Generously rub them all over with the prepared BBQ sauce, ensuring every nook and cranny is coated with the rich marinade.


4. **Bake:** Preheat your oven to 375°F (190°C). Bake the chicken thighs for 40-45 minutes or until the internal temperature reaches 165°F (75°C) and the skin is beautifully caramelized.


**A Nostalgic Family Memory:**


Growing up, Sunday afternoons were reserved for family gatherings. My grandmother's small kitchen would be filled with the comforting scent of these BBQ-style chicken thighs, a recipe passed down through generations. I remember watching her, apron dusted with flour, as she expertly mixed the ingredients, her hands moving with a rhythm that spoke of years of practice.


As the chicken baked, my siblings and I would gather around the table, setting it with plates and cutlery, the excitement of the impending feast palpable in the air. When the timer finally dinged, the chicken emerged from the oven, its skin a perfect balance of crispy and tender, glistening with the sticky, flavorful sauce.


Each bite was a symphony of flavors—sweet, tangy, and savory—transporting us to a place of warmth and comfort. Even now, every time I prepare this dish, I am reminded of those cherished Sundays, and I can’t help but smile, knowing that I am carrying on a beloved tradition.


**Difficulty Rating: 3/10**


**Classification: Main Dish**


This BBQ-style chicken thigh recipe is straightforward, requiring minimal ingredients and simple steps, making it an ideal choice for a quick weeknight dinner or a leisurely weekend meal. Whether you're a seasoned cook or a kitchen novice, this dish promises to deliver a taste of home that will leave everyone at the table smiling.


So, gather your loved ones, fire up the oven, and let this delicious recipe bring a piece of familial love and nostalgia to your plate.

Read more about Appetizers

Read more about Main Dishes

Read more about Desserts

Vegetarian Bean and Pumpkin Chili | Made by Meaghan Moineau

Vegetarian Bean and Pumpkin Chili | Made by Meaghan Moineau

**Title: Warming Hearts and Souls: Vegetarian Bean and Pumpkin Chili**


**Description:** Dive into a pot of comfort with this Vegetarian Bean and Pumpkin Chili. Infused with rich spices and heartwarming flavors, this dish is perfect for those chilly nights when you need a little nostalgia and nourishment. A combination of savory beans and seasonal pumpkin makes this a wholesome main dish that's sure to please everyone. Easy to prepare and packed with nutrients, it's a must-try for any home cook looking to spice up their fall menu.


---


As the leaves begin to change and a crisp chill fills the air, there's nothing quite like gathering around the table with family to enjoy a hearty meal. This Vegetarian Bean and Pumpkin Chili holds a special place in our family's heart, reminding us of autumn nights spent together in the warmth of our kitchen.


**Ingredients:**


- Canned tomatoes


- Canned pumpkin puree


- Serrano chiles


- Chipotle chiles in adobo


- Vegetable stock


- Water


- Onion


- Garlic


- Cumin


- Cinnamon stick


- Ground coriander


- Salt


- Chili powder


- Several dashes of Tabasco


- Shredded cheese (for garnish)


- Cilantro (for garnish)


- Sour cream (for garnish)


- Rinsed beans (soaked overnight)


**Instructions:**


1. Begin by rinsing the beans thoroughly. It's best to soak them overnight to ensure they cook evenly and achieve the perfect tenderness.


2. After rinsing the beans again, place them in your slow cooker.


3. Add the canned tomatoes, pumpkin puree, serrano and chipotle chiles, vegetable stock, water, chopped onion, minced garlic, cumin, cinnamon stick, ground coriander, salt, chili powder, and a few dashes of Tabasco.


4. Stir everything together well, ensuring all ingredients are evenly distributed.


5. Set your slow cooker to low and let it work its magic for 8 hours, or until the beans reach your desired tenderness.


6. Taste and adjust the seasoning if necessary.


7. Serve your chili hot, topped with shredded cheese, fresh cilantro, and a dollop of sour cream for added richness.


**A Nostalgic Family Memory:**


This dish always takes me back to my grandmother's kitchen, where the aroma of spices would greet us at the door. She would prepare this chili on the first cool weekend of fall, a tradition that marked the changing seasons. As the slow cooker bubbled away, we would gather around the table, sharing stories and laughter, the warmth of the chili mirroring the love and togetherness we felt. The addition of pumpkin was her special touch, a nod to her love for seasonal ingredients and a way to make each bowlful feel like a celebration of autumn.


Even now, as I prepare this dish in my own kitchen, I can hear her voice guiding me through each step, her hands showing me how to stir with care. This chili is more than just a meal; it is a reminder of the bonds we share and the comforting embrace of family traditions.


**Difficulty Rating:** 3/10


**Classification:** Main Dish


Embrace the cozy flavors of fall with this Vegetarian Bean and Pumpkin Chili, a simple yet satisfying main dish that brings warmth to your table and heart. Whether you're a seasoned cook or a kitchen novice, this recipe is as easy to prepare as it is delightful to eat. Enjoy the taste of nostalgia with each spoonful, and let it remind you of cherished family moments around a shared meal.

Read more about Appetizers

Read more about Main Dishes

Read more about Desserts

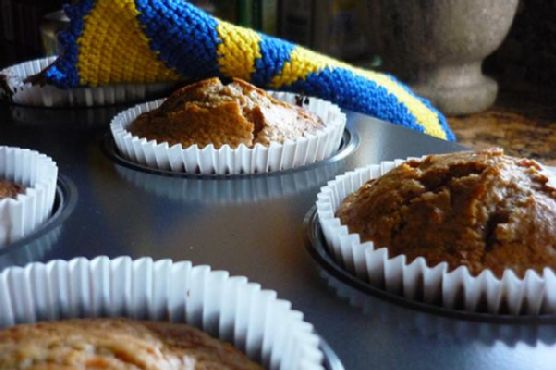
Protein Packed Carrot Muffins | Made by Meaghan Moineau

Protein Packed Carrot Muffins | Made by Meaghan Moineau

**Title: Protein-Packed Carrot Muffins: A Nostalgic Fusion of Flavor and Family**


**Description:** Dive into the delightful world of Protein Packed Carrot Muffins, a wholesome treat that combines the heartwarming nostalgia of family gatherings with the nutritious benefits of protein-rich ingredients. Perfect as a delicious dessert or a guilt-free snack, these muffins are sure to become a cherished staple in your kitchen. Discover the secret to their irresistible charm and learn how to make them at home with our easy-to-follow recipe.


---


In the realm of family recipes, there are a few that stand the test of time—those that not only fill our bellies but also warm our hearts with cherished memories. One such recipe in my family is the Protein Packed Carrot Muffins. This delightful fusion of flavor and nutrition transports me back to my grandmother's cozy kitchen, where the aroma of freshly baked goods always signaled a gathering filled with laughter and love.


**Ingredients:**


- 2 teaspoons Russian mulling spice


- 1 cup almond meal


- 1 teaspoon baking powder


- 1 teaspoon baking soda


- 1 cup grated carrots


- 1/2 cup desiccated coconut


- 1/4 cup coconut oil, melted


- 2 large eggs


- 1/4 cup fruit bits


- 2 tablespoons ground flaxseed


- Zest of 1 lemon


- 1/2 teaspoon salt


- 4 ounces tofu, crumbled


- 1 teaspoon vanilla extract


- 1/2 cup walnut pieces


- 1/4 cup whey powder


**Instructions:**


1. Preheat your oven to 350°F (175°C). Grease a muffin tin or line it with paper cups.


2. In a medium-sized bowl, mix the dry ingredients: Russian mulling spice, almond meal, baking powder, baking soda, desiccated coconut, ground flaxseed, salt, whey powder, and walnut pieces.


3. In a large bowl, combine the wet ingredients: melted coconut oil, eggs, vanilla extract, grated carrots, crumbled tofu, fruit bits, and lemon zest.


4. Gently fold the dry mixture into the wet ingredients, being careful not to overmix. This ensures the muffins remain tender and fluffy.


5. Pour the batter evenly into the prepared muffin tin. Bake for 20-25 minutes, or until a tester inserted into the center of a muffin comes out clean and dry.


6. Allow the muffins to cool slightly before serving. They can be stored in an airtight container and freeze beautifully for up to 2 months.


**A Nostalgic Tale:**


Every Sunday, my family gathered at my grandmother's house for a leisurely brunch. The highlight of these gatherings was always her famous carrot muffins. As a child, I would sit on the countertop, eagerly watching her magic unfold. She would regale us with stories of her childhood in the countryside, where she first learned the art of baking from her mother.


The secret to her muffins, she would say with a twinkle in her eye, was the perfect balance of spices and the love she kneaded into every batch. As the muffins baked, the kitchen filled with a warm, spicy aroma that was both comforting and invigorating. Those Sundays taught me the true essence of family—a blend of shared stories, laughter, and the simple joy of a homemade treat.


**Difficulty Rating:** 4/10


**Classification:** Dessert


These Protein Packed Carrot Muffins are more than just a treat; they are a testament to the power of food in bringing people together. Whether you're making them for a family gathering or as a personal indulgence, they promise to deliver a nostalgic taste of home with every bite.

Read more about Appetizers

Read more about Main Dishes

Read more about Desserts

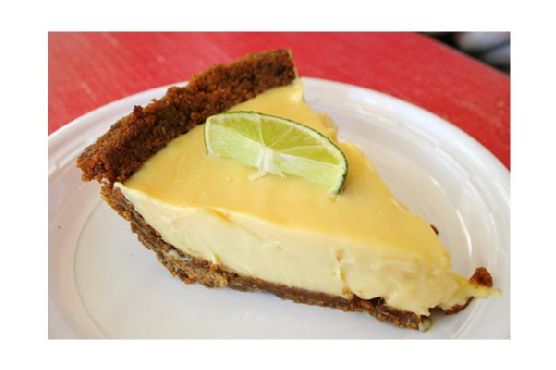
Easy Key Lime Pie | Made by Meaghan Moineau

Easy Key Lime Pie | Made by Meaghan Moineau

**Title: A Slice of Sunshine: Easy Key Lime Pie Recipe with a Dash of Family Nostalgia**


**Description:** Dive into the zestful world of Key Lime Pie with our easy-to-follow recipe. Perfect for dessert lovers, this pie combines tangy lime flavors with a buttery graham cracker crust. Join us as we explore not just the steps to create this delightful treat, but also a cherished family memory that makes this pie a staple in our home.


---


### A Slice of Sunshine: Easy Key Lime Pie Recipe with a Dash of Family Nostalgia


When the sun is high and the days are long, there's nothing quite like the refreshing bite of a Key Lime Pie to bring a little bit of sunshine to your table. This Easy Key Lime Pie recipe is a breeze to make, and it brings back fond memories of summer afternoons spent in my grandmother's kitchen, surrounded by the laughter of family and the sweet aroma of limes.


**Ingredients:**


- 1/4 cup butter, melted


- 1/4 cup sugar


- 1 1/2 cups crushed graham crackers


- 3 egg yolks


- 1 can (14 ounces) sweetened condensed milk


- 1/2 cup lime juice


- 1/4 cup water


- Whipped cream for topping


- A few drops of green food coloring (optional)


**Instructions:**


**1. Prepare the Crust:**


Start by melting the butter in a small saucepan. Once melted, stir in 1/4 cup of sugar until it's well combined. Add the crushed graham crackers to the mixture and toss until everything is mixed thoroughly.


Spread this mixture evenly into a 9-inch pie plate, pressing it firmly onto the bottom and sides to create a solid crust. Chill the crust for 1 hour or until firm. For a more robust flavor, you can also bake it in a 375-degree oven for 4-5 minutes and then let it cool before filling.


**2. Create the Filling:**


In a medium bowl, beat the egg yolks using a whisk or fork until they are smooth. Gradually whisk in the sweetened condensed milk, ensuring a creamy consistency. Next, add the lime juice and water, stirring the mixture until it begins to thicken. For a touch of color, you can add a few drops of green food coloring.


**3. Assemble and Bake:**


Spoon the lime filling into the prepared crust, spreading it evenly. Bake the pie in a 350-degree oven for 25 minutes. Once baked, allow it to cool for 1 hour before transferring it to the refrigerator to chill for an additional 3-4 hours.


**4. Serve:**


Top your pie with a generous dollop of whipped cream just before serving. Each bite is a perfect balance of creamy sweetness and tangy lime, a true testament to its reputation as a classic dessert.


**A Family Memory:**


Growing up, our family gatherings were never complete without my grandmother's famous Key Lime Pie. Every summer, she would host a picnic in her backyard, a tradition that brought together cousins from near and far. I remember watching her in the kitchen, her hands deftly working through the recipe as she hummed along to her favorite tunes.


The moment the pie emerged from the oven, a sense of anticipation filled the room. We'd gather around the table, each slice bringing with it not just a burst of lime flavor, but a flood of memories. My grandmother would share stories of her childhood in Florida, where Key Limes grew in abundance and pies like these were a staple of every family event.


Those afternoons taught me that food is more than just sustenance; it’s a bridge to the past, a vessel of tradition and love. Now, every time I make this pie, I'm reminded of those cherished moments, making it more than just a dessert, but a slice of family history.


**Difficulty Rating:** 4/10


**Category:** Dessert


---


Embrace the sunshine in every bite with this Easy Key Lime Pie recipe. Whether you're creating new memories or reliving old ones, this pie is sure to become a beloved dessert in your home. Enjoy!

Read more about Appetizers

Read more about Main Dishes

Read more about Desserts

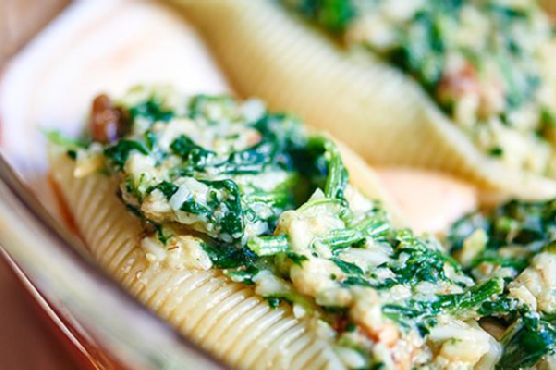
Cheesy Spinach Stuffed Shells | Made by Meaghan Moineau

Cheesy Spinach Stuffed Shells | Made by Meaghan Moineau

### Title: Delightfully Cheesy Spinach Stuffed Shells: A Comforting Family Classic


#### Description: Dive into the rich flavors of Cheesy Spinach Stuffed Shells, a wholesome and delicious main dish that brings families together. Discover the simple steps to create this comforting meal, and enjoy a nostalgic tale of family gatherings centered around this beloved recipe. Perfect for a cozy night in, this dish is sure to become a cherished favorite.


---


### Cheesy Spinach Stuffed Shells: A Wholesome Family Favorite


There's something undeniably comforting about a pan of cheesy, saucy stuffed shells fresh out of the oven. The aroma fills the kitchen, and suddenly, it feels as though every corner of the house is wrapped in a warm, loving embrace. This recipe for Cheesy Spinach Stuffed Shells is not just about the delightful combination of flavors, but it’s also about the memories it creates and the love it represents.


#### Ingredients:


- Jumbo shells


- Cooked frozen spinach


- Wheat germ


- Shredded parmesan cheese


- Pecans


- Shredded Mexican cheese


- Diced green onions


- Salt


- Dried basil


- Eggs


- Water


- Alfredo sauce


- Spaghetti sauce


#### Instructions:


1. **Prepare the Shells**: Begin by pre-boiling your jumbo shells in a large pot of salted water. Cook them for about 9 minutes, then drain them face down on a paper towel to remove excess moisture.


2. **Create the Filling**: While the shells cook, prepare the filling by microwaving the frozen spinach according to the package instructions, without adding water. Once thawed, mix in wheat germ, parmesan cheese, shredded Mexican cheese, chopped pecans, and diced green onions. Season with salt, pepper, and dried basil to taste. For a unique twist, a pinch of nutmeg can be added as well.


3. **Combine Ingredients**: Add in two eggs and a splash of water, mixing until the eggs are fully incorporated into the spinach mixture. Stuff each shell with this delicious filling.


4. **Assemble the Dish**: Grease an 8 x 8 (or 9 x 1) baking pan with cooking spray. Spread a layer of Alfredo sauce on the bottom, followed by spaghetti sauce. Arrange the stuffed shells over the sauce, then top with the remaining sauce.


5. **Bake and Serve**: Place the dish in a preheated 350-degree oven, uncovered, and bake for 30-35 minutes until the sauce is bubbly. Serve hot, and enjoy!


#### Nostalgic Family Memory:


I remember the first time my grandmother taught me how to make these Cheesy Spinach Stuffed Shells. It was a chilly Sunday afternoon, and the entire family was gathered at her cozy kitchen. The snow was gently falling outside, but inside, the warmth from the oven and the laughter shared over mixing bowls made the world feel just right.


Grandma had a way of making cooking feel like an art, and her love for family meals was evident in every dish she prepared. As we stuffed the shells together, she shared stories of her childhood and how her own mother would prepare this dish for family gatherings. It was a tradition passed down through generations, each shell filled with not just ingredients but with love and memories.


#### Difficulty: 4/10


#### Classification: Main Dish


This recipe for Cheesy Spinach Stuffed Shells is an easy-to-follow main dish perfect for a family dinner or a cozy night in. With its simple instructions and familiar flavors, it's a delightful way to bring everyone together around the dinner table. Whether you're creating new memories or reminiscing about old ones, this dish is sure to become a cherished part of your family's culinary tradition.

Read more about Appetizers

Read more about Main Dishes

Read more about Desserts

Almond Butter and Chocolate Squares | Made by Meaghan Moineau

Almond Butter and Chocolate Squares | Made by Meaghan Moineau

**Title: Nostalgic Indulgence: Almond Butter and Chocolate Squares**


**Description:** Dive into a world of delectable nostalgia with our Almond Butter and Chocolate Squares. This vegan dessert is not only a treat for your taste buds but also a heartwarming journey into cherished family memories.


---


There's something undeniably magical about the combination of almond butter and chocolate. It's as if they were destined to be together, creating a symphony of flavors that dance on your palate. Today, I invite you to join me on a journey down memory lane, as I share a recipe that's become a beloved tradition in my family: Almond Butter and Chocolate Squares.


**Ingredients:**


- Vegan butter


- Powdered sugar


- Vegan vanilla cookie crumbs


- Canned almond butter


- Dark vegan chocolate


**Instructions:**


1. Stir the melted vegan butter, powdered sugar, vegan vanilla cookie crumbs, and canned almond butter together until all of the ingredients are perfectly incorporated.


2. Line a 9 x 13-inch dish with foil, ensuring to drape the foil over the sides for easy removal once the bars set.


3. Press the mixture firmly into the bottom of the dish.


4. Melt the dark vegan chocolate in a double boiler and spread it generously over the almond butter mixture.


5. While the chocolate is still warm, cut the bars to desired sizes.


6. Allow the bars to set for at least an hour before serving.


**A Nostalgic Family Memory:**


As I prepare this delightful dessert, I'm transported back to my grandmother's cozy kitchen. The aroma of chocolate and almond wafting through the air always signaled a special occasion. My grandmother, a culinary enthusiast, believed that food was not just sustenance but a way to bring people together.


Every year, during the holiday season, our family would gather in her warm, welcoming home. The dining table would be laden with an array of dishes, but the Almond Butter and Chocolate Squares were always the highlight. I remember being a child, eagerly watching my grandmother as she skillfully prepared the mixture, her hands moving with practiced ease. She would let me spread the chocolate over the almond butter layer — a task I took very seriously, knowing it was the final touch to this culinary masterpiece.


The first bite was always the best: the rich, creamy almond butter mingling with the deep, luscious chocolate, creating a taste that lingered long after the squares were gone. These squares became a symbol of love and togetherness, a reminder of the warmth and joy that family brings.


**Difficulty Rating:** 3/10


**Classification:** Dessert


Incorporating this recipe into your repertoire not only guarantees a delicious treat but also an opportunity to create lasting memories with your loved ones. Whether you're a seasoned chef or a kitchen novice, this simple yet satisfying recipe is sure to become a favorite in your home. So, gather your ingredients, and let's create a dessert that's as rich in flavor as it is in family tradition.

Read more about Appetizers

Read more about Main Dishes

Read more about Desserts

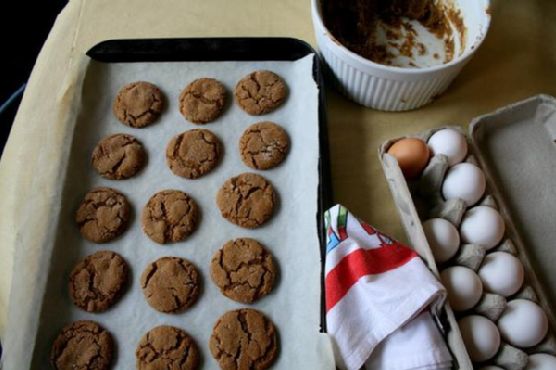
Ginger Molasses Rounds | Made by Meaghan Moineau

Ginger Molasses Rounds | Made by Meaghan Moineau

**Title: The Timeless Delight of Ginger Molasses Rounds: A Nostalgic Treat**


**Description: Discover the sweet nostalgia of Ginger Molasses Rounds, a delicious dessert that brings warmth and memories to the heart and home. With a perfect blend of spices and a chewy texture, this recipe is simple yet rich with family tradition.**


---


### A Taste of Nostalgia: Ginger Molasses Rounds


As the autumn leaves begin to fall and the air grows crisp, there's nothing quite like the comforting aroma of freshly baked cookies wafting through the house. If there's one recipe that embodies the spirit of warmth and family togetherness, it's Ginger Molasses Rounds. These cookies, with their perfect chewiness and spice, have been a beloved tradition in my family for generations.


I vividly remember the first time I helped my grandmother bake these delightful rounds. Her kitchen, always a hub of laughter and the tantalizing scents of spices, was a place where magic happened. I was a curious child, always eager to learn, and my grandmother was a patient teacher. She would gently guide my small hands as I carefully measured out the ingredients — flour, salt, baking soda, and those aromatic spices: cinnamon and ground ginger. Each step was a lesson not just in baking, but in life, as she shared stories of her childhood and how her mother taught her the same recipe.


### The Recipe


#### Ingredients:


- 1 cup butter, softened


- 1 cup sugar


- 1 egg


- 1/4 cup molasses


- 2 cups all-purpose flour


- 2 teaspoons baking soda


- 1/4 teaspoon salt


- 1 teaspoon ground cinnamon


- 1 teaspoon ground ginger


- Additional granulated sugar for rolling


#### Instructions:


1. **Cream the Butter and Sugar:**


In a large bowl, cream together the butter and sugar until smooth and fluffy. This step is essential for that perfect cookie texture.


2. **Add Egg and Molasses:**


Beat in the egg and molasses until well combined. The molasses gives these cookies their rich color and deep flavor.


3. **Mix Dry Ingredients:**


In a separate bowl, whisk together the flour, baking soda, salt, cinnamon, and ground ginger. Gradually blend this dry mixture into the creamed ingredients.


4. **Shape and Roll:**


Shape the dough into small balls, about an inch in diameter. Roll each ball in additional granulated sugar to coat.


5. **Bake:**


Place the balls 2 inches apart on a baking sheet lined with parchment paper. Bake in a preheated 350-degree oven for 8-9 minutes, until the tops are just set and slightly cracked. Remember, they will be soft but will harden as they cool, achieving that perfect chewy texture.


### A Family Tradition


Each time I bake Ginger Molasses Rounds, I'm transported back to those cherished days in my grandmother's kitchen. The cookies not only serve as a sweet treat but as a reminder of the love and lessons passed down through generations. As my own children gather around, eager to help and hear stories of the past, I know this tradition will continue, weaving a tapestry of memories that will last a lifetime.


### Difficulty and Classification


Rated a 3 out of 10 on the difficulty scale, this recipe is both simple and rewarding, making it perfect for bakers of all levels. Classified as a dessert, these cookies are a delightful way to end a meal or share with friends and family over a cup of tea.


As you bake and enjoy these Ginger Molasses Rounds, may they bring warmth to your heart and home, just as they have to mine for so many years.

Read more about Appetizers

Read more about Main Dishes

Read more about Desserts

Rocky Road Rice Krispie Treats | Made by Meaghan Moineau

Rocky Road Rice Krispie Treats | Made by Meaghan Moineau

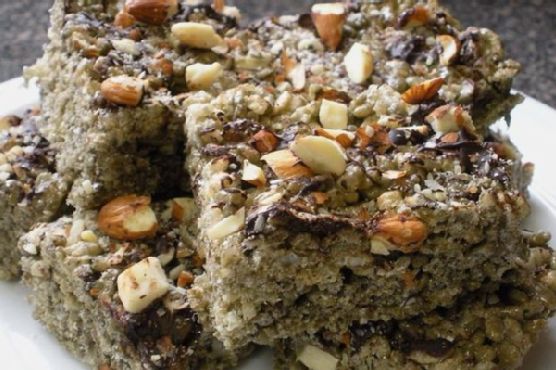
**Title: Decadent Rocky Road Rice Krispie Treats: A Nostalgic Twist on a Classic Dessert**


**Description:**


Indulge in the ultimate comfort treat with our Rocky Road Rice Krispie Treats, a delightful fusion of crunchy, chocolatey goodness with a nostalgic touch. Perfect for dessert enthusiasts, this recipe is a breeze to make and a joy to share. Dive into the story behind this family favorite and discover the simple steps to create your own batch of these rich, satisfying treats. Rated a 3/10 in difficulty, this dessert is ideal for both novice and seasoned cooks.


---


**Rocky Road Rice Krispie Treats: A Journey Down Memory Lane**


There's something undeniably magical about the combination of chocolate, marshmallows, and nuts, especially when it comes wrapped in the comforting embrace of a classic Rice Krispie treat. Our Rocky Road Rice Krispie Treats aren't just a dessert; they're a deliciously nostalgic experience that transports me back to the cherished days spent in my grandmother's cozy kitchen.


Growing up, every family gathering was a grand affair. The dining table, draped in a red checkered cloth, would be brimming with mouthwatering dishes. Yet, it was the dessert table that always captured our hearts. Among an array of sweet delights, my grandmother's Rocky Road Rice Krispie Treats held a special place. It wasn't just a treat; it was a tradition.


**Ingredients:**


- 3 tablespoons of butter


- 1 package (10 oz) chocolate vanilla swirl marshmallows


- 1 teaspoon almond extract


- 1 teaspoon vanilla extract


- 6 cups Rice Krispies cereal


- 1 1/3 cups almonds, roughly chopped


- 6 ounces bittersweet chocolate, melted


- 1/2 teaspoon kosher salt


**Instructions:**


1. In a large soup pot, melt the butter over medium heat. Add the chocolate vanilla swirl marshmallows, stirring continuously until completely melted and smooth.


2. Mix in the almond and vanilla extracts, allowing their fragrant aromas to fill the kitchen, reminiscent of those delightful family gatherings.


3. Remove from heat and quickly fold in the Rice Krispies cereal along with 1 cup of almonds. Stir until all ingredients are well combined, ensuring every bite is packed with flavor.


4. Transfer the mixture into a 9x13-inch dish sprayed with baking spray. With a spatula, gently flatten the mixture until smooth and even on top.


5. Drizzle the melted bittersweet chocolate over the prepared Rice Krispie layer. Sprinkle the remaining 1/3 cup of almonds on top, followed by a generous sprinkle of kosher salt for that perfect sweet-salty balance.


6. Allow the treats to cool completely. For best results, once they've reached room temperature, refrigerate for about an hour. This makes cutting into neat squares a breeze.


**A Sweet Tradition:**


As a child, I remember eagerly waiting for the treats to cool, the anticipation building with every passing minute. My cousins and I would sit around the kitchen island, our eyes glued to the fridge, ready to pounce as soon as my grandmother gave the nod. The first bite was always the best—a crunchy, chocolatey explosion that melted in our mouths, leaving a trail of sweet memories.


Even today, as I prepare these treats for my own family, I can't help but smile, reminiscing about those special moments. It's more than just a dessert; it's a celebration of family, love, and the simple joys of life.


**Difficulty Rating: 3/10**


**Classification: Dessert**


Creating these Rocky Road Rice Krispie Treats is an easy and rewarding experience, perfect for sharing with loved ones or indulging in a moment of nostalgia. Whether you're a culinary novice or a seasoned chef, this recipe promises to bring a smile to your face and a touch of sweetness to your day. Enjoy!

Read more about Appetizers

Read more about Main Dishes

Read more about Desserts

San Francisco Cioppino | Made by Meaghan Moineau

San Francisco Cioppino | Made by Meaghan Moineau

**Title: Dive into Flavor: The Unforgettable Experience of San Francisco Cioppino**


**Description: Discover the rich history and vibrant flavors of San Francisco Cioppino, a seafood lover's dream come true. This classic main dish, with its medley of fresh seafood and aromatic herbs, is as much a feast for the senses as it is a cherished family tradition. Join me as I share a nostalgic memory that makes this dish so special, and learn how to create this culinary masterpiece yourself.**


---


### A Taste of San Francisco: The Legacy of Cioppino


There's something magical about the way a dish can transport you back in time, bringing cherished memories to life with every bite. For me, San Francisco Cioppino is one such dish. A seafood stew with roots in the bustling ports of San Francisco, Cioppino is a symphony of flavors, blending fresh seafood with the aromatic essence of herbs and spices. It's a main dish that not only satisfies the palate but also warms the heart.


#### The Recipe


**Ingredients:**


- Fresh canned tomatoes


- Clams


- Dry white wine


- Cooked freshly Dungeness crabs


- White fresh fish


- Fresh basil


- Fresh parsley


- Garlic


- Black fresh ground pepper


- Olive oil


- Fresh oregano


- Raw shrimp


- Scallops


- Tomato paste


- Yellow onion


**Instructions:**


1. **Prepare the Crabs:** Remove the legs and claws from the crabs and break the body in half, reserving as much of the "crab butter" as possible (the yellow-colored center). Set crab pieces aside and force the crab butter through a sieve into a small bowl. Set aside.


2. **Cook the Clams:** Place the clams in a pan, add 1 cup of wine, and steam, covered, over medium heat for 5 minutes or until clams open. Remove clams and discard any that do not open. Strain the stock through a cheesecloth and reserve.


3. **Build the Base:** In an 8-quart saucepan, heat the oil. Add the onion and garlic and sauté over medium heat until soft, but not browned. Add tomatoes, tomato paste, and remaining 2 cups of wine, pepper, herbs, and clam stock. Partially cover and simmer for 20 minutes.


4. **Add the Seafood:** Add the fish, scallops, shrimp, crab, and crab butter. Simmer for approximately 5 minutes or until all seafood is cooked; do not stir or the fish will break apart.


5. **Finish and Serve:** Add the clams and heat for a scant 1 minute. Sprinkle with parsley and serve immediately from the pot.


#### A Nostalgic Memory


Every time I prepare Cioppino, I'm reminded of family gatherings at my grandparents' cozy home in San Francisco. My grandfather, a retired fisherman, would regale us with stories of the sea as he expertly prepared this dish, his hands moving deftly through the familiar motions. The kitchen would fill with the intoxicating aroma of simmering tomatoes and herbs, drawing everyone together. As we gathered around the table, the world seemed to slow down, and the warmth of family and tradition enveloped us, much like the rich flavors of the Cioppino itself.


#### Difficulty: 7/10


Creating Cioppino requires a bit of finesse, particularly in handling the seafood, but the reward is well worth the effort. With its deep, complex flavors and nostalgic charm, it stands as a testament to the culinary heritage of San Francisco and the enduring power of family traditions.


---


So, roll up your sleeves and dive into the rich, flavorful world of San Francisco Cioppino. Whether you're sharing it with family or enjoying it solo, this dish promises an unforgettable culinary journey.

Read more about Appetizers

Read more about Main Dishes

Read more about Desserts

Peppermint White Chocolate Fudge | Made by Meaghan Moineau

Peppermint White Chocolate Fudge | Made by Meaghan Moineau

**Title: Peppermint White Chocolate Fudge: A Sweet Trip Down Memory Lane**


**Description:** Dive into the world of festive flavors with our Peppermint White Chocolate Fudge recipe. Easy to make, yet rich in taste and tradition, this dessert is perfect for the holiday season. Discover how this delightful treat not only satisfies your sweet tooth but also brings back cherished family memories.


---


The holiday season is a time for family gatherings, laughter, and, of course, indulgent treats that bring warmth and joy to our hearts. One such treat that has always held a special place in my family's holiday tradition is the Peppermint White Chocolate Fudge. This dessert isn't just a delightful blend of flavors; it's a sweet reminder of the love and joy shared in my grandmother's kitchen.


**Ingredients:**


- 2 cups white chocolate chips


- 1 container of vanilla frosting


- Red food coloring


- 1 teaspoon peppermint flavoring


- Fresh peppermint candies, crushed


**Instructions:**


1. Begin by lining an 8x8 pan with plastic wrap or wax paper, ensuring easy removal of the fudge later.


2. In a large microwave-safe bowl, melt the white chocolate chips. Microwave them in 30-second intervals, stirring between each session to ensure a smooth consistency.


3. Once melted, add the container of vanilla frosting to the bowl. Stir until the mixture is well combined.


4. Incorporate the peppermint flavoring, stirring thoroughly to distribute the flavor evenly. If the mixture begins to stiffen, reheat it for an additional 10 seconds to maintain a pourable consistency.


5. Pour the mixture into the prepared pan, spreading it evenly.


6. Place 6-8 drops of red food coloring on the surface of the warm fudge. Using a toothpick or knife, swirl the color into the top of the fudge to create a marbled effect.


7. Sprinkle the crushed peppermint candies over the top, adding a festive crunch to each bite.


8. Cool the fudge in the refrigerator until it hardens. Once firm, cut into squares and enjoy!


**Nostalgic Story:**


Every Christmas Eve, my grandmother would gather all the grandchildren around her worn, wooden kitchen table, the air filled with the sweet scent of vanilla and peppermint. We were her little helpers, eagerly waiting to swirl the red food coloring into the smooth, white canvas of fudge. As she gently guided our hands, she'd recount stories from her childhood—tales of snowy holidays and simple joys that seemed to dance around us like the snowflakes outside.


The swirling of red into white became more than just a step in a recipe; it was a ritual, a moment where time seemed to stand still, capturing the essence of family togetherness. The finished product, adorned with crushed peppermint candies, was not just a treat we shared, but a memory we cherished.


**Difficulty: 2/10**


**Classification: Dessert**


This Peppermint White Chocolate Fudge is an easy-to-make dessert that brings a bit of holiday magic to your table. With simple ingredients and fond memories infused in every bite, it's sure to become a cherished tradition in your home as well. Whether you're creating new memories or reliving old ones, this fudge is a testament to the sweetness of family and festive cheer.

Read more about Appetizers

Read more about Main Dishes

Read more about Desserts