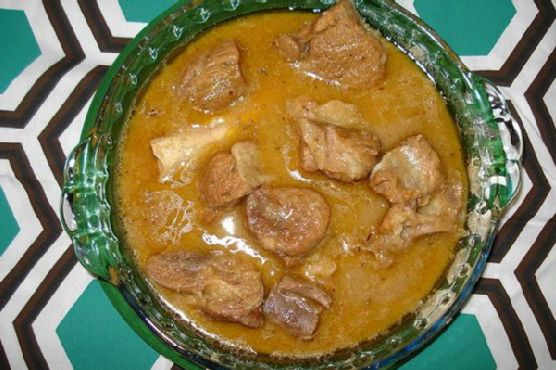
Peppermint White Chocolate Fudge | Made by Meaghan Moineau

Peppermint White Chocolate Fudge | Made by Meaghan Moineau

**Title: Peppermint White Chocolate Fudge: A Sweet Trip Down Memory Lane**


**Description:** Dive into the world of festive flavors with our Peppermint White Chocolate Fudge recipe. Easy to make, yet rich in taste and tradition, this dessert is perfect for the holiday season. Discover how this delightful treat not only satisfies your sweet tooth but also brings back cherished family memories.


---


The holiday season is a time for family gatherings, laughter, and, of course, indulgent treats that bring warmth and joy to our hearts. One such treat that has always held a special place in my family's holiday tradition is the Peppermint White Chocolate Fudge. This dessert isn't just a delightful blend of flavors; it's a sweet reminder of the love and joy shared in my grandmother's kitchen.


**Ingredients:**


- 2 cups white chocolate chips


- 1 container of vanilla frosting


- Red food coloring


- 1 teaspoon peppermint flavoring


- Fresh peppermint candies, crushed


**Instructions:**


1. Begin by lining an 8x8 pan with plastic wrap or wax paper, ensuring easy removal of the fudge later.


2. In a large microwave-safe bowl, melt the white chocolate chips. Microwave them in 30-second intervals, stirring between each session to ensure a smooth consistency.


3. Once melted, add the container of vanilla frosting to the bowl. Stir until the mixture is well combined.


4. Incorporate the peppermint flavoring, stirring thoroughly to distribute the flavor evenly. If the mixture begins to stiffen, reheat it for an additional 10 seconds to maintain a pourable consistency.


5. Pour the mixture into the prepared pan, spreading it evenly.


6. Place 6-8 drops of red food coloring on the surface of the warm fudge. Using a toothpick or knife, swirl the color into the top of the fudge to create a marbled effect.


7. Sprinkle the crushed peppermint candies over the top, adding a festive crunch to each bite.


8. Cool the fudge in the refrigerator until it hardens. Once firm, cut into squares and enjoy!


**Nostalgic Story:**


Every Christmas Eve, my grandmother would gather all the grandchildren around her worn, wooden kitchen table, the air filled with the sweet scent of vanilla and peppermint. We were her little helpers, eagerly waiting to swirl the red food coloring into the smooth, white canvas of fudge. As she gently guided our hands, she'd recount stories from her childhood—tales of snowy holidays and simple joys that seemed to dance around us like the snowflakes outside.


The swirling of red into white became more than just a step in a recipe; it was a ritual, a moment where time seemed to stand still, capturing the essence of family togetherness. The finished product, adorned with crushed peppermint candies, was not just a treat we shared, but a memory we cherished.


**Difficulty: 2/10**


**Classification: Dessert**


This Peppermint White Chocolate Fudge is an easy-to-make dessert that brings a bit of holiday magic to your table. With simple ingredients and fond memories infused in every bite, it's sure to become a cherished tradition in your home as well. Whether you're creating new memories or reliving old ones, this fudge is a testament to the sweetness of family and festive cheer.

Read more about Appetizers

Read more about Main Dishes

Read more about Desserts

Stir Fried Cabbage and Tomatoes | Made by Meaghan Moineau

Stir Fried Cabbage and Tomatoes | Made by Meaghan Moineau

# A Taste of Home: Stir-Fried Cabbage and Tomatoes


## A Nostalgic Culinary Journey with a Simple Yet Flavorful Dish


### Introduction


In the realm of comfort food, simplicity often reigns supreme. Stir-Fried Cabbage and Tomatoes is one such dish that epitomizes the beauty of humble ingredients coming together to create something greater than the sum of its parts. This recipe, with its roots deeply embedded in family tradition, offers a quick, flavorful, and nutritious meal that can easily become a household favorite. Rated at a 3 out of 10 in difficulty, it’s perfect for both novice and seasoned cooks. Classified as a **Main Dish**, it pairs beautifully with steamed rice or crusty bread for a complete meal experience.


### Ingredients


- 1 head of Beijing cabbage, coarsely shredded


- 2-3 ripe tomatoes, rinsed and diced


- 3 cloves of garlic, minced


- Salt, to taste


- 1 teaspoon sugar


- 2 tablespoons ketchup


- 2-3 tablespoons water


- Vegetable oil, for sautéing


### Instructions


1. Begin by preparing your ingredients. Coarsely shred the cabbage and rinse it well under cold water. Drain thoroughly and set aside.


2. Rinse and dice the tomatoes, then set them aside.


3. Heat a wok over medium-high heat and add a splash of vegetable oil. Sauté the minced garlic until it becomes fragrant and lightly golden.


4. Add the shredded cabbage to the wok, stirring frequently. Cook until the cabbage softens, adding a splash of water if necessary to prevent sticking.


5. Incorporate the diced tomatoes into the wok, stirring to combine with the cabbage.


6. Season the mixture with salt, sugar, and ketchup. Add 2-3 tablespoons of water to help meld the flavors.


7. Continue to stir-fry until the tomatoes have softened and the flavors are well combined.


8. Serve immediately, savoring every bite of this nostalgic dish.


### A Walk Down Memory Lane


As I prepare this dish, I am transported back to my grandmother's cozy kitchen, where the aroma of garlic sizzling in a wok was a daily symphony. My grandmother, with her deft hands and warm smile, would often prepare Stir-Fried Cabbage and Tomatoes as a quick lunch during the long summer days. The simplicity of the ingredients belied the complex flavors that would emerge as she skillfully combined them.


I remember the stories she would share, tales of her own childhood and the vibrant markets where she learned to select the freshest produce. Each meal was a lesson in love, patience, and the art of cooking from the heart. As a child, watching her transform simple vegetables into a delightful meal was nothing short of magical.


This dish, with its balance of sweet and savory, carries the warmth of family gatherings and the joy of shared meals. It’s a reminder that the best recipes are more than just a list of ingredients and instructions—they're a bridge to cherished memories and a testament to the love passed down through generations.


### Conclusion


Whether you're seeking a quick and satisfying meal or a nostalgic journey through flavors, Stir-Fried Cabbage and Tomatoes is a dish that offers both. Its ease of preparation and delightful taste make it a staple in any kitchen. Try it for yourself, and perhaps it will become a beloved part of your own family's culinary traditions.

Read more about Appetizers

Read more about Main Dishes

Read more about Desserts

Arroz Con Pollo | Made by Meaghan Moineau

Arroz Con Pollo | Made by Meaghan Moineau

**Title: Aromatic Arroz Con Pollo: A Journey Through Flavors and Memories**


**Description:** Dive into the rich tapestry of flavors with our Arroz Con Pollo recipe, a comforting main dish that marries the savory allure of spices with the heartwarming essence of family tradition. Easy to prepare and brimming with nostalgic charm, this dish promises a culinary experience that will whisk you away to cherished moments of togetherness.


---


There’s something truly magical about the way certain dishes have the power to transport us back in time, evoking vivid memories of family gatherings and laughter-filled kitchens. Arroz Con Pollo is one such dish for me. Every time I prepare it, the fragrant aroma of cumin, coriander, and turmeric fills the air, and I am instantly reminded of Sunday afternoons spent in my grandmother’s bustling kitchen.


In our household, Sundays were reserved for family. We would gather around her large wooden table, eagerly awaiting the feast that was being lovingly prepared. My grandmother, the maestro of culinary delights, would start by melting butter in her favorite cast-iron pan, the one seasoned with years of family meals. The sizzle of garlic hitting the hot butter was our cue to gather closer, drawn by the promise of the flavors to come.


She would expertly season the chicken breasts with a sprinkle of cumin, coriander, and turmeric, infusing them with a symphony of aromatic spices. As the chicken browned, she’d add diced onions and vibrant bell peppers, their colors as lively as the stories we shared. In went the canned chiles and tomatoes, followed by a generous pour of chicken broth that tied all the ingredients together in a savory embrace.


But the magic truly happened when she added the rice. As it simmered, absorbing the rich broth and spices, we would set the table, stealing glances at the bubbling pot that promised comfort and warmth. The final touch was a blanket of shredded cheese, melting into a luscious topping that crowned the dish with creamy indulgence.


Each bite of Arroz Con Pollo was a celebration—a melody of spices, tender chicken, and perfectly cooked rice, all enveloped in the melted cheese. It was more than just a meal; it was a moment of connection, a reminder of the love that went into every pot my grandmother prepared.


Today, I continue to honor this tradition, crafting Arroz Con Pollo for my own family. As I follow the familiar steps, I feel a sense of continuity, of passing down the flavors and memories to the next generation. It's a hearty main dish that rates a 5 out of 10 in difficulty, making it accessible for home cooks of all skill levels.


Whether it’s a special occasion or a casual dinner, this dish remains a beloved staple, a testament to the power of food in bringing people together. So gather your loved ones, and let the rich flavors of Arroz Con Pollo create new memories that will last a lifetime.

Read more about Appetizers

Read more about Main Dishes

Read more about Desserts

Savory Olive & Goat Cheese Palmiers | Made by Meaghan Moineau

Savory Olive & Goat Cheese Palmiers | Made by Meaghan Moineau

**Title: A Taste of Nostalgia: Crafting Savory Olive & Goat Cheese Palmiers**


**Description:** Dive into the delightful world of Savory Olive & Goat Cheese Palmiers. This irresistible appetizer combines the perfect balance of flavors with a touch of nostalgia. Discover a cherished family memory and learn how to create this elegant dish with ease.


---


When I think back to the many family gatherings of my childhood, one dish always stands out in my memory: the delectable Savory Olive & Goat Cheese Palmiers. These delicate, flaky appetizers were a staple at our family reunions, bringing a taste of sophistication to our rustic backyard picnics. The aroma of baking puff pastry and the savory blend of olives and goat cheese would waft through the air, enticing us all to gather around the kitchen.


**Creating Savory Olive & Goat Cheese Palmiers**


**Ingredients:**


- Coarse salt


- Goat cheese


- Cooked olive tapenade


- Pine nuts


- Cooked puff pastry dough


**Instructions:**


1. **Thaw and Prepare:** Begin by allowing the puff pastry dough to thaw according to the package directions. This is a crucial step to ensure the dough is pliable and easy to work with.


2. **Roll Out the Dough:** Lightly flour a flat work surface to prevent sticking. Place one sheet of the dough on top of the other on the floured surface, and gently roll it out to a 9x12-inch shape that is about 1/4-inch thick. If you prefer, you can use each sheet of dough individually.


3. **Add the Filling:** Spread the olive tapenade evenly over the dough, followed by the crumbled goat cheese. The combination of these two ingredients creates a rich, savory flavor profile. Top it off with the toasted pine nuts for added crunch and nuttiness.


4. **Roll and Chill:** Start by rolling the short ends of the dough toward each other until they meet in the middle. Tightly wrap the rolled dough in plastic wrap and refrigerate for about 30 minutes. This helps the dough firm up, making it easier to slice.


5. **Bake to Perfection:** Preheat your oven to 425 degrees F and line a baking sheet with parchment paper or a silicone baking mat. Unwrap the chilled dough and use a serrated knife to slice the rolled dough into 1/4-inch slices. Arrange them on the baking sheet about 2 inches apart. Sprinkle the tops with coarse salt and bake for 12-14 minutes, or until they are just lightly golden. Serve warm for the best experience.


**A Family Memory:**


One summer, during our annual family reunion, my grandmother shared the story of how she first discovered this dish while traveling through France with my grandfather. They stumbled upon a quaint little bakery in Provence that sold the most delightful pastries. Inspired, she decided to recreate the palmiers with her own twist, incorporating her love for olives and goat cheese. That year, she taught me how to make them, and we spent a lovely afternoon in her sunlit kitchen, rolling dough and sharing stories of her adventures. To this day, each bite of these palmiers takes me back to that special summer and the warmth of my grandmother's love.


**Difficulty Rating:** 4/10


**Classification:** Appetizer


These Savory Olive & Goat Cheese Palmiers may seem sophisticated, but they are surprisingly easy to make. With minimal ingredients and a straightforward process, this appetizer is perfect for any occasion. Whether you're hosting a dinner party or simply want to indulge in a little nostalgia, these palmiers are sure to impress. Enjoy the timeless flavors and create new memories with this delightful dish.

Read more about Appetizers

Read more about Main Dishes

Read more about Desserts

Eggplant and Tomato Sauce | Made by Meaghan Moineau

Eggplant and Tomato Sauce | Made by Meaghan Moineau

# A Taste of Tradition: Eggplant and Tomato Sauce Pasta


## Description


Dive into a world of rich flavors and family traditions with our Eggplant and Tomato Sauce Pasta. This hearty main dish will transport you to a cozy Italian kitchen, where the aroma of simmering tomatoes and fresh basil fills the air. Not only is this recipe a delight for your taste buds, but it also holds a special place in my heart as it evokes cherished memories of family gatherings. Perfect for a comforting dinner, this dish combines the earthiness of eggplant with the tanginess of tomatoes and the umami of Romano cheese for a symphony of flavors that is sure to become a staple in your household.


### Ingredients:


- 1 medium eggplant, cut into cubes


- 1 can (28 oz) crushed tomatoes


- 1 red onion, sliced


- 3 cloves garlic, chopped


- 1 cup grape tomatoes, halved


- 2 tablespoons lemon juice


- Salt and freshly ground black pepper


- 1 red bell pepper, diced


- 1 teaspoon dried oregano


- A handful of fresh basil leaves


- 1/2 cup red wine


- Your favorite macaroni


- Fresh Romano cheese, grated


- 4 tablespoons olive oil


- Red pepper flakes (optional)


### Instructions:


1. **Prepare the Eggplant Mixture**: In a large bowl, combine the cubed eggplant, chopped garlic, sliced onion, and halved grape tomatoes. Add 2 tablespoons of olive oil, lemon juice, 1 teaspoon of salt, and a sprinkle of ground black pepper. Toss everything together until well coated.


2. **Sauté the Vegetables**: Heat a large frying pan over medium heat and add 2 tablespoons of olive oil. Once hot, add the eggplant mixture and sauté until the eggplant is softened, about 10-12 minutes.


3. **Simmer the Sauce**: Add the crushed tomatoes, diced red bell pepper, dried oregano, another 1 teaspoon of salt, and a dash of ground black pepper to the pan. Stir to combine. Pour in the red wine and let the sauce simmer on low heat for about 30-35 minutes, stirring occasionally. The longer it cooks, the deeper the flavors will develop.


4. **Cook the Macaroni**: While the sauce is simmering, prepare your favorite macaroni according to the package instructions. Drain and set aside.


5. **Toss the Pasta**: In a large bowl, drizzle a little olive oil and add a few dashes of red pepper flakes, dried oregano, and grated Romano cheese. Add the cooked macaroni and toss to coat.


6. **Combine and Serve**: Add the eggplant sauce to the macaroni and toss gently to combine. Finish with more grated Romano cheese and fresh basil leaves. Serve warm.


### Difficulty: 5/10


### Classification: Main Dish


---


## A Nostalgic Bite: Family Memories


Every time I prepare this Eggplant and Tomato Sauce, I'm transported back to my grandmother's kitchen. It was a place of warmth, where the walls echoed with laughter and the clinking of pots and pans. I vividly remember the summer afternoons spent at her house, where she would let me help her in the kitchen. My task was simple yet crucial: stirring the sauce as it simmered, releasing an aroma that enveloped the entire house.


My grandmother would tell stories of her childhood in Italy, where each ingredient was carefully selected from her family's garden. She taught me that cooking was an art, one that required patience and love. As we cooked together, she would share her wisdom, reminding me that the secret to a perfect dish was to cook with your heart.


This recipe is more than just a meal; it's a bridge to my heritage and a testament to the love passed down through generations. It's a reminder that the best dishes are those that bring people together, creating new memories while honoring the old.


Every bite of this Eggplant and Tomato Sauce Pasta is a tribute to my grandmother, a celebration of family, and a cherished tradition that I hope will continue for many generations to come.

Read more about Appetizers

Read more about Main Dishes

Read more about Desserts

Strawberry Cheesecake Chocolate Crepes | Made by Meaghan Moineau

Strawberry Cheesecake Chocolate Crepes | Made by Meaghan Moineau

**Title: Delighting in Decadence: A Nostalgic Journey with Strawberry Cheesecake Chocolate Crepes**


**Description: Uncover the blissful blend of strawberries, cream cheese, and chocolate in our Strawberry Cheesecake Chocolate Crepes. This dessert marries the richness of chocolate with the refreshing taste of strawberries, wrapped in a delicate crepe. Follow our step-by-step guide to recreate a family favorite and relive cherished memories.**


---


There's something inherently comforting about crepes. They're versatile, elegant, and carry a sense of nostalgia that transports me back to my childhood kitchen. It was a bustling place, a hub of aromas and laughter, where my family gathered to create and celebrate. Among the many dishes we cherished, the Strawberry Cheesecake Chocolate Crepes stood out—a testament to the magic that happens when simple ingredients come together to create something extraordinary.


**Ingredients:**


For the Strawberry Cream Cheese Filling:


- 1 cup cream cheese


- 1 cup diced strawberries


- 1 teaspoon vanilla extract


- 1 tablespoon lemon juice


- 2 tablespoons granulated sugar


For the Chocolate Crepes:


- 1 cup flour


- 1/4 cup granulated sugar


- 1/4 cup unsweetened cocoa powder


- 1/4 teaspoon kosher salt


- 3 eggs


- 1 1/2 cups milk


- 1/2 cup water


- 3 tablespoons unsalted butter, melted


- 1 teaspoon vanilla extract


**Instructions:**


**How to Make Strawberry Cream Cheese Filling:**


1. In a medium-sized mixing bowl, combine cream cheese, diced strawberries, vanilla extract, lemon juice, and granulated sugar.


2. Using a hand mixer, wooden spoon, or spatula, mix the ingredients until smooth. Set aside.


**How to Blend Chocolate Crepes Ingredients:**


1. Combine flour, sugar, cocoa powder, salt, and eggs in a food processor or blender.


2. If using a food processor, keep it running as you gradually add milk and water. Continue to pulse until well blended.


3. Pour in the melted butter and vanilla extract. Blend until smooth.


**How to Make Chocolate Crepes:**


1. Heat a crepe pan or an 8"-10" omelet pan over medium heat.


2. Pour 1/4 cup of batter into the middle of the pan and swirl to cover the bottom.


3. Cook the crepe for 2-3 minutes, or until the bottom is light brown and the edges are set.


4. Flip the crepe over and cook for an additional minute.


5. Transfer to a serving platter and repeat with the remaining batter.


**A Taste of Nostalgia:**


Every bite of these crepes takes me back to Sunday mornings at my grandmother's house. The kitchen was her domain, a place where she spun stories as easily as she did crepes. She'd regale us with tales of her youth, while we eagerly watched her pour the batter, her hands moving with practiced ease.


The scent of chocolate filled the air, mingling with the sweet tartness of strawberries. As we sat around the table, our family would savor each bite, conversations flowing as freely as the laughter. Those mornings were more than just about the food—they were about family, tradition, and the joy of shared experiences.


**Difficulty Rating: 6/10**


**Classification: Dessert**


Creating Strawberry Cheesecake Chocolate Crepes isn't just about following a recipe; it's about embracing a tradition, crafting memories, and delighting in the simple pleasures of life. So gather your loved ones, share stories, and let these crepes be the heart of your cherished family moments.

Read more about Appetizers

Read more about Main Dishes

Read more about Desserts

Excellent No Fail and Easy Keto Zucchini Lasagna | Made by Meaghan Moineau

Excellent No Fail and Easy Keto Zucchini Lasagna | Made by Meaghan Moineau

**Title: Savor the Simplicity: The No-Fail, Easy Keto Zucchini Lasagna Recipe**


**Description:** Dive into the comforting nostalgia of family dinners with our Excellent No-Fail and Easy Keto Zucchini Lasagna. This low-carb, nutrient-packed dish is not only a healthier alternative to traditional lasagna but also a delightful journey back to cherished family gatherings. With layers of savory flavors and creamy textures, this main dish promises to be a hit at your dinner table. Rated 3 out of 10 on the difficulty scale, it's perfect for both novice and experienced cooks looking to create something special without the hassle.


---


When I think back to my childhood, the kitchen was always the heart of our home. It was a place filled with laughter, warmth, and the tantalizing aroma of my grandma's cooking. One dish that stands out, evoking a flood of memories, is her famous zucchini lasagna. A healthier twist on the classic, she crafted this masterpiece long before keto became a household term.


I remember the excitement as I watched her expertly slice the zucchini, her hands steady with years of practice. She would hand me scraps of cheese to nibble on while regaling me with stories from her past—stories of growing up in a small town, where everyone knew everyone, and meals were a communal affair. Her zucchini lasagna wasn’t just food; it was a narrative that connected generations.


Now, inspired by her, I bring to you a rendition of this beloved family classic: the Excellent No-Fail and Easy Keto Zucchini Lasagna. It’s a dish that marries nostalgia with the modern-day quest for healthier living, and it’s surprisingly simple to make.


**Ingredients:**


- Fresh basil


- 1 medium bell pepper, diced


- 1 lb lean ground turkey


- 1 ½ cups shredded mozzarella cheese


- 1 medium onion, chopped


- ½ cup shredded parmesan


- Fresh parsley, chopped


- 1 medium red bell pepper, diced


- 1 cup ricotta cheese


- A pinch of sugar (optional)


- 2 cups tomato sauce


- ½ teaspoon white pepper


- 3 medium zucchinis, sliced lengthwise


**Instructions:**


1. **Prep the Zucchini:** Preheat your oven to 375°F. Slice the zucchinis lengthwise and lay them flat on a cookie sheet. Bake for 15 minutes to remove excess moisture—an essential step for avoiding a watery lasagna.


2. **Cook the Meat Sauce:** In a medium saucepan, sauté the onion and bell peppers until they are soft and fragrant. Add the ground turkey, cooking until browned. Stir in the tomato sauce, white pepper, and a pinch of sugar to balance the acidity. Let it simmer over low heat for 5 minutes.


3. **Prepare the Cheese Mixture:** In a bowl, combine ricotta cheese, shredded parmesan, and chopped basil. Mix well and set aside.


4. **Assemble the Lasagna:** In a 9x13 baking dish, begin with a layer of zucchini noodles. Spread a portion of the cheese mixture over the zucchini, followed by a layer of the savory meat sauce. Repeat these steps to form multiple layers, ending with a generous topping of mozzarella cheese.


5. **Bake to Perfection:** Cover the baking dish with foil and bake for 30 minutes. Remove the foil and bake for an additional 10 minutes to achieve a golden, bubbly top. Allow the lasagna to cool for 5 minutes before serving.


This zucchini lasagna is more than just a meal; it’s a tribute to the legacy of family gatherings and culinary traditions. Each bite is a reminder of those cozy nights spent around the table, sharing stories and laughter.


**Difficulty:** 3/10


**Classification:** Main Dish


Indulge in the wholesome goodness of this low-carb delight, and perhaps, like me, you’ll find yourself reminiscing about your own family’s cherished kitchen memories. Enjoy!

Read more about Appetizers

Read more about Main Dishes

Read more about Desserts

Spicy Salad with Kidney Beans, Cheddar, and Nuts | Made by Meaghan Moineau

Spicy Salad with Kidney Beans, Cheddar, and Nuts | Made by Meaghan Moineau

**Title: Zesty Delight: Spicy Salad with Kidney Beans, Cheddar, and Nuts**


**Description:** Dive into a symphony of flavors with our Spicy Salad featuring kidney beans, cheddar, and a medley of nuts. This vibrant dish is not just a treat for your taste buds but also a wholesome meal that can be whipped up in record time. Perfect for a quick lunch or a light dinner, this salad is both nutritious and satisfying, boasting a tantalizing mix of creamy, crunchy, and spicy elements. Join me as I share a cherished family memory that this delightful salad brings to mind.


---


**The Art of Quick and Healthy: Spicy Salad with Kidney Beans, Cheddar, and Nuts**


When it comes to preparing a meal that's both quick and nourishing, salads often take the spotlight. This Spicy Salad with Kidney Beans, Cheddar, and Nuts is a testament to how simple ingredients can come together to create a dish that's delicious and deeply satisfying. As a bonus, it's a meal that carries with it a personal story from my childhood that makes it even more special.


**Ingredients:**


- 1 cup cooked kidney beans, rinsed and drained


- 1/4 cup almonds


- 1 ripe avocado, sliced


- 2 tablespoons balsamic vinegar


- 1/2 cup cheddar cheese, torn into small pieces


- 4 cups mixed greens


- 2 tablespoons olive oil


- 1/4 cup salted roasted cashews


- 1/4 cup sundried tomatoes, cut into strips


- A dash of Tabasco


**Instructions:**


1. Begin by preparing your ingredients: Rinse and drain the kidney beans, cut the sundried tomatoes into strips, and tear the cheddar cheese into small, bite-sized pieces.


2. In a large salad bowl, lay down a bed of mixed greens. Top the greens with kidney beans, sundried tomatoes, cheddar cheese, almonds, and cashews.


3. In a small mixing bowl, combine olive oil, balsamic vinegar, and a dash of Tabasco sauce. Stir well to create a zesty dressing.


4. Drizzle the dressing over the salad, ensuring every ingredient gets a touch of that spicy, tangy goodness.


5. Give it a gentle toss, ensuring all the flavors meld together beautifully.


This salad is not just a wonderful mix of textures and flavors but also a slice of my family's culinary history. Growing up, Sundays were reserved for family picnics in our local park. My mother would pack a wicker basket with freshly prepared dishes, and this spicy salad was always a staple. I remember the vivid flavors of the kidney beans and cheddar mixing with the crunch of the nuts and the tangy kick from the Tabasco-laced dressing. It was the perfect meal to enjoy on a sunny afternoon, surrounded by laughter and the rustling of leaves.


**Difficulty:** 3/10


**Classification:** Main Dish


With its simple preparation and vibrant flavors, this salad is an excellent choice for anyone looking to enjoy a quick, healthy meal that's rich in protein and fiber. Whether you're reminiscing about family picnics or simply seeking a nutritious lunch option, this Spicy Salad with Kidney Beans, Cheddar, and Nuts is sure to become a favorite. Enjoy the journey of flavors and memories with every bite!

Read more about Appetizers

Read more about Main Dishes

Read more about Desserts

Mixed Berry Yogurt with Almonds | Made by Meaghan Moineau

Mixed Berry Yogurt with Almonds | Made by Meaghan Moineau

**Title: "A Symphony of Flavors: Mixed Berry Yogurt with Almonds"**


**Description:**


Discover the delightful fusion of flavors in our Mixed Berry Yogurt with Almonds recipe. This versatile dish, perfect for breakfast or dessert, combines the tangy sweetness of berries with the creamy richness of Greek yogurt and the satisfying crunch of almonds. Join us as we explore the endless variations this recipe offers and share a nostalgic family memory that makes this dish truly special.


---


**A Symphony of Flavors: Mixed Berry Yogurt with Almonds**


In the realm of culinary delights, there are few combinations as harmoniously balanced as our Mixed Berry Yogurt with Almonds. This dish, with its vibrant colors and tantalizing textures, transcends the boundaries of a typical breakfast or dessert. It invites you to indulge in its simplicity while offering endless opportunities for creative variations.


**Ingredients:**


- Frozen mixed berries


- Whole oats


- Plain Greek yogurt


- Whole almonds


**Instructions:**


This recipe is as flexible as it is delicious, allowing you to assemble it in a variety of ways. For an aesthetically pleasing presentation, layer the ingredients in a glass cup or bowl. Start with a layer of Greek yogurt, followed by a sprinkle of whole oats, a generous scoop of mixed berries, and a handful of whole almonds. Repeat the layers as desired.


**Variations:**


The beauty of this recipe lies in its adaptability. For a more indulgent dessert, consider using a creamier vanilla yogurt or drizzling a touch of maple syrup over the yogurt layer. Feel free to experiment with different kinds of nuts—toast them for an added depth of flavor and crunch. If you find yourself without berries, fear not; this dish works wonderfully with almost any fruit you have on hand.


**A Nostalgic Family Memory:**


As I prepare this dish, I'm transported back to lazy summer mornings at my grandmother's house. Her kitchen was always filled with the comforting aroma of freshly toasted nuts and the sweet tang of ripe berries. I remember sitting at her wooden table, watching as she effortlessly assembled this dish with whatever fruits she had picked from her garden that morning.


Each spoonful was a burst of flavor, a harmony of textures that seemed to capture the essence of those sunlit days. My grandmother would share stories of her childhood, tales of family gatherings and the joy of creating something delicious with simple, wholesome ingredients. This dish, for me, is a connection to those cherished moments—a reminder that the simplest recipes often hold the most profound memories.


**Difficulty Rating: 2/10**


**Classification: Breakfast/Dessert**


With its minimal preparation and endless customization options, this Mixed Berry Yogurt with Almonds is a delightful dish that anyone can create. Whether you're enjoying it as a nourishing breakfast or a satisfying dessert, may it bring warmth to your table and create memories that last a lifetime.

Read more about Appetizers

Read more about Main Dishes

Read more about Desserts

Rocky Road Rice Krispie Treats | Made by Meaghan Moineau

Rocky Road Rice Krispie Treats | Made by Meaghan Moineau

**Title: Rocky Road Rice Krispie Treats: A Nostalgic Twist on a Classic Dessert**


**Description: Dive into the sweet and crunchy world of Rocky Road Rice Krispie Treats. This delightful dessert combines the rich flavors of bittersweet chocolate, almonds, and marshmallows with the crispy texture of rice cereal. Perfect for family gatherings or a nostalgic treat, this recipe is sure to become a cherished favorite.**


---


### Rocky Road Rice Krispie Treats: A Sweet Trip Down Memory Lane


Ah, the sweet nostalgia of childhood desserts. There's something about the combination of chocolate, marshmallows, and almonds that never fails to transport me back to those carefree days. Growing up, my family had a tradition of gathering in the kitchen on Sunday afternoons to whip up sweet treats. The laughter, the scent of melting chocolate, and the joy of creating something delicious together are memories I cherish dearly. One particular favorite was our own twist on the classic rice krispie treats: the Rocky Road Rice Krispie Treats.


#### Ingredients:


- **Butter**: Essential for that rich, creamy base.


- **Chocolate Vanilla Swirl Marshmallows**: The star of our show, adding a delightful twist.


- **Almond Extract & Vanilla Extract**: These extracts enhance the flavor, providing a depth that complements the chocolate beautifully.


- **Rice Krispies**: The foundation of this treat, offering that iconic crunch.


- **Almonds**: One cup mixed in and an additional 1/3 cup for topping, these add a delightful crunch and nutty flavor.


- **Bittersweet Chocolate**: Melted and drizzled on top, it adds a layer of decadence.


- **Kosher Salt**: Just a sprinkle to heighten all the flavors.


#### Instructions:


1. **Melt and Combine**: In a large soup pot, melt the butter and chocolate vanilla swirl marshmallows over a low flame, stirring constantly to create a smooth, creamy mixture.


2. **Flavor Infusion**: Stir in the almond extract and vanilla extract, allowing their rich scents to fill the kitchen and blend into the marshmallow mixture.


3. **Mix It Up**: Add the rice krispies and 1 cup of almonds into the pot. Stir well, ensuring each piece of cereal is coated with the marshmallow blend.


4. **Shape and Set**: Spread the mixture into a 9x13 dish prepped with baking spray. Press down with a spatula until the surface is smooth and even.


5. **Decadent Toppings**: Drizzle the melted bittersweet chocolate over the top and sprinkle with the remaining 1/3 cup of almonds. Finish with a light sprinkle of kosher salt (about 1/2 teaspoon) to enhance the flavors.


6. **Cool and Cut**: Allow the treats to cool completely. For ease of cutting, place them in the fridge for about an hour once they reach room temperature.


#### A Sweet Memory


I recall one particular Sunday when I was around ten years old. It was a rainy afternoon, the kind where you could hear the gentle patter of raindrops against the kitchen window. My mom, my siblings, and I were gathered around the kitchen island, each of us assigned a task. I was in charge of stirring the marshmallows and butter—a task I took very seriously. As we worked, my mom would regale us with stories of her own childhood, sharing how her mother taught her to bake. It was in those moments, surrounded by family and the comforting aroma of chocolate and almonds, that I learned the true meaning of love and tradition.


#### Difficulty: 3/10


**Classification: Dessert**


This Rocky Road Rice Krispie Treats recipe is not only simple to make but also a delightful journey down memory lane. It's perfect for bringing a touch of nostalgia to any gathering, reminding us of the warmth and joy found in family traditions. Whether you're enjoying them on a rainy afternoon or sharing them at a festive gathering, these treats promise to bring smiles and sweet memories to all who indulge.

Read more about Appetizers

Read more about Main Dishes

Read more about Desserts

Triple Citrus Cake | Made by Meaghan Moineau

Triple Citrus Cake | Made by Meaghan Moineau

**Title: Zesty Delights: Crafting the Perfect Triple Citrus Cake**


**Description:** Dive into the refreshing world of citrus with our Triple Citrus Cake. This delightful dessert combines the vibrant flavors of lemon, lime, and orange, creating a symphony of taste that dances on your palate. Easy to make and even easier to enjoy, this cake is perfect for any occasion. Join us as we share the recipe, its heartwarming backstory, and tips to perfect your baking skills.


---


### Triple Citrus Cake: A Tangy Trip Down Memory Lane


When life gives you lemons, limes, and oranges, you make a Triple Citrus Cake! This dessert is more than just a sweet treat; it's a nostalgic trip to sunlit kitchens and family gatherings. The luscious combination of lemon zest, lime yogurt, and orange glaze offers a vibrant flavor profile that's both refreshing and satisfying.


#### Ingredients:


- 1 ½ cups all-purpose flour


- 1 ½ teaspoons baking powder


- ½ teaspoon salt


- 1 cup lime yogurt


- 3 large whole eggs


- 1 cup sugar


- 1 teaspoon vanilla extract


- ½ cup grapeseed oil


- 1 tablespoon lemon zest


- 1 cup powdered sugar


- 2 tablespoons orange juice


#### Instructions:


1. **Prepare Dry Ingredients:** Whisk together the flour, baking powder, and salt. Set aside.


2. **Mix Wet Ingredients:** In a large bowl, use an electric mixer to beat the lime yogurt, eggs, sugar, vanilla, grapeseed oil, and lemon zest until well combined.


3. **Combine Mixtures:** Gradually add the dry ingredients to the wet mixture, folding gently with a spatula until fully incorporated.


4. **Prepare the Pan:** Coat a 9 x 5-inch loaf pan with floured baking spray or line with parchment paper sprayed with baking spray.


5. **Bake:** Pour the batter into the prepared pan and smooth the top. Bake in a preheated oven at 350°F (175°C) for 40-50 minutes, or until a cake tester inserted in the center comes out clean.


6. **Cool:** Allow the cake to cool in the pan for at least an hour.


7. **Glaze:** Once cool, transfer the cake to a serving plate. Mix the powdered sugar and orange juice until smooth, then drizzle over the cake.


#### A Slice of Nostalgia


Every time I bake this Triple Citrus Cake, I'm transported back to sunny Sunday afternoons at my grandmother's house. As children, my siblings and I would eagerly wait in the kitchen, captivated by the zesty aroma wafting through the air. Grandma's kitchen was a sanctuary of love and laughter, where the magic of baking brought the family together.


The Triple Citrus Cake was a family favorite, especially during summer reunions. Grandma would slice generous pieces, serving them with a side of her famous homemade lemonade. Each bite was a burst of citrusy joy that perfectly complemented the warmth of family camaraderie. Those cherished memories of shared stories and laughter over slices of this cake are etched into my heart, making this recipe truly special.


#### Difficulty: 4/10


#### Classification: Dessert


Embrace the zest of life with this Triple Citrus Cake, a delightful dessert that promises to be the star of any gathering. With its easy-to-follow steps and a taste that transports you to sunlit family kitchens, this cake is a must-try for every dessert enthusiast. So gather your ingredients, channel your inner pastry chef, and create a nostalgic masterpiece that will surely delight your family and friends!

Read more about Appetizers

Read more about Main Dishes

Read more about Desserts

Lemon and pepper veal cutlets | Made by Meaghan Moineau

Lemon and pepper veal cutlets | Made by Meaghan Moineau

# Zesty Comfort: Lemon and Pepper Veal Cutlets


## A Family Classic with a Twist of Nostalgia


### Description


Dive into the delightful blend of tangy lemon and peppery zest with our mouth-watering Lemon and Pepper Veal Cutlets. This classic main dish, enriched with creamy rosemary-infused sauce, promises to tantalize your taste buds while evoking cherished family memories. Perfectly paired with pilaf and a fresh green salad, this recipe is a heartwarming reminder of Sunday dinners at grandma's house.


### Keyword-Rich Content


Whether you're a seasoned chef or a home cook looking to impress, these Lemon and Pepper Veal Cutlets are sure to become a favorite at your dining table. This recipe is straightforward yet sophisticated, offering a burst of flavors that are both comforting and refreshing. With keywords such as "veal cutlets," "lemon zest," "creamy sauce," and "family recipe," our guide will ensure your culinary adventure is a delicious success.


### Ingredients


- 4 veal cutlets


- 2 tablespoons corn flour


- Salt and black cracked pepper to taste


- 2 tablespoons butter


- 1 tablespoon olive oil


- 1 tablespoon lemon rind


- 2 tablespoons lemon juice


- 1/2 cup cream


- 1/4 cup sour cream


- 1 tablespoon fresh rosemary, chopped


- Pilaf and green salad, to serve


### Instructions


1. **Prepare the Veal**: Slightly flatten the veal cutlets using a meat mallet for even cooking. In a shallow dish, combine corn flour, salt, and pepper. Dredge each cutlet through the mixture, ensuring an even coat.


2. **Cook the Cutlets**: Heat butter and olive oil in a large pan over medium heat. Cook the cutlets for about 3 minutes on each side, or until browned and cooked to your liking. Remove the veal from the pan and set aside, covering them to keep warm.


3. **Make the Sauce**: In the same pan, add cream, sour cream, lemon rind, lemon juice, rosemary, salt, and additional black pepper. Mix well and bring to a boil. Lower the heat and let it simmer uncovered for about 5 minutes, allowing the sauce to thicken slightly.


4. **Combine and Serve**: Return the veal cutlets to the pan, gently coating them with the luscious sauce. Serve immediately with a side of pilaf and a crisp green salad for a complete meal.


### A Nostalgic Family Memory


Every time I prepare these Lemon and Pepper Veal Cutlets, I'm transported back to my grandmother's cozy kitchen. Sunday afternoons were a family affair, with everyone gathering around the large oak table, eagerly awaiting the fragrant dishes she prepared with love. Grandma would always say that the secret ingredient was a dash of nostalgia, and indeed, each bite brings back the warmth and laughter we shared. This dish is a tribute to those precious moments, capturing the essence of family and tradition in every savory bite.


### Difficulty Rating


This recipe is rated 6 out of 10 in difficulty. It's an approachable main dish that's perfect for cooks of all levels who are ready to create a flavorful, satisfying meal.


---


Embrace the blend of citrus and spice with our Lemon and Pepper Veal Cutlets, and create new family memories with this timeless recipe. Bon appétit!

Read more about Appetizers

Read more about Main Dishes

Read more about Desserts

Spicy Seasoned Loaded Guacamole | Made by Meaghan Moineau

Spicy Seasoned Loaded Guacamole | Made by Meaghan Moineau

**Title: Unleashing Flavor: The Art of Crafting Spicy Seasoned Loaded Guacamole**


**Description:**


Dive into the vibrant world of flavors with our Spicy Seasoned Loaded Guacamole. This recipe transforms simple avocados into a fiesta of tastes with the perfect balance of heat and zest. Join me on a nostalgic journey as I share a cherished family memory linked to this beloved appetizer. With a difficulty rating of 3 out of 10, this dish is perfect for any occasion, whether you’re hosting a party or simply enjoying a cozy night in.


---


**Blog Post:**


When it comes to appetizers that steal the show, guacamole is undeniably a front-runner. There's something magical about the creamy texture of avocados enhanced by a medley of spices and fresh ingredients. Today, I invite you to experience a personal favorite: Spicy Seasoned Loaded Guacamole. This recipe not only excites the taste buds but also carries a piece of my family history, making it all the more special.


### A Nostalgic Journey


Growing up, Sunday afternoons were a sacred time in my family. It was a day dedicated to relaxation, laughter, and, most importantly, coming together over good food. My grandmother, a culinary wizard, always had the knack for taking simple ingredients and turning them into something extraordinary. Her guacamole was legendary, and I still remember the first time I watched her make it.


In her sunlit kitchen, the air was thick with anticipation. As she mashed the avocados with a well-loved fork, she would tell stories of her childhood in Mexico, where avocados were a staple at every meal. Her secret, she revealed with a wink, was a splash of white wine vinegar—a twist that added unexpected brightness to the dish.


The entire family would gather around the table, eagerly scooping up the guacamole with homemade tortilla chips. The conversation flowed as freely as the laughter, each bite a reminder of our shared heritage and the love that bound us together. Those afternoons left an indelible mark on my heart, and every time I make this guacamole, I feel my grandmother’s presence, guiding my hands and warming my spirit.


### Crafting the Perfect Guacamole


**Ingredients:**


- 2 ripe avocados


- 1 tablespoon lime juice


- 1 teaspoon white wine vinegar


- 1/4 cup finely chopped red onion


- 1 finely chopped serrano pepper (adjust for desired heat)


- 2 tablespoons chopped cilantro


- 1/2 cup diced Roma tomato


- Salt and black pepper to taste


- 1/2 teaspoon cumin


- 1/4 teaspoon garlic powder


**Instructions:**


1. In a medium bowl, begin by mashing the avocados until smooth yet chunky, achieving that perfect creamy consistency.


2. Mix in the lime juice and white wine vinegar, which not only enhance the flavor but also keep the guacamole vibrant and green.


3. Stir in the salt, black pepper, cumin, and garlic powder, ensuring each spice is evenly distributed to create a harmonious blend.


4. Incorporate the red onion, serrano pepper, cilantro, and diced Roma tomato, stirring gently to maintain the integrity of the ingredients.


5. Serve immediately for the freshest taste, or cover with plastic wrap directly on the surface to prevent browning if preparing ahead.


### Why You'll Love It


This Spicy Seasoned Loaded Guacamole is more than just an appetizer—it's an experience. The heat from the serrano pepper, the tang of vinegar and lime, and the aromatic spices come together in a dance of flavors that is as exciting as it is comforting. It’s a dish that invites you to slow down, savor each bite, and perhaps even create your own cherished memories around the table.


With a difficulty rating of 3 out of 10, this recipe is accessible to chefs of all levels, ensuring that anyone can recreate this family treasure. Whether you're hosting a lively gathering or enjoying a quiet evening, this guacamole is sure to impress.


So, next time you find yourself reaching for avocados at the market, remember this recipe and the warmth of shared stories and flavors. It’s a reminder that the simplest ingredients often hold the most profound connections. Enjoy!

Read more about Appetizers

Read more about Main Dishes

Read more about Desserts

Szechuan-Style Shirataki Noodles | Made by Meaghan Moineau

Szechuan-Style Shirataki Noodles | Made by Meaghan Moineau

# Spice Up Your Meals with Szechuan-Style Shirataki Noodles


Are you looking for an exciting twist to your weeknight dinners? Look no further! Our Szechuan-Style Shirataki Noodles are a flavorful, easy-to-make dish that will tantalize your taste buds and impress your family and friends. This recipe is packed with bold flavors and is the perfect combination of spicy, savory, and aromatic goodness. Plus, it’s a guilt-free indulgence, thanks to the low-calorie shirataki noodles. Get ready to dive into a delightful culinary adventure!


## A Family Tradition with a Twist


Growing up, family dinners were always a cherished time in our household. My mother, a culinary enthusiast, would often experiment with various global cuisines. One of my fondest memories is the first time she introduced us to Szechuan-style cooking. The spicy aroma that filled the kitchen was unlike anything I had ever smelled before. I remember sitting around the dining table, our eyes wide with anticipation, as she served us a dish that would soon become a family favorite.


Years later, I decided to recreate this dish with a modern twist by incorporating shirataki noodles. Not only did it bring back a flood of happy memories, but it also offered a healthier alternative without compromising on flavor. Sharing this dish with my own family has kept the tradition alive, and it’s now a staple in our home.


## Ingredients You’ll Need


- Shirataki noodles


- Protein of your choice (tofu, chicken, beef, or turkey)


- Soy sauce


- Dry rice wine


- Chili sauce


- Fresh ginger


- Green and white scallions


- Raw veggies (bell peppers, carrots, broccoli, etc.)


- Sesame oil


## Step-by-Step Instructions


1. **Prepare the Noodles**: Microwave the shirataki noodles for 1 minute on high. Drain them thoroughly, pat them dry, and set aside.


2. **Marinate the Protein**: In a bowl, combine soy sauce, rice wine, and chili sauce. Add your chosen protein and toss to coat. If using ground meat, mix thoroughly and set aside.


3. **Stir-Fry Magic**: Spray a non-stick skillet with vegetable oil and heat over high flame. Add fresh ginger and cook for about 30 seconds until fragrant. Add your raw veggies and stir-fry until they’re nearly al dente.


4. **Add Flavor and Protein**: Toss in the scallions and marinated protein. Continue to stir-fry until the protein is cooked through (1-2 minutes for tofu, soy, or turkey).


5. **Combine and Serve**: Add the shirataki noodles to the skillet, sprinkle with an additional 2 tsp. of soy sauce, and stir-fry for about 1 minute until heated through. Transfer to a serving bowl, drizzle with sesame oil, and toss.


## Dish Classification and Difficulty


- **Classification**: Main Dish


- **Difficulty**: 4/10


This delightful dish is not only easy to prepare but also offers a quick escape to the vibrant streets of Szechuan. Whether you’re a seasoned cook or a beginner, this recipe is straightforward and guaranteed to deliver a burst of flavor with every bite.


## Final Thoughts


Our Szechuan-Style Shirataki Noodles are more than just a meal—they’re a journey through family memories and culinary exploration. By combining traditional Szechuan flavors with the modern twist of shirataki noodles, this dish offers a perfect balance of health and taste. Gather your loved ones, share your own stories, and create new memories with this delightful recipe. Enjoy!

Read more about Appetizers

Read more about Main Dishes

Read more about Desserts

Holiday Egg Nog | Made by Meaghan Moineau

Holiday Egg Nog | Made by Meaghan Moineau

# A Sip of Nostalgia: Crafting the Perfect Holiday Egg Nog


## Description:


Delve into the comforting embrace of holiday traditions with our delectable Holiday Egg Nog recipe. This creamy, spiced delight is not just a beverage but a cherished memory in a mug. Perfectly balanced with the warm flavors of cinnamon, nutmeg, and allspice, our egg nog offers a rich and creamy texture that’s bound to become a staple at your holiday gatherings. Whether you're reminiscing about festive family gatherings or creating new memories, this recipe is sure to add a touch of nostalgia and warmth to your celebrations.


---


### Ingredients:


- **Egg yolks**


- **Sugar**


- **Milk**


- **Heavy cream**


- **Cinnamon**


- **Nutmeg**


- **Allspice**


### Instructions:


1. **Whisk the Egg Mixture:**


- Begin by adding the egg yolks and sugar to your mixer.


- Whip the mixture until it turns a light yellow color, showcasing its creamy texture.


2. **Prepare the Spiced Milk:**


- In a small saucepan, combine the milk, heavy cream, allspice, nutmeg, and cinnamon.


- Heat until just boiling, then remove from heat.


3. **Temper the Eggs:**


- Gradually add about half a cup of the hot milk to the egg mixture, whisking constantly to prevent curdling.


- Combine the tempered egg mixture with the rest of the milk mixture, continuing to whisk.


4. **Thicken the Egg Nog:**


- Return the combined mixture to medium-low heat.


- Cook until it just begins to boil and has thickened to your desired consistency.


5. **Cool and Serve:**


- Transfer the egg nog to a container and set it in the fridge to cool completely.


- Once chilled, pour yourself a glass, sprinkle a dash of cinnamon or nutmeg on top, and enjoy!


### A Nostalgic Family Memory


Every holiday season, as the first snow dusted the ground, my family would gather in the warmth of my grandmother's kitchen. The air was thick with the scent of spices and laughter, and the centerpiece of our cozy gatherings was always her famous egg nog. I vividly remember watching her deftly whisk the egg yolks and sugar, a process that seemed almost magical to my young eyes.


As a child, my job was to sprinkle the cinnamon and nutmeg, a task I took very seriously, knowing it contributed to the symphony of flavors. My grandmother would always tell the story of how her mother had passed down this recipe, a tradition that had weathered decades of holiday cheer. Each sip was like a hug from the past, filled with the warmth of family and the promise of new memories.


Making this egg nog is more than just a culinary venture; it’s a cherished ritual that connects me to the generations before me, a reminder of the love and joy that the holiday season brings.


### Difficulty:


**3/10** - This recipe is straightforward and perfect for those new to holiday cooking.


### Classification:


**Dessert** - A sweet and creamy conclusion to any festive meal.


---


This Holiday Egg Nog recipe is more than just a drink; it’s a testament to the power of tradition and the joy of shared experiences. Let each glass be a toast to the past and a celebration of the present, as you create new memories with loved ones around the warmth of the holiday hearth.

Read more about Appetizers

Read more about Main Dishes

Read more about Desserts

Gingerbread | Made by Meaghan Moineau

Gingerbread | Made by Meaghan Moineau

**Title: "Grandma's Timeless Gingerbread: A Warm Slice of Family Tradition"**


**Description:** Dive into the rich, aromatic world of gingerbread with this classic recipe that has been lovingly passed down through generations. Infused with the comforting flavors of molasses and spices, this gingerbread is not just a dessert—it's a piece of family history. Perfect for creating new memories or reliving cherished ones, this recipe is simple enough for a cozy weekend bake and special enough for festive gatherings.


---


There's something magical about the smell of gingerbread baking in the oven. For me, it immediately conjures up memories of my grandmother's kitchen, a warm haven filled with the symphony of spices and laughter. Every holiday season, my family comes together to recreate Grandma’s legendary gingerbread, a tradition that binds us across time and generations.


**Ingredients:**


- 1 cup molasses


- 1 teaspoon salt


- 2 eggs


- 1/2 cup salad oil


- 1 cup sugar


- 1 teaspoon soda


- 1 cup boiling water


- 2 1/2 cups flour


- 1 teaspoon ginger


- 1 teaspoon cinnamon


**Instructions:**


1. **Begin the Journey:** Start by preheating your oven to 350 degrees. In a large mixing bowl, combine the molasses, salad oil, sugar, ginger, cinnamon, and salt. Stir together these ingredients, allowing their fragrances to mingle and fill the air with nostalgia.


2. **Add a Touch of Love:** Crack in the eggs and beat the mixture until smooth. This step was always my favorite as a child, eagerly watching the transformation under Grandma's expert hands.


3. **The Secret Ingredient:** Dissolve the soda in 1/8 cup of boiling water, then stir it into the mixture. This little trick was Grandma’s secret to creating a perfectly airy texture.


4. **Create the Canvas:** Gradually add the flour and the remaining water, stirring gently. The batter will be thin, but don't worry—it's exactly how it should be.


5. **Bake to Perfection:** Pour the batter into a 9"x13" pan and bake until done. The anticipation builds as the spicy aroma wafts through every corner of the house.


6. **Optional Glaze:** To add an extra layer of decadence, prepare the glaze. Melt 1 stick of butter in a saucepan, add 1/4 cup milk and 1 cup brown sugar, and bring to a boil. Let it bubble away for about four minutes before drizzling generously over the gingerbread.


**Nostalgic Memory:**


One chilly afternoon, as the snowflakes danced outside, I sat by the kitchen table watching Grandma prepare her famous gingerbread. She shared stories of her childhood, her eyes twinkling with joy. Each slice of gingerbread was a gateway to the past, a comforting reminder of the enduring bonds of family. There was something inherently special about knowing that this simple recipe had brought warmth to so many generations before me.


**Difficulty Rating:** 3/10


**Classification:** Dessert


---


Whether served hot with a dollop of whipped cream or enjoyed cold with a steaming cup of tea, this gingerbread is more than just a dessert; it's a testament to the enduring power of family traditions. As you bake, may the memories of loved ones fill your heart and home with warmth and cheer. Happy baking!

Read more about Appetizers

Read more about Main Dishes

Read more about Desserts

Crispy Rhubarb Pockets | Made by Meaghan Moineau

Crispy Rhubarb Pockets | Made by Meaghan Moineau

**Title: Crispy Rhubarb Pockets: A Sweet Nostalgia Wrapped in Flaky Phyllo**


**Description:** Dive into the delightful world of Crispy Rhubarb Pockets, where the tangy sweetness of rhubarb meets the buttery flakiness of phyllo pastry. This easy-to-make dessert is perfect for those cozy family gatherings or when you simply want to indulge in a nostalgic treat. Follow our step-by-step guide to create this mouthwatering dessert that will transport you back to simpler times.


---


There's something magical about the way food can transport us back in time, evoking cherished memories with every bite. For me, Crispy Rhubarb Pockets are a ticket to my childhood, where summer afternoons were spent in my grandmother's kitchen. The sun would stream through the windows, and the air was filled with the sweet and slightly tangy scent of rhubarb simmering on the stove.


Grandma always had a knack for turning simple ingredients into something extraordinary. The sight of her gently stirring the diced rhubarb with granulated sugar, cornstarch, and a pinch of salt in her trusty saucepan is etched in my memory. The kitchen would fill with a symphony of bubbling sounds and the unmistakable aroma of rhubarb slowly releasing its liquid and transforming into a thick, chunky sauce.


As the rhubarb mixture cooled, Grandma would prepare the delicate phyllo sheets, brushing each with melted butter, creating a stack that was both crispy and decadent. I would watch in awe as she expertly cut the phyllo into perfect squares, placing a generous spoonful of the rhubarb filling in the center of each one.


The real magic happened when she pinched the corners of the phyllo, creating a beautiful pouch that would soon become a golden-brown masterpiece in our old oven. I remember eagerly waiting for the timer to ding, signaling that the Crispy Rhubarb Pockets were ready to emerge, fragrant and inviting.


Sitting around the kitchen table, we would savor each bite, the warm rhubarb filling mingling with the buttery crunch of the phyllo. It was a simple pleasure, but one that brought our family together, sharing stories and laughter as the afternoon sun dipped below the horizon.


Today, I carry on Grandma's tradition, making Crispy Rhubarb Pockets whenever I need a taste of home. This dessert, with its perfect balance of tart and sweet, is a testament to the power of food to create lasting memories and bring loved ones together.


**Difficulty:** 5/10


**Category:** Dessert


**Recipe:**


**Ingredients:**


- Diced rhubarb


- Granulated sugar


- Cornstarch


- Salt


- Vanilla extract


- Phyllo sheets


- Melted butter


**Instructions:**


1. Combine the diced rhubarb, sugar, cornstarch, and salt in a medium saucepan over medium-low heat.


2. Cook, stirring occasionally, until the rhubarb releases its liquid and begins to break down, creating a thick, chunky sauce (about 10 minutes).


3. Remove the pan from the heat and stir in the vanilla extract. Set aside to cool to room temperature.


4. Layer 4 phyllo sheets, brushing each with melted butter. Preheat the oven to 350 degrees F.


5. Cut four 4-inch squares from the phyllo stack.


6. Place 2 teaspoons of filling in the center of each square.


7. Brush phyllo from the edge of the filling to each point of the square lightly with water.


8. Gather the points of the square and pinch together just above the filling. Brush the pouch with butter.


9. Repeat the process for all 4 pouches.


10. Place filled pouches at least 1" apart on an ungreased cookie sheet or baking pan.


11. Bake in the preheated oven for 12 to 15 minutes or until golden brown.


12. Remove the pouches and let them cool on a wire rack for about 5 minutes.


13. Serve warm or at room temperature.


Indulge in this deliciously nostalgic treat and let the flavors whisk you away to simpler times. Enjoy!

Read more about Appetizers

Read more about Main Dishes

Read more about Desserts

Dutch Oven Paella | Made by Meaghan Moineau

Dutch Oven Paella | Made by Meaghan Moineau

# Dutch Oven Paella: A Flavorful Journey to the Heart of Spain


## Description


Indulge in the vibrant flavors of Spain with our Dutch Oven Paella, a dish that brings the rich traditions of Spanish cuisine to your table. This recipe combines succulent shrimp, savory chorizo, and tender chicken with aromatic saffron-infused rice, creating a delightful symphony of taste and texture. Perfect for a family gathering or an intimate dinner, this paella is sure to be a showstopper. With a difficulty rating of 7/10, this main dish is an impressive yet approachable culinary adventure for any home cook.


### Ingredients


- 1 pound shrimp, peeled and deveined


- 1 teaspoon minced garlic


- 1 tablespoon extra virgin olive oil


- Salt and pepper, to taste


- 1 pound lean skinless boneless chicken thighs


- 4 ounces Spanish chorizo sausage, sliced


- 1 red bell pepper, sliced


- 1 onion, chopped


- 1 can (14.5 oz) diced tomatoes


- 1 1/2 cups arborio rice


- 3 cups low sodium chicken broth


- 1/2 cup dry white wine


- 1/2 teaspoon saffron threads


- 1 bay leaf


- 1 cup frozen artichoke hearts


- 1 cup frozen peas


- Fresh flat-leaf parsley, chopped


- Lemon wedges, for serving


### Instructions


1. **Preparation**: Adjust your oven rack to the lower middle position and preheat the oven to 350°F. In a medium bowl, toss the shrimp with 1 teaspoon minced garlic, 1 tablespoon olive oil, 1/4 teaspoon salt, and 1/4 teaspoon pepper. Refrigerate until needed. Season the chicken with salt and pepper and set aside.


2. **Sauté the Vegetables**: Heat 2 teaspoons of olive oil in a large Dutch oven over medium-high heat until the oil shimmers. Add the bell pepper and cook, stirring occasionally until the skins blister and brown, about 3-4 minutes. Remove to a plate and set aside.


3. **Cook the Meats**: Add 1 tablespoon more oil to the pot, add the chicken thighs, and brown well, flipping once, about 3 minutes per side. Remove the chicken to a bowl. Reduce the heat to medium, add the chorizo, and cook for 4-5 minutes, stirring frequently, until browned and the fat starts to render. Add to the bowl with the browned chicken.


4. **Prepare the Base**: At medium heat, add enough oil to the pot to equal 2 tablespoons. Add the onion and cook, stirring frequently, until tender, about 3 minutes. Add the remaining garlic, cook for 1 minute, then add the tomatoes. Cook and stir until the tomatoes thicken and darken slightly, about 3 minutes.


5. **Combine Ingredients**: Add the rice, cook, and stir for about 2 minutes, ensuring everything is evenly mixed. Add the broth, wine, saffron, bay leaf, and 1/2 teaspoon salt. Add the browned chicken and sausage. Increase the heat to medium-high and bring to a boil, stirring often.


6. **Bake the Paella**: Cover the pot and place it in the oven. Bake for 15 minutes until the liquid is mostly absorbed. Remove the pot from the oven, keep the oven door closed to retain heat, and remove the lid.


7. **Finish Cooking**: Nestle the artichoke hearts into the rice. Sprinkle the shrimp over the top, followed by the peas and bell pepper strips. Replace the lid and return to the oven for another 10 minutes or until the shrimp are opaque.


8. **Create the Soccarat**: Turn the stove burner to medium-high heat. Remove the pot from the oven and place it on the stove. Cook for 5 minutes to form the browned portion on the bottom of the rice, rotating the pot 180 degrees halfway through to ensure even browning.


9. **Serve and Enjoy**: Remove the pot from heat and let the paella rest, covered, for 5 minutes. Sprinkle with fresh chopped parsley and serve with lemon wedges.


### A Nostalgic Story


Growing up, paella was more than just a meal; it was a celebration. I vividly remember the annual family reunions at my grandparents' home, where the aroma of saffron and simmering chorizo would fill the air, drawing everyone to the kitchen. My grandfather, with his Spanish roots, would preside over the Dutch oven, sharing tales of his childhood in Valencia. We would gather around the table, each serving a reminder of our shared heritage and the love that bound us together. This Dutch Oven Paella is a tribute to those cherished memories, a dish that continues to bring our family closer with each flavorful bite.


### Difficulty


7/10


### Classification


Main Dish


Prepare this Dutch Oven Paella to experience the warmth and richness of Spanish cuisine, and create lasting memories with your loved ones. Whether you’re a seasoned cook or a passionate beginner, this dish promises a delightful culinary journey. Enjoy!

Read more about Appetizers

Read more about Main Dishes

Read more about Desserts

Neoguri (Spicy Seafood Ramen) | Made by Meaghan Moineau

Neoguri (Spicy Seafood Ramen) | Made by Meaghan Moineau

**Title: Embracing the Spice: Crafting Neoguri Ramen with a Splash of Family Nostalgia**


**Description:** Dive into a steaming bowl of Neoguri Ramen, a spicy seafood delight that's as heartwarming as it is mouthwatering. Infused with rich broth and adorned with fresh mussels, scallions, and seaweed, this recipe will transport you to the vibrant kitchens of Korea. Discover the simple joy of creating this dish and the cherished memories it evokes.


---


### Neoguri Ramen: A Taste of Tradition and Love


In the heart of every family kitchen, there lies a recipe that transcends time—a dish that brings comfort, joy, and a sense of belonging. For me, that recipe is Neoguri Ramen. This spicy seafood ramen is more than just a meal; it's a connection to my roots and a cherished family memory.


**Ingredients:**


- 1 pack Neoguri ramen


- 1 egg


- A handful of fresh mussels


- 1 green scallion


- 1 sheet of gim (seaweed)


**Instructions:**


1. **Prepare the Broth:** Start by bringing a pot of water to a rolling boil. Add the mussels and the sauce packets from the Neoguri ramen. Allow the mussels to cook for about 5 minutes. If using fresh mussels, watch for them to open and discard any that remain closed. This step is crucial as it deepens the broth's flavor, enveloping your senses with the aroma of the sea.


2. **Cook the Noodles:** Introduce the ramen noodles to the pot and let them cook for 2 to 3 minutes. This is where the magic of Neoguri happens, as the noodles absorb the spicy broth, becoming a canvas of flavor.


3. **Add the Egg:** For a silky, flaky texture, beat the egg and stir it into the pot in a circular motion. If you prefer a poached egg, gently slide it into the pot off to the side, letting it poach in the spicy embrace of the broth.


4. **Garnish and Serve:** While the ramen finishes cooking, thinly slice the scallion and cut the gim sheet into strips. Once the ramen is ready, transfer it to a serving bowl and top with the fresh scallions and seaweed. The garnish adds a burst of freshness and a hint of the ocean, elevating the dish to new heights.


**Difficulty:** 4/10


**Classification:** Main Dish


### A Nostalgic Journey


Every time I prepare Neoguri Ramen, I am transported back to my grandmother's kitchen, where the air was always filled with laughter and the rich aroma of spices. I remember sitting on a wooden stool, watching her deft hands work magic with simple ingredients. Her secret? A pinch of love and stories from her childhood that she shared as we cooked together.


One chilly winter evening, we crafted this very dish. The warmth of the spicy broth was a perfect contrast to the cold air outside. As we slurped the noodles, she shared tales of her life by the sea, of gathering fresh mussels and seaweed with her siblings. That evening, the kitchen became a bridge between past and present, and the ramen was the catalyst for connection.


**Conclusion**


Neoguri Ramen is more than a spicy seafood dish—it's a symbol of tradition, family, and the simple joys of life. Whether you're a seasoned cook or a beginner, this recipe invites you to savor each moment, creating not just a meal, but a memory. So gather your ingredients, embrace the spice, and let this dish become a cherished part of your family story.

Read more about Appetizers

Read more about Main Dishes

Read more about Desserts

Chiquetaille: Cod Fish Salad | Made by Meaghan Moineau

Chiquetaille: Cod Fish Salad | Made by Meaghan Moineau

**Title: A Taste of Tradition: How to Make Chiquetaille, the Flavorful Cod Fish Salad**


**Description:** Dive into the rich flavors of Chiquetaille, a traditional cod fish salad that tantalizes the taste buds with its vibrant mix of fresh vegetables and salted cod. This dish, steeped in family history and nostalgia, makes for a delightful appetizer or main dish. Join me as I share a cherished family memory and guide you through the steps to create this captivating salad.


---


**Introduction:**


Cooking is often more than just a necessity; it’s a journey through memories and traditions. One dish that holds a special place in my heart is Chiquetaille, a cod fish salad that is as flavorful as it is meaningful. This dish has been a staple in my family for generations, and preparing it always takes me back to sun-drenched afternoons in my grandmother's kitchen.


**Ingredients:**


- Salted cod


- Onion


- Shallots


- Garlic


- Carrots


- Young green beans


- Green bell pepper


- Yellow and red bell pepper


- Green jalapeno


- Vinegar


- Olive oil


- Whole cloves


- Salt and pepper


**Instructions:**


1. **Prep the Cod:** Begin by soaking the salted cod in cold water in the refrigerator for 24 hours, changing the water three times. This process helps to desalinate the fish, ensuring a balanced flavor in the final dish.


2. **Cook the Cod:** In a large pot, bring enough water to a boil to cover the fish. Boil the cod for about 20 minutes. Once cooked, drain the fish in a vegetable strainer and allow it to cool.


3. **Prepare the Fish:** Once the fish is cool, remove the skin, bones, and any unsightly parts. Shred the cod by hand into bite-sized pieces.


4. **Mixing Time:** In a large bowl, combine the shredded fish with the chopped vegetables, olive oil, whole cloves, salt, pepper, and vinegar. Ensure everything is well-mixed to allow the flavors to meld together.


5. **Refrigerate:** For the best flavor, refrigerate the salad for at least four days. This allows the ingredients to marry beautifully, creating a dish that is greater than the sum of its parts.


6. **Serve:** Chiquetaille can be enjoyed in various ways. Spread it on baguette slices for a savory appetizer or serve it as a salad with lettuce, tomatoes, and hard-boiled eggs for a more substantial meal.


**A Family Memory:**


I was ten years old when my grandmother first taught me how to make Chiquetaille. It was a warm summer day, and the kitchen was filled with the aroma of fresh vegetables and briny cod. As we worked side by side, she recounted stories of her childhood in Haiti, where Chiquetaille was a beloved dish at family gatherings. She explained how it was more than just food; it was a symbol of togetherness and celebration.


The memory of her laughter and the joy of learning a cherished family recipe has stayed with me ever since. Every time I prepare Chiquetaille, I am transported back to that kitchen, reliving moments of love and tradition.


**Difficulty Rating:** 4/10


**Classification:** Appetizer / Main Dish


---


**Conclusion:**


Chiquetaille is more than a simple dish; it’s a culinary journey through flavors and memories. With its vibrant mix of ingredients and deep-rooted history, it's a recipe that promises to delight and inspire. Whether you're serving it at a family gathering or enjoying it as a personal treat, Chiquetaille is sure to bring a touch of tradition to your table. So why not try your hand at this flavorful cod fish salad and create your own memories today?

Read more about Appetizers

Read more about Main Dishes

Read more about Desserts