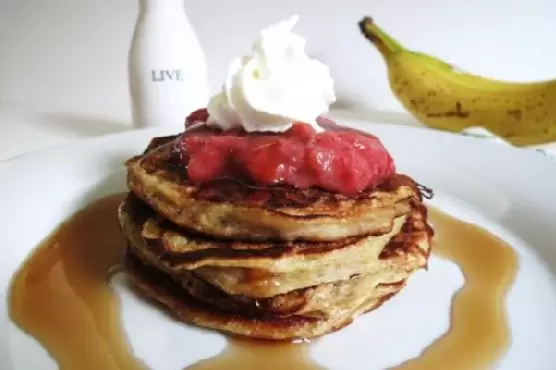
Strawberry Banana Stuffed Pancakes | Made by Meaghan Moineau
Title: "Sweet Mornings: The Magic of Strawberry Banana Stuffed Pancakes"Description: Dive into the delightful world of Strawberry Banana Stuffed Pancakes, a breakfast treat that's as nostalgic as it is delicious. Discover the simple joy of creating a recipe that brings families together, with flavors that evoke cherished memories. Rated 4 out of 10 in difficulty, this dish is a must-try dessert for anyone seeking to add a touch of sweetness to their morning routine.
---
There's something enchanting about a morning that starts with the aroma of pancakes wafting through the house. The scent carries with it a promise of warmth, comfort, and a delicious start to the day. One particular recipe that has always held a special place in our family is Strawberry Banana Stuffed Pancakes. Not only is it a delightful treat, but it also carries a nostalgic story that has been passed down through generations.
Growing up, Sunday mornings were a sacred ritual in our home. My grandmother, with her ever-so-gentle hands, would whisk together the ingredients with the precision of a seasoned artist. As a child, I would stand by her side, eager to help, yet mostly watching in awe as she transformed simple ingredients into a breakfast masterpiece.
The magic began with a bowl of creamy non-fat Greek yogurt, to which she would add a quarter cup of ripe banana, mashed to perfection. The egg whites would follow, lending a lightness to the mixture, while a splash of vanilla extract infused it with a warm, comforting aroma. In a separate bowl, the dry ingredients waited patiently: whole wheat pastry flour, a pinch of baking soda, a whisper of sugar, and a dash of salt, all combined with care.
As my grandmother combined the two mixtures, her movements were deliberate, yet gentle, ensuring everything was evenly mixed. The pièce de résistance was the addition of fresh strawberries, diced and folded into the batter, promising bursts of sweetness in every bite.
The final step, and perhaps the most exciting for a young onlooker like myself, was the cooking. The pancakes sizzled on the griddle, their edges crisping to a golden brown while the centers remained fluffy and tender. The strawberries peeked through the batter, a vibrant reminder of the deliciousness within.
These pancakes were more than just a meal; they were a tradition. A reason to gather around the table, to share stories, laughter, and the occasional debate over the last pancake. As I grew older, I realized that these mornings were not just about the pancakes themselves but about the memories they created.
Today, as I prepare these Strawberry Banana Stuffed Pancakes for my own family, I am reminded of those cherished Sundays. The recipe remains a relatively simple endeavor, earning a 4 out of 10 on the difficulty scale, making it accessible even to those who are just beginning their culinary journey. Classified as a dessert, it is the perfect sweet indulgence to start or end your day.
So, gather your ingredients and take a step back in time, creating not just a dish, but a memory that will linger long after the last bite has been savored. Embrace the joy of cooking, the nostalgia of family traditions, and the simple pleasure of a pancake breakfast that warms the heart and soul.