Mediterranean eggplants | Made by Meaghan Moineau

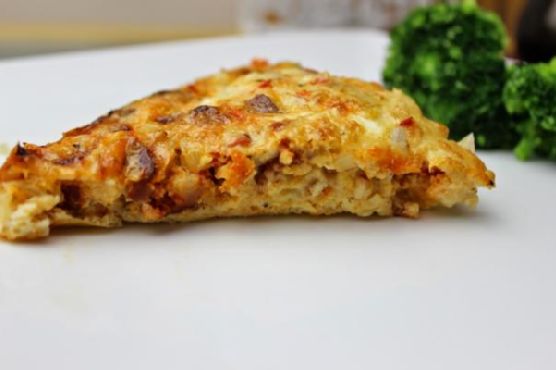
Mediterranean Eggplants: A Flavorful Journey

Intro

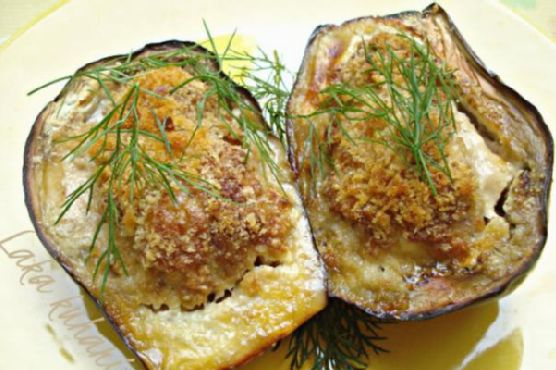
Ah, the flavors of the Mediterranean! They remind me of warm summer evenings spent on my grandmother’s porch, the sun setting over the sea, and the air filled with the scent of grilled vegetables. One of my fondest memories is her Mediterranean eggplants, a dish that perfectly captures the essence of a region that celebrates simplicity and bold flavors. Today, I’m thrilled to share this recipe with you, hoping it brings a touch of Mediterranean warmth to your home.

Why You’ll Love It

This Mediterranean eggplant recipe is a delightful blend of savory and creamy textures, punctuated by the nutty crunch of almonds. It’s a dish that’s as aromatic as it is delicious. The combination of feta and mozzarella cheeses adds a rich, tangy depth, while the fresh dill brings a hint of freshness. Whether you’re a seasoned cook or a beginner in the kitchen, you’ll find this recipe straightforward and immensely satisfying.

Ingredients

  • 2 large eggplants
  • 100g fresh sausage, without the casing
  • 1 egg
  • 100g feta cheese, crumbled
  • 100g mozzarella cheese, shredded
  • 50g almonds, chopped
  • 1 tablespoon bread crumbs
  • 2 tablespoons olive oil
  • 1 teaspoon pepper
  • Fresh dill for garnish

Instructions

  1. Preheat your oven to 230°C (450°F).
  2. Wash the eggplants thoroughly. Cut off the stems and then halve them lengthwise.
  3. Scoop out the middle of each eggplant half, creating a cavity for the filling.
  4. In a bowl, mix together the sausage meat, egg, feta cheese, mozzarella cheese, chopped almonds, and pepper until well combined.
  5. Using a spoon, stuff each eggplant half generously with the sausage and cheese mixture.
  6. Sprinkle approximately one tablespoon of breadcrumbs over each stuffed eggplant half and drizzle with olive oil.
  7. Place the stuffed eggplants on a baking sheet lined with parchment paper.
  8. Bake in the preheated oven for 25 minutes or until the eggplants are tender and the tops are golden brown.
  9. Serve hot, garnished with freshly chopped dill, chives, or basil.

Tips

For the best results, choose eggplants that are firm and glossy. If your eggplants are particularly large, you may need to adjust the baking time slightly. To avoid a soggy texture, ensure your stuffing mixture is not too wet by draining excess moisture from the ingredients before mixing.

Variations & Substitutions

If you’re looking for a vegetarian option, you can substitute the sausage with cooked quinoa or lentils. For a nut-free version, simply omit the almonds or replace them with sunflower seeds. Feel free to experiment with different herbs like oregano or parsley to suit your taste preferences.

Storage

These stuffed eggplants can be stored in an airtight container in the refrigerator for up to 3 days. To reheat, place them in an oven preheated to 180°C (350°F) until warmed through. Avoid microwaving to maintain the texture of the eggplants.

FAQ

Can I prepare the stuffing in advance?

Yes, you can prepare the stuffing mixture a day ahead. Store it in an airtight container in the refrigerator and use it when you’re ready to stuff the eggplants.

What side dishes go well with this dish?

This Mediterranean eggplant pairs beautifully with a simple green salad or a side of couscous. You might also enjoy it with a slice of crusty bread to soak up the juices.

Is this dish suitable for freezing?

While it is possible to freeze the stuffed eggplants, it is best enjoyed fresh. Freezing may alter the texture of the eggplants. If you do freeze, thaw them thoroughly and reheat in the oven for the best results.

Nutrition

This dish is a nutritious choice, packed with protein from the eggs and sausage, healthy fats from the olive oil and almonds, and fiber from the eggplants. It’s a balanced meal that fits well into a Mediterranean diet, known for its heart-healthy benefits.

Conclusion

These Mediterranean eggplants are more than just a meal; they’re a journey to the sun-drenched coasts of the Mediterranean. I hope this recipe brings as much joy to your table as it has to mine. Whether you’re cooking for family, friends, or just yourself, savor each bite and let the flavors transport you to a place where food is celebrated and shared with love. Bon appétit!

Related update: Mediterranean eggplants

Related update: Risotto With Fresh Peas

Root Vegetable Rosemary Gratin | Made by Meaghan Moineau

Root Vegetable Rosemary Gratin

Intro

As the crisp chill of autumn settles in, there’s nothing quite like the comfort of a warm, bubbling gratin fresh out of the oven. I fondly remember Sunday afternoons spent in my grandmother’s kitchen, the air filled with the earthy aroma of root vegetables and herbs. She would tell stories of how her own mother taught her the art of crafting the perfect gratin. Today, I’m excited to share this recipe for Root Vegetable Rosemary Gratin, a dish that combines the rustic flavors of red potatoes, sweet potatoes, carrots, and turnips with a fragrant hint of rosemary. This dish is perfect for cozy family dinners or as a stunning side dish for your holiday table.

Why You’ll Love It

This Root Vegetable Rosemary Gratin is a celebration of the season’s best produce. The combination of red potatoes, sweet potatoes, carrots, and turnips creates a symphony of flavors and textures, while the rosemary adds a touch of aromatic elegance. The creamy, cheesy layers are enveloped in a flaky pie crust, making each bite a delight. If you’re looking for a dish that’s both comforting and impressive, this gratin is sure to become a favorite.

Ingredients

  • 2 refrigerated piecrusts
  • 2 tablespoons fresh rosemary, chopped
  • 1 teaspoon ground black pepper
  • 2 cups shredded Gruyère cheese
  • 2 red potatoes, peeled and thinly sliced
  • 2 sweet potatoes, peeled and thinly sliced
  • 2 carrots, peeled and thinly sliced
  • 2 turnips, peeled and thinly sliced
  • 1 teaspoon kosher salt
  • 1 cup heavy cream
  • 1 garlic clove, minced

Instructions

  1. Preheat your oven to 450°F (232°C).
  2. On a lightly floured surface, unroll the piecrusts. Sprinkle with rosemary, pepper, and 1/2 cup of Gruyère cheese over one piecrust. Top with the remaining piecrust and roll into a 13-inch circle.
  3. Press the piecrust on the bottom and up the sides of a 9-inch springform pan. Fold the edges under and chill in the refrigerator.
  4. Meanwhile, peel and thinly slice the red potatoes, sweet potatoes, carrots, and turnips.
  5. Layer one-third each of the red potatoes, sweet potatoes, carrots, turnips, and salt in the prepared crust. Sprinkle with 1/2 cup of cheese.
  6. Repeat the layers twice, pressing them down slightly to fit. This will be a tight fit, but it ensures that every layer cooks evenly.
  7. In a microwave-safe cup, microwave the cream and garlic at high for 45 seconds. Pour the warm mixture over the layered potatoes in the pan.
  8. Sprinkle with the remaining 1 cup of cheese.
  9. Cover the pan with heavy-duty aluminum foil and place it on a baking sheet to catch any drips.
  10. Bake for 1 hour. Remove the foil and continue baking for an additional 25 minutes, or until the potatoes are tender and the crust is a deep, golden brown.
  11. Let the gratin stand for 10 to 15 minutes. Carefully transfer it to a serving plate and remove the sides of the pan. If desired, use a long knife or narrow spatula to slide the gratin off the bottom of the pan.

Tips

To ensure your gratin is perfectly cooked, use a mandoline slicer for even, thin slices of vegetables. This will help them cook evenly and thoroughly. Also, be sure to pack the layers tightly in the pan to prevent air pockets, which can cause uneven cooking.

Variations & Substitutions

If you prefer a different cheese, feel free to substitute Gruyère with aged cheddar or fontina. For a vegan version, replace the heavy cream with coconut milk and use a vegan cheese substitute. You can also experiment with different herbs, such as thyme or sage, to add a unique flavor twist.

Storage

Your Root Vegetable Rosemary Gratin can be stored in the refrigerator for up to 3 days. Make sure it’s covered tightly with plastic wrap or stored in an airtight container. To reheat, place in a 350°F (175°C) oven until warmed through, about 20 minutes.

FAQ

Can I make this gratin in advance?

Yes, you can prepare the gratin a day in advance. Follow all the steps up to baking, then cover and store it in the refrigerator. When you’re ready to bake, let it sit at room temperature for about 30 minutes before placing it in the oven.

What can I serve with this gratin?

This gratin pairs beautifully with roasted meats such as chicken, beef, or pork. It’s also delightful alongside a fresh green salad or steamed green beans for a lighter accompaniment.

Nutrition

This gratin is a rich and indulgent dish, perfect for special occasions. Each serving contains approximately 350 calories, 20g of fat, 30g of carbohydrates, and 12g of protein. Keep in mind, these values can vary based on the exact ingredients and portion sizes you use.

Conclusion

Root Vegetable Rosemary Gratin is a dish that brings warmth and nostalgia to the table. It’s a testament to the beauty of simple ingredients coming together to create something truly special. Whether you’re crafting a comforting dinner for your family or impressing guests with a holiday spread, this gratin is sure to be a hit. I hope it brings as much joy to your home as it has to mine. Enjoy!

Related update: Root Vegetable Rosemary Gratin

Savory Slow Roasted Tomatoes with Filet of Anchovy | Made by Meaghan Moineau

Savory Slow Roasted Tomatoes with Filet of Anchovy

Intro

There’s something magical about the aroma of slow-roasted tomatoes wafting through the kitchen. It takes me back to my grandmother’s house on lazy summer afternoons. She would spend hours preparing the most exquisite dishes, her hands moving with practiced ease. One of my favorites was her slow-roasted tomatoes topped with anchovy filets—a recipe that I’ve lovingly recreated many times over the years. There’s a warmth and nostalgia in every bite, a reminder of those sun-dappled days spent in her garden. Today, I’m thrilled to share this cherished recipe with you, hoping it brings a touch of that same magic to your home.

Why You’ll Love It

This recipe is a celebration of simplicity and flavor. The slow roasting process intensifies the natural sweetness of the tomatoes, while the anchovy filets add a savory, umami-rich layer that is simply irresistible. It’s a dish that requires minimal effort but delivers maximum flavor. Whether you’re serving it as a delightful appetizer or a side dish, these savory slow-roasted tomatoes are sure to impress your guests and become a staple in your culinary repertoire.

Ingredients

  • Round tomatoes
  • Canned fresh any herbs you like
  • Salt & pepper
  • Extra virgin olive oil
  • Anchovy filets

Instructions

  1. Preheat your oven to 150°C (280°F).
  2. Cut the top third off the tomatoes and discard the top.
  3. Place the tomatoes on a baking tray lined with parchment paper.
  4. Sprinkle generously with salt, pepper, and herbs of your choice.
  5. Drizzle a generous amount of olive oil over the tomatoes.
  6. Place the tray in the oven, allowing the tomatoes to roast for 4-6 hours, depending on their size.
  7. Occasionally baste the tomatoes in their juices and olive oil as you pass through the kitchen.
  8. Once the tomatoes shrivel slightly and take on a sun-dried appearance, they are ready. They should retain their shape and not become mushy.
  9. Remove from the oven and top each tomato with a whole anchovy filet.
  10. Serve warm or at room temperature, drizzled with the olive oil from the baking pan.

Tips

For best results, choose firm, ripe tomatoes that are uniform in size to ensure even cooking. Don’t rush the cooking time; the slow roasting is what brings out the rich, concentrated flavors. Feel free to experiment with different herbs to find your perfect flavor combination.

Variations & Substitutions

If anchovies aren’t to your liking, consider substituting them with capers or olives for a similar salty bite. For a vegan version, omit the anchovies entirely or use a plant-based alternative. You can also try different types of tomatoes, such as cherry or heirloom, adjusting the roasting time accordingly.

Storage

If you have leftovers, store the tomatoes in an airtight container in the refrigerator for up to three days. They make a delicious addition to salads, pasta dishes, or even as a topping for crusty bread. Reheat them gently in the oven to enjoy their full flavor.

FAQ

Can I use dried herbs instead of fresh?

Absolutely! Dried herbs can be a great substitute for fresh ones. Just keep in mind that dried herbs are more concentrated, so you’ll need less. Start with half the amount and adjust to taste.

What can I pair with these roasted tomatoes?

These roasted tomatoes pair beautifully with a variety of dishes. Serve them alongside grilled chicken or fish for a complete meal. They also make a wonderful topping for bruschetta or a flavorful addition to a cheese platter.

Can I make this recipe in advance?

Yes, you can prepare the roasted tomatoes a day in advance. Simply store them in the fridge and warm them up slightly before serving. They’re also delicious served cold, making them a versatile option for meal prep.

Nutrition

This dish is not only delicious but also nutritious. Tomatoes are rich in vitamins C and K, potassium, and folate, while anchovies provide a good source of omega-3 fatty acids and protein. It’s a healthy, flavorful option that you can feel good about enjoying.

Conclusion

There you have it—Savory Slow Roasted Tomatoes with Filet of Anchovy, a dish that embodies simplicity and flavor. Whether you’re reminiscing about cherished memories or creating new ones, this recipe is sure to delight your senses and warm your heart. I hope it becomes a beloved tradition in your home, just as it has in mine. Enjoy every bite!

Related update: Savory Slow Roasted Tomatoes with Filet of Anchovy

Related update: Brussels Sprouts with Bacon and Shallots

Related update: Shrimp & Crab Egg Rolls

Baked Scallops With Parma Ham | Made by Meaghan Moineau

Baked Scallops With Parma Ham

Intro

There’s a certain kind of magic that happens when you combine the delicate sweetness of scallops with the rich, savory notes of Parma ham. This recipe for Baked Scallops with Parma Ham transports me back to my childhood, when my family would gather around the table for Sunday dinners. My grandmother, an enthusiastic cook with a love for simple yet elegant dishes, would often prepare this delightful starter. The aroma of garlic and parsley mingling with the salty scent of the sea would fill the kitchen, creating an atmosphere of warmth and togetherness. Today, I’m excited to share that same sense of comfort and joy with you through this recipe.

Why You’ll Love It

This dish is a celebration of flavors and textures that complement each other beautifully. The tender, juicy scallops provide a perfect canvas for the crispy, savory topping made from Parma ham and breadcrumbs. With just a handful of ingredients, this recipe is not only delicious but also incredibly easy to prepare. Whether you’re hosting a dinner party or simply want to treat yourself, these baked scallops are sure to impress. Plus, they’re ready in under 30 minutes, making them an excellent choice for both special occasions and weeknight dinners.

Ingredients

  • Fresh big scallops
  • Parma ham
  • 1 garlic clove
  • Dried breadcrumbs
  • Parsley
  • Olive oil
  • Bell pepper

Instructions

  1. Preheat your oven to 410°F (210°C / T 7).
  2. In a food processor, mix together the breadcrumbs, Parma ham, garlic, parsley, and 1 teaspoon of olive oil until you have a coarse, crumbly mixture.
  3. Fold a piece of kitchen paper, pour 1 teaspoon of olive oil on it, and use it to grease an oven rack.
  4. Place the scallops on the greased rack and top each one with a generous spoonful of the Parma ham mixture.
  5. Drizzle a dash of olive oil on top of each scallop.
  6. Bake in the preheated oven for about 8 minutes, or until the topping is crispy and golden brown.
  7. Serve immediately as a starter, accompanied by a few leaves of lamb’s lettuce or rocket if desired.

Tips

For the best results, use fresh scallops rather than frozen ones. Fresh scallops have a sweeter, more delicate flavor that pairs perfectly with the robust Parma ham. If you’re using frozen scallops, be sure to thaw them completely and pat them dry before cooking to prevent excess moisture from affecting the dish.

To achieve an even crispier topping, consider lightly toasting the breadcrumbs in a dry pan before adding them to the food processor. This step is optional but can add a lovely depth of flavor.

Variations & Substitutions

If you’re looking to mix things up, there are plenty of variations you can try with this recipe. Consider adding a pinch of red pepper flakes to the breadcrumb mixture for a hint of heat. Alternatively, swap the parsley for fresh basil or chives for a different herbal note.

For those who prefer a non-pork option, substitute the Parma ham with turkey bacon or prosciutto. Each will offer a slightly different flavor profile while maintaining the dish’s savory richness.

Storage

While these scallops are best enjoyed fresh, you can store any leftovers in an airtight container in the refrigerator for up to two days. To reheat, place them in a preheated oven at 350°F (175°C) for about 5 minutes, or until warmed through. Avoid using the microwave, as it can make the scallops rubbery.

FAQ

Can I use frozen scallops for this recipe?

Yes, you can use frozen scallops, but be sure to thaw them completely and pat them dry before cooking. This step ensures that the scallops don’t release too much moisture during baking, which can affect the texture.

What can I serve with baked scallops?

Baked scallops make an excellent starter served with a simple salad of lamb’s lettuce or rocket. For a more substantial meal, consider pairing them with a side of creamy risotto or garlic butter pasta.

How do I know when the scallops are cooked?

The scallops are done when they’re opaque and slightly firm to the touch. Be careful not to overcook them, as they can become tough and chewy. The baking time in this recipe is just right for achieving perfectly cooked scallops.

Nutrition

While I don’t have the exact nutritional breakdown, this dish is generally low in carbohydrates and high in protein, making it a great option for those following a low-carb or keto-friendly diet. The combination of olive oil and seafood provides healthy fats, while the parsley adds a touch of freshness and vitamins.

Conclusion

Baked Scallops with Parma Ham is a dish that’s as delightful to the palate as it is to the soul. With its roots in family tradition and its simplicity in preparation, it’s a recipe that invites you to savor every moment, from the aromatic anticipation in the kitchen to the first delicious bite. Whether you’re creating new memories or reliving cherished ones, I hope this recipe brings a touch of warmth and elegance to your table. Happy cooking!

Related update: Baked Scallops With Parma Ham

Related update: Savory Slow Roasted Tomatoes with Filet of Anchovy

Avocado Nests | Made by Meaghan Moineau

Avocado Nests: A Delightful and Nutritious Breakfast

Intro

Growing up, Sunday mornings were always special in our household. My grandmother had a knack for turning simple ingredients into something extraordinary, and her Avocado Nests were no exception. The vibrant green of the avocado paired with the golden hue of hash browns and the savory goodness of bacon and eggs was a sight to behold. It was a dish that brought the family together, and to this day, it evokes cherished memories of laughter and love shared around the breakfast table.

Why You’ll Love It

This Avocado Nests recipe is more than just a feast for the eyes. It combines the creamy richness of avocados with the satisfying crunch of hash browns and the savory flavor of bacon, creating a harmonious blend of textures and tastes. The addition of deviled eggs brings an unexpected twist, elevating this dish to a new level of deliciousness. Whether you’re preparing a cozy breakfast for your family or impressing guests at brunch, Avocado Nests are sure to delight everyone at the table.

Ingredients

  • 2 ripe avocados
  • 4 hardboiled eggs
  • 2 cups frozen hash browns
  • 4 slices bacon
  • 2 tablespoons mayonaise (or cream cheese)
  • Salt and pepper to taste

Instructions

  1. Cook the frozen hash browns according to the package directions until they are golden and crispy. Set aside.
  2. Cut the bacon slices into thin strips and cook them in a skillet over medium heat until crispy, or bake them in the oven at 400°F (200°C) for about 15 minutes. Drain on a paper towel.
  3. To make the deviled eggs, carefully peel the hardboiled eggs and slice them in half lengthwise. Remove the yolks and place them in a bowl. Mix the yolks with mayonaise or cream cheese until smooth, then season with salt and pepper. Spoon or pipe the mixture back into the egg white halves.
  4. Cut the avocados in half lengthwise, remove the seeds, and gently peel the skin.
  5. On a serving plate, create a bed of hash browns and sprinkle the cooked bacon strips over them.
  6. Carefully place the deviled eggs into the seed cavity of each avocado half.
  7. Rest the filled avocado halves on the bed of hash browns and bacon, and serve immediately.

Tips

For the best results, use ripe but firm avocados to ensure they hold their shape. If you prefer a smokier flavor, consider using smoked bacon. Use a piping bag for a neater presentation of the deviled egg filling. To save time, you can prepare the deviled eggs and cook the bacon the night before.

Variations & Substitutions

Feel free to customize the Avocado Nests to suit your taste. For a vegetarian version, omit the bacon and add sautéed mushrooms or roasted bell peppers. If you’re looking to cut down on carbs, you can substitute the hash browns with a bed of fresh arugula or mixed greens. For a spicier kick, add a dash of hot sauce or a sprinkle of cayenne pepper to the deviled egg mixture.

Storage

Avocado Nests are best enjoyed fresh, but if you have leftovers, store them in an airtight container in the refrigerator for up to two days. To prevent the avocados from browning, you can brush them with a little lemon juice before storing. Reheat the hash browns and bacon in a skillet to restore their crispiness before serving.

FAQ

Can I make the deviled eggs in advance?

Yes, you can prepare the deviled eggs up to two days ahead of time. Store them in an airtight container in the refrigerator until you’re ready to assemble the dish.

What can I use instead of mayonnaise for the deviled eggs?

If you’re not a fan of mayonnaise, cream cheese or Greek yogurt are excellent substitutes that will provide a similar creamy texture.

Nutrition

While it’s difficult to provide precise nutritional information without exact measurements, Avocado Nests are generally a good source of healthy fats from the avocados, protein from the eggs, and essential nutrients from the bacon and hash browns. For those watching their calorie intake, consider using turkey bacon and reducing the amount of hash browns.

Conclusion

Avocado Nests are a delightful way to elevate your breakfast or brunch game. With their eye-catching presentation and mouthwatering flavors, they are sure to become a favorite in your household, just as they have in mine. I hope this recipe brings as much joy to your table as it has to ours. Enjoy these little nests of goodness and the memories they create with your loved ones.

Related update: Avocado Nests

Related update: Mexi-Chicken Roll Ups

Huli-Huli Chicken | Made by Meaghan Moineau

Deliciously Tangy Huli-Huli Chicken Recipe

Introduction

There’s a certain kind of magic in the air as the sweet and savory aroma of Huli-Huli Chicken wafts through the backyard. This Hawaiian classic brings back fond memories of family gatherings and warm summer evenings spent under the stars. I remember my grandmother flipping chicken on the grill, her laughter mingling with the sizzle of meat. She always had a way of turning simple ingredients into unforgettable meals. Today, I’m thrilled to share this cherished recipe with you, so you can create your own memories over a plate of delicious Huli-Huli Chicken.

Why You’ll Love It

This Huli-Huli Chicken recipe is a delightful blend of flavors that will transport you straight to the Hawaiian islands. Here’s why you’ll fall head over heels for this dish:

  • Authentic Taste: The combination of sweet, tangy, and savory flavors creates an irresistible taste that’s true to its Hawaiian roots.
  • Easy to Prepare: With a few simple steps and ingredients, you’ll have a dinner that’s both impressive and effortless.
  • Perfect for Grilling: This recipe is ideal for a barbecue, adding a tropical twist to your cookout.
  • Family-Friendly: Both kids and adults will love the flavor of this chicken, making it a great choice for family meals.

Ingredients

  • 8 chicken drumsticks
  • 4 chicken thighs
  • 4 cloves garlic, smashed
  • 1 piece ginger root, smashed
  • 3 tablespoons kosher salt
  • 1 pineapple, sliced

Instructions

  1. Prepare the Brine: In a large bowl, mix together water, sugar, salt, garlic, ginger, and thyme to create the brine.
  2. Marinate the Chicken: Place the chicken drumsticks and thighs into a large resealable bag and pour the brine over them. Seal the bag and refrigerate for at least 1 hour, but not more than 4 hours.
  3. Make the Sauce: Combine the sauce ingredients in a saucepan, stir, and simmer until the sauce thickens. Strain off the sauce into a bowl and set aside.
  4. Grill the Chicken: Remove the chicken from the brine and grill over medium heat until the skin is medium brown and the chicken is cooked through to the bone.
  5. Grill the Pineapple: Place the pineapple slices on the grill alongside the chicken.
  6. Baste and Serve: Lightly baste the chicken and pineapple with the sauce. Turn and baste 2-3 times every 2-3 minutes. Remove from the grill and serve hot.

Tips

For the best Huli-Huli Chicken, keep these tips in mind:

  • Don’t Over-Marinate: While marinating is key to infusing flavor, leaving the chicken in the brine for too long can make it too salty.
  • Keep the Grill Hot: Maintaining a consistent grill temperature ensures the chicken cooks evenly without drying out.
  • Baste Frequently: Regular basting with the sauce adds layers of flavor and keeps the chicken moist.

Variations & Substitutions

Feel free to make this recipe your own with these variations:

  • Use Different Cuts: While drumsticks and thighs are traditional, you can use chicken breasts or wings if preferred.
  • Spice it Up: Add a pinch of cayenne pepper or some chili flakes to the sauce for a spicier kick.
  • Try Different Fruits: If pineapple isn’t your favorite, try grilling mango or peaches for a different fruity flavor.

Storage

If you have leftovers, store them in an airtight container in the refrigerator for up to 3 days. To reheat, place the chicken in an oven-safe dish and warm it in the oven at 350°F until heated through. Avoid microwaving to prevent the chicken from becoming rubbery.

FAQ

Can I make this recipe without a grill?

Absolutely! You can achieve similar results using a grill pan on your stovetop. Sear the chicken on high heat to get a nice char, then finish cooking in a preheated oven at 375°F.

What should I serve with Huli-Huli Chicken?

This dish pairs beautifully with steamed rice, a fresh green salad, or coleslaw. You could also serve it with grilled vegetables for a well-rounded meal.

Can I prepare the sauce in advance?

Yes, you can make the sauce a day ahead and store it in the refrigerator. Just reheat it gently on the stove before basting the chicken and pineapple.

Nutrition

While exact nutritional values will vary based on portion sizes and specific ingredients used, Huli-Huli Chicken is generally a good source of protein and contains vitamins from the pineapple. For those monitoring their intake, consider using low-sodium soy sauce to reduce salt content.

Conclusion

Huli-Huli Chicken is more than just a meal; it’s a celebration of flavors and traditions that bring people together. Whether you’re hosting a summer barbecue or simply looking to add a little aloha spirit to your dinner table, this recipe is sure to delight. I hope you enjoy making and sharing this dish as much as I have over the years. Mahalo for joining me on this culinary journey!

Related update: Huli-Huli Chicken

Related update: Harvest Hash

Cheesy Bacon Burger with Spicy Chipotle Aiolo Sauce | Made by Meaghan Moineau

Cheesy Bacon Burger with Spicy Chipotle Aioli Sauce

Intro

There’s something magical about the smell of burgers grilling on a warm summer evening. It takes me back to those lazy Sunday afternoons at my grandparents’ house, where the whole family gathered around the backyard grill. My grandfather, with his well-worn apron and his signature chef’s hat, was the burger maestro. He always said the secret to a perfect burger was a little “surprise” inside. Inspired by his culinary wisdom and my love for a little heat, I’ve created a burger that combines the creamy goodness of cheese with the smoky allure of turkey bacon, all wrapped up in a spicy, tantalizing aioli. This Cheesy Bacon Burger with Spicy Chipotle Aioli Sauce is my homage to those cherished memories, with a contemporary twist that will make your taste buds dance with delight.

Why You’ll Love It

This burger isn’t just another patty on a bun; it’s a flavor explosion waiting to happen. The juicy beef patty is stuffed with creamy Swiss cheese that melts to perfection as it grills. The turkey bacon adds a savory crunch, while the spicy chipotle aioli brings just the right amount of heat to keep things exciting. Served on a wholesome whole wheat bun, this burger balances indulgence with nutrition. Whether you’re cooking for a backyard barbecue or a cozy family dinner, this recipe is sure to impress.

Ingredients

  • 1 can of chipotle chiles in adobo sauce
  • 1/2 cup fat free mayonnaise
  • 2 cloves garlic, minced
  • 1 teaspoon garlic powder
  • 1/2 cup Greek yogurt
  • 1 green bell pepper, diced
  • 1 teaspoon ground cumin
  • 1 teaspoon black ground pepper
  • 1 pound lean ground beef
  • 1 tablespoon fresh lime juice
  • 1 onion, diced
  • 4 whole wedges of Laughing Cow Swiss cheese
  • 4 slices cooked turkey bacon
  • 4 whole wheat hamburger buns

Instructions

  1. In a pan, cook the turkey bacon according to the directions on the package. Once cooked, remove the bacon and set it aside.
  2. In the same pan, add the diced bell pepper and onion, cooking until tender, about 10 minutes.
  3. In a small bowl, combine the ground beef with garlic powder and black ground pepper. Mix well.
  4. Divide the beef mixture into eight equal pieces, about 2 ounces each. Flatten each piece into a patty.
  5. Place half a wedge of cheese onto four patties, then top with the remaining patties. Press the edges to seal the cheese inside.
  6. Grill the burgers until cooked through, about 5 minutes per side.
  7. To make the spicy chipotle aioli sauce, combine chipotle chiles, mayonnaise, minced garlic, Greek yogurt, ground cumin, and lime juice in a small bowl. Whisk until smooth.
  8. Assemble the burgers by placing each patty on a whole wheat bun. Top with turkey bacon, sautéed peppers and onions, and a generous dollop of the spicy chipotle aioli sauce.

Tips

For the best results, use a meat thermometer to ensure your burgers reach an internal temperature of 160°F. This ensures they’re cooked safely without being overdone. If you prefer a less spicy aioli, reduce the number of chipotle chiles or substitute with smoked paprika for a milder flavor.

Variations & Substitutions

If you’re looking to switch things up, try using ground turkey or chicken instead of beef for a lighter option. You can also swap out Swiss cheese for cheddar or pepper jack for an extra kick. For a gluten-free version, use gluten-free hamburger buns or serve the burgers wrapped in lettuce leaves for a low-carb alternative.

Storage

Store any leftover burgers in an airtight container in the refrigerator for up to three days. The spicy chipotle aioli can be stored separately in a sealed jar for up to a week. For longer storage, consider freezing the cooked patties without the buns or toppings.

FAQ

Can I make the burgers ahead of time?

Yes, you can prepare the patties in advance and store them in the refrigerator for up to 24 hours before grilling. This can help save time during meal prep.

What can I serve with these burgers?

These burgers pair well with a variety of sides, such as sweet potato fries, a fresh green salad, or grilled corn on the cob. For a truly indulgent meal, consider serving them with a creamy coleslaw or homemade potato chips.

Is there a vegetarian version of this recipe?

Absolutely! You can substitute the beef with a plant-based protein like black bean patties or a store-bought vegetarian burger. Use a plant-based cheese alternative and skip the turkey bacon for a delicious vegetarian option.

Nutrition

While this recipe is a flavorful indulgence, it aims to maintain a balance with healthier ingredients. Opting for lean ground beef and whole wheat buns increases the nutritional value, while Greek yogurt in the aioli sauce provides a protein boost with reduced fat content. Adjust portions to suit your dietary needs.

Conclusion

Our Cheesy Bacon Burger with Spicy Chipotle Aioli Sauce is more than just a meal; it’s an experience. With each bite, you’ll savor the melty cheese, the crisp turkey bacon, and the zesty aioli. Whether you’re creating new memories with friends and family or enjoying a quiet dinner for one, this burger promises to deliver satisfaction and joy. So fire up the grill, gather your ingredients, and get ready to enjoy a delightful taste journey!

Related update: Cheesy Bacon Burger with Spicy Chipotle Aiolo Sauce

Pork with Blueberry Sauce | Made by Meaghan Moineau

Pork with Blueberry Sauce

Intro

There’s something uniquely satisfying about combining savory flavors with a touch of sweetness. It reminds me of summer evenings spent at my grandmother’s house, where she would always surprise us with her inventive dishes. One of my fondest memories is of her tangy pork chops served with a delightful fruit sauce that seemed to encapsulate the essence of the season. Inspired by those cherished moments, I’ve crafted this recipe for Pork with Blueberry Sauce. It’s a dish that promises to bring a burst of flavor to your dinner table, and I’m excited to share it with you.

Why You’ll Love It

This Pork with Blueberry Sauce is a symphony of flavors. The juicy pork chops are perfectly seasoned and seared to golden perfection, while the blueberry sauce provides a sweet and tangy counterpoint. The balsamic vinegar adds depth, and the lime zest gives it a zesty punch. Whether you’re hosting a dinner party or enjoying a quiet meal at home, this dish is sure to impress. Plus, it’s easy to make and requires just a few simple ingredients!

Ingredients

  • Pork chops
  • Salt and pepper
  • Canola oil
  • Fresh pint blueberries
  • Brown sugar
  • Balsamic vinegar
  • Red diced onion
  • Lime zest
  • Parsley, for garnish

Instructions

  1. Preheat the oven to 400 degrees Fahrenheit.
  2. In a nonreactive bowl, mash the blueberries with the brown sugar to your desired consistency and set aside.
  3. Heat a sauté pan over medium heat. Season the pork chops with salt and pepper on both sides.
  4. Add canola oil to the sauté pan. Brown the pork chops on both sides until golden and crispy, about 2-3 minutes on each side. Remove from the pan and place on a baking dish to finish cooking in the oven, if necessary. If the pork is thin, keep it warm aside until the sauce is ready.
  5. In the same pan, add the chopped red onion and sauté until translucent.
  6. Add the mashed blueberry-sugar mixture and balsamic vinegar. Cook until the sauce thickens, about 2-3 minutes.
  7. Add the lime zest and juice to the sauce, seasoning with salt and pepper to taste.
  8. If you placed the pork in the oven, remove it and place on serving plates. Serve the sauce on top and garnish with parsley or cilantro. Enjoy!

Tips

To get the perfect sear on your pork chops, make sure your pan is hot before adding the meat. This will help achieve a crispy exterior while keeping the inside juicy. Additionally, letting the pork rest after cooking allows the juices to redistribute, resulting in tender and flavorful meat.

Variations & Substitutions

If you’re looking to switch things up, you can substitute pork chops with chicken breasts or turkey cutlets. For a vegetarian version, consider using seared tofu or tempeh. You can also experiment with different fruits like raspberries or blackberries for the sauce, adjusting the sugar to taste.

Storage

Leftover pork with blueberry sauce can be stored in an airtight container in the refrigerator for up to 3 days. To reheat, gently warm it in a pan over medium-low heat, adding a splash of water if the sauce has thickened too much during storage.

FAQ

Can I use frozen blueberries for this recipe?

Yes, you can use frozen blueberries if fresh ones are not available. Just make sure to thaw them and drain any excess liquid before mashing them with the sugar.

What can I serve with Pork with Blueberry Sauce?

This dish pairs beautifully with a variety of sides. Consider serving it with creamy mashed potatoes, roasted vegetables, or a simple green salad to complement the flavors.

Nutrition

While the exact nutritional content can vary based on the specific ingredients and portion sizes used, this dish is a good source of protein from the pork and antioxidants from the blueberries. It’s a balanced meal that offers both nutrients and flavor.

Conclusion

This Pork with Blueberry Sauce is more than just a meal; it’s an experience that brings together the best of sweet and savory. Whether you’re cooking for your family or hosting guests, this dish is sure to delight everyone at the table. I hope it becomes a favorite in your home, just as it has in mine. Enjoy the journey of flavors and happy cooking!

Related update: Pork with Blueberry Sauce

Related update: Smoked Salmon and Mascarpone Calzone

Cheesy Potato Corn Scones | Made by Meaghan Moineau

Cheesy Potato Corn Scones

Intro

There’s something undeniably comforting about the aroma of freshly baked scones wafting through the kitchen. It instantly takes me back to my grandmother’s cozy farmhouse, where every Sunday morning, she would whip up a batch of her famous scones. Her secret ingredient? Love, of course, but also a touch of creativity that transformed simple ingredients into something extraordinary. Today, I’m sharing a delightful twist on the classic scone recipe—Cheesy Potato Corn Scones. This recipe captures the essence of those cherished mornings with a modern, cheesy twist that will have you reaching for seconds.

Why You’ll Love It

These Cheesy Potato Corn Scones are a perfect blend of savory flavors and soft textures, making them an irresistible treat for any occasion. Whether you’re hosting a brunch, looking for a satisfying snack, or simply want to enjoy a warm, cheesy delight, these scones have got you covered. The addition of potato flakes gives them a unique lightness, while the cheddar cheese and cornmeal provide a rich, hearty flavor. Plus, they’re easy to make and guaranteed to impress your family and friends!

Ingredients

  • 1 cup water
  • 1/2 cup potato flakes
  • 1/3 cup diced unsalted butter
  • 1 1/2 cups all-purpose flour
  • 1/2 cup yellow cornmeal
  • 1 cup shredded cheddar cheese, divided
  • 1 tablespoon baking powder
  • 1 teaspoon salt
  • 1 tablespoon poppy seeds
  • 3/4 cup milk

Instructions

  1. Preheat your oven to 400°F (200°C). Lightly grease a baking sheet and set aside.
  2. In a small saucepan, bring the water just to a simmer; remove from heat.
  3. Stir in the potato flakes until they are moistened.
  4. Add the diced butter to the potato mixture and stir until it is fully incorporated.
  5. In a large bowl, combine the flour, cornmeal, 3/4 cup of the cheddar cheese, baking powder, salt, and poppy seeds.
  6. Stir in the potato mixture and milk until just combined.
  7. With floured hands, gently knead and fold the dough for five to six strokes, or until it comes together in one mass.
  8. Pat the dough lightly to flatten it into a 9-inch circle on the prepared baking sheet.
  9. Using a pizza cutter or a floured knife, cut the dough into eight wedges (do not separate).
  10. Sprinkle the edges with the remaining cheese.
  11. Bake in the preheated oven for about 25 minutes or until lightly browned.
  12. Gently pull or cut the scones to separate. Serve warm and enjoy!

Tips

For the best results, use cold butter and work quickly to keep it from melting before baking. If you notice the dough is too sticky while kneading, feel free to add a little more flour, a tablespoon at a time. Additionally, using freshly grated cheddar cheese will enhance the flavor and melt beautifully in the scones.

Variations & Substitutions

If you want to experiment with flavors, consider adding chopped fresh herbs like chives or rosemary to the dough. For a spicy kick, try mixing in some diced jalapeños. If you’re looking for a gluten-free option, substitute the all-purpose flour with a 1:1 gluten-free flour blend. You can also use any other type of cheese you prefer, such as mozzarella or gouda, to change up the taste.

Storage

These scones are best enjoyed fresh out of the oven, but they can be stored in an airtight container at room temperature for up to two days. To reheat, simply place them in a 350°F (175°C) oven for 5-10 minutes. For longer storage, freeze the scones in a single layer and then transfer them to a resealable freezer bag. They can be reheated straight from the freezer in the oven at 350°F (175°C) for about 15 minutes.

FAQ

Can I make the dough ahead of time?

Yes, you can prepare the dough up to a day in advance. Wrap it tightly in plastic wrap and store it in the refrigerator. When you’re ready to bake, simply shape, cut, and bake the scones as instructed.

Can I use real potatoes instead of potato flakes?

While potato flakes are convenient and help create a fluffy texture, you can use mashed potatoes as a substitute. Just ensure they are smooth and not too wet, and adjust the flour accordingly if the dough becomes too sticky.

Nutrition

Each serving of these Cheesy Potato Corn Scones is approximately 220 calories, with 12g of fat, 22g of carbohydrates, and 6g of protein. They are a delightful indulgence, offering a comforting balance of flavors and textures.

Conclusion

These Cheesy Potato Corn Scones are a testament to the magic that happens when simple ingredients come together with a touch of love and creativity. Whether you’re savoring them with a morning coffee, serving them at a brunch gathering, or enjoying them as a cozy snack, they are sure to bring warmth and joy to your table. I hope this recipe becomes a cherished addition to your collection, just as it has in mine. Happy baking!

Related update: Cheesy Potato Corn Scones

Beef Pot Pies with Irish Cheddar Crust | Made by Meaghan Moineau

Beef Pot Pies with Irish Cheddar Crust

Intro

There’s something incredibly heartwarming about the aroma of a savory pot pie wafting through the house, especially on a cool, crisp evening. The first time I made Beef Pot Pies with Irish Cheddar Crust, I was transported back to my grandmother’s kitchen, where the warmth from her oven seemed to envelop us in a comforting embrace. Her stories of growing up in Ireland, where cheddar cheese was a staple in many family dishes, always fascinated me. Now, I cherish the tradition of baking these pies, filling my home with both a sense of nostalgia and the promise of a delicious meal.

Why You’ll Love It

This recipe combines the hearty richness of beef stew with the indulgence of a buttery, cheesy crust. The Irish cheddar adds a sharp, tangy flavor to the dough, perfectly complementing the savory filling. You’ll love how the tender beef melts in your mouth, contrasted by the flaky, golden crust. Whether you’re preparing a cozy family dinner or impressing guests with a classic dish, these pot pies are sure to delight.

Ingredients

  • Unsalted butter
  • Shredded sharp cheddar cheese
  • Flour
  • Sugar
  • Salt
  • Dry mustard
  • Cayenne pepper
  • Ice water
  • Vegetable oil
  • Beef chuck meat
  • Salt & pepper
  • Onion
  • Carrots
  • Garlic
  • Fresh thyme
  • Fresh marjoram
  • Flour
  • Canned beef broth
  • Water
  • Dijon mustard
  • Fresh parsley
  • Egg

Instructions

  1. Place the cut-up butter pieces in the freezer for 15 minutes to chill.
  2. Meanwhile, in the work bowl of a food processor, combine flour, sugar, dry mustard, salt, and cayenne pepper. Pulse to combine.
  3. After the butter has chilled, scatter the pieces over the flour mixture (still in the food processor), along with the cheddar. Pulse about 10 times.
  4. Sprinkle half the ice water over the dough, pulse about 3 times, repeat with remaining water, pulsing 3 more times. Pinch the dough to check if it sticks together; if not, add a tablespoon or two more ice water, until it comes together.
  5. Dump the mix in a large bowl and press it together to form the dough. Divide dough in half, shaping each into a 4-inch disk. Wrap each piece in plastic wrap and refrigerate at least an hour.
  6. Begin the filling: Pat the meat dry with paper towels and season with salt & pepper.
  7. Heat 2 teaspoons of oil in a large skillet over medium-high heat until just smoking. Add the meat in a single layer and cook, without stirring, until the meat browns well on the underside, anywhere between 5-10 minutes.
  8. Stir the meat and cook another couple of minutes, until it loses the raw color. Remove to a plate and set aside.
  9. Reduce heat to medium, add the remaining 2 teaspoons of oil, and the onions and carrots. Sauté until softened and starting to brown, stirring occasionally, around 5 minutes.
  10. Add the garlic, thyme, and marjoram, and cook until very fragrant, about a minute. Stir in flour, cook and stir about a minute.
  11. Slowly add in the beef broth and water, then the meat, along with any juices left on the plate. Bring to a simmer, then reduce the heat to low, to med-low. Cover and cook, stirring occasionally, until the meat is just becoming tender, around 45 minutes.
  12. Remove from heat, add in the Dijon and parsley. Adjust seasoning with salt & pepper. Set aside to cool.

Tips

For the best results, ensure your butter is very cold before incorporating it into the dough. This helps create a flaky texture in the crust. When browning the meat, patience is key—avoid stirring too soon to allow a flavorful crust to form.

Variations & Substitutions

Feel free to experiment with different types of cheese in the crust—an aged Gouda or a sharp Swiss would provide a delightful twist. For a vegetarian version, substitute the beef with hearty mushrooms and swap the beef broth for vegetable stock. You can also add peas or potatoes to the filling for additional texture and flavor.

Storage

These pot pies can be made ahead and stored in the refrigerator for up to three days. To freeze, wrap the unbaked pies tightly in plastic wrap and aluminum foil, and store for up to two months. When ready to bake, simply add a few extra minutes to the baking time.

FAQ

Can I make the dough by hand if I don’t have a food processor?

Yes, you can make the dough by hand. Use a pastry cutter or your fingertips to work the butter and cheese into the flour mixture until it resembles coarse crumbs. Gradually add the ice water, mixing until the dough comes together.

What can I serve with these pot pies?

These pot pies are quite filling on their own, but a light side salad or some roasted vegetables can complement them beautifully. A glass of red wine or a robust ale pairs wonderfully with the rich flavors of the dish.

Can I use store-bought pie dough?

While homemade dough provides a unique flavor and texture, you can certainly use store-bought pie dough for convenience. Just be sure to add some shredded cheddar to the dough if you want to keep the cheesy crust element.

Nutrition

While I don’t have specific nutritional information for this recipe, it’s worth noting that these pot pies are an indulgence, combining buttery crusts and rich beef filling. Moderation is key, and you can always tailor the recipe to your dietary needs by adjusting the salt or using leaner cuts of beef.

Conclusion

Beef Pot Pies with Irish Cheddar Crust are more than just a meal; they’re a connection to cherished memories and a testament to the comforting power of homemade food. Whether you’re new to baking or a seasoned cook, this recipe invites you to enjoy the process and savor the results. Gather your loved ones, share a story or two, and enjoy the warmth and goodness these pot pies bring to your table.

Related update: Beef Pot Pies with Irish Cheddar Crust

Related update: Kung Po Chicken

Guinness and Brats | Made by Meaghan Moineau

Guinness and Brats: A Delicious Grilled Delight

Intro

There’s something magical about the smell of bratwurst sizzling on a grill, mingling with the rich aroma of Guinness Stout. It takes me back to summer evenings spent in my grandparents’ backyard. Grandpa would fire up the grill, the scent of the brats and onions wafting through the air, while Grandma would hum an old tune, setting the table with mismatched plates and cutlery. Those moments, filled with laughter and stories under the setting sun, are forever etched in my memory. Today, I want to share this cherished family recipe with you, bringing a piece of my past to your table.

Why You’ll Love It

This recipe is a true crowd-pleaser, perfect for gatherings or a simple family meal. Here’s why you’ll love it:

  • Simplicity: With just a few ingredients, it’s easy to prepare and even easier to enjoy.
  • Flavor: The combination of Guinness Stout and bratwurst creates a rich, savory dish that’s hard to resist.
  • Versatility: While grilling is our favorite method, you can adapt this recipe for the oven or stovetop.
  • Nostalgia: It’s the perfect way to create lasting memories with family and friends.

Ingredients

  • Bratwurst
  • Hotdog buns
  • Onions, quartered
  • Guinness Stout beer

Instructions

  1. Preheat your grill to about 400°F.
  2. In a large cast iron skillet, place the bratwurst links and quartered onions.
  3. Pour a bottle of Guinness Stout over the bratwurst and onions.
  4. Place the skillet on the grill and close the lid.
  5. Every 5-10 minutes, lift the lid and toss the onions and brats in the Guinness to ensure even cooking.
  6. After about 45 minutes to an hour, the bratwurst should be fully cooked and the onions caramelized.
  7. Remove from the grill and place a bratwurst and some caramelized onions onto a hotdog bun.
  8. Serve immediately and enjoy!

Tips

  • Preheat Properly: Always ensure your grill is preheated to the right temperature for the best results.
  • Use a Cast Iron Skillet: This retains heat well and provides even cooking.
  • Regular Tossing: Toss the brats and onions regularly to ensure even cooking and prevent sticking.

Variations & Substitutions

Feel free to get creative with this recipe:

  • Beer Variations: While Guinness Stout is my personal favorite, you can use any stout or dark beer you prefer.
  • Onion Choices: Try using different types of onions, such as red or sweet onions, for a slightly different flavor profile.
  • Bun Options: Swap out hotdog buns for pretzel buns or whole wheat buns for a different texture and flavor.

Storage

If you have leftovers, store the bratwurst and onions in an airtight container in the refrigerator for up to 3 days. To reheat, place them in a skillet over medium heat until warmed through. Avoid storing the brats in the buns as they may become soggy.

FAQ

Can I make this recipe without a grill?

Yes, you can make this recipe on the stovetop or in the oven. Simply follow the same instructions using a stovetop burner or preheated oven at 400°F. The cooking time may vary, so keep an eye on the brats and onions to ensure they are cooked through.

What should I serve with Guinness and Brats?

This dish pairs wonderfully with classic sides like potato salad, coleslaw, or grilled vegetables. For a more traditional touch, serve with a side of German-style potato pancakes or soft pretzels.

Can I use a different type of sausage?

Absolutely! While bratwurst is traditional, you can experiment with other sausages like Italian or Polish sausages. Keep in mind that different sausages may have varying cooking times.

Nutrition

While I don’t have the exact nutritional breakdown, it’s good to note that bratwurst and beer-based recipes are typically higher in calories and fat. If you’re looking for a lighter version, consider using a leaner sausage and opting for whole grain buns.

Conclusion

Guinness and Brats is more than just a recipe; it’s a journey down memory lane, a celebration of flavors, and a testament to the joy of sharing a meal with loved ones. Whether you’re hosting a barbecue, celebrating a special occasion, or simply enjoying a quiet evening at home, this dish is sure to bring warmth and happiness to your table. I hope you enjoy making and eating it as much as we do. Cheers to good food, great memories, and cherished traditions!

Related update: Guinness and Brats

Related update: Beef Pot Pies with Irish Cheddar Crust

Mushroom Crepes with Vegetarian Sauce | Made by Meaghan Moineau

Mushroom Crepes with Vegetarian Sauce

Intro

There’s something magical about crepes that transports me back to my childhood. I remember standing on a stool next to my grandmother, watching her expertly flip the delicate pancakes in her ancient cast-iron skillet. The kitchen would fill with the comforting aroma of her savory mushroom filling, a family favorite that I’ve now made my own. These Mushroom Crepes with Vegetarian Sauce bring a modern twist to her classic recipe, combining earthy mushrooms with a rich, creamy sauce. Whether you’re making them for a leisurely brunch or a cozy dinner, these crepes are sure to become a beloved staple in your home as well.

Why You’ll Love It

This recipe is perfect for those who appreciate a balance of flavors and textures. The crepes are light and slightly crisp, while the mushroom filling is hearty and satisfying. The vegetarian sauce adds a creamy element that ties everything together beautifully. Not only is this dish delicious, but it’s also versatile and straightforward to prepare. Whether you’re a seasoned chef or a kitchen novice, you’ll find this recipe both approachable and rewarding.

Ingredients

  • 1 cup whole wheat flour
  • 2 eggs
  • 1 ½ cups water
  • Oil, for frying
  • 1 big onion, chopped
  • 2 garlic cloves, minced
  • 2 cups mushrooms, sliced
  • 1 can corn, drained
  • 1 cup low-fat sour cream
  • ½ cup white wine
  • 2 tablespoons chives, chopped
  • 1 tablespoon dill, chopped
  • 1 tablespoon parsley, chopped
  • 1 teaspoon garlic powder
  • 1 teaspoon ground coriander
  • 1 teaspoon sweet paprika
  • Sea salt, to taste
  • Ground pepper, to taste

Instructions

  1. Whisk the eggs in a large mixing bowl. Gradually add the water and mix well. You can use a hand-held mixer for a smoother consistency.
  2. Slowly sprinkle in the flour while continuously whisking until the batter is smooth and has the right consistency; it should be slightly thinner than pancake batter.
  3. Heat a small amount of oil in a frying pan over medium-high heat. Grease the entire surface of the pan, then pour the remaining oil into a cup for reuse.
  4. Pour a ladle of batter into the pan, tilting it to spread the batter evenly. Cook for about 2 minutes on one side, then flip and cook for another minute. Repeat until all batter is used.
  5. In another pan, heat a tablespoon of oil and sauté the chopped onion and minced garlic until translucent.
  6. Add the sliced mushrooms and cook until they are soft and browned.
  7. Stir in the corn, white wine, garlic powder, ground coriander, sweet paprika, sea salt, and ground pepper. Let it simmer for a few minutes.
  8. Reduce the heat and add the sour cream, stirring well until combined. Allow the sauce to thicken slightly.
  9. Remove from heat and stir in the chopped chives, dill, and parsley.
  10. Fill each crepe with the mushroom mixture, roll up, and serve with additional sauce drizzled over the top.

Tips

To ensure your crepes don’t stick, make sure the pan is hot before adding the batter. If your first crepe doesn’t turn out perfectly, don’t worry—it often takes a couple of tries to get the pan temperature just right. Use a non-stick pan for the best results.

Variations & Substitutions

Feel free to experiment with the filling by adding different vegetables like spinach or bell peppers. For a vegan version, replace the eggs with a flaxseed mixture (1 tablespoon flaxseed meal mixed with 2.5 tablespoons water) and use a dairy-free sour cream.

Storage

Store any leftover crepes and sauce separately in airtight containers in the refrigerator. They will keep well for up to 3 days. Reheat the crepes in a pan over low heat and the sauce in a small saucepan or microwave until warmed through.

FAQ

Can I make the crepes ahead of time?

Yes, you can prepare the crepes in advance. Stack them with a piece of parchment paper in between each crepe to prevent sticking, then wrap them tightly in plastic wrap or store them in an airtight container. They can be refrigerated for up to 3 days or frozen for up to 2 months.

What type of mushrooms should I use?

You can use any type of mushrooms you prefer. Button mushrooms, cremini, or a mix of wild mushrooms all work well in this recipe, adding unique flavors and textures to the dish.

Can I use regular flour instead of whole wheat flour?

Yes, all-purpose flour can be used as a substitute for whole wheat flour if you prefer a lighter crepe with a milder flavor. The texture will be slightly different, but they will still be delicious.

Nutrition

This recipe is packed with nutrients, thanks to its wholesome ingredients. Rich in fiber from the whole wheat flour and mushrooms, it also provides a good source of protein from the eggs and low-fat sour cream. The mix of herbs and spices not only enhances flavor but also adds antioxidants to your meal.

Conclusion

These Mushroom Crepes with Vegetarian Sauce are a comforting and flavorful dish that brings a touch of nostalgia with every bite. Perfect for any meal of the day, they offer a delightful way to enjoy the earthy flavors of mushrooms paired with a creamy sauce. Whether you follow the recipe to the letter or put your spin on it, I hope this dish brings the same joy to your table as it does to mine. Enjoy the process, savor each bite, and share this recipe with loved ones for a truly heartwarming experience.

Related update: Mushroom Crepes with Vegetarian Sauce

Related update: chettinad egg curry

Pasta with Peas and Italian Sausage | Made by Meaghan Moineau

Pasta with Peas and Italian Sausage

A delicious plate of pasta with peas and Italian sausage

Intro

There’s something truly comforting about a warm bowl of pasta, especially when it carries the flavors of childhood memories. I remember visiting my grandmother’s house every Sunday. The air would be filled with the aroma of her cooking — the scent of rich tomatoes simmering, sweet Italian sausage sizzling, and the gentle warmth of olive oil. This recipe for Pasta with Peas and Italian Sausage brings me back to those simple, joyful days around her dining table. It’s a dish that holds a special place in my heart, and I’m thrilled to share it with you.

Why You’ll Love It

This dish is a perfect blend of savory and sweet, with the sausages adding depth and the peas bringing a hint of sweetness. It’s easy to prepare, making it ideal for a quick weeknight dinner. Plus, the combination of wholesome ingredients creates a balanced meal that’s both satisfying and delicious. Whether you’re cooking for family or friends, this pasta is sure to be a hit.

Ingredients

  • 1 tablespoon butter
  • 1 cup canned tomatoes
  • 12 ounces farfalle pasta
  • 1 pound Italian sweet sausage, casings removed
  • 2 tablespoons olive oil
  • 1 cup frozen peas
  • Salt and pepper to taste
  • 1 cup Pomi strained tomato sauce

Instructions

  1. Cook the pasta according to the package directions. Drain and set aside.
  2. In a very large skillet over medium heat, add the olive oil and sausage. Sauté until the sausage is slightly browned all over.
  3. Add the frozen peas and canned tomatoes to the skillet. Season with salt and pepper to taste.
  4. Lower the heat to medium and let it cook for another 10 to 15 minutes, allowing the flavors to meld together.
  5. Return the drained pasta to the pan. Add the butter and Pomi strained tomato sauce.
  6. Mix everything well to ensure the pasta is coated with the sauce and sausage mixture.
  7. Serve hot and enjoy your nostalgic feast!

Tips

To ensure your pasta is cooked to perfection, aim for an al dente texture — firm to the bite. This adds a lovely contrast to the softness of the peas and the sausage. Also, be sure to taste the sauce as it cooks and adjust the seasoning as needed. A pinch of red pepper flakes can add a delightful kick if you prefer a bit of heat.

Variations & Substitutions

If you’re looking to mix things up, consider swapping the sausage for ground turkey or chicken for a lighter version. You can also use fresh peas instead of frozen for a fresher taste. If you prefer a vegetarian option, omit the sausage and add more vegetables like bell peppers or mushrooms for added texture and flavor.

Storage

Leftovers can be stored in an airtight container in the refrigerator for up to 3 days. To reheat, simply warm on the stove over medium heat, adding a splash of water if necessary to loosen the sauce. This dish is also freezer-friendly. Store in a freezer-safe container for up to 2 months. Thaw in the refrigerator before reheating.

FAQ

Can I make this dish gluten-free?

Absolutely! Simply substitute the farfalle pasta with your favorite gluten-free pasta. Ensure that the sausage is also gluten-free, as some brands may include gluten-containing fillers.

What can I use instead of Pomi tomato sauce?

If you can’t find Pomi, any high-quality strained tomato sauce will work. Alternatively, you can blend canned tomatoes until smooth for a homemade version.

Can I add cheese to this pasta?

Yes, you can! A sprinkle of grated Parmesan cheese on top adds a rich, nutty flavor that complements the dish beautifully. Feel free to add it right before serving.

Nutrition

This pasta dish is a well-rounded meal, providing carbohydrates, protein, and vital nutrients. The peas add fiber and vitamins, while the sausage offers protein and iron. Keep portion sizes in mind to maintain a balanced diet.

Conclusion

Pasta with Peas and Italian Sausage is not just a dish; it’s a journey back to simpler times, filled with laughter, love, and hearty meals. Whether you’re recreating family memories or making new ones, this recipe is sure to bring warmth and joy to your table. I hope you enjoy making and sharing this meal as much as I do. Happy cooking!

Related update: Pasta with Peas and Italian Sausage

Related update: Venison Stew

Fettuccine With Bacon Mushroom and Peas | Made by Meaghan Moineau

Fettuccine With Bacon, Mushroom, and Peas

Intro

There’s something magical about a steaming plate of pasta that transcends the ordinary. It has this incredible ability to transport us back in time, to moments filled with laughter, love, and the comforting aroma of a home-cooked meal. I remember the first time I tasted this delightful combination of fettuccine with bacon, mushroom, and peas. It was a chilly evening, and I was at my grandmother’s house. She had a knack for creating dishes that were simple yet bursting with flavor. This dish quickly became a family favorite, and every bite feels like a warm hug from her. Today, I’m thrilled to share this recipe with you, hoping it brings the same warmth and joy to your table.

Why You’ll Love It

This Fettuccine with Bacon, Mushroom, and Peas is a delightful blend of textures and flavors. It’s creamy, savory, and oh-so-satisfying! The smoky bacon, earthy mushrooms, and vibrant peas all come together in a luscious cream sauce that clings to every strand of fettuccine. Perfect for a weeknight dinner or a special occasion, this dish is quick to prepare and utterly comforting. Plus, it’s a versatile recipe that invites customization to suit your taste preferences.

Ingredients

  • Bacon
  • Cheese
  • Canned condensed cream of mushroom
  • Dried basil
  • Fettuccine
  • Black ground pepper
  • Canned mushroom
  • Dried oregano powder
  • Frozen green peas

Instructions

  1. Bring a large pot of water to boil over high heat and add a generous pinch of salt. Add the fettuccine and cook for about 9 minutes or until al dente.
  2. While the pasta is cooking, heat a pan over medium-high heat and brown the bacon. Once crispy, remove the bacon and drain it on paper towels. Set aside.
  3. Pour the excess oil out of the pan, leaving just a touch for flavor. Sauté the canned mushrooms for about a minute.
  4. Add the canned condensed cream of mushroom and a can of water to the pan. Stir well to combine.
  5. Season with ground black pepper, dried oregano, and/or basil, if desired. Bring the sauce to a gentle boil.
  6. Add the frozen green peas and a modest amount of grated cheese. Taste the sauce before adding more cheese, as the cream of mushroom can be quite salty.
  7. Once the pasta is cooked, drain it and add it to the sauce. Mix well to ensure each strand is coated.
  8. Crumble the cooked bacon and add it to the pasta. Give everything a good mix, then serve immediately. Enjoy!

Tips

For the best results, use high-quality bacon and freshly grated cheese. This enhances the flavor of the dish significantly. If you find the sauce too thick, add a splash of pasta water to reach your desired consistency. Be cautious with the salt as the bacon and cream of mushroom already contribute to the dish’s saltiness.

Variations & Substitutions

You can easily adapt this recipe to suit your dietary needs or preferences. For a vegetarian version, omit the bacon and add extra mushrooms or some sautéed spinach. If you’re not a fan of peas, substitute them with chopped asparagus or broccoli. You can also experiment with different types of cheese, such as Parmesan or Asiago, for a unique flavor profile.

Storage

This pasta dish is best enjoyed fresh, but leftovers can be stored in an airtight container in the refrigerator for up to 3 days. To reheat, gently warm it on the stovetop over low heat, adding a splash of milk or cream to bring back the creaminess. Avoid microwaving, as it may dry out the pasta.

FAQ

Can I use fresh mushrooms instead of canned?

Absolutely! Fresh mushrooms will add a wonderful texture and flavor. Simply slice them and sauté them in the pan before adding the cream of mushroom soup.

What type of cheese works best in this recipe?

A sharp cheddar or Parmesan cheese complements the flavors beautifully. However, feel free to use your favorite cheese or a blend to suit your taste.

Is it possible to make this dish gluten-free?

Yes, you can use gluten-free fettuccine to make this dish gluten-free. Ensure that any canned ingredients and seasonings are also certified gluten-free.

Nutrition

While it’s important to enjoy indulgent meals in moderation, this recipe offers a balance of protein from the bacon, fiber from the peas, and satisfying carbs from the pasta. Remember to consider portion control, especially if you’re watching your caloric intake.

Conclusion

Fettuccine with Bacon, Mushroom, and Peas is more than just a meal; it’s an experience. It’s a dish that brings people together, creates cherished memories, and satisfies the soul. Whether you’re cooking for loved ones or simply treating yourself, this recipe promises warmth and comfort in every bite. I hope this dish becomes a beloved part of your culinary repertoire, just as it has in my family. Happy cooking!

Related update: Fettuccine With Bacon Mushroom and Peas

Related update: Smoky Chicken Tacos

Beans With Smoked Pork Hock | Made by Meaghan Moineau

Beans With Smoked Pork Hock: A Soulful and Savory Delight

Intro

When I think of comfort food that warms the heart and soul, my mind drifts back to my grandmother’s kitchen. The heady aroma of smoked pork, mingling with the subtle earthiness of beans, would fill the air, wrapping us in a tender embrace. Her Beans With Smoked Pork Hock was a dish that epitomized family gatherings, laughter, and love. This recipe is not only a nod to my heritage but also a testament to the power of simple ingredients coming together to create something truly special. Join me on this culinary journey, and let’s bring a piece of this cherished tradition to your home.

Why You’ll Love It

This dish is a delightful amalgamation of flavors and textures that are bound to captivate your taste buds. Here’s why you’ll love it:

  • Deep, smoky flavors: The smoked pork hock imparts a rich, smoky essence that permeates the entire dish.
  • Hearty and satisfying: The combination of beans and meat ensures a filling meal that satisfies even the most robust appetites.
  • Easy to make: With just a handful of ingredients and straightforward instructions, this recipe is perfect for cooks of all levels.
  • Nostalgic comfort food: This dish brings a sense of warmth and nostalgia, making it perfect for family dinners or cozy nights in.

Ingredients

  • 1 bay leaf
  • 2 carrots
  • 1 small celery root
  • 2 cloves garlic
  • 2 cups beans, soaked overnight
  • 1 onion
  • 1 smoked pork hock
  • Salt and pepper, to taste
  • 1 vegetable cube

Instructions

  1. Soak the beans the night before to ensure they cook evenly.
  2. Wash the smoked pork hock and remove the skin for a smoother texture.
  3. In a large pan, place the onion and pork hock.
  4. Add the soaked beans, bay leaf, and garlic to the pan.
  5. Cover the beans and meat with water, ensuring everything is submerged.
  6. Crumble in the vegetable cube to enhance the flavor profile.
  7. Cook the beans and meat on low heat for about 60 minutes, keeping the pan covered to retain moisture.
  8. Chop the carrots and celery root in a blender until finely diced.
  9. Add the chopped vegetables to the pan 15 minutes before the end of cooking time and stir to combine.
  10. Once cooked, remove the pork hock from the pan and tear it into smaller, bite-sized pieces.
  11. Remove the bay leaf from the mixture to avoid bitterness.
  12. Season the dish with salt and pepper according to your taste preferences.
  13. Serve the beans with the shredded pork hock and some hearty black bread on the side.

Tips

  • For a richer flavor, consider adding a splash of apple cider vinegar to the dish before serving.
  • Make sure to soak the beans overnight to reduce cooking time and improve digestibility.
  • If the dish thickens too much, add a little more water during cooking to achieve your desired consistency.

Variations & Substitutions

Feel free to customize this dish to suit your preferences or dietary needs:

  • Vegetarian version: Skip the pork hock and incorporate smoked paprika or liquid smoke to mimic the smoky flavor.
  • Different beans: Use navy beans or kidney beans for a different texture and flavor profile.
  • Spice it up: Add a pinch of red pepper flakes for a subtle heat that enhances the dish’s depth.

Storage

This dish stores wonderfully, making it perfect for meal prep:

  • Refrigeration: Store leftovers in an airtight container in the refrigerator for up to 4 days.
  • Freezing: Freeze the dish in a freezer-safe container for up to 3 months. Thaw overnight in the refrigerator before reheating.

FAQ

Can I use canned beans instead of dried beans?

Yes, you can use canned beans to save time. Simply rinse and drain them before adding to the dish. Keep in mind that canned beans are already cooked, so you may need to adjust the cooking time accordingly.

What can I serve with Beans With Smoked Pork Hock?

This dish pairs beautifully with a slice of hearty black bread or a side of steamed vegetables. For a more substantial meal, serve it with a green salad or over a bed of rice or mashed potatoes.

Is it possible to use a slow cooker for this recipe?

Absolutely! Simply place all the ingredients in the slow cooker and cook on low for 6-8 hours or until the beans and pork are tender. Add the carrots and celery root in the last hour of cooking.

Nutrition

While I don’t have the exact nutritional breakdown, this dish is a great source of protein and fiber thanks to the beans and pork. It’s a wholesome meal that provides essential nutrients and energy to keep you satisfied.

Conclusion

Beans With Smoked Pork Hock is more than just a recipe—it’s a comforting embrace from the past, a dish that brings people together around the table. Whether you’re making it for the first time or the fiftieth, each bowl is a reminder of the warmth and love that can be created in the kitchen. I hope this recipe becomes a cherished part of your culinary repertoire, bringing joy and satisfaction to you and your loved ones.

Related Recipes

Also try: Beans With Smoked Pork Hock

Related update: Spinach, Tomato & Onion Couscous

Chorizo and egg bake | Made by Meaghan Moineau

Chorizo and egg bake | Made by Meaghan Moineau

A Hearty Delight: Chorizo and Egg Bake Recipe


Description:

Dive into the comforting flavors of our Chorizo and Egg Bake—a savory dish that perfectly balances the smokiness of chorizo with the creamy richness of eggs and cheese. This easy-to-make recipe is a delightful way to bring warmth and nostalgia to your dining table. Whether served as a hearty breakfast or a satisfying main course, it's sure to become a family favorite.

Keywords: Chorizo and Egg Bake, savory dish, smoked chorizo, family recipe, easy main course, nostalgic cooking


Ingredients:

- 200g cheddar cheese, grated

- 150g smoked chorizo sausage, sliced


- 6 large eggs


- 2 cloves garlic, minced


- 1 medium onion, finely chopped


- 1 can (200g) red and green chilli, chopped


- Salt and pepper to taste


Instructions:

1. Preheat your oven to 170°C (338°F).

2. In a large mixing bowl, whisk the eggs until well combined.


3. Add the grated cheddar cheese, onion, chorizo slices, minced garlic, and chopped chilli to the eggs.


4. Season the mixture with salt and pepper according to your taste.


5. Lightly grease a baking dish and pour in the egg mixture, spreading it evenly.


6. Place the dish in the preheated oven and bake for 20 minutes, or until the eggs are set and the top is golden brown.


7. Remove from the oven and let it cool slightly before serving.


Difficulty: 3/10


Classification: Main Dish


A Nostalgic Family Memory


Growing up in a bustling household meant that our kitchen was always filled with the tantalizing aroma of home-cooked meals. Among the many dishes my grandmother would prepare, the Chorizo and Egg Bake held a special place in my heart. Every Sunday morning, the family would gather around the kitchen table, eagerly awaiting the moment when the oven timer would sound, signaling that breakfast was ready.


I vividly remember how my grandmother would stand by the oven, her apron dusted with a hint of flour, as she expertly whisked the eggs and folded in the grated cheese. Her hands moved with a rhythm that spoke of years of practice, learned from her own mother in a small village kitchen. The sizzle of the chorizo as it hit the pan was a sound that never failed to make our stomachs rumble in anticipation.


As the bake cooked, the kitchen would fill with the rich, smoky aroma of chorizo mingling with the sharpness of cheddar and the fragrant onions and garlic. It was a smell that promised warmth and satisfaction, wrapping us in a comforting embrace even before the first bite.


When the dish was finally placed on the table, its golden crust glistening under the morning light, we would all dig in with gusto. The combination of flavors, with a hint of spice from the chillies, was a testament to the simplicity and richness of home-cooked meals. Each bite was not just delicious but also a reminder of the love and care that went into preparing it.


Even now, whenever I prepare this dish, I'm transported back to those cherished Sunday mornings. It's more than just a meal; it's a slice of my heritage, a piece of family history served on a plate.


Conclusion


The Chorizo and Egg Bake is not just a dish; it's an experience that combines taste and memory into a delightful offering. Easy to prepare and even easier to enjoy, it's a recipe that invites you to create your own family traditions. So, gather your loved ones, preheat that oven, and let the nostalgic aroma of this savory bake fill your home.

Read more about Appetizers

Read more about Main Dishes

Read more about Desserts

Vietnamese Pancakes with Vegetables, Herbs and a Fragrant Dipping Sauce (Bánh Xèo) | Made by Meaghan Moineau

Vietnamese Pancakes with Vegetables, Herbs and a Fragrant Dipping Sauce (Bánh Xèo) | Made by Meaghan Moineau

Title: Savoring Tradition: Vietnamese Bánh Xèo with Vegetables, Herbs, and a Fragrant Dipping Sauce
Description: Dive into a delightful culinary journey with Vietnamese Pancakes, or Bánh Xèo. Discover how to create this crispy, savory dish filled with vibrant vegetables, aromatic herbs, and an irresistible dipping sauce. Perfect for family gatherings or a unique dinner night, this traditional recipe is sure to impress.

---


Vietnamese Pancakes with Vegetables, Herbs, and a Fragrant Dipping Sauce (Bánh Xèo)


In the heart of Vietnamese cuisine lies a dish that encapsulates the vibrant flavors and rich traditions of its culture—Bánh Xèo. These savory pancakes, filled with an array of fresh vegetables and herbs, offer a delightful explosion of taste that dances on your palate. With a fragrant dipping sauce to tie it all together, this dish isn't just a meal; it's an experience.


Ingredients:

- For the Pancake Batter:

- 1 cup brown rice flour


- 1 egg


- 1/4 teaspoon sea salt


- 1/4 teaspoon turmeric


- A pinch of cayenne


- 1 green fresh chili, finely chopped


- 1 1/2 cups coconut milk


- For the Fragrant Dipping Sauce:

- 1 lime (juice)


- 1 tablespoon rice vinegar


- 1 tablespoon brown sugar


- 1 garlic clove, minced


- 1 red fresh chili, finely chopped


- 2 tablespoons tamari sauce


- 1 teaspoon sesame oil


- For the Filling:

- 1 carrot, julienned


- 1 daikon radish, julienned


- 4 green onions, sliced


- 2 green fresh chilies, sliced


- 1 cup snow peas, sliced


- 1 cup mung bean sprouts


- 1 cup trimmed enoki mushrooms


- Fresh basil leaves


- Fresh mint leaves


- Fresh parsley


Instructions:


1. Prepare the Pancake Batter:

Begin by whisking together the rice flour, egg, sea salt, turmeric, cayenne, and green chili in a bowl. Gradually add the coconut milk, whisking continuously until you achieve a smooth, semi-thick batter. Adjust with water if needed. Cover and let it rest.


2. Make the Dipping Sauce:

In a separate bowl, combine lime juice, rice vinegar, brown sugar, minced garlic, red chili, tamari sauce, and sesame oil. Mix well and set aside to let the flavors meld.


3. Prepare the Filling:

In a bowl, mix the carrot, radish, green onions, green chilies, and snow peas. Keep the herbs, sprouts, and mushrooms ready in separate bowls.


4. Cook the Pancakes:

Heat a teaspoon of oil in a non-stick skillet over medium heat. Pour 1/2 cup of the batter into the pan, spreading it to form a 6 to 8-inch pancake. Cook for 6 to 8 minutes until holes form and the bottom is crispy brown, then flip and cook for another few minutes. Keep warm in a 150°F oven while preparing the rest.


5. Assemble the Dish:

To serve, place a portion of the vegetable mixture, herbs, and mushrooms on one half of each pancake. Drizzle some dipping sauce over the top, fold the pancake, and finish with a final drizzle of sauce.


Family Nostalgia:


I vividly remember my grandmother’s kitchen filled with the aromatic symphony of fresh herbs and the sizzle of Bánh Xèo hitting the hot pan. Family gatherings were never complete without this beloved dish. As a child, I would eagerly watch my grandmother as she expertly flipped the pancakes, her hands moving with the grace of years of practice. Each bite was a warm reminder of our heritage, a bridge connecting generations through the love of food.


Difficulty: 6/10


Classification: Main Dish


---


Whether you're reconnecting with your roots or exploring a new culinary adventure, Bánh Xèo offers a delicious window into the heart of Vietnamese cuisine. Enjoy crafting this dish and, more importantly, sharing it with loved ones—just as my family has done for generations.

Read more about Appetizers

Read more about Main Dishes

Read more about Desserts

Spinach pie with home made dough | Made by Meaghan Moineau

Spinach pie with home made dough | Made by Meaghan Moineau

Title: A Taste of Comfort: Crafting the Perfect Spinach Pie with Homemade Dough
Description: Dive into the heartwarming world of homemade comfort food with our Spinach Pie recipe, complete with a rich, flaky crust and a savory filling. This delightful dish, bursting with fresh ingredients and rich flavors, is more than just a meal—it's a nostalgic journey back to family gatherings and cherished memories. Whether you're a seasoned chef or a kitchen novice, this recipe will guide you effortlessly through creating a dish that’s sure to become a family favorite.

---


A Nostalgic Journey: The Spinach Pie That Binds Generations

There's something magical about the aroma of a spinach pie baking in the oven. For me, it evokes memories of Sunday afternoons at my grandmother’s house. The kitchen was always a flurry of activity, with laughter mingling with the clatter of pots and pans. My grandmother, with her flour-dusted apron and twinkling eyes, would orchestrate the chaos with the grace of a maestro, her hands deftly crafting the dough that would soon envelop a savory filling.


This spinach pie was a staple at every family gathering. Its rich, flaky crust and creamy, cheesy filling were constants amidst the ever-changing landscape of our family meals. I remember sitting at the kitchen table, my feet barely touching the floor, watching in awe as she transformed a few simple ingredients into something extraordinary. The secret, she would say with a wink, was in the dough—a buttery, tender crust that she made from scratch, just as her mother had taught her.


The Recipe: Spinach Pie with Homemade Dough
Ingredients:

- 2 cups all-purpose flour


- 1/2 cup butter, softened


- 1 carrot, shredded finely


- 4 eggs (3 for filling, 1 yolk for glazing)


- 1/2 pound feta cheese (or 4.5 oz feta and 3.5 oz cheddar)


- 1 tablespoon fresh dill, chopped


- 1 package frozen spinach, defrosted and drained


- 1 cup milk


- 1 large onion, chopped


- 1 bell pepper, chopped


- Salt and pepper to taste


- 1/2 cup sour cream


- 1/4 cup water


Instructions:
1. Prepare the Dough: In a large bowl, mix the softened butter with the flour until the mixture resembles coarse crumbs. Add the slightly beaten egg, water, and a pinch of salt. Knead until the dough is smooth and no longer sticky. Wrap in plastic and chill in the fridge while you prepare the filling.
2. Make the Filling: In another bowl, combine the drained spinach, shredded feta (and cheddar if using), sour cream, dill, onion, and carrot. Beat the eggs, reserving one yolk for later, and stir into the mixture. Season with salt and pepper to taste.
3. Assemble the Pie: Preheat your oven to 356°F (180°C). Divide the chilled dough into two portions, with one piece slightly larger for the base. Roll out the larger piece on a floured surface and line an oiled baking tray, ensuring the dough covers the sides. Add the filling evenly.
4. Create the Lattice Top: Roll out the remaining dough, cut into strips, and weave them over the filling to create a lattice pattern. Mix the reserved egg yolk with 3 tablespoons of milk and brush over the dough.
5. Bake: Place the pie in the oven and bake until the crust is golden brown and the filling is set, approximately 40-45 minutes. Allow to cool slightly before serving.
Difficulty: 6/10
Classification: Main Dish
Conclusion:

This spinach pie is more than just a culinary delight; it's a bridge to the past, a reminder of the warmth and love found in family gatherings. As you prepare this dish, I hope you feel the same sense of connection and nostalgia that I do. Enjoy every bite, and may it bring joy to your table and your heart.

Read more about Appetizers

Read more about Main Dishes

Read more about Desserts

Guinness Braised Corned Beef and Cabbage | Made by Meaghan Moineau

Guinness Braised Corned Beef and Cabbage | Made by Meaghan Moineau

Title: A Hearty Feast: Guinness Braised Corned Beef and Cabbage
Description: Discover the rich flavors of our Guinness Braised Corned Beef and Cabbage recipe—a savory main dish that melds tradition with taste. Perfect for family gatherings, this recipe offers tender, flavor-infused meat and perfectly cooked vegetables, all enhanced by a robust Guinness mustard sauce. Join us as we explore a cherished family memory tied to this meal, making every bite a step into the past.

---


Guinness Braised Corned Beef and Cabbage: A Tradition Reimagined


As the leaves begin to turn and the air takes on a crisp chill, our family kitchen becomes a haven of warmth and delicious aromas. One dish that never fails to make an appearance during these cozy gatherings is our Guinness Braised Corned Beef and Cabbage. This hearty main dish not only satisfies the palate but also stirs up fond memories of family times gone by.


Ingredients:


- Corned beef brisket
- Carrots
- Parsnips
- Potatoes
- Garlic
- Guinness
- Beef broth
- Pickling spice
- Brown sugar
- Bay leaf
- Spicy honey mustard

Instructions:


1. Preparation: Begin by seasoning both sides of the corned beef liberally with pepper. Thanks to the corning process, the beef is already perfectly salty, so no need for additional salt.
2. Searing: Heat 1 tablespoon of oil in a large, shallow oven-safe pot over medium-high heat. Sear each side of the beef for about 3 minutes to develop a rich brown crust, locking in the juices. Remove the beef and set it aside on a plate.
3. Deglazing: Pour the Guinness into the pot to deglaze, scraping up any browned bits that cling to the bottom. This step is crucial for enhancing the depth of flavor.
4. Simmering: Add beef broth, pickling spice, brown sugar, bay leaf, and minced garlic to the pot. Bring the mixture to a simmer before returning the beef to the pot, along with any juices from the plate. Cover the pot and place it on the bottom rack of your oven.
5. Baking: Allow the beef to bake for 2 1/2 to 3 hours, basting with the surrounding juices every 30 minutes. After 2 hours, add carrots, parsnips, and potatoes, letting them simmer for approximately 25-30 minutes.
6. Resting: Once cooked, remove the pot from the oven. Let the beef rest on a cutting board for 15 minutes before slicing thinly against the grain.
7. Final Touches: Arrange the vegetables on a serving platter and cover with foil. Bring the sauce in the pot to a boil, add the cabbage, and cook for about 7 minutes until softened. Place the cabbage with the other vegetables.
8. Sauce: Strain the sauce and incorporate 2-3 tablespoons of spicy honey mustard until dissolved. Serve in a small dish or gravy boat alongside the beef.
9. Serving: After slicing the beef, arrange it on the serving platter, and generously ladle the Guinness mustard sauce over the meat and vegetables for a perfect glaze.

---


A Nostalgic Note


Every time I prepare this dish, I am transported back to chilly winter evenings at my grandmother's house. The windows would fog up from the warmth of the kitchen, and the whole family would gather around the dining table, eager to dig into the feast. My grandmother, with a twinkle in her eye, would share stories of her childhood in Ireland, where similar dishes were a staple. The rich aroma of Guinness and spices would fill the room, and for a moment, it felt like we were all part of something timeless. This recipe is more than just a meal; it's a bridge to our past, a reminder of family bonds, and a celebration of heritage.


---


Difficulty: 6/10
Classification: Main Dish

This Guinness Braised Corned Beef and Cabbage recipe is perfect for those seeking a comforting, flavorful meal that brings both tradition and taste to the table. Whether for a festive occasion or a simple family dinner, it's a dish that promises to create cherished memories of its own.

Read more about Appetizers

Read more about Main Dishes

Read more about Desserts

Pulled Pork Nachos | Made by Meaghan Moineau

Pulled Pork Nachos | Made by Meaghan Moineau

Title: Unleashing Flavor: Pulled Pork Nachos Perfect for Any Gathering
Description: Dive into a savory blend of tender pulled pork and crunchy nacho chips with our Pulled Pork Nachos recipe. This dish is not just a treat for your taste buds, but a journey into cherished family memories, bringing the warmth of home-cooked meals to your table. Whether you're hosting a game day party or a casual get-together, these nachos will be the star of the show. Discover how to create this mouth-watering masterpiece and why it holds a special place in our hearts.

---


Pulled Pork Nachos: A Flavorful Fusion of Family and Feasting


In the world of comfort food, few dishes can match the irresistible allure of nachos. The combination of crispy chips, creamy cheese, and savory toppings is a universal favorite. Today, we’re elevating this classic snack with a twist that brings both flavor and nostalgia to the forefront: Pulled Pork Nachos.


A Nostalgic Note:

Growing up, Sunday afternoons were reserved for family gatherings at my grandparents' house. The aroma of cooking wafted through the air, a comforting indication that something delicious was underway. My grandfather, a culinary enthusiast, was known for his incredible slow-cooked pork. He would meticulously rub the pork shoulder with spices and let it simmer in the slow cooker, filling the house with a mouth-watering scent that drew everyone to the kitchen.


Once, during a particularly lively football game, my grandmother suggested transforming his pulled pork into an appetizer. With a twinkle in her eye, she layered crunchy nacho chips with the succulent pork, fresh pico de gallo, and a generous sprinkle of cheese. The result was nothing short of spectacular—a dish that quickly became a family staple, bringing us together over laughter, stories, and the shared joy of good food.


Ingredients:

- Nacho chips


- Pico de gallo


- Pork rub


- Pork shoulder


- Shredded cheese


- Sour cream (optional)


- Vegetable broth


Instructions:
1. Prepare the Pork: Start by cleaning the pork shoulder and patting it dry. Generously apply the pork rub, ensuring the shoulder is seasoned all over.
2. Slow Cooking Magic: Place the seasoned pork shoulder into a crock pot. Set the temperature to low, add in the vegetable broth, and allow it to cook for 8-10 hours. The slow cooking process ensures the pork becomes tender and flavorful.
3. Shred and Assemble: Once the pork is cooked, remove it from the slow cooker and shred it with forks. Arrange the nacho chips on a platter and top them with the shredded pork.
4. Top It Off: Add fresh pico de gallo for a burst of flavor and color. Sprinkle shredded cheese generously over the top, allowing it to melt into gooey perfection. For an extra creamy touch, add a dollop of sour cream.
Difficulty Rating: 4/10
Classification: Appetizer

This recipe is not just about creating a delectable dish; it's about crafting a culinary experience that brings people together. Pulled Pork Nachos are the perfect blend of savory, spicy, and creamy, making them an ideal appetizer for any occasion. Whether you're sharing them with family or friends, this nostalgic recipe is sure to create new memories and delight taste buds. Enjoy the journey of flavors and the warmth of shared moments with every bite.

Read more about Appetizers

Read more about Main Dishes

Read more about Desserts