Mango Guacamole | Made by Meaghan Moineau
Title: Mango Guacamole: A Zesty Twist on a Family FavoriteDescription: Dive into the tropical allure of Mango Guacamole, a vibrant twist on the classic dip that promises to elevate your appetizer game. Bursting with flavors of ripe mango, creamy avocados, and zesty lime, this dish is not only a feast for the taste buds but also a nostalgic journey back to cherished family gatherings. Rated 3/10 in difficulty, this delightful appetizer is easy enough for any home cook to master.
---
Mango Guacamole: A Zesty Twist on a Family Favorite
There's something timeless about gathering around the family table, sharing laughter, stories, and delicious food that bridges generations. In my family, guacamole was always a staple at our summer barbecues. But it wasn't until one particular gathering that the humble guacamole was transformed into something truly unforgettable.
The Story Behind the Mango Twist
It was a balmy summer afternoon, and my family was celebrating my grandmother's 70th birthday. As the grill sizzled with an array of delicious meats, my aunt appeared with a bowl of what we thought was the usual guacamole. But as soon as she set it on the table, a sweet and tropical aroma filled the air, piquing everyone's curiosity.
My aunt, known for her adventurous culinary experiments, decided to add a unexpected ingredient: mango. At first, the combination seemed unusual, but as we all gathered around for a taste, the tangy sweetness of the mango perfectly complemented the creamy avocados and spicy serrano chiles. It was an instant hit, and from that day on, Mango Guacamole became a beloved family recipe, a tribute to the creativity that can arise from the simplest of ingredients.
The Perfect Summer Appetizer
Creating this dish at home is as easy as it is rewarding, with a difficulty rating of just 3 out of 10. Here's how you can bring this vibrant appetizer to your own table:
Ingredients:
- 3 ripe Hass avocados
- 1 ripe mango, peeled and chopped
- 1 small red onion, finely chopped
- 2 serrano chiles, seeded and finely chopped
- 2 cloves fresh garlic, minced
- 2 limes, juiced (reserve zest)
Instructions:
1. Prepare the Ingredients: Start by chopping the mango, red onion, and garlic. Seed and finely chop the serrano chiles.
2. Mash the Avocados: Chop the avocados and place them into a medium-sized bowl. Zest the limes and set the zest aside. Roll the limes on your countertop to activate the juice, then cut them in half and squeeze all of the juice into the bowl with the avocados. Give the mixture a good stir to combine.
3. Mix it All Together: Add the chopped mango, red onion, garlic, and serrano chiles to the avocado mixture. Sprinkle in the reserved lime zest and stir everything together until you reach your desired consistency.
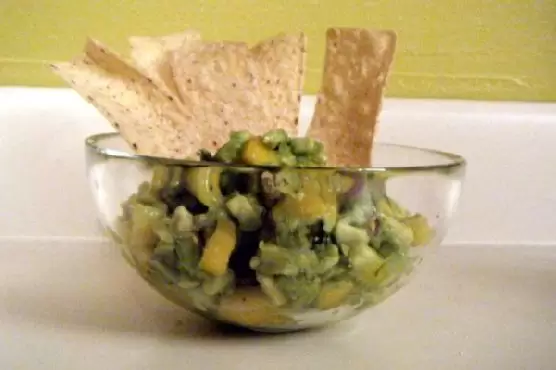
And there you have it, a refreshing Mango Guacamole that's perfect for dipping tortilla chips or as a topping for grilled chicken or fish. This appetizer not only brings a vibrant splash of color to your spread but also serves as a delightful reminder of those cherished family moments gathered around the table.
As you enjoy this tropical twist on a classic favorite, consider creating new memories with your loved ones—after all, it's the stories and laughter shared over delicious food that truly make a family recipe special.