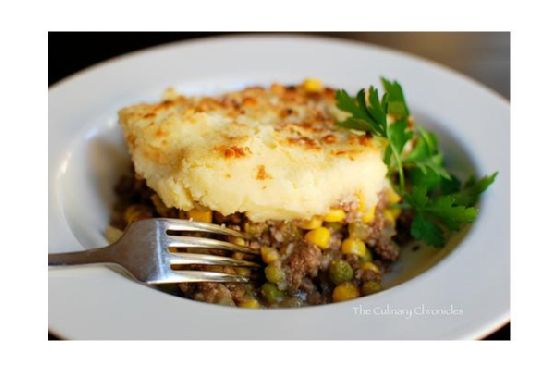
Beef Cottage Pie | Made by Meaghan Moineau
Title: "Hearty Beef Cottage Pie: A Savory Comfort to Warm Your Soul"Description: Discover the rich, savory flavors of Beef Cottage Pie, a dish that combines hearty ingredients and nostalgic memories to deliver comforting warmth with every bite. Perfect for family gatherings or a cozy night in, this main dish is as delightful to make as it is to eat.
---
Introduction
There's something truly special about a dish that brings back cherished memories while filling your home with an inviting aroma. Beef Cottage Pie is one of those dishes for me—a hearty meal that not only satisfies your taste buds but also warms your heart. Today, I’m excited to share this beloved recipe that has been a staple in my family for generations.
Ingredients:
- 1 pound of lean ground beef
- 1 cup of yellow diced onions
- 1 cup of diced celery
- 2 cloves of garlic, minced
- 1 teaspoon of fresh thyme
- 2 tablespoons of Worcestershire sauce
- 1 tablespoon of vegetable oil
- 1 cup of frozen vegetables (like peas, carrots, and corn)
- 1 cup of beef gravy
- 4 cups of mashed potatoes
- 1/4 cup of parmesan cheese
- Salt and pepper to taste
Instructions:
1. Preheat your oven to 375 degrees Fahrenheit.
2. Prepare the Vegetables: In a large skillet, heat the vegetable oil over medium heat. Add the diced onions, celery, and minced garlic. Cook until the vegetables are translucent but not browned, about 5-6 minutes. Remove to a clean dish.
3. Brown the Beef: In the same skillet, add the ground beef and cook until browned. Use a large spoon to discard any excess fat or grease.
4. Combine Ingredients: Return the onion, celery, and garlic mixture to the skillet with the beef. Stir well. Add the Worcestershire sauce and fresh thyme, cooking for an additional minute. Stir in the frozen vegetables and beef gravy, cooking for another 2-3 minutes. Season with salt and pepper to taste.
5. Assemble the Pie: Spray a large casserole dish with cooking spray. Pour the beef and vegetable mixture into the dish, spreading it evenly. Spoon the mashed potatoes over the top, carefully spreading to create an even layer. Sprinkle the parmesan cheese all over.
6. Bake: Place the dish in the preheated oven and bake for 25-30 minutes. Turn the oven broiler on and brown the top of the Cottage Pie until it turns an even golden brown color.
7. Serve: Remove from the oven and allow to set for 5-10 minutes before serving. Enjoy!
A Nostalgic Family Memory:
Growing up, Sunday dinners were a sacred time in my family. After church, my grandmother would welcome us into her warm, aromatic kitchen with a smile that rivaled the sun. Her Beef Cottage Pie was always the centerpiece of our gatherings. I remember sitting at the kitchen table, eagerly watching as she carefully spread the mashed potatoes over the beef mixture, her hands moving with grace and familiarity. Each bite of her Cottage Pie was a taste of home—rich with savory beef, creamy potatoes, and a sprinkle of love that only a grandmother could provide. Those Sundays, filled with laughter and stories, are a treasured part of my childhood, and this recipe is my way of keeping her spirit alive.
Difficulty Level: 4/10
Classification: Main Dish
---
Whether you're looking to create new memories or rekindle old ones, this Beef Cottage Pie is a timeless dish that promises comfort and satisfaction. Enjoy the process, savor the flavors, and most importantly, share it with those you love.