Simple Protein Pancakes | Made by Meaghan Moineau

You know those mornings when you hit the snooze button one too many times, and suddenly you’re in a mad dash, wishing breakfast would magically appear? Yep, been there! That’s exactly how I stumbled upon these Simple Protein Pancakes. I was running late for a Saturday brunch with friends, craving something hearty yet wholesome. What I love about this recipe is how it comes together in a flash—just a quick blend, pour, and flip—but the end result feels like a treat. It’s perfect for lazy weekend mornings or even a speedy weekday breakfast when you need something filling yet fuss-free. Bonus: they’re nutritious and satisfyingly delicious, so you won’t even feel guilty drizzling on a bit of maple syrup. Jump to Recipe

What You’ll Need

This recipe is a pantry rescue mission! Chances are you already have most of these ingredients on hand, which means fewer grocery runs and more relaxed mornings.

  • 1 banana, ripe and full of natural sweetness
  • 2 eggs, because binding is key
  • 1/2 cup of oats, to keep you energized
  • 1/4 cup of greek yogurt, adds creaminess and protein
  • 1/2 cup of almond milk, or your favorite plant-based alternative
  • 1 scoop of Premier Protein powder, vanilla flavored for that extra protein punch
  • 1 teaspoon of vanilla extract, pure magic in a bottle
  • 1 teaspoon of baking powder, for a bit of lift

How to Make Simple Protein Pancakes

  1. Start by gathering all your ingredients. Toss the banana, eggs, oats, greek yogurt, almond milk, Premier Protein powder, vanilla extract, and baking powder into a blender. Blend for about a minute until you get a smooth, well-mixed batter.
  2. Let the pancake mixture sit for a couple of minutes. This allows the batter to thicken slightly, thanks to the oats soaking up some liquid.
  3. Meanwhile, heat your skillet over medium-high heat. You want it nice and hot before you pour the batter, so those pancakes get that delightful golden crust.
  4. Pour small amounts of batter onto the hot skillet. Watch for those small bubbles along the edges, your cue that it’s time to flip. This usually takes about 2 minutes.
  5. Flip the pancakes carefully and let them cook for another minute or two on the other side until they’re golden and cooked through.
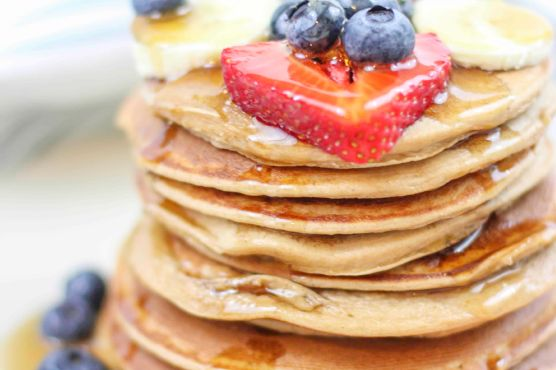
  6. Stack the pancakes high, and top with your favorite fruits, nuts, or a drizzle of maple syrup for that breakfast bliss.

Cook’s Notes

These pancakes are forgiving, so don’t stress if your banana is more green than yellow. Just add a smidge of honey or maple syrup to the batter for sweetness. If you’re planning ahead, the batter can be made the night before and kept in the fridge. Just give it a good stir before using. Leftovers (if any!) keep well in the fridge for a couple of days and reheat beautifully in a toaster for a quick breakfast. Avoid over-blending to keep the batter from getting too thin.

Make It Your Own

  • Swap the almond milk for coconut milk to add a tropical twist.
  • If you’re out of oats, try using whole wheat flour for a similar hearty texture.
  • For a chocolatey version, add a tablespoon of cocoa powder and a handful of chocolate chips—your inner child will thank you!
  • Switch out the banana for half a cup of pumpkin puree and a dash of cinnamon for a fall-inspired flavor.

If you try this, I’d love to hear how it turns out—drop a comment or tag me! These pancakes have become a staple in my morning routine, and I hope they bring a little joy to your table, too. Happy flipping!

Related update: Simple Protein Pancakes

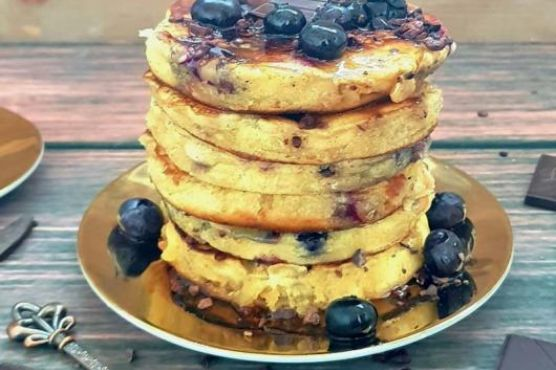
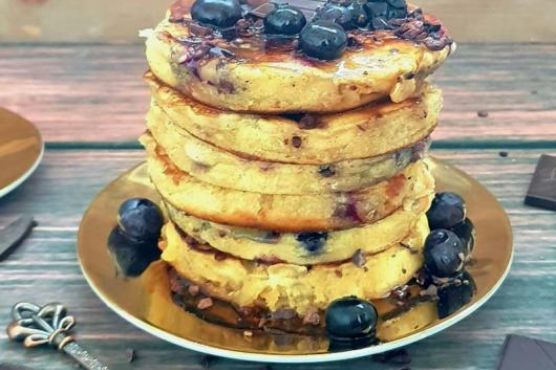
Related update: Blueberry, Chocolate & Cocao Superfood Pancakes – Gluten-Free/Paleo/Vegan

Related update: Avocado Egg Salad

Coconut Flour Pancakes with Blueberry Honey Compote | Made by Meaghan Moineau

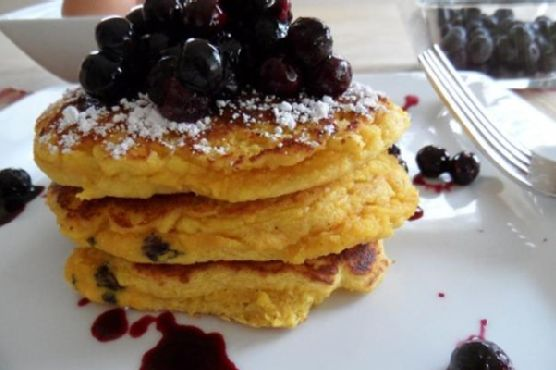
Picture this: It’s a dreary Wednesday morning, and my cravings for something sweet yet comforting are through the roof. I rummage through my pantry, and lo and behold, a bag of coconut flour winks at me from the back. My mind immediately darts to these heavenly Coconut Flour Pancakes with Blueberry Honey Compote. They’re a delightful balance of fluffy and fruity, perfect for when you need a little breakfast pick-me-up. Plus, they’re naturally gluten-free, so no need to worry about that! These pancakes are like a warm hug on a chilly day and are surprisingly easy to whip up. If you’re in the mood for a quick, fuss-free breakfast that’ll impress even the sleepiest of taste buds, you’ve got to try this.

Jump to Recipe

What You’ll Need

This ingredient list is straightforward and (almost) guaranteed to be stocked in your kitchen. The flavor comes from simple, wholesome ingredients and a touch of creativity.

  • Coconut flour – the star of the show, bringing that fluffy texture
  • Coconut milk – adds creaminess and enhances the coconut flavor
  • Eggs – for structure and richness
  • Honey
  • Olive oil
  • Baking powder
  • Salt
  • Frozen blueberries – juiciness and a pop of color
  • Agave nectar
  • Cinnamon

How to Make Coconut Flour Pancakes with Blueberry Honey Compote

  1. Start with the compote. In a small saucepan over low heat, add the frozen blueberries and agave nectar, then cover with a lid. If using fresh blueberries, throw in a tablespoon of water. After about 3 minutes, peek under the lid — once those juices start seeping out, add the cinnamon and stir it all up. Cover again and let it do its thing for another 10 to 15 minutes. You’ll know it’s ready when the juices become syrupy, and the berries are plump and hot. For a thicker syrup, mash the blueberries with a fork as they cook. Once perfect, remove from heat and keep covered to stay warm.
  2. While the compote simmers, prep the pancake batter. In a mixing bowl, combine all the wet ingredients and give them a good mix. Toss in the coconut flour, baking powder, and salt, then mix until smooth. The batter should be thick, so let it sit for about 5 minutes to thicken further.
  3. Heat a large skillet on medium-low and spread a little butter evenly over it. Spoon out about a third of the batter, shaping it into a pancake on the skillet. Coconut flour pancakes are a bit more stubborn, so you’ll need to shape them. If the edges of your pancakes start to spread too much, add a teaspoon of coconut flour to your batter.
  4. Repeat the last step for the remaining batter, ensuring each pancake has enough space to flip. Let them sit on the skillet for about 7 to 10 minutes. They’re ready to flip when the edges look set. Carefully slide a large spatula under each pancake and gently flip — be gentle as these beauties are fragile!
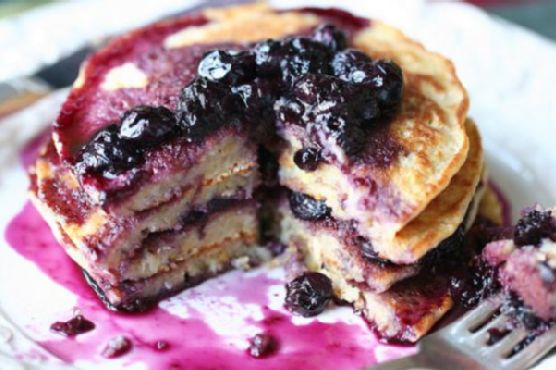
  5. Cook the pancakes for an additional 2 to 3 minutes on the other side. Once they’re golden and divine, remove them from the heat. Top the pancakes with your blueberry compote and a dusting of confectioners sugar. For an extra touch of sweetness, drizzle with agave nectar, honey, or pure maple syrup.

Cook’s Notes

Okay, let’s talk practicalities. Coconut flour is a bit finicky because it absorbs liquid like a sponge. So, if your batter is too runny, just add a teaspoon of coconut flour until you’re happy with the consistency. These pancakes can be made ahead of time — simply store them in an airtight container in the fridge for up to three days. Reheat in a skillet or microwave for a quick breakfast. Leftover compote? Drizzle it over yogurt or oatmeal for a sweet twist!

Make It Your Own

  • Berry Swap: No blueberries on hand? Swap them out for raspberries or blackberries for a different flavor profile.
  • Nutty Addition: Add a handful of chopped nuts into the batter for some crunch and extra protein.
  • Chocolate Dream: Toss in a few dark chocolate chips to the batter for an indulgent touch.
  • Spice It Up: Add a pinch of ground ginger or cardamom to the blueberry compote for a spicy kick.

If you try this, I’d love to hear how it turns out — drop a comment or tag me! These pancakes are a constant morning delight in my home, and I can’t wait for you to experience the joy they bring. Happy flipping!

Related update: Coconut Flour Pancakes with Blueberry Honey Compote

Related update: Simple Protein Pancakes

Simple Whole Wheat Crepes | Made by Meaghan Moineau

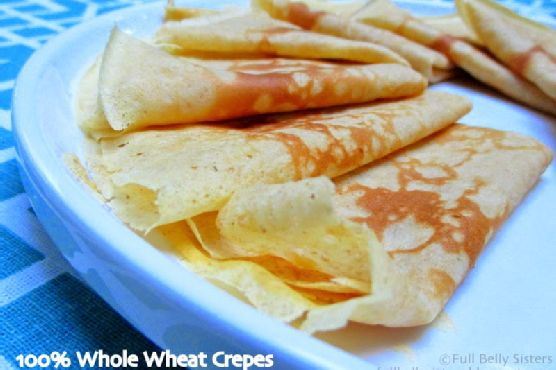
Picture this: it’s a lazy Saturday morning, and I’ve got the whole day stretched out ahead of me. No rush, no plans, just that perfect kind of weekend vibe that begs for a cozy breakfast. Enter: my Simple Whole Wheat Crepes. The first time I whipped these up, I was honestly just trying to avoid a trip to the grocery store. But now, they’ve become a staple. Quick to make, with a texture that’s both tender and slightly nutty, these crepes are fancy enough for brunch but easy enough for a weekday breakfast with the kiddos.

Jump to Recipe

What You’ll Need

These crepes come together with ingredients you probably already have lurking in your fridge and pantry. No need for a special trip to the store—unless you’re out of eggs, in which case, let’s talk.

  • 2 tablespoons butter, melted
  • 2 eggs
  • 1 tablespoon maple syrup
  • 1 ½ cups milk
  • ½ teaspoon sea salt
  • 1 cup white whole wheat flour

How to Make Simple Whole Wheat Crepes

  1. In your blender, combine the melted butter, eggs, maple syrup, milk, sea salt, and flour. Blend until the mixture is smooth and the batter is thin.
  2. Let the batter sit for at least 30 minutes. This is the perfect moment to sip your coffee slowly, or, if you’re me, lose yourself in a podcast.
  3. When ready to cook, heat your crêpe pan over medium heat. If you don’t have a crêpe pan, an electric crêpe maker works perfectly too. Either way, it’s all about that golden brown finish!
  4. Pour a small amount of batter onto the hot surface, swirling it around to evenly coat the pan. Cook until the edges start to lift and lightly brown, about 1 to 2 minutes.
  5. Flip the crêpe and cook for another 30 seconds to a minute until done to your liking. Repeat with the remaining batter, keeping finished crêpes warm in a low oven, if needed.

Cook’s Notes

Here’s a little secret: letting the batter rest is where the magic happens. This rest time allows the flour to fully hydrate and gives the gluten a chance to relax, resulting in the tenderest crepes. If you’re super organized or just love a breakfast shortcut, mix the batter the night before and let it hang out in the fridge. Just give it a quick stir before cooking. Store leftover crepes in an airtight container in the fridge for up to three days. You can also freeze them by placing wax paper between each crepe to prevent sticking, and pop them in a zip-top bag.

Make It Your Own

  • Sweet Twist: Add a teaspoon of vanilla extract and a sprinkle of cinnamon to the batter for a warm, cozy flavor.
  • Savory Spin: Omit the maple syrup and add chopped fresh herbs like chives or parsley to the batter.
  • Gluten-Free Option: Swap the white whole wheat flour for a gluten-free flour blend. Just make sure it’s one meant for baking!
  • Dairy-Free Delight: Use almond milk or another plant-based milk, and substitute the butter with coconut oil or a dairy-free butter substitute.

If you try this, I’d love to hear how it turns out—drop a comment or tag me! Let’s keep the breakfast magic alive, one crepe at a time. 🥞💛

Related update: Simple Whole Wheat Crepes

Related update: Coconut Flour Pancakes with Blueberry Honey Compote

Apple Pie Smoothie | Made by Meaghan Moineau

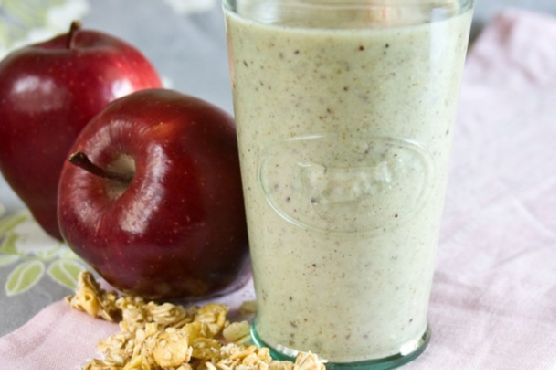
So, there I was, staring into my pantry on a crisp fall morning, craving something that screamed “autumn vibes” without going full-on pumpkin spice. That’s when the Apple Pie Smoothie idea hit me. It’s the kind of breakfast that makes you feel like you’ve done something right for the day—comforting, nostalgic, and just a little bit fancy without actually being a lot of work. This smoothie is like having dessert for breakfast, but it’s secretly healthy and totally acceptable to sip with your morning emails or after-school snack time. Seriously, you can whip this up in minutes and feel like an absolute genius for skipping the sad cereal route. Trust me, once you try it, you’ll wonder why apple pie wasn’t always a smoothie.

Jump to Recipe

What You’ll Need

This smoothie is all about cozy flavors that are probably hanging out in your kitchen already. No wild goose chases required—just simple, delicious ingredients.

  • Red Delicious apple
  • Apple sauce
  • Fat free vanilla yogurt
  • Milk
  • Unsalted almond butter
  • Maple syrup
  • Grain granola
  • Ground cinnamon
  • Honey
  • Ice cubes

How to Make Apple Pie Smoothie

  1. Start by slicing your red delicious apple into manageable pieces. Don’t worry about making them perfect—you’re blending them anyway!
  2. In your trusty blender, toss in the apple slices along with a generous scoop of apple sauce. This gives that extra apple pie oomph.
  3. Add a dollop of fat free vanilla yogurt to the mix. It’ll make the smoothie creamy and dreamy.
  4. Pour in a splash of milk. You know your blender best, so just enough to get things moving smoothly.
  5. Scoop in a tablespoon of unsalted almond butter. It adds a subtle nuttiness that works magic with apples.
  6. Drizzle in some maple syrup. It’s like the sweet whisper of an autumn forest.
  7. Sprinkle a dash of grain granola for extra texture and yum factor.
  8. Throw in a pinch of ground cinnamon. It’s the little spice that could, bringing all the flavors together.
  9. Add a touch of honey if you’re feeling like a little extra sweetness in your life.
  10. Finally, top it off with a handful of ice cubes for that refreshing chill.
  11. Blend everything on high until it’s as smooth as you want your morning to be. Give it a taste and adjust for sweetness if needed.
  12. Pour into your favorite glass, maybe add a sprinkle more of cinnamon or granola on top, and enjoy immediately!

Cook’s Notes

If you’re planning ahead, you can slice your apple the night before and store it in the fridge, soaked in a little lemon water to prevent browning. Just drain before you blend! This smoothie is best enjoyed fresh, but if you have leftovers (which is rare), store them in an airtight container in the fridge for up to a day. Give it a good shake before sipping, as it might separate a bit.

Make It Your Own

  • Swap the red delicious apple for a Granny Smith if you prefer a tarter taste.
  • Use almond milk or oat milk if you’re looking for a dairy-free option.
  • Add a scoop of protein powder to make it a post-workout treat.
  • Throw in a handful of spinach for a hidden veggie boost. The color changes, but the taste stays amazing!

If you try this, I’d love to hear how it turns out—drop a comment or tag me on your smoothie selfies! Happy sipping!

Related update: Apple Pie Smoothie

Related update: Simple Whole Wheat Crepes

Related update: Skinny Green Monster Smoothie

Strawberry Shortcake Pancakes | Made by Meaghan Moineau

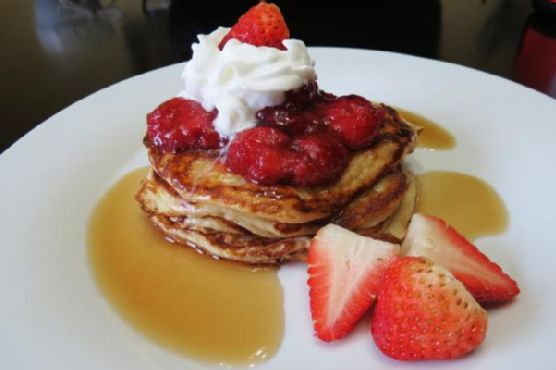
It was one of those chaotic Tuesday mornings when everything seemed to be on fast forward. The email inbox was overflowing, the laundry was giving me side-eye, and breakfast needed to be something more inspiring than a bowl of cereal. Enter Strawberry Shortcake Pancakes. They’re like a breakfast dessert that feels a little indulgent but is grounded enough in wholesome ingredients to keep the weekday guilt at bay. These pancakes are the perfect blend of light and fluffy, with a burst of strawberry goodness that just screams “summer.” Whether you’re trying to impress your brunch guests or just need a pick-me-up to tackle the day, this dish has got you covered. Plus, it’s quick enough to throw together before that first Zoom call.

Jump to Recipe

What You’ll Need

You’d be surprised at how many of these ingredients are already sitting in your pantry, just waiting to be transformed into something fabulous.

  • Greek yogurt
  • Egg whites
  • Whole-wheat flour
  • Baking soda
  • Almond extract
  • Sugar
  • Salt
  • Dried freeze strawberries
  • Fresh strawberries
  • Sugar
  • Fat-free whip cream

How to Make Strawberry Shortcake Pancakes

  1. In a small bowl, mix together the Greek yogurt, egg whites, and a splash of almond extract. The aroma of the almond extract will make you want to dive right in, but resist—it’s worth the wait.
  2. In another bowl, whisk together the whole-wheat flour, baking soda, sugar, and salt. This mixture should feel light and airy, the foundation of pancake perfection.
  3. Combine the wet and dry ingredients, whisking until just mixed. You want a smooth batter, but don’t overdo it. Stir in the dried strawberries—these little gems will add an unexpected pop of flavor in every bite.
  4. In a small saucepan, cook the fresh strawberries with a teaspoon of sugar over medium heat. Stir occasionally until they’re thawed and juicy, about 5-7 minutes. The kitchen will start to smell like a strawberry field and you’ll feel like a domestic goddess.
  5. Meanwhile, heat a skillet over medium heat and lightly coat with cooking spray. Pour 1/4 cup of batter onto the skillet. Once you see bubbles forming on the surface, it’s time to flip—aim for about 1-2 minutes per side. Flatten the batter slightly with a spatula for even cooking.
  6. Top your stacks with that luscious strawberry sauce, a drizzle of maple syrup, and a generous dollop of fat-free whip cream. You’ve just created a masterpiece in about 20 minutes.

Cook’s Notes

Let’s get real: even a pro can end up with a few duds in the bunch. If your pancakes are sticking, lower the heat a notch. If you’re prepping for the week, these pancakes freeze like a dream. Just make sure they’re cool before you stack them between sheets of parchment paper and seal them up for the freezer. Need a quick breakfast fix later? Pop them in the toaster to reheat!

Make It Your Own

If you’re feeling adventurous, here are a few tweaks to personalize your pancakes:

  • Swap the almond extract with vanilla extract for a more classic flavor profile.
  • Make it tropical with dried mango instead of strawberries and top with coconut whip.
  • Add a handful of mini chocolate chips to the batter for a sweet surprise.
  • For a nutty twist, toss in some crushed almonds or walnuts for added crunch.

If you try this, I’d love to hear how it turns out—drop a comment or tag me in your pancake selfies! There’s nothing better than sharing a bit of kitchen magic. Enjoy!

Related update: Strawberry Shortcake Pancakes

Related update: Chicken with Grape Tomatoes and Mushrooms

Related update: Apple Pie Smoothie

Beet Greens and Poached Eggs | Made by Meaghan Moineau

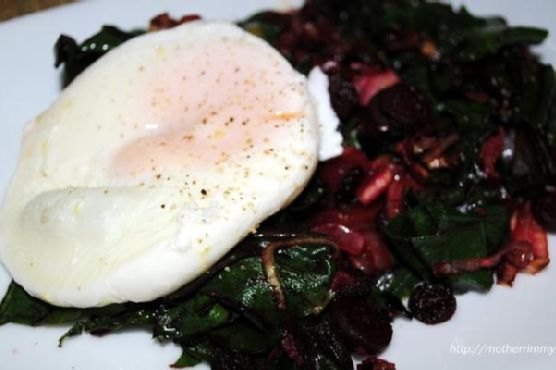
Picture this: it’s a lazy Sunday morning, and the sun’s rays are just starting to peek through your kitchen window. You’re in the mood for something special, something that feels like a treat but won’t have you slaving away in the kitchen. Enter my Beet Greens and Poached Eggs recipe. It’s one of those dishes that looks impressive but is surprisingly easy to whip up. The combination of fresh, vibrant beet greens and perfectly poached eggs is both comforting and elegant — a win-win! Plus, it’s a great way to use up those pesky beet greens that always seem to end up forgotten in the fridge. Whether you’re treating yourself or impressing a loved one, this dish will hit the spot.

Jump to Recipe

What You’ll Need

We’re keeping this simple and fresh. Chances are, you already have most of these on hand, and if not, they’re worth the grocery run.

  • Eggs – go for the freshest ones you can find.
  • Vinegar – just a splash for the poaching water.
  • Water – enough to fill a skillet for poaching.
  • Coconut oil – gives the greens a lovely depth.
  • Leek – thinly sliced for a subtle oniony flavor.
  • Baby beet greens – the star of the show, chopped.
  • Garlic – minced for that irresistible aroma.
  • Lemon (juice) – for a bright hit of acidity.
  • Shredded Parmesan cheese – because cheese makes everything better.

How to Make Beet Greens and Poached Eggs

  1. Heat a small skillet over medium-low heat and add about 2 inches of water. Wait until tiny bubbles start to gently rise to the surface. This is your cue to add a pinch of salt and a splash of vinegar.
  2. Carefully crack the eggs into the water, one at a time, slowly sliding each into its own corner of the pan. Cover the skillet and allow to simmer gently for 8 to 10 minutes. You’re aiming for whites that are set with yolks still runny — that’s the magic moment.
  3. While the eggs are poaching, heat a large nonstick skillet over medium heat and add the coconut oil. Once the oil has melted and filled the kitchen with its nutty aroma, toss in the sliced leeks and beets.
  4. Cook the leeks and beets for about 5 to 8 minutes, stirring occasionally, until they’re tender and their natural sweetness is coaxed out.
  5. Add the minced garlic, letting it do its aromatic dance for about a minute before introducing the chopped baby beet greens. Stir everything together for another two minutes, then remove from heat. Toss in a splash of lemon juice and keep stirring gently until the greens are just wilted.
  6. Divide the greens mixture between two plates. When the eggs are ready, carefully lift them out with a slotted spoon, letting the excess water drain away, and place one egg on each pile of greens.
  7. Finish each plate with a tablespoon of shredded Parmesan cheese, letting it melt slightly from the heat of the eggs. Serve immediately and enjoy the glorious marriage of flavors and textures.

Cook’s Notes

A few quick tips to make your cooking experience smoother than a perfectly poached egg. When poaching, don’t rush the process. Patience is key, and those few extra minutes will make all the difference. If your skillet lid doesn’t fit perfectly, that’s okay — just do your best to cover the pan. As for leftovers, good luck having any! But if you do, store the greens and eggs separately in the fridge and reheat gently. The greens are quite forgiving, but reheating poached eggs is a delicate dance — a quick dip in hot water can do the trick if needed.

Make It Your Own

This dish is a canvas ripe for personalization. Here are some variations to get you started:

  • Switch up the greens: Try swapping beet greens for Swiss chard or spinach for a slightly different flavor profile.
  • Add some heat: Sprinkle a pinch of red pepper flakes over the greens for a little kick.
  • Mix up the cheese: Replace Parmesan with crumbled feta for a tangy twist.
  • Protein boost: Top with crispy bacon bits or slices of smoked salmon for added texture and flavor.

If you give this recipe a try, I’d love to hear how it turns out for you! Drop a comment below or tag me in your kitchen adventures. Happy cooking, friends!

Related update: Beet Greens and Poached Eggs

Related update: Strawberry Shortcake Pancakes

Mixed Berry Yogurt with Almonds | Made by Meaghan Moineau

It was one of those mornings where everything seemed to go wrong. I woke up late, the cat knocked over my coffee, and I realized we were out of milk. You know those days, right? But hey, sometimes the universe gives you lemons so you can find a creative and tasty solution. On this particular day, I discovered my savior: Mixed Berry Yogurt with Almonds. It’s the kind of dish that feels luxurious without much effort—perfect for those hectic mornings or even as a healthy dessert when you want something a bit more special. The best part? It’s quick, comforting, and feels like a little scoop of joy.

Jump to Recipe

What You’ll Need

You might already have most of these ingredients nestled in your pantry and freezer, which is a huge win in my book.

  • 1 cup frozen mixed berries
  • 1/2 cup whole oats
  • 1 cup plain Greek yogurt
  • 1/4 cup whole almonds

How to Make Mixed Berry Yogurt with Almonds

  1. Start by toasting the almonds in a dry skillet over medium heat. Shake the skillet occasionally until they turn golden and fragrant. This should take about 3-5 minutes. Keep an eye on them; they can go from perfect to burnt in no time!
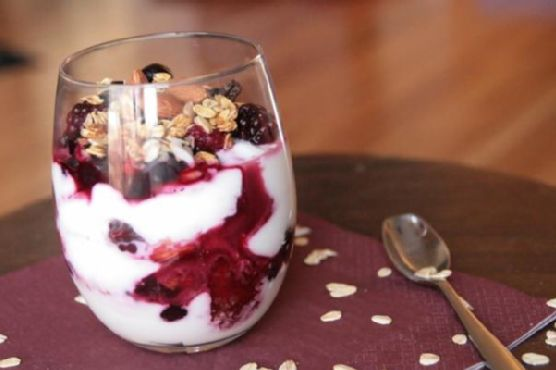
  2. While the almonds are toasting, scoop the Greek yogurt into a bowl or glass cup. I love using a clear glass because it shows off the layers and makes me feel like an artist.
  3. Evenly sprinkle the oats over the yogurt. If you want them a bit softer, you can let them sit for a minute or two to soak up some of the yogurt’s moisture.
  4. Microwave the frozen berries for about 30 seconds to thaw them slightly, then layer them over the oats. The warmth from the berries will start to melt into the yogurt, creating a beautiful marbled effect.
  5. Finally, top it all off with those perfectly toasted almonds. The crunchiness will be a lovely contrast to the creamy yogurt and juicy berries.

Cook’s Notes

This dish is super flexible, so you can tweak it based on what you have. If you want to prepare it in advance, layer the yogurt and oats first and keep the berries and almonds separate until you’re ready to serve. Leftovers can be stored in an airtight container in the fridge for up to two days, but I recommend keeping the almonds separate to maintain their crunch.

Watch out for the almond toasting process—they toast quickly and can easily burn if you’re not paying attention. Trust me, I’ve been there. If you want to make it even quicker in the morning, toast the almonds the night before!

Make It Your Own

  • Swap the Greek yogurt for a creamier vanilla yogurt if you’re serving this as a dessert.
  • Layer in a drizzle of maple syrup over the yogurt for an extra touch of sweetness.
  • Try using walnuts or pecans if you’re out of almonds, toasting them just the same for that essential crunch.
  • If berries aren’t your thing, this works beautifully with sliced peaches, bananas, or even a medley of whatever fruits you have hanging out in your fridge.

If you try this, I’d love to hear how it turns out—drop a comment or tag me! There’s nothing quite like seeing your take on these tasty creations. Enjoy every spoonful!

Related update: Mixed Berry Yogurt with Almonds

Related update: Beet Greens and Poached Eggs

Baked Apple Pancake | Made by Meaghan Moineau

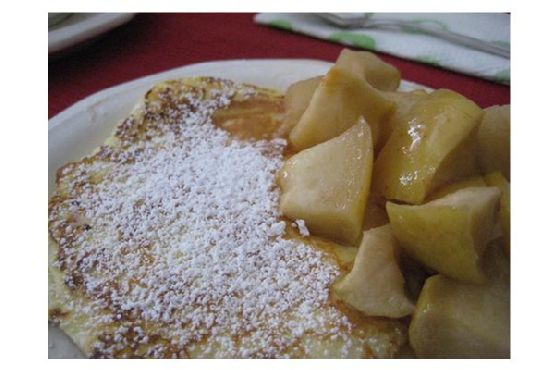
Ever have one of those mornings where you wake up and just know you need something a little extra special to kickstart the day? That was me last Sunday. As I gazed out my window at the crunchy, golden leaves piling up in my yard, it hit me—I needed something cozy and autumnal. You know, the kind of dish that feels like a hug. Enter: Baked Apple Pancake. It’s the ultimate lazy morning treat, perfect for when you want something indulgent but deceptively easy. Think of it as a fluffier, fruitier version of your favorite pancake, but baked to perfection in the oven. It’s the kind of recipe that makes you look like a kitchen pro, even if you just rolled out of bed.

Jump to Recipe

What You’ll Need

This ingredient list is blissfully simple, and chances are you already have most of it sitting in your pantry. Just a few fresh additions, and you’re ready to go!

  • 1 whole apple, sliced thin
  • 2 tablespoons butter
  • 1 tablespoon cinnamon
  • 2 whole eggs
  • 1/2 cup all-purpose flour
  • 1/2 cup milk
  • 1/4 cup nuts and raisins
  • 1/4 teaspoon salt
  • 1 tablespoon sugar

How to Make Baked Apple Pancake

  1. First things first, preheat your oven to a toasty 450°F. You want that oven nice and hot!
  2. Grab a skillet and melt 2 tablespoons of butter over medium heat. Add your apple slices to the pan and sauté until they’re tender and just starting to caramelize—think fragrant and golden.
  3. Sprinkle in the sugar, cinnamon, nuts, and raisins. Stir gently to coat the apples in this sweet and spicy goodness. Once everything is mixed, take it off the heat and set it aside.
  4. In a separate bowl, beat those eggs until they’re light and frothy. Slowly, because we’re not in a rush, add the flour and salt. Blend until smooth. Beat in the melted butter and milk until your batter is silky.
  5. Spray your skillet with a generous layer of Pam, then pour the apple filling you set aside back into the skillet. Top this with your batter, spreading it evenly.
  6. Pop it into the oven and bake for 15 minutes. You’ll want to watch as the edges start to rise and turn a delicious golden brown.
  7. Reduce the oven temperature to 350°F and let it bake for another five to ten minutes. The pancake should puff up slightly and set in the middle.
  8. Once baked, remove from the oven and let it cool for just a minute. Cut the pancake into four hearty pieces and serve with your favorite topping. Maple syrup, whipped cream, or even a dollop of yogurt would be heavenly!

Cook’s Notes

This recipe comes from a note marked “good!” by Barbara Michel, and I’ve made a couple of tweaks to honor her enthusiasm.

  • If you’re planning to make this ahead of time, you can sauté the apples and set them aside in the fridge. Just bring them back to room temperature before assembling the dish.
  • Leftovers (if there are any!) are delightful warmed up the next day. Just pop them in the microwave for a quick reheat.
  • Avoid overmixing the batter; it should be smooth, but overmixing can make it dense.

Make It Your Own

Here are a few fun tweaks to shake things up if you feel like experimenting.

  • Swap the apple for pear slices and add a touch of ginger for a spiced twist.
  • Substitute the nuts and raisins for dried cranberries and pecans for a seasonal flair.
  • If you’re feeling indulgent, drizzle the top with a caramel sauce right before serving.
  • For a citrus kick, add some orange zest to the batter.

If you try this, I’d love to hear how it turns out—drop a comment or tag me! Whether you stick to the classic or put your own spin on it, I hope this baked apple pancake brings a little extra warmth to your morning. Enjoy every bite!

Related update: Baked Apple Pancake

Related update: Mixed Berry Yogurt with Almonds

Lemon Scented Polenta Pancakes with Blueberry Thyme Syrup | Made by Meaghan Moineau

Picture this: it’s a lazy Sunday morning, and the sunlight is peeking through the kitchen window just enough to gently nudge me from my cozy corner on the couch. That’s when the craving hits—something vibrant and refreshing yet comforting to kickstart the day. Enter Lemon Scented Polenta Pancakes with Blueberry Thyme Syrup. This whimsical twist on the classic pancake is my answer to those mornings where you need a dish that feels special but isn’t a hassle to whip up. With the zing of lemon and the earthy sweetness of blueberry thyme syrup, this dish is an absolute keeper. It’s just fancy enough to impress anyone who stumbles into your kitchen but easy enough to make you wonder why you don’t do this every weekend.

Jump to Recipe

What You’ll Need

This recipe is one of those magical ones where you probably have most of the stuff lounging in your pantry, waiting to be turned into something fabulous. Here’s what you’ll need:

  • All-purpose flour
  • Baking powder
  • Fresh blueberries
  • Butter
  • Cornmeal
  • Egg
  • Fresh thyme
  • Honey
  • Lemon zest
  • Maple syrup
  • Milk
  • Salt
  • Vanilla extract
  • Water

How to Make Lemon Scented Polenta Pancakes with Blueberry Thyme Syrup

  1. Start by making the syrup. Combine the syrup ingredients: blueberries, maple syrup, and thyme sprigs in a small saucepan. Bring this mixture to a gentle boil. Once boiling, reduce the heat and let it simmer. The blueberries will soften and the thyme will infuse its earthy aroma. Remember to remove the thyme sprigs just before serving.
  2. For the pancakes, grab a medium saucepan and combine the cornmeal with cold water. Bring this to a boil, whisking constantly so it’s smooth and not lumpy. Reduce the heat and let it simmer until thickened, about 4 to 5 minutes. It should have the consistency of a thick porridge.
  3. In a small bowl, whisk together the milk, egg, honey, and a splash of vanilla extract. Add this to the thickened cornmeal, transforming it into a creamy polenta custard.
  4. In your largest mixing bowl, whisk together the all-purpose flour, baking powder, salt, and lemon zest. Make a well in the center of the dry ingredients and pour your polenta custard into the middle. Stir until everything is just combined; over-mixing is a no-go!
  5. Heat up a large griddle or non-stick pan and give it a good brush of butter. Ladle enough batter onto the griddle for 4-inch pancakes. If the batter seems too thick, a splash more milk will help it along.
  6. Cook the pancakes over moderate heat until bubbles form on the surface and the edges look a touch dry. This is your cue to flip them. Cook until the other side is beautifully golden and the pancakes have a little puff to them, about 2 minutes more.
  7. Transfer these golden beauties to warm plates and repeat with the remaining batter. Drench them in the warm blueberry syrup, and you’re set for a morning of deliciousness.

Cook’s Notes

Let’s talk about a few things to keep in mind as you embark on this pancake adventure. First, the syrup is the star—don’t skimp on the thyme unless you’re not a fan of its unique flavor! This syrup can be stored in an airtight container in the fridge for up to a week and reheated gently on the stove. As for the pancakes, if you’ve got leftovers (which is doubtful), they freeze well. Layer parchment paper between them and pop them in a zip-top bag for freezer storage. Defrost in the toaster on a low setting for a quick breakfast. Also, if you’re making these ahead of time, keep them warm in a low oven while you finish up the batch.

Make It Your Own

This recipe is wonderful as is, but who doesn’t love a little culinary improvisation? Here are a few ideas to make these pancakes truly yours:

  • Swap the blueberries for raspberries or blackberries if that’s what you have on hand or prefer.
  • Add a tablespoon of poppy seeds to the pancake batter for a delightful crunch that complements the lemon zest.
  • If you’re dairy-free, use almond milk and vegan butter without sacrificing any of the flavor.
  • For a nutty twist, replace half of the cornmeal with almond flour.

If you try this, I’d love to hear how it turns out—drop a comment or tag me! There’s nothing quite like seeing your creations and hearing how these pancakes brightened your day. Enjoy, my friends!

Related update: Lemon Scented Polenta Pancakes with Blueberry Thyme Syrup

Related update: Superbowl Chili

Related update: Baked Apple Pancake

Chia Seed Pudding | Made by Meaghan Moineau

It was one of those hectic Tuesday nights when my brain was fried from work, and the fridge seemed like a barren wasteland. I needed something easy yet satisfying, and I really didn’t want to run to the store. Enter: chia seed pudding. This little gem is like a miracle in a bowl — crazy simple to whip up with stuff you probably have on hand, and it feels like a little treat when you need it most. Plus, it’s perfect if you’re like me and need a grab-and-go breakfast or a midnight snack that doesn’t involve cookies (well, not always). Trust me, once you try this, you’ll wonder how you managed without it.

Jump to Recipe

What You’ll Need

Chances are you already have most of these ingredients lounging in your pantry or fridge, just waiting to become something delicious.

  • Black chia seeds
  • Almond milk
  • Raw agave syrup
  • Vanilla extract
  • Salt
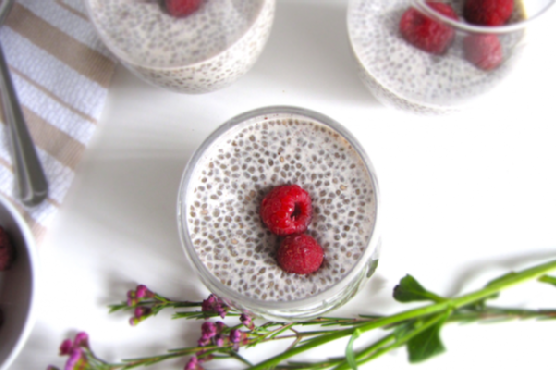
  • Fresh raspberries for garnish (or any berries you adore)

How to Make Chia Seed Pudding

  1. In a small bowl, mix together the black chia seeds and almond milk until the seeds are evenly dispersed and not clumpy.
  2. Add in a dash of salt, a splash of vanilla extract, and drizzle in the raw agave syrup to sweeten things up. Stir until everything is well combined and the syrup has dissolved.
  3. Cover the bowl and pop it in the fridge overnight or for at least 4 hours. You’ll know it’s ready when the mixture has thickened and resembles a pudding-like consistency.
  4. Before diving in, give it a good stir and top with fresh raspberries. The chill and sweetness from the berries are going to be a game-changer.

Cook’s Notes

Here’s a little secret: the longer the chia seeds soak, the creamier your pudding will be. They need time to absorb the liquid, so patience is key. If you find it too thick in the morning, just stir in a splash more almond milk to reach your desired consistency.

  • Store any leftovers in an airtight container in the fridge, and they’ll keep for up to five days. Perfect if you want to meal prep!
  • Don’t stress if you don’t have almond milk; any milk (or milk substitute) works fine. Each brings a slightly different vibe to the pudding.
  • Be sure to stir well after it’s set. Chia seeds have a habit of clumping together, and a good stir smooths it all out.

Make It Your Own

  • Swap out the almond milk for coconut milk for a tropical twist that pairs beautifully with mango chunks.
  • Use maple syrup instead of agave if that’s what you have — it gives a warm, rich sweetness that’s divine.
  • For a chocolatey version, stir in a tablespoon of cocoa powder with the seeds and milk.
  • Add a sprinkle of cinnamon or nutmeg for a cozy, spiced-up flavor.

If you try this, I’d love to hear how it turns out — drop a comment or tag me! Your version might just inspire my next kitchen adventure.

Related update: Chia Seed Pudding

Related update: Fudgy chocolate cream cheese brownies with Baileys

Bailey’s Irish Cream Crepes With Creme | Made by Meaghan Moineau

Bailey’s Irish Cream Crepes With Creme

Intro

There’s something magical about crepes that transports me back to Sunday mornings at my grandmother’s house. As a child, I would eagerly watch her expertly flip those delicate pancakes, the smell of butter and sugar wafting through the air. Today, I’m excited to share a twist on that nostalgic favorite with a recipe that infuses the classic crepe with the rich, indulgent flavors of Bailey’s Irish Cream, bananas, and a hint of brown sugar. These Bailey’s Irish Cream Crepes With Creme are perfect for a leisurely breakfast or a sophisticated brunch with friends. Let’s dive into the recipe and create new memories around the table.

Why You’ll Love It

This recipe is not just about delicious crepes; it’s about creating an experience. You’ll love the warm, nutty aroma of browned butter combined with the creamy, smooth notes of Bailey’s Irish Cream. The addition of fresh bananas and creme fraiche elevates these crepes to a new level of indulgence. Whether you’re a seasoned cook or a beginner, this recipe is approachable and guaranteed to impress your family and friends. Plus, these crepes are versatile and can be dressed up or down depending on the occasion.

Ingredients

  • Bananas
  • Brown sugar
  • Browned butter
  • Sour creme fraiche
  • Eggs
  • Bailey’s Irish Cream
  • Milk
  • Salt
  • Sugar

Instructions

  1. Brown your butter by adding slices of butter to a heavy-bottomed saucepan. Once melted, whisk it frequently until you see small brown specks begin to form at the bottom of the pan. The butter should have a nutty aroma. Remove it from the pan to prevent further cooking.
  2. Mix the browned butter with the flour, salt, sugar, eggs, milk, and Bailey’s Irish Cream. Using an immersion blender, blend the mixture until completely smooth.
  3. Let the mixture rest for 1/2 hour to allow the flavors to meld and the batter to thicken slightly.
  4. Butter a non-stick frying pan and heat over medium heat.
  5. Using a ladle, spoon in the batter and quickly pick up the pan and swish it around so that the entire pan bottom is covered with a very thin layer of batter.
  6. When the underside is golden, use your fingers or a spatula to flip the crepe over to cook the other side.
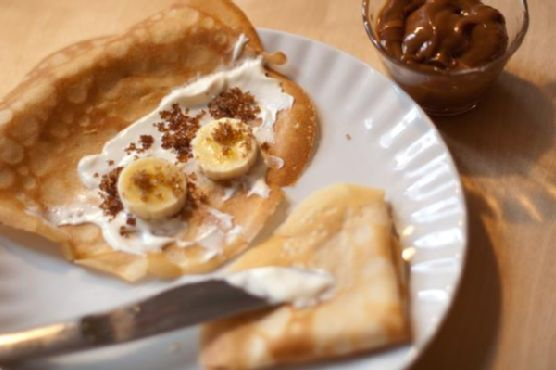
  7. Serve with sliced bananas, creme fraiche (or sour cream), and brown sugar. For an extra treat, have Dulce de Leche on the table!

Tips

Here are some tips to ensure your crepes turn out perfectly:

  • Letting the batter rest is crucial for a smooth texture. It allows the flour to fully absorb the liquid and results in more tender crepes.
  • Use a non-stick pan to make flipping the crepes easier. If you don’t have one, ensure your pan is well-buttered.
  • Keep your pan at a medium heat to prevent burning. If the crepes are cooking too quickly or slowly, adjust the heat accordingly.

Variations & Substitutions

Feel free to get creative with this recipe. Here are some variations and substitutions you can try:

  • Filling: Swap out the bananas for strawberries or raspberries for a different fruity flavor.
  • Alcohol: If you prefer a non-alcoholic version, replace the Bailey’s Irish Cream with vanilla extract and a bit more milk.
  • Dairy-Free: Use coconut cream instead of creme fraiche and almond milk in place of regular milk for a dairy-free option.

Storage

These crepes are best enjoyed fresh, but if you have leftovers, here’s how to store them:

  • Let the crepes cool completely before stacking them with parchment paper in between each crepe.
  • Wrap the stack tightly in plastic wrap or store them in an airtight container.
  • They can be refrigerated for up to 3 days. To reheat, gently warm them in a non-stick pan over low heat.

FAQ

Can I make the batter ahead of time?

Yes, you can prepare the batter up to 24 hours in advance. Store it in the refrigerator and give it a good stir before cooking the crepes.

How do I prevent my crepes from tearing?

Ensure your pan is properly heated and buttered before adding the batter. Also, handle the crepes gently when flipping. If they’re tearing, they may be too thick; try using less batter for each crepe.

Can I freeze the crepes?

Yes, you can freeze the crepes. Allow them to cool completely, then stack them with parchment paper in between each crepe, and store them in a freezer-safe bag. They can be frozen for up to 2 months. Thaw in the refrigerator before reheating.

Nutrition

This recipe is a delightful indulgence, perfect for special occasions. While it’s not low in calories, it offers a good balance of carbohydrates, fats, and proteins. The addition of bananas provides potassium and a natural sweetness, while the Bailey’s Irish Cream adds a unique flavor profile without the need for additional sugars.

Conclusion

Bailey’s Irish Cream Crepes With Creme are a delightful way to elevate any breakfast or brunch occasion. With their rich, nutty flavor and creamy toppings, they are sure to become a new family favorite. Whether you’re making them for a special celebration or simply to indulge yourself, these crepes will fill your home with warmth and delicious aromas. Try them out and create lasting memories around the table, just like I did all those years ago. Enjoy!

Related update: Bailey’s Irish Cream Crepes With Creme

Related update: Ginger Snap and Pumpkin Ice Cream Sandwiches

Related update: Chia Seed Pudding

Related update: Mini Spinach and Feta Quiches