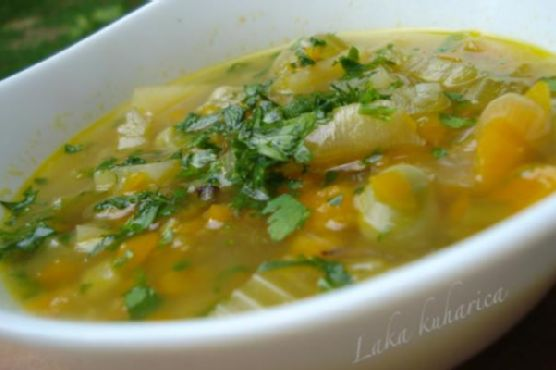
The Perfect Butter Beans Stew
Intro
Welcome to a cozy corner of my kitchen, where the aroma of simmering stews fills the air and warms the soul. Today, I’m thrilled to share with you a recipe that holds a special place in my heart: The Perfect Butter Beans Stew. This dish is more than just a meal; it’s a comforting embrace on a chilly day, a nostalgic reminder of family gatherings and heartwarming stories shared around the dinner table.
When I was a child, my grandmother’s kitchen was the heartbeat of our home. I remember watching her effortlessly create magic in her pots, her hands moving deftly, her eyes alight with joy. The butter beans stew was a family favorite, a recipe passed down through generations, each iteration lovingly tweaked and perfected. Today, I’m excited to pass this cherished recipe on to you, hoping it will bring the same warmth and joy to your home as it has to mine.
Why You’ll Love It
This butter beans stew is a celebration of simple, wholesome ingredients coming together to create a symphony of flavors. Here’s why you’ll love it:
- Hearty and Nutritious: Packed with protein-rich butter beans and a medley of aromatic spices, this stew is both satisfying and nourishing.
- Simple Ingredients: You’ll find most of these ingredients in your pantry, making it an accessible dish for any day of the week.
- Versatile: Enjoy it as a standalone meal, or serve it as a side dish with your favorite protein.
- Comforting: Perfect for those colder months when you crave a warm, home-cooked meal.
Ingredients
- 1 cup dry lima beans, soaked overnight
- 2 diced onions
- 3 garlic cloves, minced
- 1 teaspoon dry tarragon
- 1 tablespoon canned fresh tarragon
- 2 teaspoons sweet paprika
- 2 bay leaves
- 3 tablespoons unrefined sunflower oil
- 1 teaspoon ground pepper
- Salt to taste
Instructions
For the full step-by-step instructions, including tips and techniques to perfect this dish, please visit my blog at http://gourmandelle.com/the-perfect-butter-beans-stew/.
Tips
- Soak the Beans: Don’t skip soaking the butter beans overnight. This step ensures they cook evenly and reach the perfect, tender texture.
- Season Generously: Don’t be shy with the spices. The tarragon and paprika are key to developing the stew’s rich, savory flavor.
- Simmer Slowly: Allow the stew to simmer on low heat. This slow cooking process melds the flavors beautifully.
Variations & Substitutions
Feel free to customize this stew to suit your taste preferences or dietary needs:
- Vegetarian Option: For a vegetarian version, replace the unrefined sunflower oil with olive oil, and enhance the flavor with vegetable broth instead of water.
- Spicy Kick: Add a pinch of chili flakes or a dash of hot sauce if you prefer your stews with a bit of heat.
- Herb Variations: Swap the tarragon with rosemary or thyme for a different herbaceous note.
Storage
This butter beans stew stores beautifully, making it a perfect make-ahead meal:
- Refrigerator: Store in an airtight container in the fridge for up to 4 days.
- Freezer: For longer storage, freeze the stew in individual portions. It will keep well for up to 3 months.
- Reheating: Reheat gently on the stove over low heat, adding a splash of water or broth if needed to adjust the consistency.
FAQ
Can I use canned beans instead of dried?
Yes, you can use canned butter beans as a convenient alternative. Simply rinse and drain them before adding them to the stew. Keep in mind that the cooking time will be reduced since canned beans are pre-cooked.
What can I serve with butter beans stew?
This stew pairs wonderfully with crusty bread, rice, or quinoa. A fresh green salad or roasted vegetables also complement the rich flavors of the stew beautifully.
Nutrition
This butter beans stew is a nutritious powerhouse, offering a good balance of protein, fiber, and essential vitamins. While the exact nutrition will vary based on portion size, here’s a rough estimate per serving:
- Calories: Approximately 250-300 calories
- Protein: 12-15 grams
- Fiber: 8-10 grams
- Fat: 10 grams
Conclusion
The Perfect Butter Beans Stew is more than a recipe; it’s a culinary journey back to simpler times, filled with warmth and love. As you savor each spoonful, may it bring you the same comfort and joy it has brought my family for generations. I hope this stew becomes a staple in your kitchen, weaving its way into your cherished food memories. Thank you for joining me on this delicious adventure. Happy cooking!
Related update: The Perfect Butter Beans Stew
Related update: Chicken Suya