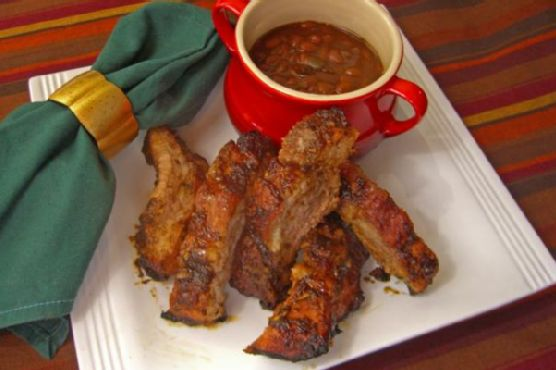
Slow Cooker Kahlua Pork with Sweet Chili Pineapple Sauce
Intro
There’s something magical about the aroma of a slow-cooked meal wafting through the house, especially when it’s a dish that has been a family favorite for generations. I can still vividly recall the Sunday afternoons at my grandmother’s house, where family gatherings were synonymous with her signature Kahlua Pork. As kids, we would eagerly await the moment when the tender, flavorful pork would be served, accompanied by the sweet and tangy pineapple sauce. This recipe is my homage to those cherished memories, with a modern twist that brings the flavors to life in a convenient slow-cooker format.
Why You’ll Love It
This Slow Cooker Kahlua Pork with Sweet Chili Pineapple Sauce is the perfect blend of savory and sweet, with a hint of smokiness that makes it irresistible. It’s incredibly easy to prepare, requiring minimal effort but delivering maximum flavor. The slow cooker does all the hard work, breaking down the pork until it’s melt-in-your-mouth tender. The sweet chili pineapple sauce adds a zesty kick that perfectly complements the richness of the pork. Whether you’re hosting a gathering or just want a comforting meal for the family, this dish is sure to become a staple in your home.
Ingredients
- 4 lbs pork butt
- 2 tablespoons liquid smoke
- 1 tablespoon regular sea salt
- 1 cup pineapple juice
- 1/4 cup rice vinegar
- 1/4 cup honey
- 2 tablespoons garlic chili sauce
- 2 tablespoons hoisin sauce
Instructions
- Place the pork, fat side up, in the slow cooker.
- Using a fork, pierce the roast all over and pour the liquid smoke over it to coat.
- Sprinkle the sea salt evenly over the roast and cover.
- Cook on low for 10 hours, until the meat begins to fall apart when shredded with a fork.
- In a small saucepan, whisk together the pineapple juice, rice vinegar, honey, chili sauce, and hoisin sauce.
- Bring the mixture to a boil and cook the sauce until reduced by half, stirring frequently with a heat-resistant spatula.
- Set aside the sauce once reduced.
- When the roast is done, transfer to a cutting board and shred the meat using two forks.
- Return the shredded meat back to the slow cooker and serve immediately with the sauce.
Tips
For best results, choose a pork butt with good marbling, as the fat will render down during cooking, keeping the meat juicy and flavorful. If you prefer a bit of spice, feel free to adjust the amount of garlic chili sauce to your liking. Keep an eye on the sauce as it reduces to ensure it doesn’t burn, and remember to stir frequently.
Variations & Substitutions
If you’re looking for a different flavor profile, you can substitute the hoisin sauce with soy sauce for a less sweet, more savory sauce. For a tropical twist, try adding crushed pineapples to the sauce during the reduction process. Vegetarians can swap the pork for jackfruit, which mimics the texture of shredded meat and absorbs flavors beautifully.
Storage
Leftovers can be stored in an airtight container in the refrigerator for up to 4 days. Reheat gently on the stovetop or in the microwave, adding a splash of water or pineapple juice to keep the meat moist. You can also freeze the pork and sauce in separate containers for up to 3 months. Thaw in the refrigerator overnight before reheating.
FAQ
Can I use a different cut of pork?
Yes, you can use pork shoulder or pork loin as alternatives. However, keep in mind that pork loin is leaner and may not be as tender as pork butt or shoulder. Adjust the cooking time accordingly and monitor the tenderness of the meat.
What can I serve with this dish?
This Kahlua Pork pairs wonderfully with steamed rice or a side of roasted vegetables. For a complete Hawaiian-inspired meal, consider serving it with macaroni salad and coleslaw.
Is there a way to make it in the oven?
Absolutely! Preheat your oven to 325°F (165°C). Follow the preparation steps and place the pork in a roasting pan. Cover tightly with foil and bake for 5-6 hours, until the pork is tender and easily shredded.
Nutrition
This dish is a source of protein and offers a delightful balance of sweet and savory flavors. The sauce contains natural sweetness from honey and pineapple juice, making it more nutrient-dense than sugar-laden alternatives. If you’re watching your sodium intake, consider using a reduced-sodium soy sauce in place of hoisin sauce.
Conclusion
This Slow Cooker Kahlua Pork with Sweet Chili Pineapple Sauce is a testament to the power of simple ingredients and traditional cooking methods. It’s a dish that brings people together, creating a sense of warmth and nostalgia with every bite. Whether it’s for a special occasion or a cozy family dinner, this recipe is sure to become a beloved fixture in your culinary repertoire. Enjoy the flavors, and may it bring as much joy to your table as it has to mine!
Related update: Slow Cooker Kahlua Pork with Sweet Chili Pineapple Sauce
Related update: Creamy White Chili