Garlic and Herb Pork Roast With Potatoes, Wilted Spinach, and Cooling Cucumber Cream | Made by Meaghan Moineau

Garlic and Herb Pork Roast With Potatoes, Wilted Spinach, and Cooling Cucumber Cream | Made by Meaghan Moineau

Title: A Culinary Symphony: Garlic and Herb Pork Roast with Potatoes and Cooling Cucumber Cream
Description: Dive into the harmonious blend of flavors in this Garlic and Herb Pork Roast, paired with crispy potatoes, wilted spinach, and a cooling cucumber cream. This elegant main dish is a tribute to family gatherings, where food is more than a meal—it's a memory. With a taste profile that sings of spring, this dish is a perfect centerpiece for your next dinner party. Rated 6/10 in difficulty, it's perfectly accessible for home cooks looking to impress.

---


A Culinary Symphony: Garlic and Herb Pork Roast with Potatoes and Cooling Cucumber Cream


Picture this: a kitchen filled with the tantalizing aroma of rosemary and oregano, the comforting sizzle of pork roast caramelizing to a golden brown, and the refreshing zing of cucumber cream. This is not just a dish—it's a sensory experience, a journey into culinary bliss that brings back cherished family memories.


Ingredients:


- Boneless butterfly pork butt


- Fresh oregano


- Fresh rosemary


- Fresh garlic


- Baby spinach


- Red potatoes


- White onions


- Extra virgin olive oil (EVOO)


- White balsamic vinegar


- Greek yogurt


- Cucumber


- Lemon


- Black sea salt


Cooking Instructions:


1. Prepare the Herb Paste: Strip the leaves from two sprigs each of rosemary and oregano, chop them finely to make about a half-cup, and blend with four minced garlic cloves. Mix this with a few glugs of EVOO, sea salt, and cracked black pepper to create a savory paste.
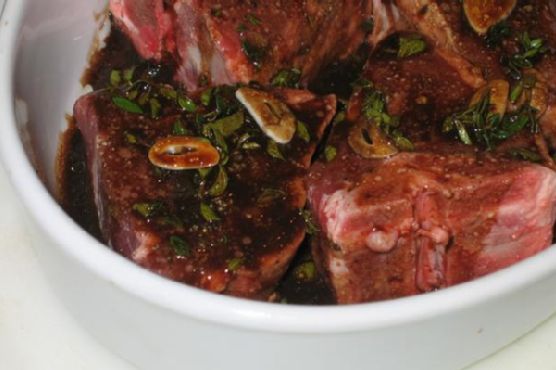
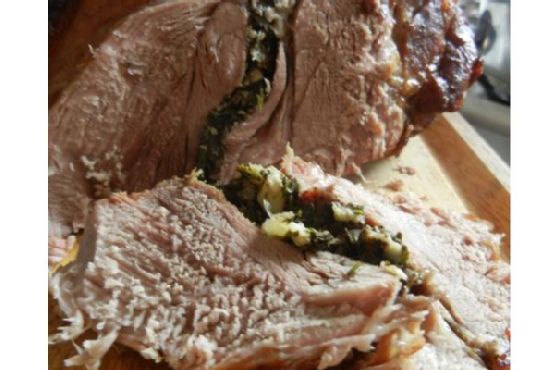
2. Marinate the Pork: Spread the herb paste inside the pork butt, fold it in half, and secure with kitchen string. Let it marinate in a ziplock bag for several hours or overnight in the fridge.
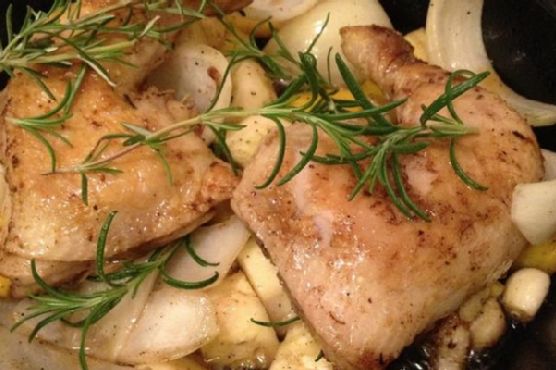
3. Sear the Pork: Preheat your roasting pan to high heat with more EVOO. Sear the pork on all sides until it's beautifully browned, finishing with the fat cap to lock in flavor.
4. Begin Roasting: Nestle thick slices of white onion under the pork roast to prevent over-searing and add flavor. Wrap the roast in foil and bake in a preheated oven for at least two hours.
5. Prepare Cucumber Cream: Peel, slice, and chop a cucumber, then mix with Greek yogurt, two cloves of minced garlic, lemon zest, the juice of half a lemon, sea salt, and black pepper. Refrigerate to blend flavors.
6. Roast the Potatoes: Quarter the red potatoes and toss with EVOO, sea salt, black pepper, and another half-cup of chopped rosemary and oregano. Roast on the oven's bottom shelf for crispy edges.
7. Pickle the Onions: Toss sliced white onions in the residual herbed oil, season with oregano, and drizzle with white balsamic vinegar. Let them pick up the dressing's flavors, stirring occasionally.
8. Finish and Serve: In the last 10 minutes of pork roasting, remove the foil to crisp the skin. Increase the oven temperature to 425°F for a final sear. Wilt baby spinach over the pickled onions, then pour the hot, crispy potatoes over the mix, tossing well. Serve slices of the tender pork roast, crowned with cucumber cream, alongside the savory spuds and wilted greens.

A Nostalgic Family Memory:


This dish always brings me back to Sunday family dinners in my grandmother's cozy kitchen. The dining table, lovingly set with mismatched china, bore witness to the laughter and stories shared over meals like this one. I remember my grandmother teaching me the art of balancing flavors, her hands deftly weaving magic with herbs and spices. This pork roast was a staple, its aroma wafting through the house, signaling a gathering of love and warmth. Each bite was a testament to her culinary skills and the bonds that food can beautifully create.


Difficulty Rating: 6/10


Classification: Main Dish


This Garlic and Herb Pork Roast with Potatoes and Cooling Cucumber Cream is more than a meal—it's an invitation to savor the simple joys of cooking and sharing. Light, fresh, and fantastic, it is a dish that welcomes the first breezes of early spring through freshly reopened windows. I wish I could have you all over for dinner because this is truly a company-worthy meal!

Read more about Appetizers

Read more about Main Dishes

Read more about Desserts

Turkey Burgers | Made by Meaghan Moineau

Turkey Burgers | Made by Meaghan Moineau

Title: Savoring Simplicity: The Perfect Turkey Burgers for Family Gatherings
Description: Discover the delightful flavors of homemade turkey burgers, a comforting dish that brings families together. This easy-to-follow recipe combines healthy ingredients and a touch of nostalgia, making it a must-try for any occasion.

---


When I think back to family gatherings during those long summer evenings, one dish stands out as a perennial favorite: turkey burgers. These delightful patties, bursting with flavor and wholesome goodness, were a staple at our backyard barbecues. I vividly remember the aroma wafting through the air, mingling with the laughter and warmth of cherished family moments.


The recipe I'm sharing today is not just about making a delicious meal; it's about creating memories. These turkey burgers are crafted with a blend of lean extra ground turkey, shredded carrots, zucchini, and spinach, bringing a healthy twist to a classic favorite. The addition of garlic, green onions, and smoked paprika infuses each bite with a savory depth that is simply irresistible.


Ingredients:

- 1 lb lean extra ground turkey


- 1/2 cup shredded carrots


- 1 zucchini, grated


- 1 cup spinach, chopped


- 1 egg


- 2 cloves garlic, minced


- 2 green onions, finely chopped


- 1/4 cup panko


- 2 tbsp tomato paste


- 1 tsp smoked paprika


- Salt and pepper to taste


- 1 red bell pepper, seeded and sliced for roasted rings


Instructions:

1. Begin by mixing all the ingredients, except the red bell pepper, in a large bowl. Remember, the key is not to overwork the mixture—just enough to ensure it's well combined.


2. Shape the mixture into 4-6 round patties, depending on your preferred size.


3. Preheat your grill or stovetop to medium-high heat. Cook the patties thoroughly, ensuring they reach an internal temperature of 165°F. This ensures the burgers are perfectly cooked while retaining their juicy goodness.


4. For the roasted red pepper rings, lightly spritz the slices with olive oil and bake them in an oven preheated to 425°F for about 20 minutes. This simple addition adds a delightful sweetness and a hint of charred flavor to your burgers.


As we gathered around the table, the turkey burgers were always the star of the show. I remember my grandmother's kitchen, where she would let me shape the patties, my small hands mimicking her practiced movements. The joy of contributing to our family meal was a memory I cherish deeply. These turkey burgers not only offer a taste of nostalgia but also serve as a reminder that the simplest of dishes can create the most profound connections.


Difficulty: 3/10
Classification: Main Dish

This turkey burger recipe is perfect for those seeking a nutritious yet satisfying meal. Its simplicity ensures that even novice cooks can prepare it with ease, while the robust flavors promise to impress family and friends alike. So fire up the grill, gather your loved ones, and create your own cherished memories with these delicious turkey burgers.

Read more about Appetizers

Read more about Main Dishes

Read more about Desserts

Paneer jalfrezi | Made by Meaghan Moineau

Paneer jalfrezi | Made by Meaghan Moineau

Title: A Taste of Home: Reliving Memories with Paneer Jalfrezi
Description: Discover the vibrant flavors of Paneer Jalfrezi, a delightful Indian dish that effortlessly combines fresh ingredients with aromatic spices. Rated 4/10 in difficulty, this main dish is easy enough for a weeknight meal yet impressive enough for a festive gathering. Join me as I take a flavorful journey back to cherished family memories and share a beloved recipe that continues to warm our hearts and homes.

---


There's something incredibly comforting about the aroma of Indian spices sizzling in oil. It transports me back to my childhood, where the kitchen was the heart of our home, filled with laughter, stories, and the mouthwatering scent of my mother's cooking. Paneer Jalfrezi was a staple in our household, a dish that brought everyone together, whether it was a special occasion or just a regular Tuesday night.


Ingredients:

- Paneer


- 2 tbsp oil


- 1 tsp cumin seeds


- 2 tomatoes


- 1 onion


- 1 red bell pepper


- 1 green bell pepper


- 1/2 tsp turmeric powder


- 1/2 tsp chili powder


- 2 green chilies


- 2 kashmiri red dried chilies


- 1 inch ginger, finely sliced


- 1 tsp garam masala


- 1 tsp sugar


- 1 tbsp vinegar


- Fresh coriander, for garnish


- Salt, to taste


Instructions:
1. Prepare the Base: Roughly chop half an onion and two tomatoes. Heat 1 tablespoon of oil in a non-stick pan. Add the onions and fry until they turn lightly brown. Add the tomatoes and cook for 2-3 minutes until softened. Remove from heat, let cool, and blend to a smooth puree.
2. Spice It Up: In the same pan, heat another tablespoon of oil over medium heat. Add cumin seeds and let them sputter to release their aroma. Add the kashmiri red chilies and finely sliced ginger, frying for 30-45 seconds until fragrant.
3. Build the Flavors: Sprinkle in turmeric powder, followed by the remaining chopped onions, bell peppers, chili powder, salt, and two-thirds of the green chilies. Fry for 3-4 minutes, allowing the vegetables to soften and the spices to intermingle.
4. Add the Star Ingredient: Gently add the paneer cubes and cook on low heat for 5 minutes, allowing the paneer to absorb the flavors.
5. Finish with a Flourish: Stir in the tomato puree, garam masala, and sugar, simmering for 2 minutes until the sauce thickens slightly. Add the tomatoes cut into strips and toss everything together. Finally, stir in the vinegar to balance the flavors.
6. Garnish and Serve: Garnish with the remaining green chilies and a generous handful of fresh coriander. Serve hot with naan or rice, and enjoy a meal that’s as heartwarming as it is delicious.
A Family Memory:

Every Sunday, our family would gather at my grandparents' house for a big meal. Paneer Jalfrezi was always on the menu, a dish my grandmother prepared with so much love. I remember sitting on the kitchen floor, watching her expertly slice vegetables while sharing stories from her own childhood. The vibrant colors of the bell peppers, the sizzle of spices hitting hot oil, and the comforting aroma of paneer cooking in rich tomato sauce are memories I cherish deeply. It was in those moments that I learned the true meaning of family and the power of a shared meal.


Difficulty Rating: 4/10
Classification: Main Dish

Paneer Jalfrezi is more than just a meal; it's a celebration of flavors and memories, a tradition I proudly continue with my own family. Whether you're reliving your own nostalgic culinary moments or creating new ones, this dish promises to fill your kitchen with warmth and joy.

Read more about Appetizers

Read more about Main Dishes

Read more about Desserts

Kk’s Fish Tacos | Made by Meaghan Moineau

Kk's Fish Tacos | Made by Meaghan Moineau

Title: "Kk's Delightful Fish Tacos: A Taste of Family Memories"
Description: Dive into the rich flavors of Kk's Fish Tacos, a dish that brings together the zest of fresh ingredients and cherished family memories. This simple yet delectable recipe promises to transform your kitchen into a haven of culinary delight. Perfect for a family gathering or a casual dinner, this main dish combines fresh tilapia, crispy tortillas, and vibrant toppings to create a meal that's both satisfying and heartwarming.

---


Kk's Fish Tacos Recipe: A Culinary Journey Through Time

If there's one dish that encapsulates the essence of family gatherings and summer evenings, it's Kk's Fish Tacos. With every bite, you're not just savoring the delightful combination of crunchy tilapia and fresh toppings, but also reliving moments of laughter and warmth shared with loved ones.


Ingredients You'll Need:

- Fresh tilapia


- Flour tortillas


- Cilantro


- Limes


- Iceberg lettuce


- Diced tomatoes


- Diced onion


- Italian bread crumbs


- Creole seasoning


- Lard


Instructions:
1. Prepare the Fish: In a pie pan or deep dish, add your Italian bread crumbs. Heat about 1 cup of oil in a large pan until sizzling. If your tilapia is frozen, thaw it in lukewarm water and then drain well.
2. Fry the Fish: Once the oil is ready, coat both sides of each fillet thoroughly with bread crumbs. Place the fillets in the hot oil, cooking each side until golden brown, approximately 2-3 minutes per side. After frying, place the fillets on paper towels to drain excess oil, and lightly season with salt or Creole seasoning.
3. Prepare the Toppings: While the fish is cooking, chop up your iceberg lettuce, tomatoes, onion, and cilantro. Ensure your toppings are fresh and ready for the taco-building process.
4. Warm the Tortillas: Microwave your flour tortillas on high for about 30 seconds, covering them completely with a paper towel or clean dishtowel to keep them soft.
5. Build Your Tacos: Create a taco-building buffet. Start with the fish, add a little queso, layer on your veggies, sprinkle a pinch of cilantro, and finish with salsa and/or guacamole. Use lime wedges to give your taco an extra citrusy kick!
A Nostalgic Family Memory:

Every summer, my family would gather at my grandparents' beach house. The salty air mixed with the aroma of freshly cooked fish was a signature scent of our vacations. One particular evening, as the golden sun dipped below the horizon, my grandmother, lovingly known as Kk, introduced us to her special fish tacos. We gathered around the kitchen island, eagerly building our tacos while sharing stories of the day's adventures. The laughter, the clinking of glasses, and the taste of Kk's tacos created a tapestry of memories that I cherish to this day. These tacos weren't just a meal; they were an expression of love and togetherness that brought our family closer.


Recipe Difficulty: 4/10
Classification: Main Dish

Kk's Fish Tacos are more than just a delightful meal; they're a bridge to moments filled with joy and togetherness. Whether you're reminiscing about family gatherings or creating new memories, these tacos are sure to bring a smile to your face and warmth to your heart. Enjoy!

Read more about Appetizers

Read more about Main Dishes

Read more about Desserts

Cilantro Lime Fish Tacos | Made by Meaghan Moineau

Cilantro Lime Fish Tacos | Made by Meaghan Moineau

A Family Feast: Cilantro Lime Fish Tacos That Bring Us Together


Discover the Zesty Delight of Cilantro Lime Fish Tacos


In the heart of our family gatherings, there's one dish that embodies both the zest of life and the warmth of togetherness — Cilantro Lime Fish Tacos. This dish is more than just a meal; it's a nostalgic journey to sunlit kitchens and laughter-filled tables, where the aroma of fresh cilantro and tangy lime dances in the air.


Difficulty: 3/10
Classification: Main Dish

The Ingredients of Joy


- 2 tablespoons olive oil


- 4 fresh tilapia fillets


- 1/4 cup flavor-concentrated seafood broth


- Juice of 2 limes


- 1/2 cup fresh cilantro leaves, chopped


- 8 fresh corn tortillas


- 1 cup shredded lettuce


- 1/2 cup red diced onions


- 1 cup chunky salsa


- 1/2 cup sour cream


Cooking Instructions


1. Heat and Sizzle: Begin by heating the olive oil in a 12-inch skillet over medium-high heat. The sizzle of oil is a prelude to the enticing flavors that are about to unfold.
2. Cook the Fish: Gently lay the fresh tilapia fillets into the skillet. Cook them for about 8 minutes, turning each fillet once halfway through, until they flake easily with a fork. The fish should be tender and infused with the aromatic oil.
3. Infuse with Flavor: Add the concentrated seafood broth, lime juice, and chopped cilantro to the skillet. Break the fish into large, succulent pieces with a spoon, ensuring they are well-coated with the zesty broth mixture.
4. Assemble the Tacos: Divide the flavorful fish mixture evenly among the corn tortillas. Top each taco with shredded lettuce, diced red onions, a dollop of sour cream, and a generous spoonful of chunky salsa.
5. Fold and Savor: Carefully fold the tortillas around the vibrant filling, creating a handheld feast ready to be devoured.

A Nostalgic Tale: The Heart of Our Family


As a child, I remember the weekends when our family kitchen transformed into a vibrant hub of activity. My grandmother, the matriarch of our culinary adventures, would orchestrate these gatherings with a sparkle in her eye and a spring in her step. Her Cilantro Lime Fish Tacos were the star of these occasions, a recipe passed down through generations, each iteration carrying a piece of our family’s heart.


We would gather around the kitchen island, each of us assigned a task — chopping cilantro, squeezing limes, or gently stirring the fish in the skillet. It was a symphony of flavors and laughter, where stories of the past mingled with dreams of the future. As we savored each bite of the tangy, fresh tacos, the world outside seemed to pause, leaving just us and the flavors that bound us together.


These tacos aren't just food; they are a canvas of memories, painted with the vibrant hues of family love and culinary tradition. Every bite takes me back to those cherished moments, reminding me of the joy that comes from sharing a meal with those you love.


Conclusion


Cilantro Lime Fish Tacos are more than just a main dish; they are an experience, a journey, a celebration of flavors that brings families closer. With a sprinkle of nostalgia and a zest of lime, they transform any meal into a cherished memory. Gather your loved ones, recreate this simple yet flavorful recipe, and let the magic of these tacos fill your hearts and homes.

Read more about Appetizers

Read more about Main Dishes

Read more about Desserts

Easy Baked Parmesan Chicken | Made by Meaghan Moineau

Easy Baked Parmesan Chicken | Made by Meaghan Moineau

Title: A Taste of Home: Easy Baked Parmesan Chicken
Description: Discover the comforting flavors of Easy Baked Parmesan Chicken, a dish that brings warmth to your dining table and heart. With its simple preparation and rich taste, this main dish is perfect for busy weeknights or a cozy family dinner. Let the aroma of Italian spices and melted cheese fill your home as you create a meal that's sure to become a family favorite.

---


When it comes to creating meals that evoke warm memories and bring families together, few dishes do it as beautifully as the Easy Baked Parmesan Chicken. This dish is a savory symphony of flavors, combining tender chicken, crispy bread crumbs, and a rich medley of cheeses, all embraced by a hearty pasta sauce. Not only is it a delight to the palate, but it also holds a special place in my heart, reminding me of cherished family gatherings from my childhood.


Ingredients:

- 4 skinless, boneless chicken breast halves


- 1 egg, beaten


- 1 cup Italian bread crumbs


- 1 jar pasta sauce


- 1 cup shredded mozzarella cheese


- 1/2 cup grated Parmesan cheese


Instructions:

1. Preheat your oven to 400 degrees Fahrenheit.


2. Dip each chicken breast half into the beaten egg, ensuring it's fully coated.


3. Dredge the egg-coated chicken in the Italian bread crumbs, pressing gently to adhere.


4. Arrange the breaded chicken breasts in a 13 x 9-inch baking dish.


5. Bake uncovered in the preheated oven for 20 minutes.


6. Remove the dish from the oven and pour the pasta sauce over the chicken.


7. Sprinkle the mozzarella and Parmesan cheeses generously over the sauce-covered chicken.


8. Return the dish to the oven and bake for an additional 10 minutes, or until the chicken reaches an internal temperature of 170 degrees and is no longer pink.


9. Serve immediately, either on its own or over a bed of pasta for a complete meal.


Difficulty: 3/10
Classification: Main Dish
A Nostalgic Family Memory:

As I prepare this dish, I am transported back to my grandmother's cozy kitchen, where the aroma of her famous Baked Parmesan Chicken filled the air. Every Sunday, our family gathered around her large, wooden dining table, eagerly awaiting the meal that was always the highlight of the week. I remember watching in awe as she deftly coated each piece of chicken, her hands moving rhythmically as she hummed a familiar tune.


This dish was more than just a meal; it was a tradition. Each bite was a reminder of the laughter and love that filled the room, the stories shared, and the bonds strengthened. Even now, as an adult, I find myself recreating this recipe for my own family, hoping to pass down not just the taste, but the sentiment of those cherished Sunday afternoons.


Cooking the Easy Baked Parmesan Chicken is more than just about following a recipe; it's about reliving those memories and creating new ones. Whether you're serving it to friends or family, this dish is sure to warm their hearts and become a beloved tradition in your own home.

Read more about Appetizers

Read more about Main Dishes

Read more about Desserts

Chicken En Papillote With Basil and Cherry Tomatoes | Made by Meaghan Moineau

Chicken En Papillote With Basil and Cherry Tomatoes | Made by Meaghan Moineau

A Taste of Memories: Chicken En Papillote With Basil and Cherry Tomatoes


Description

Discover the culinary magic of Chicken En Papillote With Basil and Cherry Tomatoes, a dish that not only delights the palate but also stirs the heart with familial nostalgia. This elegantly simple main dish, infused with the fragrant aroma of fresh basil and the sweet tang of cherry tomatoes, is perfect for a cozy family dinner or an intimate gathering with friends. Dive into the recipe, reminisce about cherished family moments, and create new memories around the table.

---


Ingredients

- 2 skinless, boneless chicken breasts

- Salt and pepper, to taste


- 2 tablespoons olive oil


- 1 onion, thinly sliced


- 1 garlic clove, minced


- 1/4 cup white wine


- 4 to 5 cherry tomatoes, halved


- 6 to 8 fresh basil leaves


- Fresh basil chiffonade, for garnish


Instructions

1. Preheat your oven to 400 degrees Fahrenheit (200 degrees Celsius).

2. Season the chicken breasts with salt and pepper and place each on its own parchment sheet.


3. Drizzle the chicken with olive oil, then top with sliced onion, minced garlic, cherry tomatoes, and fresh basil leaves.


4. Pour a splash of white wine over the chicken and vegetables.


5. Wrap the parchment tightly around the contents, folding the edges to create a secure package. Use kitchen twine to tie the package closed.


6. Place the parchment packages on a cookie sheet and bake in the preheated oven for 35 to 40 minutes, or until a meat thermometer reads 165 degrees Fahrenheit when inserted into the chicken.


7. Carefully unwrap the packages, taking in the aromatic steam, and serve hot, garnished with fresh basil chiffonade.


A Nostalgic Family Memory

I still remember the first time my grandmother made this delightful dish. It was a warm summer evening, and our entire family had gathered at her cozy country home for a weekend retreat. The kitchen was bustling with laughter and the clinking of dishes, while the air was filled with the inviting scent of fresh basil from her little garden out back.

As she prepared the Chicken En Papillote, Grandma shared stories of her childhood in Italy, where she first learned to cook with herbs and fresh ingredients. I sat at the kitchen table, watching her nimble hands wrap the parchment around the chicken, creating little parcels of love and flavor.


When she finally opened the packages, the room was filled with a fragrant cloud that made everyone’s mouth water. The dish was a hit, and to this day, whenever I make Chicken En Papillote, I am transported back to that summer evening, surrounded by family and the warmth of Grandma's stories.


Difficulty Rating: 4/10

This recipe is surprisingly easy to prepare, yet it impresses with its presentation and depth of flavor. It's perfect for cooks of all skill levels who want to create a memorable meal with minimal fuss.

Classification: Main Dish


Experience the joy of cooking and the warmth of family with this delightful Chicken En Papillote With Basil and Cherry Tomatoes. Whether you're reminiscing about past gatherings or creating new traditions, this dish is sure to become a beloved staple in your culinary repertoire.

Read more about Appetizers

Read more about Main Dishes

Read more about Desserts

Minestrone Soup | Made by Meaghan Moineau

Minestrone Soup | Made by Meaghan Moineau

Title: "Hearty Minestrone Soup: A Family Classic to Warm Your Soul"
Description: Discover the comforting embrace of our Minestrone Soup recipe—a heartwarming blend of wholesome ingredients and cherished family memories. With its rich flavors and ease of preparation, this classic dish is perfect for any occasion. Join us as we take a delicious journey down memory lane, sharing the joy of cooking and savoring this timeless soup.

---


There’s something profoundly comforting about a simmering pot of soup on the stove, especially when it’s a recipe passed down through generations. Minestrone Soup, with its robust flavors and nourishing ingredients, has always been a staple in my family. It’s more than just a meal; it’s a delightful reminder of the times spent in my grandmother’s kitchen, surrounded by the laughter of loved ones and the aroma of fresh ingredients mingling together.


Ingredients:

- Smoked bacon, cut into strips


- 1 can of kidney beans


- 1 can of tomatoes


- 2 carrots, diced


- 2 celery stalks, chopped


- 1 tablespoon fresh thyme leaves


- 2 cloves garlic, minced


- 0.5 oz. macaroni


- 2 tablespoons olive oil


- 1 onion, finely chopped


- Parmesan cheese, to serve


- Black salt and pepper, to taste


- 1 cup shredded savoy cabbage


- 2 tablespoons tomato purée


- 2 fresh tomatoes, cut into eighths


- 4 cups vegetable stock


Instructions:
1. Begin with a Sizzle: Heat the olive oil in a very large pan with a close-fitting lid. Add the celery, bacon, onion, carrot, and garlic. Fry for about 5 to 7 minutes until the vegetables soften. Ensure the heat is moderate to avoid browning.
2. Infuse with Flavor: Stir in the tomato purée and thyme leaves. Allow them to cook for about 30 seconds until aromatic.
3. Build the Base: Pour in the vegetable stock, canned tomatoes, fresh tomatoes, and season with a little salt and pepper. Stir everything thoroughly, set to a gentle simmer, cover, and cook for about 25 minutes until the vegetables are al dente.
4. Perfect the Pasta: Add the macaroni and cook according to the package instructions, usually around 7 minutes.
5. Finish with Finesse: Incorporate the cabbage and kidney beans, cooking until the cabbage wilts, approximately 5 minutes. Taste, adjust seasoning with salt and pepper as needed.
6. Serve with a Sprinkle: Ladle the soup into bowls, topping each with a sprinkle of Parmesan cheese.
A Taste of Nostalgia:

As a child, Sunday afternoons at my grandmother's house were a cherished ritual. Her Minestrone Soup was the star of the table, a steaming pot filled with love and warmth. My siblings and I would crowd around the kitchen, eager to help chop vegetables or stir the pot. The aroma of garlic and thyme would fill the air, mingling with the sound of family chatter and laughter. Those moments taught me that food is more than sustenance; it’s a bridge to the past, a way to connect with our heritage and each other.


Difficulty: 4/10
Classification: Main Dish

This Minestrone Soup is an invitation to create new memories while honoring the old, a dish that brings both flavor and family together. Whether you're a seasoned cook or a kitchen novice, this recipe is a delightful endeavor, promising rich rewards for your taste buds and your heart.

Read more about Appetizers

Read more about Main Dishes

Read more about Desserts

Chinese Style Chicken and Noodle Stir Fry | Made by Meaghan Moineau

Chinese Style Chicken and Noodle Stir Fry | Made by Meaghan Moineau

Title: Savory Memories: A Journey to the Heart of Chinese Style Chicken and Noodle Stir Fry


Description:

Dive into the flavors of a cherished family tradition with our Chinese Style Chicken and Noodle Stir Fry. Discover the perfect balance of savory and sweet with this mouthwatering main dish, and relive the nostalgia of family gatherings filled with laughter and delightful aromas. Rated 6/10 in difficulty, this recipe is both a culinary adventure and a heartwarming memory waiting to be recreated in your kitchen.

---


A Taste of Nostalgia: Chinese Style Chicken and Noodle Stir Fry


In every family, there are dishes that transcend the act of eating and enter the realm of cherished memories. For me, Chinese Style Chicken and Noodle Stir Fry is one such dish. Its vibrant colors, enticing aromas, and harmonious flavors remind me of the many Sunday afternoons spent in my grandmother's bustling kitchen. This recipe was a staple at our family gatherings, a dish that brought everyone together around the table, sharing stories and laughter.


Ingredients:

- Chow mein noodles


- Chicken broth


- Sugar


- Oyster sauce


- Soy sauce


- Water


- Vegetable oil


- Garlic, minced


- Ginger, minced


- Skinless boneless chicken thighs, sliced


- Onion, sliced


- Red bell pepper, julienned


- Carrots, julienned


- Sugar snap peas


Instructions:
1. Prepare the Noodles: Begin by soaking the chow mein noodles in hot water until softened, about 5 minutes. Drain and set them aside. This simple step is the foundation of our flavorful stir fry.
2. Create the Sauce: In a small bowl, combine chicken broth, sugar, oyster sauce, soy sauce, and water. Set this aside as it will tie all the flavors together beautifully.
3. Sauté Aromatics: Heat vegetable oil in a wok over medium-high heat. When the oil is hot, add minced garlic and ginger, cooking until they release their fragrance, about 30 seconds. This is where the magic begins, as these aromatics form the base of our dish.
4. Cook the Chicken: Add sliced chicken thighs to the wok, cooking until they are done. The chicken absorbs the flavors of garlic and ginger, creating a savory depth that will resonate through the dish.
5. Add Vegetables: Introduce the onion, red bell pepper, carrots, and sugar snap peas to the wok. Cook until the vegetables are tender-crisp, about 4-5 minutes. Their vibrant colors and fresh crunch are what make this stir fry so visually appealing and delicious.
6. Combine and Serve: Pour in the chicken broth mixture and stir in the drained noodles. Cook until everything is heated through, about 2 minutes. Toss everything together to ensure the noodles are well coated with the sauce. Serve hot and enjoy the blend of textures and flavors that dance in every bite.
A Family Tradition:

Every time I cook this dish, I'm transported back to my childhood, watching my grandmother expertly wield her wok with a grace that seemed almost magical. She would often share stories about her own childhood, cooking alongside her mother, and it felt like a culinary baton was being passed down through generations. This dish was more than just a meal; it was a way of preserving family history, a delicious tapestry woven with love, culture, and tradition.


Difficulty Rating: 6/10
Classification: Main Dish

Crafting this Chinese Style Chicken and Noodle Stir Fry is more than just following a recipe; it’s about embracing a tradition and creating memories. Whether you're sharing it with family or introducing it to friends, this dish promises a delightful experience that bridges past and present, one flavorful bite at a time.

Read more about Appetizers

Read more about Main Dishes

Read more about Desserts

Beef Pot Pies with Irish Cheddar Crust | Made by Meaghan Moineau

Beef Pot Pies with Irish Cheddar Crust | Made by Meaghan Moineau

Title: A Heartwarming Feast: Beef Pot Pies with Irish Cheddar Crust
Description: Dive into a culinary journey that marries rich, savory beef with the distinctive sharpness of Irish cheddar. Our Beef Pot Pies with Irish Cheddar Crust promise to deliver a comforting meal that not only delights your taste buds but also warms your heart. Discover how this dish, with its flaky, flavorful crust and tender, aromatic filling, has become a cherished family tradition, perfect for any gathering.

---


There’s something undeniably comforting about the aroma of beef pot pies wafting through the house on a chilly evening. For me, the scent is more than just a promise of a delicious meal; it’s a portal to cherished family gatherings, where laughter mingled with the savory aromas, creating memories that have lingered long after the meal was over.


Growing up, Sunday dinners were a sacred ritual in our home. As the seasons changed and the days grew shorter, my grandmother would prepare her signature Beef Pot Pies with Irish Cheddar Crust. The process was a labor of love, and I remember watching in awe as she expertly transformed simple ingredients into a culinary masterpiece.


The magic began with the crust—a buttery, flaky creation that owed its unique flavor to the sharpness of Irish cheddar. As a child, I would sneak small pinches of shredded cheddar from the counter, savoring the sharp, tangy taste that would soon become a golden crust enveloping our pot pies.


The filling was a rich tapestry of flavors. Tender chunks of beef, seasoned to perfection, married with the sweetness of sautéed onions and carrots, all mingling with the fresh earthiness of thyme and marjoram. The addition of Dijon mustard and fresh parsley right before filling the pies added a zing that elevated the dish beyond the ordinary.


As my grandmother and I worked side by side, she’d often share stories of her childhood in Ireland, where the cheese came from. She’d tell me about the rolling green hills and the small village markets filled with fresh produce and local cheeses. Her tales made the meal not just a feast for the body, but a feast for the imagination as well.


When the pot pies finally emerged from the oven, their golden crusts glistening and fragrant, it was as if we had captured a piece of those Irish hills right there in our kitchen. Gathering around the table, our family would dive into the steaming pies, the tender beef and aromatic vegetables enveloped in that perfect crust, savoring each bite as if it were the first.


These pot pies were more than just food; they were a symbol of warmth, love, and family. Even now, each time I prepare them, I am transported back to those cozy evenings, feeling the warmth of my grandmother’s kitchen and the love she infused into every dish.


Difficulty Level: 7/10
Classification: Main Dish

Whether you’re looking to create new memories or relive old ones, these Beef Pot Pies with Irish Cheddar Crust are sure to become a beloved staple in your culinary repertoire. Try this recipe, and let it become a part of your family’s story, just as it has been a cherished part of mine.

Read more about Appetizers

Read more about Main Dishes

Read more about Desserts

Coconut-Almond Crusted Tilapia | Made by Meaghan Moineau

Coconut-Almond Crusted Tilapia | Made by Meaghan Moineau

Title: Dive Into Tropical Flavors with Coconut-Almond Crusted Tilapia
Description: Discover the delightful fusion of tropical flavors in our Coconut-Almond Crusted Tilapia recipe. This dish, swimming in the freshness of lemon and the creaminess of coconut milk, is a perfect main course for any dinner table. With a nostalgia-inducing story, easy-to-follow instructions, and a difficulty rating of just 4 out of 10, this recipe ensures a deliciously memorable meal.

---


A Tropical Escape: Coconut-Almond Crusted Tilapia


When I was a child, summer vacations were a time of wonder and exploration. My family would pack up and head to a quaint beach house nestled on the coast. The sound of the waves crashing against the shore was a constant lullaby, and the scent of the ocean lingered in the air, mingling with the enticing aroma of freshly cooked meals.


One evening, as the sun dipped below the horizon, casting a golden glow over the sea, my mother decided to prepare her special Coconut-Almond Crusted Tilapia. This dish became the highlight of our meal, a beloved tradition that captured the essence of our beachside adventures.


Ingredients


- 4 white tilapia fillets


- 1 lemon


- 1/4 cup coconut milk


- 1/2 cup almond flour


- 1/4 cup unsweetened shredded coconut


- Salt and black pepper to taste


- 1/2 teaspoon ground ginger


- 1/2 teaspoon dried mint


- Oil for frying


Instructions


1. Prepare the Fish: Pat and dry the tilapia fillets thoroughly. Sprinkle both sides with a pinch or two of salt and black pepper. Squeeze the juice from half of the lemon over the fish and drizzle with coconut milk. Turn the fillets to ensure they are well-coated. Allow them to marinate at room temperature for 15 minutes.
2. Make the Breading: In a shallow bowl, combine the almond flour, shredded coconut, a pinch of salt and pepper, ground ginger, and dried mint. Mix well to create a flavorful breading mixture.
3. Cook the Tilapia: Cover the bottom of a large skillet with oil and bring to medium heat. Carefully lay the marinated fillets in the skillet. Cook each side until golden brown and the fish flakes easily with a fork, about 3 to 5 minutes per side for thin fillets, longer for thicker ones.
4. Drain and Cool: Transfer the cooked fillets to a stack of paper towels to drain and cool slightly.
5. Serve: Pair the Coconut-Almond Crusted Tilapia with a side of Tropical Sweets & Reds Mash, and enjoy the symphony of flavors.

Memories on a Plate


As we sat around the table, the sea breeze gently rustling the curtains, the first bite of the crispy, nutty crust and tender fish transported us. The subtle hints of ginger and mint danced across our palates, reminiscent of the vibrant, lively days spent by the ocean. This dish not only satisfied our hunger but also wove the tapestry of our family’s summer stories, shared and cherished over every meal.


Difficulty: 4/10


Classification: Main Dish


This Coconut-Almond Crusted Tilapia, with its tropical allure and comforting nostalgia, has become a family favorite, a delicious reminder of sun-kissed days and shared laughter. Try it out, and perhaps it will become a treasured part of your culinary adventures too.

Read more about Appetizers

Read more about Main Dishes

Read more about Desserts

Balsamic Marinated Lamb Chops | Made by Meaghan Moineau

Balsamic Marinated Lamb Chops | Made by Meaghan Moineau

Title: Unleash the Flavors: Balsamic Marinated Lamb Chops for a Memorable Family Feast
Description: Discover the rich and savory world of Balsamic Marinated Lamb Chops—a dish that marries tender lamb with a bold marinade for an unforgettable dining experience. Perfect for a cozy family gathering, this recipe is easy to prepare yet delivers gourmet results. Rated as 5/10 in difficulty, this main dish is sure to capture the hearts and taste buds of your loved ones.

---


There's something magical about the aromatic sizzle of lamb chops on the grill, especially when they are infused with a balsamic vinegar marinade that's rich in flavor and steeped in nostalgia. Our Balsamic Marinated Lamb Chops recipe is a blend of savory sophistication and homely comfort—a perfect centerpiece for any family gathering.


Ingredients:

- Lamb loin chops


- Garlic


- Balsamic vinegar


- Dijon mustard


- Fresh oregano


- Red wine vinegar


- Olive oil


- Brown sugar


- Kosher salt


- Black pepper


Instructions:
1. Prepare the Marinade: In a mixing bowl, combine garlic, balsamic vinegar, Dijon mustard, fresh oregano, red wine vinegar, olive oil, and brown sugar. Mix well to create a harmonious blend of flavors.
2. Season the Lamb: Generously sprinkle kosher salt and black pepper over the lamb loin chops on both sides, setting the stage for a delightful taste experience.
3. Marinate the Lamb: Toss the seasoned lamb chops in the bowl with the prepared marinade, ensuring each chop is well-coated. Cover the bowl and refrigerate for at least 1 to 2 hours, turning occasionally to allow the flavors to penetrate the meat thoroughly.
4. Grill to Perfection: Preheat your BBQ to medium-high, utilizing indirect heat for even cooking. Grill the marinated lamb chops to a succulent medium-rare—approximately 7 minutes per side, depending on thickness. The result is a juicy and aromatic delight that promises to impress.
A Taste of Nostalgia:

This dish always takes me back to warm summer evenings spent in my grandparents' backyard. My grandfather, with his love for grilling, would carefully tend to the lamb chops, creating a feast that was both simple and grand. The balsamic marinade was his secret—an alchemy of flavors that transformed the meal into a cherished family tradition. As the sun set and the air filled with the aroma of grilling lamb, we would gather around the table, sharing stories and laughter, creating memories that last a lifetime.


Difficulty Rating: 5/10
Classification: Main Dish

Whether you're looking to recreate a cherished family memory or simply enjoy a delectable meal, these Balsamic Marinated Lamb Chops are sure to become a beloved staple in your home. Their rich flavors and tender texture make them a standout dish that's both easy to prepare and delightful to savor. So, fire up the grill and let the magic of this recipe bring your family together once more.

Read more about Appetizers

Read more about Main Dishes

Read more about Desserts

Classic French Onion Soup | Made by Meaghan Moineau

Classic French Onion Soup | Made by Meaghan Moineau

Title: "Savoring Tradition: Crafting the Perfect Classic French Onion Soup"
Description: Dive into the warmth and nostalgia of a timeless Classic French Onion Soup. This comforting dish, with its rich flavors and aromatic herbs, is not only a culinary masterpiece but also a vessel of cherished family memories. Join us as we explore the heartwarming story behind this delectable soup and provide a detailed, step-by-step guide to crafting it in your own kitchen.

---


The Enchantment of Classic French Onion Soup: A Family Tradition

There's something profoundly magical about the aroma of onions caramelizing slowly, mingling with the robust scent of simmering beef broth, and the unmistakable fragrance of fresh herbs. Each spoonful of Classic French Onion Soup is a journey back to simpler times when the warmth of the kitchen brought families together.


As I prepare this cherished dish today, I am reminded of the countless Sunday afternoons spent in my grandmother's cozy kitchen. The heart of her home was always filled with the comforting melody of simmering pots and the gentle hum of family chatter. French Onion Soup was her specialty, a recipe passed down through generations, each one adding their unique touch yet preserving its classic essence.


Creating Your Own Bowl of Nostalgia
Ingredients:

- 3 tablespoons salted butter


- 6 large yellow onions, thinly sliced


- 2 tablespoons flour


- 1/2 cup sherry or dry white wine


- 8 cups beef broth


- 1 teaspoon fresh thyme


- 1 tablespoon fresh parsley, chopped


- 1 bay leaf


- Salt and pepper to taste


- 1 French crusty baguette, sliced


- 1 1/2 cups shredded Gruyere cheese


Instructions:
1. Preparation: Preheat your oven to 400°F (200°C).
2. Caramelizing the Onions: In a large Dutch oven, melt the butter over medium heat. Add the sliced onions to the pot, sprinkling them with flour. Reduce the heat to medium-low and let them cook for about 45 minutes, stirring occasionally. If the onions begin to cook too quickly, reduce the heat further. Let them reach a tender, golden hue.
3. De-glazing the Pot: Once the onions are perfectly caramelized, de-glaze the pan with sherry, scraping up any delicious brown bits from the bottom.
4. Simmering the Soup: Pour in the beef broth and bring the mixture to a gentle boil over medium heat. Add the thyme, parsley, bay leaf, and season with salt and pepper to taste. Reduce the heat and let it simmer for 15 minutes.
5. Preparing the Bread: Lightly spray a cookie sheet with cooking spray. Butter the slices of the French baguette and bake them in the oven for 5-10 minutes until they're dry and crusty. Set them aside.
6. Final Touches: Remove the herb stalks and bay leaf from the soup. Ladle portions of the soup into four oven-safe ramekins. Top each with a slice of the crusty French baguette and a generous sprinkle of shredded Gruyere cheese.
7. Melting the Cheese: Place the ramekins on a cookie sheet and bake, uncovered, at 400°F (200°C) for 5-10 minutes, or until the cheese is bubbling. For an extra golden top, broil for one more minute.
8. Serve Warm: Carefully remove the ramekins from the oven and serve immediately.
A Culinary Journey
Classifying this dish as a Main Dish, its rich flavors and hearty ingredients make it a perfect standalone meal. With a difficulty rating of 6 out of 10, this recipe is ideal for those intermediate cooks looking to expand their culinary repertoire and impress guests with a touch of French elegance.

As you savor each spoonful, may you feel the warmth of family and tradition, much like I did in my grandmother's kitchen. This Classic French Onion Soup is more than a dish; it's a beautiful reminder of the power of food to connect us with loved ones and cherished memories. Enjoy the journey of making it just as much as the delightful taste that awaits.

Read more about Appetizers

Read more about Main Dishes

Read more about Desserts

Flank Steak with Herbed Salsa | Made by Meaghan Moineau

Flank Steak with Herbed Salsa | Made by Meaghan Moineau

Title: Flavors of Nostalgia: Flank Steak with Herbed Salsa
Description: Dive into the vibrant flavors of our Flank Steak with Herbed Salsa recipe—a simple yet flavorful main dish that will transport you back to cherished family gatherings. With a difficulty rating of 5 out of 10, this dish combines succulent steak with a zesty, herbed salsa, offering a perfect blend of spices and memories.

---


A Taste of Tradition: Flank Steak with Herbed Salsa


In the heart of many families, certain dishes become synonymous with special occasions, weaving themselves into the fabric of shared experiences and stories. For me, Flank Steak with Herbed Salsa is more than just a meal; it's a tapestry of summer barbecues, laughter-filled evenings, and the unmistakable aroma of grilled perfection that lingers in the air.


Ingredients:


- 1 bunch of cilantro, finely chopped


- 3 tablespoons extra virgin olive oil


- 1 1/2 pounds flank steak


- 1 garlic clove, minced


- 1 whole jalapeno, finely chopped


- Juice of 1 lemon


- Juice of 1 lime


- Salt and freshly ground pepper, to taste


- 3 white scallions, thinly sliced


- 2 large tomatoes, diced


Instructions:


1. Prepare the Grill: Preheat a grill pan or light a grill to get it nice and hot.
2. Make the Herbed Salsa: In a medium bowl, combine the tomatoes, scallions, cilantro, jalapeno, garlic, lemon juice, and lime juice. Season the salsa with salt and freshly ground pepper to taste. Let it sit, allowing the flavors to meld together beautifully.
3. Season the Steak: Generously season the flank steak on both sides with salt and pepper.
4. Grill the Steak: Brush a light coat of extra virgin olive oil on the grill pan. Place the pan over high heat. Once hot, add the flank steak. Cook until it’s beautifully charred on the outside and medium-rare on the inside, approximately 3 minutes per side.
5. Rest and Serve: Transfer the steak to a carving board and let it rest for 5 minutes. This rest period is crucial as it helps the juices redistribute, making each bite tender and juicy. Thinly slice the steak across the grain and serve with a generous helping of herbed salsa.

A Nostalgic Family Memory:


Growing up, weekends were a time for family gatherings. My parents would host impromptu barbecues, inviting neighbors and friends to join in the festivities. The star of these gatherings was always my dad's Flank Steak with Herbed Salsa. As the grill sizzled, I would watch him expertly flip the steak, while the air filled with the mingling scents of garlic, citrus, and charred meat.


One evening stands out vividly in my memory. It was the Fourth of July, and our backyard was aglow with fairy lights and the crackling of fireworks in the distance. As we all gathered around the table, my dad served the flank steak, its juices glistening under the patio lights. With each bite, the flavors danced on our tongues, a perfect symphony of spice and zest. It was a meal that brought us all together, a reminder of the simple joys of good food and great company.


Difficulty Rating: 5/10


This dish is classified as a Main Dish—perfect for those looking to impress with minimal effort. The recipe’s moderate difficulty ensures that even novice cooks can achieve a restaurant-quality meal right at home.

---


Embrace the nostalgia and let this Flank Steak with Herbed Salsa become a staple in your own family’s culinary traditions. Whether it’s a special occasion or a casual weeknight dinner, this dish promises to bring warmth and flavor to your table.

Read more about Appetizers

Read more about Main Dishes

Read more about Desserts

Mardi Gras Shrimp Étouffée | Made by Meaghan Moineau

Mardi Gras Shrimp Étouffée | Made by Meaghan Moineau

Title: Celebrate Mardi Gras with a Classic Shrimp Étouffée Recipe
Description: Dive into the vibrant flavors of New Orleans with our Mardi Gras Shrimp Étouffée recipe. This classic dish combines perfectly seasoned shrimp with a rich, savory sauce, served over fluffy rice. Whether you're celebrating Mardi Gras or simply craving some Southern comfort, this dish is sure to delight. Plus, discover a heartwarming family memory that makes this dish even more special.

---


Mardi Gras Shrimp Étouffée: A Flavorful Journey to New Orleans


Mardi Gras is a time of celebration, vibrant colors, and tantalizing flavors. It's that time of year when the streets of New Orleans come alive with parades, music, and culinary delights that captivate the senses. One dish that stands out among the festive foods is the classic Shrimp Étouffée. With its rich blend of spices and succulent shrimp, this dish is the perfect way to bring a taste of Mardi Gras into your home.


Ingredients:


- 4 tablespoons butter


- 4 tablespoons flour


- 2 green bell peppers, diced


- 3 celery stalks, diced


- 1 large yellow onion, diced


- 3 garlic cloves, minced


- 1 teaspoon dried thyme


- 2 tablespoons tomato paste


- 1 tablespoon Worcestershire sauce


- 2 tablespoons Creole seasoning


- 2 cups chicken broth


- 1 pound shrimp, peeled and deveined


- 1 tablespoon butter


- 3 scallions, sliced


- 1 diced fresh tomato


- Cooked rice for serving


Instructions:


1. Prepare the Roux: Heat a heavy pot over low heat. Add the butter and cook for about 10-12 minutes until it turns a light golden brown, stirring occasionally to prevent burning. Whisk in the flour until smooth, continuing to cook for about 8 minutes on low. The mixture should resemble slightly loose peanut butter.
2. Cook the Vegetables: Add in the diced bell peppers, celery, and onion. Stir to coat the veggies with the roux. Cook for another 10-15 minutes until softened.
3. Enhance the Flavor: Stir in the minced garlic and dried thyme, cooking for about a minute until fragrant. Add the tomato paste, Worcestershire sauce, Creole seasoning, and chicken broth. Simmer on low for 30-40 minutes, stirring occasionally, until the sauce is slightly thickened.
4. Add the Shrimp: Stir in the shrimp, turn off the heat, and cover with a lid. Allow the shrimp to cook for 5-8 minutes until they're just cooked through. Finish with an additional tablespoon of butter for added richness.
5. Serve and Garnish: Serve the Shrimp Étouffée over a bed of cooked rice. Garnish with sliced scallions and fresh diced tomato.

A Nostalgic Family Memory:


Growing up, Mardi Gras was more than just a festival; it was a cherished family tradition. Every year, my grandmother would gather the family in her cozy kitchen to prepare her famous Shrimp Étouffée. The air would be filled with laughter, stories, and the aroma of simmering spices. As a child, I remember being entrusted with the "important" job of stirring the roux, feeling a sense of pride as I watched the mixture transform.


Grandma would recount tales of her own childhood in New Orleans, weaving stories of parades and jazz into the fabric of our meal. To this day, whenever I make Shrimp Étouffée, I am transported back to those joyful gatherings, and I feel a connection to the generations before me who celebrated with this same beloved dish.


Difficulty Rating: 6/10


Classification: Main Dish


Bring the spirit of Mardi Gras into your home with this Shrimp Étouffée recipe. It's a dish that not only delights the taste buds but also warms the heart with its rich history and family ties. Enjoy and laissez les bons temps rouler! (Let the good times roll!)

Read more about Appetizers

Read more about Main Dishes

Read more about Desserts

Cornish Game Hen with Whisky and Cream Pan Sauce | Made by Meaghan Moineau

Cornish Game Hen with Whisky and Cream Pan Sauce | Made by Meaghan Moineau

Title: "A Taste of Tradition: Cornish Game Hen with Whisky and Cream Pan Sauce"
Description: Discover the delightful blend of flavors in this Cornish Game Hen with Whisky and Cream Pan Sauce. This main dish is a journey through time, evoking cherished family memories with every bite. With its rich, savory sauce and tender, juicy meat, this recipe is perfect for special occasions or a nostalgic Sunday dinner. Rated a 6 out of 10 for difficulty, it's an achievable culinary adventure for home chefs looking to impress.

---


A Taste of Tradition: Cornish Game Hen with Whisky and Cream Pan Sauce

When I think of comfort food, my mind often drifts back to Sunday dinners at my grandmother's house. The warm, inviting aroma of roasting game hens would greet us at the door, mingling with the laughter and chatter of family gathered around the table. Those afternoons were filled with stories from the past, shared over a meal that was as much about connection as it was about flavor.


One of my all-time favorites from those gatherings was the Cornish Game Hen with Whisky and Cream Pan Sauce. This dish encapsulates a blend of rustic charm and refined taste, making it a standout at any family feast. The tender, succulent meat combined with the rich, creamy sauce creates a harmony of flavors that transports me back to those cherished family moments.


Ingredients:

- 2 Cornish game hens


- 2 tablespoons butter, divided


- Olive oil


- Salt and pepper, to taste


- 1 tablespoon Herbs de Provence


- 1 tablespoon unsalted butter


- 2 shallots, finely chopped


- 2 tablespoons Worcestershire sauce


- 2 teaspoons Dijon mustard


- 1 cup heavy cream


- 1 tablespoon fresh lemon juice


- 2 tablespoons whisky


Instructions:
1. Preheat and Prepare: Preheat your oven to 450°F (232°C) and position the rack in the middle. Begin by placing a hen, breast side down, on a cutting board. Using kitchen shears or a sharp knife, remove the backbone by cutting along both sides. Flip the hen and flatten it by pressing down on the breastbone with your palm. Split the hen into two along the breastbone. Repeat with the remaining hen.
2. Season and Roast: Arrange the hen halves on a heavy baking dish. On each half, spread 1/2 teaspoon of butter, a sprinkle of Herbs de Provence, salt, and pepper, and a drop of olive oil. Place the hens in the preheated oven and roast for 30 to 45 minutes. During cooking, occasionally poke the hens to release any juices. Once done, remove from the oven, place the hens in a dish, cover with aluminum foil, and let them rest.
3. Prepare the Pan Sauce: In a saucepan over medium heat, melt 1 tablespoon of unsalted butter. Add the chopped shallots and sauté until translucent. Stir in the Worcestershire sauce and Dijon mustard. Pour in the heavy cream and whisky, stirring to combine. Allow the sauce to simmer and thicken slightly before adding fresh lemon juice for a touch of brightness.
4. Serve: Once the hens have rested, serve them with a generous drizzle of the whisky and cream pan sauce. Pair with your favorite sides for a complete meal.
Nostalgia in Every Bite:

This dish isn't just about the flavors; it's a time capsule of family gatherings, bringing back memories of love, laughter, and shared stories. It's a reminder of how food can connect generations, preserving traditions and creating new ones.


Whether you're cooking for a special occasion or simply want to bring a touch of nostalgia to your dinner table, this Cornish Game Hen with Whisky and Cream Pan Sauce is a delightful choice. Rated a 6 out of 10 for difficulty, it's an accessible recipe that promises to impress both family and friends. Enjoy the taste of tradition and create memories with every bite.

Read more about Appetizers

Read more about Main Dishes

Read more about Desserts

Roast Chicken with Apples and Rosemary | Made by Meaghan Moineau

Roast Chicken with Apples and Rosemary | Made by Meaghan Moineau

Title: Aromatic Roast Chicken with Apples and Rosemary: A Taste of Family Tradition
Description: Discover the heartwarming flavors of Roast Chicken with Apples and Rosemary, a dish that brings a touch of tradition and a burst of freshness to your table. This recipe features juicy chicken infused with the aromatic blend of apples, rosemary, and lemon, perfect for a comforting family meal.

---


There’s something about the aroma of roast chicken wafting through the house that instantly transports me back to Sunday dinners at my grandmother’s home. The kitchen was always abuzz with activity, filled with laughter and the rich, inviting scents of family recipes passed down through generations. One dish that particularly stands out is our Roast Chicken with Apples and Rosemary—a recipe that not only warms the stomach but the heart.


This recipe is more than just a meal; it's a family tradition that has graced our table for as long as I can remember. My grandmother always insisted on using the freshest ingredients, and her kitchen was often stocked with the bounty from her own garden. The combination of apples and rosemary was her signature twist, adding a fragrant, slightly sweet, and earthy note to the classic roast chicken.


Ingredients:

- Fresh apples


- Onions


- Garlic


- Fresh rosemary


- Lemons


- Raimondo Sicilian Lemon Balsamic Vinegar


- Seasoning (for rub)


- Roasting chickens


- Canned stock


Instructions:

1. Preheat your oven to 400 degrees Fahrenheit and position a rack in the lower third of the oven.


2. Rinse the chicken thoroughly, then dry it well with paper towels, both inside and out.


3. In a shallow roasting pan, arrange apples, rosemary, lemons, onions, and garlic in a single layer. Season with salt and pepper, toss well, and pour in the balsamic vinegar.


4. Season the chicken generously with the prepared rub. Place it breast-side-up on top of the fruits and vegetables. Stuff the cavity of the chicken with the remaining fruits and veggies.


5. Roast the chicken for 30 minutes until the breast is firm and just beginning to brown. Using tongs, turn the chicken breast-down and continue roasting for another 20 minutes until the skin is lightly browned and an instant-read thermometer registers 175-180°F.


6. Tilt the chicken to drain cavity juices into the pan. Remove the chicken and set it aside on a cutting board.


7. Remove the rack from the pan and spoon off any excess fat. Set the pan over high heat, add the stock, and cook while scraping up any browned bits.


8. Squeeze the last lemon over the sauce to release its juices. Carve the chicken and serve with the chunky jus.


Nostalgic Family Memory:

I remember the first time I was allowed to help with this dish. I was about ten, and my grandmother guided me through each step with patience. We plucked fresh rosemary from her garden, its heady aroma filling the air as we gathered the sprigs. My favorite part was always arranging the apples and onions in the pan—their sweetness mingling with the sharpness of garlic and the zest of lemon. As we worked, she shared stories of her own childhood, of family gatherings filled with love and laughter, of recipes carried over from the old country. Those afternoons spent cooking with her taught me more than just how to prepare a meal; they taught me the importance of family traditions and the joy of sharing them.


Difficulty: 6/10
Classification: Main Dish

This Roast Chicken with Apples and Rosemary is not just a main dish; it’s a culinary journey that celebrates family, tradition, and the simple joys of home-cooked meals. Whether you’re creating new memories or reminiscing about the past, this dish is sure to become a beloved staple in your family’s recipe collection.

Read more about Appetizers

Read more about Main Dishes

Read more about Desserts

Cheese and Leek Strata | Made by Meaghan Moineau

Cheese and Leek Strata | Made by Meaghan Moineau

Savory Nostalgia: The Comforting Layers of Cheese and Leek Strata


Description


Dive into the delectable layers of our Cheese and Leek Strata, a dish that combines the humble charm of sourdough bread with the rich flavors of cheddar and Swiss cheese, all brought together by the subtle sweetness of leeks and the vibrant color of red bell peppers. This delightful recipe is perfect for a cozy brunch or a satisfying family dinner. With a hint of porter adding an unexpected depth, this strata promises to tantalize your taste buds and bring a touch of nostalgia to your dining table.


Ingredients


- 6 large eggs


- 2 cups milk


- 1/2 cup porter beer


- 1 garlic clove, minced


- Salt and pepper to taste


- 8 cups cubed sourdough bread


- 1 leek, cleaned and sliced


- 1 red bell pepper, diced


- 1 cup shredded cheddar cheese


- 1 cup shredded Swiss cheese


Instructions


1. Prepare the Oven: Preheat your oven to 350 degrees F (175 degrees C).
2. Mix the Egg Mixture: In a large bowl, combine eggs, milk, porter beer, minced garlic, salt, and pepper. Beat well until the mixture is thoroughly blended.
3. Layer the Ingredients:

- Place half of the bread cubes at the bottom of a greased 2.5-quart round baking dish.


- Sprinkle half of the sliced leeks and diced red bell pepper over the bread cubes.


- Top with half of the Swiss cheese and half of the cheddar cheese.


- Repeat the layers with the remaining ingredients, finishing with a generous layer of cheddar cheese on top.


4. Add the Egg Mixture: Pour the egg mixture evenly over the layered ingredients in the baking dish.
5. Refrigerate: Cover the dish tightly with foil or plastic wrap. Weigh the top of the strata down with a slightly smaller baking dish to compress the layers. Refrigerate for at least 2 hours, or ideally, overnight to allow the flavors to meld.
6. Bake: Remove the cover and bake the strata, uncovered, for 40 minutes or until the center is set and the top is golden brown.
7. Serve: Let it cool for a few minutes before serving warm.

A Slice of Memory


Every bite of this Cheese and Leek Strata takes me back to Sunday brunch at my grandmother's house. The kitchen would be filled with the aroma of baking bread and melting cheese, a scent that promised warmth and comfort. As children, my siblings and I would eagerly gather around the table, watching as my grandmother sliced into the perfectly golden crust, revealing the gooey layers within. It wasn't just a meal; it was a tradition, a time for family stories and laughter, all centered around this delicious dish. Even now, as I recreate this recipe in my own kitchen, I am reminded of those cherished Sundays and the love that went into every strata my grandmother made.


Difficulty


Rating: 4/10
Classification: Main Dish

This Cheese and Leek Strata is a straightforward yet rewarding dish that requires minimal preparation and rewards with maximum flavor. Ideal for feeding a crowd with ease or indulging in a weeknight treat, it's a dish that invites both novice and seasoned cooks to enjoy the art of layering flavors.

Read more about Appetizers

Read more about Main Dishes

Read more about Desserts

2 Minute Chocolate Yum | Made by Meaghan Moineau

2 Minute Chocolate Yum | Made by Meaghan Moineau

Title: "2-Minute Chocolate Yum: A Quick Dessert with a Nostalgic Twist"
Description: Discover the magic of crafting a delightful dessert in just two minutes with this easy-to-follow recipe. Perfect for satisfying your chocolate cravings, this 2-Minute Chocolate Yum is a simple yet decadent treat that will whisk you away to sweet family memories. With minimal ingredients and a microwave, indulge in a dessert that feels both nostalgic and indulgent, all while being incredibly quick and easy to prepare.

---


2-Minute Chocolate Yum: A Quick Dessert with a Nostalgic Twist

If there's one thing that can instantly warm the heart and soul, it's the aroma of chocolate wafting through the air. Growing up, chocolate desserts were a staple in our household, especially during those impromptu gatherings when friends and family would drop by unannounced. My mother had a knack for whipping up something quick and delightful, and the 2-Minute Chocolate Yum was her secret weapon.


Ingredients:

- 2 tablespoons cocoa powder


- 1 large egg


- 2 tablespoons flour


- 2 tablespoons milk


- 1 tablespoon oil


- A pinch of salt


- 2 tablespoons sugar


- ½ teaspoon vanilla extract


Instructions:

1. In a small mixing bowl, combine all the ingredients. Whip together until the mixture is smooth.


2. Pour the batter into two smaller 6-8 oz. ramekins, filling them a little over halfway.


3. Cook each ramekin one at a time in the microwave for 2 minutes, or until the cake is puffed up.


4. Serve immediately. Top with a scoop of ice cream or a dollop of whipped topping, or simply dust with a powdered sugar and cocoa powder mixture.


For a delightful twist, transform these into mini black forest cakes. Simply pour half of the batter into the ramekin, add a small spoonful of cherry pie filling, and top with the remaining batter before microwaving.


A Nostalgic Family Memory:

I remember one rainy afternoon when the house was filled with the chatter of cousins and the sound of raindrops tapping against the windows. My mother, ever the gracious host, decided to treat us all to her famous 2-Minute Chocolate Yum. As the aroma of chocolate filled the room, it transported me back to simpler times, where joy was found in the little things—like sharing a warm, gooey dessert with loved ones.


We gathered around the dining table, each of us with our own ramekin, topped with a generous scoop of vanilla ice cream. Laughter and stories flowed as freely as the rain outside, each bite of the warm, chocolatey goodness adding to the magic of the moment. It was in these moments that I realized the power of food to create cherished memories and bring people together.


Difficulty Rating: 2/10
Classification: Dessert

This 2-Minute Chocolate Yum is not only a quick and easy dessert to prepare, but it's also a delightful way to create lasting memories with family and friends. Whether you're a seasoned baker or a beginner in the kitchen, this recipe is sure to become a beloved go-to for any occasion. So go ahead, indulge in a little nostalgia, and share the love with this scrumptious chocolate treat.

Read more about Appetizers

Read more about Main Dishes

Read more about Desserts

Tuna Mexi Melts | Made by Meaghan Moineau

Tuna Mexi Melts | Made by Meaghan Moineau

Title: "Tuna Mexi Melts: A Flavorful Twist on a Family Classic"
Description: Discover the irresistible fusion of flavors in Tuna Mexi Melts, a delightful dish that combines zesty spices with creamy cheeses for a satisfying meal. This easy-to-make recipe is perfect for a cozy family gathering or a casual dinner party. Read on to learn how to prepare this mouthwatering dish and enjoy a nostalgic story that adds a personal touch to this family favorite.

---


Tuna Mexi Melts: A Flavorful Twist on a Family Classic


Introduction


There's something magical about the combination of savory tuna, spicy jalapeños, and melted cheese that transports me back to my childhood. Tuna Mexi Melts have always been a staple in my family, a dish that not only tantalizes the taste buds but also warms the heart. This recipe, bursting with Mexican-inspired flavors, is perfect for those seeking a comforting meal with a kick. Let's dive into the world of Tuna Mexi Melts and explore what makes them a cherished addition to any recipe collection.


Ingredients


To create this culinary delight, gather the following ingredients:

- Butter


- Chile powder


- Fresh cilantro


- Cumin


- French bread


- Garlic powder


- Green onions


- Jalapeño


- Lime juice


- Paprika


- Pepper jack cheese


- Picante sauce (your choice)


- Roma tomatoes


- Salt


- Shredded cheddar cheese


- Sour cream


- Tuna


Instructions


1. Prepare the Picante Sauce:

- Begin by adding all the ingredients for the picante sauce into your food processor.


- Blend until smooth, then season with salt to taste.


2. Prepare the Bread:

- Slice the French loaf into 1-inch slices.


- Brush each slice with melted butter.


- Sprinkle cumin, chile powder, and garlic powder over the buttered slices.


3. Mix the Melt Ingredients:

- In a bowl, combine all the ingredients for the melt, except for the pepper jack cheese.


- Mix thoroughly until everything is well incorporated.


4. Assemble the Melts:

- Spoon a generous amount of the tuna mixture onto each bread slice.


- Top each with a slice of pepper jack cheese.


5. Bake:

- Preheat the oven to 350°F (175°C).


- Place the assembled sandwiches on a baking sheet and bake for 10 to 15 minutes, or until the cheese is melted and bubbling.


A Nostalgic Family Memory


Every summer, my family would gather at my grandparents' house for a weekend of laughter, stories, and of course, delicious food. My grandmother, the heart of our family, had a knack for turning simple ingredients into unforgettable meals. Tuna Mexi Melts were her specialty, a dish she made with love and tradition. As kids, we would gather around the kitchen, eagerly watching her work her culinary magic. The aroma of spices and melting cheese filled the air, drawing us in like a comforting embrace. Each bite was a burst of flavor, a reminder of the warmth and joy that family gatherings bring. To this day, Tuna Mexi Melts remain a beloved recipe, a testament to the enduring power of food to connect us with cherished memories.


Difficulty & Classification


Difficulty: 4/10
Classification: Main Dish

Conclusion


Tuna Mexi Melts are more than just a meal; they are a flavorful journey into the heart of family traditions. With a smorgasbord of spices and creamy cheeses, this dish is sure to please your palate and evoke fond memories. Whether you're looking to recreate a family classic or introduce a new favorite, Tuna Mexi Melts are a delightful choice for any occasion. Enjoy the warmth and nostalgia this recipe brings, and share it with those you love.

Read more about Appetizers

Read more about Main Dishes

Read more about Desserts