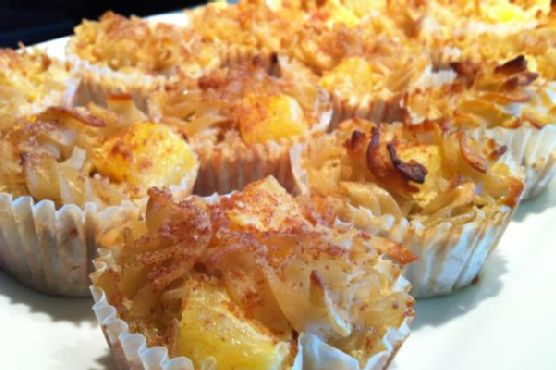
It was one of those unpredictable Tuesday evenings when the craving for something sweet and comforting hit me like a freight train. I rummaged through my pantry, hoping for inspiration, when my eyes landed on that lonely can of pineapple chunks. It instantly sparked the memory of a gluten-free, dairy-free noodle kugel I had whipped up on a similar night of culinary chaos. This dish is not just a savior for your midweek dessert dilemmas; it’s a luxurious treat that feels indulgent yet light. Plus, it’s a crowd-pleaser that accommodates almost every dietary restriction. So, here it is, an irresistible Noodle Kugel with Pineapple that will have you dreaming about your next slice before you’ve even finished the first.
Jump to Recipe
What You’ll Need
Good news: you likely already have most of these ingredients hiding in your kitchen! This kugel is proof that a few pantry staples can transform into something magical.
- Gluten-free spiral rice pasta
- Canned pineapple chunks (make sure to drain them!)
- Unsweetened vanilla coconut milk or coconut creamer
- Sunflower oil
- Egg yolks
- Xylitol (or regular sugar if you prefer)
- Evaporated cane sugar
- Ground cinnamon
- Ground nutmeg
- Kosher salt
- Cupcake liners
- Earth Balance soy-free margarine
- Red brown rice flour
How to Make Noodle Kugel with Pineapple-Gluten free, Dairy Free
- Preheat your oven to 350 degrees F. It’s about to get cozy in here!
- Fill a medium stockpot with water and set it over high heat. Once boiling, add 2 tablespoons of kosher salt. Toss in the gluten-free spiral rice pasta and stir well to prevent any sticking. Keep stirring occasionally and let it cook for 8-10 minutes. The pasta should have a slight bite to it.
- Once cooked, let the pasta sit in the hot water for a few minutes. Then, transfer it to a large glass or heatproof bowl. This will give it some time to cool off while you prep the other ingredients.
- In the meantime, grab another bowl and mix together the unsweetened vanilla coconut milk, coconut creamer, drained pineapple chunks, xylitol, evaporated cane sugar, a dash of ground cinnamon, ground nutmeg, and sunflower oil. Combine everything well. Trust your intuition and taste it—it should be sweet and spiced just right.
- Add the egg yolks to your mixture and stir until everything is creamy and well combined. The color will be warm and golden.
- Line two cupcake pans with cupcake liners. Fill each liner with the noodle mixture using a dry 1/4 cup measuring spoon, mounding it generously over the top. If some look dry, pour any remaining liquid evenly over them.
- Sprinkle a small amount of crumble over each kugel (about 1/2 teaspoon per kugel). It’s your chance to unleash your inner artist!
- Place the pans in the oven and bake for 40-45 minutes. The kugels should be golden, with a hint of crust on the edges. Allow them to cool for about 10 minutes before removing them from the pans. You can take the liners off before serving if you prefer an elegant presentation.
- Serve your noodle kugel hot or warm. There’s something magical about that first warm bite!
Cook’s Notes
- The key to a perfectly textured kugel is in the pasta. Make sure you don’t overcook it. Slightly al dente is the goal since it will continue cooking while baking.
- If you find yourself with leftovers, they store beautifully in an airtight container in the fridge for about 3 days. Reheat them in the oven to maintain that lovely texture.
- Don’t be shy with the spices. Cinnamon and nutmeg are what give this dish its comforting warmth. Feel free to adjust according to your taste.
Make It Your Own
- Swap the canned pineapple for fresh diced apples or pears for a different fruity twist.
- Replace the sunflower oil with coconut oil for a richer, tropical vibe.
- If you’re out of ground nutmeg, try using pumpkin pie spice for an autumnal flair.
- Add a handful of raisins or dried cranberries to the mixture for a burst of sweetness in every bite.
If you try this, I’d love to hear how it turns out—drop a comment or tag me! Remember, this kugel isn’t just a recipe; it’s a chance to bring warmth and sweetness to the everyday hustle. Happy baking!
Related update: Noodle Kugel with Pineapple-Gluten free, Dairy Free
Related update: German Rhubarb Cake with Meringue
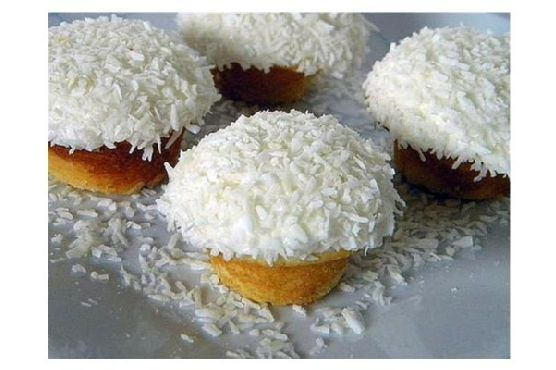
Last Tuesday, somewhere between the hustle of a long workday and the clamor of my kids’ animated dinner table debates, I felt that familiar urge to bake something comforting. It was the kind of chilly autumn evening that practically begs for a cozy, sweet treat — an edible hug, if you will. Enter these Vanilla Coconut Snowball Cupcakes. They’re the perfect blend of fluffy vanilla goodness and tropical coconut flair, transforming a regular weeknight into something a bit more special. The best part? They’re as easy as they are impressive, requiring only pantry staples and a little love. So, while I was elbow-deep in flour, and someone spilled milk all over the kitchen floor (of course), I realized these cupcakes were worth every bit of chaos. Jump to Recipe
What You’ll Need
Chances are, you’ve got most of these tucked away in your pantry or fridge already.
- 1 1/2 cups **flour**
- 1 1/2 teaspoons **baking powder**
- 1/4 teaspoon **salt**
- 1/2 cup **butter**, softened
- 1 cup **sugar**
- 1 teaspoon **vanilla extract**
- 2 large **eggs**
- 1/3 cup **regular milk**
- 1/4 cup **sour cream**
- 1 cup **unsweetened coconut flakes**
- For the frosting:
- 1/2 cup **butter**, softened
- 1/4 cup **sour cream**
- 1 teaspoon **vanilla**
- 2-3 cups **confectioners’ sugar**
- Additional **coconut flakes** for coating
How to Make Vanilla Coconut Snowball Cupcakes
- Preheat your oven to 350°F (175°C) and line a 12-cupcake pan with paper liners or grease it lightly if you’re all out of liners.
- In a small bowl, whisk together the flour, baking powder, and salt. Set this aside to get cozy with itself.
- In a large mixing bowl, beat the butter on medium-high speed until it’s creamy, about 2 minutes. This is where you’ll see magic starting to happen.
- Gradually add sugar to the butter, beating until the mix is light and fluffy — around 3 minutes. Don’t forget to scrape down the sides of the bowl midway.
- Beat in the vanilla extract, imagining the sweet fragrance wrapping around your senses.
- Add the eggs, one at a time, beating well between each addition. Your batter should now resemble a lovely, satiny mix.
- Alternately add the flour mixture and milk, starting and ending with the flour. Beat briefly after each addition just to combine.
- Stir in the sour cream and coconut, feeling the texture change as it all comes together.
- Fill the cupcake wells about 3/4 full. Pop them in the oven and let them bake for about 18 minutes or until a toothpick comes out clean.
- Transfer the pan to a wire rack for 5 minutes, then remove the cupcakes and let them cool completely on the rack.
- For the frosting, beat together the butter, sour cream, and vanilla until fluffy. Slowly add 2 cups of confectioners’ sugar, beating on low until combined. Increase speed and beat until light and fluffy, adding more sugar as needed.
- Fill a shallow bowl with coconut flakes. Frost each cooled cupcake and dip the tops into the coconut, pressing gently to adhere.
Cook’s Notes
Here are a few tidbits to keep in mind as you venture into cupcake bliss:
- Room temperature ingredients are key for that perfect, smooth batter — so don’t skip this step.
- The coconut flakes add a delightful texture and flavor, but if you’re not a fan, simply skip coating the tops. The cupcakes will still shine.
- You can bake these a day ahead. Just keep them unfrosted and stored in an airtight container. Frost them before serving for that fresh, right-out-of-the-oven vibe.
- Leftovers, if you have any, can be stored in the fridge for 3-4 days. Bring them to room temperature before indulging, as the flavors are best when not too cold.
Make It Your Own
- **Nutty Twist:** Substitute the coconut flakes with toasted almonds or pecans for a delightful crunch.
- **Chocolate Lovers’ Dream:** Swap out half the flour for cocoa powder, and add chocolate chips to the batter for a decadent treat.
- **Lemon Coconut Delight:** Add the zest of one lemon to the batter and the frosting for a zingy, fresh take.
- **Berry Bliss:** Gently fold in a handful of blueberries or raspberries into the batter for a burst of fruity goodness in every bite.
If you try these Vanilla Coconut Snowball Cupcakes, I’d love to hear how they turned out! Drop a comment below or tag me in your baking adventures. Happy baking, my friends! 🧁✨
Related update: Vanilla Coconut Snowball Cupcakes
Related update: Noodle Kugel with Pineapple-Gluten free, Dairy Free
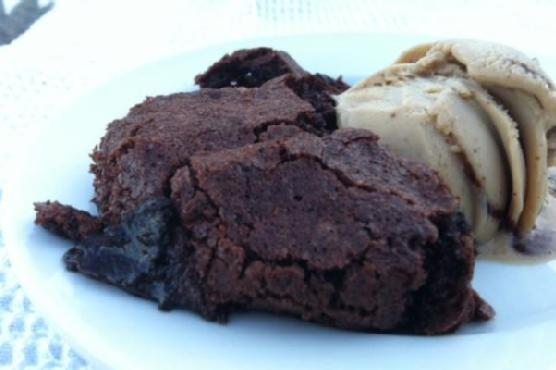
The other day, I found myself staring at a half-eaten bar of dark chocolate, a stray packet of espresso powder, and a whole lot of nothing for dessert. You know those moments when you just need something gooey and comforting but also want to keep it somewhat aligned with your food goals? Enter the Brownie Cake that’s both gluten-free and dairy-free yet decadently delicious. This isn’t just any dessert; it’s an easy weeknight indulgence that feels special enough for company but straightforward enough to whip up with pantry staples. The magic lies in its cake-like exterior giving way to a molten, pudding-like center. It’s the kind of dish that makes you feel like a kitchen wizard with minimal effort.
Jump to Recipe
What You’ll Need
This ingredient list is refreshingly simple, and chances are you already have most of these staples in your kitchen.
- Earth Balance Soy Free Spread (for that buttery richness without the dairy)
- Eggs (they give it that fluffy cake-like lift)
- Cane Sugar (because, duh, brownies need sweetness)
- Red Dark Chocolate (the star of the show)
- Vanilla Paste (adds a luxurious depth)
- Espresso Powder (just a touch for an extra kick)
- White Gluten Free Flour Blend (the base that keeps it light and gluten-free)
- Cocoa Powder (for that intense chocolate punch)
- Coconut Oil (keeps everything moist and lovely)
How to Make Brownie Cake gluten free, dairy free
- Preheat your oven to 325°F. Trust me, this temperature is key to getting that perfect texture.
- Lightly spread coconut oil in a 9x12x2 inch deep oval baking dish. This ensures nothing sticks and makes for easy serving later.
- Grab a bowl, sift together your flour and cocoa powder, and set aside. This little step ensures no lumps and a smooth batter.
- In the bowl of an electric mixer, beat the eggs and sugar on medium-high for about 5 minutes. You’re aiming for a consistency that’s thick, pale yellow, and reminiscent of cake batter.
- Once your egg and sugar mixture is ready, lower the speed to low and add the vanilla paste and espresso powder. It’ll smell heavenly.
- Slowly incorporate the flour and cocoa powder mixture. A handy tip: throw a dish towel over the mixer to avoid cocoa dust everywhere.
- Add in the Earth Balance Spread and mix for another 10 seconds. Just enough to combine.
- Pour the brownie mixture into your prepared dish. Smooth the top, but don’t obsess over it.
- Place this dish into a bigger roasting pan. Carefully fill the roasting pan with very hot tap water, reaching about halfway up the side of your brownie dish. This water bath technique gives it that unique texture.
- Bake for exactly 65 minutes. Patience is a virtue here. The cake will be set on the outside but fabulously gooey on the inside.
- Allow it to cool for 20 minutes before serving. Serve warm for the best experience.
Cook’s Notes
This Brownie Cake is a dreamy blend of textures, but a few tips will ensure it’s perfect every time. Make sure your eggs are at room temperature before starting; this helps them whip up better and combine more smoothly with the sugar. If you’re making this in advance, store it in the fridge and reheat gently in the oven before serving. It keeps well for about 3 days, not that it’ll last that long once your family gets a taste.
Make It Your Own
- Feeling nutty? Toss in a handful of chopped almonds or pecans for a delightful crunch.
- If dark chocolate isn’t your thing, swap it for semi-sweet or even white chocolate chips.
- Add a swirl of peanut butter into the batter before baking for a nutty flavor twist.
- Infuse the batter with a teaspoon of orange zest for a zesty chocolate-orange experience.
If you try this Brownie Cake, I’d love to hear how it turns out — drop a comment or tag me with your creations! Happy baking, friends!
Related update: Brownie Cake gluten free, dairy free
Related update: Vanilla Coconut Snowball Cupcakes
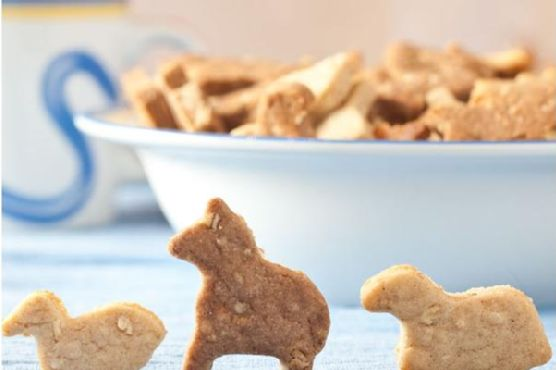
It was one of those grey, lazy Sundays when the weather had no intention of letting you out of the house. My kids were bored, the couch had become a kingdom of pillows, and we were in desperate need of a fun kitchen project that would end with something delightful to snack on. That’s how we landed on making homemade animal crackers. It’s the perfect rainy-day activity that promises not just giggles and flour-covered noses but also a batch of wonderfully crunchy, subtly spiced crackers that beat anything from a box. Plus, they’re surprisingly simple to whip up with ingredients that are probably lounging in your pantry right now. Jump to Recipe
What You’ll Need
The beauty of these animal crackers is in their simplicity. Chances are you already have most of this hanging around in your kitchen. Here’s what you’ll need:
- Butter – the base of flavor and texture
- Brown sugar – for that slight caramel sweetness
- Egg – to bind it all together
- Vanilla – a warm aroma booster
- Cinnamon – the spice that whispers “home”
- Allspice – for a hint of mystery spice
- Salt – because sweet needs balance
- Baking powder – to lift them ever so slightly
- Oats – for a bit of texture
- Flour – the backbone of the dough
- Cocoa powder – optional, but oh what it adds!
How to Make Homemade Animal Crackers
Ready to dive in? Let’s do this!
- In a mixing bowl, cream together the butter and brown sugar until the mixture is light and fluffy. You should see it lighten in color slightly.
- Add in the egg and vanilla, and mix until everything is well combined and smooth.
- Sprinkle in the cinnamon, allspice, and salt. The dough will start to smell like a cozy autumn afternoon.
- Mix in the baking powder, oats, and flour. If you’re going the chocolatey route, replace some of the flour with cocoa powder as you measure.
- Once everything is incorporated, form the dough into a ball. It will be a bit sticky, but that’s okay!
- Wrap it in plastic wrap and let that dough chill in the fridge for at least an hour, but overnight is perfectly fine too.
- When you’re ready, preheat your oven to 350°F. Pull the dough from the fridge, grab a hunk, and roll it out to a 1/4″ thickness. Think of it as your edible crafting clay.
- Use your favorite animal-shaped cookie cutters to stamp out shapes and place them on a cookie sheet lined with parchment paper. Give them a little breathing room—they need space to grow!
- Bake for 5-7 minutes. Keep an eye out—once they turn golden and fragrant, you’re in business.
Cook’s Notes
Here’s the deal: don’t skip the chilling. It makes the dough easier to handle and helps the flavors meld together nicely. If you’re planning ahead, this dough holds well in the fridge for about 24 hours. Once baked, keep the crackers in an airtight container. They should stay crunchy and delicious for about a week, if they last that long. Remember to roll the dough evenly, so all your crackers bake at the same rate. And if they get a little too golden, don’t worry, that just means more crunch.
Make It Your Own
Feel free to play around with the recipe. Here are some ideas:
- Swap the cinnamon for nutmeg or ginger for a different kind of spice.
- Add a handful of mini chocolate chips to the dough for a surprise treat.
- Replace the oats with shredded coconut for a tropical twist.
- Use almond extract instead of vanilla for a nuttier flavor.
If you try this, I’d love to hear how it turns out—drop a comment or tag me! These little guys are a joy to make and even more fun to eat, so I hope they bring a bit of joy to your table too. Happy baking!
Related update: Homemade Animal Crackers
Related update: Brownie Cake gluten free, dairy free
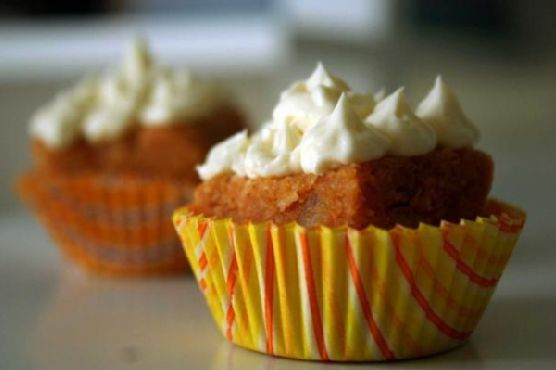
Last Tuesday, I found myself staring at a bag of carrots in my fridge. There they were, looking slightly disheveled and in need of a purpose. It was one of those days when I craved something sweet yet healthy, something that didn’t scream “I’m trying too hard.” Enter my raw carrot cake. It’s a little slice of indulgence that’s as wholesome as it is easy to make. No oven, no fuss, just pure deliciousness. The magic of this recipe lies in the simplicity and the satisfying blend of warm spices mingling with the natural sweetness of fruits. Trust me; this cake is your ticket to dessert heaven on a weeknight hustle.
Jump to Recipe
What You’ll Need
Ah, the ingredient list that’s as generous as your pantry. Chances are, you already have most of these lying around.
- Carrots
- Raisins
- Dried apricots
- Mixed peel
- Date purée
- Almond flour
- Desiccated coconut
- Ginger powder
- Cinnamon powder
- Cloves
How to Make Raw Carrot Cake
- Start by pulsing the carrots, raisins, date purée, and spices in a blender. You want a rough blend, where the carrots still have some texture. The aroma of ginger and cinnamon will instantly hit you, setting the vibe just right.
- Next, drop in the chopped apricots and mixed peel. Pulse a couple of times until they are well incorporated but not fully obliterated — those little bursts of flavor are the hidden gems of this cake.
- Transfer the mixture into a large bowl. Add the almond flour and desiccated coconut, and mix well. You’ll notice the mixture coming together, thick and cohesive, almost begging to be molded.
- Press the mixture into a large cake pan. Ensure it’s even and smooth out the top with a spatula. Refrigerate uncovered until it sets, which should take about an hour.
- Once set, cut the cake into bite-sized squares. You have the option to frost them with whipped cream or roll them into balls and dust with desiccated coconut for an added flair.
Cook’s Notes
A few things to keep in mind while embarking on this carrot cake journey. The trickiest part is pulsing the mixture just right. You don’t want a puree; the goal is a chunky texture. As for storing, these delightful squares can be kept in the fridge for up to a week. If you’re planning ahead, you can make the mixture a day before and let it sit in the fridge, setting aside those frosting duties for the last minute. Just remember, if you opt for whipped cream, apply it just before serving to retain its fresh appeal.
Make It Your Own
This recipe is your canvas, and a few tweaks can lead to new masterpieces.
- Swap the raisins for dried cranberries to add a tart twist.
- Use walnut or pecan flour instead of almond flour for a different nutty flavor.
- For a tropical vibe, add some crushed pineapple (well-drained) into the mix.
- If you’re a fan of spice, add a pinch of nutmeg to the mixture for an extra kick.
If you try this, I’d love to hear how it turns out — drop a comment or tag me! I can’t wait to see your take on this raw carrot cake delight.
Related update: Raw Carrot Cake
Related update: Cheesy Pasta in a Pot
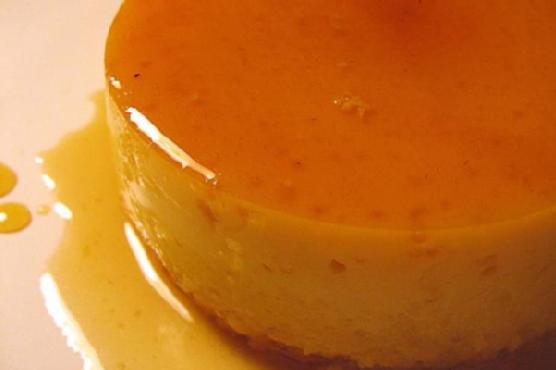
One rainy Tuesday night, I found myself staring at an almost-empty fridge, pondering what kind of magic I could muster up. You know those evenings when you’re craving something sweet but don’t want to fuss around with a dozen ingredients? Enter: Baked Caramel Custard. It’s that classy, melt-in-your-mouth treat that feels like a hug after a long day. The best part? You probably have most of what you need in your pantry already. Plus, it’s secretly impressive — looks like a million bucks, but simple enough for a weeknight adventure. Trust me, this is one of those desserts you’ll keep coming back to whenever you need a little pick-me-up.
Jump to Recipe
What You’ll Need
This recipe is all about simplicity with a touch of elegance. No need to run to a fancy gourmet store, just grab these from your kitchen:
- Egg substitute
- 1 egg yolk
- 1 can of evaporated skim milk
- Sugar (plus a little extra for that rich caramel)
- 1 cup skim milk
- 2 tablespoons port wine
- 1 teaspoon vanilla extract
How to Make Baked Caramel Custard
- Preheat your oven to 350 degrees. Get it nice and toasty for the custards.
- In a heavy saucepan, scald the evaporated skim milk and skim milk together. You’ll know it’s ready when tiny bubbles start forming around the edges—don’t let it boil!
- Meanwhile, in a skillet over medium heat, caramelize the sugar. Watch closely as it melts and transforms into a golden brown liquid; don’t let it burn.
- Carefully pour the warm milk into the caramelized sugar, stirring constantly. Keep stirring until the sugar is completely dissolved into the milky mixture.
- In a medium bowl, beat the egg substitute and yolk together. Aim for that dreamy lemon color.
- Slowly add the sugary milk mixture to the eggs, whisking constantly to avoid scrambling. Add in the port and vanilla, and give it a good stir.
- Divide the mixture evenly into 6 custard cups. Place them in a baking dish.
- Pour boiling water into the baking dish until it reaches halfway up the sides of the cups. This water bath will ensure the custards cook gently and evenly.
- Bake for 35 to 40 minutes until the custards are set. You’ll know they’re done when a gentle jiggle in the center is all that remains.
- Once out of the oven, let them cool completely in the refrigerator. When chilled, invert each onto a dessert plate and serve immediately.
Cook’s Notes
Don’t rush the caramelizing process! It’s a bit of a dance and takes patience, but it’s worth every second. If your caramel starts to smell burnt, toss it and start again. Trust me, burnt sugar is not what you want here.
- Make these ahead of time and store them in the fridge – they’ll keep beautifully for up to three days. Perfect for a make-ahead dessert when entertaining.
- For leftovers (if you have any!), keep them covered in the fridge, but let’s be honest, you’ll be sneaking spoonfuls until they’re gone.
Make It Your Own
- Swap the port wine for a splash of your favorite rum or bourbon for an adult-only twist.
- Add a pinch of cinnamon or nutmeg to the milk mixture for a warm, spiced note.
- For a dairy-free option, use coconut milk instead of skim milk and evaporated milk. Bonus: It’ll add a lovely tropical flavor.
- If you like your custard with a bit of crunch, sprinkle some crushed pistachios or almonds on top before serving.
If you try this, I’d love to hear how it turns out — drop a comment or tag me! Enjoy the creamy, caramel goodness, friends!
Related update: Baked Caramel Custard
Related update: Raw Carrot Cake
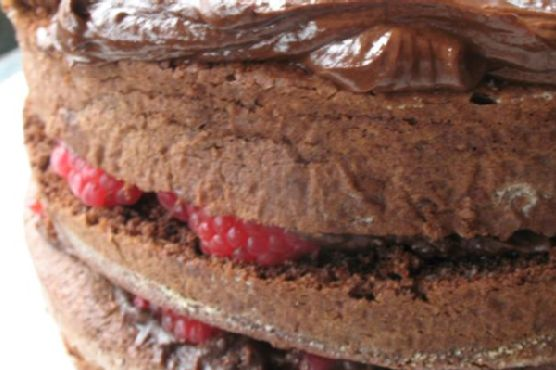
Last Saturday, I found myself staring at a stubborn box of dark chocolate in my pantry, trying to decide what to do with it. It was one of those rainy afternoons when all you want is something rich and comforting. The kind of day where you get cozy in your leggings, the playlist is just right, and you’re itching to bake something indulgent. That’s how my Chocoholic’s Deep Dark Dream Chiffon Cake came to life. It’s heaven in cake form—moist, fluffy, and oh-so-decadent. The secret? It’s a magical combo of creamy chocolate layers and velvety ganache. Perfect for impressing guests or just treating yourself because, let’s be honest, we all deserve a slice of chocolate bliss every now and then.
Jump to Recipe
What You’ll Need
You might already have most of these ingredients tucked away in your kitchen, which makes this cake even more tempting to whip up on a whim. Trust me, it’s worth checking your cupboards for these beauties:
- 1 cup all-purpose flour
- 1 cup sugar
- 1/3 cup sugar (for meringue)
- 2 tablespoons baking powder
- 1/2 teaspoon salt
- 6 tablespoons butter
- 5% cream – you’ll need this twice!
- 2/3 cup dark Dutch cocoa
- 2/3 cup dark Belgian chocolate
- 1 tablespoon cream of tartar
- 6 large egg whites
- 6 large egg yolks
- 1/2 cup water
- 1 teaspoon vanilla extract
- 1/2 cup icing sugar
- 1/3 cup vegetable oil
How to Make Chocoholic’s Deep Dark Dream Chiffon Cake
- Start by mixing your cocoa with boiling water until smooth, then let it cool. This is where the cake’s deep chocolate flavor begins.
- In a large bowl, whisk together flour, 1 cup of sugar, baking powder, and salt. These dry ingredients set the foundation for your cake batter.
- In another bowl, beat egg whites and cream of tartar with an electric mixer until soft peaks form. Gradually add 1/3 cup sugar and continue beating until peaks are firm but not dry.
- Make a well in your dry ingredients. Add vegetable oil, egg yolks, vanilla, and that decadent cooled cocoa mixture. Beat until smooth and luscious.
- Gently fold a quarter of the egg whites into the batter to lighten it, then carefully fold in the remaining whites. This step ensures a light, airy texture.
- Divide the batter between two 8-inch prepared cake pans and bake in a preheated oven at 350°F for 30-35 minutes. You’ll know it’s ready when a wooden skewer comes out clean.
- For the filling, blend sugar, cocoa, and butter with an electric mixer. Add vanilla and cream, adjusting cream to reach your desired texture.
- For the topping, heat cream until just below boiling. Stir in chocolate pieces and butter until smooth. Allow to cool, thickening into a rich ganache.
- To assemble, slice each cake in half horizontally, creating four layers. Sprinkle your favorite liqueur on the first layer, spread with filling, then arrange raspberry halves for a tart contrast. Repeat for remaining layers, finishing with ganache on top.
Cook’s Notes
This cake might seem a little fancy, but I promise it’s totally doable. Make sure those egg whites are at room temp before you whip them. It makes all the difference for volume and stability. And speaking of stable, be gentle when folding them into the batter. You want to keep that air in there! Store the cake in an airtight container to keep it moist, though honestly, it never lasts long enough for leftovers in my house. If you do have any left, it’s even better the next day as the flavors meld together perfectly. You can make the cake layers a day ahead, just wrap them tightly in plastic wrap.
Make It Your Own
Here’s where you can put your own spin on it:
- Spice it up: Add a teaspoon of cinnamon or cayenne to the dry ingredients for a spicy kick.
- Nutty twist: Swap raspberries for toasted hazelnuts between the layers.
- Mocha love: Stir a teaspoon of instant coffee into the boiling water for a mocha-flavored cake.
- Berry blast: Use a mix of berries instead of just raspberries for a burst of color and flavor.
Baking this cake feels like giving yourself a big chocolaty hug. If you try it, I’d love to hear how it turns out. Drop a comment or tag me in your cake photos—I can’t wait to see your dreamy creations!
Related update: Chocoholic’s Deep Dark Dream Chiffon Cake
Related update: Baked Caramel Custard

Picture this: It’s a Saturday afternoon, and I’m in the kitchen with my son. We’re both craving something sweet but don’t want to spend hours baking. Suddenly, the idea hits me—OREO Cookie Balls! These aren’t just any cookie balls; we’re going to turn them into adorable snowmen. It feels like the perfect plan for a chilly day when you want something as comforting as a warm sweater but as easy as a quick snack. The best part? You probably already have most of the ingredients in your pantry. Trust me, these little bites are worth making. They’re quick and fun, especially if you have little helpers around.
Jump to Recipe
What You’ll Need
So here’s the deal: These ingredients are as simple as it gets. You might even have them stashed away already. Let’s dive in:
- A full package of OREO Cookies
- One block of cream cheese (softened to room temperature)
- Baker’s chocolate (for melting)
- Rolo chocolate candy
- Black gel icing (for the eyes and buttons)
- Orange gel icing (for the nose)
- Additional supplies to decorate snowmen (think scarves made of licorice or hats from mini peanut butter cups)
How to Make OREO Cookie Balls – Snowman
Ready? Let’s make some magic happen!
- First, grab your package of OREO Cookies. Without removing the filling, crush them up in a large gallon-sized ziplock bag. You want fine crumbs, so give them a good whack!
- Pour your cookie crumbs into a large mixing bowl, and add in the softened cream cheese. Mix these together on medium speed until you have a smooth, dough-like consistency.
- Take a 1-inch cookie scoop (or just eyeball it) to portion out the mixture. Roll each scoop between your palms to form smooth, even balls.
- Place the cookie balls on a cookie sheet and pop them in the freezer for about 10 minutes. This helps them firm up a bit.
- While they’re chilling, melt your Baker’s chocolate according to the package instructions. You want it smooth and glossy, ready for dipping.
- Remove the cookie balls from the freezer and dip each one into the melted chocolate. Use a fork to lift them out, letting any excess chocolate drip off before placing them on a wax paper-lined cookie sheet.
- With a gentle touch, add the Rolo chocolate candy on top for the hat while the chocolate is still wet.
- Chill your snowmen in the refrigerator for about an hour until the chocolate shell is firm and set.
- Now, the fun part—decorate! Use the black gel icing for eyes and buttons, and the orange gel icing for the cute little carrot nose. Let your creativity shine with any additional decorations you like.
Cook’s Notes
Alright, let’s talk strategy. If the OREO dough feels too sticky, chill it in the fridge for a bit. It makes rolling much easier. Regarding the chocolate, avoid overheating it—give it slow, gentle warmth so it won’t seize. For storage, these snowmen can chill out in the fridge for up to a week or stay cozy in the freezer for about a month. Just make sure they’re in an airtight container to keep them fresh. If you’re planning to make these ahead of time, consider doing the base a day in advance to save on last-minute hustle.
Make It Your Own
Feel like changing things up? Here’s how you can shake up the snowman scene:
- Swap the Baker’s chocolate with white chocolate for an even snowier look.
- Use colored gel icing to create vibrant scarves or hats.
- Add crushed peppermint candy to the cookie crumb mixture for a holiday twist.
- Substitute the Rolo candy with a mini marshmallow for a softer hat look.
If you try this, I’d love to hear how it turns out—drop a comment or tag me! Let’s share some sweet little snowmen with the world. Happy decorating!
Related update: OREO Cookie Balls – Snowman
Related update: Chocoholic's Deep Dark Dream Chiffon Cake
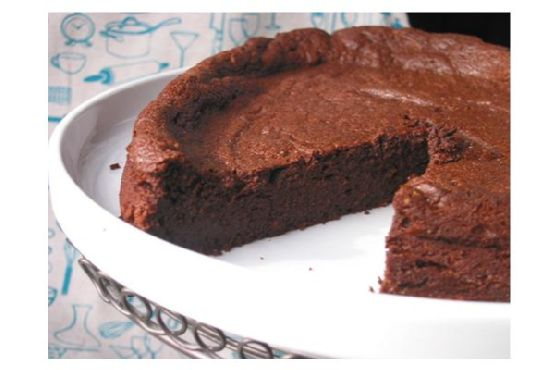
Picture this: it’s a late Tuesday night, and I’ve got a serious craving for something sweet. The kind of craving that whispers, “bake something now, or forever hold your peace.” But who has the energy for an elaborate dessert after a long day? I need something quick, comforting, and chocolatey. Enter: my 10 Minute Brownies. This recipe is the superhero of the sweet-tooth world. It’s so simple, you could practically make it with your eyes closed. Plus, it’s got this lush, fudgy texture thanks to a surprising ingredient — unsweetened applesauce. So, if you find yourself in need of a quick chocolate fix that feels both indulgent and guilt-free, these brownies are your answer.
Jump to Recipe
What You’ll Need
You might be surprised at how basic the ingredient list is. Spoiler: you likely have most of these on hand. Here’s what you’ll need to get started:
- Canola oil – for that perfect moist texture.
- Semisweet chocolate chips – because what’s a brownie without chocolate?
- Unsweetened applesauce – our secret for keeping it moist without extra fat.
- Sugar – for that classic brownie sweetness.
- Vanilla extract – for a hint of flavor depth.
- Unbleached flour – a staple!
- Baking powder – gives it that slight lift, so they aren’t bricks.
- Finely-chopped walnuts – optional, but they add a nice crunch.
How to Make 10 Minute Brownies
- Preheat your oven to 350 degrees F. Grab a 6 x 9 inch baking pan, lightly oil it, and set it aside for later.
- In a small saucepan over low heat, combine the canola oil and semisweet chocolate chips. Stir occasionally until the chocolate melts into a silky, smooth mixture. Remove from heat and let it cool slightly.
- In a large bowl, mix the unsweetened applesauce, sugar, and vanilla extract until everything is well blended. You should smell that sweet, vanilla aroma.
- Pour the cooled chocolate mixture into your applesauce blend. Whip it up until it’s smooth and shiny.
- Add in the unbleached flour, baking powder, and finely-chopped walnuts. Stir just until everything is combined; you don’t want to overmix and end up with tough brownies.
- Spoon the batter into your prepared baking pan, smoothing the top with a spatula.
- Bake in the oven for 25 to 30 minutes. You’ll know they’re done when the top springs back gently upon touch. The kitchen will smell like chocolate heaven by now!
- Allow the brownies to cool completely before cutting them into luscious squares. This waiting game is tough, but so worth it.
Cook’s Notes
Let’s be real, these brownies are pretty forgiving. But here are a few tips to ensure you get the best results every time. First, be careful not to overbake them. You’re going for fudgy, not crumbly. They might look a little underdone when you first pull them out, but they’ll firm up as they cool. For storing, keep them in an airtight container in the fridge, and they’ll stay fresh for up to a week — not that they’ll last that long!
Make It Your Own
The beauty of this recipe is its flexibility. Here are some delicious variations you can try:
- Nut-free: Skip the walnuts if you’re not a fan or have allergies. Consider adding a handful of chocolate chips instead for extra gooeyness.
- Gluten-free: Swap the unbleached flour for a gluten-free blend. No one will even know the difference.
- Peanut butter swirls: Dollop some peanut butter over the batter before baking and swirl it in with a knife for a nutty twist.
- Raspberry delight: Throw in a handful of fresh or frozen raspberries for a fruity surprise that pairs beautifully with the chocolate.
If you try this, I’d love to hear how it turns out — drop a comment or tag me! Happy baking, friends. 🍫✨
Related update: 10 Minute Brownies
Related update: OREO Cookie Balls – Snowman
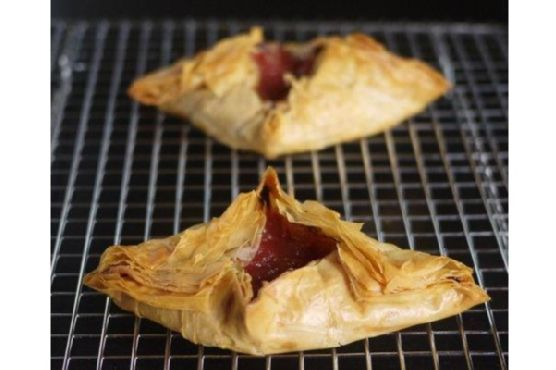
It was one of those drizzly, stay-inside afternoons when a sudden craving hit me — something sweet but tangy, with a satisfying crunch. My pantry didn’t offer much in the way of excitement, but there was rhubarb in the fridge and an untouched packet of phyllo dough languishing in the freezer. That’s when the idea for Crispy Rhubarb Pockets was born. Trust me, this dish is worth making not just because it’s the perfect balance of tart and sweet, but also because it’s beautifully rustic and so very satisfying. It’s the kind of dessert that looks like you’ve put in a lot of effort when really, it’s just a clever little trick. Plus, who doesn’t love a crispy bite-sized treat?
Jump to Recipe
What You’ll Need
Honestly, you probably have most of these ingredients at home. It’s a grab-and-go situation, making it perfect for those spontaneous baking whims.
- Diced rhubarb – the heart of our pockets, bringing the tangy goodness
- Granulated sugar – to sweeten the deal
- Cornstarch – our trusty thickener
- Salt – just a pinch to balance flavors
- Vanilla extract – a splash for that warm, comforting aroma
- Phyllo sheets – the secret to crispy, flaky pockets
- Melted butter – for brushing, because butter makes everything better
- Water – to help seal those delicious pockets
How to Make Crispy Rhubarb Pockets
- In a medium saucepan, toss in the diced rhubarb, sugar, cornstarch, and salt. Set it over medium-low heat. As it warms up, stir occasionally. You’ll know it’s ready when the rhubarb releases its liquid and starts breaking down into a thick, chunky sauce — give it about 10 minutes.
- Take the pan off the heat and stir in the vanilla extract. Let this mixture cool to room temperature. The vanilla will mingle with the rhubarb, creating a divine aroma that fills the kitchen.
- Grab your phyllo sheets and layer four of them, brushing each layer with melted butter. Phyllo is delicate, so handle with care, and don’t skimp on the butter — it’s key to that golden crunch.
- Preheat your oven to 350 degrees F. While it warms up, cut four 4-inch squares from your buttered phyllo stack. Precision isn’t necessary; rustic is charming.
- Spoon 2 teaspoons of the rhubarb filling into the center of each square. Now, brush from the edge of the filling to each point of the square lightly with water. This is the part where you channel your inner artist.
- Gather the points of the square and pinch them together just above the filling, forming a little pouch. Brush it all over with more butter. Repeat this artistic process for all four pouches.
- Arrange the pouches on an ungreased cookie sheet or baking pan, spacing them at least an inch apart. Into the preheated oven they go for 12 to 15 minutes, or until they’re golden brown and begging to be devoured.
- Remove the pouches from the oven and let them cool on a wire rack for about 5 minutes. They’re equally delightful warm or at room temperature, so serve according to your patience level!
Cook’s Notes
So, a few things to keep in mind: first, don’t rush the rhubarb cooking process; it needs time to release its magic. Phyllo can be a bit tricky since it dries out quickly, so keep it covered with a damp cloth while you work. If you make these ahead of time, you can store them in an airtight container for up to two days. Just pop them back in a warmed oven to re-crisp them. Leftovers (if there are any) are wonderful with a dollop of vanilla ice cream.
Make It Your Own
There’s plenty of room to play around with this recipe:
- Swap the rhubarb for diced apples and add a sprinkle of cinnamon for a fall vibe.
- If you’re a fan of berries, mix in some strawberries with the rhubarb for a sweeter, juicier filling.
- Try adding a handful of chopped nuts to the filling for some extra crunch and depth.
- If vanilla isn’t your thing, lemon zest can add a zesty twist to the filling.
If you try this, I’d love to hear how it turns out — drop a comment or tag me! Whether you stick to the original recipe or venture into variations, these little pockets are sure to delight. Happy baking!
Related update: Crispy Rhubarb Pockets
Related update: 10 Minute Brownies
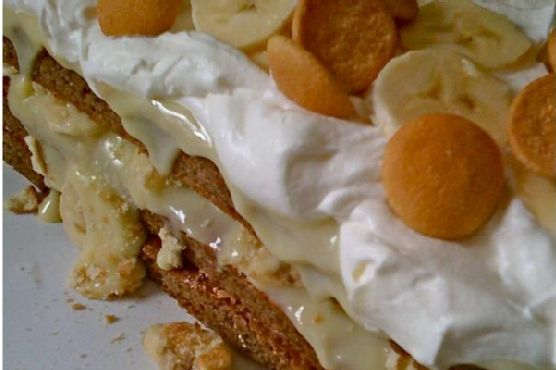
Alright, picture this: It’s Wednesday evening, halfway through a week that feels like it’s been two weeks long, and you’re in dire need of something indulgent but not overly complicated. That’s the exact moment I found myself in last week when I decided to whip up a Banana Pudding Cake. This isn’t just any banana dessert; it’s got layers of moist cake, creamy custard, and a light-as-air whipped cream topping that makes it feel like a hug on a plate. Plus, it’s a great way to use up those slightly too-ripe bananas staring you down on the counter. The best part? You probably have most of the ingredients already lying around. Trust me, this is the dessert you deserve after adulting so hard all week. Jump to Recipe
What You’ll Need
This isn’t your typical mile-long ingredient list. Chances are you already have most of this.
- Bananas
- Vanilla wafers
- Egg yolks
- Eggs
- Flour
- Sugar
- Baking powder
- Cocoa powder
- Milk
- Salt
- Pudding
- Vanilla extract
- Heavy whipping cream
- Powdered sugar
- Whipped cream
How to Make Banana Pudding Cake
- Preheat your oven to 350°F (175°C). In a large bowl, beat the egg yolks with sugar until the mixture gets that pale, creamy consistency, and set it aside.
- In the bowl of an electric mixer, whip the egg whites until they form stiff peaks that hold their shape like a dream.
- Gently add the baking powder, processed wafers, and cocoa to the egg yolk mixture. It gets a bit thick and fudgy here; you’re on the right track.
- Drop about 1/4 of the whipped egg whites into the larger bowl and fold lightly to get things started. Then fold in the remaining whites carefully until no streaks remain.
- Line a jellyroll sheet pan with parchment paper, ensuring it covers all sides, and spray the paper with non-stick floured baking spray.
- Spread the cake batter evenly over the paper, making sure it covers the entire pan, and bake it in your preheated oven for 15-20 minutes. The cake should feel springy to the touch.
- Let the cake cool completely on the sheet—this will take at least 30 minutes to an hour, so patience, my friend.
- Meanwhile, mix sugar, flour, and salt in the top of a double boiler. If you don’t have one, improvise with a saucepan over another with boiling water.
- Blend in the egg yolks and milk, then cook uncovered while stirring constantly for 10 to 12 minutes, or until the mixture thickens nicely. Remove from heat and stir in the vanilla extract.
- Once your cake is cooled, carefully lift the parchment paper, remove the cake from the pan, and place it on a flat surface. Starting from the short end, cut into three even pieces.
- Assemble your masterpiece by placing the first layer of cake on a serving platter. Spread half of the custard over the top, then cover with a third of the banana slices and a third of the crumbled wafers.
- Top with the next piece of cake and repeat, making sure to reserve a few bananas and crumbled cookies for later. Spread the final amount of custard onto the top layer of cake.
- Refrigerate the whole cake for at least 2 hours or until you’re ready to serve. This chill time is crucial for the flavors to really meld together.
- Just before serving, whip up the cream topping. Combine all ingredients in a large mixing bowl and beat until the cream thickens and becomes stiff.
- Spread the whipped cream over the cake and top with the reserved banana slices and wafers right before serving to keep everything fresh and delightful.
Cook’s Notes
This cake is best made ahead, allowing time for the flavors to develop in the fridge. Just keep the final toppings off until serving time to avoid any sad, brown bananas. Store leftovers in an airtight container in the fridge for up to 3 days, though the bananas might start to look a little tired by then. Don’t worry, the taste will still be on point!
- If you’re in a hurry, ready-made pudding can be used in place of homemade custard, but honestly, the homemade is worth the little extra effort.
- To avoid the dreaded banana browning, toss the slices in a bit of lemon juice before layering them in the cake.
Make It Your Own
- Go chocolatey: Sprinkle some mini chocolate chips between the layers for a chocolate-banana twist.
- Nutty buddy: Add a layer of crushed pecans or walnuts for a bit of crunch.
- Berry bliss: Substitute half of the banana slices with fresh strawberries for a fruity variation.
- Gluten-free: Use gluten-free vanilla wafers and your favorite gluten-free flour blend for the cake.
If you try this, I’d love to hear how it turns out—drop a comment or tag me! Happy baking, friends. Let’s make mid-week desserts a thing, because why not?
Related update: Banana Pudding Cake
Related update: Crispy Rhubarb Pockets
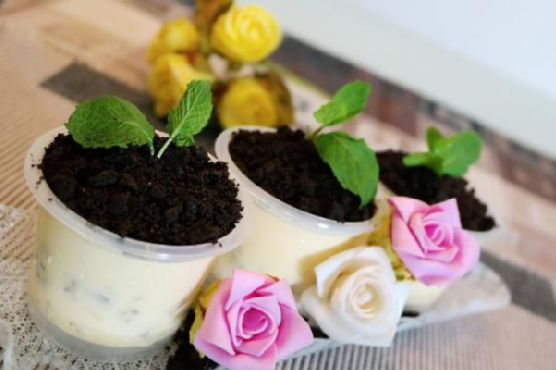
It was a seemingly ordinary Tuesday evening, and I found myself staring at the contents of my freezer, feeling a bit uninspired. A pint of vanilla bean ice cream caught my eye, and suddenly, I was reminded of a cute dessert idea I’d seen earlier — those adorable potted plant ice cream treats. I mean, who wouldn’t want to dig their spoon into what looks like a tiny pot of dirt, only to find a luscious, creamy surprise underneath? Perfect for Valentine’s Day or just because, these desserts are delightfully simple to make and never fail to impress with their whimsical presentation. They come together quickly and are the kind of thing you can whip up on a whim, which, as a busy home cook, is exactly the kind of recipe I adore.
Jump to Recipe
What You’ll Need
Chances are you already have most of this hanging around, but the way these flavors and textures come together is just magical.
- Vanilla bean ice-cream
- Diced palm seeds
- Mixed nuts
- Blueberries
- Oreo cookies
- Parsley
How to Make Valentine’s Day Potted Plant Ice-Cream Desserts
- Start by separating the Oreo cookies; remove the cream filling and set it aside (or snack on it, no judgment here!). Pound the cookies until they transform into fine crumbs that resemble rich, dark soil.
- In a mixing bowl, combine the vanilla bean ice-cream with the diced palm seeds, mixed nuts, and a handful of blueberries. The idea is to get a balanced mix of creaminess, crunch, and bursts of fruity freshness.
- Divide this heavenly mixture into your serving cups. It doesn’t have to be perfect — a little messiness adds to the charm. Place these in the freezer for a good chill.
- Once your ice-cream cups are well-frozen, generously top each one with the Oreo cookie crumbs to create that authentic “soil” look.
- Just before serving, insert a sprig of parsley into each cup. Voilà! You’ve got yourself some delightful potted plant ice-cream desserts that are sure to wow anyone lucky enough to dig in.
Cook’s Notes
Making these desserts is almost as fun as eating them. Remember, the less perfect they look, the better — we’re aiming for a natural, earthy vibe. If you’re prepping ahead, keep the ice-cream mix in the freezer until just before serving, then add the cookie crumbs and parsley. Leftovers (if you have any!) can stay in the freezer for a few days, but be sure to add fresh parsley right before serving again to keep that vibrant green pop.
Make It Your Own
- Swap the vanilla bean ice-cream for chocolate if you want that extra chocolatey punch — it’s a game-changer!
- Try using mint leaves instead of parsley for a refreshing twist and a subtle hint of minty fragrance.
- For a tropical vibe, substitute the blueberries with chunks of pineapple or mango.
- If you’re nuts about nuts, add a sprinkle of crushed pistachios on top of the “soil” for extra crunch and color.
If you try this, I’d love to hear how it turns out — drop a comment or tag me in your potted plant creations! Trust me, these little delightful desserts will grow on you just as they have on me. Happy cooking!
Related update: Valentine’s Day Potted Plant Ice-Cream Desserts
Related update: Banana Pudding Cake
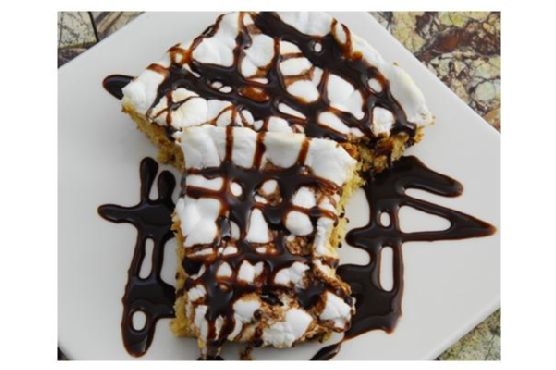
Last Tuesday, I found myself in need of a pick-me-up. It was one of those dreary afternoons when everything seemed to drag. The sky was grey, the email inbox was overflowing, and honestly, I just wanted something sweet and gooey to make it all better. That’s when I remembered these Chocolate Chip Peanut Butter Mallow Dessert Bars. Trust me, they’re the kind of treat that can turn any day around. Quick to whip up, using ingredients you likely already have kicking around your pantry, these bars are a perfect mix of chocolatey, peanut buttery magic with a delightful marshmallow surprise. They’re everything you didn’t know you needed.
Jump to Recipe
What You’ll Need
This is one of those recipes where a quick pantry dive will probably yield most of what you need. The combination of these ingredients is pure joy.
- 1 package of chocolate chip cookie mix
- 1 egg
- 3 tablespoons of milk
- 1/2 cup of butter, melted
- 1/2 cup of peanut butter
- 1 cup of marshmallows
- Drizzle of chocolate syrup
How to Make Chocolate Chip Peanut Butter Mallow Dessert Bars
- Preheat your oven to 375°F (190°C). While it warms, grab a mixing bowl and stir together the chocolate chip cookie mix, egg, milk, and melted butter until smooth. It should be creamy and thick but pliable enough to spread.
- Grease an 8×8 baking pan well. Trust me, you’ll thank yourself later. Spread the cookie mixture evenly into the bottom of the pan. The more even, the better it’ll bake.
- Pop the pan into the oven for 15-20 minutes. You’ll know it’s ready when the edges are golden and the center looks set and slightly puffed. Your kitchen will smell like heaven by now.
- Take the pan out and immediately spread the peanut butter evenly over the hot cookie base. The warmth will help it glide smoothly.
- Top the peanut butter layer with marshmallows. Feel free to sneak a few into your mouth — I won’t tell.
- Return the pan to the oven for a few more minutes, just until the marshmallows start to melt and get a little golden on the tips.
- Remove from the oven and use a spatula to spread the marshmallows evenly over the peanut butter layer, creating a gooey, sticky blanket.
- Drizzle the chocolate syrup over the top. Let it cool to set completely before cutting into squares. This is the hardest part — waiting! But I promise it’s worth it.
Cook’s Notes
Keep an eye on the marshmallows when you pop the pan back in the oven. They can go from beautifully melted to burnt in a blink. If you’re making these ahead, let them cool completely before storing them in an airtight container at room temperature. They’ll keep for about 3-4 days, not that they’ll last that long! For leftovers, a quick zap in the microwave will bring back that gooey goodness.
Make It Your Own
- Nut Swap: Substitute the peanut butter with almond or cashew butter for a different nutty twist.
- S’mores Style: Add a layer of crushed graham crackers in between the peanut butter and marshmallows for a classic s’mores flavor.
- Extra Chocolatey: Mix in a handful of chocolate chips into the cookie dough batter for extra bursts of chocolate with every bite.
- Spice It Up: Stir a teaspoon of cinnamon into the cookie mix for a warm, spiced undertone.
If you try this, I’d love to hear how it turns out — drop a comment or tag me! There’s nothing like sharing a good recipe and seeing everyone’s delicious results. Happy baking, and may your days be as sweet as these bars!
Related update: Chocolate Chip Peanut Butter Mallow Dessert Bars
Related update: Valentine's Day Potted Plant Ice-Cream Desserts
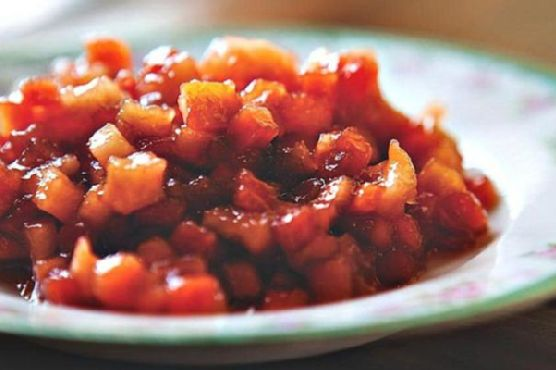
I recently found myself staring at a couple of Honeycrisp apples on my kitchen counter, feeling the first whispers of autumn in the air. You know the days when you can finally break out your sweaters but you still need sunglasses? That’s when my mind started tiptoeing towards something warm and cozy. I mean, what could be better than making a quick, delightful fall fruit compote that ties together all the best flavors of the season? The best part? You don’t need a culinary degree to whip this up. It’s a simple, heart-warming recipe that gives you that “kitchen hero” feeling without the sweat. Plus, it pairs perfectly with so many things, like crispy potato latkes or a dollop of ice cream.
Jump to Recipe
What You’ll Need
Trust me, chances are you already have most of this in your pantry or fridge. The real stars here are the cozy, autumnal ingredients that just sing when they’re together.
- 2 tablespoons of butter
- 2 cups of diced honeycrisp apples
- 1 cup of diced pears
- 1/2 cup of dried cherries
- 1/4 cup of brown sugar
- 1 tablespoon of apple cider vinegar
- 1 cup of apple juice
- 1 cinnamon stick
How to Make Fall Fruit Compote
- Start by melting the butter in a medium-sized saucepan over high heat. You’ll know it’s ready when it starts to smell nutty and divine.
- Once the butter is melted, toss in those diced apples, pears, dried cherries, vinegar, apple juice, brown sugar, and the cinnamon stick. Give it a good stir to coat everything in buttery goodness.
- Let it cook for about 5 minutes. You want the mixture to start bubbling, and the smell will be pure fall magic.
- Turn the heat down to medium and let it simmer for a few more minutes, just until the fruit is tender and the syrupy liquid has mostly reduced. If things start to stick, splash in a little more apple juice to keep it all juicy and lush.
- Once it’s all tender and gorgeous, you’re done! Serve warm and enjoy the fruit-laden spoonfuls of autumn joy.
Cook’s Notes
Let’s chat about some practical tidbits to make your compote experience as smooth as butter. First off, don’t forget that compote thickens as it cools, so don’t worry if it looks a little saucy at first. If you’re planning to serve it later, just warm it up slightly before serving to get back that perfect consistency. If you find yourself with leftovers, pop them in a sealed container in the fridge, and it will stay happy for about a week. This compote is perfect to make ahead of time, especially if you’re planning to dazzle some guests a day or two later.
Make It Your Own
Let’s play around with this compote base because, trust me, versatility is its middle name.
- Swap out the apples for ripe peaches if they’re still in season. They add a lovely, juicy dimension.
- Try cranberries instead of dried cherries for a tarter twist. A little zing never hurt anyone!
- For a boozy touch, replace half the apple juice with a splash of bourbon or rum. It makes things just a little more grown-up.
- Add a pinch of ground ginger or nutmeg for extra warmth and spice. Your taste buds will thank you.
If you give this autumnal delight a go, I’d love to hear how it turns out — drop a comment or tag me in your fall feasting pics! Happy cooking, friend!
Related update: Fall Fruit Compote
Related update: Chocolate Chip Peanut Butter Mallow Dessert Bars

A few weekends ago, I found myself with a bowl of ripe pears staring back at me from the counter, practically begging to be transformed into something special. It was one of those blustery autumn afternoons where the leaves were doing their dance down the street, and all I wanted was a cozy dessert that felt both comforting and indulgent. Enter Oven Roasted Pears with Blackberry Sauce—a dish that marries the rich sweetness of roasted fruit with the tangy brightness of blackberries. It sounds fancy but is as easy as pie (actually, even easier since there’s no crust to wrestle with!). This little number is perfect for impressing your dinner guests or just treating yourself on a Tuesday night. Jump to Recipe
What You’ll Need
Chances are, you already have most of these hanging out in your pantry and fridge. This recipe is all about letting a few simple ingredients shine.
- Pears (ripe but firm)
- Unsalted butter
- Blackberries (fresh and juicy)
- Juice from a lemon
- Powdered sugar
- Confectioners sugar
- Cream of tartar
- Egg whites
- Granulated sugar
- Bittersweet chocolate
How to Make Oven Roasted Pears With Blackberry Sauce
- Preheat your oven to 450°F. Begin by peeling, coring, and quartering the pears. Melt the unsalted butter in a large casserole or baking dish over high heat. A 10-quart Dutch oven works perfectly for this.
- Once the butter is melted and sizzling, add the pear quarters. Cook them for about 10 minutes, stirring occasionally, until they’re golden brown all over. The aroma will be absolutely irresistible.
- Transfer your dish to the oven and let the pears roast for another 7 to 10 minutes. You’ll know they’re ready when a paring knife easily pierces through. Once done, take them out of the oven and let them cool to room temperature.
- As the pears cool, wash and dry the blackberries—my salad spinner is a lifesaver for this! Reserve a handful for garnishing later.
- In a food processor, blend 3 cups of blackberries with powdered sugar and lemon juice until smooth. Pour this vibrant sauce into a bowl and set aside.
- Now, for the meringue kisses! Preheat the oven to 275°F. Line a full-size sheet pan with a silpat mat or parchment paper lightly sprayed with cooking spray.
- In a food processor, give the granulated sugar a blitz for about a minute until it’s superfine. Transfer it to a bowl. Next, process the confectioners sugar and bittersweet chocolate together until the chocolate is reduced to tiny flecks.
- Using a mixer, beat the egg whites at a slow speed until they start to froth. Add the cream of tartar and crank up the speed to high, beating until stiff peaks form.
- Gradually add the superfine sugar, continuing to beat for another two minutes. Transfer this fluffy mixture to a pastry bag fitted with a star tip.
- Pipe out little meringue kisses onto the lined baking sheet, giving each a small peak by pushing the tip into the dollop and pulling away quickly.
- Place the meringues in the oven for an hour and a half. They’re done when they feel hard to the touch, perfectly dried out.
- To serve, spoon the blackberry sauce onto each plate, arrange 3 or 4 pear quarters on top, add a few meringue kisses, and garnish with those reserved whole blackberries.
Cook’s Notes
Here’s the thing, timing is everything with this dessert. You want the pears to still have a bit of bite, so don’t over-roast them. The meringue kisses can be made ahead of time and stored in an airtight container for up to a week. If you’re prepping the blackberry sauce ahead, keep it in the fridge for a day or two, but don’t add the lemon juice until just before serving to keep that bright flavor.
Make It Your Own
- Swap the blackberries for raspberries for a different berry twist.
- Add a splash of vanilla extract to the meringue mixture for a subtle aromatic boost.
- For a dairy-free option, use coconut oil instead of butter when roasting the pears.
- Garnish with some toasted chopped nuts (like hazelnuts or almonds) for a crunchy contrast.
If you try this recipe, I’d love to hear how it turns out—drop a comment below or tag me on social media with your delicious creations!
Related update: Oven Roasted Pears With Blackberry Sauce
Related update: Fall Fruit Compote
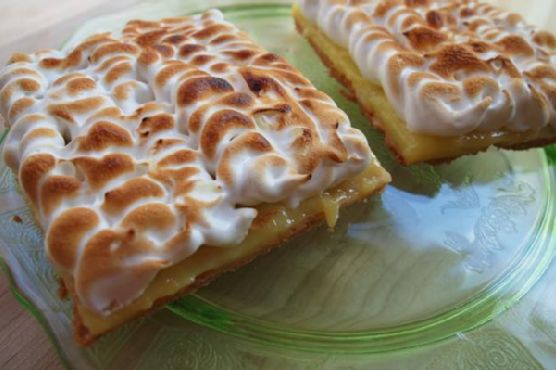
It was one of those sticky summer afternoons when the sun refused to set and the heat clung to every corner of my kitchen. I had just about given up on finding a dessert that felt right for the weather — something light and refreshing that wouldn’t require me to turn my kitchen into a sauna. That’s when the idea for these Lemon Bars hit me. They’re a sunshine-packed treat that’s as easy as they are impressive, giving you that sweet-tart zing without the fuss. Plus, they’re perfect for prepping ahead, which means more time for sipping iced tea on the porch. Whether you’re looking to whip up something special for a summer BBQ or just craving a burst of citrus, these Lemon Bars are your golden ticket.
Jump to Recipe
What You’ll Need
Chances are you already have most of this in your kitchen, making these bars a snap to put together.
- Butter, melted
- Cream cheese
- Flour
- Regular size containers of lemon pudding
- Milk
- Cool whip
- Nuts, chopped
- Powdered sugar
How to Make Lemon Bars
- Preheat your oven to 350°F. Mix the flour and melted butter together with a beater until combined. You’ll know it’s ready when it resembles coarse crumbs.
- Press this mixture firmly into the bottom of a 13 x 9 inch pan, creating a base layer. Bake it for about 20 minutes, or until it’s golden and fragrant.
- Remove from the oven and let it cool completely. Patience is key here!
- In a separate bowl, beat the cream cheese and powdered sugar until smooth and creamy. Blend in one cup of whipped topping. You’ll want a silky, spreadable texture.
- Once the pastry is cool, smoothly spread the cream cheese mixture over it, ensuring an even layer.
- Next, beat the instant pudding with milk until it thickens. Spread this lemony goodness over the cream cheese layer.
- Top everything with the remaining whipped topping, spreading it gently across the surface.
- Finish with a sprinkle of chopped nuts for a bit of crunch. Refrigerate overnight or for at least 3 hours. Let these bars chill until firm before serving.
- When ready to indulge, cut into 24 bars and enjoy the sunshine on a plate!
Cook’s Notes
These Lemon Bars are pretty forgiving, but there are a few things to keep in mind. Make sure the crust has time to cool completely before adding the cream cheese layer, as rushing this part can lead to a melty mess. For those moments when time isn’t on your side, pop your pan in the fridge to speed things up. If you’re planning ahead, rest assured these bars keep wonderfully in the fridge for up to three days. Just be sure to cover them tightly to keep them fresh.
Make It Your Own
- Swap the nuts for toasted coconut to give it a tropical twist.
- Use lime pudding instead of lemon for a zesty variation that’s equally delicious.
- Add a layer of fresh raspberries between the cream cheese and pudding layers for a burst of berry flavor.
- For a nut-free version, simply omit the nuts or replace them with white chocolate shavings.
If you try this, I’d love to hear how it turns out — drop a comment or tag me! There’s something magical about sharing food, and I hope these Lemon Bars bring a little sunshine to your day. Happy baking!
Related update: Lemon Bars
Related update: Oven Roasted Pears With Blackberry Sauce
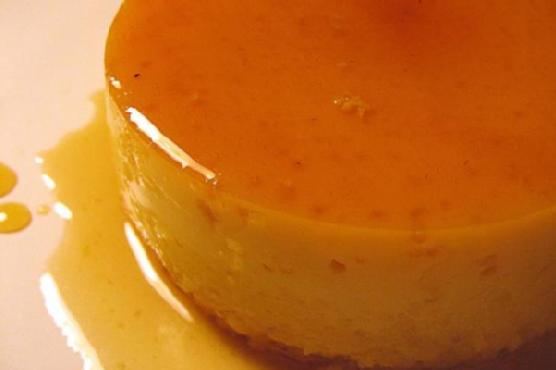
It was one of those chilly evenings when the wind seemed to sneak its way into my kitchen despite all the windows being tightly shut. I had a craving for something sweet but not overly indulgent, the kind of dessert that feels luxurious without leaving you with a sugar hangover. Rummaging through my pantry and fridge, I realized I had everything I needed to make this Baked Caramel Custard. It’s one of those recipes that sounds fancy enough to impress but is simple enough to whip up on a weeknight. A little bit of whisking, a touch of caramelizing, and you’ve got yourself a smooth, silky dessert that hits the spot.
Jump to Recipe
What You’ll Need
Trust me, you might already have most of these ingredients lounging around in your kitchen. Here’s what you’ll need to gather:
- Egg substitute
- 1 egg yolk
- Evaporated skim milk
- Port wine
- Skim milk
- Sugar plus extra for caramelizing
- Vanilla extract
How to Make Baked Caramel Custard
- First things first, preheat your oven to 350 degrees. Your kitchen will be all toasty and inviting in no time.
- In a heavy saucepan, scald the evaporated skim milk and skim milk together. You’ll want to heat them until tiny bubbles form around the edge — don’t let it boil!
- Now, let’s get caramelizing. In a skillet over medium heat, let the extra sugar melt until it becomes a golden brown liquid, like liquid gold. Keep an eye on it so it doesn’t burn.
- Slowly add your scalded milk to the caramel. Stir constantly until the sugar is completely dissolved. The mixture will bubble and foam a bit, just keep stirring until it calms down.
- In a medium bowl, beat together the egg substitute and egg yolk until they’re a lovely lemon color. This is where the magic begins!
- Pour the milk mixture into the bowl with the eggs. Add in the port wine and vanilla extract, mixing until smooth and well combined.
- Divide this creamy dream into six custard cups. Place the cups in a baking dish, then pour boiling water into the dish until it reaches halfway up the sides of the cups.
- Bake the custard in the oven for about 35 to 40 minutes. You’ll know it’s done when you give a little jiggle to the cups, and the centers just barely wobble.
- Remove the custard cups from the oven and let them cool completely in the refrigerator. Patience is key here — you want them nice and chilled.
- When ready to serve, place a dessert plate on top of each custard cup, then boldly invert. The custard should slide out with a little coaxing, revealing its luscious caramel top.
Cook’s Notes
Want to make this ahead of time? You totally can! This custard keeps well in the fridge for up to two days, which makes it a perfect make-ahead dessert for entertaining. Just remember to pop them out of their cups right before serving. And hey, don’t rush the caramelizing process — it’s tempting to crank up the heat, but slow and steady wins the race here. If your caramel seizes up when you add the milk, just return it to the heat and stir until smooth.
Make It Your Own
Feel like switching things up? Here are a few variations to try:
- Swap the port wine for a splash of rum for a slightly different boozy note.
- For a non-alcoholic version, omit the port wine and add a teaspoon of orange zest for a citrusy kick.
- Use whole milk instead of skim for a richer custard if you’re feeling indulgent.
- For a nutty twist, sprinkle the top with toasted chopped hazelnuts before serving.
If you try this, I’d love to hear how it turns out — drop a comment or tag me on social media! Happy baking, and may your custard always be silky and your caramel perfectly golden.
Related update: Lemon Bars
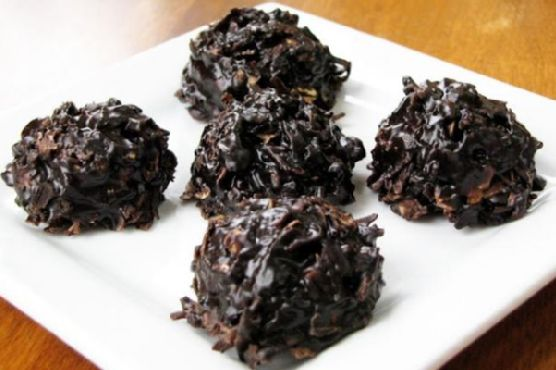
There I was, staring into my pantry on a rainy Wednesday afternoon, feeling the familiar pang of craving something sweet but not wanting to turn on the oven. You know those days when you just need a chocolate fix without all the fuss? That’s when I remembered these delightful little bites of joy: Xocai Oatmeal Dark Chocolate No-Bake Cookies. They’re the perfect balance of chocolatey goodness and wholesome oats, plus a breeze to whip up. What’s not to love about a recipe that feels like a treat but is secretly kind of healthy?
Jump to Recipe
What You’ll Need
This ingredient list is all about simplicity and, chances are, you already have most of these hanging out in your kitchen. Here’s what you’ll need:
- Butter substitute (for that creamy texture without the extra calories)
- Xocai healthy chocolate nugget (the star of the show with its rich, dark chocolate flavor)
- Oats (old-fashioned or quick oats both work perfectly)
- Peanut butter (for that nutty, irresistible taste)
- Soy milk
- Sugar substitute (to keep things sweet but light)
- Vanilla (a splash for that extra depth of flavor)
How to Make Xocai Oatmeal Dark Chocolate No-Bake Cookies
- In a medium saucepan, combine the butter substitute, Xocai chocolate nugget, oats, and peanut butter. Heat this mixture over medium heat, stirring gently to keep things smooth.
- Once everything is well-mixed and starting to melt together, increase the heat slightly and bring the mixture to a gentle boil. Keep stirring, and let it boil for five minutes. The mixture should become glossy and aromatic, like the best kind of hug in a pot.
- Remove the saucepan from the heat and stir in the soy milk, sugar substitute, and vanilla. This is where the mixture starts to transform into cookie magic.
- Finally, fold in the remaining Xocai chocolate nugget pieces. You want them to stay somewhat intact for that delightful chocolate burst in every bite.
- Spoon the mixture onto wax paper or foil, allowing the cookies to cool and harden. They’ll set as they cool, becoming perfectly chewy and rich.
Cook’s Notes
These cookies are incredibly forgiving, but here are a few tips to make them extra perfect:
- Make sure to stir constantly while boiling; this prevents the mixture from sticking to the pan or burning.
- If the cookies aren’t hardening, pop them in the fridge for a quicker set.
- Store the cookies in an airtight container at room temperature for up to a week, but I bet they won’t last that long!
Make It Your Own
- Swap the peanut butter for almond or cashew butter for a different nutty twist.
- Use almond milk instead of soy milk if that’s what you have on hand.
- Add a handful of shredded coconut to the mix for a tropical flair.
- Try adding a pinch of sea salt on top before they set for a sweet and salty combo.
If you try this, I’d love to hear how it turns out — drop a comment or tag me! There’s nothing better than sharing these little pieces of happiness with you all. Happy no-baking!
Related update: Xocai Oatmeal Dark Chocolate No-Bake Cookies
Related update: Cinnamon & Sugar Roasted Chickpeas
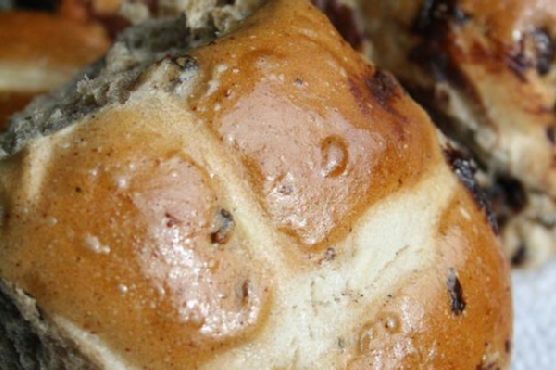
It was one of those unpredictable spring mornings where the sky couldn’t decide if it wanted to rain or shine. I found myself craving something that felt like a warm hug, something that would fill the house with the spicy sweet scent of comfort. Enter Hot Cross Buns. They’re perfect for those “in-between” days, bridging the gap between winter’s end and spring’s full bloom. What I adore about these buns is how deceptively simple they are to make; they sound fancy, but they’re actually pretty forgiving. You just mix, knead, roll, and bake. They’re like little pillows of happiness, complete with a sweet cross on top that’s practically begging to be photographed. Trust me, once you try them, these buns will become a regular request in your household.
Jump to Recipe
What You’ll Need
There’s a good chance you already have most of these ingredients lurking in your pantry. The combination of spices gives the buns their signature warmth, and the sour milk keeps them tender.
- Flour
- Sugar
- Baking powder
- Baking soda
- Salt
- Cinnamon
- Nutmeg
- Shortening
- Raisins
- Sour milk (or add a splash of vinegar or lemon juice to regular milk)
How to Make Hot Cross Buns
- Sift the flour once, then measure it out into a large bowl. Add the baking soda, baking powder, salt, sugar, and spices. Trust me, the double sifting might sound extra, but it makes the buns incredibly light.
- Cut in the shortening. You want to mix until the flour looks like coarse crumbs. This is your time to channel the patient, zen gardener within.
- Stir in the raisins. These little gems add pockets of sweetness in every bite.
- Add enough sour milk to create a stiff dough. You want it just moist enough to hold together without being sticky.
- Turn the dough onto a floured board and knead it slightly—just enough to bring it all together. Don’t overdo it!
- Roll the dough out to about 1/2 inch thickness. Use a 2-inch cutter to cut out your buns. It’s oddly satisfying, like cutting out cookies.
- Place the buns close together in a shallow pan. With a sharp knife, cut a cross into the top of each bun. This is where the magic happens.
- Brush the tops with a mixture of milk and sugar. This will give them a lovely gloss and help them brown beautifully.
- Bake in a hot oven at 475 degrees for 20 minutes. You’ll know they’re done when they’re golden and fragrant.
- Once out of the oven, brush them again with the milk and sugar solution. Fill the cross with plain frosting if desired. Serve them warm and watch them disappear.
Cook’s Notes
Here’s the scoop: these buns are best served warm, fresh out of the oven, but they do reheat well if you find yourself with leftovers (unlikely, but possible). Just pop them in the oven for a few minutes, wrapped in foil, to refresh them. You can make the dough ahead and keep it in the fridge overnight if you want to do the hard part in advance. Just be sure to let it come back to room temperature before rolling and cutting.
Make It Your Own
Feel free to play around with the recipe a bit. Here are some variations to consider:
- Swap raisins for dried cranberries for a tart twist.
- Add orange zest to the dough for a citrusy zing.
- Replace the frosting with a cream cheese glaze for a tangy finish.
- Throw in some chopped nuts if you’re in the mood for a bit of crunch.
If you try these Hot Cross Buns, I’d absolutely love to hear how they turn out for you! Drop a comment below or tag me on social media with your bun pics. Happy baking!
Related update: Hot Cross Buns
Related update: Xocai Oatmeal Dark Chocolate No-Bake Cookies
Related update: Simply Amazing Cinnamon Swirl Wheat Bread
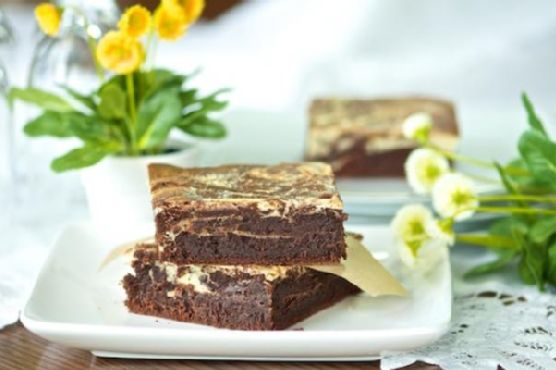
Last Wednesday, as the rain tapped against my kitchen window, a sudden craving for something rich, chocolatey, and indulgent hit me hard. It was one of those evenings where comfort food felt less like an option and more of a necessity. I rifled through my pantry, feeling the urge to concoct something that was both decadent and a tad boozy—a treat just for me. That’s when the idea of Fudgy Chocolate Cream Cheese Brownies with Baileys popped into my head. This is the kind of recipe that turns a gloomy night into a cozy one, with swirls of cream cheese dancing through the chocolate, accented by the warmth of Baileys. It’s not just dessert; it’s the dessert you make when you want to treat yourself to something special.
Jump to Recipe
What You’ll Need
Before you start, take a quick peek in your pantry. You might already have most of what you need. This ingredient list is straightforward, with a couple of stars to give it that wow factor.
- Bittersweet chocolate
- Butter
- Cream cheese
- Eggs
- Flour
- Espresso powder (optional, but it does wonders to elevate the chocolate flavor!)
- Sugar
- Vanilla extract
- Baileys Irish Cream
- Non-stick spray or butter and flour for the pan
How to Make Fudgy Chocolate Cream Cheese Brownies with Baileys
Let’s get down to business! Here’s how to bring this luscious creation to life:
- To whip up the chocolate layer, toss your bittersweet chocolate and butter into a large glass dish. Microwave them for about 1.5 minutes. Don’t panic if the chocolate looks like it hasn’t melted; give it a good stir, and it will melt into a velvety pool. If it’s still stubbornly chunky, give it a few more seconds in the microwave. Just avoid overheating—it’s a slippery slope to a burnt mess.
- Once your chocolate is all dreamy and melted, stir in the sugar and vanilla extract with a whisk. Let it cool down a tad; you don’t want scrambled eggs in your brownies.
- Now, beat in the eggs, one at a time, making sure each is well incorporated before adding the next. This is where the magic begins.
- Sift the flour over the chocolate mixture slowly, mixing as you go. The batter will start to look like a chocolate lover’s dream. Set this chocolatey goodness aside for a moment.
- For the cream cheese layer, pop the cream cheese in a bowl and give it a whirl with a hand mixer until it’s smooth and ready to mingle. Add sugar and mix again until it’s sweet and creamy.
- Beat in an egg and give it a splash of Baileys. Mix until everything’s just right.
- Prep your baking pan. Spray it with non-stick spray or butter and flour it. You can line it with parchment for easy lifting later—trust me, you’ll want to.
- Pour the chocolate mixture evenly into the pan, then drizzle the cream cheese mixture over it. Use a fork to create swirls so the cream cheese peeks through the chocolate. Don’t overdo it; you want distinct marbled patterns.
- Pop the pan into your preheated 350°F oven. Let it bake for about 35 minutes or until a knife comes out clean. The aroma will drive you wild, but patience, my friend—it’ll be worth it.
- Once baked, let it cool before slicing into perfect squares of indulgence. Enjoy!
Cook’s Notes
Here’s the inside scoop on making sure these brownies come out just right. Be patient with the chocolate melting process; stirring is your friend. If you rush and overheat, you’ll get a grainy texture—not cool. When blending the batters, gentle swirling is key for that beautiful marbled look. These brownies store well in an airtight container at room temperature for up to three days, but let’s be honest—they won’t last that long. If you’re thinking ahead, they freeze beautifully too. Just wrap them tightly in parchment and foil.
Make It Your Own
Want to add your own twist? Here are a few ideas:
- Swap the Baileys for your favorite flavored liqueur like Kahlua or Amaretto for a different, yet delightful, boozy touch.
- Add a handful of crushed nuts to the chocolate layer for a crunchy surprise in every bite.
- Mix in a teaspoon of cinnamon into the chocolate for a warm, spicy note that pairs beautifully with the Baileys.
- Looking for a non-alcoholic version? Use a splash of coffee instead of Baileys to deepen the chocolate flavor without the booze.
If you give this a go, I’d love to hear how it turns out for you. Drop me a comment or tag me with your brownie pics. Let’s share the love and the chocolate!
Related update: Fudgy chocolate cream cheese brownies with Baileys
Related update: Hot Cross Buns