How to Make OREO Turkeys for Thanksgiving | Made by Meaghan Moineau

Thanksgiving at my place is never complete without a little bit of chaos and a lot of laughter. One year, I thought I’d try my hand at a new dessert after we had a bit of a mishap with the pumpkin pie (don’t ask!). In the spirit of whimsy and fun, I concocted these adorable little OREO Turkeys that not only saved the day but also became a family favorite. These treats are deceptively simple to make and a delightful project to get kids involved in. Plus, who can resist the combination of OREO cookies and chocolate? Trust me, once you try them, they’ll be a staple at every Thanksgiving feast. Jump to Recipe

What You’ll Need

This ingredient list is a breeze, and chances are you’re already stocked up on most of it, especially if you’ve got a sweet tooth like me!

  • OREO cookies (3 cups, crushed)
  • Cream cheese (softened)
  • Sweet semi baking chocolate (melted)
  • Candy corn
  • Candy eyes
  • Icing (as glue)

How to Make OREO Turkeys for Thanksgiving

  1. First up, grab a package of OREO cookies and crush them up finely. We’re talking almost powdery, so they mix well.
  2. Mix the crushed OREO cookies with softened cream cheese until you have a smooth, pliable dough. It should feel like a rich, chocolatey clay.
  3. Roll this mixture into one-inch balls. They should be small enough to handle easily but big enough to hold their own as a turkey body.
  4. Pop those balls into the freezer for a quick chill — about 10 minutes should do the trick. This helps them firm up for the chocolate dip.
  5. Dip each ball into the melted chocolate, making sure it’s completely coated, and place them on a cookie sheet lined with wax paper. The chocolate should be smooth and glossy.
  6. Refrigerate the chocolate-coated balls for 15 minutes to an hour. This gives them a nice, firm shell.
  7. Now the fun part: decorating! Stick 5 candy corn pieces into the back of each ball to create colorful tail feathers.
  8. Use icing as glue to attach candy eyes towards the front top of the ball. We want those eyes peering out cutely!
  9. For the finishing touch, take a candy corn and cut it into pieces. Use the white tip for a nose and stick it under the eyes, then use the orange pieces as feet. Your turkey should look absolutely adorable!

Cook’s Notes

If your cookie balls are too sticky to roll, try chilling the mixture for a bit longer. It should be firm yet pliable. Don’t worry if your OREO Turkeys aren’t perfect; their charm is in their handmade look! You can make these a day ahead and store them in the refrigerator to keep the chocolate nice and solid. Leftovers (if there are any) can be kept in an airtight container for up to a week.

Make It Your Own

  • Swap the candy eyes with mini chocolate chips. They’re just as cute and give a different texture.
  • Use white chocolate instead of semi-sweet for a sweeter, more vibrant look.
  • Try using different flavored OREOs, like mint or peanut butter, for a twist on the classic flavor.
  • Add a dash of cinnamon to the cream cheese mixture for a subtle, warm hint of spice.

If you try this recipe, I’d love to hear how it turns out — drop a comment or tag me on social media! Your feedback and creativity always make my day. Happy Thanksgiving, and may your kitchen be filled with delightful chaos!

Related update: How to Make OREO Turkeys for Thanksgiving
Grandma Inez’s Pineapple Pie | Made by Meaghan Moineau

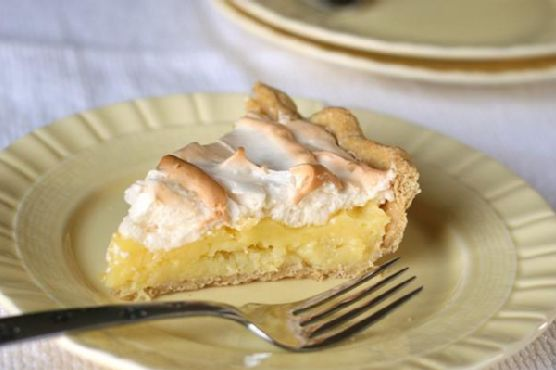
Picture this: it’s a Tuesday evening, and the only thing standing between me and a total kitchen meltdown is the comforting prospect of pulling together Grandma Inez’s Pineapple Pie. I was staring down a pantry that looked more like a post-tornado disaster zone than the well-stocked haven I imagined. But there it was, hidden among the cans of neglected beans and a jar of something unrecognizable — a lone can of pineapple. That’s when I remembered this pie, a dessert that feels like a tropical vacation and a cozy hug all rolled into one. It’s quick, it’s a little quirky, and it’s a whole lot of delicious. A pie so luscious and breezy, it practically makes the kitchen clean itself. Well, almost.

Jump to Recipe

What You’ll Need

If you’ve got a stocked baking cupboard, you’re probably halfway there. The beauty of this pie is that it doesn’t ask for much — just a bit of finesse and a lot of love.

  • 1 pre-baked pie crust
  • 1 can crushed pineapple (keep the juice!)
  • 1 cup sugar (divided)
  • 1/4 cup butter
  • 3 tablespoons cornstarch
  • 1 teaspoon vanilla
  • 3 egg yolks
  • 3 egg whites
  • 1/4 teaspoon cream of tartar
  • 1/4 teaspoon salt
  • 1/2 cup water

How to Make Grandma Inez’s Pineapple Pie

  1. Start by creaming 3/4 cup of the sugar, butter, and egg yolks in a medium saucepan. Use a hand-held mixer to make it fluffy — a workout for your good arm, just until it’s pale and dreamy.
  2. Blend in the cornstarch and vanilla until smooth. It should look like a creamy potion, sweet and inviting.
  3. Add the water and that whole can of crushed pineapple, juice and all. Mix again, until everything feels like it’s come to a tropical accord.
  4. Transfer your saucepan to the stove and set it over medium heat. Stir constantly — think of it as a zen exercise — until the mix thickens. You’ll know it’s ready when it can coat the back of a spoon.
  5. Pour this luscious filling into your pre-baked pie crust, spreading it out like you’re tucking it into bed.
  6. Now, whip the egg whites until they’re foamy, like the top of a cappuccino. Gradually add the remaining 1/4 cup sugar, cream of tartar, and salt. Keep whipping until soft peaks form and the mixture is glossy like a magazine finish.
  7. Spread the meringue over the cooled pie. Use the back of a spoon to create little peaks, like waves on an ocean.
  8. Bake in a preheated 400°F oven for just a few minutes. Stay close! You want the meringue to be golden, not torched.
  9. Let it cool completely before slicing — if you can wait that long. Store in the fridge and sneak slices whenever you need a pick-me-up.

Cook’s Notes

A few tips to keep this pie from veering off course:

– Make sure your pie crust is completely cool before adding the filling — we want a crispy base, not a soggy one.
– Meringue can be a bit temperamental. Avoid making it on a humid day, or it might weep. No one likes a sad pie.
– The pie is best eaten within a day or two, but trust me, it rarely makes it that long. If you’ve got leftovers, keep them covered in the fridge. The meringue might lose its crispness, but it’ll still taste divine.

Make It Your Own

Here’s where you get to flex your creative muscles:

  • Swap the pineapple for mango or passion fruit for a different tropical twist.
  • Add a hint of ginger or nutmeg to the filling for a warm-spiced version.
  • Use almond extract instead of vanilla for a nutty, nuanced flavor.
  • Try topping with coconut flakes post-bake for an extra layer of texture and flavor.

If you try this, I’d love to hear how it turns out — drop a comment or tag me! Your kitchen is about to smell amazing, and I can’t wait for you to taste this slice of sunshine. Enjoy every bite!

Related update: Grandma Inez’s Pineapple Pie

Related update: How to Make OREO Turkeys for Thanksgiving

Candy Cane Chocolate Marshmallows | Made by Meaghan Moineau

Last winter, I found myself staring down a half-eaten box of candy canes—a festive gift from my overly enthusiastic neighbor. I adore peppermint, but there’s only so much peppermint tea one can drink! Desperate to create something my friends and family would devour, it hit me: those candy canes needed a sweet partner. Enter my Candy Cane Chocolate Marshmallows. Perfect for a cozy evening in your favorite fuzzy socks, these treats are surprisingly easy to make and look infinitely more impressive than the effort they require. They’re the kind of thing you whip up to wow guests during holiday gatherings or to simply satisfy that post-dinner sweet tooth while binge-watching your favorite show. Trust me, they’re a hit! Jump to Recipe

What You’ll Need

This recipe is like a scavenger hunt in your pantry; chances are you already have most of the goodies tucked away. Here’s what you’ll need:

  • Candy canes – the stars of the show!
  • Dark chocolate – for that rich, bittersweet contrast.
  • Marshmallows – go for the big, fluffy kind.
  • Milk chocolate – adds a creamy sweetness to balance the dark chocolate.

How to Make Candy Cane Chocolate Marshmallows

  1. First, let’s get those candy canes ready. Grab a few and crush them using the bottom of a sturdy glass or a mallet. You want pieces small enough to stick but not so tiny that they turn to dust. Set them aside.
  2. Set up a double boiler by placing a heat-safe bowl over a pot of simmering water. Make sure the bottom of the bowl doesn’t touch the water. Add the dark and milk chocolate to the bowl, stirring occasionally until the mixture is smooth and glossy.
  3. Now for the fun part—dip each marshmallow into the melted chocolate, ensuring it’s nicely coated but not drowning. Let the excess drip off back into the bowl.
  4. Immediately roll the chocolate-dipped marshmallow into the crushed candy canes. The pieces should stick to the chocolate, creating a delightful crunchy coating.
  5. Place each finished marshmallow on a sheet of wax paper. They’ll need to chill in the fridge for at least an hour, or until the chocolate has fully hardened.

Cook’s Notes

These little delights are pretty forgiving, so don’t stress if things get a bit messy. Here are a few pointers to keep you on track:

  • If you don’t have a double boiler, don’t sweat it. Use a microwave in short bursts to melt the chocolate, stirring in between.
  • Store your marshmallows in an airtight container in a cool, dry place. They should last up to a week, but honestly, they’ll probably disappear much sooner!
  • To make ahead, prepare them up to two days in advance. They’re the perfect treat to have waiting for last-minute guests or unexpected sweet cravings.

Make It Your Own

  • Try using white chocolate for a sweeter, milder twist. It pairs beautifully with peppermint!
  • For a nutty crunch, roll the chocolate-coated marshmallows in finely chopped hazelnuts instead of candy canes.
  • If you’re feeling adventurous, add a pinch of cayenne pepper to the melted chocolate for a spicy kick.
  • Not a fan of peppermint? Substitute with crushed graham crackers and sprinkle with a touch of cinnamon for a s’mores vibe.

If you try this, I’d love to hear how it turns out—drop a comment or tag me in your marshmallow masterpiece! Happy indulging, and may your winter be as sweet as these treats!

Related update: Candy Cane Chocolate Marshmallows

Related update: Grandma Inez’s Pineapple Pie

Related update: Tuna and Tofu Cold Dish

2 Minute Chocolate Yum | Made by Meaghan Moineau

It was one of those evenings where you stare into your pantry hoping for a miracle, and it just magically happens! I had a sweet tooth that just wouldn’t quit, but the thought of baking a whole cake felt like running a marathon in heels. Ever been there? Enter: the 2 Minute Chocolate Yum. It’s that indulgent treat that saves you from dessert FOMO when you’re short on time and ingredients. Seriously, it’s like a chocolate hug in a mug. Imagine something that’s as easy as making a cup of coffee but infinitely more rewarding. Just a quick whip and zap, and you’ve got a dessert that feels like it took way more effort than it did. Also, if you’ve got a sudden guest or a cranky kid demanding sweets, this is your lifesaver.

Jump to Recipe

What You’ll Need

This recipe is a pantry hero; chances are, you’ve got most of these on hand. Here’s what you’ll need to whip up some chocolate magic:

  • Cocoa powder
  • Egg
  • Flour
  • Milk
  • Oil
  • Salt
  • Sugar
  • Vanilla

How to Make 2 Minute Chocolate Yum

  1. In a small mixing bowl, combine the cocoa powder, egg, flour, milk, oil, salt, sugar, and vanilla. Whip them together until the mixture is smooth and glossy, much like a velvety chocolate drizzle.
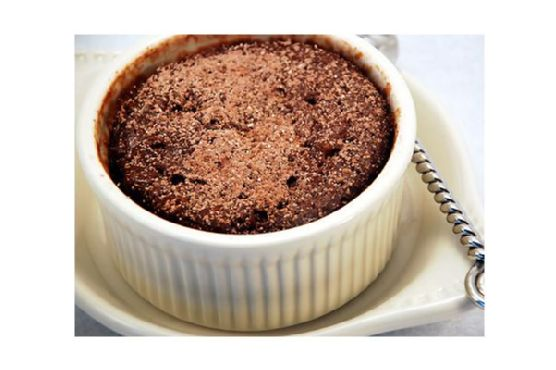
  2. Divide the batter evenly between two 6-8 oz. ramekins. Fill them a little over halfway full so they have room to puff up in the microwave.
  3. Microwave one ramekin at a time for about 2 minutes. You’ll know it’s done when the cake is puffed and looks like it’s ready to burst with chocolatey goodness.
  4. Serve immediately. Top with a scoop of ice cream, a dollop of whipped cream, or just a sprinkle of powdered sugar and cocoa for that minimalist vibe.

Cook’s Notes

Let’s keep it real: microwaves vary, so you might need to adjust the cooking time based on your machine’s mood swings. Start with 90 seconds if you’re unsure and then zap it in 10-second intervals until perfect. If you want to save some batter for later, it holds up well covered in the fridge for a day. Just give it a good stir before microwaving. Stuck with leftovers? Unlikely, but if that happens, you can refrigerate and reheat gently. The texture might change a bit, but it’ll still hit the spot.

Make It Your Own

  • Black Forest Twist: Add a spoonful of cherry pie filling in the middle of the batter before cooking for a luscious surprise.
  • Nutty Buddy: Stir in a tablespoon of peanut butter for a chocolate-peanut butter dream.
  • Minty Fresh: A few drops of peppermint extract can turn this into a festive treat.
  • Spice It Up: Add a pinch of cinnamon or chili powder for a surprising kick.

If you try this, I’d love to hear how it turns out! Drop a comment or tag me on social media with your chocolatey creations. Keep those sweet moments coming!

Related update: 2 Minute Chocolate Yum

Related update: Candy Cane Chocolate Marshmallows

Gingerbread | Made by Meaghan Moineau

It was one of those blustery autumn afternoons when the wind just howls around your windows, and all you want is something to make the house smell amazing and your soul feel cozy. I was rummaging through my pantry, craving something spicy and sweet, when I realized I had everything I needed for gingerbread. You know that feeling when you stumble upon a recipe that makes your kitchen feel like a warm hug? This gingerbread is exactly that. It’s quick enough for a weeknight treat but feels special with its aromatic spices and deep molasses goodness. Plus, the glaze? Pure magic. Once you make it, you’ll want to drizzle it over everything.

Jump to Recipe

What You’ll Need

This gingerbread recipe is so forgiving and made with ingredients you probably already have hanging out in your kitchen.

  • Molasses
  • Salt
  • Eggs
  • Salad oil
  • Sugar
  • Soda
  • Water
  • Flour
  • Ginger
  • Cinnamon

How to Make Gingerbread

  1. In a large bowl, mix together the molasses, salad oil, sugar, ginger, cinnamon, and salt until the sugar dissolves and everything smells like holiday cheer.
  2. Add the eggs and beat the mixture until it becomes smooth and glossy.
  3. Dissolve the soda in 1/8 cup of boiling water, then stir it into the molasses mixture. You’ll see the batter start to bubble a little.
  4. Gradually add in the flour, alternating with the remaining water, stirring gently until the batter is smooth. It will be pretty thin, almost like pancake batter, but trust the process!
  5. Pour the batter into a greased 9″x13″ pan and bake at 350 degrees until the top is firm and a toothpick comes out clean. The edges will pull away slightly from the sides of the pan.
  6. While the gingerbread bakes, make the glaze: melt the butter, then stir in the milk and brown sugar. Bring to a boil and let it bubble away for about 4 minutes, stirring occasionally. It’ll thicken a bit as it cools.
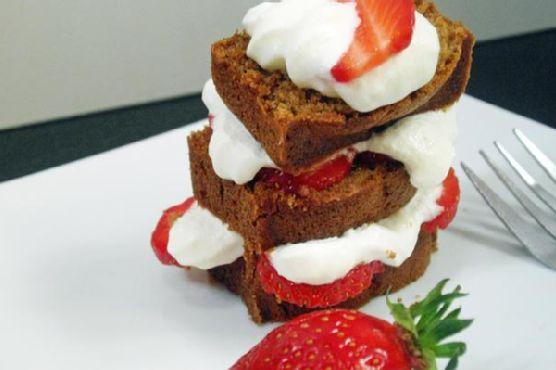
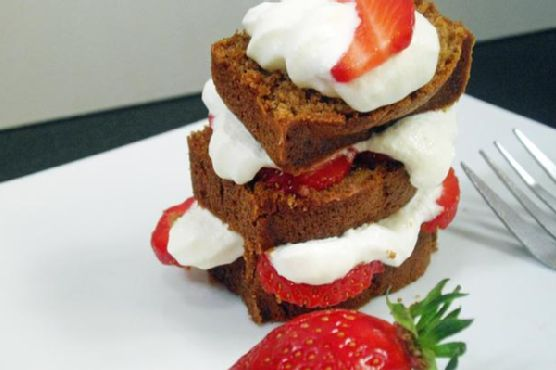
  7. Once the gingerbread is done, let it cool slightly before drizzling the glaze over the top. Serve warm or wait until it’s cold—your call!

Cook’s Notes

This gingerbread can be stored covered at room temperature for up to 3 days, though it’s usually gone by day two in my house! If you want to make it ahead, it freezes beautifully. Just wrap it tightly in plastic wrap, and when you’re ready to enjoy, let it thaw at room temperature.

Watch out for overbaking. Because the batter is thin, it might cook faster than you think, especially if your oven runs hot. Check it a bit earlier than you’d expect.

  • For extra flavor depth, consider adding a pinch of nutmeg or cloves along with the ginger and cinnamon.
  • If you want to make the glaze ahead of time, you can reheat it gently before drizzling over the gingerbread.

Make It Your Own

  • Swap the salad oil with melted butter for a richer flavor.
  • Replace half of the flour with whole wheat flour for a heartier texture.
  • Add a handful of chopped walnuts or pecans for a nutty crunch.
  • Add a teaspoon of vanilla extract to the glaze for a hint of vanilla sweetness.

If you try this, I’d love to hear how it turns out—drop a comment or tag me! I promise this gingerbread will make your kitchen feel like the coziest place on earth.

Related update: Gingerbread

Related update: 2 Minute Chocolate Yum

Gingerbread | Made by Meaghan Moineau

It was one of those unexpectedly chilly evenings when I found myself craving warmth, not just from the heater but from something I could savor. The kind of evening where you want to wrap yourself in a cozy sweater and let your kitchen fill with the scent of baking spices. That’s when gingerbread came to mind — the kind that’s rich with molasses and spices, yet so simple to whip up that you almost wonder if you missed a step. This recipe is one of those gems; it’s quick but doesn’t skimp on flavor, comforting with just the right amount of sweetness, and impressive enough if you decide last-minute to invite a friend over for tea. Trust me, you won’t regret letting this gingerbread become part of your chilly evening rituals.

Jump to Recipe

What You’ll Need

Gingerbread is all about those warm, inviting flavors that make your house smell like a dream. Chances are, you’ll already have most of these ingredients tucked away in your pantry:

  • Molasses
  • Salt
  • Eggs
  • Salad oil (use what you have — canola or vegetable oil works great)
  • Sugar
  • Baking soda
  • Boiling water
  • Flour
  • Ground ginger
  • Cinnamon

How to Make Gingerbread

  1. Start by mixing the molasses, salad oil, sugar, ground ginger, cinnamon, and a pinch of salt in a large bowl. Stir them together until the mixture looks smooth and the spices are beautifully fragrant.
  2. Add the eggs into the mix and beat them well. You want the batter to be uniform and glossy.
  3. Dissolve the baking soda in 1/8 cup of boiling water. This step is crucial as it activates the soda, giving your gingerbread the rise it needs. Stir this into your batter.
  4. Gradually add the flour and the rest of the water into the mixture. The batter will be thin, but that’s exactly what you’re aiming for.
  5. Pour the batter into a 9″x13″ pan, spreading it evenly. Bake in a preheated oven at 350°F until the top is done and lightly springy to the touch — your kitchen will smell divine!
  6. If you’re feeling extra indulgent, make the glaze: combine a stick of butter, 1/4 cup milk, and 1 cup brown sugar in a saucepan. Bring the mixture to a boil and let it bubble away for about 4 minutes. Drizzle this heavenly glaze over your gingerbread once it’s out of the oven.

Cook’s Notes

Here’s the thing about gingerbread: it’s forgiving. If you find yourself without ground ginger, a bit of allspice or nutmeg can pinch-hit in a hurry. Store any leftovers tightly wrapped in foil, and they’ll keep well at room temperature for a few days — if they last that long. To really appreciate its flavor, serve it either hot or cold; each temperature brings out different notes in the spices and molasses.

If you’re planning ahead, the gingerbread can be made a day in advance. Just keep it covered and apply the glaze right before serving to maintain that perfect texture.

Make It Your Own

  • Switch up the spices: Add a bit of ground cloves or nutmeg for an extra spice twist.
  • Nutty addition: Stir in a handful of chopped walnuts or pecans for some delightful crunch.
  • Fruity flair: Toss in a handful of raisins or chopped dried apricot before baking for a fruity surprise.
  • Lemon zest: For a citrusy zing, add the zest of a lemon to the batter before baking.

If you try this gingerbread, I’d truly love to know how it turns out — drop a comment or tag me in a post! Your kitchen will thank you for the delightful aroma, and your taste buds will be doing a happy dance. Happy baking!

Related update: Gingerbread

Related update: Gingerbread

Kahlua Tiramisu | Made by Meaghan Moineau

It was one of those rainy Wednesday nights when the craving hit hard. You know the type — the kind where you just need something indulgent to take the edge off the mid-week blues. My mind immediately went to tiramisu, but not just any tiramisu. I wanted something with a little extra kick, a little something-something to make it feel like more than just a dessert. Enter Kahlua Tiramisu. This dish is luxurious yet surprisingly easy, a balance of creamy mascarpone and velvety espresso with a splash of Kahlua for that extra oomph. The best part? You don’t need to be a pastry chef to whip this up. It’s perfect for those nights when you want to impress with minimal effort.

Jump to Recipe

What You’ll Need

Before diving in, take a peek at the ingredient list. Chances are you already have most of this sitting around, just waiting to transform into dessert magic.

  • Mascarpone cheese
  • Vanilla extract
  • Kahlua
  • Espresso
  • Whipping cream
  • Icing sugar
  • Ladyfingers (pick a pack that will fit snugly in an 11×7 dish)
  • Cocoa powder

How to Make Kahlua Tiramisu

  1. In a medium mixing bowl, combine the mascarpone cheese with vanilla extract, Kahlua, and just under half of your freshly brewed espresso. Blend it well until you achieve a smooth, lush mixture.
  2. In another medium bowl, whip the cream with the icing sugar until it holds soft peaks. You want it smooth, like a cloud. Gently fold in the mascarpone mixture until it’s fully incorporated.
  3. Pour the remaining espresso into a wide, shallow dish, ready to soak those ladyfingers. Quickly dip each ladyfinger in, flipping it to coat both sides. Don’t let them soak too long — you want them soft but not mushy.
  4. Arrange the soaked ladyfingers to form a single layer at the bottom of an 11×7 casserole dish. Spread half of your mascarpone mixture over the ladyfingers, covering them evenly.
  5. Repeat the dipping and layering process with the rest of the ladyfingers and mascarpone mixture.
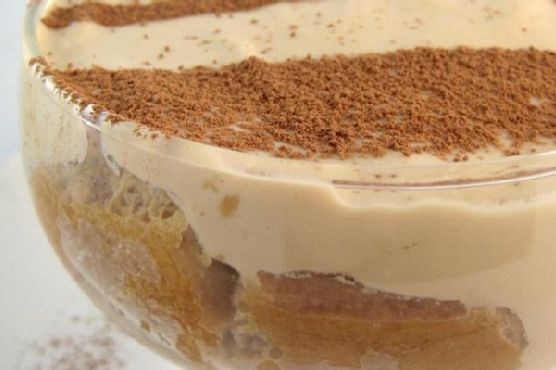
  6. Refrigerate for at least 4 hours, preferably overnight, to let the flavors meld. Just before you’re ready to serve, dust a generous layer of cocoa powder over the top using a fine sieve. For an extra treat, scatter some grated bittersweet chocolate or chocolate curls over the top.

Cook’s Notes

This dessert is a dream for planners. You can make it a day ahead, and it actually tastes better the next day as the flavors have time to develop and deepen. Store leftovers in the fridge, tightly covered, for up to three days. Avoid freezing; it messes with the creamy texture that makes tiramisu so delightful. When dipping ladyfingers, keep it quick! A mere second or so in the espresso will keep them from getting too soggy and disintegrating.

Make It Your Own

  • For a boozier version, swap some of the espresso for extra Kahlua. Your call!
  • Not a fan of Kahlua? Try using a hazelnut liqueur or even a shot of Baileys for a different flavor profile.
  • For a nutty twist, add a layer of crushed toasted almonds in between the mascarpone layers. It adds a lovely crunch.
  • If you’re watching sugar intake, reduce the amount of icing sugar in the whipped cream, or use a sugar substitute that blends well.

If you try this, I’d love to hear how it turns out — drop a comment or tag me! There’s nothing quite like sharing a sweet success. Enjoy your little slice of indulgence!

Related update: Kahlua Tiramisu

Related update: Gingerbread

Home made coffee ice cream | Made by Meaghan Moineau

The other day, I found myself standing in my kitchen at 10 PM, staring longingly at the empty ice cream tub in my freezer. It was one of those evenings where you just need a little something sweet and comforting to wind down. I glanced over at my coffee maker, and a light bulb went off in my head. Why not combine my love of coffee with my undeniable ice cream addiction? And so, my homemade coffee ice cream was born. This recipe is worth the extra few steps because it’s creamy, full of java flavor, and doesn’t require anything fancy. Just a bit of time and patience, and you’ll be savoring the smoothest, most delightful treat you can imagine.

Jump to Recipe

What You’ll Need

This isn’t one of those ingredient lists that sends you on a wild goose chase. Chances are, you already have most of these goodies hanging out in your kitchen:

  • 2 cups of cream
  • 3/4 cup of sugar
  • 1 tablespoon of coffee granules
  • 1 cup of milk
  • 4 large egg yolks
  • 1 teaspoon of vanilla extract

How to Make Home made coffee ice cream

  1. In a medium, heavy saucepan, combine the cream, milk, sugar, and coffee granules. Bring the mixture to a gentle boil over medium heat, watching for those tiny bubbles at the edges and a heavenly coffee aroma, then remove from the heat and set aside.
  2. In a medium bowl, beat the egg yolks until they’re smooth and slightly frothy. Slowly whisk 1 cup of the hot cream mixture into the yolks, then stir in the vanilla extract.
  3. Pour the egg mixture back into the saucepan with the remaining hot cream mixture. Over low heat, cook the custard, stirring constantly with a wooden spoon or spatula until it thickens enough to coat the back of the spoon, about 4-5 minutes.
  4. Remove the custard from the heat and strain it through a fine mesh strainer into a clean bowl or container, catching any sneaky little bits of cooked egg. Press plastic wrap directly onto the surface to prevent a skin from forming.
  5. Chill the custard in the refrigerator for at least 2 hours to make it nice and cold. The anticipation will be worth it, trust me!
  6. Once chilled, pour the custard into your ice cream machine and churn according to the manufacturer’s instructions. The mixture will transform into a creamy, dreamy delight.
  7. Transfer the churned ice cream to a plastic container and pop it in the freezer for a few hours to firm up. When you’re ready to serve, let it sit out for 5-10 minutes to get to that perfect scoopable stage.

Cook’s Notes

There’s something magical about homemade ice cream, but it can be a bit tricky if you’re not careful. Always keep stirring the custard to prevent it from curdling. If you don’t have an ice cream maker, a bit of patience and elbow grease will do the trick—just freeze the mixture and stir it every 30 minutes until it’s frozen. Store the ice cream in an airtight container, and it should keep well for up to two weeks. That is, if you can resist finishing it off sooner!

Make It Your Own

Want to jazz things up a bit? Here are some simple swaps and additions:

  • For a mocha twist, melt 1/2 cup of chocolate chips into the cream mixture before boiling.
  • Add a teaspoon of cinnamon to the egg yolks for a spicy kick that pairs perfectly with the coffee.
  • Mix in crushed biscotti or chocolate-covered espresso beans during the last few minutes of churning for a crunchy surprise.
  • Swap the milk with almond milk for a nutty note that sings with the coffee flavor.

If you try this, I’d love to hear how it turns out—drop a comment or tag me! Enjoy every heavenly bite.

Related update: Home made coffee ice cream

Related update: Kahlua Tiramisu

Home made coffee ice cream | Made by Meaghan Moineau

It was one of those afternoons when the sun was too hot, and all I could think of was something cool and creamy to beat the heat. The store-bought ice cream in my freezer just didn’t seem to cut it. I craved something more indulgent—a little scoop of homemade bliss I could savor slowly. That’s when I remembered this magic trick of a recipe for homemade coffee ice cream. It’s the kind of treat that sneaks in the backdoor of your afternoon and turns an ordinary day into something special. All you need is a few pantry staples and a bit of patience. Trust me, this coffee ice cream will make your taste buds dance and your kitchen smell like a cozy coffee shop. It’s the ultimate indulgence, perfect for a quick escape from the everyday grind or for impressing your dinner guests without breaking a sweat.

Jump to Recipe

What You’ll Need

The beauty of this recipe is its simplicity. Chances are, your kitchen already holds most of the magic beans for this spell. Here’s what you’ll need to whip up this silky delight:

  • 2 cups of cream
  • 1 cup of milk
  • 3/4 cup of sugar
  • 1 tablespoon of coffee granules
  • 5 egg yolks
  • 1 teaspoon of vanilla extract

How to Make Homemade Coffee Ice Cream

  1. In a medium, heavy saucepan, combine the cream, milk, sugar, and coffee granules. Heat gently over medium until it just begins to boil, filling your kitchen with a fragrant aroma. Remove from heat and let it sit while you move on to the eggs.
  2. In a medium bowl, beat the egg yolks until they’re smooth like sunshine. Slowly whisk in a cup of your hot coffee cream, taking care not to scramble the eggs.
  3. Add a dash of vanilla extract to this warm blend, because why not add a hint of sweetness to this love affair?
  4. Returning to your saucepan, gradually introduce the egg mixture by pouring it in a steady stream, stirring constantly. Cook over low heat until the mixture coats the back of a spoon, about 4-5 minutes. You’ll know it’s ready when it’s luxuriously thickened.
  5. Remove from heat and pour through a fine mesh strainer into a clean container. This step ensures your ice cream is as smooth as a jazz singer’s voice.
  6. Cover with plastic wrap, pressing it directly onto the surface to prevent a skin from forming. Chill in the fridge for at least 2 hours—perfect time to catch up on your favorite show!
  7. Once chilled, pour the mixture into an ice cream machine and churn according to the manufacturer’s instructions until it reaches a soft serve consistency.
  8. Transfer to a plastic container and freeze for a few hours to firm up. Before serving, let it sit out for 5-10 minutes to soften to the perfect scooping texture.

Cook’s Notes

This recipe is forgiving and rewards patience. Make sure you keep the temperature low when cooking with the egg yolks to avoid unpleasant curdling. Straining the mixture is not optional—it’s essential for that ultra-smooth texture. If you’re making this ahead of time, the mixture can be left to chill overnight in the fridge. Store your ready ice cream in an airtight container to keep it fresh; it should last about a week, but I doubt it will stick around that long!

Make It Your Own

  • Want a more robust coffee flavor? Swap out regular coffee granules for an espresso version.
  • For a luscious mocha twist, add a tablespoon of cocoa powder when combining the cream, milk, sugar, and coffee.
  • Looking to impress with a boozy treat? Fold in a shot of coffee liqueur right before churning.
  • Try using coconut milk instead of cow’s milk for a tropical vibe—it adds an unexpected twist and creaminess.

If you try this, I’d love to hear how it turns out—drop a comment or tag me! Whether you’re savoring this on a quiet afternoon or sharing it with friends, I hope it brings a little extra joy to your day.

Related update: Home made coffee ice cream

Related update: Home made coffee ice cream

Cheesecake with cranberries | Made by Meaghan Moineau

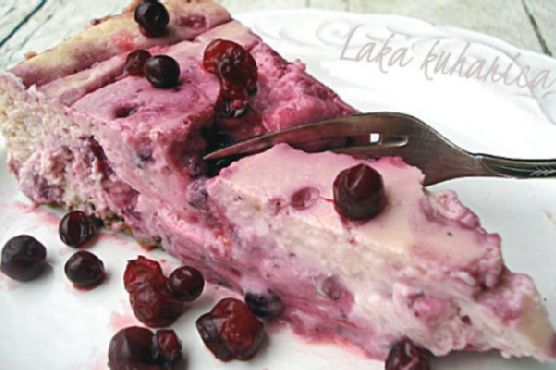
Picture this: It’s a chilly autumn evening, and I’m staring at a bag of cranberries sitting on the counter, just begging to be transformed into something fabulous. The leaves are turning that gorgeous burnt orange, and I’ve got this urge to whip up something that screams cozy. Enter, my Cheesecake with Cranberries. It’s not just any cheesecake; it’s that magical blend of tart cranberries meeting creamy, dreamy cheesecake all bundled up in a hug of buttery, crumbly crust. If you’re in the mood for something that feels like a warm sweater for your taste buds but seems way more impressive than the effort it takes, this is your go-to. And the best part? You might already have most of these ingredients skulking in your pantry. So let’s dive right in.

Jump to Recipe

What You’ll Need

You know those recipes that call for exotic spices and ingredients that you’ll probably only use once? Yeah, this isn’t one of them. Chances are, your cupboards are already harboring most of these goodies.

  • Cranberries – fresh is best, trust me on this one!
  • Water – the unsung hero
  • Allspice – gives it that warm, cozy vibe
  • Cloves – just a pinch for depth
  • Orange extract – for that zingy, citrusy kick
  • Sugar – duh! Sweetness is key
  • McVitie’s wholewheat digestive cookies – the foundation of our crumbly crust
  • Butter – because buttery crust is life
  • Cream cheese – the heart of the cheesecake
  • Sour cream – adds a tangy creaminess
  • Cornstarch – to hold it all together
  • Eggs – the glue that binds

How to Make Cheesecake with Cranberries

  1. First things first, take those cranberries and toss them into a medium saucepan with some water. Bring it to a boil until the skins burst open. It’s like nature’s way of telling you they’re ready—about 5 minutes should do it.
  2. Take the pan off the heat and stir in allspice, cloves, orange extract, and sugar. Mix it all up until it’s just right, then pop it into the fridge to cool. Patience, my friend.
  3. Now, for the crust. Crush those digestive cookies into fine crumbs, mix them with sugar and melted butter, and press the lot into the bottom of a greased 9-inch springform pan. There, the base of our cheesecake empire!
  4. In a mixing bowl, beat the cream cheese and sugar together until they’re smooth like a jazz sax solo. Add the sour cream and cornstarch, beating until well combined.
  5. Gently add the eggs, beating on low speed. This is crucial—overbeating could deflate your cake, and nobody wants that.
  6. Drain the cranberry sauce and reserve those plump cranberry bits. Fold a cup of that sauce into the cheesecake mixture, pour it over your crust, and drizzle with the remaining sauce.
  7. Bake at 160°C for about 30-35 minutes, just until the center is almost set. A little jiggle is fine—it’ll firm up as it cools.
  8. Cool it on a wire rack for about 10 minutes. Run a knife around the edge to loosen it, then let it cool for another hour. Then, into the fridge it goes overnight. Yes, waiting is the hardest part.
  9. When you’re ready to serve, top with those reserved cranberries if you want to get fancy.

Cook’s Notes

Here’s the deal: Cheesecake is one of those things that just gets better with a little time chillin’ in the fridge. If you can, make it the day before. It gives the flavors more time to get together and party. Store leftovers in the fridge, tightly covered, for up to 4 days—if it lasts that long! When making the cranberry sauce, make sure it’s cool before folding it in. Warm sauce can curdle the cream cheese mixture, and we don’t want that drama.

Make It Your Own

Want to put your own spin on this cheesecake wonder? Here are some ideas:

  • Swap the cranberries for raspberries if you’re feeling a different kind of tart.
  • Try ginger snaps instead of digestive cookies for a spicier kick.
  • Feeling nutty? Add a handful of chopped walnuts to the crust mixture for some crunch.
  • For a citrus twist, add a tablespoon of lemon zest to the cream cheese mixture.

If you try this, I’d love to hear how it turns out—drop a comment or tag me in your delicious creations! Your kitchen adventures are what make this all worthwhile. 🍰

Related update: Cheesecake with cranberries

Related update: Home made coffee ice cream

Bacon Brownie Cupcakes | Made by Meaghan Moineau

I once found myself in the middle of a weeknight conundrum—my sweet tooth was hollering louder than a toddler missing nap time, and my pantry was looking a little sparse. Cue the genius idea: Bacon Brownie Cupcakes. This is the kind of recipe that was born out of necessity, a craving, and a little slice of bacon heaven left over from breakfast. What’s better than combining the gooey richness of brownies with the savory crunch of bacon? This dish dances the line between dessert and daring, and let me tell you, it’s worth every single bite. Plus, it’s all done using familiar pantry staples, so you’ll feel like a kitchen wizard in no time.

Jump to Recipe

What You’ll Need

When I say this ingredient list will make you feel like you’ve hit the jackpot, I mean it. With just a few special touches, you’ll be whipping up a treat that feels both classic and adventurous.

  • Unsweetened chocolate
  • Sweetened chocolate
  • Butter
  • Sugar
  • Salt
  • Eggs
  • All-purpose flour
  • Cocoa powder
  • Bacon

How to Make Bacon Brownie Cupcakes

  1. Preheat your oven to 350°F, and let’s get that muffin pan greased well. Trust me, you want these to come out looking fab, not stuck like a toddler’s fist in a cookie jar.
  2. Fry up your bacon until it’s crispy perfection, but avoid any charred bits. You want that savory crunch without the burnt taste. Pat it dry and crumble it up, discarding any overly fatty pieces.
  3. In a double boiler, melt the unsweetened chocolate and butter together. Stir occasionally until smooth, then let it cool slightly. This mixture will become the soul of your brownie cupcakes.
  4. Whisk in the sugar and salt into the melted chocolate. Add the eggs one at a time, making sure each is fully incorporated before adding the next. This gives them that fudgy texture we adore.
  5. Sift the flour and cocoa powder together, then gently fold it into the chocolate mixture. This is where the magic happens—don’t rush this step!
  6. Stir in the bacon pieces and sweetened chocolate bits. Pour the batter into your prepared muffin pan, filling each cup about ¾ full.
  7. Bake for around 30 minutes. You’ll know they’re ready when a toothpick inserted in the center comes out with a few moist crumbs. Let them cool before attempting to remove them from the pan.

Cook’s Notes

These little beauties can be stored in an airtight container for up to four days, but let’s be real—they’ll probably vanish much sooner. If you’re making them ahead for a party or just because, you can prepare the batter and refrigerate it for up to 24 hours before baking. Just bring it to room temperature before popping it in the oven. Sometimes the bacon can be a bit tricky; ensure it’s well-drained so you don’t end up with greasy cupcakes. And whatever you do, resist the urge to gobble them up straight from the oven—you’ll want them to firm up a bit first.

Make It Your Own

  • Feeling nutty? Swap out half the bacon for toasted walnuts for a crunchy twist.
  • Prefer a spicy kick? Add a pinch of cayenne pepper to the batter for a surprising heat that pairs beautifully with the chocolate.
  • Not a fan of bacon (gasp!)? Substitute with crispy tofu bits seasoned with smoked paprika for a vegetarian-friendly version.
  • Craving a bit of extra sweetness? Sprinkle some sea salt caramel bits on top before baking for a salty-sweet sensation.

If you try this, I’d love to hear how it turns out—drop a comment or tag me! Whether you stick to the script or put your own twist on it, these Bacon Brownie Cupcakes are bound to be a story in the making. Happy baking!

Related update: Bacon Brownie Cupcakes

Related update: Hard-Boiled Egg Gratin In A Bechamel Sauce

Related update: Cheesecake with cranberries

Cinnamon Sugar Fried Apples | Made by Meaghan Moineau

It was one of those Tuesday evenings where everything felt a little upside down. My oven was on the fritz, my dinner plans had gone awry, and yet, that familiar sweet craving hit me like clockwork. As I rummaged through my pantry, the thought of something warm and comforting felt like the perfect antidote to my topsy-turvy day. Enter, cinnamon sugar fried apples. Not only are these little guys a quick fix for any sweet tooth, but they also bring a cozy vibe that feels like a warm hug on a plate. And honestly, who doesn’t love a recipe that transforms humble ingredients into something downright delicious?

Jump to Recipe

What You’ll Need

This recipe is all about simplicity — chances are you’ve got most of this in your kitchen already. Here’s what you’ll need:

  • All-purpose flour
  • Apples (crisp varieties like Granny Smith or Honeycrisp work great!)
  • Brown sugar
  • Cinnamon
  • Eggs
  • Granulated sugar
  • Lemon zest
  • Milk
  • Oil (for frying)
  • Salt
  • Unsalted butter

How to Make Cinnamon Sugar Fried Apples

  1. In a large bowl, whisk together the all-purpose flour, a pinch of salt, granulated sugar, milk, lightly beaten eggs, lemon zest, and melted unsalted butter until the batter is smooth to the touch. Cover the bowl with plastic wrap and let it rest for 30 minutes to ensure the flour fully hydrates and the flavors meld beautifully.
  2. While the batter is resting, core and slice your apples into 1 cm thick rings. Aim for even slices as this will help them cook uniformly. Set them aside and start heating the oil in your preferred frying vessel over medium heat.
  3. Once your batter has rested and your oil is shimmering and ready, dip each apple slice into the batter, allowing any excess to drip back into the bowl. Gently lay the slices into the hot oil.
  4. Fry the apple slices until they are golden and fragrant, about 2-3 minutes per side. You’ll know they’re ready when the edges turn a beautiful golden hue and your kitchen is filled with the nostalgic aroma of apples and cinnamon.
  5. As each batch finishes, transfer the fried apples to a plate lined with double-layered paper towels to drain any excess oil.
  6. In a small bowl, combine the brown sugar and cinnamon. Sprinkle this delightful cinnamon sugar mixture generously over the warm apple slices. Serve immediately for that perfect combination of crispy, sweet, and spiced.

Cook’s Notes

Here’s the thing: frying can be a bit of a mess, but it’s so worth it. Make sure your oil is hot enough before dipping in the apples; otherwise, they’ll soak up too much oil and get soggy. A small kitchen thermometer can be handy if you’re unsure. If you’re planning to make these ahead of time, I’d recommend just prepping the batter and slicing the apples. Frying is best done right before serving to maintain that delightful crispiness. If you do end up with leftovers, a quick reheat in the oven at 350°F should do the trick.

Make It Your Own

Want to put your own spin on these cinnamon sugar fried apples? Here are some fun ideas:

  • Instead of apples, try using firm pears for a slightly different but equally delicious twist.
  • For a nutty crunch, toss in some chopped pecans or walnuts after sprinkling the cinnamon sugar.
  • Want a caramel vibe? Drizzle some homemade or store-bought caramel sauce over the fried apples for an extra indulgent treat.
  • Looking for a boozy kick? Add a splash of spiced rum to the batter for a grown-up version.

If you try this recipe, I’d love to hear how it turns out — drop a comment or tag me in your delicious creations! Whatever you do, make sure to enjoy each crispy, sweet bite. Happy cooking! 🍏✨

Related update: Cinnamon Sugar Fried Apples

Related update: Roasted Red Pepper & Tomato Salsa

Related update: Bacon Brownie Cupcakes

Peach Pie | Made by Meaghan Moineau

It was one of those chaotic Tuesdays when everything felt like it was going sideways. You know the type—emails piling up, a to-do list that looks like a novel, and somehow, the cord to my headphones decided to have a secret life of its own. All I wanted was to escape into a little slice of comfort, and that’s when it hit me: Peach Pie. Not just any peach pie, but a delightfully simple one that could come together faster than you can say “midweek madness.” This pie is my sweet escape—comforting and a little indulgent but totally achievable even when time isn’t your friend.

The true magic of this pie is in its simplicity. A buttery crust that you don’t have to fuss over, juicy peaches that make you wish summer could last forever, and a creamy filling that lends the whole thing an air of sophistication without needing a culinary degree. Trust me, once you’ve savored a slice, you’ll see why this recipe is a keeper.

Jump to Recipe

What You’ll Need

This recipe might just be your new pantry hero because chances are, you already have most of these ingredients.

  • Pastry crust – Store-bought or homemade, your call!
  • Cut up peaches – Fresh is fantastic, but canned works too.
  • Brown eggs
  • Almond paste – Adds a subtle, nutty depth.
  • Brown sugar
  • Heavy cream
  • Vanilla extract

How to Make Peach Pie

  1. Preheat your oven to 375°F (190°C). This is crucial for getting that crust just right.
  2. Roll out your pastry crust and gently lay it into a 9-inch pie plate. Be kind to it—no one likes a torn crust! Lightly poke the base with a fork.
  3. Pop the crust into the oven for a quick prebake, about 8 minutes. This gives it a head start so it won’t turn soggy later on. Once it’s lightly golden, remove and let it cool slightly.
  4. In a large mixing bowl, whisk together the eggs, almond paste, heavy cream, brown sugar, and vanilla extract until smooth. You’re looking for a fragrant, creamy mixture that’s just begging to be poured.
  5. Layer your cut-up peaches evenly over the prebaked crust. Feel free to sneak a few bites; it’s part of the process!
  6. Pour the creamy egg mixture over the peaches, making sure everything is nicely coated.
  7. Lower the oven temperature to 350°F (175°C) and bake the pie for about 45 minutes, or until the center is set and firm. The edges should be bubbling and the top should have a lovely golden hue.

Cook’s Notes

Alright, here’s the thing. This pie is pretty forgiving, but a few tips will make your life easier. When prebaking your crust, keep an eye on it—every oven has its quirks, and a few extra minutes can make the difference between golden and overdone. If your almond paste is a little tough to mix, try grating it first. It’ll blend like a dream. And about those peaches: if you’re using canned, just make sure to drain them well. We’re aiming for juicy, not soggy.

The pie is best enjoyed the day it’s made, but it’ll keep in the fridge for up to 3 days. Reheat it gently, or savor it cold—it’s surprisingly good that way.

Make It Your Own

This pie is a blank canvas, ready for your personal touch. Here are a few ideas to get your creativity flowing:

  • Swap the almond paste with lemon zest for a refreshing citrus twist.
  • Add a splash of bourbon to the filling for an adult version of this classic.
  • Top the finished pie with a handful of crushed walnuts for a bit of crunch.
  • Mix in a cup of fresh raspberries with the peaches for a berry-peach fusion.

If you try this, I’d love to hear how it turns out—drop a comment or tag me! Remember, pie is one of those things that brings a bit of magic to even the most mundane days, so get baking and enjoy every crumb.

Related update: Peach Pie

Related update: Cinnamon Sugar Fried Apples

Valentine Hearts | Made by Meaghan Moineau

Picture this: It’s a chilly February evening, and my kitchen is filled with the aroma of something sweet and promising. I had just returned from a hectic day at work, my scarf still draped haphazardly around my neck, when I realized Valentine’s Day was a mere twenty-four hours away. Inspired by the spirit of love and a bit of a sweet tooth, I decided to whip up something special yet uncomplicated — Valentine Hearts. These delightful little treats are the perfect blend of flaky, creamy, and fruity, with a touch of chocolate for good measure. They’re not just easy on the eyes, but they’re a breeze to make — perfect for those of us who don’t have hours to spend in the kitchen. Whether you’re planning a romantic dinner or just want to indulge yourself, these hearts are bound to win over anyone’s heart.

Jump to Recipe

What You’ll Need

Trust me, you probably have most of this in your pantry already. Just a quick trip to the store for a couple of fresh items, and you’re ready to go.

  • Puff pastry – store-bought is perfect for this quick recipe.
  • 1 egg – for that perfect golden glaze.
  • Castor sugar – for a touch of sweetness on the crust.
  • Canned crème fraiche – this creamy goodness holds everything together.
  • Fresh strawberries – because what’s a Valentine treat without a bit of berry love?
  • Plain chocolate – for drizzling on top. Decadent and delightful!

How to Make Valentine Hearts

  1. Preheat your oven to 220°C (425°F). Trust me, this is the sweet spot for puff pastry perfection.
  2. Thaw the puff pastry sheet according to the package instructions. You don’t want it too soft, just enough to handle.
  3. Unroll the pastry sheet gently. Use a medium-sized heart-shaped cookie cutter to cut out about 8 hearts. Go ahead, it’s okay to indulge in a little love here.
  4. Prick each heart with a fork to prevent them from puffing up too much. This step is crucial to keep them in shape.
  5. Brush each heart with beaten egg, then sprinkle lightly with castor sugar. This will give them a beautiful golden shine and a touch of sweetness.
  6. Place the hearts on a greased baking sheet and pop them in the oven for about 10 minutes, or until they’re risen and golden brown. Your kitchen will start smelling absolutely heavenly, I promise.
  7. Let them cool completely. Patience, my friend, patience.
  8. Slice the strawberries while the hearts cool. Once cooled, carefully split each heart horizontally using a sharp knife.
  9. Sandwich each heart with a generous dollop of crème fraiche and a few slices of strawberry.
  10. Finally, drizzle melted plain chocolate over the top and dust with a little more castor sugar. Voilà! Your Valentine Hearts are ready to impress.

Cook’s Notes

Here’s a little wisdom from my kitchen to yours. Keeping the pastry cold is key to achieving that flaky texture, so don’t let it sit out for too long. If you see the pastry getting sticky, pop it back in the fridge for a few minutes. When slicing the hearts, be gentle to avoid breaking them; a serrated knife usually does the trick. If you’re making these in advance, you can prepare the puff pastry hearts and store them in an airtight container for up to two days. Just assemble with strawberries and crème fraîche right before serving for the freshest taste.

Make It Your Own

Feeling adventurous? Here are some fun variations:

  • Swap the strawberries with raspberries or blueberries for a different fruity twist.
  • Use lemon curd instead of crème fraiche for a tangy surprise.
  • Try white chocolate drizzle instead of plain for a sweeter, creamier finish.
  • Add a pinch of cinnamon to the sugar before sprinkling on the pastry for a warm, spicy note.

If you try this, I’d love to hear how it turns out — drop a comment or tag me in your pictures! Whether you’re sharing with a loved one or treating yourself, these Valentine Hearts are sure to bring a smile. Enjoy every flaky, creamy, chocolaty bite!

Related update: Valentine Hearts

Related update: The BEST Sweet Potato Casserole

Related update: Peach Pie

Oreo Cake | Made by Meaghan Moineau

It was one of those weeks where everything felt like a bit too much—work stress, social commitments, and a never-ending to-do list. I wanted to treat myself and my family to something indulgent but didn’t have the energy for an elaborate dessert. That’s when I remembered my Oreo Cake recipe, the ultimate no-bake comfort food that feels like a hug on a plate. It’s like having a sundae in cake form, with layers of creamy vanilla ice cream and that iconic Oreo crunch. Plus, it’s a crowd-pleaser with minimal effort. Win-win, right?

Jump to Recipe

What You’ll Need

This ingredient list is a dream come true for those last-minute dessert cravings. Chances are you already have most of this delightful ensemble in your pantry or freezer.

  • 1/2 cup butter
  • 1 can chocolate syrup
  • 1 container Cool Whip
  • 1 package Oreo cookies
  • 1 gallon vanilla bean ice cream

How to Make Oreo Cake

  1. Crumble the entire package of Oreo cookies. Keep about 1/3 of the crumbs aside for the topping.
  2. In a mixing bowl, combine the melted butter with the remaining 2/3 of the cookie crumbs. Stir until the mixture resembles wet sand.
  3. Press this buttery Oreo mixture firmly into the bottom of a long cake pan. This will be your deliciously crunchy crust.
  4. Scoop out half a gallon of vanilla bean ice cream and spread it evenly over the crust. Let it sit for a minute or two to soften a bit if needed.
  5. Pour half the can of chocolate syrup over the ice cream layer, spreading it gently with the back of a spoon.
  6. Layer on the Cool Whip, smoothing it out into an even layer that reaches all the corners.
  7. Sprinkle the reserved Oreo crumbs over the top, followed by a drizzle of the remaining chocolate syrup.
  8. Cover the cake pan with foil or plastic wrap and freeze it overnight, or for at least 12 hours, to ensure it sets beautifully.

Cook’s Notes

Here’s a little tip: this cake is best served with a bit of time out of the freezer, about 10-15 minutes, so it softens just enough to cut easily. If you’re planning to make this in advance, it can be frozen for up to a week—just make sure it’s well-covered to prevent freezer burn. As for leftovers (if there are any!), they keep nicely in the freezer for about another week.

  • Ensure the ice cream is slightly softened before spreading it, or you might end up with an uneven layer.
  • If you want stronger chocolate flavor, feel free to add more syrup according to your taste.

Make It Your Own

  • Swap the vanilla bean ice cream for chocolate or mint chocolate chip for an interesting twist.
  • Use peanut butter sandwich cookies instead of Oreos for a nutty flavor that’s simply irresistible.
  • Add a layer of sliced bananas between the ice cream and Cool Whip for a fruity surprise.
  • If you’re a coffee lover, drizzle some cooled espresso along with the chocolate syrup for a mocha kick.

If you try this Oreo Cake, I’d love to hear how it turns out! Drop a comment below or tag me in your pictures—sharing your sweet creations makes my day!

Related update: Oreo Cake

Related update: Valentine Hearts

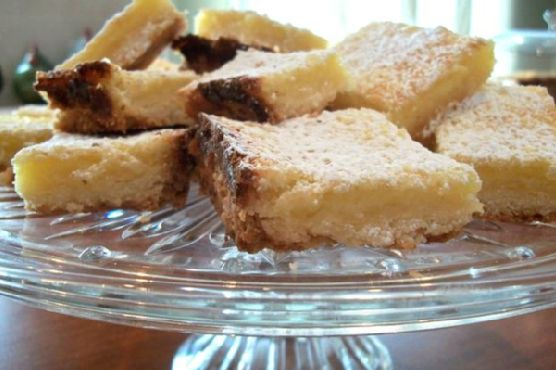
Luscious Lemon Bars | Made by Meaghan Moineau

Picture this: it’s a lazy Sunday afternoon, and I’m inevitably in the mood for something sweet and tangy that won’t monopolize my entire day. My eyes wander to the lemons on my counter, practically begging to be transformed into something divine. Enter: Luscious Lemon Bars. These bars hit the sweet spot between indulgent and refreshingly light—they’re the perfect antidote to a gray day or a midweek slump. Plus, with a buttery crust and a gooey lemony filling, it’s one of those recipes that’s way more impressive than the effort you put in. Intrigued yet? Let’s get those lemons going.

Jump to Recipe

What You’ll Need

The beauty of this recipe is that it relies on staple ingredients that are probably already lounging in your pantry. We’re talking about those trusty items you turn to when the craving strikes. Here’s what you’ll need:

  • 1 cup of flour
  • 1/2 cup of softened butter
  • 1/4 cup of white sugar
  • 2 large eggs
  • 1 cup of white sugar
  • 1/4 cup of flour
  • 1/2 teaspoon of baking powder
  • Juice of 2 lemons (about 1/3 cup)
  • Zest of 2 lemons
  • Powdered sugar for dusting

How to Make Luscious Lemon Bars

  1. First things first: PREHEAT your oven to 350°F. While it’s getting toasty, GREASE a 9×13-inch rectangular cake pan. This ensures your bars will pop out without a fuss later on.
  2. Next, COMBINE the crust ingredients—flour, butter, and white sugar—in a mixing bowl. Use your fingertips to press this crumbly heaven into the pan evenly. No need to overthink it; rustic is our aim here.
  3. Once smooth and even, BAKE the crust for about 20 minutes. You’re aiming for a pale golden brown, the kind of color that tells you it’s ready for the spotlight.
  4. While your crust is getting cozy in the oven, let’s talk FILLING. In a bowl, whisk together the remaining ingredients: eggs, sugar, flour, baking powder, lemon juice, and zest. Whisk it up until it’s smooth and well combined, a sunny yellow mixture that smells irresistible.
  5. When your crust is ready, REMOVE it from the oven and pour the lemon filling over the top. Return the pan to the oven and BAKE for an additional 23-25 minutes. Keep an eye on it; you want the top to be set but not too brown.
  6. Once baked, REMOVE the pan from the oven and allow the bars to cool on a wire rack for about 30 minutes. They need this time to firm up.
  7. To get those perfect squares, CUT the bars in half and use a large flexible spatula to lift each half out. This makes the final cutting much easier and less messy.
  8. Finally, DUST with a good amount of sifted powdered sugar. This isn’t just for looks—it adds a sweet layer that complements the tangy filling. And just like that, you’re DONE!

Cook’s Notes

Don’t rush the cooling process—these bars need it to set properly. If you’re in a hurry, pop them in the fridge after they’ve cooled on the rack a bit. They can be stored in an airtight container for up to a week, but honestly, they’re usually gone by day two. If you’re making them ahead of time, they freeze beautifully. Just wrap them tightly before dusting with sugar, and thaw in the fridge overnight when you’re ready to indulge.

Make It Your Own

Cooking is all about making a recipe fit your tastes. Here are a few ways to tweak these bars:

  • Swap out the lemon for lime for a zesty twist.
  • Mix in some raspberries to the filling for a fruity burst.
  • Use gluten-free flour for a GF-friendly treat.
  • Add a pinch of sea salt to the crust for a salty-sweet contrast.

If you try this, I’d love to hear how it turns out—drop a comment or tag me! Your feedback makes my day and I always enjoy seeing your delicious creations come to life. Happy baking!

Related update: Luscious Lemon Bars

Related update: Oreo Cake

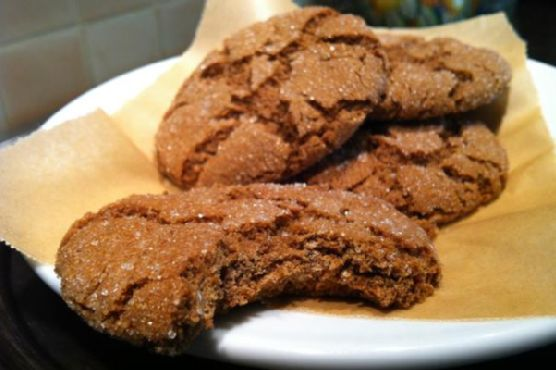
Ginger Cookies- gluten free, soy free, vegan | Made by Meaghan Moineau

On a Tuesday evening, after a day that felt like it just couldn’t decide between rain or shine, I found myself in dire need of comfort. The kind of comfort that only a cozy kitchen and the warm scent of spices can provide. That’s when the idea of making ginger cookies hit me. But not just any ginger cookies—ones that would be kind to everyone around my table, regardless of food allergies or dietary needs. So I whipped up a batch of these delightful gluten-free, soy-free, vegan ginger cookies. They’re the perfect blend of spicy and sweet, crispy on the edges yet chewy in the middle, and trust me—these cookies are destined to become a staple in your baking repertoire. Whether it’s a last-minute treat or a planned indulgence, they never fail to impress with their simplicity and flavor. Jump to Recipe

What You’ll Need

This recipe is a pantry hero. Chances are, you already have most of these ingredients tucked away in your kitchen.

  • Dark brown sugar
  • Coconut oil
  • Molasses
  • Chunky applesauce
  • Red gluten-free flour
  • Ground cinnamon
  • Ground ginger
  • Ground cloves
  • Pumpkin spice blend
  • Baking soda
  • Cane sugar (for rolling)

How to Make Ginger Cookies – gluten free, soy free, vegan

  1. Preheat your oven to 350 degrees F. Line three half-sheet baking pans with parchment paper and set them aside.
  2. In a small shallow bowl, add cane sugar for rolling and set aside.
  3. In a small bowl, whisk together the flour, spices, and baking soda. Set this dry mixture aside.
  4. Using a stand mixer with a paddle attachment, or a bowl with a hand mixer, combine the dark brown sugar, coconut oil, molasses, and applesauce. Start on low speed to avoid a sugar storm, then increase to medium speed for about 2 minutes until everything is fully incorporated.
  5. Slowly add the flour mixture to the wet ingredients, a third at a time, ensuring a proper blend with each addition.
  6. Lay out a piece of wax or parchment paper, about a foot wide, to set the rolled cookies before their sugar bath.
  7. Roll the dough into 1-inch balls with light pressure, similar to how you’d roll a meatball.
  8. Transfer the cookie dough balls into the bowl with sugar, as many as you can fit at a time, and gently roll them to ensure all sides are coated. Repeat until all the dough is used.
  9. Place the sugared cookie dough balls onto the prepared baking sheets. Press down gently on each ball to just dent the top a bit.
  10. Bake in the preheated oven for 9-11 minutes. When done, let them cool on the baking sheets for 15 minutes before transferring them to a cooling rack to cool completely.

Cook’s Notes

These cookies are surprisingly adaptable yet truly shine in their original form. The dough can be made ahead of time and chilled for up to a day if needed. Just make sure to let it come back to room temperature before rolling into balls. Once baked, they store wonderfully in an airtight container in the refrigerator for up to a week. If you’re planning to make a large batch, these cookies freeze well for up to a month. Simply thaw them at room temperature, and they’ll be as good as fresh.

Make It Your Own

  • For a nutty twist, try adding a tablespoon of almond flour to the dry ingredients for extra flavor and texture.
  • If you’re not strictly vegan, replace the applesauce with an egg for a traditional cookie crumb.
  • Add a teaspoon of vanilla extract to the wet ingredients for a more complex flavor.
  • If you love a bit of heat, add a pinch of cayenne pepper to the spice mix for a surprising kick.

If you try this, I’d love to hear how it turns out — drop a comment or tag me! Whether you stick to the recipe or try some fun variations, these ginger cookies are sure to bring a smile to your face and a burst of warmth to your home.

Related update: Ginger Cookies- gluten free, soy free, vegan

Related update: Grilled Potato Skins

Related update: Luscious Lemon Bars

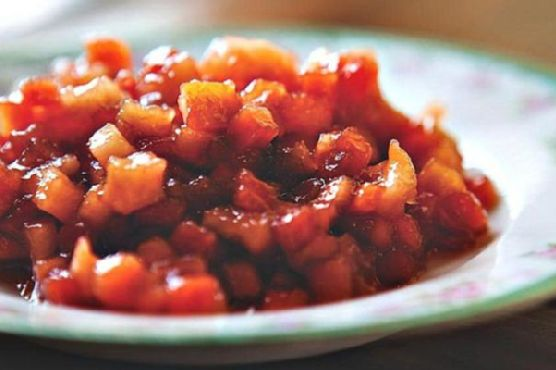
Fall Fruit Compote | Made by Meaghan Moineau

Picture this: It’s a crisp Saturday morning in late October, and the air smells like fallen leaves and the promise of something delicious bubbling on the stove. I’d just come back from the local farmers’ market with a basket full of honeycrisp apples and ripe pears, when I had this sudden inspiration to make something that feels like a warm hug for your taste buds. That’s how this Fall Fruit Compote came to life! It’s the perfect combination of sweet and tangy with a hint of spice from the cinnamon, making it a cozy companion for just about any dish. Whether you’re spooning it over pancakes, pairing it with savory potato latkes, or just nibbling it straight from the jar (guilty as charged), this compote is a must-try for the season.

Jump to Recipe

What You’ll Need

This recipe is all about embracing the flavors of fall, with ingredients that are probably hanging out in your pantry already or easy to snag at the store.

  • Butter – for that rich, dreamy base
  • Diced honeycrisp apples – sweet and crispy, the star of this show
  • Diced pears – a soft, juicy partner for the apples
  • Dried cherries – they add a pop of color and tartness
  • Apple cider vinegar – just a splash to bring out the flavors
  • Apple juice – keeps everything juicy and flavorful
  • Brown sugar – for a deep, molasses-y sweetness
  • Cinnamon stick – the essential fall spice

How to Make Fall Fruit Compote

  1. Melt the butter in a medium saucepan over high heat until it starts to bubble and sizzle. You want that nutty aroma to fill the air.
  2. Toss in the diced apples, pears, and dried cherries, followed by the apple cider vinegar, apple juice, brown sugar, and cinnamon stick. Give it all a good stir to make sure everyone’s getting along in the pot.
  3. Cook this fruit medley for about 5 minutes. The apples and pears should start to soften, and the cherries will begin plumping up.
  4. Lower the heat to medium. Let it cook for a few minutes more, keeping a watchful eye as the liquid reduces and the fruit becomes tender. Stir occasionally to prevent sticking.
  5. If the mixture looks like it’s drying out too quickly, trickle in a bit more apple juice. You want the fruit tender and the liquid mostly gone, leaving a thick, syrupy goodness.

Cook’s Notes

Alright, here’s the scoop on perfecting this compote. First off, keep an eye on your heat levels. It’s easy for the sugars to burn if the heat’s too high, especially towards the end when the liquid is nearly evaporated. If you’re making this ahead, know that it keeps wonderfully in the fridge for up to a week. Just pop it in a jar or airtight container. When you’re ready for a warm serving, a quick zap in the microwave or a gentle reheat on the stove works like a charm. And remember, if you find yourself with leftovers (rare, but it happens), this compote is a dream swirled into yogurt or spread over toast.

Make It Your Own

Get creative and switch things up with these ideas:

  • Swap the dried cherries for dried cranberries for a tarter twist.
  • Add a splash of bourbon or rum for a grown-up, boozy version.
  • For a spicier kick, throw in a pinch of ground ginger or nutmeg with the cinnamon.
  • Use maple syrup instead of brown sugar for a different layer of sweetness.

If you try this, I’d love to hear how it turns out — drop a comment or tag me! Enjoy the cozy vibes, and happy cooking! 🍎🍐

Related update: Fall Fruit Compote

Related update: Ginger Cookies- gluten free, soy free, vegan

Related update: Dandelion pesto

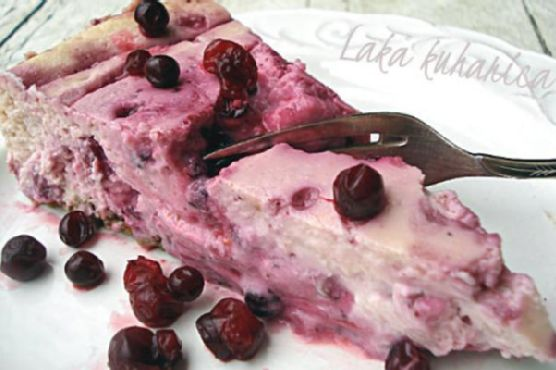
Cheesecake with cranberries | Made by Meaghan Moineau

Picture this: It’s a chilly Saturday afternoon, and I’m craving something sweet but not too cloying, something that feels like a hug in dessert form. My mind wanders to the bags of fresh cranberries I picked up on a whim during my last grocery run. That’s when inspiration strikes — why not whip up a cheesecake with a tangy cranberry twist? This cheesecake is creamy, bursting with seasonal flavor, and surprisingly easy to make. If you’ve ever thought cheesecake was too complicated for a casual bake, think again. This recipe is as straightforward as it gets and leaves you with a dessert that’s as impressive as it is delicious.

Jump to Recipe

What You’ll Need

The beauty of this cheesecake is that you probably have most of these ingredients on hand. The only thing you might need to grab is the fresh cranberries, but trust me, they’re worth it.

  • Fresh cranberries – these are the star of the show.
  • Water
  • Sugar
  • Allspice
  • Cloves
  • Orange extract
  • Mcvitie’s wholewheat digestive cookies – perfect for the crust.
  • Butter
  • Cream cheese – the foundation of any good cheesecake.
  • Sour cream
  • Cornstarch
  • Eggs

How to Make Cheesecake with Cranberries

  1. Start by making the cranberry sauce. In a medium saucepan, bring the cranberries and water to a boil. Let them bubble away until you hear the satisfying pop of the berries’ skins bursting, around 5 minutes.
  2. Once popped, remove the saucepan from the heat and stir in the allspice, cloves, orange extract, and sugar. Mix it all together until it’s thoroughly combined. Pop it in the fridge to cool while you work on the rest.
  3. For the crust, take those Mcvitie’s digestive cookies and crush them into crumbs. Combine the crumbs with sugar and melted butter in a small bowl. Press this mixture firmly into the bottom of a greased 9-inch springform pan, making sure it’s even. Set it aside.
  4. In a mixing bowl, beat the cream cheese and sugar together until the mixture is smooth and creamy. Then add the sour cream and cornstarch, beating well to ensure everything is perfectly blended. Add the eggs one at a time, beating on low just until each one is incorporated.
  5. Drain your cooled cranberry sauce, reserving the cranberries for later. Gently fold one cup of the sauce into the cream cheese mixture, letting the vibrant red sauce ripple through the creamy batter.
  6. Pour the batter into your prepared crust. Sprinkle the top with the remaining cranberry sauce, letting it swirl and mingle with the batter.
  7. Bake the cheesecake at 160°C for 30-35 minutes, or until the center is almost set. You’ll know it’s ready when it still has a slight jiggle in the middle.
  8. Once baked, let the cheesecake cool on a wire rack for about 10 minutes. Run a knife around the edge to loosen the cake from the pan, then let it cool for another hour.
  9. Refrigerate overnight. I know it’s hard to wait, but this step is crucial for setting the cheesecake properly.
  10. Before serving, you can top the cake with the reserved cranberries for an extra pop of color and tartness.

Cook’s Notes

Making cheesecake might seem intimidating, but it becomes a cinch once you break it down. A few tips: make sure your cream cheese is at room temperature for easy blending. When adding eggs, less is more — over-beating can lead to those pesky cracks. If you’re pressed for time, the cranberry sauce can be made a day ahead, and stored in the fridge. The cheesecake itself is best made the night before serving, giving it ample time to set in the fridge. Leftovers (if there are any) can be stored covered in the fridge for up to four days. If you’re planning to freeze, wrap the cheesecake tightly and enjoy within a month for best taste.

Make It Your Own

Variations are the spice of life, so here are some ideas to tweak this cheesecake to your liking:

  • Swap the fresh cranberries for frozen ones if fresh aren’t available. Just add a couple extra minutes to the cooking time.
  • Want a boozy twist? Add a splash of Grand Marnier to the cranberry sauce for an adult-friendly version.
  • Make it nutty by adding a pecan crumb topping — mix chopped pecans with brown sugar and sprinkle on before baking.
  • If you’re a chocolate lover, fold in a handful of mini chocolate chips into the batter for a choc-berry treat.

If you try this, I’d love to hear how it turns out — drop a comment or tag me! Whether it’s a cozy weekend at home or a dinner party with friends, this cheesecake is sure to be a hit. Enjoy every creamy, tangy bite!

Related update: Cheesecake with cranberries

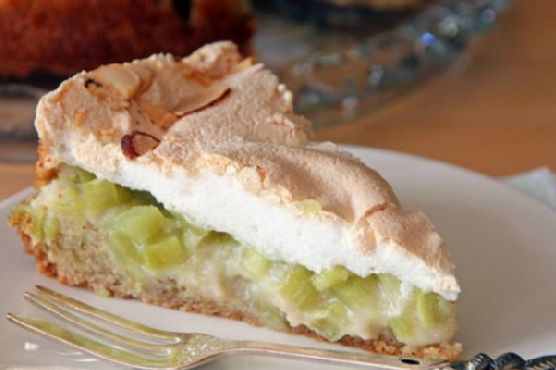
German Rhubarb Cake with Meringue | Made by Meaghan Moineau

It was one of those indecisive spring days, warm enough in the sun to consider a picnic, but with a breeze that still held a whisper of winter. The rhubarb in my garden had just started to show its rosy stalks, and I felt the irresistible urge to bake something that straddled the seasons just as beautifully. Enter the German Rhubarb Cake with Meringue. It’s the kind of bake that’s both a showstopper and a comfort food, with its tart rhubarb base and fluffy, cloud-like meringue topping. I promise, it’s simpler than it looks, and you probably have most of the ingredients already lounging in your pantry.

Jump to Recipe

What You’ll Need

Trust me, the ingredient list might seem a tad long, but it’s mostly the usual suspects in your kitchen. Plus, the bold flavors that rhubarb and almonds bring to the party are well worth it!

  • Rhubarb – Fresh and tart, the star of our cake!
  • Sugar – For sweetening everything up.
  • Vanilla extract
  • Salt
  • Eggs – We’ll use both yolks and whites, no waste here!
  • Flour
  • Roasted almonds
  • Baking powder
  • Egg whites
  • Almonds

How to Make German Rhubarb Cake with Meringue

  1. First things first, preheat your oven to 350°F convection. It’s the secret to getting that perfect bake.
  2. Grease a round 26 cm (9 1/2 inch) springform pan. We don’t want any sticking mishaps later!
  3. Wash, dry, and peel your rhubarb. Slice it into small pieces, sprinkle with 2 tablespoons of sugar, and let it sit for at least half an hour. This draws out the excess water, keeping our cake from getting soggy.
  4. Once that’s done, give the rhubarb a good pat dry. Prepping well now means a tastier cake later.
  5. In your trusty kitchen machine, beat together the butter, sugar, and vanilla extract until the mixture is fluffy and the sugar is dissolved. It should look creamy and pale.
  6. Crack in the eggs, one at a time, mixing well after each addition. We want a silky smooth batter here.
  7. In a separate bowl, sift together the flour, ground almonds, salt, and baking powder. Slowly incorporate this into the egg mixture. Be gentle; we don’t want to over-mix.
  8. Pour the dough into your prepared springform pan, smoothing the top. Layer on the rhubarb pieces evenly.
  9. Pop it in the oven for 25 minutes. Your kitchen will start to smell heavenly about halfway through.
  10. While the cake is baking, it’s time to whip up the meringue topping. Beat the egg whites until stiff peaks form, then gradually add in the sugar until your meringue is glossy.
  11. Spread the meringue over the baked cake and decorate with almond slices.
  12. Return it to the oven for 15 more minutes. Check after 5 minutes and cover with foil if the meringue is getting too toasty.
  13. Let the cake cool completely before you attempt the big reveal from the springform pan. Patience, my friend, is key!

Cook’s Notes

This cake is a dream to make ahead. Once cooled, it keeps well at room temperature for a day or two, though the meringue might soften a bit. For longer storage, refrigerate it—just let it come back to room temp before serving for the best texture. A common mistake is skipping the step where you let the sugared rhubarb sit. Don’t rush it! Draining the rhubarb is essential for avoiding a watery cake base. Also, if you’re worried about your meringue browning too quickly, keep that aluminum foil close at hand.

Make It Your Own

  • Squeeze in some citrus: Add lemon zest to the cake batter for a zingy twist.
  • Swap the nuts: Use pistachios instead of almonds for a delightful green contrast and rich flavor.
  • Go berry: Sub half the rhubarb with strawberries for a classic combo.
  • Spice it up: Add a pinch of cinnamon to the cake batter for a warm, spicy note.

If you give this German Rhubarb Cake with Meringue a spin, I’d love to hear how it turns out! Drop a comment or tag me in your culinary masterpieces. Happy baking! 🌟

Related update: German Rhubarb Cake with Meringue

Related update: Cheesecake with cranberries