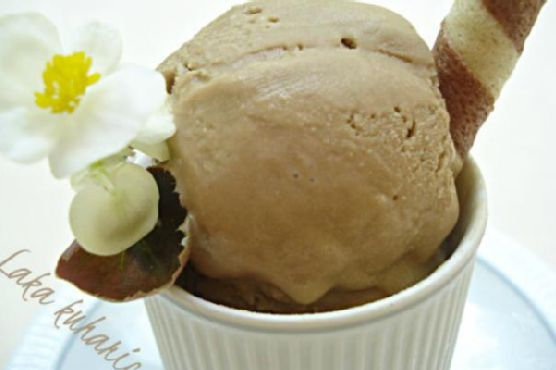
Peanut Butter Sriracha Cookies | Made by Meaghan Moineau

Picture this: It’s a Wednesday evening, the kind where you’ve been hustling all day but still crave something that feels like a hug on a plate. That’s when these Peanut Butter Sriracha Cookies waltzed into my chaotic kitchen. A little sweet, a little heat, these cookies tick all the boxes for something spectacularly different yet comfortingly familiar. It’s the kind of dessert that makes you feel like you’ve got your life together, even if just for a moment. Trust me, they’re worth the mini adventure of adding a spicy twist to our beloved peanut butter classic.

Jump to Recipe

What You’ll Need

So, here’s the good news: you probably have almost everything you need chilling in your pantry. This isn’t one of those recipes that sends you on a wild goose chase for exotic ingredients. But don’t underestimate the magic here; it’s all about that surprise kick of sriracha.

  • 1/2 cup unsalted butter, softened
  • 1 cup crunchy peanut butter
  • 1/2 cup sugar
  • 1/2 cup brown sugar
  • 1 tablespoon sriracha
  • 2 large eggs
  • 1 teaspoon vanilla extract
  • 1 3/4 cups all-purpose flour
  • 1 teaspoon baking powder
  • 1/2 teaspoon baking soda
  • 1/2 teaspoon salt
  • Granulated sugar, for rolling
  • Hershey’s chocolate kisses, for topping

How to Make Peanut Butter Sriracha Cookies

  1. Start by creaming together the unsalted butter, crunchy peanut butter, sugar, and brown sugar in a spacious mixing bowl. You’re looking for a smooth, creamy dream here.
  2. Slowly drizzle in the sriracha, then add the eggs and vanilla. Beat until everything is well combined and you have a beautifully cohesive mixture.
  3. In another bowl, whisk together the flour, baking powder, baking soda, and salt. This step is key to ensuring everything rises just enough.
  4. Gently mix the dry ingredients into the peanut butter concoction until you have a consistent dough. It should feel like the softest playdough ever.
  5. Here’s where it gets serious: refrigerate the dough for about an hour. This chill time helps the flavors meld and makes the dough easier to handle.
  6. Preheat your oven to a cozy 375 degrees Fahrenheit.
  7. Scoop the dough into 1-inch balls (a cookie scoop works wonders here). Dip the tops into granulated sugar for that sparkle and place on a cookie sheet.
  8. Use a fork to flatten each ball, creating that classic criss-cross pattern we all know and love.
  9. Bake for 8-10 minutes, just until the cookies start to brown. Keep an eye on them – do not over-bake unless you like cookies that double as hockey pucks.
  10. As soon as you pull them out of the oven, press a Hershey’s chocolate kiss into the center of each cookie. Let them cool on wire racks and then, my friend, indulge!

Cook’s Notes

Let me offer some pearls of wisdom: First, don’t skimp on the chill time—it’s essential for preventing spread. If you’re planning to bake ahead, you can make the dough and freeze it; just roll the dough into balls and freeze them on a tray before transferring to a bag. Bake them directly from frozen but add a couple more minutes to the baking time. As for leftovers, if there are any, store them in an airtight container at room temp for up to a week, though they rarely last that long in my house!

Make It Your Own

Why not put your own spin on these cookies? Here are a few ideas:

  • Substitute the peanut butter with almond butter if you’re feeling fancy or have a nut allergy to consider.
  • Kick it up a notch with more sriracha if you’re a heat seeker.
  • Try dark chocolate kisses instead of milk chocolate for a richer taste.
  • Add a handful of chopped peanuts for extra crunch if texture is your thing.

And there you have it! If you try this recipe, I’d love to hear how it turns out for you — drop a comment or tag me on social media. Can’t wait to hear what you think about this sweet and spicy twist!

Related update: Peanut Butter Sriracha Cookies

Related update: Chocolate Hazelnut Mousse

Buttermilk Pound Cake | Made by Meaghan Moineau

Introduction

There’s something truly magical about a classic buttermilk pound cake. It takes me back to lazy Sunday afternoons in my grandmother’s kitchen, where the smell of freshly baked cake would fill the house, drawing everyone together. This recipe has been in our family for generations, cherished and passed down with love. The beauty of this cake lies in its simplicity, each ingredient playing a crucial role in creating a perfectly tender crumb and a rich, buttery flavor that leaves you reaching for just one more slice.

Why You’ll Love It

This buttermilk pound cake is the epitome of comfort baking. It’s wonderfully moist with a soft, dense crumb and a delightful hint of lemon and nutmeg that sets it apart from other pound cakes. Whether you’re a novice baker or a seasoned pro, this cake is straightforward and rewarding to make. Perfect for any occasion, it can be dressed up with a drizzle of glaze or enjoyed plain with a cup of tea or coffee. The versatility and timeless appeal of this cake make it a must-have recipe in your baking repertoire.

Ingredients

  • 2 cups all-purpose flour
  • 1/2 teaspoon baking soda
  • 1/2 teaspoon salt
  • 1 cup unsalted butter, softened
  • 2 cups white sugar
  • 4 large eggs
  • 1 tablespoon lemon zest
  • 1/4 teaspoon nutmeg
  • 1 teaspoon vanilla extract
  • 1 cup buttermilk

Instructions

  1. Preheat your oven to 325°F (165°C). Prepare a 9- or 10-inch tube pan by buttering it generously, lining the bottom with parchment paper, and buttering it again. For an extra special touch, coat the sides with sugar after buttering.
  2. In a medium bowl, sift together the flour, baking soda, and salt. Set this dry mixture aside for later.
  3. In a large mixing bowl, beat the softened butter and sugar together until creamy and light. This should take about 5 minutes of mixing.
  4. Add the eggs to the butter mixture one at a time, ensuring each egg is fully incorporated before adding the next. Mix in the lemon zest, nutmeg, and vanilla extract.
  5. Begin adding the dry ingredients and buttermilk alternately to the batter. Start with one-third of the flour mixture, mixing until just combined. Add half of the buttermilk, mixing again until just combined. Repeat, alternating between the dry ingredients and buttermilk, and finish with the last third of the flour mixture.
  6. Pour the batter into the prepared tube pan, smoothing the top with a spatula.
  7. Bake in the preheated oven for 70 to 75 minutes, or until a toothpick inserted into the center comes out clean.
  8. Allow the cake to cool in the pan for about 15 minutes before turning it out onto a wire rack to cool completely.

Tips

To ensure your pound cake is a success, here are a few tips: Make sure all your ingredients are at room temperature before you start; this helps them blend more smoothly and evenly. Don’t rush the creaming of the butter and sugar; this step is critical for incorporating air and achieving that perfect cake crumb. Lastly, be careful not to overmix once you begin adding the flour, as this can lead to a dense cake.

Variations & Substitutions

This buttermilk pound cake is wonderfully versatile. Feel free to swap the lemon zest for orange zest if you prefer a different citrus note. For a more spiced flavor, a pinch of cinnamon can be added along with the nutmeg. If you’re out of buttermilk, you can make a quick substitute by adding a tablespoon of lemon juice or vinegar to a cup of milk and letting it sit for 5 minutes.

Storage

Your buttermilk pound cake will stay fresh for up to 3 days if stored in an airtight container at room temperature. If you wish to keep it longer, wrap the cake tightly in plastic wrap and store it in the refrigerator for up to a week. This cake also freezes beautifully; wrap individual slices in plastic wrap, then aluminum foil, and store them in a freezer-safe bag for up to 3 months.

FAQ

Can I use a different type of pan?

Yes, you can use a loaf pan or bundt pan if you prefer. Just be sure to adjust the baking time accordingly and check for doneness with a toothpick.

Is it okay to use salted butter?

If you only have salted butter, you can use it, but omit the additional salt in the recipe to balance the flavors.

Nutrition

While I don’t have the exact nutritional breakdown, this recipe yields a rich and buttery cake. Keep in mind that it’s a treat best enjoyed in moderation. For those counting calories or managing dietary restrictions, consider using a sugar substitute or reducing the sugar by a third.

Conclusion

Making this buttermilk pound cake is like baking a slice of nostalgia. Its rich flavor, tender crumb, and delightful aroma will have you falling in love from the first bite. Whether you enjoy it plain or with a scoop of ice cream, this cake is a delightful reminder of life’s simple pleasures. I hope this recipe brings as much joy to your kitchen as it does to ours. Happy baking!

Related update: Buttermilk Pound Cake

Related update: Peanut Butter Sriracha Cookies

Ginger Snap and Pumpkin Ice Cream Sandwiches | Made by Meaghan Moineau

Ginger Snap and Pumpkin Ice Cream Sandwiches

Intro

As the leaves begin to turn and the air gets crisp, my kitchen becomes a haven for all things warm and spicy. Growing up, autumn weekends were synonymous with baking days with my grandmother. I can still vividly recall the comforting aroma of ginger and cinnamon wafting through the house, mingling with the distant sound of leaves crunching underfoot outside. This recipe for Ginger Snap and Pumpkin Ice Cream Sandwiches combines those cherished memories with a modern twist, creating a delightful treat that brings together the best flavors of fall.

Why You’ll Love It

This dessert is a celebration of autumn in every bite. The soft, creamy pumpkin ice cream is perfectly complemented by the warm, spicy snap of the ginger cookies. Whether you’re looking to impress guests at a fall gathering or simply indulge in a cozy treat at home, these sandwiches are sure to be a hit. They’re also a wonderful make-ahead dessert, allowing you to enjoy the flavors of the season without the last-minute rush.

Ingredients

  • Whole milk
  • Heavy cream
  • Granulated sugar
  • Cinnamon
  • Nutmeg
  • Ground ginger
  • Whole cinnamon stick
  • Kosher salt
  • Egg yolks
  • Canned pumpkin puree
  • Vanilla
  • All purpose flour
  • Baking soda
  • Ground cinnamon
  • Ground ginger
  • Ground nutmeg
  • Ground pepper
  • Unsalted butter
  • Granulated sugar
  • Vanilla extract
  • Molasses
  • Egg

Instructions

  1. In a medium saucepan over medium heat, combine the milk, cream, granulated sugar, ginger, ground cinnamon, cinnamon stick, nutmeg, and salt. Heat the mixture until steaming and it begins to foam. Remove from the heat.
  2. In a small bowl, whisk the egg yolks until pale yellow. Gradually whisk in one cup of the warm cream mixture, whisking constantly.
  3. Pour the yolks and cream mixture back into the saucepan and cook over low heat, stirring constantly and being sure to scrape the bottom and sides of the pan. Continue cooking until the mixture thickens and coats the back of a spoon.
  4. Place some ice and water into a large bowl and place a smaller bowl inside. Pour the cream mixture through a mesh strainer into the bowl.
  5. Stir in the pumpkin and vanilla, add the cinnamon stick back to the mixture. Chill thoroughly, preferably overnight.
  6. Pour the mixture into the freezer can of an electric ice cream maker and freeze according to the manufacturer’s instructions.
  7. In a small bowl, whisk together the dry ingredients.
  8. In the bowl of an electric mixer, beat the butter until soft. Add the sugar and continue beating until smooth and creamy. Stop the mixer occasionally to scrape down the sides of the bowl.
  9. Stir in the vanilla, molasses, and egg, combine thoroughly.
  10. Mix in the dry ingredients gradually until the dough is smooth. Turn the dough out onto a lightly floured surface and divide in half.
  11. Roll each half into a log about 2 inches in diameter. Wrap each log in plastic wrap and then roll them lightly to smooth them out. Refrigerate or freeze until firm.
  12. Preheat the oven to 350 degrees and line two baking sheets with parchment paper.
  13. Slice the dough into 1/4 inch rounds with a serrated knife, being careful to keep their shape. Place the rounds on the baking sheet and sprinkle with granulated or coarse sugar.
  14. Bake for 10-13 minutes, rotating the pans halfway through the baking time. Let the cookies cool in the pan for about 2 minutes and then transfer to a wire cooling rack.

Tips

For the best flavor, make sure to chill the ice cream base thoroughly before churning. This helps the ice cream to set properly and enhances the rich, creamy texture. When slicing the cookie dough, use a sharp serrated knife to maintain the shape of the cookies. Freezing the dough logs slightly before slicing makes this task much easier.

Variations & Substitutions

If you’re looking to change things up, try adding a hint of clove or allspice to the ice cream base for an extra layer of warmth. You can also substitute the pumpkin puree with sweet potato puree for a slightly different flavor profile. For a gluten-free version, use a 1:1 gluten-free baking flour in place of the all-purpose flour.

Storage

The cookie dough can be refrigerated for up to five days or frozen for up to three months, making it easy to prepare in advance. Once baked, the ginger snaps can be stored in an airtight container for approximately a week. The assembled ice cream sandwiches can be wrapped individually and stored in the freezer for up to two weeks, ready to enjoy whenever the craving strikes.

FAQ

Can I make the ice cream without an ice cream maker?

Yes, you can make the ice cream without a machine by pouring the chilled mixture into a shallow dish and freezing it. Stir the mixture every 30 minutes until it’s frozen to ensure a smooth texture.

What else can I use the ginger snaps for?

These ginger snaps are delicious on their own, but they also pair beautifully with a cup of tea or coffee. You can crumble them over yogurt or use them as a crust for pies and cheesecakes.

Nutrition

While this dessert is definitely a treat, it’s made with wholesome ingredients that provide a bit of comfort and warmth. The pumpkin adds fiber and vitamin A, while the spices offer antioxidants and flavor without the need for excessive sugar.

Conclusion

Ginger Snap and Pumpkin Ice Cream Sandwiches encapsulate the essence of fall, combining familiar flavors with a touch of nostalgia. Whether you’re recreating memories of baking with family or simply savoring the changing seasons, this recipe offers a delightful way to celebrate the cozy warmth of autumn. So, grab a blanket, your favorite book, and enjoy this sweet indulgence.

Related update: Ginger Snap and Pumpkin Ice Cream Sandwiches

Related update: Buttermilk Pound Cake

Bailey’s Irish Cream Crepes With Creme | Made by Meaghan Moineau

Bailey’s Irish Cream Crepes With Creme

Intro

There’s something magical about crepes that transports me back to Sunday mornings at my grandmother’s house. As a child, I would eagerly watch her expertly flip those delicate pancakes, the smell of butter and sugar wafting through the air. Today, I’m excited to share a twist on that nostalgic favorite with a recipe that infuses the classic crepe with the rich, indulgent flavors of Bailey’s Irish Cream, bananas, and a hint of brown sugar. These Bailey’s Irish Cream Crepes With Creme are perfect for a leisurely breakfast or a sophisticated brunch with friends. Let’s dive into the recipe and create new memories around the table.

Why You’ll Love It

This recipe is not just about delicious crepes; it’s about creating an experience. You’ll love the warm, nutty aroma of browned butter combined with the creamy, smooth notes of Bailey’s Irish Cream. The addition of fresh bananas and creme fraiche elevates these crepes to a new level of indulgence. Whether you’re a seasoned cook or a beginner, this recipe is approachable and guaranteed to impress your family and friends. Plus, these crepes are versatile and can be dressed up or down depending on the occasion.

Ingredients

  • Bananas
  • Brown sugar
  • Browned butter
  • Sour creme fraiche
  • Eggs
  • Bailey’s Irish Cream
  • Milk
  • Salt
  • Sugar

Instructions

  1. Brown your butter by adding slices of butter to a heavy-bottomed saucepan. Once melted, whisk it frequently until you see small brown specks begin to form at the bottom of the pan. The butter should have a nutty aroma. Remove it from the pan to prevent further cooking.
  2. Mix the browned butter with the flour, salt, sugar, eggs, milk, and Bailey’s Irish Cream. Using an immersion blender, blend the mixture until completely smooth.
  3. Let the mixture rest for 1/2 hour to allow the flavors to meld and the batter to thicken slightly.
  4. Butter a non-stick frying pan and heat over medium heat.
  5. Using a ladle, spoon in the batter and quickly pick up the pan and swish it around so that the entire pan bottom is covered with a very thin layer of batter.
  6. When the underside is golden, use your fingers or a spatula to flip the crepe over to cook the other side.
  7. Serve with sliced bananas, creme fraiche (or sour cream), and brown sugar. For an extra treat, have Dulce de Leche on the table!

Tips

Here are some tips to ensure your crepes turn out perfectly:

  • Letting the batter rest is crucial for a smooth texture. It allows the flour to fully absorb the liquid and results in more tender crepes.
  • Use a non-stick pan to make flipping the crepes easier. If you don’t have one, ensure your pan is well-buttered.
  • Keep your pan at a medium heat to prevent burning. If the crepes are cooking too quickly or slowly, adjust the heat accordingly.

Variations & Substitutions

Feel free to get creative with this recipe. Here are some variations and substitutions you can try:

  • Filling: Swap out the bananas for strawberries or raspberries for a different fruity flavor.
  • Alcohol: If you prefer a non-alcoholic version, replace the Bailey’s Irish Cream with vanilla extract and a bit more milk.
  • Dairy-Free: Use coconut cream instead of creme fraiche and almond milk in place of regular milk for a dairy-free option.

Storage

These crepes are best enjoyed fresh, but if you have leftovers, here’s how to store them:

  • Let the crepes cool completely before stacking them with parchment paper in between each crepe.
  • Wrap the stack tightly in plastic wrap or store them in an airtight container.
  • They can be refrigerated for up to 3 days. To reheat, gently warm them in a non-stick pan over low heat.

FAQ

Can I make the batter ahead of time?

Yes, you can prepare the batter up to 24 hours in advance. Store it in the refrigerator and give it a good stir before cooking the crepes.

How do I prevent my crepes from tearing?

Ensure your pan is properly heated and buttered before adding the batter. Also, handle the crepes gently when flipping. If they’re tearing, they may be too thick; try using less batter for each crepe.

Can I freeze the crepes?

Yes, you can freeze the crepes. Allow them to cool completely, then stack them with parchment paper in between each crepe, and store them in a freezer-safe bag. They can be frozen for up to 2 months. Thaw in the refrigerator before reheating.

Nutrition

This recipe is a delightful indulgence, perfect for special occasions. While it’s not low in calories, it offers a good balance of carbohydrates, fats, and proteins. The addition of bananas provides potassium and a natural sweetness, while the Bailey’s Irish Cream adds a unique flavor profile without the need for additional sugars.

Conclusion

Bailey’s Irish Cream Crepes With Creme are a delightful way to elevate any breakfast or brunch occasion. With their rich, nutty flavor and creamy toppings, they are sure to become a new family favorite. Whether you’re making them for a special celebration or simply to indulge yourself, these crepes will fill your home with warmth and delicious aromas. Try them out and create lasting memories around the table, just like I did all those years ago. Enjoy!

Related update: Bailey’s Irish Cream Crepes With Creme

Related update: Ginger Snap and Pumpkin Ice Cream Sandwiches

Related update: Chia Seed Pudding

Related update: Mini Spinach and Feta Quiches