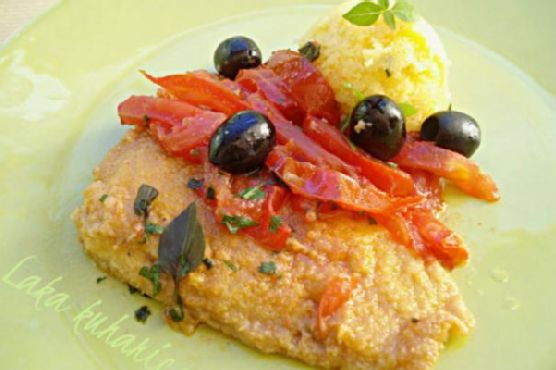
Cod with tomatoes, olives and polenta | Made by Meaghan Moineau
Title: Savoring Tradition: Cod with Tomatoes, Olives, and Polenta - A Heartfelt Italian FeastDescription: Dive into the flavors of the Mediterranean with our Cod with Tomatoes, Olives, and Polenta recipe. This main dish, rated at a moderate difficulty of 5/10, combines the fresh taste of cod with the tangy depth of olives and tomatoes, all served alongside creamy polenta. It's a nostalgic culinary journey that warms the soul and brings back cherished family memories.
---
A Culinary Journey Through Time: Cod with Tomatoes, Olives, and Polenta
In the heart of our family kitchen, the aroma of cod simmering with ripe tomatoes and briny olives was synonymous with Sunday gatherings. This dish, steeped in tradition and rich in flavor, was a staple at our family table. It was a recipe passed down from my Nonna, a cherished family heirloom that we lovingly recreated, preserving its authenticity with each preparation.
Ingredients:
- Fresh cod fillets
- Black olives
- Tomatoes
- Dry white wine
- Fresh parsley
- Olive oil
- Fresh and dry oregano
- Corn flour
- Instant corn polenta
- Salt
- White pepper
- Water
Instructions:
1. Prepare the Cod: If your fillets are frozen, be sure to thaw them beforehand. In a shallow dish, mix corn flour with a pinch of salt and white pepper. Dredge each fillet through the seasoned flour, coating evenly.
2. Sauté the Fillets: Heat olive oil in a large skillet over medium heat. Sauté the fillets, allowing them to cook for about 3 minutes on each side until they develop a golden crust. Once done, sprinkle the fillets with a splash of dry white wine, letting it sizzle and infuse the fish with its delicate aroma.
3. Create the Sauce: Add chopped tomatoes and black olives to the skillet, letting them mingle with the fish. Cook this vibrant mixture for about 5 minutes, until the tomatoes soften and release their juices.
4. Finish with Herbs: Before serving, garnish the fillets with freshly chopped parsley and a sprinkle of oregano, both dry and fresh, to elevate the dish with their fragrant essence.
5. Craft the Polenta: In a separate pot, bring water to a boil. Add a dash of white wine, a sprinkle of salt, and a hint of dry oregano. Gradually stir in the instant polenta, whisking continuously for about 5 minutes until it thickens to your desired consistency. If the mixture becomes too thick, add a bit more boiling water.
6. Serve: Allow the polenta to cool slightly before serving it alongside the cod, ensuring each bite is a comforting blend of flavors.
A Taste of Nostalgia:
This dish is more than just a meal; it's a portal to cherished memories. I remember standing on a stool beside my mother, my small hands eager to help as she expertly coated the cod in flour, her eyes twinkling with the joy of passing down our family tradition. The kitchen was filled with laughter and stories of my grandparents' adventures in the Italian countryside, where this recipe was born.
As the sun dipped below the horizon, our family gathered around the table, the comforting warmth of this dish uniting us. Each bite was a celebration of our heritage, a reminder of the love and labor that went into creating this masterpiece.
Difficulty: 5/10
Classification: Main Dish
---
Whether you're recreating this dish for a special occasion or a cozy family dinner, our Cod with Tomatoes, Olives, and Polenta is a delightful reminder of the simple pleasures of life. It's a taste of nostalgia, a journey through tradition, and a testament to the power of food to bring families together. Enjoy this recipe, and may it become a beloved part of your own culinary story.