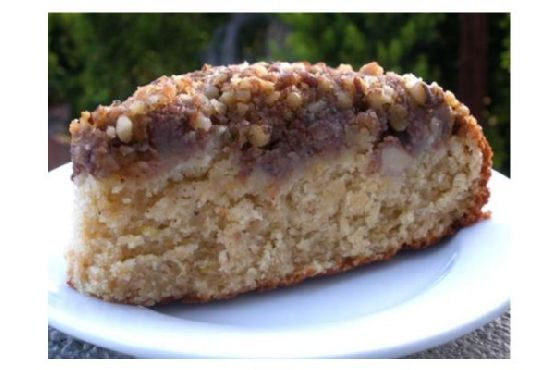
Pear and Walnut Coffee Cake
Intro
There’s something magical about the aroma of freshly baked goods wafting through the house, especially on a crisp autumn morning. Growing up, Sunday mornings were a special time in my household. My grandmother would put on her well-worn apron and start baking her famous coffee cake. The sweet and spicy scent of cinnamon mingled with the warmth of baked pears would gently coax everyone out of bed. This Pear and Walnut Coffee Cake carries that same nostalgic warmth and is sure to become a cherished favorite in your home.
Why You’ll Love It
Our Pear and Walnut Coffee Cake is a delightful blend of rich flavors and comforting textures. Whether you’re serving it as a breakfast treat or a cozy dessert, this cake is sure to impress. Here’s why you’ll love it:
- Flavorful Layers: The combination of juicy pears, crunchy walnuts, and a spiced crumble topping creates a symphony of flavors in every bite.
- Moist and Tender: Thanks to the sour cream and butter in the batter, this cake stays incredibly moist.
- Perfect for Any Occasion: This cake is versatile enough for a casual brunch or a festive holiday gathering.
Ingredients
- 1 cup brown sugar
- 1 teaspoon ground cinnamon
- 1/2 teaspoon ground ginger
- 1/4 teaspoon ground cardamom
- 1/4 teaspoon ground allspice
- 1/2 cup flour
- 1/4 cup wheat germ
- 1/2 cup walnuts
- 1/2 cup diced unsalted butter
- 2 cups flour
- 1 teaspoon baking powder
- 1/2 teaspoon baking soda
- 1/4 teaspoon kosher salt
- 1/2 cup unsalted butter, softened
- 1 cup brown sugar
- 2 large eggs
- 1 teaspoon vanilla extract
- 1/2 cup sour cream
- 3 pears, diced
- Juice of 1 lemon
- Zest of 1 lemon
Instructions
- Start the topping by putting brown sugar, cinnamon, ginger, cardamom, allspice, flour, wheat germ, walnuts, and diced butter in a food processor. Blend until crumbly. Cover and place in the fridge to keep cold.
- Grease a 10-inch springform pan with butter, then lightly dust with flour and tap out the excess. Set aside.
- Toss diced pears with lemon juice and set aside.
- With an electric mixer, beat softened butter, brown sugar, and lemon zest for the cake batter until fluffy, approximately 3-5 minutes.
- Add eggs and vanilla extract to the butter mixture and mix until combined.
- In a separate bowl, whisk together the flour, baking soda, baking powder, and salt.
- Starting with the sour cream, alternately add it to the cake batter along with the dry ingredients, mixing until just combined.
- Pour the cake batter into the prepared pan. Top with the lemon-tossed pears and sprinkle the crumble topping over the fruit.
- Bake in a preheated oven at 350°F (175°C) for 40-50 minutes or until a tester comes out clean.
- Remove from the oven and cool in the pan for at least 20-25 minutes before serving.
Tips
- Ensure your butter is at room temperature for a smoother batter.
- Use ripe but firm pears for the best texture and flavor.
- Toasting the walnuts before adding them to the topping enhances their flavor.
Variations & Substitutions
Feel free to get creative with this recipe! Here are a few ideas:
- Fruit Variations: Substitute apples or peaches for the pears if desired.
- Nuts: Pecans can be used in place of walnuts for a different nutty flavor.
- Spices: Adjust the spices to your liking, or try adding nutmeg for an additional warm note.
Storage
This coffee cake can be stored at room temperature in an airtight container for up to 3 days. For longer storage, keep it in the refrigerator for up to a week. It also freezes well; simply wrap individual slices in plastic wrap and store them in a freezer-safe bag for up to 3 months.
FAQ
Can I use canned pears instead of fresh ones?
While fresh pears are recommended for the best flavor and texture, canned pears can be used in a pinch. Just make sure to drain them well and pat them dry before using.
What is the best way to serve this cake?
This cake is delightful on its own, but you can also serve it with a dollop of whipped cream or a scoop of vanilla ice cream for an extra treat.
Nutrition
This Pear and Walnut Coffee Cake is a treat best enjoyed in moderation. It contains wholesome ingredients like fresh fruit and nuts, but also has butter and sugar. If you’re mindful of your sugar intake, consider reducing the amount of sugar in the topping or cake batter.
Conclusion
Baking this Pear and Walnut Coffee Cake is more than just making a delicious dessert—it’s about creating an experience filled with warmth and joy. Whether you’re looking to impress guests or simply enjoy a quiet moment with a slice and a cup of coffee, this cake delivers in every way. So gather your ingredients, preheat your oven, and let the comforting aroma of spices and baked pears fill your home. Here’s to creating new memories with a recipe that’s sure to become a family favorite!
Related update: Pear and Walnut Coffee Cake
Related update: Fall Apple Yeast Bread