Ham and Red Bean Soup | Made by Meaghan Moineau

It was one of those chilly, dreary Tuesday evenings when I found myself staring blankly into the fridge, hoping for dinner inspiration to magically appear. The kids were grumbling about homework, and my partner was running late from work—classic weeknight chaos. The answer to my dinner dilemma came in the form of a half-eaten ham from Sunday’s roast, sitting lonely on the shelf. I decided to whip up a comforting pot of Ham and Red Bean Soup, a dish I love for its ability to transform leftovers into a cozy, steaming meal. This soup not only warms you from the inside out, but it also fills your kitchen with the aroma of home-cooked goodness. Plus, it’s one of those recipes where the ingredients do most of the work for you, simmering away until dinner time.

Jump to Recipe

What You’ll Need

This ingredient list is a gentle reminder that sometimes the best meals come from what’s already in your pantry and fridge.

  • Reserved green leek top
  • Thyme sprigs
  • Bay leaf
  • Coriander seeds
  • Black peppercorns
  • Cumin seeds
  • Olive oil
  • Diced carrots
  • Diced celery
  • Garlic
  • Tomato paste
  • Red beans
  • Cooked diced smoked bone from ham
  • 3 cups cooked diced ham
  • Ground chipotle chile powder
  • Salt and pepper
  • Water

How to Make Ham and Red Bean Soup

  1. Start by taking those fragrant thyme sprigs and a bay leaf, and wrapping them securely with the reserved green leek top. Tie it tightly with butcher’s twine—it should look like a tiny herb burrito.
  2. Next, gather your coriander seeds, peppercorns, and cumin seeds. Place them in the center of a coffee filter or a small piece of cheesecloth, and make a spice bundle by tying it with butcher’s twine.
  3. In a large stockpot, heat some olive oil over medium heat. Add the leeks, carrots, and celery, and sauté for about 5 minutes until they’re softened and releasing a sweet, earthy aroma.
  4. Toss in the garlic and let it sauté for another minute, followed by the tomato paste. Stir it around for another minute; you want the paste to coat the veggies and deepen in color.
  5. Add the red beans, ham bone, the herb bundle, and the spice bundle. Pour in enough water to cover everything, and bring the pot to a gentle boil. Once boiling, reduce the heat to a simmer and partially cover the pot. Let it simmer for 1 hour.
  6. After an hour, add the diced ham and the ground chipotle chile powder. Stir it all together and let the soup simmer for another 1½ to 2 hours, until the beans are soft and just beginning to break open, releasing their starchy goodness into the broth.
  7. Before serving, taste and adjust the seasoning with salt and pepper as needed. Remove the ham bone, pulling any remaining meat from it and returning it to the pot. Discard the herb bundle and spice bundle.
  8. Ladle the steaming soup into bowls and enjoy the cozy comfort of a simple, satisfying meal.

Cook’s Notes

This soup is pretty forgiving, which is a blessing on busy nights. You can prepare the herb and spice bundles in advance, making the actual cooking a breeze. The soup keeps well in the fridge for up to three days and, like most soups, tastes even better the next day as the flavors meld. If you’re thinking long-term, this soup freezes beautifully for up to three months—just omit the potatoes if you decide to add them, as they tend to get grainy after freezing.

Make It Your Own

Here are a few ideas to put your own spin on this classic:

  • Swap the ham for crispy tofu cubes if you’re looking for a vegetarian option. Just skip the ham bone and increase the cumin for a smoky flavor.
  • Add some diced potatoes or sweet potatoes an hour before the soup is done for an extra hearty version.
  • Throw in a handful of chopped kale or spinach in the last 10 minutes of cooking for a pop of green and a boost of nutrients.
  • If you like it spicy, increase the ground chipotle chile powder or add a diced jalapeño along with the garlic.

If you try this, I’d love to hear how it turns out—drop a comment or tag me! There’s truly something magical about turning a leftover ham into a bowl of comfort, and I can’t wait to hear your spin on it. Happy cooking!

Related update: Ham and Red Bean Soup

Tuna Noodle Casserole: Mommie Cooks | Made by Meaghan Moineau

One chilly evening last fall, I found myself rummaging through the pantry, desperate for something delicious but low-effort. Honestly, it had been one of those days where the last thing I wanted was a complicated dinner. That’s when I stumbled across a can of tuna and a pack of egg noodles — and like magic, the comforting idea of a Tuna Noodle Casserole bubbled to the surface. It’s the kind of dish that wraps you in a warm, cozy hug, yet is simple enough to pull together on a weeknight. With just a bit of chopping, stirring, and baking, the whole family can gather around a meal that feels like home. Trust me, this is a dinner worth diving into.

Jump to Recipe

What You’ll Need

The beauty of this recipe is that most of these ingredients are pantry staples. You might not even need a grocery run.

  • 1 cup bread crumbs
  • 5 tablespoons butter, divided
  • 1 can mushrooms, drained
  • 1 can peas, drained
  • 2 cans tuna in water, drained
  • 2 celery sticks, diced
  • 1 cup shredded cheese (cheddar works great!)
  • 1 cup chicken broth
  • 12 ounces cooked egg noodles
  • 1/4 cup flour
  • 3 cloves garlic, minced
  • 1 cup milk
  • 1 small onion, diced
  • 2 tablespoons chopped parsley
  • 1/4 cup pimientos, diced
  • Salt and pepper to taste
  • 1/4 cup sherry (optional, but adds depth)

How to Make Tuna Noodle Casserole: Mommie Cooks

  1. Melt 1 tablespoon of the butter in a skillet over medium heat. Toss in the garlic, onion, celery, mushrooms, and a pinch of salt and pepper. Cook for about 3 to 4 minutes until everything is soft and fragrant.
  2. Remove the veggies from the pan and turn the heat down to medium-low. Melt the remaining 4 tablespoons of butter in the skillet. Once melted, sprinkle in the flour and mix it up to create a roux.
  3. To the roux, slowly add in the milk, sherry, and chicken broth. Stir continuously and bring the mixture to a boil until it thickens, about 5 minutes.
  4. Reduce the heat to low and return the cooked veggies to the pan. Add in the tuna, peas, and pimientos. Give it a good stir to combine everything.
  5. Fold in the cooked egg noodles, ensuring they’re coated with the creamy goodness. Pour the mixture into an oven-safe dish.
  6. Top the casserole with bread crumbs and shredded cheese. Sprinkle with parsley for a pop of color.
  7. Bake in a preheated oven at 350°F for about 20 minutes, or until the cheese is bubbly and golden-brown.

Cook’s Notes

This casserole is pretty forgiving, so give yourself some grace if you’re not exact with measurements. Leftovers can be stored in the fridge for up to 3 days — just pop them in the microwave for a quick reheat. If you fancy making it ahead, prepare the casserole up to the baking step, then cover and refrigerate. When you’re ready to eat, bake it for an extra 10 minutes or so to ensure it’s heated through.

Watch out for overcooking the noodles initially; they’ll soften further as they bake, so aim for al dente. Also, if you’re not into sherry, simply leave it out or replace it with a bit more broth.

Make It Your Own

  • Swap the tuna for crispy tofu for a vegetarian spin.
  • Add a spicy kick with a teaspoon of red pepper flakes mixed into the sauce.
  • Trade the canned mushrooms for fresh ones, sautéing them with the onions and celery for an earthier flavor.
  • Use gluten-free noodles and flour to make this dish gluten-friendly.

If you try this recipe, I’d love to hear how it turns out for you! Drop a comment or tag me in your culinary adventures. Happy cooking, friends!

Related update: Tuna Noodle Casserole: Mommie Cooks

Related update: Apple Cheddar Turkey Burgers With Chipotle Yogurt Sauce

Related update: Crockpot "Refried" Beans

Instant Pot Chicken Thighs | Made by Meaghan Moineau

It was one of those chaotic weekday evenings where all I could think about was getting dinner on the table in less time than it would take for me to order takeout. I stood in my kitchen, slightly overwhelmed by the day’s hustle, when I felt that familiar craving for something warm and homey — something that felt like a hug on a plate. The answer? My trusty Instant Pot Chicken Thighs. This dish is perfect when you want something flavorful but don’t want to spend hours in the kitchen. With a few pantry staples and the magic of the Instant Pot, dinner would be ready in a flash. It’s the kind of meal that makes you feel accomplished and cozy all at once.

Jump to Recipe

What You’ll Need

This recipe is great because you probably have most of these ingredients already lounging in your pantry, like they’re waiting for their time to shine. Here’s what you’ll need:

  • Skinless boneless chicken thighs
  • Dried oregano
  • Dried thyme
  • Pepper
  • Garlic powder
  • Onion powder
  • White pepper
  • Olive oil

How to Make Instant Pot Chicken Thighs

  1. In a small bowl, mix together dried oregano, dried thyme, pepper, garlic powder, onion powder, and white pepper. This will be your flavor magic dust.
  2. Rub the chicken thighs generously with the seasoning mix. Imagine you’re giving them a spa treatment — they deserve it.
  3. Set your Instant Pot to Saute mode and let it get nice and warm for about a minute. When it’s ready, add the olive oil. The oil should shimmer — that’s your cue.
  4. Place the seasoned chicken thighs in the pot and cook them for 3-4 minutes on each side until they’re lightly browned. You want them to have that golden look, and your kitchen will start smelling heavenly.
  5. Transfer the chicken thighs to a plate. Now, turn off the Instant Pot and pour in 1 cup of water. Use a scraper to gently nudge all those tasty brown bits off the bottom of the pot — these are flavor bombs!
  6. Place the metal trivet into the pot, and then nestle the chicken thighs on top of it.
  7. Secure the lid on the Instant Pot, making sure the vent is closed. Set it to Manual Pressure on high for 8 minutes. This is where the Instant Pot works its magic.
  8. Once the timer is up, let the pressure release naturally for 10 minutes. Then, carefully release any remaining pressure. When the pin drops, it’s safe to open the lid and reveal your perfectly cooked chicken.
  9. Serve these juicy chicken thighs with your favorite sides, and enjoy the deliciousness!

Cook’s Notes

Here’s the scoop: don’t skip the browning step. It adds a depth of flavor that makes people wonder if you’ve been cooking all day. If you’re making this ahead of time, these chicken thighs reheat beautifully. Just pop them in the microwave or a warm oven for a few minutes. Store leftovers in an airtight container in the fridge for up to three days. If you happen to forget to release the pressure naturally, don’t worry too much; the chicken should still be juicy, but try to remember next time for the best texture.

Make It Your Own

There’s a world of possibilities to tweak this recipe to your liking:

  • Swap the chicken thighs for crispy tofu if you’re going for a vegetarian vibe. Just be mindful of cooking times.
  • Add a squeeze of lemon juice and zest to the seasoning mix for a bright, zesty kick.
  • Craving spice? Toss in some cayenne pepper with the seasoning for a fiery twist.
  • Throw in some baby potatoes or carrots on the trivet with the chicken for a complete one-pot meal.

If you try this, I’d love to hear how it turns out — drop a comment or tag me! This dish has saved my sanity more times than I can count, and I hope it becomes a staple in your kitchen too. Enjoy every bite!

Related update: Instant Pot Chicken Thighs

Related update: Tuna Noodle Casserole: Mommie Cooks

Cinnamon Sugar Fried Apples | Made by Meaghan Moineau

It was one of those Tuesday evenings where everything felt a little upside down. My oven was on the fritz, my dinner plans had gone awry, and yet, that familiar sweet craving hit me like clockwork. As I rummaged through my pantry, the thought of something warm and comforting felt like the perfect antidote to my topsy-turvy day. Enter, cinnamon sugar fried apples. Not only are these little guys a quick fix for any sweet tooth, but they also bring a cozy vibe that feels like a warm hug on a plate. And honestly, who doesn’t love a recipe that transforms humble ingredients into something downright delicious?

Jump to Recipe

What You’ll Need

This recipe is all about simplicity — chances are you’ve got most of this in your kitchen already. Here’s what you’ll need:

  • All-purpose flour
  • Apples (crisp varieties like Granny Smith or Honeycrisp work great!)
  • Brown sugar
  • Cinnamon
  • Eggs
  • Granulated sugar
  • Lemon zest
  • Milk
  • Oil (for frying)
  • Salt
  • Unsalted butter

How to Make Cinnamon Sugar Fried Apples

  1. In a large bowl, whisk together the all-purpose flour, a pinch of salt, granulated sugar, milk, lightly beaten eggs, lemon zest, and melted unsalted butter until the batter is smooth to the touch. Cover the bowl with plastic wrap and let it rest for 30 minutes to ensure the flour fully hydrates and the flavors meld beautifully.
  2. While the batter is resting, core and slice your apples into 1 cm thick rings. Aim for even slices as this will help them cook uniformly. Set them aside and start heating the oil in your preferred frying vessel over medium heat.
  3. Once your batter has rested and your oil is shimmering and ready, dip each apple slice into the batter, allowing any excess to drip back into the bowl. Gently lay the slices into the hot oil.
  4. Fry the apple slices until they are golden and fragrant, about 2-3 minutes per side. You’ll know they’re ready when the edges turn a beautiful golden hue and your kitchen is filled with the nostalgic aroma of apples and cinnamon.
  5. As each batch finishes, transfer the fried apples to a plate lined with double-layered paper towels to drain any excess oil.
  6. In a small bowl, combine the brown sugar and cinnamon. Sprinkle this delightful cinnamon sugar mixture generously over the warm apple slices. Serve immediately for that perfect combination of crispy, sweet, and spiced.

Cook’s Notes

Here’s the thing: frying can be a bit of a mess, but it’s so worth it. Make sure your oil is hot enough before dipping in the apples; otherwise, they’ll soak up too much oil and get soggy. A small kitchen thermometer can be handy if you’re unsure. If you’re planning to make these ahead of time, I’d recommend just prepping the batter and slicing the apples. Frying is best done right before serving to maintain that delightful crispiness. If you do end up with leftovers, a quick reheat in the oven at 350°F should do the trick.

Make It Your Own

Want to put your own spin on these cinnamon sugar fried apples? Here are some fun ideas:

  • Instead of apples, try using firm pears for a slightly different but equally delicious twist.
  • For a nutty crunch, toss in some chopped pecans or walnuts after sprinkling the cinnamon sugar.
  • Want a caramel vibe? Drizzle some homemade or store-bought caramel sauce over the fried apples for an extra indulgent treat.
  • Looking for a boozy kick? Add a splash of spiced rum to the batter for a grown-up version.

If you try this recipe, I’d love to hear how it turns out — drop a comment or tag me in your delicious creations! Whatever you do, make sure to enjoy each crispy, sweet bite. Happy cooking! 🍏✨

Related update: Cinnamon Sugar Fried Apples

Related update: Roasted Red Pepper & Tomato Salsa

Related update: Bacon Brownie Cupcakes

Simple Protein Pancakes | Made by Meaghan Moineau

You know those mornings when you hit the snooze button one too many times, and suddenly you’re in a mad dash, wishing breakfast would magically appear? Yep, been there! That’s exactly how I stumbled upon these Simple Protein Pancakes. I was running late for a Saturday brunch with friends, craving something hearty yet wholesome. What I love about this recipe is how it comes together in a flash—just a quick blend, pour, and flip—but the end result feels like a treat. It’s perfect for lazy weekend mornings or even a speedy weekday breakfast when you need something filling yet fuss-free. Bonus: they’re nutritious and satisfyingly delicious, so you won’t even feel guilty drizzling on a bit of maple syrup. Jump to Recipe

What You’ll Need

This recipe is a pantry rescue mission! Chances are you already have most of these ingredients on hand, which means fewer grocery runs and more relaxed mornings.

  • 1 banana, ripe and full of natural sweetness
  • 2 eggs, because binding is key
  • 1/2 cup of oats, to keep you energized
  • 1/4 cup of greek yogurt, adds creaminess and protein
  • 1/2 cup of almond milk, or your favorite plant-based alternative
  • 1 scoop of Premier Protein powder, vanilla flavored for that extra protein punch
  • 1 teaspoon of vanilla extract, pure magic in a bottle
  • 1 teaspoon of baking powder, for a bit of lift

How to Make Simple Protein Pancakes

  1. Start by gathering all your ingredients. Toss the banana, eggs, oats, greek yogurt, almond milk, Premier Protein powder, vanilla extract, and baking powder into a blender. Blend for about a minute until you get a smooth, well-mixed batter.
  2. Let the pancake mixture sit for a couple of minutes. This allows the batter to thicken slightly, thanks to the oats soaking up some liquid.
  3. Meanwhile, heat your skillet over medium-high heat. You want it nice and hot before you pour the batter, so those pancakes get that delightful golden crust.
  4. Pour small amounts of batter onto the hot skillet. Watch for those small bubbles along the edges, your cue that it’s time to flip. This usually takes about 2 minutes.
  5. Flip the pancakes carefully and let them cook for another minute or two on the other side until they’re golden and cooked through.
  6. Stack the pancakes high, and top with your favorite fruits, nuts, or a drizzle of maple syrup for that breakfast bliss.

Cook’s Notes

These pancakes are forgiving, so don’t stress if your banana is more green than yellow. Just add a smidge of honey or maple syrup to the batter for sweetness. If you’re planning ahead, the batter can be made the night before and kept in the fridge. Just give it a good stir before using. Leftovers (if any!) keep well in the fridge for a couple of days and reheat beautifully in a toaster for a quick breakfast. Avoid over-blending to keep the batter from getting too thin.

Make It Your Own

  • Swap the almond milk for coconut milk to add a tropical twist.
  • If you’re out of oats, try using whole wheat flour for a similar hearty texture.
  • For a chocolatey version, add a tablespoon of cocoa powder and a handful of chocolate chips—your inner child will thank you!
  • Switch out the banana for half a cup of pumpkin puree and a dash of cinnamon for a fall-inspired flavor.

If you try this, I’d love to hear how it turns out—drop a comment or tag me! These pancakes have become a staple in my morning routine, and I hope they bring a little joy to your table, too. Happy flipping!

Related update: Simple Protein Pancakes

Related update: Blueberry, Chocolate & Cocao Superfood Pancakes – Gluten-Free/Paleo/Vegan

Related update: Avocado Egg Salad

Peach Pie | Made by Meaghan Moineau

It was one of those chaotic Tuesdays when everything felt like it was going sideways. You know the type—emails piling up, a to-do list that looks like a novel, and somehow, the cord to my headphones decided to have a secret life of its own. All I wanted was to escape into a little slice of comfort, and that’s when it hit me: Peach Pie. Not just any peach pie, but a delightfully simple one that could come together faster than you can say “midweek madness.” This pie is my sweet escape—comforting and a little indulgent but totally achievable even when time isn’t your friend.

The true magic of this pie is in its simplicity. A buttery crust that you don’t have to fuss over, juicy peaches that make you wish summer could last forever, and a creamy filling that lends the whole thing an air of sophistication without needing a culinary degree. Trust me, once you’ve savored a slice, you’ll see why this recipe is a keeper.

Jump to Recipe

What You’ll Need

This recipe might just be your new pantry hero because chances are, you already have most of these ingredients.

  • Pastry crust – Store-bought or homemade, your call!
  • Cut up peaches – Fresh is fantastic, but canned works too.
  • Brown eggs
  • Almond paste – Adds a subtle, nutty depth.
  • Brown sugar
  • Heavy cream
  • Vanilla extract

How to Make Peach Pie

  1. Preheat your oven to 375°F (190°C). This is crucial for getting that crust just right.
  2. Roll out your pastry crust and gently lay it into a 9-inch pie plate. Be kind to it—no one likes a torn crust! Lightly poke the base with a fork.
  3. Pop the crust into the oven for a quick prebake, about 8 minutes. This gives it a head start so it won’t turn soggy later on. Once it’s lightly golden, remove and let it cool slightly.
  4. In a large mixing bowl, whisk together the eggs, almond paste, heavy cream, brown sugar, and vanilla extract until smooth. You’re looking for a fragrant, creamy mixture that’s just begging to be poured.
  5. Layer your cut-up peaches evenly over the prebaked crust. Feel free to sneak a few bites; it’s part of the process!
  6. Pour the creamy egg mixture over the peaches, making sure everything is nicely coated.
  7. Lower the oven temperature to 350°F (175°C) and bake the pie for about 45 minutes, or until the center is set and firm. The edges should be bubbling and the top should have a lovely golden hue.

Cook’s Notes

Alright, here’s the thing. This pie is pretty forgiving, but a few tips will make your life easier. When prebaking your crust, keep an eye on it—every oven has its quirks, and a few extra minutes can make the difference between golden and overdone. If your almond paste is a little tough to mix, try grating it first. It’ll blend like a dream. And about those peaches: if you’re using canned, just make sure to drain them well. We’re aiming for juicy, not soggy.

The pie is best enjoyed the day it’s made, but it’ll keep in the fridge for up to 3 days. Reheat it gently, or savor it cold—it’s surprisingly good that way.

Make It Your Own

This pie is a blank canvas, ready for your personal touch. Here are a few ideas to get your creativity flowing:

  • Swap the almond paste with lemon zest for a refreshing citrus twist.
  • Add a splash of bourbon to the filling for an adult version of this classic.
  • Top the finished pie with a handful of crushed walnuts for a bit of crunch.
  • Mix in a cup of fresh raspberries with the peaches for a berry-peach fusion.

If you try this, I’d love to hear how it turns out—drop a comment or tag me! Remember, pie is one of those things that brings a bit of magic to even the most mundane days, so get baking and enjoy every crumb.

Related update: Peach Pie

Related update: Cinnamon Sugar Fried Apples

The BEST Sweet Potato Casserole | Made by Meaghan Moineau

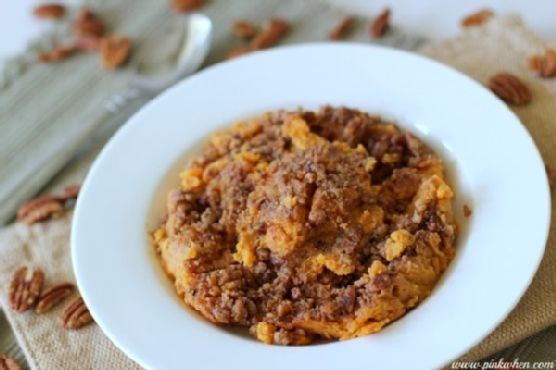
It was one of those chilly fall afternoons when the idea of a cozy dinner just felt right. I had spent the morning raking leaves, my nose cold, my fingers tingling, and all I could think about was something warm and comforting for dinner. My mind wandered to sweet potatoes, with their vibrant orange hue and naturally sweet flavor. And that’s how this Sweet Potato Casserole came to be. It’s the perfect blend of creamy, sweet, and crunchy, thanks to a delightful pecan topping that just makes it irresistible. Whether you’re preparing for a family gathering or simply want to treat yourself to a homemade delight, this casserole is bound to bring warmth and smiles to the table.

Jump to Recipe

What You’ll Need

This dish is a breeze to make, and chances are you already have most of these ingredients tucked away in your pantry or fridge. Here’s what you’ll need:

  • 5 sweet potatoes (or you can use cooked yams)
  • 2 eggs
  • 1 teaspoon ground cinnamon
  • 1 cup heavy cream
  • Sugared pecans (make these the day before for best results)
  • 1/2 teaspoon salt
  • 1/2 cup unsalted butter
  • 2 teaspoons vanilla extract
  • 1 cup white sugar

How to Make The BEST Sweet Potato Casserole

  1. Preheat your oven to 350°F (175°C). Prepare a 9 x 13 glass baking dish with a light coat of butter or cooking spray.
  2. In a medium-sized mixing bowl, place your cooked sweet potatoes. Add the salt, butter, eggs, vanilla extract, ground cinnamon, white sugar, and heavy cream. Mix thoroughly for about a minute until smooth and well-combined.
  3. Take your sugared pecans and place them in a blender or food processor. Chop them until they’re small and easy to sprinkle, but be careful not to turn them into dust!
  4. Spoon the sweet potato mixture into the prepared baking dish, spreading it out evenly. Then, cover the top with your finely chopped sugared pecans, making sure every inch is covered.
  5. Bake in the preheated oven for 30 minutes or until the topping is lightly browned and the edges start to bubble slightly. Let it cool for a few minutes before serving to allow the casserole to set.

Cook’s Notes

Here’s a little secret: if you boil your sweet potatoes rather than bake them, they become super easy to mash, and the flavor remains delightfully sweet. If you’re running short on time, you can even prep the sweet potatoes and pecans a day ahead. Just keep them in airtight containers in the fridge. When it comes to leftovers, they can be stored in the fridge for up to three days and reheated in the oven at 325°F (160°C) for about 15 minutes. Avoid the microwave, as it tends to make the topping less crunchy.

Make It Your Own

  • Nut swap: If pecans aren’t your thing, try using chopped walnuts or almonds for a slightly different texture and flavor.
  • Spice it up: Add a pinch of nutmeg or cloves to the sweet potato mixture for an extra layer of warmth and spice.
  • Go dairy-free: Swap the heavy cream with coconut milk and use a plant-based butter alternative. Still totally delicious!
  • Add a twist: Mix in a handful of shredded coconut to the pecan topping for a tropical touch.

If you try this, I’d love to hear how it turns out — drop a comment or tag me on social media! Let your kitchen adventures begin!

Related update: The BEST Sweet Potato Casserole

Related update: Curried Cauliflower Gratin

Oreo Cake | Made by Meaghan Moineau

It was one of those weeks where everything felt like a bit too much—work stress, social commitments, and a never-ending to-do list. I wanted to treat myself and my family to something indulgent but didn’t have the energy for an elaborate dessert. That’s when I remembered my Oreo Cake recipe, the ultimate no-bake comfort food that feels like a hug on a plate. It’s like having a sundae in cake form, with layers of creamy vanilla ice cream and that iconic Oreo crunch. Plus, it’s a crowd-pleaser with minimal effort. Win-win, right?

Jump to Recipe

What You’ll Need

This ingredient list is a dream come true for those last-minute dessert cravings. Chances are you already have most of this delightful ensemble in your pantry or freezer.

  • 1/2 cup butter
  • 1 can chocolate syrup
  • 1 container Cool Whip
  • 1 package Oreo cookies
  • 1 gallon vanilla bean ice cream

How to Make Oreo Cake

  1. Crumble the entire package of Oreo cookies. Keep about 1/3 of the crumbs aside for the topping.
  2. In a mixing bowl, combine the melted butter with the remaining 2/3 of the cookie crumbs. Stir until the mixture resembles wet sand.
  3. Press this buttery Oreo mixture firmly into the bottom of a long cake pan. This will be your deliciously crunchy crust.
  4. Scoop out half a gallon of vanilla bean ice cream and spread it evenly over the crust. Let it sit for a minute or two to soften a bit if needed.
  5. Pour half the can of chocolate syrup over the ice cream layer, spreading it gently with the back of a spoon.
  6. Layer on the Cool Whip, smoothing it out into an even layer that reaches all the corners.
  7. Sprinkle the reserved Oreo crumbs over the top, followed by a drizzle of the remaining chocolate syrup.
  8. Cover the cake pan with foil or plastic wrap and freeze it overnight, or for at least 12 hours, to ensure it sets beautifully.

Cook’s Notes

Here’s a little tip: this cake is best served with a bit of time out of the freezer, about 10-15 minutes, so it softens just enough to cut easily. If you’re planning to make this in advance, it can be frozen for up to a week—just make sure it’s well-covered to prevent freezer burn. As for leftovers (if there are any!), they keep nicely in the freezer for about another week.

  • Ensure the ice cream is slightly softened before spreading it, or you might end up with an uneven layer.
  • If you want stronger chocolate flavor, feel free to add more syrup according to your taste.

Make It Your Own

  • Swap the vanilla bean ice cream for chocolate or mint chocolate chip for an interesting twist.
  • Use peanut butter sandwich cookies instead of Oreos for a nutty flavor that’s simply irresistible.
  • Add a layer of sliced bananas between the ice cream and Cool Whip for a fruity surprise.
  • If you’re a coffee lover, drizzle some cooled espresso along with the chocolate syrup for a mocha kick.

If you try this Oreo Cake, I’d love to hear how it turns out! Drop a comment below or tag me in your pictures—sharing your sweet creations makes my day!

Related update: Oreo Cake

Related update: Valentine Hearts

Luscious Lemon Bars | Made by Meaghan Moineau

Picture this: it’s a lazy Sunday afternoon, and I’m inevitably in the mood for something sweet and tangy that won’t monopolize my entire day. My eyes wander to the lemons on my counter, practically begging to be transformed into something divine. Enter: Luscious Lemon Bars. These bars hit the sweet spot between indulgent and refreshingly light—they’re the perfect antidote to a gray day or a midweek slump. Plus, with a buttery crust and a gooey lemony filling, it’s one of those recipes that’s way more impressive than the effort you put in. Intrigued yet? Let’s get those lemons going.

Jump to Recipe

What You’ll Need

The beauty of this recipe is that it relies on staple ingredients that are probably already lounging in your pantry. We’re talking about those trusty items you turn to when the craving strikes. Here’s what you’ll need:

  • 1 cup of flour
  • 1/2 cup of softened butter
  • 1/4 cup of white sugar
  • 2 large eggs
  • 1 cup of white sugar
  • 1/4 cup of flour
  • 1/2 teaspoon of baking powder
  • Juice of 2 lemons (about 1/3 cup)
  • Zest of 2 lemons
  • Powdered sugar for dusting

How to Make Luscious Lemon Bars

  1. First things first: PREHEAT your oven to 350°F. While it’s getting toasty, GREASE a 9×13-inch rectangular cake pan. This ensures your bars will pop out without a fuss later on.
  2. Next, COMBINE the crust ingredients—flour, butter, and white sugar—in a mixing bowl. Use your fingertips to press this crumbly heaven into the pan evenly. No need to overthink it; rustic is our aim here.
  3. Once smooth and even, BAKE the crust for about 20 minutes. You’re aiming for a pale golden brown, the kind of color that tells you it’s ready for the spotlight.
  4. While your crust is getting cozy in the oven, let’s talk FILLING. In a bowl, whisk together the remaining ingredients: eggs, sugar, flour, baking powder, lemon juice, and zest. Whisk it up until it’s smooth and well combined, a sunny yellow mixture that smells irresistible.
  5. When your crust is ready, REMOVE it from the oven and pour the lemon filling over the top. Return the pan to the oven and BAKE for an additional 23-25 minutes. Keep an eye on it; you want the top to be set but not too brown.
  6. Once baked, REMOVE the pan from the oven and allow the bars to cool on a wire rack for about 30 minutes. They need this time to firm up.
  7. To get those perfect squares, CUT the bars in half and use a large flexible spatula to lift each half out. This makes the final cutting much easier and less messy.
  8. Finally, DUST with a good amount of sifted powdered sugar. This isn’t just for looks—it adds a sweet layer that complements the tangy filling. And just like that, you’re DONE!

Cook’s Notes

Don’t rush the cooling process—these bars need it to set properly. If you’re in a hurry, pop them in the fridge after they’ve cooled on the rack a bit. They can be stored in an airtight container for up to a week, but honestly, they’re usually gone by day two. If you’re making them ahead of time, they freeze beautifully. Just wrap them tightly before dusting with sugar, and thaw in the fridge overnight when you’re ready to indulge.

Make It Your Own

Cooking is all about making a recipe fit your tastes. Here are a few ways to tweak these bars:

  • Swap out the lemon for lime for a zesty twist.
  • Mix in some raspberries to the filling for a fruity burst.
  • Use gluten-free flour for a GF-friendly treat.
  • Add a pinch of sea salt to the crust for a salty-sweet contrast.

If you try this, I’d love to hear how it turns out—drop a comment or tag me! Your feedback makes my day and I always enjoy seeing your delicious creations come to life. Happy baking!

Related update: Luscious Lemon Bars

Related update: Oreo Cake

Chicken Enchilada Salad Wraps | Made by Meaghan Moineau

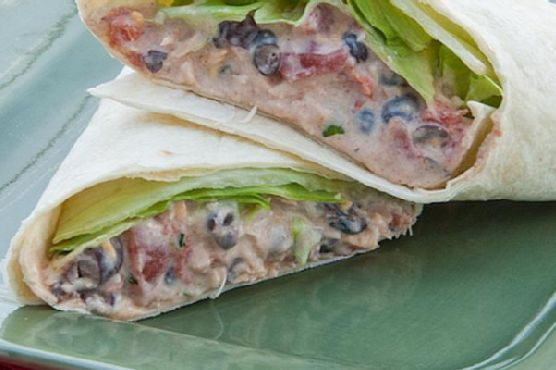
Picture this: It’s a Tuesday night, and you’re dead set on making dinner happen without a trip to the store. As I rummaged through my pantry, I found a can of Swanson Premium Chicken and thought, “Well, this could be interesting!” That’s how these Chicken Enchilada Salad Wraps came to life. They’re the kind of dish that feels like you’ve put way more effort into dinner than you really have. Perfect for when you want something comforting yet fresh and vibrant. These wraps are my go-to when I need a quick meal that doesn’t skimp on flavor. Trust me, they’re a keeper! Jump to Recipe

What You’ll Need

There’s a good chance you already have most of these ingredients hiding in your kitchen. It’s all about those pantry staples coming together to make magic.

  • Light cream cheese
  • Sour light cream
  • Chili powder
  • Cumin
  • Garlic
  • Canned Swanson Premium Chicken
  • Shredded cheddar cheese
  • Diced canned tomatoes
  • Diced green onions
  • Fresh cilantro
  • Lettuce
  • Burrito-sized tortillas

How to Make Chicken Enchilada Salad Wraps

  1. In a medium-sized bowl, blend together the light cream cheese, sour cream, chili powder, cumin, and garlic until smooth. You’ll want the mixture to be creamy with a little bit of a kick – smell those spices bloom!
  2. Gently fold in the shredded cheddar cheese, Swanson Premium Chicken, diced tomatoes, green onions, and fresh cilantro. Make sure everything is evenly mixed so you get a bit of everything in each bite.
  3. Divide the mixture evenly between the tortillas, making sure to spread it to the edges for maximum flavor coverage.
  4. Top each tortilla with a handful of lettuce. This adds a nice crunch and keeps things fresh and light.
  5. Roll up each tortilla burrito-style, tucking in the edges as you go to keep all the goodness inside.
  6. Slice in half if you’re feeling fancy and serve immediately. Enjoy the meld of textures and flavors, from cool and creamy to warm and savory.

Cook’s Notes

These wraps are pretty forgiving, so feel free to adjust the spices to your liking. If you’re a spice lover, a dash of cayenne wouldn’t hurt. They’re best enjoyed fresh but will keep in the fridge for a day or so. Just wrap them tightly in foil or plastic wrap to keep them from drying out.

  • If you’re making them ahead for a lunchbox, keep the lettuce separate until you’re ready to eat to avoid it getting soggy.
  • Got leftovers? They make a surprisingly good quesadilla filling. Just heat a pan and crisp them up until golden!

Make It Your Own

  • Swap the chicken for crispy tofu for a vegetarian twist that still packs in the protein.
  • Use spinach instead of lettuce for a slight nutritional boost and a different kind of crunch.
  • If you’re out of tortillas, this mix works wonderfully as a dip with some crispy tortilla chips.
  • Add some sliced avocado for an extra creamy dimension and a touch of healthy fat.

If you try this, I’d love to hear how it turns out — drop a comment or tag me! Your kitchen adventures always make my day.

Related update: Chicken Enchilada Salad Wraps

Related update: Hyderabadi baghara Baingan

Apple Pie Smoothie | Made by Meaghan Moineau

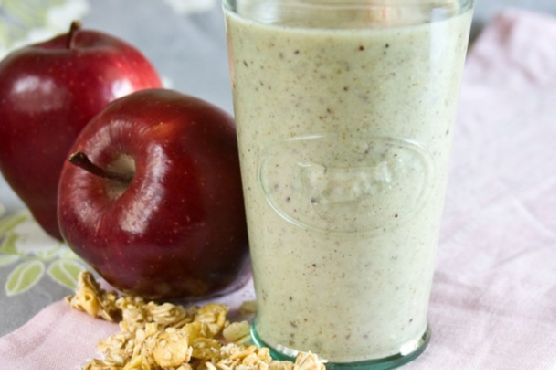
So, there I was, staring into my pantry on a crisp fall morning, craving something that screamed “autumn vibes” without going full-on pumpkin spice. That’s when the Apple Pie Smoothie idea hit me. It’s the kind of breakfast that makes you feel like you’ve done something right for the day—comforting, nostalgic, and just a little bit fancy without actually being a lot of work. This smoothie is like having dessert for breakfast, but it’s secretly healthy and totally acceptable to sip with your morning emails or after-school snack time. Seriously, you can whip this up in minutes and feel like an absolute genius for skipping the sad cereal route. Trust me, once you try it, you’ll wonder why apple pie wasn’t always a smoothie.

Jump to Recipe

What You’ll Need

This smoothie is all about cozy flavors that are probably hanging out in your kitchen already. No wild goose chases required—just simple, delicious ingredients.

  • Red Delicious apple
  • Apple sauce
  • Fat free vanilla yogurt
  • Milk
  • Unsalted almond butter
  • Maple syrup
  • Grain granola
  • Ground cinnamon
  • Honey
  • Ice cubes

How to Make Apple Pie Smoothie

  1. Start by slicing your red delicious apple into manageable pieces. Don’t worry about making them perfect—you’re blending them anyway!
  2. In your trusty blender, toss in the apple slices along with a generous scoop of apple sauce. This gives that extra apple pie oomph.
  3. Add a dollop of fat free vanilla yogurt to the mix. It’ll make the smoothie creamy and dreamy.
  4. Pour in a splash of milk. You know your blender best, so just enough to get things moving smoothly.
  5. Scoop in a tablespoon of unsalted almond butter. It adds a subtle nuttiness that works magic with apples.
  6. Drizzle in some maple syrup. It’s like the sweet whisper of an autumn forest.
  7. Sprinkle a dash of grain granola for extra texture and yum factor.
  8. Throw in a pinch of ground cinnamon. It’s the little spice that could, bringing all the flavors together.
  9. Add a touch of honey if you’re feeling like a little extra sweetness in your life.
  10. Finally, top it off with a handful of ice cubes for that refreshing chill.
  11. Blend everything on high until it’s as smooth as you want your morning to be. Give it a taste and adjust for sweetness if needed.
  12. Pour into your favorite glass, maybe add a sprinkle more of cinnamon or granola on top, and enjoy immediately!

Cook’s Notes

If you’re planning ahead, you can slice your apple the night before and store it in the fridge, soaked in a little lemon water to prevent browning. Just drain before you blend! This smoothie is best enjoyed fresh, but if you have leftovers (which is rare), store them in an airtight container in the fridge for up to a day. Give it a good shake before sipping, as it might separate a bit.

Make It Your Own

  • Swap the red delicious apple for a Granny Smith if you prefer a tarter taste.
  • Use almond milk or oat milk if you’re looking for a dairy-free option.
  • Add a scoop of protein powder to make it a post-workout treat.
  • Throw in a handful of spinach for a hidden veggie boost. The color changes, but the taste stays amazing!

If you try this, I’d love to hear how it turns out—drop a comment or tag me on your smoothie selfies! Happy sipping!

Related update: Apple Pie Smoothie

Related update: Simple Whole Wheat Crepes

Related update: Skinny Green Monster Smoothie

Chicken with Grape Tomatoes and Mushrooms | Made by Meaghan Moineau

It was one of those evenings where the fridge seemed determined to sabotage my dinner plans. A random mix of odds and ends stared back at me — a handful of grape tomatoes about to bid farewell, a shy pack of mushrooms, and the ever-reliable chicken breast. I was craving something that felt like comfort but didn’t require a culinary degree. And just like that, this Chicken with Grape Tomatoes and Mushrooms came to life. It’s simple, a bit rustic, and oh, the flavors! You can whip it up in about 30 minutes, and it’s perfect for those nights when you want something special but don’t want to break a sweat.

Jump to Recipe

What You’ll Need

This dish is all about fresh simplicity. You might already have most of these beauties in your kitchen:

  • 2 tablespoons olive oil
  • 4 skinless boneless chicken breast halves
  • 2 cups fresh mushrooms, sliced
  • 2 cloves garlic, minced
  • 1 cup grape tomatoes, halved
  • 2 green onions, sliced
  • 1 packet flavor concentrated chicken broth
  • 1/4 cup water

How to Make Chicken with Grape Tomatoes and Mushrooms

  1. Start by heating 1 tablespoon of the olive oil in a 12-inch skillet over medium-high heat. Once the oil shimmers, add the chicken and let it sizzle until well browned, turning occasionally to get an even golden crust. This should take about 5-7 minutes. Remove the chicken and set it aside.
  2. In the same skillet, pour in the remaining tablespoon of oil. Toss in the mushrooms and let them cook, stirring occasionally, until they’re tender and releasing their juices, about 5 minutes.
  3. Reduce the heat to medium and add the garlic, grape tomatoes, and green onions to the skillet. Stir everything together for about a minute until the garlic is fragrant and the tomatoes start to soften slightly.
  4. Nestle the browned chicken back into the skillet. Pour in the flavor boost and water, stirring gently to combine all the flavors. Let everything simmer together for another 5-7 minutes, or until the chicken is cooked through and no longer pink in the middle.

Cook’s Notes

When cooking chicken, keep an eye on the heat. If it’s too high, the chicken can dry out and the vegetables might scorch. If you’re not a fan of mushrooms, swap them out for zucchini or bell peppers. This dish can be made ahead of time and stored in the fridge for up to 3 days in a sealed container. To reheat, simply warm it in a skillet over low heat until heated through. Avoid using the microwave if you can — it tends to make the chicken rubbery.

Make It Your Own

  • Swap the chicken for crispy tofu for a vegetarian version. Just be sure to press the tofu to remove excess moisture.
  • Add a splash of white wine when you add the garlic for a richer flavor profile. Let it cook off slightly before proceeding to the next step.
  • If you love a bit of heat, throw in a pinch of red pepper flakes along with the garlic and tomatoes.
  • For a creamier sauce, stir in a tablespoon of heavy cream right at the end.

If you try this, I’d love to hear how it turns out — drop a comment or tag me! I’m always curious to see how you make it your own. Happy cooking!

Related update: Chicken with Grape Tomatoes and Mushrooms

Related update: Farfalle with Shrimps, Tomatoes Basil Sauce

Related update: Chicken Enchilada Salad Wraps

Grilled Potato Skins | Made by Meaghan Moineau

I remember the first time I tried to grill potato skins. It was a balmy summer evening, and my friends and I had decided on an impromptu barbecue to celebrate the end of a long workweek. We were short on the usual grilling staples, and I found myself rummaging through the pantry, just hoping to find anything that could be charred over an open flame. In a stroke of serendipitous genius—or desperation, depending on how you look at it—I stumbled upon a bag of baking potatoes. And so began my love affair with crispy, gooey, and utterly addictive grilled potato skins. They’re the perfect combination of crispy potato goodness and creamy, cheesy decadence, making them a crowd-pleaser that’s surprisingly easy to throw together. You won’t believe how fast these disappear once they hit the table.

Jump to Recipe

What You’ll Need

The beauty of this recipe is its simplicity. Chances are you already have most of these ingredients on hand.

  • Baking potatoes
  • Cooked bacon or finely-chopped ham
  • Picante sauce
  • Shredded cheddar cheese
  • Sour cream
  • Unsalted butter

How to Make Grilled Potato Skins

  1. First, preheat your oven to 375 degrees. Prick your baking potatoes all over with a fork to let them vent, then bake them for 50 to 60 minutes until they’re tender and can be easily pierced.
  2. Once the potatoes are cool enough to handle, cut each one in half lengthwise. Scoop out most of the insides, leaving a sturdy 1/4-inch shell. Save the scooped-out potato for mash or soup later!
  3. Melt some unsalted butter and brush the inside of each potato shell generously. This will help them get that delicious golden crispiness we’re after.
  4. Spoon about 2 teaspoons of picante sauce into each shell, spreading it around to coat the bottom. This adds a delightful zesty kick.
  5. Next, sprinkle a hearty amount of shredded cheddar cheese into each potato, followed by bits of your cooked bacon or ham. Really pack it in there—no one likes a stingy potato skin.
  6. Fire up your grill to medium heat. Place the potato skins directly over the coals, and let them grill uncovered for 10 to 12 minutes. You’ll know they’re ready when the skins are crisp and the cheese is bubbly and golden.
  7. If you’re feeling fancy, sprinkle with diced tomato and green onions right before serving. Finish with a generous dollop of sour cream on top.

Cook’s Notes

Grilled potato skins are pretty forgiving, but here are a few things to keep in mind:

  • If you’re making these ahead of time, follow all the steps up to grilling and then store them in the fridge. When you’re ready to eat, pop them on the grill straight from the fridge. Just add a couple of extra minutes to the grill time.
  • Leftovers can be stored in an airtight container in the fridge for up to three days. Reheat them in a 350-degree oven or a toaster oven until they’re heated through and crispy again.
  • Make sure your grill is properly preheated before you start cooking. This ensures the skins get crispy rather than just drying out.

Make It Your Own

  • Swap the bacon for crispy tofu to make it vegetarian-friendly.
  • Use Monterey Jack or pepper jack cheese for a different flavor profile.
  • Try adding black beans or corn for a southwestern twist.
  • If you’re not a fan of picante sauce, substitute it with a mild salsa or even BBQ sauce for a smoky vibe.

If you try this, I’d love to hear how it turns out—drop a comment or tag me on social media! There’s nothing more satisfying than seeing your spin on these tasty potato skins. Enjoy every crispy, cheesy bite!

Related update: Grilled Potato Skins

Related update: Blue Cheese Tartlets With Fig Jam and Walnuts

Venison Stew | Made by Meaghan Moineau

I was in the middle of a chilly Tuesday evening, the kind where you’re just craving something warm and hearty, and I found myself staring at a package of venison stew meat in my fridge. You know those days, right? The ones where you want comfort food without all the fuss? That was me. I didn’t want to wait forever for flavors to meld, and I certainly wasn’t in the mood for a culinary marathon. Enter this venison stew — it’s that perfect blend of savory goodness, with tender chunks of venison and veggies that practically hug you from the inside. It’s simple enough to throw together on a weeknight, but tastes like it’s been simmering all day.

Jump to Recipe

What You’ll Need

I love how this recipe doesn’t require a grocery cart full of fancy ingredients. Chances are, you’ve already got most of these at home, especially if you’re a fan of hearty stews!

  • Venison stew meat
  • 4 stalks celery
  • 1 can mushrooms
  • 1 green bell pepper
  • 1 cup flour plus 3 tbsp
  • 2 tablespoons beef bouillon
  • Water
  • Potatoes
  • Onion
  • Baby carrots

How to Make Venison Stew

  1. Begin by cutting all your veggies and the venison into 1-inch pieces. Grab a bowl and dredge the venison in a mix of flour, salt, and pepper until it’s nicely coated.
  2. Heat a splash of vegetable oil in a large pot over medium-high heat. Add the venison and let it brown on all sides. You’re looking for a nice, golden crust here — that’s flavor!
  3. Once browned, add the beef bouillon and enough water to cover the meat. Bring it to a boil, then reduce the heat and let it simmer for about 2 hours. This is where the magic happens, and the meat gets tender.
  4. After 2 hours, toss in all the veggies: carrots, celery, mushrooms, potatoes, and bell pepper. Let everything simmer together for another 30 minutes, until the veggies are nice and tender.
  5. Mix 3 tablespoons of flour with 1 cup of cold water. Stir it into the stew to thicken. Give it a few minutes, and you’ll see it transform into a rich, heartwarming dish.

Cook’s Notes

Okay, here’s the thing — patience really is a virtue with this stew. Letting the venison simmer for a full two hours ensures it’s melt-in-your-mouth tender. If you’re in a pinch, you can reduce the simmering time, but it won’t be as tender. As for storage, this stew actually tastes even better the next day. Just keep it in an airtight container in the fridge, and it’ll last for about 3 days. You can also freeze it for up to 3 months. Just make sure to let it cool completely before freezing.

Make It Your Own

  • Swap the venison for beef if that’s what you have on hand — just as delicious!
  • For a veggie twist, replace the meat with chickpeas and add extra mushrooms for a hearty vegetarian version.
  • Add a splash of red wine while simmering for an extra depth of flavor.
  • Throw in some parsnips or turnips if you’re in the mood for an earthy undertone.

If you try this, I’d love to hear how it turns out — drop a comment or tag me! It’s one of those dishes that just feels like a warm hug, and I hope it brings you as much comfort as it does me. Happy cooking!

Related update: Venison Stew

Fall Fruit Compote | Made by Meaghan Moineau

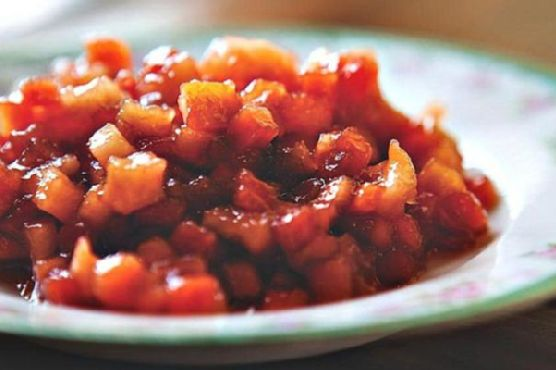
Picture this: It’s a crisp Saturday morning in late October, and the air smells like fallen leaves and the promise of something delicious bubbling on the stove. I’d just come back from the local farmers’ market with a basket full of honeycrisp apples and ripe pears, when I had this sudden inspiration to make something that feels like a warm hug for your taste buds. That’s how this Fall Fruit Compote came to life! It’s the perfect combination of sweet and tangy with a hint of spice from the cinnamon, making it a cozy companion for just about any dish. Whether you’re spooning it over pancakes, pairing it with savory potato latkes, or just nibbling it straight from the jar (guilty as charged), this compote is a must-try for the season.

Jump to Recipe

What You’ll Need

This recipe is all about embracing the flavors of fall, with ingredients that are probably hanging out in your pantry already or easy to snag at the store.

  • Butter – for that rich, dreamy base
  • Diced honeycrisp apples – sweet and crispy, the star of this show
  • Diced pears – a soft, juicy partner for the apples
  • Dried cherries – they add a pop of color and tartness
  • Apple cider vinegar – just a splash to bring out the flavors
  • Apple juice – keeps everything juicy and flavorful
  • Brown sugar – for a deep, molasses-y sweetness
  • Cinnamon stick – the essential fall spice

How to Make Fall Fruit Compote

  1. Melt the butter in a medium saucepan over high heat until it starts to bubble and sizzle. You want that nutty aroma to fill the air.
  2. Toss in the diced apples, pears, and dried cherries, followed by the apple cider vinegar, apple juice, brown sugar, and cinnamon stick. Give it all a good stir to make sure everyone’s getting along in the pot.
  3. Cook this fruit medley for about 5 minutes. The apples and pears should start to soften, and the cherries will begin plumping up.
  4. Lower the heat to medium. Let it cook for a few minutes more, keeping a watchful eye as the liquid reduces and the fruit becomes tender. Stir occasionally to prevent sticking.
  5. If the mixture looks like it’s drying out too quickly, trickle in a bit more apple juice. You want the fruit tender and the liquid mostly gone, leaving a thick, syrupy goodness.

Cook’s Notes

Alright, here’s the scoop on perfecting this compote. First off, keep an eye on your heat levels. It’s easy for the sugars to burn if the heat’s too high, especially towards the end when the liquid is nearly evaporated. If you’re making this ahead, know that it keeps wonderfully in the fridge for up to a week. Just pop it in a jar or airtight container. When you’re ready for a warm serving, a quick zap in the microwave or a gentle reheat on the stove works like a charm. And remember, if you find yourself with leftovers (rare, but it happens), this compote is a dream swirled into yogurt or spread over toast.

Make It Your Own

Get creative and switch things up with these ideas:

  • Swap the dried cherries for dried cranberries for a tarter twist.
  • Add a splash of bourbon or rum for a grown-up, boozy version.
  • For a spicier kick, throw in a pinch of ground ginger or nutmeg with the cinnamon.
  • Use maple syrup instead of brown sugar for a different layer of sweetness.

If you try this, I’d love to hear how it turns out — drop a comment or tag me! Enjoy the cozy vibes, and happy cooking! 🍎🍐

Related update: Fall Fruit Compote

Related update: Ginger Cookies- gluten free, soy free, vegan

Related update: Dandelion pesto

Amazing Braised Beef Short Ribs | Made by Meaghan Moineau

So it was one of those Thursday afternoons. You know the kind — when the clock seems to tick extraordinarily slowly, and the chilly breeze outside just makes you crave something deeply satisfying. I found myself staring at a pack of beef short ribs in the fridge, remembering a long-ago failed attempt at a backyard barbecue. But this day was different. I had a plan that didn’t involve open flames but rather the comforting embrace of a dutch oven. These Amazing Braised Beef Short Ribs are perfect for when you want to impress without the stress. They practically cook themselves once they’re in the oven, and trust me, the aroma will fill your home with anticipation.

Jump to Recipe

What You’ll Need

You might already have most of these tucked in your pantry, but a quick trip to grab a few fresh items will make this dish sing.

  • 4 strips of bacon
  • 3 tablespoons olive oil
  • 2 pounds of beef short ribs
  • sea salt and fresh ground pepper
  • 8 ounces of white button mushrooms, sliced
  • 1 cup of yellow diced onions
  • 1 cup of diced carrot
  • 3 cloves of garlic, minced
  • 2 cups of Cabernet Sauvignon wine
  • 2 cups of beef stock
  • 2 tablespoons of tomato paste
  • 1 tablespoon of beef base
  • 2 teaspoons of fresh dried thyme
  • 2 bay leaves

How to Make Amazing Braised Beef Short Ribs

  1. Preheat your oven to 300°F. Grab your largest heavy-bottomed pot—I swear by my trusty Le Creuset for this.
  2. Over medium heat, cook the bacon until crisp, then let it drain on paper towels. You’re gonna crumble this into the sauce later, but for now, keep the bacon fat in the pot.
  3. Pat the short ribs dry with paper towels. This is crucial for that perfect caramelization. Trim a bit of the excess fat, but don’t go overboard—flavor, remember?
  4. Season the short ribs liberally with sea salt and fresh ground pepper. Brown them in the pot over medium-high heat in olive oil and bacon fat, making sure to give them space. You might need to do this in batches.
  5. Once browned, remove the ribs and set them aside in a large bowl. Pour out the used fat, keeping those flavorful bits stuck to the bottom intact.
  6. Lower the heat to medium, add fresh olive oil, and sauté the mushrooms until crisp and golden, about 7-10 minutes.
  7. Throw in the onions and carrots, cooking until soft, about 5-7 minutes. Add the garlic and cook for just a minute more.
  8. Crank up the heat to high and deglaze the pot with the Cabernet Sauvignon. Stir vigorously, scraping up the browned bits. Bring to a boil.
  9. Add beef stock, tomato paste, beef base, thyme, bay leaves, sea salt, and pepper. Let it boil while stirring for about 3 minutes.
  10. Snuggle the browned short ribs back into the pot, ensure they’re covered in liquid, and bring it back to a boil for 2 more minutes.
  11. Put the lid on the pot and transfer it to the oven. Let it cook undisturbed for 3 hours—don’t peek!
  12. When time’s up, carefully remove the pot from the oven and brace yourself for a steam facial as you take the lid off.
  13. Gently move the short ribs to a bowl—they’ll be meltingly tender. Skim the fat off the sauce that’s gathered at the top.
  14. Remove the bay leaves and thyme stems. Bring the pot back to medium-high heat and reduce the sauce by a third, concentrating the flavors.
  15. Crumble the bacon into the sauce, stirring well. Return the short ribs to the pot, ensuring they’re well-coated in the sauce. Serve immediately over mashed potatoes or polenta. Absolute heaven!

Cook’s Notes

– Bacon lovers, rejoice! The bacon fat really amps up the richness, but if you’re looking for a lighter version, you can skim more of it off before deglazing.
– This dish is even better the next day, so consider making it ahead and letting the flavors meld overnight in the fridge. Just reheat gently on the stovetop.
– If your sauce turns out too salty, don’t worry—add a touch more beef stock or water during the reduction phase to balance it out.
– Leftovers can be stored in an airtight container in the fridge for up to three days. They’re pretty dreamy in a sandwich or tossed with pasta!

Make It Your Own

  • Substitute the short ribs with boneless chicken thighs. They’ll cook faster—about 1.5 to 2 hours should do it.
  • Swap the carrots for parsnips or sweet potatoes for a different kind of sweetness.
  • Use a different red wine like Merlot if Cabernet isn’t your jam.
  • Add a handful of chopped fresh herbs like parsley or basil at the end for a fresh, bright twist.

If you try this, I’d love to hear how it turns out—drop a comment or tag me! There’s something so fulfilling about sharing good food, and I hope this becomes one of your go-to comfort dishes. Enjoy every delicious bite!

Related update: Amazing Braised Beef Short Ribs

Related update: Steak with lemon and capers

Cheesecake with cranberries | Made by Meaghan Moineau

Picture this: It’s a chilly Saturday afternoon, and I’m craving something sweet but not too cloying, something that feels like a hug in dessert form. My mind wanders to the bags of fresh cranberries I picked up on a whim during my last grocery run. That’s when inspiration strikes — why not whip up a cheesecake with a tangy cranberry twist? This cheesecake is creamy, bursting with seasonal flavor, and surprisingly easy to make. If you’ve ever thought cheesecake was too complicated for a casual bake, think again. This recipe is as straightforward as it gets and leaves you with a dessert that’s as impressive as it is delicious.

Jump to Recipe

What You’ll Need

The beauty of this cheesecake is that you probably have most of these ingredients on hand. The only thing you might need to grab is the fresh cranberries, but trust me, they’re worth it.

  • Fresh cranberries – these are the star of the show.
  • Water
  • Sugar
  • Allspice
  • Cloves
  • Orange extract
  • Mcvitie’s wholewheat digestive cookies – perfect for the crust.
  • Butter
  • Cream cheese – the foundation of any good cheesecake.
  • Sour cream
  • Cornstarch
  • Eggs

How to Make Cheesecake with Cranberries

  1. Start by making the cranberry sauce. In a medium saucepan, bring the cranberries and water to a boil. Let them bubble away until you hear the satisfying pop of the berries’ skins bursting, around 5 minutes.
  2. Once popped, remove the saucepan from the heat and stir in the allspice, cloves, orange extract, and sugar. Mix it all together until it’s thoroughly combined. Pop it in the fridge to cool while you work on the rest.
  3. For the crust, take those Mcvitie’s digestive cookies and crush them into crumbs. Combine the crumbs with sugar and melted butter in a small bowl. Press this mixture firmly into the bottom of a greased 9-inch springform pan, making sure it’s even. Set it aside.
  4. In a mixing bowl, beat the cream cheese and sugar together until the mixture is smooth and creamy. Then add the sour cream and cornstarch, beating well to ensure everything is perfectly blended. Add the eggs one at a time, beating on low just until each one is incorporated.
  5. Drain your cooled cranberry sauce, reserving the cranberries for later. Gently fold one cup of the sauce into the cream cheese mixture, letting the vibrant red sauce ripple through the creamy batter.
  6. Pour the batter into your prepared crust. Sprinkle the top with the remaining cranberry sauce, letting it swirl and mingle with the batter.
  7. Bake the cheesecake at 160°C for 30-35 minutes, or until the center is almost set. You’ll know it’s ready when it still has a slight jiggle in the middle.
  8. Once baked, let the cheesecake cool on a wire rack for about 10 minutes. Run a knife around the edge to loosen the cake from the pan, then let it cool for another hour.
  9. Refrigerate overnight. I know it’s hard to wait, but this step is crucial for setting the cheesecake properly.
  10. Before serving, you can top the cake with the reserved cranberries for an extra pop of color and tartness.

Cook’s Notes

Making cheesecake might seem intimidating, but it becomes a cinch once you break it down. A few tips: make sure your cream cheese is at room temperature for easy blending. When adding eggs, less is more — over-beating can lead to those pesky cracks. If you’re pressed for time, the cranberry sauce can be made a day ahead, and stored in the fridge. The cheesecake itself is best made the night before serving, giving it ample time to set in the fridge. Leftovers (if there are any) can be stored covered in the fridge for up to four days. If you’re planning to freeze, wrap the cheesecake tightly and enjoy within a month for best taste.

Make It Your Own

Variations are the spice of life, so here are some ideas to tweak this cheesecake to your liking:

  • Swap the fresh cranberries for frozen ones if fresh aren’t available. Just add a couple extra minutes to the cooking time.
  • Want a boozy twist? Add a splash of Grand Marnier to the cranberry sauce for an adult-friendly version.
  • Make it nutty by adding a pecan crumb topping — mix chopped pecans with brown sugar and sprinkle on before baking.
  • If you’re a chocolate lover, fold in a handful of mini chocolate chips into the batter for a choc-berry treat.

If you try this, I’d love to hear how it turns out — drop a comment or tag me! Whether it’s a cozy weekend at home or a dinner party with friends, this cheesecake is sure to be a hit. Enjoy every creamy, tangy bite!

Related update: Cheesecake with cranberries

Cheddar Polenta With Bacon Wrapped Asparagus | Made by Meaghan Moineau

It was one of those wild Mondays where nothing seemed to go as planned—spilled coffee, missing socks, you name it. By the time dinner rolled around, I needed something comforting and quick. Enter my Cheddar Polenta with Bacon Wrapped Asparagus. This dish is like a warm hug in a bowl, yet impressive enough to make you feel like a kitchen wizard. It’s the perfect combo of creamy, cheesy polenta topped with crispy bacon and tender asparagus. Trust me, this is comfort food that doesn’t demand hours in the kitchen.

Jump to Recipe

What You’ll Need

If you’re like me, you probably have a lot of this stuff already hanging out in your kitchen. Here’s what you’ll need to pull together this weeknight savior:

  • 6 spears of asparagus
  • 2 slices of raw bacon
  • 2 cups chicken broth
  • 1 cup coarse corn grits
  • 1 cup extra sharp cheddar cheese, shredded
  • 1 bell pepper (optional, for extra crunch)
  • Salt and pepper, to taste

How to Make Cheddar Polenta With Bacon Wrapped Asparagus

  1. Preheat your oven to 400°F (200°C). This is when your kitchen will start smelling promising!
  2. Take the asparagus spears and wrap them in bacon. I like to use two slices for the full crispy effect. Place these beauties on a small baking sheet.
  3. Spritz the asparagus bundle lightly with nonstick cooking spray. This helps the salt and pepper stick and adds a hint of flavor.
  4. Roast for 15-20 minutes. Keep an eye out: the bacon should be crispy and the asparagus fork-tender, with some golden edges peeking through.
  5. While the asparagus is roasting, bring your chicken broth to a boil in a small saucepan. The bubbling will be music to your ears.
  6. Once boiling, stir in the polenta. Lower the heat and let it cook slowly for about 5 minutes, stirring occasionally. You’ll know it’s ready when it has thickened and looks like a cozy blanket.
  7. Stir in the cheddar cheese and a dash of salt and pepper. The cheese should melt into the polenta, creating a creamy, golden mixture.
  8. To assemble, scoop the polenta into a dish and gently place the bacon wrapped asparagus on top. Serve warm and enjoy every bite!

Cook’s Notes

Alright, let’s get real for a second. Polenta can sometimes turn out lumpy if you rush it. Stir it slowly and give it the attention it deserves. This dish is best enjoyed fresh, but if you have leftovers, store the polenta and asparagus separately in airtight containers in the fridge for up to two days. Reheat the polenta with a splash of water or broth to bring it back to its creamy glory.

Make It Your Own

Feel free to get creative with this recipe! Here are a few ideas to switch things up:

  • Swap the bacon for prosciutto if you’re feeling fancy or have it on hand.
  • For a vegetarian twist, ditch the bacon and roast the asparagus with a sprinkle of smoked paprika and olive oil.
  • Try using Parmesan instead of cheddar for a sharp, nutty flavor.
  • Add some heat with a sprinkle of crushed red pepper flakes over the polenta just before serving.

If you give this recipe a try, I’d love to hear how it turns out—drop a comment or tag me on social media! Your kitchen stories make my day. Happy cooking!

Related update: Cheddar Polenta With Bacon Wrapped Asparagus

Related update: Amazing Braised Beef Short Ribs

Superbowl Chili | Made by Meaghan Moineau

It was one of those classic winter weekends when all you want to do is nestle under a blanket with something hearty and warm. The kind where the wind whistles outside like it’s in on some secret joke. I was in the kitchen, rifling through the pantry, and there it was: a can of black beans. That was the spark for my Superbowl Chili, a dish that’s not just for the big game but perfect for any occasion when you need a comforting, one-pot wonder. It’s rich, robust, and oh-so-satisfying, with a kick that warms you from the inside out. The best part? You probably have most of the ingredients already sitting in your kitchen waiting for their moment to shine.

Jump to Recipe

What You’ll Need

Most of these ingredients are pantry staples, so you might not even need a grocery run. And honestly, any recipe that saves me a trip to the store is already a win in my book.

  • Lean ground beef – This is our hearty base.
  • Sirloin steak – Adds a nice textural contrast.
  • Olive oil
  • Yellow onions
  • Carrots
  • Garlic
  • Canned black beans
  • Diced canned tomatoes
  • Chili powder
  • Cumin
  • Dried oregano
  • Chipotle chile pepper in adobo sauce
  • Kosher salt
  • Low sodium chicken stock
  • Fresh cilantro
  • Green onions
  • Lime
  • Monterey jack cheese
  • Sour cream

How to Make Superbowl Chili

  1. In a large heavy pot set over high heat, add the ground beef and steak chunks. Stir frequently until the meat is browned. This should take about 8 minutes. The kitchen will start to fill with those irresistible, savory aromas.
  2. Using a slotted spoon, remove the beef to a plate. Pour off the excess liquid from the pot. I like to use a strainer over a bowl to make sure I catch all the leftover juices, leaving the meat nicely drained.
  3. In the same pot, add a splash of olive oil and set over medium heat. Once it’s shimmering, toss in the carrots, onions, and garlic. Stir these until they’re softened, about 5 minutes, and enjoy how they turn golden and fragrant.
  4. Return the beef to the pot and sprinkle in the chili powder, cumin, oregano, salt, and chopped chipotle chile. Stir and let these cook for just a minute to unlock all those bold, mouth-watering flavors.
  5. Add in your diced tomatoes and chicken stock. Bring everything to a simmer, then reduce the heat to keep it at a gentle simmer for 30 minutes. Stir occasionally and watch as the liquid gradually reduces, intensifying the flavors.
  6. Stir in all but 1/3 cup of the black beans and cook for another 5 minutes. Mash the reserved beans with a fork and mix them into the chili for extra body and thickness.
  7. If you find the chili too thick, don’t fret. You can stir in up to an additional cup of chicken stock to get your preferred consistency. Let it warm for a few minutes, and you’re ready to serve.
  8. Ladle the chili into bowls and garnish with your favorite toppings like fresh cilantro, green onions, a squeeze of lime, a sprinkle of Monterey jack cheese, and a dollop of sour cream. Enjoy!

Cook’s Notes

This chili is perfect for making ahead. You can prepare it up to two days before you plan to serve it. Just cool, cover, and refrigerate. When you’re ready to eat, reheat it over medium heat, stirring often to make sure it warms evenly.

Here’s a tip: if you’re making this for a crowd, keep the garnishes in separate bowls so everyone can customize their bowl just the way they like it. Don’t rush the simmering step. It’s crucial for developing that deep, rich flavor that makes this chili so special.

Make It Your Own

This chili is a canvas waiting for your personal touches. Here are a few ideas:

  • Swap the beef for crispy tofu to make it vegetarian. Just cube and brown the tofu before adding to the pot.
  • Use smoked paprika instead of regular chili powder for a smoky twist.
  • Add some bell peppers with the onions and carrots for an extra layer of sweetness.
  • For a spicier kick, add an extra chipotle pepper or a teaspoon of cayenne pepper.

If you try this, I’d love to hear how it turns out — drop a comment or tag me! Whether you’re watching the game or just enjoying a cozy night in, I hope this chili warms your heart and home. Enjoy every spoonful!

Related update: Superbowl Chili

Related update: Healthy Orange Chicken

Lemon Scented Polenta Pancakes with Blueberry Thyme Syrup | Made by Meaghan Moineau

Picture this: it’s a lazy Sunday morning, and the sunlight is peeking through the kitchen window just enough to gently nudge me from my cozy corner on the couch. That’s when the craving hits—something vibrant and refreshing yet comforting to kickstart the day. Enter Lemon Scented Polenta Pancakes with Blueberry Thyme Syrup. This whimsical twist on the classic pancake is my answer to those mornings where you need a dish that feels special but isn’t a hassle to whip up. With the zing of lemon and the earthy sweetness of blueberry thyme syrup, this dish is an absolute keeper. It’s just fancy enough to impress anyone who stumbles into your kitchen but easy enough to make you wonder why you don’t do this every weekend.

Jump to Recipe

What You’ll Need

This recipe is one of those magical ones where you probably have most of the stuff lounging in your pantry, waiting to be turned into something fabulous. Here’s what you’ll need:

  • All-purpose flour
  • Baking powder
  • Fresh blueberries
  • Butter
  • Cornmeal
  • Egg
  • Fresh thyme
  • Honey
  • Lemon zest
  • Maple syrup
  • Milk
  • Salt
  • Vanilla extract
  • Water

How to Make Lemon Scented Polenta Pancakes with Blueberry Thyme Syrup

  1. Start by making the syrup. Combine the syrup ingredients: blueberries, maple syrup, and thyme sprigs in a small saucepan. Bring this mixture to a gentle boil. Once boiling, reduce the heat and let it simmer. The blueberries will soften and the thyme will infuse its earthy aroma. Remember to remove the thyme sprigs just before serving.
  2. For the pancakes, grab a medium saucepan and combine the cornmeal with cold water. Bring this to a boil, whisking constantly so it’s smooth and not lumpy. Reduce the heat and let it simmer until thickened, about 4 to 5 minutes. It should have the consistency of a thick porridge.
  3. In a small bowl, whisk together the milk, egg, honey, and a splash of vanilla extract. Add this to the thickened cornmeal, transforming it into a creamy polenta custard.
  4. In your largest mixing bowl, whisk together the all-purpose flour, baking powder, salt, and lemon zest. Make a well in the center of the dry ingredients and pour your polenta custard into the middle. Stir until everything is just combined; over-mixing is a no-go!
  5. Heat up a large griddle or non-stick pan and give it a good brush of butter. Ladle enough batter onto the griddle for 4-inch pancakes. If the batter seems too thick, a splash more milk will help it along.
  6. Cook the pancakes over moderate heat until bubbles form on the surface and the edges look a touch dry. This is your cue to flip them. Cook until the other side is beautifully golden and the pancakes have a little puff to them, about 2 minutes more.
  7. Transfer these golden beauties to warm plates and repeat with the remaining batter. Drench them in the warm blueberry syrup, and you’re set for a morning of deliciousness.

Cook’s Notes

Let’s talk about a few things to keep in mind as you embark on this pancake adventure. First, the syrup is the star—don’t skimp on the thyme unless you’re not a fan of its unique flavor! This syrup can be stored in an airtight container in the fridge for up to a week and reheated gently on the stove. As for the pancakes, if you’ve got leftovers (which is doubtful), they freeze well. Layer parchment paper between them and pop them in a zip-top bag for freezer storage. Defrost in the toaster on a low setting for a quick breakfast. Also, if you’re making these ahead of time, keep them warm in a low oven while you finish up the batch.

Make It Your Own

This recipe is wonderful as is, but who doesn’t love a little culinary improvisation? Here are a few ideas to make these pancakes truly yours:

  • Swap the blueberries for raspberries or blackberries if that’s what you have on hand or prefer.
  • Add a tablespoon of poppy seeds to the pancake batter for a delightful crunch that complements the lemon zest.
  • If you’re dairy-free, use almond milk and vegan butter without sacrificing any of the flavor.
  • For a nutty twist, replace half of the cornmeal with almond flour.

If you try this, I’d love to hear how it turns out—drop a comment or tag me! There’s nothing quite like seeing your creations and hearing how these pancakes brightened your day. Enjoy, my friends!

Related update: Lemon Scented Polenta Pancakes with Blueberry Thyme Syrup

Related update: Superbowl Chili

Related update: Baked Apple Pancake