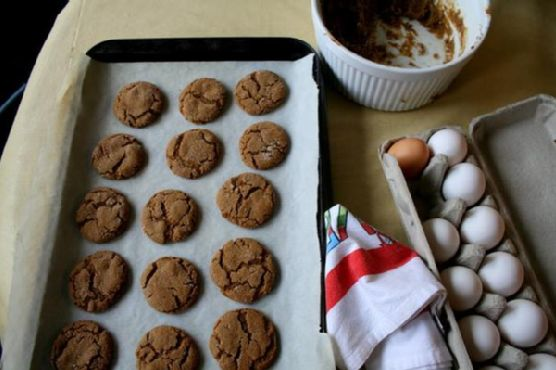
Ginger Molasses Rounds
Intro
As the days grow shorter and the air crisper, there’s nothing quite like the comfort of a warm, spiced cookie straight out of the oven. These Ginger Molasses Rounds take me back to my grandmother’s kitchen, where the aroma of spices and the sound of laughter filled the air. Every year, as the first leaves turned gold, she would bake these cookies with me, guiding my young hands with her own seasoned ones. The magic of mixing simple ingredients to create something so delightful was a lesson in love and patience. This recipe has been passed down through generations, and it’s my pleasure to share it with you, hoping it brings warmth and joy to your home as it always has to mine.
Why You’ll Love It
These Ginger Molasses Rounds are more than just cookies; they’re little bites of nostalgia and comfort. Here’s why you’ll fall in love with them:
- Perfectly Spiced: The combination of ginger and cinnamon provides a warming, aromatic flavor that’s perfect for the fall and winter months.
- Deliciously Chewy: Baking them just right ensures a soft, chewy texture that melts in your mouth.
- Simple Ingredients: You probably already have most of the ingredients in your pantry!
- Quick to Make: With a short baking time, these cookies are perfect for last-minute gatherings or a cozy evening treat.
Ingredients
- 1 teaspoon baking soda
- 3/4 cup butter, softened
- 1 teaspoon ground cinnamon
- 1 egg
- 2 cups all-purpose flour
- 1/4 cup additional granulated sugar (for rolling)
- 1 teaspoon ground ginger
- 1/4 cup molasses
- 1/4 teaspoon salt
- 1 cup granulated sugar
Instructions
- Preheat your oven to 350°F (175°C). Line a baking sheet with parchment paper.
- In a large bowl, cream together the butter and sugar until light and fluffy.
- Beat in the egg and molasses until fully incorporated.
- In a separate bowl, whisk together the flour, baking soda, salt, cinnamon, and ginger.
- Gradually blend the dry ingredients into the creamed mixture until just combined.
- Shape the dough into small balls, about 1 inch in diameter.
- Roll each ball in the additional granulated sugar to coat.
- Place the balls 2 inches apart on the prepared baking sheet.
- Bake for 8-9 minutes, until the cookies are just set and their tops are slightly cracked.
- Remove from the oven and let them cool on the baking sheet for a few minutes before transferring to a wire rack to cool completely.
Tips
To achieve the perfect texture, be sure to remove the cookies from the oven while they’re still soft. They’ll continue to firm up as they cool. If you prefer a slightly firmer cookie, you can bake them for an additional minute, but be careful not to overbake, as they can quickly become too hard.
Variations & Substitutions
- Spice it Up: Add a pinch of nutmeg or cloves for an extra layer of warmth.
- Whole Wheat Flour: Substitute half of the all-purpose flour with whole wheat flour for a nuttier flavor and added nutrition.
- Gluten-Free: Use a 1:1 gluten-free baking blend in place of the all-purpose flour for a gluten-free version.
- Vegan Option: Replace the butter with a vegan buttery spread and the egg with a flax egg (1 tablespoon ground flaxseed mixed with 3 tablespoons water).
Storage
Store these cookies in an airtight container at room temperature for up to a week. For longer storage, you can freeze them for up to three months. To enjoy from frozen, simply let them thaw at room temperature or warm them in a low oven for a few minutes.
FAQ
Can I use blackstrap molasses in this recipe?
Blackstrap molasses has a stronger, more bitter flavor compared to regular molasses, which can affect the taste of these cookies. If you enjoy a more robust molasses flavor, you can use blackstrap, but I recommend sticking with regular molasses for the classic taste.
Why are my cookies not cracking?
If your cookies aren’t cracking, it might be because the dough is too warm. Try chilling the dough for 10-15 minutes before baking. Also, ensure your baking soda is fresh, as it helps create those beautiful cracks on top.
Nutrition
Each cookie (assuming the recipe makes about 24 cookies) contains approximately:
- Calories: 110
- Fat: 5g
- Carbohydrates: 16g
- Protein: 1g
- Sugar: 10g
Conclusion
Baking these Ginger Molasses Rounds is more than just making a dessert; it’s creating memories. Whether you share them with loved ones or enjoy them with a warm cup of tea on a quiet afternoon, these cookies are sure to bring a smile to your face. I hope this recipe becomes a cherished part of your family’s traditions, just as it is in mine. Happy baking!
Related update: Ginger Molasses Rounds
Related update: Carrot Cake Snack Bites
Related update: Chocolate Peppermint Cookies