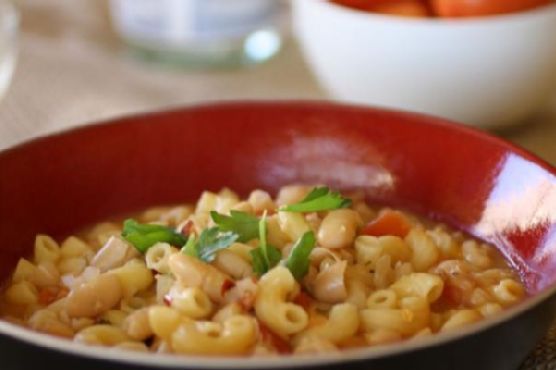
Pasta e Fagioli (Pasta and Beans) | Made by Meaghan Moineau
Title: A Hearty Hug in a Bowl: The Comforting Magic of Pasta e FagioliDescription: Dive into the heartwarming world of Pasta e Fagioli, a classic Italian dish that wraps you in warmth and nostalgia. Discover the simple, yet flavorful recipe that has been a cherished family tradition, bringing loved ones together around the dinner table.
---
Pasta e Fagioli: A Timeless Italian Classic
There's something undeniably comforting about a bowl of Pasta e Fagioli. As the leaves begin to turn and the air grows crisp, this hearty dish becomes a staple in my kitchen—a recipe passed down through generations, each spoonful steeped in love and tradition. Today, I'll share not only the recipe but also a treasured family memory that makes this dish so special.
Ingredients:
- 2 tablespoons olive oil
- 1 cup diced onion
- 2 cups diced tomatoes (or marinara sauce)
- 1 garlic clove, minced
- 4 cups low sodium vegetable stock
- 2 cups water
- 1 teaspoon salt
- 1/2 teaspoon black pepper
- 1/4 teaspoon red pepper flakes
- 1 cup elbow macaroni
- 1 can (15 oz) cannellini beans, drained and rinsed
- 1/4 cup fresh parsley, chopped
- Parmesan cheese, for serving
- Additional parsley for garnish
Instructions:
1. In a large stock pan over medium-high heat, add the olive oil and diced onion. Sauté until the onion becomes tender and translucent, about 3 minutes.
2. Stir in the diced tomatoes and minced garlic. Cook for 1-2 minutes, ensuring the garlic doesn't burn.
3. Pour in the vegetable stock and water, then season with salt, black pepper, and red pepper flakes. Bring to a gentle boil.
4. Add the elbow macaroni, reduce the heat, and let it cook until it's about 3/4 of the way done (still slightly firm).
5. Stir in the cannellini beans and continue cooking until the pasta is fully cooked, approximately 10-15 minutes.
6. Fold in the fresh parsley towards the end of the cooking time. Adjust seasoning to taste.
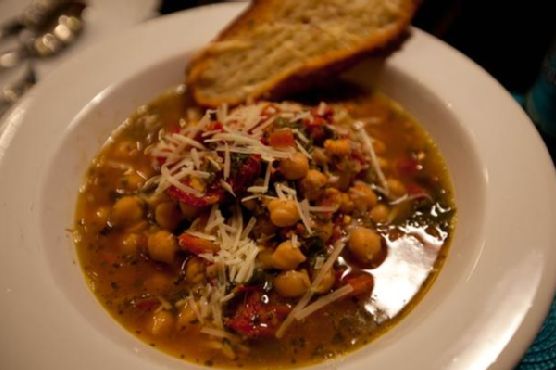
7. Serve in individual bowls, garnished with extra parsley and a generous sprinkle of Parmesan cheese.
Nostalgic Memory:
The aroma of Pasta e Fagioli always transports me back to my grandmother's cozy kitchen, where laughter and love filled the air as much as the smell of simmering soup did. Every autumn, our family would gather at her house for Sunday dinner—a tradition that felt like an unspoken promise of warmth and togetherness. I remember sitting around the long wooden table, my grandmother proudly ladling “pasta fazool” into each bowl, her eyes twinkling as she recounted tales from her childhood in Italy. These stories, woven into the fabric of our family history, served as the perfect seasoning for our meal. This dish was not just sustenance; it was a celebration of heritage, a reminder of where we came from, and a testament to the simple joy of sharing a meal with loved ones.
Difficulty Rating: 4/10
Category: Main Dish
Pasta e Fagioli is an uncomplicated, yet deeply satisfying dish. Its simplicity is part of its charm, making it an accessible recipe for both novice and seasoned cooks alike. As you prepare it, I hope you find as much warmth and connection in this dish as our family has over the years. Buon appetito!