The Perfect Butter Beans Stew
Intro
There’s something about a warm bowl of stew that feels like a gentle hug on a chilly day. Growing up, butter beans stew was a staple in my grandmother’s kitchen, a dish that brought our family together around the dinner table. I remember the fragrant aroma wafting through the house, the anticipation of that first comforting bite, and the joy of sharing stories while savoring each spoonful. Over the years, I’ve adapted her recipe slightly, but the heart of it remains the same: a humble yet deeply satisfying stew that nourishes both body and soul.
Why You’ll Love It
This Perfect Butter Beans Stew is more than just a meal; it’s an experience. Here’s why you’ll find it irresistible:
- Hearty and Satisfying: This stew is packed with protein-rich beans, making it a filling and nutritious option.
- Simple Ingredients: With common pantry staples, you can whip up this delightful dish.
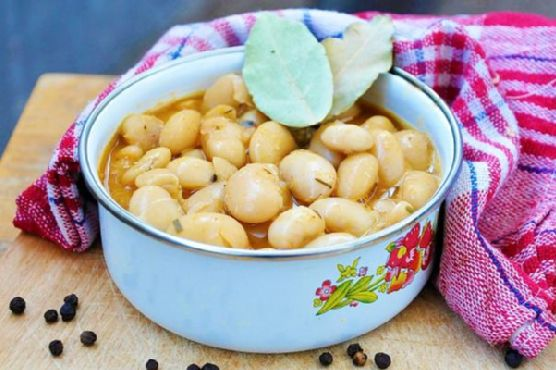
- Rich Flavors: The combination of tarragon, sweet paprika, and bay leaves creates a symphony of flavors that dance on your palate.
- Comforting and Nostalgic: It’s a timeless recipe that evokes warmth and homeliness, perfect for family dinners.
Ingredients
- 250g dry lima beans, soaked overnight
- 1 large onion, diced
- 3 garlic cloves, minced
- 1 teaspoon dry tarragon
- 1 tablespoon fresh tarragon, chopped
- 1 teaspoon sweet paprika
- 2 bay leaves
- 2 tablespoons unrefined sunflower oil
- Ground pepper, to taste
- Sea salt, to taste
Instructions
- To get the full instructions for making The Perfect Butter Beans Stew, visit my blog: The Perfect Butter Beans Stew Recipe.
Tips
Here are some tips to ensure your Butter Beans Stew turns out perfectly every time:
- Soak the Beans: Soaking the beans overnight helps reduce cooking time and makes them easier to digest.
- Season Generously: Don’t shy away from seasoning. Adjust the salt and pepper to suit your taste, enhancing the stew’s flavors.
- Low and Slow: Cook the stew on a low flame to allow the flavors to meld beautifully, resulting in a richer taste.
Variations & Substitutions
This stew is wonderfully versatile. Here are some variations and substitutions you can try:
- Meaty Addition: Add in some cooked bacon or sausage for a non-vegetarian twist.
- Vegetable Boost: Include diced carrots or celery for added texture and nutrients.
- Herb Swap: If you don’t have tarragon, try using thyme or rosemary for a different flavor profile.
Storage
Store any leftovers in an airtight container in the refrigerator for up to 3 days. This stew also freezes well. Place it in a freezer-safe container, and it should keep for up to 2 months. Reheat gently on the stovetop, adding a splash of water if needed to reach desired consistency.
FAQ
Can I use canned beans instead of dry beans?
Yes, you can use canned beans for a quicker version of this stew. Drain and rinse the beans before adding them to the stew. You won’t need to cook them as long, just until they are heated through and the flavors have melded.
What can I serve with this stew?
This butter beans stew pairs beautifully with crusty bread or over a bed of rice or quinoa. For a lighter option, serve it alongside a fresh green salad.
Is this stew vegan?
Yes, this recipe is naturally vegan, as it contains no animal products. It’s a great option for those following a plant-based diet.
Nutrition
While I’m not a nutritionist, this stew is packed with plant-based protein and fiber from the beans, making it a wholesome, nutrient-dense meal. The use of unrefined sunflower oil also adds healthy fats, and the variety of herbs and spices contribute additional micronutrients.
Conclusion
The Perfect Butter Beans Stew is more than just a recipe; it’s a cherished memory, a warm embrace, and a promise of comfort. Whether you’re sharing it with family or enjoying a quiet meal alone, this stew is sure to become a favorite in your home. I hope this dish brings as much joy to your table as it has to mine.
Related update: The Perfect Butter Beans Stew
Related update: Pork Carnitas Tacos