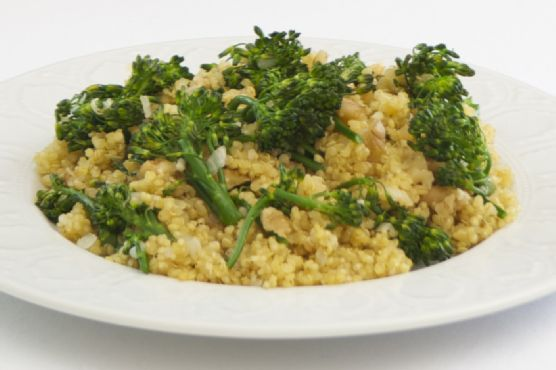
Broccolini Quinoa Pilaf
Intro
There’s something incredibly comforting about dishes that marry simplicity with wholesome flavors. Growing up, my grandmother’s kitchen was a haven of delightful aromas and hearty meals. One of my all-time favorites was her pilaf, a dish that brought the family together around the dining table. Inspired by those cherished memories, I’ve crafted a modern twist on a classic with this Broccolini Quinoa Pilaf. It’s a recipe that not only pays homage to my grandmother’s culinary legacy but also brings a fresh, nutritious element to the table.
Why You’ll Love It
This Broccolini Quinoa Pilaf is a delightful fusion of textures and flavors. You’ll love how the nutty quinoa pairs with the tender-crisp broccolini, creating a satisfying bite with every forkful. The addition of garlic and onions offers a savory depth, while the walnuts add a pleasant crunch. It’s a dish that’s not only nutritious but also visually appealing, perfect for a weeknight dinner or a special gathering.
Ingredients
- 1 bunch broccolini, trimmed
- 1 garlic clove, minced
- 2 tablespoons olive oil
- 1 medium onion, diced
- 1 cup quinoa, rinsed
- 2 cups vegetable broth
- 1/2 cup walnuts, roughly chopped
- Salt and pepper, to taste
Instructions
- In a large pan with a lid, heat olive oil over medium-high heat.
- Add onions and cook for 1 minute.
- Add garlic and cook until onions are translucent and garlic is fragrant.
- Add quinoa to the pan, stir to combine.
- Slowly add in the broth and bring to a boil.
- Cover and reduce heat to low, cook for 15 minutes.
- In the last 2-3 minutes of cooking, add in broccolini on top of the quinoa (do not stir) and cover.
- Uncover and toss broccolini and quinoa together.
- Season to taste with salt and pepper. Add walnuts and serve hot.
Tips
For the best results, ensure that you rinse the quinoa well before cooking to remove any bitterness. Also, make sure to monitor the broccolini and add it in the last few minutes to maintain its vibrant color and crispness. If you like a bit of heat, consider adding a pinch of red pepper flakes along with the garlic.
Variations & Substitutions
This recipe is incredibly versatile. You can substitute broccolini with regular broccoli or even asparagus based on what’s available. If you’re looking for a protein boost, consider adding chickpeas or grilled chicken. For a nut-free version, you can replace walnuts with pumpkin seeds or omit them altogether.
Storage
Store any leftovers in an airtight container in the refrigerator for up to 3 days. This pilaf reheats well, making it a great option for meal prep. Simply warm it up on the stove or in the microwave, adding a splash of broth or water to bring back its moisture.
FAQ
Can I use frozen broccolini?
Yes, you can use frozen broccolini if fresh is not available. Just be sure to thaw and drain it well before adding it to the pilaf to avoid excess moisture.
Is this dish suitable for a gluten-free diet?
Absolutely! Quinoa is naturally gluten-free, making this pilaf a perfect option for those following a gluten-free diet.
What can I serve with Broccolini Quinoa Pilaf?
This pilaf pairs wonderfully with grilled proteins like chicken, fish, or tofu. You can also serve it alongside a fresh salad for a complete and balanced meal.
Nutrition
This Broccolini Quinoa Pilaf is a nutritious dish that offers a good balance of macronutrients. It’s high in protein and fiber thanks to the quinoa and broccolini, while the walnuts provide healthy fats. It’s a great option for those looking to enjoy a wholesome and satisfying meal.
Conclusion
Broccolini Quinoa Pilaf is more than just a meal; it’s a connection to memories of family gatherings and love shared over a table. It’s a dish that brings warmth, nourishment, and a touch of nostalgia with every bite. Whether you’re making it for a busy weeknight or a leisurely weekend dinner, this recipe is sure to become a beloved staple in your culinary repertoire. Enjoy!
Related update: Broccolini Quinoa Pilaf
Related update: Fall Fruit Compote
Related update: Skillet Chili Mac