Chocolate Fudge Cookies | Made by Meaghan Moineau

Chocolate Fudge Cookies | Made by Meaghan Moineau

Title: "Nostalgic Chocolate Fudge Cookies: A Sweet Escape into Childhood Memories"


Description:

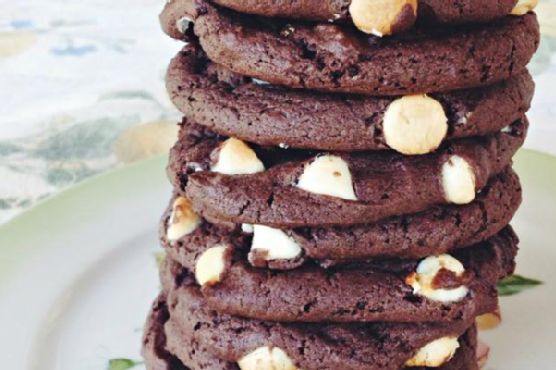
Dive into the world of rich, chocolatey goodness with our Chocolate Fudge Cookies recipe. This delightful treat is not just a dessert; it's a ticket back to cherished family moments and nostalgic kitchen adventures. Easy to make and impossible to resist, these cookies promise to be a hit at any gathering. Read on for the full recipe, a heartwarming family story, and tips to perfect your baking experience.

---


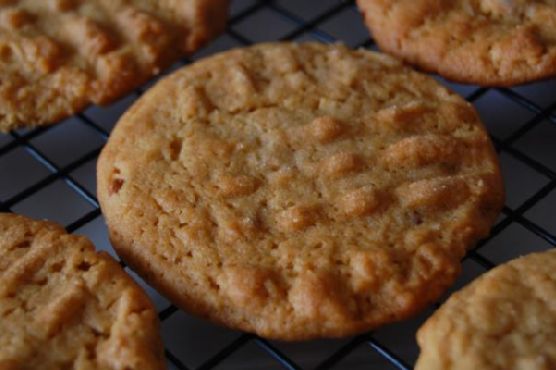
Chocolate Fudge Cookies Recipe
Ingredients:

- 1/2 cup butter, softened


- 1/4 cup canola oil


- 1 cup white dark chocolate chips


- 1 large egg


- 1 box Betty Crocker chocolate fudge cake mix


- 1/4 cup peanut butter


- 1/2 cup rolled oats


- 1 teaspoon vanilla extract


- 1/4 cup whole milk


Instructions:

1. Preheat your oven to 350°F (175°C).


2. In a stand mixer or food processor, combine the butter, canola oil, white dark chocolate chips, egg, chocolate fudge cake mix, peanut butter, rolled oats, vanilla extract, and whole milk. Mix until everything is well combined and the dough is smooth.


3. Spoon the dough onto prepared cookie sheets, spacing each dollop a few inches apart. Use the back of a spoon to gently press down on each cookie.


4. Bake in the preheated oven for 6-8 minutes, or until the edges are lightly golden.


5. Transfer the cookies to a wire rack to cool completely.


6. Enjoy these delightful treats with a glass of milk or a warm cup of coffee!


Difficulty Rating: 3/10
Classification: Dessert

---


A Sweet Journey Down Memory Lane


Growing up, weekends at my grandmother's house were always a time of joy and indulgence. The highlight of our visits was undoubtedly the moment we walked into the kitchen, greeted by the heavenly aroma of freshly baked cookies. My grandmother had a knack for creating the most delicious treats, and her Chocolate Fudge Cookies were a family favorite.


As a child, I would stand by her side, eyes wide with anticipation, as she expertly mixed the ingredients. She would let me stir the dough—a task I took very seriously—and sneak a taste of the chocolate chips when she wasn't looking. Each batch of cookies was a masterpiece, a perfect blend of creamy peanut butter and rich chocolate, with a delightful crunch from the oats.


Baking these cookies was more than just a culinary exercise; it was a bonding experience, filled with laughter and storytelling. My grandmother would share tales from her childhood, making each cookie session a bridge between generations. The kitchen was our haven, a place where love was measured in cups and memories were baked into every bite.


Even now, as I recreate this recipe in my own kitchen, I'm transported back to those cherished moments. The sweet scent of chocolate fudge wafts through my home, bringing with it a sense of comfort and nostalgia. These cookies are more than a dessert; they're a reminder of love, family, and the simple joys of life.


Whether you're looking to create new memories or simply indulge in a delicious treat, these Chocolate Fudge Cookies are sure to delight. Gather your loved ones, roll up your sleeves, and let the magic of baking bring you closer together.


---


Conclusion


This Chocolate Fudge Cookies recipe is a delightful way to bring a touch of nostalgia into your home. With simple ingredients and easy steps, you can create a dessert that's not only delicious but also a beautiful reminder of cherished family moments. So go ahead, bake a batch, and let the memories unfold with every bite!

Read more about Appetizers

Read more about Main Dishes

Read more about Desserts

Dark Chocolate Cinnamon Easter Eggnog | Made by Meaghan Moineau

Dark Chocolate Cinnamon Easter Eggnog | Made by Meaghan Moineau

Title: Indulgence in a Cup: Dark Chocolate Cinnamon Easter Eggnog
Description: Dive into the rich, velvety embrace of our Dark Chocolate Cinnamon Easter Eggnog, a delightful fusion of classic holiday flavors with a luxurious twist. This decadent dessert drink will not only tantalize your taste buds but also evoke cherished family memories, perfect for sharing around the Easter table.

---


A Chocolate Lover’s Dream: Dark Chocolate Cinnamon Easter Eggnog Recipe


As the bright hues of spring unfurl with the promise of Easter, our family tradition always circles back to the kitchen, where the aroma of cinnamon and chocolate heralds the festive season. This year, bring a touch of nostalgia and indulgence to your Easter gathering with our Dark Chocolate Cinnamon Easter Eggnog. This luscious dessert drink is rated a 5 out of 10 in difficulty, making it an approachable yet impressive treat for any home cook.


Ingredients:


- 4 egg yolks
- 2 cups milk
- ½ cup granulated sugar
- 4 oz dark chocolate, chopped
- 2 tablespoons unsweetened dark cocoa powder
- 1 teaspoon ground cinnamon
- 1 cup heavy whipping cream
- ¼ cup chocolate liqueur
- 1 teaspoon vanilla extract

Instructions:


1. Combine Ingredients: In a medium saucepan over medium heat, whisk together the egg yolks, milk, sugar, dark chocolate, cocoa powder, and cinnamon. The key here is to whisk continuously, ensuring the ingredients meld into a smooth, chocolatey mixture.
2. Heat and Stir: As the mixture heats and just starts to boil and bubble, remove it from the heat promptly to prevent curdling. The fragrance of cinnamon and chocolate will fill your kitchen, a sensory cue that the mixture is ready.
3. Cool Down: Pour the mixture into a bowl set over an ice bath. Whisk for several minutes until the concoction is cool to the touch.
4. Final Touches: Once cooled, whisk in the heavy cream, chocolate liqueur, and vanilla extract. At this point, your eggnog is ready to serve. For an extra touch, top with whipped cream and a sprinkle of cinnamon.
5. Serve or Store: Serve immediately for the freshest taste, or store in the refrigerator for up to two days, allowing the flavors to deepen.

Snappy Tips and Substitutions:


- Egg Yolks: Ensure thorough whisking to avoid curdling.
- Chocolate Variations: Use original unsweetened cocoa powder if dark chocolate isn't to your liking, and feel free to swap in your favorite chopped chocolate.
- Liqueur Options: Substitute with another liqueur of your choice if chocolate liqueur isn't available.

A Family Memory:


Easter Sundays at my grandma’s house were nothing short of magical. As children, we were drawn to the kitchen by the enchanting scents of warm spices and melting chocolate. Grandma would always make her signature eggnog, a recipe passed down through generations, with her own special twist of adding cinnamon and chocolate. We’d gather around her small kitchen table, our eyes wide with anticipation, as she ladled the creamy concoction into our mugs. Even as adults, that first sip transports us back to those carefree days of childhood wonder and family togetherness.


Dessert Delight:


Our Dark Chocolate Cinnamon Easter Eggnog is the perfect dessert drink to cap off your Easter feast. Its rich flavors and creamy texture offer a comforting, indulgent experience, making it a delightful addition to your holiday traditions. Whether enjoyed as a nostalgic nod to the past or a new family favorite, this eggnog recipe is sure to warm hearts and create lasting memories.


Celebrate the season with this decadent treat, and let it become a cherished part of your Easter celebrations.

Read more about Appetizers

Read more about Main Dishes

Read more about Desserts

Salmon Confit with Lemongrass Sauce | Made by Meaghan Moineau

Salmon Confit with Lemongrass Sauce | Made by Meaghan Moineau

Title: A Taste of Home: Savory Salmon Confit with Zesty Lemongrass Sauce
Description: Dive into the delightful world of flavors with our Salmon Confit with Lemongrass Sauce. This dish combines the rich taste of salmon with the aromatic allure of lemongrass, creating a harmony of textures and tastes that is sure to impress. Perfect for a special family dinner or an elegant evening meal, this recipe holds a special place in my heart, evoking fond memories of gatherings that were filled with laughter and love.
The Story Behind the Dish

Growing up, Sunday evenings were a cherished time in our home. It was the one day of the week when everyone gathered around the dining table for a family meal, free from the distractions of busy schedules. My mother, an avid cook with a knack for experimenting, introduced us to a myriad of flavors and dishes. Among them, the Salmon Confit with Lemongrass Sauce was a favorite.


I remember the first time my mother prepared this dish. The kitchen was filled with the fragrance of fresh lemons and the distinct aroma of lemongrass. As she carefully laid the salmon fillets over the lemon slices, she shared stories of her childhood, recounting how her own mother would create magic in the kitchen with just a few simple ingredients. It was in those moments that I realized food was more than just sustenance; it was a bridge to our past and a canvas for creating new memories.


As the salmon slowly cooked in the oven, we would set the table with our best plates, a ritual that always made the meal feel extra special. The dish was served with a medley of vibrant vegetables—carrots and spinach, their colors as bright as the laughter that filled the room. The first bite was always an explosion of flavors, the richness of the salmon perfectly complemented by the creamy, tangy lemongrass sauce. It was a meal that brought us together, one that we eagerly anticipated each week.


Recipe: Salmon Confit with Lemongrass Sauce

*Ingredients:*


- Skinless salmon fillets


- 2 tablespoons extra virgin olive oil


- Salt and pepper (Masterfoods Garlic Pepper recommended)


- 2 lemons


- 1 large carrot


- 150g baby spinach leaves


- 2 tablespoons cooking oil


- 2 tablespoons butter


- 1 tablespoon minced garlic


- 2 stalks lemongrass


- 150ml fresh cream


- 1 teaspoon liquid chicken stock concentrate


- 1 tablespoon lemon juice


- Chives for garnish


*Instructions:*


1. Preheat the Oven: Set your oven to 120°C. Adjust according to your oven's tendencies.
2. Prepare the Salmon: Coat salmon fillets with olive oil, salt, and pepper. Lay lemon slices on a lined baking tray, place fillets atop.
3. Bake: Cook in the oven for 25-30 minutes depending on thickness.
4. Vegetable Medley: Stir fry sliced carrots in oil and butter for a minute. Set aside. In the same pan, cook garlic and spinach until wilted. Add seasonings and set aside.
5. Lemongrass Sauce: In a saucepan, cook lemongrass in butter. Add cream and chicken stock, boiling until thickened. Finish with lemon juice.
6. Assemble the Dish: On a plate, lay the spinach and carrots, top with salmon, drizzle sauce, and garnish with chives.
Difficulty Rating: 7/10
Classification: Main Dish

Creating this Salmon Confit with Lemongrass Sauce is more than just cooking; it's an experience that brings warmth and nostalgia to the dining table. Perfect for those who love to explore new flavors while honoring cherished memories, this dish is a testament to the power of food in connecting us to our past and each other.

Read more about Appetizers

Read more about Main Dishes

Read more about Desserts

Aromatic perch fillets | Made by Meaghan Moineau

Aromatic perch fillets | Made by Meaghan Moineau

Title: "Aromatic Perch Fillets: A Nostalgic Journey Through Flavor"
Description: Dive into a culinary experience with our Aromatic Perch Fillets, a recipe that not only tantalizes your taste buds with its rich flavors but also evokes heartwarming family memories. This main dish, rated a 6 out of 10 in difficulty, is perfect for those who appreciate the art of cooking with spices. With its delightful combination of aromatic spices and crispy texture, it's sure to become a cherished favorite in your own kitchen.

---


Aromatic Perch Fillets: A Nostalgic Journey Through Flavor


There’s something incredibly comforting about a dish that brings back fond memories, and for me, Aromatic Perch Fillets do just that. This delightful main dish, infused with the warm and inviting spices of bay leaves, cardamom, and cinnamon, takes me back to countless family gatherings by the lake where laughter, love, and the smell of freshly fried fish filled the air.


Ingredients:


- Fresh perch fillets


- 1 cup flour


- ½ cup corn flour


- Sea salt


- Ground pepper


- 1 tablespoon seasoning mix (bay leaves, black peppercorn, cardamom, cinnamon, ground nutmeg, sweet ground paprika)


- 1 cup light beer


- Peanut oil for frying


- Garlic


- Black peppercorn


- Potato salad for serving


Instructions:


1. Prepare the Flour Mixture: In a large bowl, combine the flour, corn flour, sea salt, and freshly ground pepper.
2. Craft the Seasoning Mix: Finely grind bay leaves, black peppercorn, cardamom, cinnamon, nutmeg, and sweet paprika. Store any excess in an airtight glass bottle in the refrigerator for future culinary adventures.
3. Create the Batter: Add the seasoning mix to the flour mixture and stir well. Gradually pour in light beer, whisking constantly until you achieve a smooth batter consistency.
4. Fry the Fillets: Heat peanut oil in a frying pan over medium-high heat. Coat the perch fillets in the batter, then fry each side for about 3 minutes or until they reach a golden brown perfection. Transfer the fillets to a warm place to keep them hot and crispy.
5. Bonus Pancakes: With any remaining batter, form small pancakes and fry in the same oil. These make a delightful accompaniment to the perch fillets.
6. Serve: Pair the fillets with a refreshing potato salad and enjoy immediately.

A Taste of Nostalgia


As a child, my summers were spent at our family cabin by the lake. The highlight of each day was when my grandfather and I would head out early in the morning to fish. The joy of reeling in a fresh perch was only surpassed by the excitement of knowing what delicious dish awaited us later. Back at the cabin, my grandmother would work her magic, transforming our catch into the most aromatic, golden fillets. The house would fill with the warm scent of spices, mingling with laughter and stories shared around the dining table.


This dish is more than just a meal; it's a portal to those cherished memories. Cooking it now, in my own kitchen, I find myself transported back to those sunny days by the lake, surrounded by family and filled with the simple joys of life.


Difficulty & Classification:


- Difficulty: 6/10 - This recipe requires some precision with the batter and frying but is manageable for most home cooks.
- Classification: Main Dish

This aromatic perch fillet recipe not only satisfies your palate but also warms your heart, proving that the best recipes are those that connect us to our past while creating new memories for the future. Enjoy this dish with loved ones and let it become a staple in your family's culinary traditions.

Read more about Appetizers

Read more about Main Dishes

Read more about Desserts

Lasagne Roll Ups | Made by Meaghan Moineau

Lasagne Roll Ups | Made by Meaghan Moineau

Title: Rolling with Tradition: Delightful Lasagne Roll Ups for Family Gatherings
Description: Discover a heartwarming twist on a classic Italian favorite with our Lasagne Roll Ups. Packed with vibrant flavors and a touch of nostalgia, this dish is perfect for bringing families together. Dive into this main dish recipe that’s rich in taste and memories, rated 6/10 on the difficulty scale.

---


Ah, lasagne! A dish that has graced many tables, bringing warmth and comfort to countless gatherings. But have you ever tried Lasagne Roll Ups? This delightful variation not only elevates the classic flavors but also adds a touch of elegance to your dining experience.


Ingredients:

- Fresh finely-chopped basil leaves


- Red thinly-sliced bell peppers


- Black pepper


- Chicken broth


- Dried thyme


- 2 garlic cloves, minced


- Fresh lemon juice


- A pinch of nutmeg


- Olive oil


- 1 finely-chopped onion


- Parmesan cheese


- Dry lasagne pasta sheets


- Red dried pepper flakes


- Ricotta cheese


- Salt


- Shredded mozzarella cheese


- 1 packet frozen spinach, thawed and drained


- Unsalted butter


Instructions:
1. Prepare the Sauce: In a skillet, heat olive oil over moderately-low heat. Add garlic, onion, red pepper flakes, thyme, and salt and pepper to taste. Stir until the onion softens. Reserve 3 tablespoons of this mixture in a bowl.
2. Cook the Peppers: Add bell peppers and chicken broth to the skillet. Cover and simmer for about 10 minutes until the peppers are very soft. Puree the mixture in a blender until smooth, then return it to the skillet. Swirl in unsalted butter and stir in basil and lemon juice.
3. Cook the Noodles: Cook the lasagne noodles according to package directions. Rinse with cold water and drain.
4. Preheat the Oven: Set your oven to 375°F (190°C).
5. Make the Filling: In a bowl, combine the reserved onion mixture, 1/4 cup Parmesan cheese, mozzarella, ricotta, nutmeg, spinach, and salt and pepper. Mix well.
6. Assemble the Roll Ups: Spread 1 cup of sauce in a 9x9x2-inch baking pan. Spread 3 tablespoons of filling on each noodle, roll up like a jelly roll, and place seam-side down in the pan. Repeat with remaining noodles.
7. Bake: Top with remaining sauce, cover with foil, and bake for 25 minutes. Uncover, sprinkle with remaining Parmesan cheese, and bake uncovered until golden, about 5 more minutes.

This recipe yields 6 servings of pure joy.


Nostalgic Story:

Growing up, Sunday family dinners were a sacred tradition in our household. Grandma would always whip up her legendary lasagne, the recipe passed down from her mother, who brought it over from the old country. But it wasn't until one chilly autumn afternoon that she decided to give the classic a twist.


I remember the warmth of the kitchen, the aroma of garlic and basil wafting through the air, blending with the laughter of my cousins and the gentle hum of the radio. Grandma, with her ever-present apron, decided to surprise us with Lasagne Roll Ups. It was her way of honoring tradition while embracing creativity.


As I helped her spread the filling and roll the noodles, she shared stories of her childhood, the challenges and joys of adapting to a new world while preserving her heritage. Those roll ups were more than just a meal; they were a testament to resilience and love. Every bite was a journey back to simpler times, a reminder of the strength found in family bonds.


To this day, whenever I prepare Lasagne Roll Ups, I am transported back to that cozy kitchen, surrounded by love and laughter, reminded of the power of food to connect us across generations.


Difficulty: 6/10
Classification: Main Dish

Whether you’re creating new memories or honoring old traditions, Lasagne Roll Ups are a delightful way to bring everyone together. Enjoy!

Read more about Appetizers

Read more about Main Dishes

Read more about Desserts

Rocky Road Rice Krispie Treats | Made by Meaghan Moineau

Rocky Road Rice Krispie Treats | Made by Meaghan Moineau

Title: Nostalgic Indulgence: Rocky Road Rice Krispie Treats
Description: Dive into the sweet, crunchy, and nostalgic world of Rocky Road Rice Krispie Treats. This delightful dessert combines the comfort of childhood favorites with a sophisticated twist, perfect for gatherings or a cozy night in. Discover a treasured family memory woven into this recipe and learn how to make this easy yet irresistible treat.

---


Nostalgic Indulgence: Rocky Road Rice Krispie Treats

There's something inherently comforting about a treat that takes you back to cherished moments of childhood. Rocky Road Rice Krispie Treats do just that, blending the simplicity of a well-loved snack with the decadent flavors of bittersweet chocolate and almonds. These treats are more than just a dessert; they are a bridge to the past, a reminder of family gatherings, and the laughter that filled the air.


A Family Memory

Growing up, my family had a tradition of gathering every Sunday afternoon for a potluck-style feast. Each family member brought their signature dish, but my grandmother's Rocky Road Rice Krispie Treats were always the highlight. She had a knack for turning simple ingredients into something magical, and these treats were no exception.


I remember standing on tiptoe to peer over the kitchen counter, watching her expertly melt the butter and marshmallows in her well-worn soup pot. The aroma of almond extract and vanilla filled the air, wrapping us in a warm, sweet embrace. She would let me stir in the rice cereal and almonds, my small hands guided by hers, as she shared stories from her childhood. Those afternoons, filled with stories and laughter, are memories I hold dear.


Recipe: Rocky Road Rice Krispie Treats
Ingredients:

- 4 tablespoons butter


- 1 bag (10 oz) chocolate vanilla swirl marshmallows


- 1 teaspoon almond extract


- 1 teaspoon vanilla extract


- 6 cups rice krispies


- 1 cup + 1/3 cup almonds, chopped


- 6 oz bittersweet chocolate, melted


- 1/2 teaspoon kosher salt


Instructions:

1. In a large soup pot, melt the butter and chocolate vanilla swirl marshmallows over medium heat, stirring until smooth.


2. Add the almond and vanilla extracts, stirring to incorporate their fragrant flavors into the marshmallow mixture.


3. Remove from heat and gently fold in the rice krispies and 1 cup of chopped almonds, ensuring each piece is well-coated.


4. Spread the mixture into a 9x13-inch dish sprayed with baking spray. Use a spatula to flatten and smooth the top.


5. Drizzle the melted bittersweet chocolate over the top, then sprinkle the remaining 1/3 cup of almonds evenly.


6. Finish with a sprinkle of kosher salt to enhance the flavors.


7. Allow to cool completely before cutting into squares. For best results, let them sit in the refrigerator for about an hour once they've reached room temperature.


Difficulty: 3/10
Category: Dessert

These Rocky Road Rice Krispie Treats are a delightful blend of crunch and sweetness, with a touch of nostalgia in every bite. Perfect for a family gathering or as a comforting indulgence after a long day, this recipe is a testament to the simple joys of life and the lasting memories of family traditions. Whether you're making them for the first time or the fiftieth, these treats are sure to bring a smile to your face and warmth to your heart.

Read more about Appetizers

Read more about Main Dishes

Read more about Desserts

Couscous Salad With Roasted Vegetables | Made by Meaghan Moineau

Couscous Salad With Roasted Vegetables | Made by Meaghan Moineau

Title: "Savoring Summer: Couscous Salad with Roasted Vegetables"
Description: Dive into a vibrant and wholesome dish that captures the essence of summer with every bite. Our Couscous Salad with Roasted Vegetables is not only a feast for the senses but also a cherished family tradition. Perfect as a main dish, this recipe is bursting with flavors and memories, rated at an easy 5 out of 10 on the difficulty scale.

---


A Taste of Tradition: Couscous Salad with Roasted Vegetables


As the sun begins to dip into the horizon, casting a golden hue over our backyard, I am reminded of the countless summer evenings spent gathered around the family table. The aroma of roasted vegetables mingling with the fragrant notes of basil pesto would waft through the air, a prelude to the delicious meal ahead. My grandmother, the culinary artist of our family, would orchestrate these gatherings with a dish that has since become a treasured family tradition: Couscous Salad with Roasted Vegetables.


Ingredients:


- 1 cup regular couscous


- 2 cups chicken stock


- 3 tablespoons olive oil


- 1/4 cup sun-dried tomatoes, chopped


- 2 tablespoons basil pesto


- 2 tablespoons balsamic vinegar


- Salt and pepper, to taste


- 1/2 cup feta cheese, crumbled


- 2 medium-sized zucchinis


- 3 yellow squashes


- 1 red bell pepper


- 1 cup brown mushrooms, sliced


- 3 garlic cloves, minced


- 1 small butternut squash, cubed


- 2 red onions, sliced


- 1 bunch asparagus, trimmed


Instructions:


1. Prepare the Couscous: In a pot, add the couscous and pour over the hot chicken stock. Simmer for 15 to 20 minutes until the stock is fully absorbed. This step infuses the couscous with a savory depth, a secret my grandmother swore by.
2. Roast the Vegetables: Preheat your oven to 400°F. Grease an ovenproof dish with non-stick spray. Arrange zucchinis, yellow squash, red bell pepper, mushrooms, garlic, butternut squash, and red onions in a single layer. Drizzle with olive oil and roast for about 20 to 25 minutes. Add the asparagus after the first 10 minutes and gently stir. Once done, drizzle with a touch of balsamic vinegar.
3. Mix the Salad: Stir in the extra-virgin olive oil, sun-dried tomatoes, and basil pesto into the cooked couscous, making it moist and fragrant. Season with balsamic vinegar, salt, and pepper. Add the roasted vegetables and mix well. Finally, sprinkle with feta cheese and gently fold everything together.
4. Serve: This salad can be enjoyed warm or cooled to room temperature. It pairs beautifully with grilled beef or chicken, making it a versatile addition to any meal.

A Nostalgic Touch:


Every bite of this salad takes me back to those balmy evenings in my grandmother's garden, where laughter was as abundant as the food on our plates. She would tell stories of her childhood, where the simple joys of life were celebrated with food that nourished both body and soul. The Couscous Salad with Roasted Vegetables was her way of bringing us together, a dish that transcended generations and became a staple at our family gatherings.


So, the next time you’re looking for a dish that is both nourishing and heartwarming, try this Couscous Salad with Roasted Vegetables. Let it be more than just a meal; let it be a bridge to cherished memories and the creation of new ones.


Difficulty: 5/10
Classification: Main Dish

---


Whether it's a family reunion or a quiet dinner at home, this Couscous Salad with Roasted Vegetables is sure to become a beloved part of your culinary repertoire. Enjoy the vibrant flavors and the warm memories it brings to your table.

Read more about Appetizers

Read more about Main Dishes

Read more about Desserts

Peanut Butter Sriracha Cookies | Made by Meaghan Moineau

Peanut Butter Sriracha Cookies | Made by Meaghan Moineau

Spice Up Your Sweet Tooth: Peanut Butter Sriracha Cookies


A Nostalgic Twist on a Family Favorite


When it comes to baking, few things evoke nostalgia like the comforting aroma of cookies wafting through the house. Growing up, cookies were a staple in our household, each batch a different adventure, each bite a fond memory. Among the myriad of recipes my family experimented with, one always stood out for its unique blend of flavors: Peanut Butter Sriracha Cookies. As unconventional as it sounds, this daring combination became a beloved treat, sparking laughter and curiosity every time we shared them with friends and family.


The Story Behind the Spice


My earliest memory of these cookies dates back to a rainy Sunday afternoon. My mom, ever the culinary adventurer, decided to put a twist on the traditional peanut butter cookie recipe by adding a hint of sriracha. The result was nothing short of magical—a perfect blend of sweet, salty, and spicy, topped with a classic Hershey's chocolate kiss. I remember the initial skepticism turning into surprise and delight as we all took our first bites. The cookies became a family staple, often requested at gatherings and cherished as a symbol of our family's love for creativity and adventure in the kitchen.


The Recipe: A Perfect Blend of Sweet and Heat


Ingredients:

- 1 cup unsalted butter, softened


- 1 cup crunchy peanut butter


- 1 cup sugar


- 1 cup brown sugar


- 1 tablespoon sriracha


- 2 large eggs


- 1 teaspoon vanilla extract


- 2 1/2 cups all-purpose flour


- 1 teaspoon baking powder


- 1/2 teaspoon salt


- 1 teaspoon baking soda


- Granulated sugar for rolling


- Hershey's chocolate kisses for topping


Instructions:

1. In a large mixing bowl, cream together the unsalted butter, crunchy peanut butter, sugar, and brown sugar until smooth and fluffy.


2. Gradually add in the sriracha, eggs, and vanilla extract. Beat the mixture until everything is well combined.


3. In a separate bowl, whisk together the flour, baking powder, baking soda, and salt.


4. Slowly incorporate the dry ingredients into the peanut butter mixture, stirring until fully combined.


5. Chill the dough in the refrigerator for 1 hour.


6. Preheat your oven to 375 degrees Fahrenheit.


7. Roll the dough into approximately 1-inch balls, or use a medium-sized cookie scoop for uniformity.


8. Dip the top of each dough ball into granulated sugar, then place them onto a cookie sheet.


9. Flatten each ball with a fork, creating a criss-cross pattern.


10. Bake for 8-10 minutes, ensuring not to over-bake them. The cookies should just begin to brown.


11. Once out of the oven, immediately press a Hershey's chocolate kiss into the center of each cookie.


12. Allow the cookies to cool on wire racks before indulging.


The Verdict


Difficulty Rating: 4/10
Classification: Dessert

These Peanut Butter Sriracha Cookies are more than just a dessert; they're a conversation starter. Easy enough for a novice baker yet intriguing enough for a seasoned one, they offer a delightful surprise with every bite. Whether you're looking to impress at a potluck or just craving something different, these cookies promise a unique experience that's sure to leave a lasting impression on anyone who tries them. So, why not spice up your sweet tooth and create some new, heartwarming memories along the way?

Read more about Appetizers

Read more about Main Dishes

Read more about Desserts

Roasted Beet Hummus | Made by Meaghan Moineau

Roasted Beet Hummus | Made by Meaghan Moineau

Title: A Vibrant Twist on Tradition: Roasted Beet Hummus
Description: Dive into the colorful world of Roasted Beet Hummus, a delightful fusion of earthy beets and creamy chickpeas. Discover a nostalgic family story that brings this dish to life, while learning how to create this flavorful appetizer in your own kitchen.

---


A Vibrant Twist on Tradition: Roasted Beet Hummus


In the heart of many family gatherings, food often takes center stage, binding loved ones together with its warmth and flavors. One dish that has become a beloved staple in my family is Roasted Beet Hummus. This vibrant, flavorful dip is more than just a treat for the taste buds—it's a journey down memory lane, rich with the colors and textures that make every get-together special.


A Family Memory: The Beetroot Legacy


Growing up, the sweet and earthy aroma of roasted beets often wafted through my grandmother's kitchen. She had an affinity for adding a pop of color to her dishes, and beets were her secret weapon. I remember sitting on a stool, watching her expertly peel and slice the beets, her hands stained a vivid magenta—a testament to her culinary expertise and love for vibrant, natural ingredients.


One summer, she decided to blend her love for traditional hummus with her beetroot obsession. The result was a stunning Roasted Beet Hummus that became an instant family favorite. I vividly recall the excitement and curiosity as she unveiled the bright pink dip, its color as bold as its flavor. We gathered around the table, dipping warm pita bread into the hummus, each bite a harmonious blend of earthy beets and creamy chickpeas, with a hint of lemon and garlic.


This dish quickly became a family tradition, gracing every gathering with its presence and reminding us of those joyful summer days. Even now, making Roasted Beet Hummus brings back memories of laughter, love, and the vibrant spirit of my grandmother.


The Recipe: Roasted Beet Hummus


Ingredients:

- 2 medium red roasted beets, peeled and chopped


- 1 can (15 oz) cooked chickpeas, drained and rinsed


- 2 cloves garlic, minced


- 1 teaspoon ground cumin


- Juice of 1 lemon


- 2 tablespoons tahini sesame seed paste


- 3 tablespoons olive oil (plus more for consistency)


- Salt to taste


Instructions:

1. In a food processor or blender, combine the roasted beets, garlic, cumin, lemon juice, tahini, and salt. Pulse until well blended.


2. Add the chickpeas and olive oil to the mixture. Pulse until just incorporated.


3. If the hummus is too thick, gradually add more olive oil, blending until you reach the desired consistency.


4. Serve with warm pita or flatbread, and enjoy a taste of tradition with a colorful twist.


Difficulty Rating: 3/10


This recipe is delightfully simple, making it accessible for even novice cooks while promising a delicious and visually stunning result. It's the perfect appetizer for any occasion, offering a unique twist on a classic favorite.


---


Roasted Beet Hummus is more than just a dish; it's a celebration of tradition, family, and the joy of sharing something beautiful and delicious with those you love. Whether you're creating new memories or reliving cherished ones, this vibrant hummus is sure to be a hit at your next gathering.

Read more about Appetizers

Read more about Main Dishes

Read more about Desserts

Peanut Butter and Apple Oatmeal Breakfast Bars | Made by Meaghan Moineau

Peanut Butter and Apple Oatmeal Breakfast Bars | Made by Meaghan Moineau

Morning Bliss: Peanut Butter and Apple Oatmeal Breakfast Bars


A Delicious Morning Routine


There's something magical about the aroma of freshly baked oatmeal bars wafting through the house in the morning. Today, we will dive into a delightful recipe that will not only tantalize your taste buds but also fill your kitchen with the comforting scent of cinnamon and apples. Introducing our Peanut Butter and Apple Oatmeal Breakfast Bars—a perfect blend of wholesome ingredients and nostalgic flavors that are sure to make your mornings special.


Ingredients


- 2 cups Quaker oats


- 1/2 cup smooth peanut butter


- 1/4 cup butter


- 2 tablespoons vegetable oil


- 1/2 cup whole wheat flour


- 1/4 cup honey


- 1/3 cup brown sugar


- 1 teaspoon vanilla extract


- 1 teaspoon cinnamon


- 1 large apple, peeled and diced into small pieces


Instructions


1. Preparation: Preheat your oven to 350°F (175°C). Grease an 11x7 inch baking pan, or use an 8x8, 9x9, or 11x13 inch pan if necessary.
2. Mixing: Place the peanut butter and butter in a microwave-safe dish. Heat in the microwave for 30-45 seconds or until the butter is melted. Stir until smooth.
3. Combining Ingredients: In a large bowl, combine the oats, peanut butter mixture, vegetable oil, whole wheat flour, honey, brown sugar, vanilla extract, and cinnamon. Use an electric beater or KitchenAid mixer to blend the ingredients for approximately one minute.
4. Adding Apples: Carefully peel and dice the apple into small pieces, about the size of a pinky nail. Gently fold the diced apple into the oatmeal mixture.
5. Baking: Pour the mixture into the prepared pan and press down firmly with your fingers to ensure an even layer. Place the pan in the oven and bake for 25 minutes, or until the edges are golden brown. If using an 11x13 pan, check a bit earlier as the mixture will be thinner and cook faster.
6. Cooling and Serving: Let the bars cool for 10 minutes before slicing into strips. Allow the remaining bars to cool completely before storing them in a Tupperware container or wrapping them in foil.

A Nostalgic Family Memory


Growing up, Saturday mornings were a cherished family tradition in our household. The kitchen would come alive with the sound of laughter and the gentle clatter of mixing bowls. My mother, with her well-worn apron and a twinkle in her eye, would lead the culinary charge, and these Peanut Butter and Apple Oatmeal Breakfast Bars were always the star of the show.


I remember the excitement of peeling the apples with my little hands, the anticipation building as the sweet and nutty aroma filled the air. Once baked, the bars were a symphony of flavors—warm, comforting, and with just the right hint of cinnamon. After breakfast, our family would gather around the table, savoring each bite and sharing stories of the week gone by. These cherished moments are etched in my memory, a testament to the power of food in bringing people together.


Difficulty and Classification


- Difficulty: 3/10
- Classification: Main Dish

These Peanut Butter and Apple Oatmeal Breakfast Bars are not just a recipe; they are a gateway to creating beautiful memories with loved ones. Simple to make, yet profoundly satisfying, these bars are the perfect way to start your day with a touch of nostalgia and a whole lot of flavor. Enjoy baking, indulging, and making your mornings just a bit sweeter!

Read more about Appetizers

Read more about Main Dishes

Read more about Desserts

Rigatoni With Sweet Sausages In Creamy Tomato Sauce | Made by Meaghan Moineau

Rigatoni With Sweet Sausages In Creamy Tomato Sauce | Made by Meaghan Moineau

Title: "Nostalgic Comfort: Rigatoni with Sweet Sausages in Creamy Tomato Sauce"


Description: Dive into the heartwarming flavors of Italy with our Rigatoni with Sweet Sausages in Creamy Tomato Sauce. This recipe combines the savory essence of sweet sausages with the aromatic richness of fresh sage and leeks, all enveloped in a luscious, creamy tomato sauce. Join us as we share a cherished family memory that's bound to make this dish even more special. With a difficulty rating of 4/10, this main dish is perfect for a cozy family dinner or a nostalgic culinary journey.


---


Rigatoni with Sweet Sausages in Creamy Tomato Sauce: A Taste of Home


There's something undeniably comforting about a bowl of pasta, especially when it's infused with the rich flavors of sweet sausages and a creamy tomato sauce. This dish not only tantalizes the taste buds but also carries a legacy of family gatherings and nostalgic memories.


Ingredients You’ll Need:


- Sweet sausages


- 1 leek (cut in half lengthwise and rinsed thoroughly)


- Fresh sage


- 3 garlic cloves


- 1 onion


- Canned tomatoes


- Rigatoni pasta


- Milk


- Dried thyme


- Cayenne pepper


- Butter


- Extra virgin olive oil


- Sugar


- Salt & pepper


Cooking Instructions:


1. Prepare Your Ingredients: Begin by bringing a large pot of salted water to a boil. Chop the onion and garlic, setting them aside. Slice the leek in half lengthwise, rinse thoroughly, and chop. Chop the fresh sage and set it aside separately.
2. Cook the Sausages: To easily remove the casings, lightly slice each sausage lengthwise and peel them off with your fingers. In a large pan over medium-high heat, cook the sausages until they turn a beautiful golden brown, breaking them apart until they resemble ground meat. Remove the meat from the pan and set it aside in a bowl.
3. Sauté the Aromatics: Add 2 tablespoons of olive oil to the same pan and toss in the fresh sage. Cook for about a minute before adding the leeks and a pinch of cayenne pepper. Cook for an additional 2 to 3 minutes until the leeks soften. Return the sausage mixture to the pan, turn off the heat, and let the flavors meld.
4. Create the Sauce: In a separate pot, combine canned tomatoes, a splash of milk, and a sprinkle of dried thyme. Add a pinch of sugar to balance the acidity of the tomatoes. Season with salt and pepper to taste. Simmer the sauce for 10 minutes until it thickens.
5. Combine and Serve: Add the cooked rigatoni to the sausage and leek mixture, pouring the creamy tomato sauce over everything. Toss gently to combine and serve hot.

A Nostalgic Family Memory


Every time I prepare this dish, I'm transported back to my grandmother's cozy kitchen. The smell of sweet sausages sizzling in the pan and the sight of her expertly chopping leeks with the precision of years of practice. Sunday dinners were sacred in our family, with three generations gathered around the dining table, sharing stories and laughter. This rigatoni dish was always a staple, making an appearance at every family gathering. It was my grandmother's way of bringing us all together, each bite infused with love and tradition. Now, as I cook it for my family, I hope to pass on that same feeling of warmth and togetherness.


Difficulty Rating: 4/10


This main dish is perfect for home cooks looking to create something special without the stress of a complex recipe. The steps are simple and straightforward, ensuring a delightful meal that's sure to become a family favorite.


Conclusion


Rigatoni with Sweet Sausages in Creamy Tomato Sauce is more than just a meal; it's a connection to cherished memories and traditions. Whether you're cooking for your family or seeking comfort in a bowl, this dish promises to deliver warmth and satisfaction. Enjoy every bite and the stories that come with it.

Read more about Appetizers

Read more about Main Dishes

Read more about Desserts

Peppery Absorption-Cooked Red-Wine Capellini | Made by Meaghan Moineau

Peppery Absorption-Cooked Red-Wine Capellini | Made by Meaghan Moineau

A Taste of Memories: Peppery Absorption-Cooked Red-Wine Capellini


Description

Indulge in the flavors of tradition with our Peppery Absorption-Cooked Red-Wine Capellini, a dish that combines the elegance of angel hair pasta with the robust notes of Spanish red wine and fresh herbs. Perfect as a main dish, this recipe not only tantalizes the taste buds but also evokes cherished family memories. With a difficulty rating of 6/10, this dish is both a culinary adventure and a nostalgic journey.

---


Ingredients


- Angel hair pasta: A delicate base that absorbs rich flavors.
- Olive oil: For a Mediterranean touch.
- White onion and garlic cloves: Aromatic essentials that form the backbone of flavor.
- Kosher salt: To enhance the natural taste of ingredients.
- Diced zucchini and trimmed asparagus: Fresh vegetables that add texture and nutrition.
- Cherry tomatoes: Juicy bursts of sweetness.
- Smoked paprika, black pepper, cayenne pepper: For that peppery kick.
- Fresh oregano and rosemary leaves: Fragrant herbs that elevate the dish.
- Spanish red wine and water: A bold liquid for absorption cooking.
- Fresh flat parsley leaves: A vibrant garnish to finish.

---


Instructions


1. Preheat and Toast: Preheat your oven to 375°F. Break the capellini into 3-inch lengths and spread them on a baking sheet. Toast in the oven, tossing occasionally, until golden brown, about 12 minutes.
2. Sauté Aromatics: In a large pot, heat olive oil over medium heat. Add the onion, garlic, and a pinch of salt. Cook until the onion and garlic are soft and aromatic, approximately 5 minutes.
3. Brown the Zucchini: Increase heat to medium-high. Add zucchini with another pinch of salt, and sauté until well browned, about 5 minutes.
4. Layer and Flavor: Place the toasted noodles atop the zucchini mixture. Layer asparagus and 1 cup of cherry tomatoes over the pasta. Sprinkle smoked paprika, black pepper, cayenne pepper, oregano, and rosemary.
5. Cook with Wine: Pour the red wine and ½ cup of water over the mixture. Toss gently with tongs. Cover the pot, reduce heat to medium, and cook for 8-12 minutes, tossing every 3 minutes. Add more wine or water if needed until noodles are cooked to your liking.
6. Final Touches: Adjust seasoning if necessary. Transfer to serving bowls. Garnish with remaining cherry tomatoes, parsley, and an extra grind of black pepper. Serve immediately.

---


Family Memory: A Dish from the Heart


The aroma of garlic sizzling in olive oil instantly transports me back to my grandmother’s kitchen. Every Sunday, the family would gather around her worn wooden table, eager to savor her latest creation. Among all her dishes, the Peppery Absorption-Cooked Red-Wine Capellini was a perennial favorite.


I remember the laughter and stories shared as we toasted the pasta, a simple task that somehow became an event in itself. My grandmother would let me sprinkle the smoked paprika, declaring that a “dash of love” was the secret ingredient. The dish was more than just a meal; it was a tapestry of flavors woven with love, laughter, and the warmth of family.


This recipe is my homage to those cherished Sundays. It’s a reminder that food is not just sustenance but a bridge to our past, connecting generations through taste and tradition.


---


Conclusion


The Peppery Absorption-Cooked Red-Wine Capellini is more than a dish; it’s a culinary experience infused with the flavors of memory and love. As you savor each bite, may it evoke the warmth of family gatherings and the joy of shared stories. Whether you’re crafting it for a special occasion or a simple dinner, this dish promises to bring a touch of nostalgia and a burst of flavor to your table. Enjoy this main dish with a 6/10 difficulty rating, and let it become a part of your family tradition.

Read more about Appetizers

Read more about Main Dishes

Read more about Desserts

My Drunken Fish Fillet | Made by Meaghan Moineau

My Drunken Fish Fillet | Made by Meaghan Moineau

Title: "My Drunken Fish Fillet: A Nostalgic Dive into Flavor"


Description:

Uncover the secrets of My Drunken Fish Fillet, an irresistible dish that combines the perfect blend of textures and flavors. Journey with me through a cherished family memory, as we explore this recipe that promises a delightful culinary experience. Rated as a 6 out of 10 in difficulty, this main dish is a must-try for any adventurous cook looking to impress their guests.

---


My Drunken Fish Fillet: A Nostalgic Dive into Flavor


In the heart of my family's kitchen, amidst the clatter of pots and pans, lies a recipe passed down through generations—My Drunken Fish Fillet. This dish is more than just a meal; it's a gateway to cherished memories and flavors that linger long after the last bite.


Ingredients:

- Fresh fish fillets

- Salt (to fillet the fish)


- White ground pepper (to fillet the fish)


- A splash of rice wine


- 1 cup of beer


- 2 white eggs (separate the yolks from the whites)


- 1 cup all-purpose flour (plus a little more for dredging)


- ½ tsp salt


- Oil (for frying)


Instructions:

1. Batter Preparation:

- In a mixing bowl, combine the beer, egg yolk, flour, and ½ tsp of salt. Beat well until the mixture becomes thick and smooth. Refrigerate for one hour to allow the flavors to meld and the batter to thicken.


2. Fish Preparation:

- Sprinkle salt and white ground pepper over the fish fillets. Pat them gently to ensure they're well-coated.


- Splash the rice wine over the fillets and let them marinate for 15 to 20 minutes. This step infuses the fish with a subtle yet distinct aroma.


3. Batter Enhancement:

- Before cooking, whip the egg whites until they form soft, foamy peaks. Gently fold the egg whites into the chilled batter, mixing carefully to maintain a light and airy texture.


4. Frying:

- Dip the marinated fish fillets into the drunken batter, ensuring each piece is well-coated.


- Heat oil in a pan over medium heat. Fry the fillets, three pieces at a time, until they are golden brown and crispy.


5. Serving Suggestion:

- For a complementary dip, mix Yamasa soy sauce with wasabi from a tube and a dash of lemon juice. This tangy, spicy dip perfectly balances the richness of the fish.


A Family Memory:


Every summer, as the golden hues of dusk settled over our lakeside cabin, my grandmother would gather the family for a special feast. Her version of the Drunken Fish Fillet was the star of the show, accompanied by laughter and stories that echoed through the years. The kitchen would fill with the aroma of sizzling fish, mingling with the cool evening breeze.


I remember the first time she entrusted me with the task of preparing the batter. After a few flour-dusted attempts, I finally achieved the right consistency. "Patience," she said, "is the secret ingredient." As we cooked together, she shared tales of her own childhood, of fishing trips with her father, and the first time she learned to make this dish.


This recipe is a tribute to those precious moments, capturing the essence of family, tradition, and the joy of cooking together.


Difficulty Rating: 6/10

Classification: Main Dish


Whether you're looking to recreate a nostalgic family memory or simply indulge in a delightful culinary adventure, My Drunken Fish Fillet promises an experience that is as heartwarming as it is delicious. So gather your loved ones, roll up your sleeves, and let the magic of this dish bring you closer together.

Read more about Appetizers

Read more about Main Dishes

Read more about Desserts

Spinach, Tomato & Onion Couscous | Made by Meaghan Moineau

Spinach, Tomato & Onion Couscous | Made by Meaghan Moineau

A Symphony of Flavors: Spinach, Tomato & Onion Couscous


A Hearty Main Dish That Brings the Family Together


Introduction


There’s something magical about a dish that brings people together, evoking cherished memories and creating new ones with every bite. Spinach, Tomato & Onion Couscous is one such dish—a delightful blend of fresh, wholesome ingredients that will have your taste buds dancing. This recipe is not only a feast for the senses but also a nostalgic trip down memory lane for me and my family.


Ingredients


- 1 cup whole-wheat couscous
- 1 ¼ cups water
- ½ teaspoon salt, divided
- 2 tablespoons olive oil
- 1 red onion, thinly sliced
- 2 tomatoes, diced
- 2 cups fresh spinach
- ¼ cup pine nuts
- ½ cup crumbled feta cheese
- Salt and pepper to taste

Instructions


1. Prepare the Couscous: In a small pan, bring the water and half of the salt to a boil. Once boiling, add the couscous, stir, and cover with a lid. Remove the pot from the heat and let it sit for 5 to 7 minutes while you prepare the vegetables.
2. Sauté the Vegetables: Heat a large pan over medium-high heat and add the olive oil. Once the oil is hot, add the onions and sauté until they begin to brown. Add the tomatoes and remaining salt, sautéing until they start to wilt, about 20 to 30 seconds. Add the spinach and sauté just until it wilts but remains bright green.
3. Mix It All Together: Stir the pine nuts into the vegetable mixture and remove the pan from the heat. Season with salt and pepper to taste. Pour the couscous into a large bowl, add the sautéed vegetables along with the crumbled feta, and toss everything together. Top with extra crumbled feta and enjoy while hot.

A Nostalgic Family Memory


Growing up, Sunday dinners were a sacred time in my family. No matter how busy the week had been, we all made it a point to gather around the dining table to share not just a meal, but our lives. My grandmother, the heart of our family, would often prepare her famous Spinach, Tomato & Onion Couscous. I remember the aroma of sautéed onions and fresh spinach wafting through the house, a scent that signaled warmth and togetherness.


As a child, I was fascinated by the way my grandmother would expertly toss the couscous with the vibrant vegetables, her hands moving gracefully as she added a sprinkle of feta cheese to finish the dish. It was her secret ingredient, she would say with a wink, and it never failed to elicit smiles from everyone at the table.


Those evenings were filled with laughter, stories, and the comforting knowledge that we were part of something bigger—a family bound by love and tradition. Today, whenever I prepare this couscous dish, I’m transported back to those cherished moments, and I hope it brings the same joy to your family as it has to mine.


Difficulty Rating


This recipe is rated 3 out of 10 for difficulty, making it accessible for cooks of all skill levels. It's a delightful main dish that's perfect for a family dinner or a cozy night in.

Conclusion


Spinach, Tomato & Onion Couscous is more than just a meal; it’s an experience, a connection to the past, and a celebration of the present. With its wholesome ingredients and simple preparation, it’s a dish that invites everyone to gather, share, and savor the taste of togetherness. So, why not try this recipe for your next family dinner and create some unforgettable memories of your own?

Read more about Appetizers

Read more about Main Dishes

Read more about Desserts

Creamy Chicken Orzo Soup | Made by Meaghan Moineau

Creamy Chicken Orzo Soup | Made by Meaghan Moineau

Title: "Nostalgic Comfort in a Bowl: Creamy Chicken Orzo Soup"
Description:

Warm your soul with the delightful embrace of Creamy Chicken Orzo Soup, a dish that promises not only to satisfy your hunger but also to evoke cherished memories of family gatherings. This heartwarming recipe is an ode to simplicity and flavor, combining tender vegetables, succulent chicken, and creamy orzo in a harmonious blend that is as comforting as a grandmother's hug. Ideal as a main dish, this soup is a perfect choice for those seeking a taste of nostalgia with a modern twist. Rated a 3 out of 10 for difficulty, it is accessible for home cooks of all skill levels.


---


Creamy Chicken Orzo Soup Recipe
Ingredients:

- Olive oil


- Celery


- Baby carrots


- Onion


- Kosher salt


- Freshly ground black pepper


- Canned Swanson Premium Chicken


- Canned Swanson Chicken Broth


- Poultry seasoning


- Orzo


- Cream of chicken condensed soup


Instructions:

1. In a large pot, heat a generous drizzle of olive oil over medium heat. Add chopped celery, baby carrots, and onion, and sauté for about 10 minutes until the vegetables are tender and fragrant.


2. Drain the canned chicken and add it to the pot, stirring gently to combine with the sautéed vegetables.


3. Season the mixture with kosher salt and freshly ground black pepper to taste. Stir to ensure even seasoning.


4. Increase the heat to medium-high and pour in the chicken broth along with two cans of warm water. Stir the mixture well and bring it to a gentle simmer.


5. Allow the soup to simmer for 15 minutes, then add the uncooked orzo and poultry seasoning. Stir to combine.


6. Continue to let the soup simmer for an additional 20 minutes, stirring occasionally to prevent the orzo from sticking to the bottom.


7. Finally, add the cream of chicken condensed soup. Stir until the broth transforms into a creamy delight. Serve hot and enjoy the comforting nostalgia in every spoonful.


---


A Taste of Nostalgia:

Every time I prepare this Creamy Chicken Orzo Soup, I am transported back to my grandmother's cozy kitchen, a place where love was the main ingredient in every dish. As a child, I would watch her from the corner of the room, mesmerized by her skillful movements as she chopped vegetables and stirred the pot with a wooden spoon worn smooth by years of use.


Sunday afternoons were special, a time when family gathered around the large wooden table, sharing stories and laughter while savoring bowls of this delicious soup. The aroma of simmering chicken broth and sautéed vegetables would fill the air, mingling with the sounds of clinking spoons and bubbling laughter. It was these simple moments, the warmth of family and the comfort of a meal shared, that made each Sunday unforgettable.


Now, I recreate this soup in my own kitchen, sharing it with my family, hoping to create similar memories for my children. Each spoonful is a reminder of those precious times, a bridge connecting the past with the present.


Difficulty Rating: 3/10
Classification: Main Dish

Whether you're seeking a comforting meal on a chilly day or longing for a taste of family nostalgia, this Creamy Chicken Orzo Soup is sure to deliver warmth and satisfaction. Enjoy each bite and let it remind you of cherished moments spent with loved ones.

Read more about Appetizers

Read more about Main Dishes

Read more about Desserts

Butter-Bread | Made by Meaghan Moineau

Butter-Bread | Made by Meaghan Moineau

Butter-Bread Bliss: A Nostalgic Journey Through Flavor and Family


Description

Uncover the secrets behind a delightfully soft and fragrant butter-bread that promises to transport you back to cherished family moments. This recipe combines the rustic charm of homemade bread with the creamy richness of butter, all while being deceptively easy to make. Whether you're a seasoned baker or a curious beginner, this guide will walk you through every step, ensuring a perfect loaf every time. Rated 6/10 in difficulty, this main dish is perfect for any occasion that calls for a touch of warmth and nostalgia.

---


Ingredients

- 500g white strong bread flour

- 150g butter, softened


- 15g fresh yeast


- 1 tbsp liquid malt extract


- 10g salt


- 20ml sunflower oil


- 300ml water, room temperature


For the Starter Dough (prepare a night before)

- 100g white strong bread flour

- 5g fresh yeast


- 150ml water


---


Instructions


Preparation: The Night Before

1. Starter Dough: In a mixing bowl, combine the white strong bread flour, fresh yeast, and water. Mix until smooth. Cover the bowl and place it in the fridge overnight.

Baking Day: Morning Rituals

2. Room Temperature Preparation: Remove the starter dough and butter from the fridge an hour before you begin baking, allowing them to reach room temperature.
3. Yeast Mixture: In a small bowl, mix the yeast, liquid malt extract, and water until smooth and lump-free.
4. Combine Ingredients: In a large mixing bowl, add the white strong bread flour, salt, and softened butter. Pour in the yeast mixture and stir until combined.
5. Incorporate Starter Dough: Add the starter dough to the bowl and knead the mixture for 10 minutes. For best results, use a food processor with a dough hook attachment—knead on a slow speed for 5 minutes, then increase to a fast speed for another 5 minutes.
6. First Rise: Turn the dough onto a floured surface, dust generously with flour, cover, and let it sit for 30 minutes. Every 10 minutes, punch the dough down, stretch it, fold the edges over, and turn it.

Shaping and Final Rise

7. Prepare the Tin: Grease a loaf tin with sunflower oil. Shake off any excess flour from the dough, form it into a loaf shape, and place it in the tin.
8. Score and Rise: Cover the loaf and allow it to rise for another 30 minutes. After 10 minutes, use a sharp knife to score a 2 cm line down the center.

Baking

9. Preheat and Steam: Preheat your oven to 230°C. Place the loaf on the middle shelf, and using a spray bottle, mist around the bread to create steam.
10. Bake: Bake for 45 minutes. After 15 minutes, spray the bread again with water and reduce the temperature to 200°C.
11. Cool: Check for doneness with a skewer—it should come out clean. Allow the bread to cool completely on a wire rack before slicing.

---


A Taste of Memory


As the aroma of freshly baked butter-bread fills your kitchen, I'm reminded of my grandmother's cozy kitchen during crisp autumn afternoons. Every Sunday, she'd gather us around her wooden table, the centerpiece being her famous butter-bread. It was more than just a meal; it was a bond, a tradition passed down through generations. The soft, buttery texture and golden crust were the perfect companions to her stories of family adventures and heartfelt laughter. Baking this bread brings me back to those warm, love-filled days, proving that the best recipes are those that nourish both body and soul.


---


Difficulty Rating

6/10 - This recipe is moderately challenging, requiring some kneading skills and patience for the dough to rise. Perfect for an adventurous baker looking to create something truly special.

Classification

Main Dish - Ideal for sharing at family gatherings or as a comforting solo treat, this butter-bread is more than just a side; it's a centerpiece of flavor and tradition.

Read more about Appetizers

Read more about Main Dishes

Read more about Desserts

Creamy Polenta with Egg, Arrabiata & Bacon | Made by Meaghan Moineau

Creamy Polenta with Egg, Arrabiata & Bacon | Made by Meaghan Moineau

Title: Savor the Comfort: Creamy Polenta with Egg, Arrabiata & Bacon
Description: Dive into a world of creamy comfort with our Creamy Polenta with Egg, Arrabiata & Bacon recipe. This flavorful blend of polenta, rich cheeses, and crispy bacon, topped with a perfectly cooked egg, is sure to become a family favorite. With a touch of nostalgia and a hint of spice, this dish is as much about the memories it evokes as it is about its tantalizing taste. Easy to make yet packed with flavor, this main dish is perfect for a cozy weekend brunch or a hearty dinner.

---


When the winter chill wraps its icy fingers around our home, I find solace in the warmth of the kitchen, where hearty aromas mingle in the air. My mind drifts back to Sunday mornings with my grandmother, her hands deftly working over the stove, a ritual as comforting as the dish she prepared – a creamy polenta that was as much a cure for the cold as it was a feast for the soul. This Creamy Polenta with Egg, Arrabiata & Bacon recipe is a loving nod to those cherished memories.


Ingredients:

- Bacon


- Cream cheese


- Eggs


- Fresh parsley


- Goat cheese


- Olive oil


- Polenta


- Black salt & pepper


Instructions:
1. Preheat and Prepare: Preheat your oven to 425 degrees F. Prepare a medium saucepan by bringing 4 cups of water to a boil. Gradually whisk in the polenta, ensuring a smooth mix with no lumps. Allow it to simmer over medium-low heat for 30 minutes, stirring occasionally.
2. Incorporate the Cheeses: Once the polenta has reached a tender and thick consistency, stir in the goat cheese and cream cheese until fully melted and incorporated. Season with salt and pepper to taste.
3. Crisp the Bacon: Arrange the bacon on a parchment-lined baking sheet, placing it in the oven's middle rack. Roast for 15-18 minutes until golden and crisp. Once done, let the bacon rest on a paper towel-lined plate.
4. Heat the Arrabiata: Warm the marinara sauce in a small saucepan or microwave until simmering. Keep it warm for assembly.
5. Fry the Eggs: In a large non-stick skillet, heat 1 tablespoon of olive oil over medium heat. Add the eggs, cooking until the whites are opaque yet still runny on top. Cover with a lid, turning off the heat, allowing them to cook until the whites set while keeping the yolk runny.
6. Assemble the Bowls: Spoon generous portions of polenta into each bowl. Add a dollop of arrabiata, an egg, and two slices of crispy bacon. Garnish with freshly chopped parsley for a burst of color and freshness. Serve immediately, savoring each bite and the memories it rekindles.
A Nostalgic Family Memory:

The sight of this dish takes me back to my grandmother's kitchen, where the wooden table was always set for family. She would hum softly, a melody only she knew, as she prepared this dish with love. Her polenta, always perfectly creamy, served as the canvas for crispy bacon and eggs cooked just right. We would gather around, bowls in hand, sharing stories and laughter. It was more than a meal; it was a moment in time, a tradition passed through generations.


Difficulty Rating: 4/10
Classification: Main Dish

---


This Creamy Polenta with Egg, Arrabiata & Bacon is more than just a recipe; it's an experience, a reminder of the warmth and love that food can bring into our lives. Perfect for family gatherings or a quiet evening at home, it offers a taste of nostalgia with every bite. Enjoy the comfort and joy it brings, and perhaps create new memories of your own.

Read more about Appetizers

Read more about Main Dishes

Read more about Desserts

Creamy Mushroom Soup ~ with a “Kick” | Made by Meaghan Moineau

Creamy Mushroom Soup ~ with a “Kick” | Made by Meaghan Moineau

Title: A Hearty Embrace: Creamy Mushroom Soup with a Kick
Description: Dive into a bowl of comfort and nostalgia with our Creamy Mushroom Soup with a Kick. This flavorful blend combines the earthy richness of mushrooms with a spicy twist from long pepper, topped with crispy bacon and zesty lime. Perfect as a cozy main dish, this soup will warm your heart and soul, bringing back cherished family memories.

---


When the leaves turn golden and the air starts to carry a crisp whisper of winter, my mind inevitably drifts back to my grandmother's kitchen. It was the heart of her home—a place where laughter mingled with the aroma of simmering soups and the promise of a hearty meal. Among her many culinary treasures, one dish stands out: her Creamy Mushroom Soup with a Kick.


A Nostalgic Tale:

Growing up, Sunday afternoons meant gathering at Grandma's for a family feast. As the youngest, I was often tasked with keeping a watchful eye on the soup pot—a role I embraced with enthusiasm. The kitchen would come alive with the sizzling of bacon on the griddle, filling the room with its irresistible aroma. Grandma would hand me a wooden spoon and let me stir the pot as button mushrooms, sweet onions, and garlic danced in a drizzle of olive oil.


The excitement in her voice was palpable when she would add a sprinkle of long pepper—her secret ingredient. "This," she would say with a wink, "is the kick that keeps everyone coming back for more." I watched as she stirred in the vegeta bouillon and cups of water, the flavors mingling into a savory symphony. The potato buds were next, lending their creamy texture to the bubbling mixture.


As we waited for the soup to simmer, Grandma and I would sit at the old wooden table, where she shared stories of her childhood, tales woven with warmth and wisdom. When it was time to add the milk, I knew we were nearing the end of our culinary journey. A squeeze of lime juice added that final touch of zest, brightening the flavors.


Finally, the soup was ladled into bowls, crowned with crispy bacon bits, a handful of shredded cheddar cheese, and a sprinkle of fresh cilantro. With each spoonful, I was enveloped in a tapestry of flavors and memories, a comforting reminder of those cherished Sundays spent in Grandma's kitchen.


Instructions:

1. Heat a large saucepot with a drizzle of olive oil.


2. Sauté garlic, long hot pepper, onion, and mushrooms until the onion is translucent.


3. Prepare bacon on a heated griddle until crispy, then set aside.


4. Add one tablespoon of bouillon and six cups of water to the pot, simmer.


5. Stir in one cup of potato buds, continuing to simmer on low.


6. Gradually add two cups of milk, simmering on low for a few minutes.


7. When ready to serve, stir in lime juice.


8. Top with bacon bits, cilantro, and cheddar cheese before serving.


Difficulty Rating: 5/10
Classification: Main Dish
Conclusion:

This Creamy Mushroom Soup with a Kick is more than just a recipe—it's a vessel for memories, a celebration of family, and a testament to the power of food to bring people together. Whether you're recreating a cherished family tradition or starting a new one, this hearty soup is sure to become a beloved staple in your culinary repertoire. Warm your heart and soul with this flavorful embrace, and relish the nostalgia with every spoonful.

Read more about Appetizers

Read more about Main Dishes

Read more about Desserts

Citrus Beet Salad | Made by Meaghan Moineau

Citrus Beet Salad | Made by Meaghan Moineau

Title: A Taste of Sunshine: Creating a Nostalgic Citrus Beet Salad
Description: Dive into a world of vibrant flavors and cherished memories with our Citrus Beet Salad recipe. This delightful dish combines earthy beets, tangy grapefruit, and creamy goat cheese for an unforgettable culinary experience. Perfect as an appetizer or light main dish, this salad is sure to brighten any meal. Join us as we explore the simple joys of cooking and the heartfelt memories that come with it.

---


There's something magical about the fusion of colors and flavors that the Citrus Beet Salad brings to the table. With its earthy beets, tangy grapefruit, and creamy goat cheese, this dish is a symphony of tastes that dance on your palate. Rated 4 out of 10 in difficulty, it’s a perfect appetizer or light main dish that’s both visually stunning and incredibly delicious.


Ingredients:

- Beets


- Olive oil


- Balsamic vinegar


- Grapefruit


- Sprouts


- Pumpkin seeds


- Goat cheese


Instructions:

1. Begin by washing the beets thoroughly and patting them dry. Place them on a sheet of aluminum foil and drizzle generously with olive oil.


2. Fold the foil around the beets to create a sealed pouch, ensuring no steam will escape. Place this pouch on a cookie sheet and bake in the oven.


3. The cooking time will vary depending on the size of the beets. After 30 minutes, pierce them with a fork. If they remain firm, continue baking, checking every 15 minutes until they reach tenderness.


4. Once tender, remove the beets from the oven and allow them to cool until they can be handled safely. Use your hands to gently peel away the skins.


5. Slice the beets into bite-sized wedges and drizzle with balsamic vinegar for an added layer of flavor.


6. In a large bowl, create a base with fresh sprouts. Arrange the beet wedges and grapefruit segments on top.


7. Finish with a sprinkle of pumpkin seeds and crumbled goat cheese, then serve this vibrant salad immediately.


Nostalgic Memory:

Every time I prepare this Citrus Beet Salad, I am transported back to my grandmother's kitchen, filled with the aroma of roasting beets and the laughter of family gatherings. As a child, I remember sitting on a stool, watching her masterfully slice the grapefruit, her fingers sticky with its tangy juice. She would hand me a piece, and the burst of citrus was a delightful surprise every time.


Grandma believed that food was more than sustenance; it was a way to bring people together, to share stories, and to create lasting memories. Her beet salad, with its vibrant colors and contrasting flavors, was always the star of our summer picnics. We would gather around the table, the sun casting a golden hue over everything, and savor each bite as if it were a piece of sunshine itself.


Today, as I recreate this beloved dish, I am reminded of those carefree days and the warmth of family bonds. The Citrus Beet Salad is more than just a recipe; it’s a cherished heirloom, a link to the love and joy that filled my grandmother's kitchen.


---


This Citrus Beet Salad is not only a feast for the senses but also a joyful journey down memory lane. Whether you're recreating family traditions or starting new ones, this dish is sure to be a treasured part of your culinary repertoire.

Read more about Appetizers

Read more about Main Dishes

Read more about Desserts

Cauliflower Chickpea Stew | Made by Meaghan Moineau

Cauliflower Chickpea Stew | Made by Meaghan Moineau

Title: Wholesome Comfort: Cauliflower Chickpea Stew to Warm Your Soul
Description: Discover the heartwarming flavors of our Cauliflower Chickpea Stew, a nourishing blend of spices and vegetables that transports you to cozy family dinners. With a difficulty rating of 6/10, this hearty main dish is perfect for both novice and seasoned cooks alike. Dive into a recipe steeped in nostalgia and unforgettable family memories.

---


A Nostalgic Family Dinner: Cauliflower Chickpea Stew

There's something magical about the aroma of spices wafting through the kitchen, reminiscent of cherished family gatherings around the dinner table. One such dish that never fails to evoke warm memories for me is the Cauliflower Chickpea Stew. This hearty and flavorful stew was a staple in my childhood home, especially during the cooler months when the air was crisp, and the evenings were spent wrapped in the warmth of family.


Ingredients for a Cozy Night In:

- Olive oil


- Brown rice


- Twice the amount of water as rice


- Garlic cloves


- Turmeric


- Salt & pepper


- Onion


- Canned tomatoes


- Tomato puree


- Fresh ginger


- Fresh chili


- Cinnamon


- Garam masala


- Paprika


- Sweet potatoes


- Lemon (juice)


- Cauliflower


- Canned chickpeas


Instructions:
1. Infuse the Aroma: Begin by heating a generous splash of olive oil in a large saucepan over high heat. Crush the garlic cloves and fry them with turmeric, salt, and pepper for about a minute. This aromatic base sets the stage for the comforting flavors to come.
2. Toasty Grains: Add the brown rice to the pan, allowing it to fry for 4-5 minutes. The rice should start to toast, absorbing the fragrant spices and oil.
3. Simmering Serenity: Pour in the water, bringing it to a boil before reducing the heat to low-medium. Cover and let it simmer for 30 minutes, allowing the rice to soak up the flavors and reach perfect tenderness.
4. Building Layers of Flavor: While the rice simmers, in a separate pot, sauté diced onion until translucent. Add canned tomatoes, tomato puree, freshly grated ginger, chopped chili, cinnamon, garam masala, and paprika. Let these ingredients meld together, creating a rich and inviting sauce.
5. Hearty Additions: Stir in cubed sweet potatoes, cauliflower florets, and canned chickpeas. Allow these to cook in the sauce until the vegetables are tender and the flavors have melded beautifully.
6. Finishing Touches: Just before serving, squeeze fresh lemon juice over the stew, brightening the dish with a zesty finish.
A Dish Steeped in Memory

As a child, I remember this stew being a centerpiece at family dinners. My mother would prepare it with such care, filling the house with its aromatic allure. It was more than just a meal; it was a symbol of togetherness, a dish that brought everyone to the table, sharing stories and laughter.


Difficulty Rating: 6/10

This Cauliflower Chickpea Stew is a delightful main dish that's accessible to both new and seasoned cooks, offering a rewarding culinary experience that captures the essence of home-cooked comfort.


Whether you're seeking a nourishing meal for a cozy night in or a dish to share with loved ones, this stew is a testament to the power of food to connect and comfort. Embrace the warmth and nostalgia it brings, and create your own cherished memories around the table.

Read more about Appetizers

Read more about Main Dishes

Read more about Desserts