Summer Veggie Bake | Made by Meaghan Moineau

Summer Veggie Bake | Made by Meaghan Moineau

Title: A Taste of Summer: The Perfect Summer Veggie Bake
Description: Dive into the flavors of summer with our Summer Veggie Bake—a delightful blend of fresh vegetables, tender orzo, and savory cheeses. This main dish is not only a feast for the taste buds but also a heartwarming journey down memory lane. Join us to discover how this dish became a family favorite and learn how to bring this seasonal delight to your table.

---


A Taste of Summer: The Perfect Summer Veggie Bake


When summer rolls around, it's time for sun-kissed afternoons and meals that celebrate the bounty of the season. Our Summer Veggie Bake is a dish that captures the essence of summer in every bite. With its vibrant mix of fresh vegetables and creamy, cheesy goodness, this dish serves as the perfect centerpiece for any summer gathering.


Ingredients:


- 2 ears of corn, kernels removed


- 1 teaspoon garlic powder


- Juice of 1 lemon


- 1 cup low-fat milk


- 1 cup low sodium chicken broth


- 1 teaspoon onion powder


- 1 cup orzo


- 1/2 cup panko breadcrumbs


- 1/2 teaspoon paprika


- 1/2 cup shredded parmesan cheese


- 1/4 cup chopped fresh parsley


- 1/2 teaspoon pepper


- 2 cups shredded rotisserie chicken


- 1 cup shredded mozzarella cheese


- 2 tomatoes, sliced


- 1 zucchini, sliced


Instructions:


1. Preheat and Prep: Preheat your oven to 400 degrees Fahrenheit. In a medium saucepan, combine the low-fat milk and chicken broth. Bring to a boil.
2. Cook the Orzo: Add the orzo to the boiling liquid and reduce the heat to medium. Cook until the orzo is tender and the liquid is absorbed, about 15 minutes.
3. Mix the Ingredients: While the orzo is cooking, in a large mixing bowl, combine the shredded rotisserie chicken, parmesan and mozzarella cheeses, garlic powder, onion powder, paprika, lemon juice, corn kernels, and parsley. Mix well.
4. Combine and Transfer: Once the orzo is ready, add the chicken and cheese mixture to the saucepan. Stir until all ingredients are evenly distributed. Pour the mixture into an 8 by 8-inch glass baking dish.
5. Layer and Season: For the topping, layer the sliced zucchini and tomatoes, alternating each veggie over the orzo mixture. Sprinkle panko breadcrumbs, additional garlic powder, and pepper over the top.
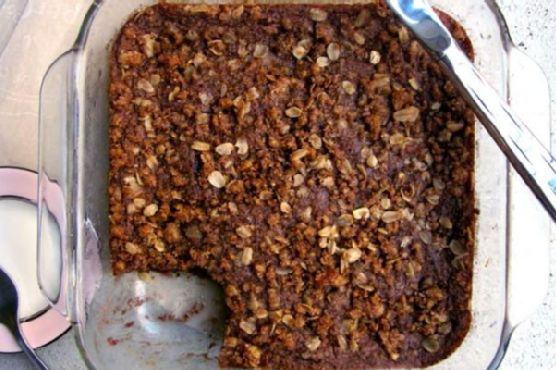
6. Bake to Perfection: Lightly spray the panko with olive oil cooking spray to ensure a crispy topping. Place the dish in the oven and bake for 40 minutes. For an extra golden brown finish, broil for about 2 minutes before serving.
7. Serve and Enjoy: Once out of the oven, serve immediately and enjoy the delightful combination of summer flavors.

---


A Nostalgic Summer Memory:


The Summer Veggie Bake holds a special place in my heart, as it always reminds me of sunny afternoons spent in my grandmother's garden. Each summer, our family would gather for a picnic, with fresh produce picked right from her backyard. The tomatoes were juicy, the corn sweet, and the zucchini perfectly tender. Grandma would whip up her version of the Summer Veggie Bake, adding her secret touch—a sprinkle of love and a dash of laughter.


As we sat around the picnic table, stories of summers past would fill the air, accompanied by the delightful aroma of the baking dish. The bake was more than just a meal; it was a tradition that brought our family together, creating cherished memories that still warm my heart today.


---


Difficulty Rating and Classification:


Difficulty: 4/10
Classification: Main Dish

Our Summer Veggie Bake is a straightforward recipe that delivers big on flavor with minimal effort. Perfect for both novice cooks and seasoned chefs, this dish allows the fresh ingredients to shine, making it an ideal choice for a summer main dish. Whether it's a family gathering or a weekday dinner, this bake is sure to become a staple in your summer recipe rotation. Enjoy!

Read more about Appetizers

Read more about Main Dishes

Read more about Desserts

Salmon Quinoa Risotto | Made by Meaghan Moineau

Salmon Quinoa Risotto | Made by Meaghan Moineau

Title: A Taste of Comfort: Salmon Quinoa Risotto
Description: Discover the heartwarming flavors of our Salmon Quinoa Risotto—a dish that marries the wholesome goodness of quinoa with the rich, savory taste of poached salmon and vibrant kale. This delightful recipe is not just a main dish; it’s a nostalgic journey back to cherished family moments, perfect for a cozy dinner at home. With a difficulty rating of 6 out of 10, it's an ideal choice for both seasoned cooks and kitchen novices alike.

---


In the heart of every beloved dish lies a story, a memory that stirs emotions as much as the flavors excite the palate. Our Salmon Quinoa Risotto is a culinary journey that not only delights your taste buds but also evokes the warmth of family gatherings.


Growing up, Sundays were reserved for family dinners at my grandmother's house. Her kitchen was a symphony of sizzling sounds and fragrant aromas, a place where love was the secret ingredient in every dish she prepared. Among her repertoire of comforting meals, her salmon risotto was a standout—a dish that brought everyone together around the table, sharing stories and laughter.


Inspired by those cherished evenings, I’ve recreated this classic dish with a modern twist by incorporating quinoa—a nutrient-rich superfood that adds a delightful texture and nutty flavor. The process begins in a 4-quart saucepan, where the fragrance of diced onions sizzling in olive oil fills the air. As the onions turn transparent, quinoa is introduced, toasting gently to enhance its flavor.


The art of risotto lies in patience and the gradual addition of vegetable stock, stirring lovingly until each ladleful is absorbed. This slow process allows the quinoa to soak up the aromatic stock, resulting in a creamy and satisfying base.


While the quinoa simmers, a separate pan is dedicated to the vibrant kale, infused with the robust essence of garlic sautéed in olive oil. The kale is turned until fragrant, its deep green hue a testament to its freshness.


As the quinoa reaches its perfect consistency, the sautéed kale and tender, poached salmon are folded in, uniting the dish in a harmonious blend of flavors. A sprinkle of salt and pepper to taste completes this masterpiece.


Every bite of this Salmon Quinoa Risotto is a nostalgic nod to those treasured family dinners, where each mouthful was accompanied by a story, a laugh, or a moment of connection. It's a dish that not only nourishes the body but also feeds the soul, embodying the spirit of togetherness that only a lovingly prepared meal can offer.


Whether you’re recreating this memory for your own family or introducing it as a new tradition, this risotto is more than just a main dish—it’s a celebration of the simple joys that bring us together. So gather your loved ones, share this meal, and create your own memories around the table.

Read more about Appetizers

Read more about Main Dishes

Read more about Desserts

Eggs Florentine | Made by Meaghan Moineau

Eggs Florentine | Made by Meaghan Moineau

Eggs Florentine: A Culinary Classic with a Nostalgic Twist


Description:

Delight in the timeless elegance of Eggs Florentine, a dish that marries the creamy richness of hollandaise sauce with the freshness of sautéed spinach and perfectly poached eggs. This classic recipe not only tantalizes your taste buds but also evokes cherished memories of family gatherings and Sunday brunches. Dive into the recipe and discover the warmth of tradition and the joy of creating a masterpiece in your own kitchen.

---


Ingredients:

- 8 eggs

- 4 English muffins


- 4 tablespoons butter


- 1 pinch cayenne pepper


- 1 pinch kosher salt


- 2 tablespoons lemon juice


- 2 cups fresh spinach


- 1 cup water


Instructions:


Preparing the Spinach and Muffins:

1. Sauté the Spinach: In a sauté pan, melt a tablespoon of butter over medium heat. Add the spinach and cook until wilted, about 2-3 minutes. Set aside.
2. Poach the Eggs: Bring a pot of water to a simmer. Carefully crack each egg into the simmering water and poach until the whites are set but the yolks remain runny, approximately 3-4 minutes.
3. Toast the Muffins: Split the English muffins and toast them until golden brown.

Assembling the Dish:

1. Build the Base: Place a toasted muffin half on each serving plate. Top generously with sautéed spinach.
2. Add the Eggs: Gently place a poached egg on top of the spinach.

Crafting the Hollandaise Sauce:

1. Melt the Butter: In a small saucepan, melt the remaining butter and keep it warm.
2. Prepare the Lemon Juice: Warm the lemon juice slightly in a separate small pan.
3. Whisk the Egg Yolks: Place the top of a double boiler over hot water. Add 3 egg yolks and whisk until they begin to thicken.
4. Incorporate Water: Gradually add 1 tablespoon of boiling water at a time, whisking continuously until the sauce begins to thicken.
5. Blend in Lemon and Butter: Stir in the warmed lemon juice. Remove from heat and slowly whisk in the melted butter until the sauce is thick. Season with kosher salt and cayenne pepper.

Serve:

- Drizzle the hollandaise sauce generously over each poached egg. Serve immediately for the best taste.

---


A Nostalgic Family Memory:

Eggs Florentine has always held a special place at our family table, reminiscent of leisurely Sunday brunches at Grandma's house. I remember the warmth of her kitchen, the tantalizing aroma of butter and lemon mingling with the earthy scent of fresh spinach. Grandma, with her gentle hands and patient spirit, would guide me through the delicate process of making the hollandaise sauce, teaching me the importance of timing and the art of whisking just right.

As we gathered around the table, each bite was a celebration of love and tradition. The creamy sauce, the perfectly poached eggs, and the crunch of toasted muffins were more than just flavors—they were the essence of family togetherness. This dish, rich with history and flavor, continues to be a beloved centerpiece at our family gatherings, a testament to the timeless bonds we share.


Difficulty Rating: 7/10

Classification: Main Dish

---


Eggs Florentine is more than just a meal; it's a journey into the past, a blend of flavors that tells a story. Whether you're gathering with family or exploring the joys of culinary creation, this dish promises to be a delightful experience. Enjoy the process, savor the taste, and cherish the memories it brings to your table.

Read more about Appetizers

Read more about Main Dishes

Read more about Desserts

Shrimp and Lemongrass Soup | Made by Meaghan Moineau

Shrimp and Lemongrass Soup | Made by Meaghan Moineau

Title: Savoring Memories: How to Make Delicious Shrimp and Lemongrass Soup
Description: Dive into the aromatic world of Shrimp and Lemongrass Soup, a delightful blend of flavors that transports you back to cherished family gatherings. Discover the perfect balance of ingredients, coupled with a heartwarming personal story that makes this dish a cherished family favorite. Perfect as an appetizer, this recipe is easy to make and scores a 4 out of 10 on the difficulty scale.

---


A Journey Through Flavor: Crafting the Perfect Shrimp and Lemongrass Soup

There’s something magical about a bowl of steaming Shrimp and Lemongrass Soup. It’s a dish that effortlessly combines the vibrant flavors of Southeast Asia with the joy of shared family moments. Today, I invite you on a culinary journey to recreate this soul-warming soup, and I’ll share a little family nostalgia to go with it.


Ingredients You'll Need:

- Raw shrimp


- Lemongrass stems


- Scallion


- Bean sprouts


- Lime (juice)


- Carrot


- Daikon


- Chicken stock


- Fresh mint


Instructions:
1. Prepare the Lemongrass: Begin by cutting off the white parts of the lemongrass stems, keeping the tops aside. Slice these white sections into inch-long pieces and flatten them gently with your knife.
2. Infuse the Stock: In a large stockpot, bring your chicken stock to a rolling boil. Add the flattened lemongrass stems and the shrimp shells. Allow them to simmer for about two minutes to infuse their flavors into the stock. Once done, set it aside to steep for a few more minutes.
3. Strain and Enhance the Stock: Strain the stock to remove the shells and lemongrass pieces, then return it to the stockpot. Slice the remaining lemongrass tops and finely chop them. Add these, along with the raw shrimp, to the stock. Simmer gently for 3-4 minutes until the shrimp turns a delightful pink.
4. Add Fresh Ingredients: Next, add lime juice, scallions, bean sprouts, carrots, and daikon to the pot. Stir the contents well, allowing all the flavors to meld together seamlessly. Season according to your taste preferences.
5. Finish with a Minty Garnish: Ladle the soup into bowls and finish each serving with a fresh mint garnish. The mint not only enhances the aroma but also adds a refreshing touch to each spoonful.
A Nostalgic Glimpse:

As a child, I vividly remember visiting my grandmother’s house during the holidays. Her kitchen was always bustling with activity, and the air was filled with the comforting scents of her cooking. Of all the dishes she prepared, her Shrimp and Lemongrass Soup was a family favorite.


Gathered around the dining table, we'd eagerly wait as she ladled the fragrant soup into our bowls. The first sip was always magical, a harmonious blend of tangy lime, aromatic lemongrass, and sweet shrimp. It was a dish that brought us together, sparking laughter and stories that would be cherished for years to come.


Creating this soup today is more than just following a recipe; it’s reliving those precious moments of togetherness. As you prepare this dish, I hope it brings you the same warmth and joy it has brought to my family.


Difficulty and Classification:

This Shrimp and Lemongrass Soup is an ideal starter, perfect for whetting the appetite without being overly filling. On a scale of difficulty, I’d rate it a 4 out of 10. With a little preparation and attention to timing, you’ll have a delicious appetizer ready to impress your guests.


Incorporate this delightful soup into your culinary repertoire and create your own cherished memories around the table. Enjoy!

Read more about Appetizers

Read more about Main Dishes

Read more about Desserts

Vegan Chocolate Banana Pie | Made by Meaghan Moineau

Vegan Chocolate Banana Pie | Made by Meaghan Moineau

Title: Nostalgic Delights: A Vegan Chocolate Banana Pie That Tastes Like Home
Description: Dive into the heartwarming world of vegan delights with our Vegan Chocolate Banana Pie. This decadent dessert, rich in flavors and memories, is perfect for those seeking a guilt-free indulgence. Discover the simple steps to create this mouthwatering pie and relive cherished family moments with every bite.

---


A Journey Back in Time with Vegan Chocolate Banana Pie

There’s something magical about desserts that transport you back to your childhood, those sweet moments spent in the kitchen with family. For me, the Vegan Chocolate Banana Pie is one such treat, infused with nostalgia and love. Growing up, my grandmother would often whip up a version of this pie whenever we visited her cozy, sun-dappled home during the summer holidays. The smell of melting chocolate mingled with ripe bananas would fill the air, creating an aroma that was nothing short of heavenly.


As a child, I would sit on the counter, eagerly watching her blend together the silken tofu and bananas, fascinated by how these simple ingredients could transform into something so delightful. It was during these times that I learned the true essence of cooking: love, patience, and a touch of creativity.


Ingredients:

- 1 block of silken tofu


- 3 ripe bananas


- 200g dark chocolate, melted in a bain marie


- 2 tablespoons cornstarch, mixed


- 3 tablespoons maple syrup


- 1 pre-cooked pie crust


Instructions:

1. Begin by blending the silken tofu until it reaches a creamy consistency. This will serve as the smooth base of your pie.


2. Add the ripe bananas to the blender and pulse until fully incorporated.


3. In a bain marie, melt the dark chocolate. This gentle method ensures a silky texture and prevents the chocolate from burning.


4. Pour the melted chocolate into the blender, followed by the cornstarch mixture and maple syrup. Blend until all ingredients are well-combined and smooth.


5. Carefully pour the luscious mixture into a pre-cooked pie crust, smoothing out the top with a spatula.


6. Place the pie in the fridge, allowing it to set for as long as possible. The longer it chills, the more the flavors meld together into a harmonious blend of chocolate and banana.


Difficulty: 4/10

This recipe is delightfully simple, making it perfect for novice bakers or those short on time. The most challenging aspect is merely waiting for it to set in the fridge!


Classification: Dessert

A perfect conclusion to any meal, this Vegan Chocolate Banana Pie is a testament to how desserts can be both indulgent and health-conscious. Whether you're serving it at a family gathering or enjoying a slice in solitude, this pie is sure to become a cherished favorite.


Conclusion:

Creating this Vegan Chocolate Banana Pie is more than just making a dessert; it's about connecting with the past and bringing a piece of family history into the present. Each bite is a reminder of those carefree summer days spent in my grandmother’s kitchen, where love was the main ingredient. I hope this pie brings you as much joy and nostalgia as it brings me, and perhaps even inspires you to create new memories with your loved ones.

Read more about Appetizers

Read more about Main Dishes

Read more about Desserts

Berry Fruit Crumble | Made by Meaghan Moineau

Berry Fruit Crumble | Made by Meaghan Moineau

Title: A Taste of Nostalgia: Indulging in a Classic Berry Fruit Crumble
Description: Dive into the warmth and comfort of a classic Berry Fruit Crumble, a dessert that not only delights the palate but also stirs cherished family memories. With its perfect blend of fresh berries and crunchy oatmeal topping, this recipe is an easy and delightful end to any meal.

---


There's something inherently comforting about a dessert that combines the vibrant flavors of fresh berries with the warm, crunchy goodness of an oatmeal topping. Our Berry Fruit Crumble is a delightful dessert, easy to make yet rich in flavor—a perfect way to end any meal on a sweet note.


Ingredients:

- Fresh mixed berries


- Maple syrup


- Old-fashioned oatmeal


- Almond meal


- Brown sugar


- Ground cinnamon


- Light margarine


Instructions:

1. Preheat your oven to 350°F (175°C).


2. In a baking dish, combine the fresh mixed berries with a generous drizzle of maple syrup. Give it a light stir and set aside.


3. In a small bowl, mix together the oatmeal, almond meal, brown sugar, and ground cinnamon.


4. Add the light margarine and crumble the mixture together using a fork until it resembles coarse crumbs.


5. Evenly sprinkle the oatmeal topping over the berry mixture in the baking dish.


6. Place in the oven and bake for 30 minutes, or until the top is a light golden brown.


*Note: If you don't have almond meal, simply grind some almonds in a food processor until they are crumbly, but be cautious not to process them too long, or you’ll end up with almond butter! Alternatively, whole wheat flour can be used as a substitute.*


Nutritional Information (per serving):

- Calories: 165


- Fat: 6.2g


- Cholesterol: 0mg


- Sodium: 32mg


- Potassium: 35mg


- Carbs: 24g


- Fiber: 6.5g


- Sugar: 10g


- Protein: 4g


Difficulty Rating: 3/10
Classification: Dessert

---


A Nostalgic Family Memory:

I remember the first time I made this Berry Fruit Crumble, vividly etched in my memory during a summer family reunion at my grandmother's country home. The air was filled with laughter, the sun casting a golden hue over the fields, and the unmistakable aroma of freshly baked crumble wafting through the kitchen.


My grandmother, ever the culinary maestro, would enlist the help of all her grandchildren in the kitchen. I was tasked with picking the ripest berries from her sprawling garden, a task I took on with an eager heart and berry-stained fingers. As I watched her combine the ingredients with practiced ease, I realized that this dish was more than just food; it was a love letter to our family, a tradition that brought us together.


When the crumble finally emerged from the oven, its golden top crackling enticingly, we gathered around the table, spoons in hand, ready to dive into the delicious treat. Each bite was a burst of sweet and tangy flavors, a perfect harmony of textures that danced on our taste buds. It was a dish that transcended time, a dessert that, even years later, still evokes the warmth and love of those summer days.


Creating this Berry Fruit Crumble has become a cherished ritual in my own home, a way to share a piece of family history with my loved ones. It's more than just a dessert; it's a flavorful journey back to the days of laughter and togetherness, a reminder that some of life's sweetest moments are best shared over a warm crumble.

Read more about Appetizers

Read more about Main Dishes

Read more about Desserts

Pasta With Chicken and Broccoli | Made by Meaghan Moineau

Pasta With Chicken and Broccoli | Made by Meaghan Moineau

Title: Savoring Tradition: Pasta with Chicken and Broccoli


Description:

Discover a comforting, family-favorite recipe for Pasta with Chicken and Broccoli. This easy-to-make main dish combines succulent chicken, vibrant broccoli, and savory parmesan cheese, all tossed perfectly with lasagna noodles in a flavorful wine and broth sauce. Delight in the nostalgia of a cherished family memory while preparing this simple yet delicious meal. Rated 6/10 in difficulty, this main dish is perfect for any dinner table.

---


Pasta with Chicken and Broccoli: A Family Affair

There's something undeniably heartwarming about a dish that not only satisfies your taste buds but also stirs up fond memories of family gatherings. Pasta with Chicken and Broccoli is one such recipe that has been passed down through my family, each iteration adding a new layer of flavor and love. As I prepare this dish in my own kitchen, I am transported back to bustling family dinners where laughter was as abundant as the food.


I recall a particular evening at my grandmother's house, where the aroma of garlic sautéing in olive oil filled the air. My cousins and I would crowd around the kitchen, eager to sneak a taste of the crisp, yet tender broccoli florets before they made their way into the skillet. My grandmother, with her gentle yet firm command, orchestrated the kitchen like a maestro, ensuring each ingredient was added with precision and care.


Ingredients:

- 2 tablespoons olive oil


- 2 boneless chicken breasts, cut into bite-sized pieces


- 1/2 teaspoon red pepper flakes


- 8 cooked lasagna noodles, cut into strips


- 3 garlic cloves, minced


- 2 cups broccoli florets


- 1 teaspoon dried basil leaves


- 1/2 cup white wine


- 1/2 cup chicken broth


- Salt and pepper to taste


- Grated parmesan cheese for topping


Instructions:

1. Begin by heating the olive oil in a large skillet over medium heat. Once shimmering, add the minced garlic, sautéing for about one minute while stirring constantly to prevent burning.


2. Add the chicken pieces to the skillet, cooking until they are well done and golden brown on the outside.


3. Introduce the broccoli florets to the pan, cooking until they reach a perfect crisp-tender stage.


4. Season the mixture with dried basil leaves, red pepper flakes, and a pinch of salt and pepper to taste.


5. Pour in the white wine and chicken broth, allowing the flavors to meld as the mixture simmers for about five minutes.


6. Add the cooked and drained lasagna noodles to the skillet, tossing everything to combine and heating for an additional 1 to 2 minutes.


7. Serve hot, garnished with grated parmesan cheese if desired.


A Nostalgic Twist:

This dish always reminds me of the laughter and love that filled my grandmother's kitchen. It was there that I learned the importance of patience and attention to detail, as she gently taught me how to sauté garlic without burning it and the perfect timing for adding the broccoli. The kitchen was our haven, where stories were shared and bonds were strengthened over the simple, yet profound act of cooking together.


Difficulty: 6/10
Classification: Main Dish

As you prepare this delightful dish, may it not only nourish your body but also create lasting memories with your loved ones. After all, the best recipes are those that bring family together, making each meal a celebration of tradition and love. Enjoy your Pasta with Chicken and Broccoli, and may it become a cherished part of your family's culinary journey.

Read more about Appetizers

Read more about Main Dishes

Read more about Desserts

Tuna Mexi Melts | Made by Meaghan Moineau

Tuna Mexi Melts | Made by Meaghan Moineau

Title: Savor the Spice: Crafting the Perfect Tuna Mexi Melts for Family Gatherings
Description: Dive into the vibrant world of flavors with our Tuna Mexi Melts, a delightful fusion perfect for any family gathering. This easy-to-make dish, bursting with zest and warmth, is sure to become a staple in your culinary repertoire. Follow our step-by-step guide to create this unforgettable appetizer that marries the boldness of Mexican spices with the comforting taste of melted cheese and tuna.

---


Tuna Mexi Melts: A Nostalgic Family Favorite

There's something magical about the aroma of melted cheese and spices wafting through the house, reminding me of sunlit afternoons spent in my grandmother's kitchen. Our family tradition of making Tuna Mexi Melts always brought us together, infusing our home with warmth and laughter. As my siblings and I gathered around the kitchen table, slicing the fresh French bread and mixing the vibrant ingredients, we knew we were creating more than just a meal; we were crafting memories.


Ingredients:

- Butter (melted)


- 1 tsp. Chile powder


- 1 bunch of cilantro, chopped


- 1 tsp. Cumin


- 1 loaf of French bread


- 1 tsp. Garlic powder


- 2 Green onions, chopped


- 1 Jalapeno, finely diced


- Juice of 1 lime


- 1 tsp. Paprika


- 1 cup Pepper jack cheese, sliced


- 1 cup Picante sauce


- 2 Roma tomatoes, diced


- Salt to taste


- 1 cup Shredded cheddar cheese


- 1 cup Sour cream


- 2 cans Tuna, drained


Instructions:
1. Prepare the Picante Sauce:

Start by whipping up the picante sauce. Combine the cilantro, jalapeno, lime juice, roma tomatoes, and salt in your food processor. Blend until smooth and set aside.


2. Prepare the Bread:

Slice the French loaf into 1-inch slices. Brush each slice with melted butter, then sprinkle with cumin, chile powder, and garlic powder for an added kick.


3. Mix the Tuna Filling:

In a large bowl, combine the drained tuna, green onions, shredded cheddar cheese, sour cream, and picante sauce. Mix thoroughly until all ingredients are well incorporated.


4. Assemble the Melts:

Spoon a generous amount of the tuna mixture onto each slice of bread. Top each with a slice of pepper jack cheese.


5. Bake:

Preheat your oven to 350°F (175°C). Arrange the prepared slices on a baking sheet and bake for 10 to 15 minutes, or until the cheese is melted and bubbling.


6. Serve:

Remove from the oven and serve warm. Enjoy the crunchy, flavorful bite that is sure to bring a smile to everyone's face.


Difficulty Rating: 4/10
Classification: Appetizer

These Tuna Mexi Melts, with their spicy undertones and cheesy goodness, remain a cherished recipe in our family. Every bite takes me back to those cherished moments of togetherness and joy. Whether you’re looking to impress guests or simply indulge in a nostalgic treat, these melts are sure to become a favorite in your home too. Enjoy the journey of flavors and the memories they create around your family table.

Read more about Appetizers

Read more about Main Dishes

Read more about Desserts

Cheesy Bacon Burger with Spicy Chipotle Aiolo Sauce | Made by Meaghan Moineau

Cheesy Bacon Burger with Spicy Chipotle Aiolo Sauce | Made by Meaghan Moineau

Savor the Flavor: Cheesy Bacon Burger with Spicy Chipotle Aioli Sauce


Description:

Dive into the delicious world of mouthwatering flavors with our Cheesy Bacon Burger featuring Spicy Chipotle Aioli Sauce. Packed with savory ingredients like lean ground beef, turkey bacon, and creamy Laughing Cow Swiss cheese, this burger promises a delightful culinary experience. Perfectly complemented by a spicy chipotle aioli, this dish is a must-try for burger enthusiasts. Whether you're hosting a backyard barbecue or looking to impress family and friends with a gourmet touch, this burger is your ticket to flavor paradise.

Ingredients:

- For the Burger:

- 1 green bell pepper, diced


- 1 onion, diced


- 1 lb lean ground beef


- 1 tsp garlic powder


- 1/2 tsp ground black pepper


- 4 wedges of Laughing Cow Swiss cheese


- 6 slices of cooked turkey bacon


- 4 whole wheat hamburger buns


- For the Spicy Chipotle Aioli Sauce:

- 3 chipotle chiles in adobo, minced


- 1/2 cup fat-free mayonnaise


- 2 cloves garlic, minced


- 1/4 cup Greek yogurt


- 1 tbsp fresh lime juice


- 1/2 tsp ground cumin


Instructions:


For the Burgers:

1. In a pan, cook the turkey bacon according to package directions. Once cooked, remove and set aside.

2. In the same pan, add the diced bell pepper and onion. Cook until tender, about 10 minutes.


3. In a small bowl, combine the ground beef with garlic powder and ground black pepper. Mix well.


4. Divide the meat into 8 equal portions (approximately 2 oz each). Flatten each portion and place half a cheese wedge onto four of them. Cover with the other four portions and seal the edges to prevent the cheese from oozing out.


5. Preheat the grill and cook the burgers until done, about 5 minutes per side.


6. Assemble the burgers by placing them on whole wheat buns and topping with turkey bacon, sautéed peppers and onions, and a generous dollop of spicy chipotle aioli sauce.


For the Spicy Chipotle Aioli Sauce:

1. In a small bowl, combine all the sauce ingredients: chipotle chiles, fat-free mayonnaise, minced garlic, Greek yogurt, fresh lime juice, and ground cumin.

2. Whisk together until well combined.


A Nostalgic Family Memory:

As I prepare this delectable burger, I'm transported back to summer evenings at my grandparents' house. My grandfather, a culinary enthusiast, always had a knack for combining flavors that left our taste buds dancing. One lazy afternoon, he decided to craft his version of the ultimate burger. Watching him, I was amazed at how he effortlessly mixed spices and lovingly placed cheese inside the patties, explaining that the secret to a great burger is the surprise of flavor with each bite. The smell of sizzling meat and roasting peppers filled the air, creating a sense of warmth and joy that I still cherish today. Sharing these burgers with family, surrounded by laughter and stories, made every bite even more special.

Difficulty Rating: 5/10

Classification: Main Dish


With the blend of savory bacon, creamy cheese, and spicy aioli, this Cheesy Bacon Burger with Spicy Chipotle Aioli Sauce is not just a meal—it's an experience. Whether you're a seasoned chef or a home cook, this recipe offers a delightful challenge and a rewarding payoff. Enjoy the taste of nostalgia and new memories with every bite!

Read more about Appetizers

Read more about Main Dishes

Read more about Desserts

Peach Crostata | Made by Meaghan Moineau

Peach Crostata | Made by Meaghan Moineau

The Perfect Summer Treat: Peach Crostata


A Delightful Blend of Nostalgia and Flavor


There's a certain magic in the air as summer approaches, bringing with it the sweet, juicy allure of ripe peaches. One of the best ways to capture this essence is through the creation of a Peach Crostata, a rustic dessert that not only satisfies the taste buds but also evokes cherished memories of family gatherings and sunlit afternoons.


Ingredients for a Simple Indulgence


- Recipe Pie Dough: The foundation of our crostata, offering a buttery and flaky base.
- Peaches: The star of the show, bursting with sweetness and a hint of tartness.
- Sugar: Adds a touch of sweetness to the fruit mixture.
- Flour: Helps thicken the fruit’s juices as they bake.
- Butter: A pat on top for a rich finish.
- Whole Egg: Used for brushing the pastry, giving it a golden sheen.
- Ice Cream: A perfect accompaniment, adding a creamy contrast to the warm crostata.

Steps to Create Your Peach Crostata


1. Preheat and Prepare: Start by preheating your oven to 375 degrees. Line a baking sheet with parchment paper to prevent sticking.
2. Assemble the Base: Place your uncooked pie dough onto the prepared baking sheet.
3. Mix the Filling: In a bowl, gently combine the peaches, sugar, and flour until the peaches are well-coated.
4. Fill the Dough: Pour the fruit mixture into the center of the pastry round, ensuring you leave about 2 1/2 inches around the edge for folding.
5. Fold and Brush: Carefully fold up the edges of the pastry dough over the filling to create a rustic rim, fanning the edges as you go. Brush the dough with the beaten egg to achieve that golden-brown finish.
6. Add Butter and Bake: Place a pat of butter on top of the fruit mixture. Bake in the preheated oven for 30 to 45 minutes until the crust is golden and the fruit is bubbling.
7. Cool and Serve: Once done, cool the crostata on a rack. Serve warm with a scoop of ice cream for an irresistible treat.

A Nostalgic Slice of Life


Every bite of Peach Crostata takes me back to my grandmother's kitchen on those lazy summer Sundays. The sweet aroma of peaches baking would waft through the house, drawing family members together like moths to a flame. My cousins and I would play in the backyard, our cheeks flushed with the sun's warmth, eagerly waiting for the crostata to cool just enough to eat. Grandma would serve it with a generous scoop of vanilla ice cream, its creamy texture melting over the warm pastry. It wasn't just a dessert; it was a centerpiece of family unity and laughter, a tradition I cherish and continue to this day.


Difficulty and Classification


Difficulty Rating: 3/10 – This dessert is delightfully simple, perfect for novice bakers and experienced chefs alike.
Classification: Dessert – A sweet conclusion to any meal, ideal for showcasing summer's bounty.

Incorporating the simplicity and nostalgia of a Peach Crostata into your summer festivities not only brings a delicious dessert to the table but also a piece of cherished family history. Enjoy the process, savor the moments, and indulge in this delightful summer treat.

Read more about Appetizers

Read more about Main Dishes

Read more about Desserts

Shortbread Lemon Cookies | Made by Meaghan Moineau

Shortbread Lemon Cookies | Made by Meaghan Moineau

Zesty Delights: Nostalgic Shortbread Lemon Cookies


A Journey of Taste: The Sweet and Tangy Embrace of Lemon Cookies


Imagine the vibrant zest of lemon mingling with the buttery goodness of shortbread, creating a perfect symphony of flavors that dance on your taste buds. Shortbread Lemon Cookies are not just a treat; they are a journey back to cherished family memories and sunny afternoons filled with laughter. With a difficulty rating of 4 out of 10, these delightful cookies are an easy yet impressive dessert to share with loved ones.


The Ingredients of Joy


To embark on this flavorful journey, gather these simple yet transformative ingredients:

- 1 cup butter, softened


- 2 eggs


- 1 tablespoon lemon zest


- 1 cup almond flour


- 1/2 cup caster sugar


- 1 1/2 cups all-purpose flour


- 2 tablespoons lemon juice


- Whole dried lemons, sliced


- Powdered sugar (optional)


A Recipe Steeped in Family Tradition


Growing up, the aroma of lemon cookies wafting through my grandmother’s kitchen signaled the start of summer. These cookies were more than just a treat; they were a symbol of our family’s love for gathering and sharing stories. I remember sitting on the porch, a plate of freshly baked cookies in my lap, as my grandmother recounted tales from her childhood.


The tradition was simple yet profound: each summer, we would make these cookies together, measuring ingredients and sharing laughter. The tangy aroma of lemon zest would fill the air as we shaped the dough into perfect rolls. These moments taught me the joy of baking and the importance of family bonds.


Crafting Your Own Memories: Instructions


1. Prepare the Base: Beat the softened butter with one egg until creamy. Gradually add the almond flour, caster sugar, all-purpose flour, and lemon juice, mixing on the lowest setting until a smooth dough forms.
2. Chill the Dough: Divide and shape the dough into two rolls, each about 2 inches in diameter. Wrap them in parchment paper and refrigerate for at least 3 hours to firm up the dough.
3. Ready the Oven: Preheat your oven to 350°F (175°C). While waiting, revel in the anticipation of the deliciousness to come.
4. Slice and Arrange: Once chilled, slice each log into cookies about 1/8 inch thick. Place them on a lightly greased baking sheet, leaving space for them to expand slightly.
5. Add a Golden Touch: Beat the second egg and gently brush the top of each cookie. Crown each with a slice of dried lemon and sprinkle with a touch of sugar.
6. Bake to Perfection: Bake in the preheated oven for 12-15 minutes. For a beautifully browned top, place the cookies under the broiler for the last 5 minutes. Allow them to cool on a wire rack.
7. Optional Elegance: Dust with powdered sugar for an added touch of elegance and a hint of sweetness.

A Sweet Conclusion


Shortbread Lemon Cookies are more than just a dessert; they are a gateway to cherished memories and the creation of new ones. Whether enjoyed on a warm summer day or as a treat during a cozy gathering, these cookies bring joy and connection to any occasion. So, gather your loved ones, embrace the nostalgia, and let the magic of lemon and shortbread transport you to a place of warmth and happiness.


Enjoy the journey, and happy baking!

Read more about Appetizers

Read more about Main Dishes

Read more about Desserts

Bahamian Goombay Smash Cocktail | Made by Meaghan Moineau

Bahamian Goombay Smash Cocktail | Made by Meaghan Moineau

Title: Sip the Tropics: Crafting the Perfect Bahamian Goombay Smash Cocktail
Description: Dive into the vibrant flavors of the Bahamian Goombay Smash Cocktail, a tropical delight that captures the essence of island life. With a blend of coconut rum, apricot brandy, and fresh juices, this cocktail promises to transport your senses to sun-soaked beaches. Join me as I share a nostalgic family memory tied to this refreshing drink, and learn how to create this masterpiece right at home. Difficulty: 3/10. Category: Appetizer.

---


When the sun dips low and paints the sky in hues of orange and pink, there's one drink that brings the spirit of the Bahamas to life: the Goombay Smash Cocktail. This tropical concoction, bursting with the rich flavors of coconut rum, apricot brandy, and fresh juices, is more than just a drink—it's an experience, a memory, a taste of paradise in a glass.


Ingredients


- Coconut Rum: Infuses the cocktail with a delightful tropical sweetness.
- Apricot Brandy: Adds a rich, fruity depth that balances the rum.
- Dark Rum: Provides a robust, molasses-like flavor.
- Pineapple Juice: Offers a vibrant, tangy sweetness.
- Orange Juice: Complements with a fresh, citrusy zing.
- Fresh Orange and Pineapple: For the perfect garnish.

Instructions


1. Begin by filling a small pitcher with ice, setting the stage for a chilled, refreshing drink.


2. Add both the coconut rum and dark rum, followed by the apricot brandy, creating a strong yet sweet foundation.


3. Pour in the pineapple juice, allowing its tang to dance with the rums.


4. Top off with orange juice, balancing the flavors with a citrusy brightness.


5. Stir gently, ensuring all ingredients meld together.


6. Garnish with slices of fresh orange and pineapple, enhancing both the visual and aromatic appeal.


A Nostalgic Family Memory


Every sip of the Goombay Smash takes me back to summers spent at my grandmother's quaint beach house on Eleuthera Island. It was a tradition for our family to gather every evening on the porch, the warm breeze carrying the scent of salt and hibiscus. My grandmother, with her infectious laughter and sun-kissed skin, would expertly mix a pitcher of Goombay Smash as we shared stories of our day.


This cocktail was more than just a drink; it was a symbol of togetherness and joy. As the sun set, painting the sky with a palette of tropical colors, we would raise our glasses, toasting to another unforgettable day in paradise. The Goombay Smash was our family's liquid sunshine, a reminder of the beautiful moments shared.


Difficulty and Classification


Creating the Bahamian Goombay Smash Cocktail is delightfully simple, with a difficulty rating of 3/10. Its ease of preparation makes it a perfect appetizer cocktail, setting a vibrant, tropical tone for any gathering.


---


In crafting the Goombay Smash, you're not just making a cocktail; you're capturing the essence of the Bahamas, inviting the spirit of the islands into your home. Whether you're reminiscing about family gatherings or creating new memories, this delightful drink is sure to become a cherished favorite, just as it has been for my family. So, shake off the day, embrace the island vibes, and enjoy your very own Bahamian escape, one sip at a time.

Read more about Appetizers

Read more about Main Dishes

Read more about Desserts

Warm Duck Salad With Roasted Beetroot | Made by Meaghan Moineau

Warm Duck Salad With Roasted Beetroot | Made by Meaghan Moineau

Title: Embrace the Seasons with a Warm Duck Salad and Roasted Beetroot Melody
Description: Discover the delightful fusion of rich flavors in our Warm Duck Salad with Roasted Beetroot. This comforting dish, with its blend of succulent duck breast, earthy beets, and vibrant citrus notes, is a true celebration of seasonal ingredients. Join us as we share not only a step-by-step guide to creating this culinary masterpiece but also a heartwarming family memory that makes this dish even more special.

---


Warm Duck Salad with Roasted Beetroot: A Taste of Tradition

As the leaves turn golden and the air grows crisp, there’s nothing like gathering around the table with family, sharing stories, and savoring the warmth of a lovingly prepared meal. One such dish that brings back the fondest memories in our family is the Warm Duck Salad with Roasted Beetroot. It’s a recipe that has been passed down through generations, always gracing our table during special fall gatherings.


Ingredients:

- Duck breast meat (skin left on)


- Baby beets


- Orange zest


- Honey


- Salt


- Arugula greens


- Pine nuts


- Canned mandarin orange segments


- Fresh mint


- Feta cheese


- Orange (juice)


- Extra virgin olive oil


- Balsamic vinegar


- Salt and pepper


Instructions:
1. Roast the Beets: Preheat your oven to 200°C (400°F). Clean the beets thoroughly, wrap them in aluminum foil, and roast for 30-40 minutes until tender.
2. Prepare Orange Zest: While the beets cook, peel an orange, ensuring you capture the zest without the bitter pith. Cut into fine strips and set aside.
3. Cook the Duck: Clean and dry the duck breasts, score the skin, and rub with salt. Place in a cold pan and cook on medium heat to render fat and brown the skin. Flip and cook until golden brown on both sides. Rest the duck under foil for half the cooking time.
4. Make the Vinaigrette: Squeeze the orange juice into a bowl, add olive oil, balsamic vinegar, and season with salt and pepper. Whisk well.
5. Prepare the Beets: Once cooled, peel and cut the beets into small pieces. Toss with vinaigrette and honey.
6. Assemble the Salad: Slice the duck thinly and layer with arugula, pine nuts, mandarin segments, mint, and feta cheese. Add beets and garnish with orange zest. Drizzle the remaining vinaigrette over the top.
A Nostalgic Family Memory:

Every autumn, my grandmother would gather the family for a weekend brunch, where this Warm Duck Salad was the star of the meal. I remember her bustling around the kitchen, sharing snippets of wisdom as she cooked. She taught me the art of perfecting duck breast and the importance of letting it rest, just as life sometimes requires us to pause and savor the moment.


This dish not only filled our bellies but also our hearts. We’d sit around the table, the vibrant colors of the salad matching the hues of the falling leaves, and share stories of our day. The scent of roasted beets mingling with citrusy notes of orange would fill the air, creating an atmosphere of warmth and love.


Difficulty: 6/10
Classification: Main Dish

This dish is more than just a meal; it’s a cherished family tradition, a tapestry of flavors woven with love and nostalgia. Whether you’re cooking for family or friends, this Warm Duck Salad with Roasted Beetroot is sure to create lasting memories and a sense of togetherness. Enjoy every bite and every moment.

Read more about Appetizers

Read more about Main Dishes

Read more about Desserts

Turkey BLT with Creamy Dijon Mustard | Made by Meaghan Moineau

Turkey BLT with Creamy Dijon Mustard | Made by Meaghan Moineau

Title: Turkey BLT with Creamy Dijon Mustard: A Nostalgic Twist on a Classic
Description:

Dive into the savory layers of our Turkey BLT with Creamy Dijon Mustard—a modern take on a beloved classic. This recipe combines the tangy zest of Dijon mustard with the rich flavors of turkey bacon and Swiss cheese, all nestled between slices of fresh Italian bread. Easy to prepare yet delightfully satisfying, it's a dish that will transport you back to cherished family gatherings. Whether you're cooking for an intimate lunch or a casual get-together, this sandwich is sure to become a household favorite. Rated 3 out of 10 in difficulty, it's perfect for a quick Main Dish that doesn't sacrifice taste.


---


Turkey BLT with Creamy Dijon Mustard: A Recipe and a Memory

There’s something magical about the aroma of turkey bacon sizzling on the skillet. It takes me back to Sunday afternoons spent in my grandmother’s kitchen, where the air was always fragrant with the delightful smell of simple yet hearty meals. One of our favorites was the Turkey BLT, a sandwich that somehow managed to bring the family together in eager anticipation.


Ingredients:

- 1 tablespoon Dijon mustard


- 8 slices fresh Italian bread


- 1 tablespoon olive oil


- 4 romaine heart leaves


- 2 tablespoons salad dressing


- 4 slices Swiss cheese


- 2 ripe tomatoes, sliced


- 8 slices turkey bacon


- 1 Vidalia onion, thinly sliced


Instructions:
1. Prepare the Oven and Bacon: Preheat your oven to 350 degrees Fahrenheit. While the oven is warming, cook the turkey bacon in a skillet over medium heat until crispy. The sizzling sound and savory smell are bound to bring back memories of comfort and warmth.
2. Bread and Spread: Slice the Italian bread into 8 even slices. In a small bowl, mix the Dijon mustard and salad dressing to create a creamy spread. Generously coat one side of each bread slice with this mixture.
3. Assemble the Sandwich: On four of the slices, layer two pieces of Swiss cheese, two romaine leaves, two slices of tomato, one slice of Vidalia onion, and four slices of the crispy turkey bacon. Top each with another slice of bread, spread side down.
4. Toast to Perfection: Drizzle the top of each sandwich with olive oil. Arrange them on a baking sheet and bake in the preheated oven. Turn halfway through, allowing each side to toast and the cheese to melt, approximately 4-5 minutes per side. For a different texture, you can also use a panini maker or toast them in a skillet on the stove top.

As a child, I’d often watch my grandmother meticulously assemble these sandwiches, her hands moving deftly over the ingredients. The final touch was always her signature drizzle of olive oil, which imparted a golden crispness to the bread. Once the sandwiches were ready, we’d gather around the table, the warmth of the kitchen wrapping around us like a familiar blanket.


This Turkey BLT with Creamy Dijon Mustard is more than a meal; it’s a tradition, a reminder of simpler times when the most profound joy was found in the company of loved ones and the shared experience of a delicious, lovingly prepared meal.


Difficulty: 3/10
Classification: Main Dish

---


Recreate this timeless dish and perhaps, like me, you too will find comfort in its layers. Whether it's the tang of the mustard or the crispiness of the bacon, this sandwich is sure to evoke cherished memories while creating new ones around your table.

Read more about Appetizers

Read more about Main Dishes

Read more about Desserts

Vanilla Panna Cotta with Chocolate Ganache | Made by Meaghan Moineau

Vanilla Panna Cotta with Chocolate Ganache | Made by Meaghan Moineau

Title: A Sweet Symphony: Vanilla Panna Cotta with Chocolate Ganache
Description: Experience the perfect balance of creamy vanilla panna cotta and rich chocolate ganache with this elegant dessert recipe. A touch of nostalgia, a dash of sophistication, and a whole lot of flavor await you in this culinary journey.

---


When it comes to creating a dessert that is both elegant and comforting, few dishes can match the allure of Vanilla Panna Cotta with Chocolate Ganache. This classic Italian dessert, with its silky texture and harmonious flavors, is the perfect way to end a meal on a high note. In this blog post, I'll walk you through the process of making this delightful treat, while sharing a personal family memory that makes this dish even more special.


Ingredients:

- Gelatin

- Milk


- Vanilla bean


- Cream


- Sugar


- Chocolate bar


Instructions:


1. Prepare the Gelatin: Begin by filling a bowl with water and adding the gelatin. Let it soak until it becomes soft and pliable.
2. Heat the Milk: Pour the milk into a pan and bring it to just below simmering. It's crucial not to let it boil, as boiling can ruin the delicate texture of your panna cotta. Once the milk is heated, remove the pan from the heat.
3. Incorporate the Gelatin: Drain and squeeze out the gelatin, then add it to the warm milk, stirring until completely dissolved.
4. Flavor with Vanilla: In another pan, pour the cream and add sugar along with a split vanilla bean. Bring this mixture to a gentle boil over low heat, stirring constantly to infuse the cream with the vanilla's sweet aroma. Once it begins to boil, remove from heat and discard the vanilla bean.
5. Combine and Chill: Stir the milk mixture into the cream. Rinse your chosen ramekins or molds in ice-cold water, shaking out any excess, and fill them with the panna cotta mixture. Chill in the refrigerator for at least 3-4 hours, or until set.
6. Prepare the Chocolate Ganache: Using a double boiler, melt a chocolate bar until completely smooth. Gradually whisk in cream until you reach the desired consistency for your ganache.
7. Serve with Elegance: Once the panna cotta is set, gently turn it out onto a serving dish. Drizzle the luxurious chocolate ganache over the top just before serving.

A Slice of Nostalgia:


Every time I make this Vanilla Panna Cotta with Chocolate Ganache, I'm transported back to my grandmother's cozy kitchen. I recall a chilly winter evening when the family gathered around her rustic dining table, eagerly anticipating the dessert she'd promised. She was a maestro in the kitchen, turning simple ingredients into spectacular creations. That night, the panna cotta she served was a revelation—its creamy richness perfectly complemented by the decadent chocolate ganache. As we savored each bite, the room was filled with stories, laughter, and the warmth of family. It was one of those evenings that felt like a scene from a movie, and it's a memory I cherish every time I recreate this dish.


Difficulty Rating: 5/10


Classification: Dessert


This Vanilla Panna Cotta with Chocolate Ganache is a dessert that combines simplicity with sophistication. Whether you're hosting a dinner party or simply treating yourself, this recipe is sure to impress. So, gather your ingredients, embrace the nostalgia, and enjoy the sweet symphony of flavors in every bite.

Read more about Appetizers

Read more about Main Dishes

Read more about Desserts

My Sister’s Soup: Creamy Curried Squash and Cauliflower Soup | Made by Meaghan Moineau

My Sister's Soup: Creamy Curried Squash and Cauliflower Soup | Made by Meaghan Moineau

Title: A Bowl of Memories: My Sister's Creamy Curried Squash and Cauliflower Soup
Description: Discover the heartwarming blend of flavors and nostalgia in my sister's Creamy Curried Squash and Cauliflower Soup. This delightful recipe, rated a 4 out of 10 in difficulty, is perfect as a comforting main dish for those chilly evenings. Dive into a family story that adds a dash of warmth to every spoonful.

---


Growing up, the kitchen was the heart of our home—a place where stories were shared, laughter echoed, and the aroma of delicious meals filled the air. Among the many recipes that emerged from that cozy space, my sister's Creamy Curried Squash and Cauliflower Soup holds a special place in my heart. It embodies not just the flavors of fall, but also the essence of cherished family moments.


A Nostalgic Tale:

I vividly remember the first time my sister crafted this soup. It was a crisp autumn evening, and the leaves had turned into shades of gold and crimson. We had just returned from a day of raking leaves and jumping into the piles with reckless abandon. Our cheeks were rosy from the chill, and our stomachs rumbled with hunger.


In the warmth of the kitchen, my sister, always the culinary adventurer, decided to experiment with the squash we'd picked up from the local farmer's market. I watched as she methodically sliced the butternut and delicata squash, her hands steady and sure. The scent of roasting squash soon mingled with the fragrance of sautéed onions and garlic, creating an inviting aroma that filled every corner of our home.


As the soup simmered, we gathered around the table, sharing stories and laughter. My sister ladled the rich, creamy soup into bowls, each serving topped with a dollop of sour cream that melted into a swirl of golden goodness. With the first spoonful, I was enveloped in warmth—both from the flavors of the soup and the love that went into making it.


The Recipe:
Ingredients:

- 1 butternut squash


- 1 delicata squash


- 1 head of cauliflower, chopped


- 4 cups vegetable stock


- 1 yellow onion, diced


- 2 cloves fresh garlic, minced


- 1 tablespoon curry powder


- 2 tablespoons butter


- Dashes of cayenne pepper


- Salt and pepper to taste


- Sour cream, for serving


Instructions:
1. Preheat your oven to 375°F (190°C). Slice the butternut and delicata squash lengthwise and place them face down in a casserole dish with about 1/4" of water at the bottom.
2. Bake for about 30 minutes or until the squash is tender. Allow them to cool slightly. Once cool enough to handle, scoop out the seeds and set them aside. Scoop the squash flesh into a bowl.
3. In a large stock pot, heat the butter over low-to-medium heat. Sauté the diced onions until they become translucent.

4. Add the minced garlic, curry powder, cayenne pepper, salt, and pepper to the onions, stirring to combine.


5. Add the squash and chopped cauliflower to the pot along with the vegetable stock. Simmer for about 20 minutes until the vegetables are tender.
6. Puree the mixture in batches in a blender until smooth. If the soup is too thick, add more stock a little at a time.
7. Serve the soup hot in bowls with a generous dollop of sour cream on top.

This dish, rated a 4 out of 10 in difficulty, primarily serves as a satisfying main dish. It's a recipe that invites everyone to gather, savor, and reminisce about the simple joys of life.


Every time I make this soup, it takes me back to that autumn evening, reminding me of the warmth of family and the delicious magic that happens when loved ones come together over food. Whether you're making it for the first time or the hundredth, may this soup bring a slice of nostalgia to your table.

Read more about Appetizers

Read more about Main Dishes

Read more about Desserts

Candy Cane Chocolate Marshmallows | Made by Meaghan Moineau

Candy Cane Chocolate Marshmallows | Made by Meaghan Moineau

A Festive Treat: Candy Cane Chocolate Marshmallows


Description:

Dive into the festive spirit with our Candy Cane Chocolate Marshmallows, a delightful dessert that combines the rich flavors of dark and milk chocolate with the refreshing crunch of candy canes. Perfect for holiday gatherings or as a sweet indulgence to enjoy by the fire, these treats are sure to bring warmth and joy to your winter season.


The Ingredients:


- Candy canes


- Dark chocolate


- Marshmallows


- Milk chocolate


Step-by-Step Instructions:


1. Crush the Candy Canes: Begin by placing your candy canes in a sealed plastic bag. Use the bottom of a glass, a mallet, or whatever you have on hand to crush them into fine pieces. The key is to achieve a texture that will coat your marshmallows perfectly.
2. Melt the Chocolate: Set up a double boiler. If you don't have one, a heatproof bowl over a pot of simmering water will work just as well. Add both the dark and milk chocolate to the bowl, stirring occasionally until completely melted. Be careful to ensure the chocolate does not touch the water, as this can cause it to seize.
3. Dip and Coat: Take each marshmallow and dip it into the luscious melted chocolate, ensuring an even coat. Immediately roll the chocolate-covered marshmallow in the crushed candy canes, allowing them to adhere to the surface.
4. Set and Chill: Place the coated marshmallows on a sheet of wax paper and allow them to cool. For best results, chill them in the refrigerator for at least an hour or until the chocolate has fully hardened.
5. Store and Enjoy: Once set, store your Candy Cane Chocolate Marshmallows in an airtight container to keep them fresh. Enjoy them on their own or dunk them into a steaming mug of hot chocolate for an extra dose of holiday cheer.

A Nostalgic Family Memory


Every year as the holidays approached, my family would gather in the cozy kitchen of my grandmother's house. The air was always filled with the tantalizing aroma of chocolate and peppermint, a scent that to this day reminds me of cherished moments. One year, my grandmother decided to introduce a new recipe to our holiday traditions: Candy Cane Chocolate Marshmallows.


I remember being a young child, barely able to reach the countertop, eagerly watching as she crushed candy canes with the bottom of a sturdy glass. My siblings and I took turns rolling marshmallows in the melted chocolate, giggling as we inevitably ended up with sticky fingers. The highlight was always the first taste test, when we gathered around the fireplace, sipping hot chocolate and savoring our homemade creations.


Those Candy Cane Chocolate Marshmallows became more than just a treat; they were a symbol of family togetherness and the magic of the holiday season. To this day, making them brings back a wave of nostalgia, reminding me of those cherished moments spent with loved ones.


Difficulty Rating: 3/10


Classification: Dessert


This recipe is delightfully simple, making it a perfect activity to share with family and friends. With minimal ingredients and easy-to-follow steps, even novice bakers can enjoy the process of creating these festive treats. So gather your loved ones, roll up your sleeves, and enjoy the sweet journey of making Candy Cane Chocolate Marshmallows together. Happy holidays!

Read more about Appetizers

Read more about Main Dishes

Read more about Desserts

Creamy Mushroom Soup ~ with a “Kick” | Made by Meaghan Moineau

Creamy Mushroom Soup ~ with a “Kick” | Made by Meaghan Moineau

Title: Creamy Mushroom Soup with a Kick: A Hearty Bowl of Comfort
Description: Dive into the warmth and savory delight of Creamy Mushroom Soup with a Kick. This rich, flavorful dish combines earthy button mushrooms with zesty lime and a hint of spice, bringing a vibrant twist to a comforting classic. Perfect for chilly days or when you need a comforting meal, this soup is an easy-to-make culinary masterpiece that will leave your taste buds dancing.

---


As the leaves turn golden and the air fills with a crisp chill, there's no better time to indulge in a bowl of homemade soup. This Creamy Mushroom Soup with a Kick is a recipe that has been passed down through my family for generations, and it never fails to bring back fond memories of cozy family gatherings.


A Nostalgic Family Tradition

Growing up, autumn Sundays were always special in our household. My grandmother, known for her culinary prowess, would invite the entire family over for a hearty lunch. The house would be filled with the comforting aroma of sizzling bacon and sautéing onions, as she masterfully prepared her signature dish—Creamy Mushroom Soup with a Kick.


We would gather around the large, rustic dining table, eagerly awaiting the moment when Grandma would bring in her steaming pot of soup. Each bowl was garnished with crispy bacon bits, fresh cilantro, and a generous sprinkle of shredded cheddar cheese. The first spoonful was always a revelation—a rich, creamy base with the earthy depth of mushrooms, a subtle heat from the long pepper, and a surprising zest from the lime juice. It was a symphony of flavors that danced on our palates and warmed our souls.


Ingredients:

- 6 strips of bacon


- 2 cups of button mushrooms, sliced


- 1/4 cup of fresh cilantro, chopped


- 3 cloves of garlic, minced


- Juice of 1 lime


- 1 long pepper, chopped


- 2 cups of milk


- 2 tablespoons of olive oil


- 1 cup of potato buds


- 1 cup shredded cheddar cheese


- 1 sweet onion, diced


- 1 tablespoon of vegeta bouillon


- 6 cups of water


Instructions:
1. Sauté the Vegetables: Heat a large saucepot over medium heat and add a drizzle of olive oil. Add the garlic, long hot pepper, onion, and mushrooms to the pot. Sauté until the onion becomes translucent and the mushrooms are tender.
2. Prepare the Bacon: On a heated griddle, cook the bacon until it is nice and crispy. Once done, set it aside on a paper towel to drain excess oil.
3. Simmer the Soup Base: Add the tablespoon of vegeta bouillon and 6 cups of water to the pot. Bring to a simmer, then add the cup of potato buds, stirring occasionally. Allow the mixture to simmer on low heat.
4. Add Creaminess: Pour in the cups of milk and continue to simmer on low for a few more minutes. This will give the soup its creamy texture.
5. Finishing Touches: Just before serving, add the lime juice and stir well. Ladle the soup into bowls and top with crispy bacon bits, chopped cilantro, and shredded cheddar cheese.
Difficulty Rating: 4/10
Classification: Main Dish

This Creamy Mushroom Soup with a Kick is a delightful main dish that requires minimal effort but delivers maximum flavor. Its simplicity in preparation and rich, layered taste make it a perfect choice for any dinner table. Whether you’re enjoying it solo or sharing it with loved ones, this soup is sure to leave a lasting impression and create new, heartwarming memories.


So, the next chilly day, why not gather your family around the table and serve this nostalgic dish? Let its warmth and flavor transport you back to cherished moments, just as it does for me every time I take that first comforting spoonful.

Read more about Appetizers

Read more about Main Dishes

Read more about Desserts

Raspberry Walnut Coffee Cake | Made by Meaghan Moineau

Raspberry Walnut Coffee Cake | Made by Meaghan Moineau

Title: A Slice of Nostalgia: Raspberry Walnut Coffee Cake Recipe
Description: Dive into a delightful blend of raspberries and walnuts with this easy-to-make coffee cake. Perfect for brunch or dessert, this recipe is not only delicious but also brings back cherished family memories.

---


A Slice of Nostalgia: Raspberry Walnut Coffee Cake Recipe

When the sun peeked through the kitchen window on lazy Sunday mornings, the air would soon be filled with the comforting aroma of baking. My grandmother, with her soft hands and warm smile, would guide me as we prepared her famous Raspberry Walnut Coffee Cake. This wasn’t just a dessert; it was a ritual, a cherished connection to family and tradition.


Ingredients:

- Almond milk


- 1 tablespoon ground flaxseed


- 1 teaspoon vanilla extract


- 1/2 cup maple syrup


- 2 tablespoons oil (vegetable or coconut)


- 1 teaspoon baking soda


- 1 teaspoon cinnamon


- 1/2 teaspoon salt


- 1 cup oat flour


- Raspberry jam


- 1/2 cup walnuts


- 1/4 cup turbinado sugar


- Rolled oats (optional for topping)


Instructions:

1. Preheat your oven to 375°F (190°C) and grease an 8x8-inch baking pan.


2. In a mixing bowl, combine all wet ingredients: almond milk, ground flaxseed, vanilla extract, maple syrup, and oil. Let this mixture stand while you prepare the walnuts.


3. Grind the walnuts in a food processor until they resemble a coarse meal.


4. In another bowl, whisk together the oat flour, baking soda, cinnamon, and salt. Add the ground walnuts to this mixture.


5. Pour half of the batter into the prepared pan. Using a spoon, dollop lines of raspberry jam across the batter. Use a knife to swirl the jam into the batter gently.


6. Pour the rest of the batter on top.


7. For the crumble topping, place walnuts in a bag and crush them into pea-sized crumbs. Combine with oat flour, cinnamon, turbinado sugar, and rolled oats if using. Mix in the oil until the mixture becomes crumbly.


8. Sprinkle the topping evenly over the batter.


9. Bake for 25 minutes, or until the top is browned and springs back slightly when touched. Serve warm.


A Sweet Memory

Every time I bake this cake, I am transported back to those mornings in my grandmother’s kitchen. The laughter, the stories, and the simple joy of creating something together are memories I hold dear. This Raspberry Walnut Coffee Cake is more than just a treat; it's a piece of my family’s heart, shared through generations.


Difficulty Rating: 4/10
Classification: Dessert

This delightful Raspberry Walnut Coffee Cake is a perfect blend of nostalgia and flavor. Whether you’re looking for a sweet start to your day or a comforting dessert to share with loved ones, this recipe promises to bring smiles and warm memories to your table.

Read more about Appetizers

Read more about Main Dishes

Read more about Desserts

Chicken Roll-Ups With Feta Cheese and Arugula | Made by Meaghan Moineau

Chicken Roll-Ups With Feta Cheese and Arugula | Made by Meaghan Moineau

Title: A Taste of Tradition: Chicken Roll-Ups with Feta Cheese and Arugula
Description: Dive into the delightful flavors and heartwarming memories with our Chicken Roll-Ups with Feta Cheese and Arugula. This simple yet elegant dish combines tender chicken, peppery arugula, and creamy feta, making it a perfect main dish for any occasion.

---


When it comes to family gatherings, the kitchen has always been the heart of our home. I have vivid memories of bustling around with my grandmother, the aroma of fresh ingredients wafting through the air as we prepared meals infused with love and tradition. One dish that holds a special place in my heart is the Chicken Roll-Ups with Feta Cheese and Arugula. This recipe, passed down through generations, is a testament to the simplicity and elegance of classic home cooking.


Ingredients:


- Chicken breast cutlets


- Coarse salt and ground pepper


- Baby arugula


- Feta cheese


- Olive oil


Instructions:


1. Prepare the Chicken:

Begin by seasoning the chicken breast cutlets with coarse salt and ground pepper. This simple seasoning allows the natural flavors of the chicken to shine through, creating a delicious base for our roll-ups.


2. Assemble the Roll-Ups:

Layer each cutlet with a generous handful of baby arugula. The arugula adds a peppery freshness that perfectly complements the creamy feta cheese. Crumble the feta in the center of each cutlet, ensuring every bite is filled with cheesy goodness.


3. Roll and Secure:

Starting with the narrow end, roll up the chicken tightly. Secure each roll-up with a toothpick to ensure they hold their shape during cooking.


4. Cook to Perfection:

Heat olive oil in a large nonstick ovenproof skillet over medium-high heat. Swirl the oil to coat the bottom of the pan evenly. Place the chicken roll-ups seam side down and cook until golden brown, about 1 to 2 minutes. Turn the chicken to ensure even cooking.


5. Bake Until Done:

Transfer the skillet to a preheated oven and cook until the chicken is opaque throughout, approximately 10 to 12 minutes. The result is tender, juicy chicken infused with the flavors of arugula and feta.


6. Serve and Enjoy:

Remove the toothpicks and slice the chicken crosswise for an elegant presentation, if desired. Serve warm and enjoy the delightful combination of flavors.


A Nostalgic Memory:


As a child, I remember eagerly helping my grandmother prepare this dish for Sunday dinners. Her kitchen was a sanctuary of warmth and laughter, where stories were shared and memories were made. She would tell tales of her own childhood, where her mother would prepare similar dishes using fresh ingredients from their backyard garden. As we rolled up each chicken cutlet, I felt connected to the past, knowing that I was part of a culinary tradition that spanned generations.


This recipe is more than just a dish; it’s a piece of our family history. The combination of juicy chicken, tangy feta, and peppery arugula brings back fond memories of those cherished family gatherings. Every bite is a reminder of the love and tradition that binds us together.


Difficulty Rating:


- Difficulty: 4/10
- Classification: Main Dish

Create your own family memories with this simple yet flavorful Chicken Roll-Ups with Feta Cheese and Arugula. Perfect for a cozy dinner or a special occasion, this dish is sure to become a beloved tradition in your home as well.

Read more about Appetizers

Read more about Main Dishes

Read more about Desserts