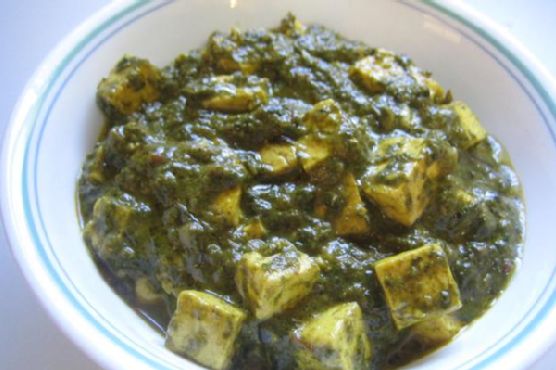
Palak-tofu (bean curd) | Made by Meaghan Moineau
A Culinary Journey: Embracing Comfort with Palak-Tofu Delight
Discover the Heartwarming Recipe that Combines Tradition and Taste
Description: Dive into the comforting embrace of Palak-Tofu, a rich and flavorful dish that brings together the nutritional goodness of spinach and the delightful texture of tofu. This recipe not only tantalizes your taste buds but also carries the warmth of cherished family memories. Rated 6/10 on the difficulty scale, this main dish is perfect for those looking to explore a classic Indian delicacy with a modern twist.
---
A Nostalgic Journey into the Heart of Indian Cuisine
Growing up, Sundays were synonymous with family gatherings at my grandmother's house. The kitchen would come alive with the aroma of spices, laughter, and the warmth of togetherness. Among the array of delectable dishes, her Palak-Tofu was an all-time favorite. The vibrant green of the spinach, combined with the creamy texture of tofu, was a sight to behold and a treat to savor.
My grandmother would often recount stories of her childhood, where fresh spinach was handpicked from her family’s garden. As she lovingly prepared the dish, she would tell us how each ingredient was chosen with care, much like the love she poured into her cooking. This recipe is a tribute to her legacy, a reminder of the simple joys of life, and the magic that unfolds when tradition meets the table.
Ingredients:
- 1 block of tofu
- 2 cups of palak (spinach)
- 2 tablespoons of oil
- 1 tablespoon of butter
- 1 teaspoon of coriander powder
- 1 teaspoon of cumin seeds
- 1 teaspoon of garam masala
- 1 tablespoon of ginger-garlic paste
- 2 green chillies, finely chopped
- 2 tablespoons of kasuri methi (dried fenugreek leaves)
- 1 cup of cream or milk
- 2 onions, finely chopped
- 2 tomatoes, chopped
- 1/2 teaspoon of turmeric
- Salt to taste
Instructions:
1. Sauté the Onions: Heat 1 tablespoon of oil in a pan. Add the onions and sauté until they turn golden brown.
2. Aromatic Base: Stir in the ginger-garlic paste and sauté for a minute. Add the green chillies and chopped tomatoes, and sauté until the tomatoes soften.
3. Wilt the Palak: Add the washed, uncut palak to the mixture and sauté for about 5 minutes until the leaves wilt. Remove from heat and allow it to cool.
4. Create the Palak Paste: Once cooled, grind the mixture to a coarse paste in a blender. Set aside.
5. Prepare the Tofu: In the same pan, add another tablespoon of oil and sauté the tofu cubes with a pinch of salt and turmeric for about 2 minutes. Remove from the pan and set aside.
6. Cook the Palak: Return the coarse palak paste to the pan, add salt to taste along with coriander powder, and let it cook on a low flame for 10 minutes.
7. Combine and Season: Add the sautéed tofu cubes into the pan, mixing well. Crush the kasuri methi between your palms and stir it into the mixture.
8. Creamy Finish: Pour in the milk or cream, mix well, and cover the pan. Let it simmer on a low flame for 5 minutes.
9. Final Touch: Drop in the butter for added creaminess and finish with a sprinkle of garam masala.
10. Serve: Serve hot with roti or paratha, and let the flavors take you on a nostalgic culinary journey.
---
The Palak-Tofu recipe is more than just a dish; it's a passage through time, connecting us to our roots and the love that binds families together. Whether you're a seasoned cook or a culinary explorer, this dish promises a heartwarming experience that lingers long after the meal is over. Enjoy every bite as you create new memories with your loved ones.