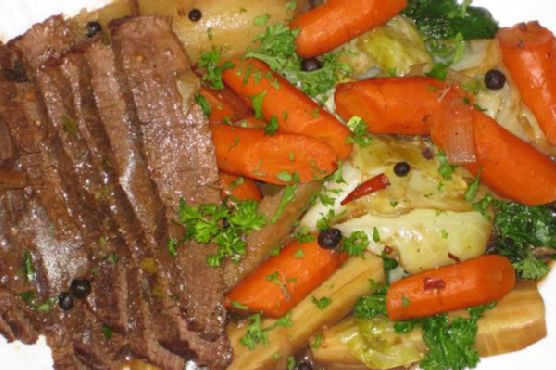
Guinness Braised Corned Beef and Cabbage | Made by Meaghan Moineau
Title: A Hearty Feast: Guinness Braised Corned Beef and CabbageDescription: Discover the rich flavors of our Guinness Braised Corned Beef and Cabbage recipe—a savory main dish that melds tradition with taste. Perfect for family gatherings, this recipe offers tender, flavor-infused meat and perfectly cooked vegetables, all enhanced by a robust Guinness mustard sauce. Join us as we explore a cherished family memory tied to this meal, making every bite a step into the past.
---
Guinness Braised Corned Beef and Cabbage: A Tradition Reimagined
As the leaves begin to turn and the air takes on a crisp chill, our family kitchen becomes a haven of warmth and delicious aromas. One dish that never fails to make an appearance during these cozy gatherings is our Guinness Braised Corned Beef and Cabbage. This hearty main dish not only satisfies the palate but also stirs up fond memories of family times gone by.
Ingredients:
- Corned beef brisket
- Carrots
- Parsnips
- Potatoes
- Garlic
- Guinness
- Beef broth
- Pickling spice
- Brown sugar
- Bay leaf
- Spicy honey mustard
Instructions:
1. Preparation: Begin by seasoning both sides of the corned beef liberally with pepper. Thanks to the corning process, the beef is already perfectly salty, so no need for additional salt.
2. Searing: Heat 1 tablespoon of oil in a large, shallow oven-safe pot over medium-high heat. Sear each side of the beef for about 3 minutes to develop a rich brown crust, locking in the juices. Remove the beef and set it aside on a plate.
3. Deglazing: Pour the Guinness into the pot to deglaze, scraping up any browned bits that cling to the bottom. This step is crucial for enhancing the depth of flavor.
4. Simmering: Add beef broth, pickling spice, brown sugar, bay leaf, and minced garlic to the pot. Bring the mixture to a simmer before returning the beef to the pot, along with any juices from the plate. Cover the pot and place it on the bottom rack of your oven.
5. Baking: Allow the beef to bake for 2 1/2 to 3 hours, basting with the surrounding juices every 30 minutes. After 2 hours, add carrots, parsnips, and potatoes, letting them simmer for approximately 25-30 minutes.
6. Resting: Once cooked, remove the pot from the oven. Let the beef rest on a cutting board for 15 minutes before slicing thinly against the grain.
7. Final Touches: Arrange the vegetables on a serving platter and cover with foil. Bring the sauce in the pot to a boil, add the cabbage, and cook for about 7 minutes until softened. Place the cabbage with the other vegetables.
8. Sauce: Strain the sauce and incorporate 2-3 tablespoons of spicy honey mustard until dissolved. Serve in a small dish or gravy boat alongside the beef.
9. Serving: After slicing the beef, arrange it on the serving platter, and generously ladle the Guinness mustard sauce over the meat and vegetables for a perfect glaze.
---
A Nostalgic Note
Every time I prepare this dish, I am transported back to chilly winter evenings at my grandmother's house. The windows would fog up from the warmth of the kitchen, and the whole family would gather around the dining table, eager to dig into the feast. My grandmother, with a twinkle in her eye, would share stories of her childhood in Ireland, where similar dishes were a staple. The rich aroma of Guinness and spices would fill the room, and for a moment, it felt like we were all part of something timeless. This recipe is more than just a meal; it's a bridge to our past, a reminder of family bonds, and a celebration of heritage.
---
Difficulty: 6/10
Classification: Main Dish
This Guinness Braised Corned Beef and Cabbage recipe is perfect for those seeking a comforting, flavorful meal that brings both tradition and taste to the table. Whether for a festive occasion or a simple family dinner, it's a dish that promises to create cherished memories of its own.