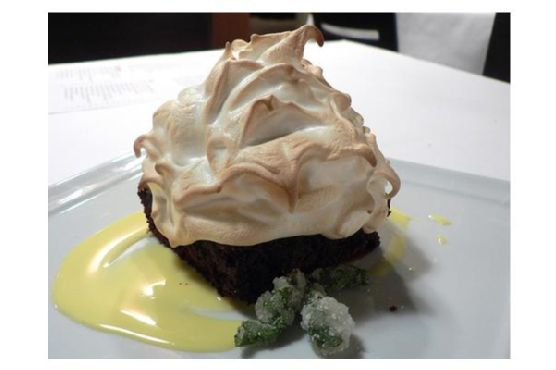
Picture this: It’s a Friday night, and you’ve had one of those weeks where everything felt like a never-ending to-do list. You’re craving something special, a little dramatic even, to kick off your weekend with flair. That’s when I remembered Baked Alaska. It’s one of those desserts that looks like a total showstopper but is actually super manageable to whip up. I love how it combines the coolness of ice cream, the soft texture of cake, and a toasty meringue that you can’t help but admire. It’s great because you can make it ahead of time, and it doesn’t require any fancy equipment. Seriously, if I can do it, anyone can. You just have to get over the idea that baking something on top of ice cream is somehow impossible — spoiler: it’s not, and it’s ridiculously fun. Jump to Recipe
What You’ll Need
Let’s be real: you’ve probably got most of this stuff on hand already, except maybe the ice cream. But hey, any excuse to grab a pint, right?
- A round cake (store-bought or homemade, your call!)
- Ice cream (about 1/2 gallon of your favorite flavor)
- Egg whites (from about 3 large eggs)
- Cream of tartar
- Powdered sugar
How to Make Baked Alaska
- Start by greasing a 7-inch bowl with a flavorless oil or unsalted butter. This bowl should be just big enough to snugly hold half a gallon of ice cream, but no wider than your cake round.
- Let your ice cream soften a bit so it’s workable. Then pack it tightly into the bowl. Pop it back into the freezer until it hardens — about an hour should do.
- For the meringue, beat your egg whites until they are foamy. Add a pinch of cream of tartar and keep whipping until you see stiff peaks. This is when the meringue holds its shape firmly.
- Gently fold in the powdered sugar, a bit at a time, to avoid deflating all that nice air you just whipped in.
- Once you’re ready to assemble, place your round cake on a plate that’s slightly larger than the cake itself.
- To unmold the ice cream, center it over the cake. If it’s being stubborn and won’t release from the bowl, run a bit of warm water over the outside of the bowl for a few seconds.
- Time to “frost” it! Cover the cake and ice cream completely with meringue, going wild with a spoon to create peaks and swirls. Don’t be shy — more is more with meringue.
- Bake your masterpiece in a preheated oven at 450°F for about 6-7 minutes, until those meringue peaks are beautifully golden brown.
- Pop it back in the freezer until you’re ready to serve. It’ll keep just fine for a day or two.
Cook’s Notes
A couple of quick tips to save your sanity: First, make sure your bowl is really cold to help the ice cream set faster. If you’re nervous about the meringue deflating, sift the powdered sugar first; it makes a surprising difference. And for those moments when the ice cream just won’t release, a quick dip in warm water works like magic!
Baked Alaska is a dream to make ahead. You can do all the components a day or two before and just assemble it the day of. Leftovers can be stored in the freezer, but they might lose a bit of their magic.
Make It Your Own
- Switch out the vanilla ice cream for something more adventurous like coffee or pistachio for a gourmet spin.
- Use a chocolate or lemon cake base instead of vanilla to complement or contrast your ice cream choice.
- Add a layer of jam between the cake and ice cream for a fruity surprise that cuts through the richness.
- Feeling nutty? Toss some toasted almonds or hazelnuts into the meringue for a crunchy texture.
If you try this, I’d love to hear how it turns out — drop a comment or tag me in your photos! Let’s see how your Baked Alaska stacks up. Happy baking, friends!
Related update: Baked Alaska
Related update: Rugelach
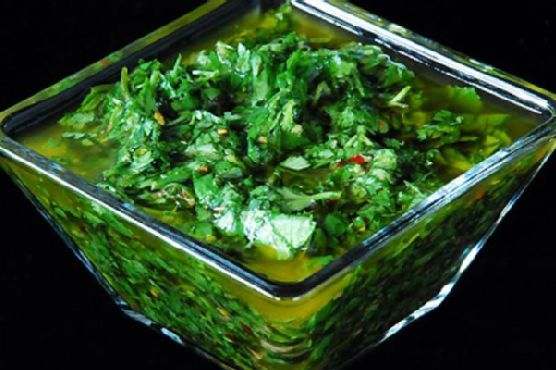
It was one of those evenings when the fridge light flickers on to reveal a collection of *almosts* — almost enough of this, almost enough of that. As I stood there contemplating the remnants of the weekend’s cooking adventures, the memory of a tangy, herby sauce came to mind, something quick yet transformative: Chimichurri. Perfect for those nights when you crave something more than just a meal — a bright, green punch of flavor to enliven whatever protein you can scrounge up. Plus, it’s one of those recipes that’s practically foolproof and endlessly adaptable. Trust me, your taste buds will thank you, and your fridge’s odds and ends might just disappear in the best way.
Jump to Recipe
What You’ll Need
I love this ingredient list because chances are, you already have most of these lying around! Here’s what you’ll need to whip up some magic:
- Parsley – the base of our green goodness
- Cilantro – for that citrusy zing
- Garlic cloves – because what’s a sauce without garlic?
- Red wine vinegar – sharp and tangy
- Olive oil – rich and smooth
- Salt – to balance and enhance
- Black fresh ground pepper – for a touch of warmth
- Red pepper flakes – a hint of heat
- Capers – optional, but they add a lovely brininess
How to Make Chimichurri
- Chop the parsley and cilantro until they’re finely minced, releasing a vibrant, fresh aroma. Toss them into a medium mixing bowl.
- Mince the garlic cloves and add them to the bowl, stirring until these aromatic delights are evenly distributed among the greenery.
- Pour in the red wine vinegar, then sprinkle in the salt, black pepper, and red pepper flakes. Stir gently, letting the fragrance of the vinegar meld with the herbs.
- Slowly drizzle in the olive oil, stirring as you go, until everything is well-coated and glistening. The mixture should be thick, not soupy, holding together beautifully.
- Let the chimichurri sit for about 30 minutes. As it rests, the flavors will meld together, creating that punchy, tangy blend that’s oh-so-addictive.
Cook’s Notes
Chimichurri is all about balance and personal preference. If you find the sauce too tangy, add a bit more olive oil. Too mild? A pinch more salt might do the trick. I like to make it ahead of time and let it sit in the fridge overnight — the flavors just seem to get better. Store any leftovers in a tightly sealed jar in the refrigerator; it should stay fresh for about a week. Just give it a good stir before using it again. And remember, this isn’t just a sauce for meats; drizzle it over roasted veggies or even mix it into your scrambled eggs for a herby twist.
Make It Your Own
- Swap the cilantro for fresh mint for a refreshing spin that’s perfect over lamb.
- Add a teaspoon of lemon zest for a citrusy burst that pairs beautifully with grilled fish.
- Incorporate some finely chopped shallots for a subtle sweetness and depth.
- Replace red wine vinegar with apple cider vinegar for a slightly sweeter, fruitier undertone.
If you try this, I’d love to hear how it turns out — drop a comment or tag me in your photos! Let’s see those creative tweaks and the delicious results. Happy saucing!
Related update: Chimichurri
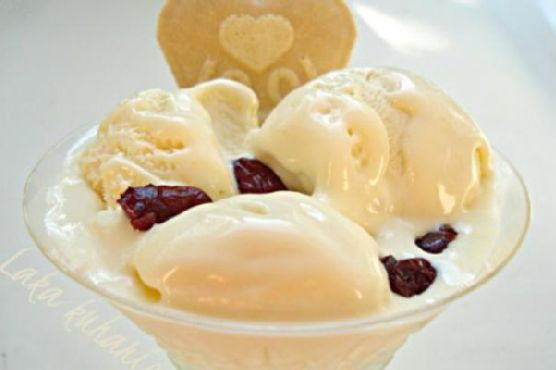
So, last Tuesday was one of those days where you open every cupboard and the fridge like five times, hoping for some magic to happen. You know what I mean, right? That weird limbo between wanting something sweet but not willing to spend hours in the kitchen. That’s when I remembered this white chocolate-cranberry ice cream recipe, and honestly, it’s a game-changer. We’re talking creamy, dreamy, with bursts of cranberry goodness — and it doesn’t demand a culinary degree. Perfect for when you need a sweet fix without the fuss. Jump to Recipe
What You’ll Need
The magic of this recipe? You probably have most of these tucked away already. Let’s check off the essentials:
- Double cream – The base for that silky smooth texture.
- Dried cranberries – For those tart little bursts.
- Egg yolks – Just the yolks, no cheating!
- Full fat milk – Because why compromise?
- Caster sugar – For sweetness, of course.
- Vanilla extract – A hint to bring it all together.
- White chocolate – The star of the show.
How to Make White Chocolate-Cranberry Ice Cream
- Start by heating the milk in a medium saucepan just until it begins to gently bubble. Don’t let it boil over — we’re not making hot chocolate here!
- Take it off the heat and set it aside for a moment. Let’s get those eggs going.
- In a separate bowl, whisk the egg yolks and sugar together. You’ll want to go at it for about 3 minutes until they turn pale yellow and fluffy. It’s like magic!
- Slowly pour that warm milk over the egg mixture, stirring as you go. Then, tip it all back into the saucepan.
- Simmer very lightly, stirring continuously. Watch for the custard to thicken or for it to coat the back of a wooden spoon. It should feel like a silky dream.
- Off the heat, stir in the chopped white chocolate. The residual heat will melt it beautifully. Trust the process.
- Once the mixture is cool, add in the vanilla extract. Pop it in the fridge to chill completely.
- When it’s nicely chilled, stir in the cream until everything is perfectly combined.
- Pour the mixture into your ice cream machine and churn until it’s lovely and frozen.
- In the last 5 minutes of churning, toss in those dried cranberries, letting the machine do the work of mixing them in.
- Transfer your creation into a plastic container and freeze for at least 3 hours before serving.
Cook’s Notes
Ah, the little things that make life easier (and tastier):
- If you don’t have an ice cream machine, you can still make this by freezing the mixture and stirring every 30 minutes until it sets. But, if we’re being honest, the machine really does make it creamier.
- Store this ice cream in an airtight container to keep it fresh. It’ll last about a week, but will probably disappear much sooner.
- Don’t rush the chilling process. The colder the mix before churning, the better the texture.
Make It Your Own
Feeling creative? Here’s how to switch things up:
- Swap dried cranberries with chopped dark chocolate for a double chocolate vibe.
- Try adding a pinch of sea salt when you stir in the vanilla for a salted white chocolate twist.
- Mix in some toasted almonds with the cranberries for a nutty crunch.
- Infuse the milk with a cinnamon stick while heating it for a spicy kick.
If you give this white chocolate-cranberry ice cream a whirl, I’d love to hear about it. Drop a comment or tag me in your posts — let’s share all this deliciousness together!
Related update: White chocolate-cranberry ice cream
Related update: Baked Alaska