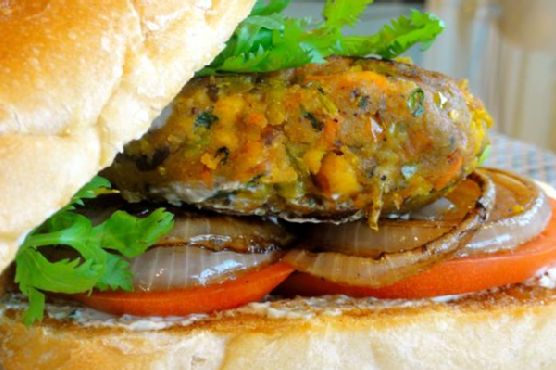
Masala-Tofu Burger | Made by Meaghan Moineau

Masala-Tofu Burger | Made by Meaghan Moineau

Title: Savor the Spice: A Journey with the Masala-Tofu Burger
Description: Uncover the vibrant flavors of Indian cuisine with our Masala-Tofu Burger recipe. Perfectly spiced and richly textured, this burger is a delightful fusion of tradition and modern culinary innovation. Join me as I share a cherished family memory associated with this dish, bringing warmth and nostalgia to your table.

---


There’s a certain magic in the kitchen when the smell of sizzling spices fills the air. My journey with the Masala-Tofu Burger is reminiscent of lazy Sunday afternoons spent in my grandmother's kitchen. The memories of those days are fragrant with the aroma of mustard seeds popping in hot oil and the earthy scent of cumin and turmeric wafting around us.


Growing up, my grandmother was a culinary artist in her own right. Her kitchen was a haven where spices were her paints, and the dishes she crafted were masterpieces that told stories of our rich cultural heritage. One particular afternoon stands out in my memory. It was a family gathering, a boisterous affair filled with laughter and the sound of clinking plates. She decided to surprise us all with her innovative twist on a classic dish: the Masala-Tofu Burger.


The Star Ingredient: Tofu
The foundation of this flavorful burger is tofu, a versatile ingredient that beautifully absorbs the spices. Before we dive into the preparation, let's gather our ingredients:

- White onion


- Diced red, orange, and green bell peppers


- Frozen peas and carrots mix


- Green chillies


- Tofu


- Diced boiled potato


- Garlic


- Black mustard seeds


- Curry leaves


- Hing


- Cumin powder


- Turmeric


- Lemon


- Salt


- Cilantro


- Indian breadcrumbs


- Vegetable oil


- PAM Original Flavor spray


- Red or white onion


- Beefsteak tomatoes


- Mint-cilantro chutney spread


- Portuguese rolls


A Flavorful Symphony: Cooking Instructions
1. Spice Infusion: In a large skillet over medium-high heat, spray a generous amount of PAM and add oil. Add mustard seeds and sauté for 30 seconds until you hear popping noises. Carefully add the curry leaves, as they tend to pop in hot oil.
2. Building the Base: Add onions and peppers, sweat for about 30 seconds. Introduce chopped garlic, chilies, and turmeric, sautéing for 5-7 minutes until the onions and peppers soften.
3. Vegetable Mix: Incorporate the peas and carrots mixture, cumin powder, and salt. Sauté for 7-10 minutes until all veggies are soft and cooked through.
4. Tofu Magic: In a small bowl, marinate cubed tofu with a pinch of turmeric, cumin powder, coarse black pepper, and optional cayenne pepper. Once the veggies are cooked, add the tofu to the skillet, sautéing until slightly brown and crumbly.
5. Flavor Balancing: Add juice from half a lemon and half of the chopped cilantro. Mix in the diced boiled potato, tossing until everything is well-coated. Taste for salt and spices.
6. Forming Patties: Mash the mixture until mushy and the veggies are small. Once cooled, mix in breadcrumbs until the mixture is firm enough to form into four thick patties. Wrap in plastic wrap until ready to use.
7. Cooking the Patties: In a small skillet sprayed with PAM over medium-high heat, cook each patty for about 2 minutes on each side until browned and crispy.
8. Assembling the Burger: Sauté thick slices of onion until charred and slightly soft. Spread a generous amount of mint-cilantro chutney on each side of the Portuguese rolls, place the burger, onions, tomato slices, and cilantro leaves on top. Serve with a slice of lemon and reduced-fat chips on the side.
A Bite of Nostalgia

As I took my first bite, I was transported back to that family gathering. The flavors were a symphony, each note perfectly played. This dish, rated a 6 out of 10 in difficulty, is a Main Dish that embodies both comfort and adventure. It's a celebration of family, culture, and the shared joy of creating something beautiful together.


Whether you are revisiting old memories or creating new ones, the Masala-Tofu Burger is a testament to the power of food to connect us to our roots and each other. Enjoy the journey of flavors and the stories they tell.


Read more about Appetizers

Read more about Main Dishes

Read more about Desserts

Gluten Free Profiteroles | Made by Meaghan Moineau

Gluten Free Profiteroles | Made by Meaghan Moineau

Discover the Delight of Gluten-Free Profiteroles: A Nostalgic Dessert for All Occasions


Description:

Indulge in the delicate, airy magic of gluten-free profiteroles—an exquisite dessert that not only pleases the palate but also brings cherished family memories to life. Our gluten-free recipe ensures that everyone at your table can experience the joy of these classic French treats. With a few simple ingredients and a touch of patience, you'll be crafting golden puffs filled with memories and flavor. Whether you're a seasoned baker or a curious novice, this recipe promises to be your new favorite indulgence.

---


Gluten-Free Profiteroles: A Family Tradition


Ingredients:

- 1/2 cup butter

- 1 cup gluten-free flour


- 1/4 teaspoon xantham gum


- 1/4 teaspoon salt


- 1 tablespoon sugar


- 1/2 cup milk


- 1/2 cup water


- 4 large eggs


Instructions:


1. Preheat Oven: Set your oven to 375°F (190°C).
2. Sift Dry Ingredients: Combine gluten-free flour, xantham gum, salt, and sugar. Sift together 3-4 times for even distribution and set aside near your stove.
3. Prepare Wet Ingredients: Crack the eggs into a measuring cup, whisk to combine, and set aside. Prepare your hand mixer for later use.
4. Create the Milk Mixture: In a deep, heavy-bottomed pan, combine milk and water. Add butter cut into small chunks. Heat gently until the butter is fully melted.
5. Boil and Mix: Increase heat to bring the mixture to a rolling boil. Remove from heat and quickly add the flour mixture, stirring vigorously with a wooden spoon.
6. Cook the Paste: Return to low heat, continuing to beat until a smooth, shiny paste forms and pulls away cleanly from the pan's sides and bottom. Avoid overcooking to prevent heavy buns.
7. Incorporate Eggs: Remove from heat. Gradually add the whisked eggs, beating well with a hand mixer. Ensure the paste remains firm yet elastic. It should stand on its own when dropped by spoonfuls.
8. Prepare Baking Sheet: Run a baking sheet under cold water, shaking off excess but leaving it damp. Use two baking sheets to prevent burning.
9. Shape and Bake: Drop tablespoons of the mixture onto the sheet, spaced about 10 cm apart. Bake for 20-25 minutes until golden brown. Do not open the oven during the first 15 minutes to prevent collapse.
10. Cool and Serve: Once golden on all sides, remove profiteroles to a rack, piercing each with a toothpick to release steam. Reheat as desired for a crisp texture.

---


A Nostalgic Family Memory


Growing up, Sunday afternoons in our house meant one thing: the tantalizing aroma of baking profiteroles wafting through the air. My grandmother, a spirited woman with a love for French pastries, would gather the family in the kitchen, her domain of culinary magic. She'd tell stories of her mother teaching her this very recipe, a legacy passed down through generations.


As a child, I watched in awe as she effortlessly mixed and shaped the dough, her hands moving with the confidence of years of practice. The joy of biting into a warm, freshly baked profiterole, its delicate shell giving way to a heavenly filling, was unmatched. It wasn't just about the taste; it was the laughter, the stories, and the shared moments that made each bite special.


Today, as I recreate this gluten-free version, I feel her presence in the kitchen with me. It's a reminder that while ingredients may change, the love and tradition behind a recipe remain timeless.


---


Recipe Difficulty:

6/10

Classification:

Dessert

---


Whether you're new to gluten-free baking or honoring a family tradition, these profiteroles promise a delightful experience. Enjoy creating memories and sharing the joy of these classic treats with those you love.

Read more about Appetizers

Read more about Main Dishes

Read more about Desserts

Gluten Free Yellow Cake And Cupcakes | Made by Meaghan Moineau

Gluten Free Yellow Cake And Cupcakes | Made by Meaghan Moineau

Title: Celebrating Family Traditions with a Scrumptious Gluten-Free Yellow Cake and Cupcakes
Description: Dive into a heartwarming recipe for a Gluten-Free Yellow Cake and Cupcakes that promises to excite your taste buds while keeping dietary restrictions in mind. Perfect for family gatherings or a simple treat, this dessert boasts a delightful blend of coconut and tapioca flour with a rich vanilla essence. Indulge in a nostalgic journey as we share a cherished family memory tied to this delectable dessert. Rate difficulty: 5/10. Classified as Dessert.

---


There's something magical about the aroma of a cake baking in the oven. It evokes cherished memories and brings people together, serving as a centerpiece for celebrations and simple family moments alike. This Gluten-Free Yellow Cake and Cupcakes recipe is no exception—it's a testament to the power of food in creating lasting memories.


Growing up, Sunday afternoons at my grandmother's house were always a special occasion. The entire family would gather around her cozy kitchen, eagerly awaiting the treats she had lovingly prepared. Her signature yellow cake was always a highlight, and it became a family tradition to bake it together.


When my younger sister was diagnosed with gluten intolerance, my grandmother was determined to adapt her beloved recipe so everyone could enjoy it. After some trial and error, she created this delightful Gluten-Free Yellow Cake and Cupcakes recipe, using coconut flour and tapioca flour to achieve the perfect texture.


Ingredients:

- 1 cup coconut flour


- 1 cup tapioca flour


- 1/2 teaspoon salt


- 1 teaspoon baking soda


- 1 teaspoon baking powder


- 1 teaspoon xanthan gum


- 6 whole eggs


- 1 1/2 cups sugar


- 1 cup veganaise


- 3/4 cup milk alternative (just under)


- 1 tablespoon vanilla extract


- 1/2 cup Earth Balance butter, melted


- 1 cup dairy-free chocolate chips


- Pinch of salt


- 2 cups powdered sugar


Instructions:

1. Preheat your oven to 350 degrees Fahrenheit. If making a layer cake, grease two 8 or 9-inch round cake pans and dust with tapioca flour. Alternatively, line a muffin tin with baking cups for cupcakes.


2. In a bowl, combine the coconut flour, tapioca flour, salt, xanthan gum, baking soda, and baking powder. Set aside.


3. In a separate large bowl, beat the eggs, sugar, and veganaise until the mixture is light and fluffy.


4. Gradually add the vanilla extract, flour mixture, and milk alternative to the egg mixture, alternating between the dry ingredients and milk. This helps achieve a fluffy cake texture.


5. Pour the batter into the prepared cake pans or fill the baking cups 3/4 full. This recipe yields approximately 24 cupcakes.


6. Bake for 20-25 minutes for the cakes or 12-15 minutes for the cupcakes. The cakes are ready when they are nicely browned, spring back when lightly touched, or when a toothpick inserted in the center comes out clean.


7. Let the cakes or cupcakes cool completely before icing.


This recipe holds a special place in my heart, not just for its delightful taste but also for the memories it brings back. Every bite reminds me of those joyful Sunday afternoons, filled with laughter and the warmth of family. Baking this cake has become a way for us to honor my grandmother's legacy and continue creating new memories around the table.


Whether you're celebrating a birthday, a holiday, or simply the joy of being together, this Gluten-Free Yellow Cake and Cupcakes recipe is sure to become a cherished part of your family traditions. Enjoy the process, savor the taste, and create your own nostalgic moments with loved ones.

Read more about Appetizers

Read more about Main Dishes

Read more about Desserts

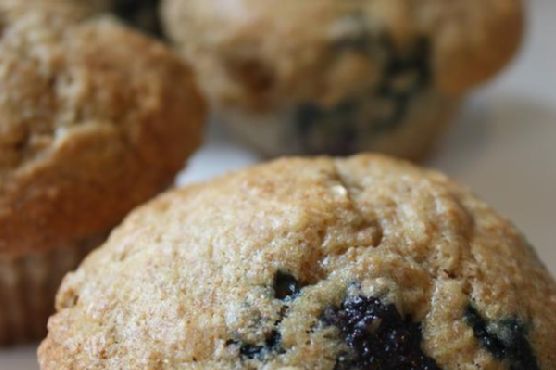
Whole Wheat Blueberry Muffins | Made by Meaghan Moineau

Whole Wheat Blueberry Muffins | Made by Meaghan Moineau

Title: Rise and Shine with Whole Wheat Blueberry Muffins: A Nostalgic Delight
Description: Dive into the comforting world of Whole Wheat Blueberry Muffins, a recipe that promises to fill your kitchen with the warm and inviting aroma of fresh bananas and plump blueberries. Perfect as a delightful breakfast or a sweet afternoon treat, these muffins not only nourish the body but also the soul. Join me as I share a cherished family memory wrapped around this beloved recipe, and discover just how easy it is to recreate this wholesome dessert in your own home.

---


Whole Wheat Blueberry Muffins: A Journey of Flavor and Memories


There’s something magical about the smell of freshly baked muffins wafting through the house on a lazy Sunday morning. For me, it instantly transports me back to my grandma’s cozy kitchen, where every baking session was an adventure for my little fingers and curious palate. Her Whole Wheat Blueberry Muffins were a staple, a testament to her love for simple, wholesome ingredients and the joy of bringing family together.


Ingredients You’ll Need:


- 1 ½ cups whole wheat flour


- 2 tsp baking powder


- ½ tsp baking soda


- ½ tsp sea salt


- ½ cup light brown sugar


- 2 ripe bananas, mashed


- 1 cup fresh blueberries


- ¼ cup butter, melted


- ¾ cup buttermilk


- 1 large egg, beaten


- Raw sugar for sprinkling


Instructions:


1. Preheat your oven to 350 degrees Fahrenheit, and line a muffin tin with paper or silicone cups.


2. Begin by peeling and mashing the bananas in a small bowl. Set them aside.


3. In a large mixing bowl, combine the whole wheat flour, baking powder, baking soda, sea salt, and light brown sugar.


4. Create a well in the center of the dry ingredients and add the buttermilk, beaten egg, melted butter, and mashed bananas. Gently mix until just combined. Be careful not to overmix the batter to keep your muffins tender.


5. Fold in the fresh blueberries with a couple of gentle stirs, ensuring they are evenly distributed throughout the batter.


6. Spoon the batter into the prepared muffin cups until full. Sprinkle the tops with raw sugar for a delightful crunch.


7. Bake in the preheated oven for 20-25 minutes or until the muffins are golden brown and a toothpick inserted into the center comes out clean.


8. Allow the muffins to cool in the pan for a few minutes before transferring them to a wire rack to cool completely.


A Nostalgic Memory


I vividly remember my small hands eagerly reaching for the batter bowl, ready to lick the remnants of sweet dough while grandma prepared the next batch. Her laughter filled the kitchen, a melody that harmonized with the soft hum of the oven. Each muffin was a labor of love, carefully crafted with the finest ingredients, and shared with the family over stories and laughter. These muffins are more than a recipe; they are a link to the past, a reminder of my grandma's warm embrace and the cherished moments that shaped my childhood.


Difficulty Rating: 3/10


These Whole Wheat Blueberry Muffins are simple to make and perfect for bakers of all skill levels. With minimal steps and straightforward ingredients, this recipe ensures that even a novice can create a delicious batch of muffins with ease.


Classification: Dessert


While they make an excellent breakfast option, these muffins are also a delightful dessert, offering a perfect balance of sweetness and wholesomeness.


---


Whether you’re looking to recreate a cherished family memory or simply indulge in a wholesome treat, these Whole Wheat Blueberry Muffins are sure to delight. Enjoy each bite, and let it transport you to a place of warmth and nostalgia, just as it does for me. Happy baking!

Read more about Appetizers

Read more about Main Dishes

Read more about Desserts

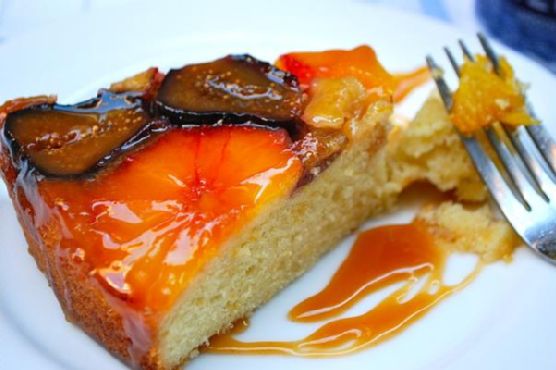
Orange-Fig Teacake with Caramel Glaze | Made by Meaghan Moineau

Orange-Fig Teacake with Caramel Glaze | Made by Meaghan Moineau

Title: "Savoring Sweet Memories: The Delightful Dance of Orange-Fig Teacake with Caramel Glaze"
Description:

Indulge in the harmonious blend of citrusy and fruity notes with our Orange-Fig Teacake, crowned with a luscious caramel glaze. This blog post will guide you through crafting this exquisite dessert while sharing a heartfelt family memory that adds a sprinkle of nostalgia to the mix. Discover the joy of baking and the magic of cherished moments wrapped in a delectable teacake.


---


The Orange-Fig Teacake with Caramel Glaze: A Slice of Nostalgia

There's something undeniably comforting about the aroma of a freshly baked cake wafting through the house. Every year, as the summer sun began to mellow into the gentle warmth of autumn, my grandmother would prepare her legendary Orange-Fig Teacake. The enticing fusion of zesty oranges and sweet figs, complemented by a rich caramel glaze, made it a dessert to remember. It was more than just a cake; it was a tradition, a marker of seasons changing, and a canvas for family memories.


Ingredients:

- 2 cups all-purpose flour


- 1 1/2 teaspoons baking powder


- 1 teaspoon ground cardamom


- 1/2 teaspoon salt


- 1 cup unsalted butter, softened


- 1 cup sugar


- 3 large eggs


- 1/2 cup heavy cream, plus more for caramel


- 1 teaspoon vanilla extract


- 2 navel oranges


- 6-8 fresh figs


- 1 cup sugar (for caramel sauce)


- 1/4 cup water


- 2 tablespoons butter


Instructions:

1. Preheat your oven to 350°F (175°C). Prepare a 9" springform pan by spraying it with baking spray or buttering and sprinkling it with 2 tablespoons of sugar.


2. Zest one orange and add the zest to your mixing bowl. Peel both oranges, removing all pith, and slice into 1/4" rounds. Halve the figs.


3. In a large bowl, combine the softened butter, orange zest, and sugar. Beat until light and fluffy.


4. Add the eggs, heavy cream, and vanilla extract to the mixture. Beat well until smooth.


5. Sift together the flour, baking powder, cardamom, and salt. Gently incorporate the dry ingredients into the batter.


6. Arrange the fig halves and orange slices in the prepared pan. Spoon the batter over the fruit, spreading it evenly and tapping the pan to release air bubbles.


7. Bake for approximately 45 minutes, or until a tester comes out clean. Allow the cake to cool slightly before inverting it onto a rack to cool completely.


8. For the caramel glaze, combine sugar and water in a saucepan over medium-high heat. Once the sugar turns a golden amber, turn off the heat and slowly add the warmed heavy cream, stirring constantly.


9. Add the butter, stirring until smooth. Let the glaze cool for a few minutes before brushing it over the cake while still warm.


A Slice of Memory:

I vividly recall the annual family gatherings where my grandmother would serve this delightful creation. As children, my siblings and I would gather around the kitchen table, eagerly watching her expertly layer the figs and oranges before gently spreading the batter. The kitchen would fill with the sweet and spicy aroma of baking cardamom and citrus. The anticipation of that first bite, the sweet burst of orange and fig mingling with the creamy caramel, was pure bliss. Each slice of the teacake was a reminder of the love and warmth that bound our family together.


With every bite of this Orange-Fig Teacake, I am transported back to those cherished moments, surrounded by laughter and the comforting embrace of family. I hope this recipe brings the same joy and warmth to your home as it has to mine.


Difficulty Rating: 6/10
Classification: Dessert

Whether you're a seasoned baker or a novice in the kitchen, this teacake offers a delightful challenge that promises to reward you with a taste experience steeped in history and heart. Enjoy the journey of baking, and may each bite bring you as much joy as it has brought my family over the years.

Read more about Appetizers

Read more about Main Dishes

Read more about Desserts

Knockwurst with sauerkraut | Made by Meaghan Moineau

Knockwurst with sauerkraut | Made by Meaghan Moineau

Title: A Taste of Tradition: Knockwurst with Sauerkraut
Description: Dive into a heartwarming culinary journey with our Knockwurst with Sauerkraut recipe. This delightful main dish blends savory and sweet flavors, capturing the essence of a cherished family tradition. Rated 5 out of 10 in difficulty, it's a dish that's as accessible as it is delicious. Join us as we explore the rich history and personal stories behind this comforting classic.

---


A Taste of Tradition: Knockwurst with Sauerkraut


There’s something magical about the way food can transport us back in time, evoking memories long tucked away in the corners of our minds. For me, Knockwurst with Sauerkraut is one such dish that never fails to whisk me back to the warm, bustling kitchen of my grandmother’s house.


Every Sunday, my family would gather around her old wooden dining table, the air thick with anticipation and the fragrant aroma of knockwurst sizzling in the pan. My grandmother, with her flour-dusted apron and twinkling eyes, would hum her favorite tunes as she prepared this beloved meal, a ritual that has since become a cherished family tradition.


Ingredients:

- 1 onion, chopped

- 1 cup beer


- 1 cup water


- 2 tablespoons cornstarch


- 2 tablespoons brown mustard


- 1 tablespoon molasses


- 1 teaspoon caraway seed


- 1/2 teaspoon ground allspice


- 1/4 teaspoon pepper


- 1 rutabaga, peeled and cubed


- 6 cooked knockwurst sausages


- 2 cooking apples, cored and cut into wedges


- 1 can (16 ounces) sauerkraut, drained and rinsed


Instructions:


1. Brown the Knockwurst: Begin by buttering a medium fry pan. Heat the knockwurst until browned, about 10-12 minutes, ensuring they are evenly cooked and flavorful.
2. Prepare the Sauerkraut: Drain the sauerkraut, rinse it under cold water, and drain well to remove excess salt and tang.
3. Cook the Onion: In a large pot, cook the chopped onion until tender but not browned, allowing its natural sweetness to emerge.
4. Combine and Thicken: Stir in the beer for a rich, malty base. In a 2-cup glass measure, combine water, cornstarch, brown mustard, molasses, caraway seed, allspice, and pepper. Stir this mixture into the onions and cook until thickened and bubbly.
5. Add the Vegetables: Add the cubed rutabaga, cover, and cook for 15 minutes until slightly softened.
6. Mix Everything Together: Stir in the browned knockwurst, apple wedges, and rinsed sauerkraut. Cover and cook for an additional 15 to 20 minutes, allowing the flavors to meld and the apples to become tender.

A Nostalgic Memory


As a child, I remember standing on tiptoes, peeking over the kitchen counter to watch my grandmother masterfully blend these ingredients. The kitchen would fill with laughter and stories, as my grandfather shared tales of his childhood in Germany, where knockwurst was a staple on their dinner table. This dish was more than just a meal; it was a celebration of our heritage and a reminder of the love that binds us.


Difficulty Rating: 5/10


This recipe is perfect for those looking to explore traditional flavors without feeling overwhelmed. Its straightforward steps make it accessible to both novice and experienced cooks alike.


Classification: Main Dish


Knockwurst with Sauerkraut is a classic main dish, ideal for family gatherings or a comforting weeknight dinner. Serve it with crusty bread or mashed potatoes to soak up the delicious sauce.


---


Food has a unique way of connecting us to our past, and with each bite of this Knockwurst with Sauerkraut, you too can share in a piece of my family's story. Whether you’re seeking comfort, tradition, or simply a new culinary adventure, this recipe promises to deliver all that and more. Enjoy!

Read more about Appetizers

Read more about Main Dishes

Read more about Desserts

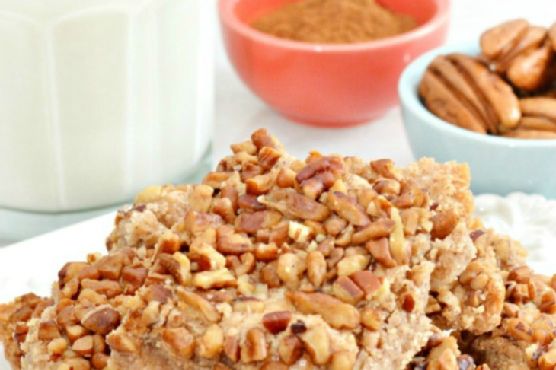
Cinnamon Nut Squares | Made by Meaghan Moineau

Cinnamon Nut Squares | Made by Meaghan Moineau

Title: Warm Memories and Sweet Treats: The Irresistible Allure of Cinnamon Nut Squares
Description: Discover the warmth of nostalgia with our Cinnamon Nut Squares—a delightful dessert that combines the rich flavors of cinnamon and pecans with a heartwarming family story. This easy-to-make recipe will become a cherished staple in your kitchen, perfect for creating new memories.

---


There’s something undeniably special about the aroma of cinnamon wafting through the house. It’s a scent that seems to wrap you in a warm hug, transporting you back to cherished moments of laughter and love. For me, the enchanting smell of cinnamon always takes me back to my grandmother’s cozy kitchen, where I first discovered the magic of baking.


Cinnamon Nut Squares: A Taste of Nostalgia
Ingredients:

- 1 cup butter, softened


- 1 teaspoon butter vanilla bakery emulsion


- 1 tablespoon ground cinnamon


- 1 large egg, separated


- 2 cups all-purpose flour


- 1 cup chopped pecans


- 1/2 teaspoon salt


- 3/4 cup sugar


Instructions:

1. Preheat your oven to 300 degrees Fahrenheit and generously spray a 14x8x2 inch oblong baking pan with baking spray.


2. In a mixing bowl, cream the butter, gradually adding the sugar. Continue beating until the mixture is light and fluffy, reminiscent of the joy a simple kitchen can bring.


3. Add the egg yolk, flour, cinnamon, salt, and vanilla emulsion. Mix well until the dough is thick, just like the bond of family.


4. Press the dough evenly into the prepared pan, creating a crust that may be thin but is full of flavor and love.


5. Lightly beat the egg white and brush it over the top of the dough. Sprinkle the chopped pecans evenly, pressing them gently into the dough.


6. Bake for about 50 minutes or until the edges turn golden brown, echoing the golden memories of yesteryears.


7. Remove from the oven and cut into squares while still hot. Let them cool and use a spatula to remove them from the pan.


8. Store in a tightly covered container; these sweet squares will keep for up to a week, inviting you to indulge in nostalgia one bite at a time.


A Walk Down Memory Lane

The first time I tasted these delightful squares was during a crisp autumn afternoon at my grandmother’s house. I was a curious child, always eager to help in the kitchen, and the task of pressing the dough into the pan was mine. I remember the way my small hands moved over the dough, feeling the coolness of the butter and the warmth of the cinnamon. It was a simple task, but the pride it brought was immense.


As the squares baked, my grandmother would regale me with stories of her own childhood, tales of family gatherings and the comforting presence of home-baked goods. The kitchen became a place where the past and the present intertwined, where each ingredient was a thread in the tapestry of our family history.


A Sweet Conclusion

Cinnamon Nut Squares are more than just a dessert—they are a vessel for memories, a tribute to the bonds that tie us together. With a difficulty rating of 3 out of 10, they are accessible to bakers of all levels, inviting everyone to create their own cherished moments.


Classified as a dessert, these squares are perfect for sharing at family gatherings, holiday parties, or simply as a treat to enjoy with a cup of tea. As you bake and savor these little squares of joy, may they remind you of the warmth of family and the sweetness of tradition.


So, gather your loved ones, preheat your oven, and let the delightful aroma of Cinnamon Nut Squares fill your home with memories old and new.

Read more about Appetizers

Read more about Main Dishes

Read more about Desserts

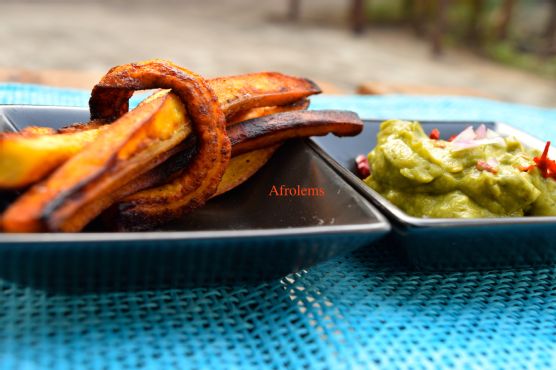
Buttered Plantain Fries and Seasoned Avocado | Made by Meaghan Moineau

Buttered Plantain Fries and Seasoned Avocado | Made by Meaghan Moineau

Title: Reliving Family Moments with Buttered Plantain Fries and Seasoned Avocado
Description: Dive into the heartwarming world of culinary nostalgia with our Buttered Plantain Fries and Seasoned Avocado recipe. This easy-to-make appetizer is not only a delightful treat for your taste buds but also a gateway to cherished family memories. Discover the blend of crispy plantains and creamy avocado that promises to be both a crowd-pleaser and a conversation starter at any gathering.

---


Buttered Plantain Fries and Seasoned Avocado: A Taste of Home

There's something magical about the aroma of buttered plantains sizzling in the kitchen. It takes me back to lazy Sunday afternoons, where the warmth of family laughter filled the air, mingling seamlessly with the comforting smell of plantains frying on the stove. My grandmother, with a knowing smile, would always say that the secret to the best plantain fries was patience—letting them brown to perfection.


Ingredients:


- 1 ripe plantain


- 2 tablespoons butter


- 1 tablespoon vegetable oil


- 1 ripe avocado


- 1 chili pepper, finely chopped


- 1 clove of garlic, minced


- Salt, to taste


- Onions, chopped for garnish


Instructions:


1. Prepare the Plantains:

- Begin by peeling the plantain and slicing it into thin stripes. This step is crucial; the thinner the slices, the crispier the fries.


2. Fry the Plantains:

- In a medium-sized pan, pour in the butter and vegetable oil. Heat slowly until the butter melts and the mixture is hot.


- Gently toss in the plantain slices, ensuring they are evenly coated with the butter and oil.


- Allow them to cook, turning occasionally, until they are golden brown on all sides. The aroma at this stage is simply irresistible.


3. Prepare the Avocado:

- While the plantains are frying, mash the avocado in a bowl until smooth and creamy.


- Season with a pinch of salt, and stir in the chopped chili pepper, minced garlic, and some of the chopped onions. This seasoned avocado mix is the perfect complement to the crispy plantains.


4. Serve:

- Arrange the buttered plantain fries on a serving platter and accompany them with a generous dollop of the seasoned avocado. Garnish with additional chopped onions for a touch of freshness.


Nostalgic Story:


Every time I make this dish, I'm transported back to my grandmother's kitchen. I remember sitting on the counter, swinging my legs as I watched her expertly slice the plantains. She would tell stories of her childhood, of how plantains were a staple in her family's home. Her tales of family gatherings and the joy of sharing meals created a legacy that I now pass on to my own children. The combination of crispy plantains and creamy avocado has always been more than just food; it’s a reminder of love, family, and tradition.


Difficulty Rating:


- Difficulty: 3/10

This dish is simple to prepare, making it perfect for both novice cooks and seasoned chefs looking for a quick yet satisfying appetizer.


Classification:


- Appetizer

Whether you're hosting a family gathering or simply want a nostalgic snack, Buttered Plantain Fries and Seasoned Avocado is a dish that bridges the past with the present, bringing a slice of home to your table. Enjoy the journey of flavors and memories with every bite.

Read more about Appetizers

Read more about Main Dishes

Read more about Desserts

Ginger Lentils With Carrots and Fresh Herbs | Made by Meaghan Moineau

Ginger Lentils With Carrots and Fresh Herbs | Made by Meaghan Moineau

A Symphony of Flavors: Ginger Lentils with Carrots and Fresh Herbs


A Culinary Journey Down Memory Lane


Have you ever stumbled upon a dish that not only tantalizes your taste buds but also transports you back to cherished moments from the past? Our recipe for Ginger Lentils with Carrots and Fresh Herbs is one such culinary masterpiece. It's a delightful blend of vibrant ingredients that tells a story of tradition, warmth, and nostalgia, all in one bowl.


Description


Discover the zestful symphony of flavors in our Ginger Lentils with Carrots and Fresh Herbs. This dish combines the earthy richness of lentils with the zesty brightness of fresh ginger, creating a harmonious balance that is both comforting and invigorating. Carrots, sautéed with aromatic cumin seeds, add a subtle sweetness, while fresh mint leaves lend a refreshing touch. The creamy avocado and tangy lemon juice bring all the elements together, creating a dish that is as wholesome as it is delicious. Perfect as a main dish, this recipe is a celebration of seasonal produce and simple, nourishing ingredients.


Ingredients


- 1 avocado, diced


- 2 medium carrots, peeled and sliced


- 1 teaspoon cumin seeds


- 1 tablespoon fresh ginger, peeled and grated


- A handful of fresh mint leaves, chopped


- Juice of 1 lemon


- 1 cup lentils, cooked


- 1 tablespoon raw honey


- Sea salt, to taste


Instructions


1. Begin by peeling and slicing the carrots. In a skillet, sauté the carrot slices with cumin seeds over medium heat for about 15 minutes, or until they are tender and aromatic. Remove from the heat and let them cool.


2. While the carrots are cooling, peel and grate the fresh ginger. In a small bowl, combine the grated ginger with the juice of one lemon, raw honey, fresh mint, and sea salt. Taste the dressing and adjust the seasoning to your liking.


3. In a large mixing bowl, combine the sautéed carrots, cooked lentils, and diced avocado. Pour the ginger-mint dressing over the mixture and toss gently to ensure everything is well coated.


4. Serve immediately, and enjoy the medley of flavors and textures.


A Nostalgic Family Memory


As I prepare this dish, I'm reminded of lazy Sunday afternoons spent in my grandmother's kitchen. Her home was always filled with the comforting aroma of spices and the sound of laughter. She had a knack for turning simple ingredients into extraordinary dishes, much like this one. I remember sitting at her kitchen table, eagerly waiting for a taste of whatever she was cooking. It was in her kitchen that I learned the art of balancing flavors and appreciating the beauty of fresh, wholesome ingredients.


This recipe is a tribute to those times and to the love and warmth that my grandmother infused into every meal she made. Each bite of these ginger lentils brings me back to those cherished moments, reminding me of the importance of family, tradition, and good food.


Difficulty


Rated 4 out of 10, this recipe is accessible to cooks of all skill levels.


Classification


This flavorful dish makes a satisfying and nutritious main dish, perfect for a cozy dinner or a special family gathering.


---


Whether you're cooking for your family or simply seeking a delicious meal to enjoy on your own, our Ginger Lentils with Carrots and Fresh Herbs is sure to delight. With its vibrant ingredients and nostalgic roots, it's more than just a dish—it's a journey back to the heart of home cooking.

Read more about Appetizers

Read more about Main Dishes

Read more about Desserts

Ancho Chipotle Chili | Made by Meaghan Moineau

Ancho Chipotle Chili | Made by Meaghan Moineau

Title: "A Hearty Bowl of Memories: Ancho Chipotle Chili"
Description: Dive into the rich, smoky flavors of our Ancho Chipotle Chili, a dish that not only warms the body but also the soul. Infused with nostalgia and packed with robust spices, this recipe will transport your taste buds to a cherished family gathering. A main dish that is both fulfilling and heartwarming, learn how to create your own culinary masterpiece that rates a 6 out of 10 in difficulty.

---


A Hearty Bowl of Memories: Ancho Chipotle Chili

As the leaves turn golden and the crisp autumn air ushers us indoors, nothing beckons the warmth of shared family moments quite like a steaming pot of chili. Today, I’m taking you on a flavorful journey with our Ancho Chipotle Chili, a recipe that intertwines the zest of vibrant ingredients with the tapestry of heartfelt memories.


A Nostalgic Aroma

The first time I encountered the savory embrace of Ancho Chipotle Chili was during one of our family reunions at my grandparents' rustic cabin. The aroma of toasted chilies and seasoned beef wafted through the air, creating a magnetic pull that drew everyone towards the kitchen. Just like our family, this dish is a harmonious blend of diverse elements, each ingredient contributing its unique note to the symphony of flavors.


The Recipe Unfolds

*Ingredients:*


- 1 dried ancho chile


- 1 dried chipotle chile


- 5 grams vegetable bouillon powder


- 1 teaspoon cumin


- Fresh cilantro, for garnish


- 1 lb ground beef


- 1 cup mushrooms, chopped


- 1 onion, diced


- 1 teaspoon dried oregano


- 1 red bell pepper, chopped


- Salt and pepper to taste


- 1 can (15 oz) tomato sauce


- 500 ml water


*Instructions:*


1. Preparing the Chilies: Begin by slicing open the dried ancho and chipotle chilies. Remove the seeds and pith carefully. Toast the chilies in a warm skillet over medium heat, pressing them flat with a spatula until they're fragrant—just a few seconds on each side. This step is crucial for releasing their smoky essence. Transfer the toasted chilies to a bowl, pour 250 ml of boiling water over them, and let them soak for at least 15 minutes.
2. Sautéing the Vegetables: In a large pot, sauté the bell pepper, onion, and mushrooms over medium heat until they soften and release their flavors.
3. Frying the Beef: Simultaneously, in a separate hot skillet, fry the ground beef until it's crispy and browned. The sizzle and aroma will be your guide.
4. Blending the Chilies: As the beef cooks, blend the soaked chilies with their soaking liquid. This forms a rich chili paste that is the heart of our dish.
5. Simmering the Chili: Combine the crispy beef with the sautéed vegetables in the large pot. Pour in the tomato sauce and blended chili paste. If the mixture seems a bit dry, add some broth—made from the remaining 250 ml of water and bouillon powder—until everything is just covered. Season generously with salt, pepper, cumin, and oregano to taste.
6. Let It Simmer: Allow the chili to simmer gently for about 45 minutes, or until it reaches your desired thickness.
7. Serve and Savor: Garnish with fresh cilantro and serve hot, reveling in the deep, smoky flavors that promise comfort with every spoonful.
A Taste of Togetherness

This dish, with its complexity and warmth, mirrors the very essence of family gatherings. Though the ingredients are varied, together they create a cohesive and comforting experience—much like those cherished times spent with loved ones. So, as you prepare this Ancho Chipotle Chili, may it not only fill your home with its inviting aroma but also your heart with the warmth of fond memories.


Difficulty Rating: 6/10
Classification: Main Dish

In conclusion, every bowl of Ancho Chipotle Chili is more than just a meal; it's an invitation to reminisce, to connect, and to savor the moment. Whether you're sharing it with family or enjoying a quiet evening alone, this dish is sure to become a staple in your autumn repertoire, just as it has in mine.

Read more about Appetizers

Read more about Main Dishes

Read more about Desserts

Michelada | Made by Meaghan Moineau

Michelada | Made by Meaghan Moineau

Title: Savoring Summer: The Perfect Michelada Recipe for Family Gatherings
Description: Dive into the refreshing world of Micheladas with this easy-to-make recipe that combines the zest of lime and the kick of spices. Perfect for those warm summer evenings spent with family.

---


As the summer sun set over the horizon, painting the sky in hues of orange and pink, our family gathered on the porch, ready to enjoy another cherished tradition: making Micheladas. This tangy, spicy beverage, with its origins rooted in Mexican culture, has always been a staple at our family gatherings, evoking nostalgia and laughter with every sip.


The Michelada Recipe: A Simple Yet Flavorful Classic
Creating the perfect Michelada is an art that balances simplicity with a burst of flavor. Here’s how to make it:
Ingredients:

- Lager (your choice)


- Lime


- Salt


- Tabasco sauce


- Worcestershire sauce


Instructions:

1. Salt the rim of a tall glass to add a savory touch right from the first sip.


2. Squeeze in the juice of half to a whole large lime, adjusting to your taste preference for that refreshing citrus kick.


3. Add a dash of Tabasco sauce for heat and a dash of Worcestershire sauce for depth of flavor.


4. Pour in the lager and gently mix to combine the flavors without losing the fizz.


Family Memory: A Toast to Togetherness

Every year, as the days grew longer and the evenings warmer, my grandmother would lead us in preparing Micheladas on her sprawling Southern porch. It wasn’t just about the drink itself but the ritual of crafting it together that made it special. I remember her gentle hands demonstrating the perfect amount of salt for the rim, her laughter ringing like a melody as she shared stories of her youth.


We would all take turns squeezing the limes, our fingers sticky with juice, while the scent of citrus filled the air. Each family member would add their own twist—a little extra Tabasco for those who liked it spicy or a touch more lime for the tangy enthusiasts. It was a collaborative effort that brought us closer, each glass a testament to our shared history and individual tastes.


Difficulty Rating: 2/10

The Michelada is incredibly easy to make, requiring just a few simple steps and ingredients. It’s the perfect drink for both novice and seasoned cocktail makers alike.


Classification: Appetizer

While not an appetizer in the traditional sense, the Michelada serves as a refreshing prelude to a meal, awakening the palate and setting the stage for the flavors to come.


---


Next time you find yourself surrounded by family on a lazy summer evening, consider whipping up a batch of Micheladas. Not only will you be crafting a delicious beverage, but you'll also be creating memories that will linger long after the last drop is gone. Cheers to togetherness and the simple pleasures of life!

Read more about Appetizers

Read more about Main Dishes

Read more about Desserts

Baked Ziti Or Rigatoni | Made by Meaghan Moineau

Baked Ziti Or Rigatoni | Made by Meaghan Moineau

Title: "Savor the Comfort: Baked Ziti/Rigatoni Recipe to Warm the Heart and Home"
Description: Dive into the rich, comforting flavors of this Baked Ziti or Rigatoni recipe—a classic Italian-American dish that's sure to become a family favorite. With gooey mozzarella, creamy ricotta, and a savory tomato sauce, this main dish is both easy to prepare and delightful to eat. Follow along as we share not only the simple steps to this delicious pasta bake but also a nostalgic family story that highlights the warmth and love this dish brings to the table.

---


A Taste of Home: Baked Ziti/Rigatoni


When the air turns crisp and the leaves begin to fall, there's nothing quite like indulging in a hearty dish that feels like a warm hug. Baked Ziti or Rigatoni is that dish for many families, a staple at gatherings and a beacon of comfort on chilly evenings. This recipe is a straightforward yet flavorful delight, earning a difficulty rating of 4 out of 10, making it an accessible main dish for cooks of all levels.


Ingredients:

- Cooked ziti or rigatoni

- 1 egg


- 1 cup Parmesan cheese, divided


- 1 cup ricotta cheese


- 2 cups shredded mozzarella cheese


- 3 1/2 cups spaghetti sauce, divided


Instructions:

1. Preheat your oven to 375°F (190°C).

2. In a large mixing bowl, combine the cooked ziti, egg, 1/2 cup of Parmesan cheese, ricotta, shredded mozzarella, and 1 1/2 cups of spaghetti sauce. Mix until well blended.


3. In a 2 1/2 quart baking dish, spread 1/2 cup of spaghetti sauce evenly across the bottom.


4. Pour the ziti mixture into the baking dish, spreading it out evenly.


5. Top the ziti mixture with the remaining 1 1/2 cups of spaghetti sauce.


6. Sprinkle the top with the remaining 1/2 cup of Parmesan cheese.


7. Bake in the preheated oven for 30 minutes, or until the top is slightly browned and bubbly.


8. Allow to cool for a few minutes before serving.


A Family Memory


For me, Baked Ziti has always been more than just a meal; it's a cherished family tradition. I remember one particularly chilly autumn day when my grandmother decided to teach me how to make her famous Baked Ziti. The kitchen was filled with the scent of simmering tomato sauce and fresh herbs, a sensory invitation to warmth and comfort.


As we prepared the dish together, my grandmother shared stories of her own childhood, recounting how her mother would make this very dish for Sunday dinners. It was a ritual of love, bringing the family together after a long week. We laughed as we accidentally spilled a bit of mozzarella on the floor, and she playfully nudged me with her elbow, reminding me that cooking is just as much about the memories we create as it is about the food itself.


When the ziti emerged from the oven, golden and bubbling, it was as if time had slowed down, allowing us to savor the moment. Each bite was rich and satisfying, filled with the flavors of tradition and the warmth of family bonds. Even now, years later, every time I bake ziti, I am transported back to that cozy kitchen, enveloped by the love and laughter of generations past.


Conclusion


Baked Ziti or Rigatoni is more than just a recipe; it's a bridge to the past, a tradition to be savored and shared. Whether you're cooking for loved ones or enjoying a quiet meal at home, this dish promises comfort and joy with every bite. So gather your ingredients, preheat your oven, and let this simple yet exquisite recipe become a part of your family's cherished memories.

Read more about Appetizers

Read more about Main Dishes

Read more about Desserts

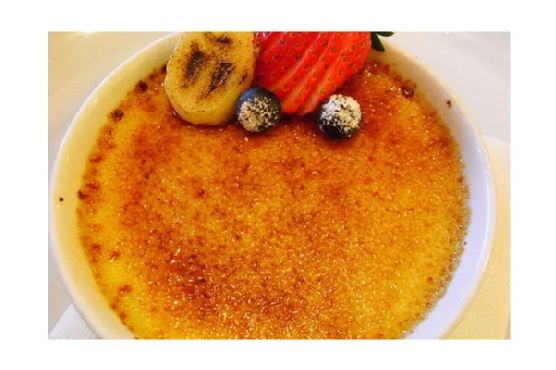
Banana Creme Brulee | Made by Meaghan Moineau

Banana Creme Brulee | Made by Meaghan Moineau

Banana Creme Brulee: A Sweet Dance of Nostalgia and Decadence


Description


Dive into a world where creamy custard meets caramelized perfection. Our Banana Creme Brulee is not only a delightful dessert but a gateway to cherished family memories. Discover the rich flavors of bananas and vanilla bean, topped with a golden sugar crust that cracks with a satisfying tap. Ideal for those seeking a touch of elegance, this dessert is a symphony of flavors and textures. Rated 6/10 in difficulty, it's a rewarding challenge for any home cook.


---


A Family Legacy in a Spoonful


Every time I whip up a batch of Banana Creme Brulee, I'm transported back to the cozy kitchen of my grandmother's house. The aroma of vanilla and caramelized sugar would envelop the room, a sweet prelude to Sunday dinners with the family. My grandmother, an avid cook, had a knack for turning simple ingredients into magical creations. Her Banana Creme Brulee was legendary, not just for its taste, but for the love and warmth it symbolized.


As a child, I would watch in awe as she carefully sliced the bananas, her hands moving with practiced grace. The way she split the vanilla bean pod and scraped out the seeds was like witnessing a maestro at work. Her secret, she would say with a wink, was in the gentle simmering of the cream, coaxing out every bit of flavor from the vanilla.


The highlight, of course, was the caramelization. My cousins and I would gather around the kitchen island, eyes wide with anticipation, as she expertly wielded the blowtorch, transforming the demerara sugar into a glistening, amber crust. That first crack of the spoon against the hardened top was music to our ears, signaling the start of another sweet memory.


Recipe: Banana Creme Brulee


Ingredients:

- Bananas


- Little demerara sugar


- Egg yolks


- Heavy cream


- Sugar


- Vanilla bean pod


Instructions:
1. Infuse the Cream: In a medium saucepan, combine the cream and vanilla bean pod. Bring slowly to a boil, then remove from heat just before it reaches boiling.
2. Prepare the Bananas: Slice bananas thickly and divide them between 8 small ramekins.
3. Mix the Custard: In a mixing bowl, beat egg yolks, caster sugar, and vanilla seeds until thick and creamy. Pour the hot cream over the egg mixture, stirring continuously.
4. Thicken the Custard: Rinse and dry the saucepan, then pour in the custard mixture. Heat gently, stirring constantly, until the mixture thickens. Be sure to stir right into the corners to prevent curdling. Do not let it boil.
5. Assemble and Chill: Pour the custard through a sieve into the ramekins, filling them to the top. Set aside to cool, then refrigerate overnight.
6. Caramelize the Tops: Dust each custard with a thin layer of demerara sugar. Place under a very hot grill for a few seconds until the sugar melts into a shiny caramel. Leave to cool and harden.
Serves: 8
Difficulty: 6/10
Category: Dessert

Conclusion


In every spoonful of Banana Creme Brulee, there's a story waiting to be told—a tale of family gatherings, shared laughter, and the comforting embrace of a beloved recipe. Whether you're recreating this dessert for the first time or the hundredth, may it bring a touch of nostalgia and sweetness to your table.

Read more about Appetizers

Read more about Main Dishes

Read more about Desserts

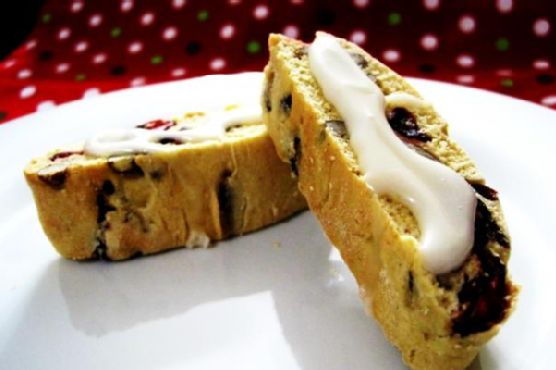
Cranberry Orange Biscotti | Made by Meaghan Moineau

Cranberry Orange Biscotti | Made by Meaghan Moineau

Title: "Cranberry Orange Biscotti: A Taste of Nostalgia and Citrus Delight"
Description: Dive into the delightful world of Cranberry Orange Biscotti, a perfect fusion of tart cranberries and zesty orange. This dessert not only serves as a delicious treat but also carries a nostalgic family memory, making it a cherished addition to any holiday gathering.

---


There's something magical about the aroma of freshly baked biscotti wafting through the house, especially when the flavors of cranberry and orange meld together in perfect harmony. This Cranberry Orange Biscotti recipe is more than just a delightful dessert; it's a journey back to cherished family memories and festive gatherings.


A Nostalgic Journey

Growing up, my grandmother's kitchen was the heart of every holiday season. The warmth of the oven and the vibrant scents of citrus and spices created an inviting atmosphere that drew everyone in. Every year, as the first cold snap of winter hinted at the approaching holidays, my grandmother would pull out her well-worn recipe card for Cranberry Orange Biscotti.


I remember sitting at the kitchen table, watching her expertly mix the ingredients—unsalted butter, sugar, and the zest of fresh oranges—while recounting stories of her childhood. She'd tell us how her mother, my great-grandmother, would bake these very biscotti during the festive season, using them as a means to bring the family together over laughter, stories, and the occasional cup of hot cocoa.


As a child, I was fascinated by the process. The transformation of simple ingredients like flour, whole wheat pastry flour, and baking powder into golden, slightly cracked logs seemed like magic. When she added the dried cranberries and pecans, I could hardly wait for the first taste. The tartness of the cranberries paired with the citrusy sweetness of the orange glaze was a combination that danced on the palate.


The Recipe

*Ingredients:*


- 1 tablespoon baking powder


- 1 cup confectioners' sugar


- 1 cup dried cranberries


- 3 large eggs


- 2 cups all-purpose flour


- 1/2 cup fresh orange juice


- 2 tablespoons orange zest


- 1 cup pecans, chopped


- 1/4 teaspoon salt


- 1 cup sugar


- 1/2 cup unsalted butter, softened


- 1 teaspoon vanilla extract


- 1 cup whole wheat pastry flour


*Instructions:*


1. Preheat the oven to 350°F (175°C), positioning racks in the upper and lower thirds. Line two baking sheets with parchment paper.


2. In a mixer, beat the butter and sugar until light. Add eggs one at a time, mixing well between each. Stir in orange zest and vanilla.


3. In a separate bowl, whisk together the flours, baking powder, and salt. Gradually add to the wet mixture, mixing until just combined. Fold in cranberries and pecans.


4. Transfer dough to a floured surface, divide into three pieces, and shape into 12-inch logs. Place on baking sheets.


5. Bake for 15-18 minutes, switching sheet positions halfway through. Let rest for 10 minutes. Reduce oven to 300°F (150°C).


6. Slice logs diagonally into 3/4-inch pieces. Lay slices on their sides and bake for 10-15 minutes until golden.


7. For the glaze, mix confectioners' sugar with orange juice to desired consistency. Drizzle over warm biscotti.


Difficulty: 6/10
Classification: Dessert

This biscotti is not just a treat but a tradition, a way to connect with loved ones both past and present. As I bake these biscotti today, I'm reminded of those cherished moments in my grandmother's kitchen, the stories shared, and the love that went into each batch. Every bite is a taste of nostalgia, bringing family and friends together, just as it always has.

Read more about Appetizers

Read more about Main Dishes

Read more about Desserts

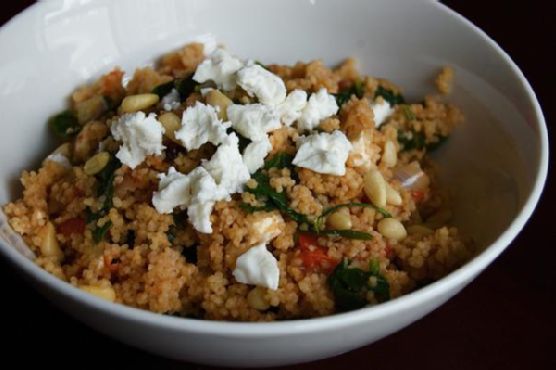
Spinach, Tomato & Onion Couscous | Made by Meaghan Moineau

Spinach, Tomato & Onion Couscous | Made by Meaghan Moineau

Title: A Taste of Home: Spinach, Tomato & Onion Couscous
Description: Discover the warmth and nostalgia of our Spinach, Tomato & Onion Couscous recipe. This delightful dish, enriched with feta and pine nuts, is more than just a meal; it's a journey back to cherished family gatherings. Join us as we explore this wholesome main dish, easy enough for a weeknight dinner yet special enough to evoke fond memories. Difficulty: 3/10.

---


As the days grow shorter and the air turns crisp, I find myself yearning for the comforting flavors of my childhood. One dish that always brings back fond memories is the Spinach, Tomato & Onion Couscous. This simple yet flavorful meal is more than a recipe; it's a reminder of cozy family dinners and the laughter that filled our home.


I remember the first time my mother made this dish. It was a chilly autumn evening, and the kitchen was filled with the aromatic blend of sautéed onions and tomatoes. My siblings and I would gather around the table, eagerly waiting for the vibrant colors and enticing smells of the meal to fill our plates.


Ingredients You'll Need:

- Whole-wheat couscous


- Fresh spinach


- Tomatoes


- Red onion


- Olive oil


- Pine nuts


- Feta cheese


- Salt


- Water


Instructions:

1. Begin by bringing water and half the salt to a boil in a small pan. Once bubbling, add the couscous, give it a quick stir, and cover with a lid. Remove from heat, allowing it to sit and absorb the flavors while you prepare the vegetables.


2. In a large pan over medium-high heat, warm the olive oil. Once hot, add the onions, sautéing until they begin to brown. The sizzling sound and sweet aroma always remind me of watching my mother expertly move around the kitchen, a comforting sight that never grows old.


3. Add the tomatoes and remaining salt, sautéing until they start to wilt—this takes merely seconds. Then, add the spinach, cooking just until it wilts but retains its bright, inviting green color. Stir in the pine nuts, and remove the pan from the heat. Season with salt and pepper to taste.


4. Pour the couscous into a large bowl, add the sautéed vegetables, and sprinkle in the crumbled feta. Toss everything together until well combined, and top with extra feta for that rich, tangy finish.


A Nostalgic Journey:

This dish was always a family favorite, especially during fall gatherings. I vividly remember the warmth of the kitchen, the laughter echoing through the house, and the way this meal brought us all together. My grandmother would often share stories from her youth as we savored each bite, her tales as rich and satisfying as the meal itself.


As you prepare this Spinach, Tomato & Onion Couscous, I hope it brings you the same sense of comfort and connection it has always brought to my family. It's an easy-to-make main dish, with a difficulty level of just 3 out of 10, yet its simplicity is what makes it so special.


Whether you're creating new memories or reminiscing about old ones, may this dish warm your heart and home as it has mine for many years. Enjoy this culinary journey, and let it be a staple in your family traditions for generations to come.

Read more about Appetizers

Read more about Main Dishes

Read more about Desserts

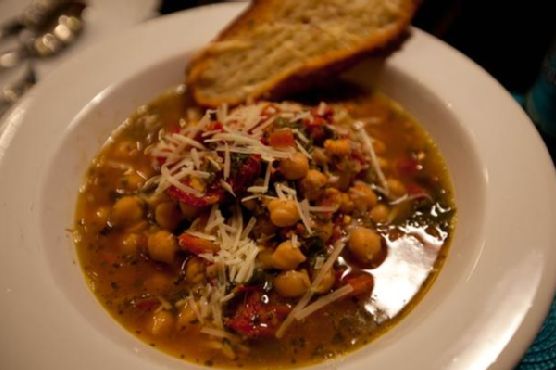
Lemon Chickpea & Tomato Stew | Made by Meaghan Moineau

Lemon Chickpea & Tomato Stew | Made by Meaghan Moineau

Delightful Comfort: Lemon Chickpea & Tomato Stew
Description:

Indulge in the heartwarming flavors of our Lemon Chickpea & Tomato Stew, a dish that combines the vibrant essence of fresh ingredients with the nostalgia of cherished family gatherings. This stew, lovingly crafted with aromatic herbs and zesty lemon, offers a delightful culinary experience that transports you back to cozy family dinners. Perfect as a main dish, it pairs wonderfully with warm crusty bread, making it a comforting choice for any occasion.


---


A Nostalgic Journey Through Flavor

The aroma of lemon zest mingling with garlic and oregano wafting through the kitchen instantly takes me back to my grandmother's cozy home on a chilly autumn evening. She would often prepare her signature Lemon Chickpea & Tomato Stew, a dish that became a staple at our family gatherings. As the stew simmered gently on the stove, we would gather around the kitchen table, the warmth of the oven-dried tomatoes and the subtle heat of the jalapeño chili creating an inviting atmosphere.


I remember my grandmother recounting tales of her own childhood, how this dish was a symbol of love and togetherness in her home. The tangy burst of fresh lemon zest combined with the hearty chickpeas and rich chicken broth created a symphony of flavors that brought comfort to the soul. Each spoonful was a reminder of the love and laughter shared around the table, a tradition I now carry forward with my own family.


---


Lemon Chickpea & Tomato Stew Recipe
Ingredients:

- Olive oil


- 1 shallot, finely chopped


- 2 garlic cloves, minced


- 1 canned chickpeas, drained and rinsed


- 1 jalapeño chili, sliced


- 1/2 teaspoon dried oregano


- 1 bay leaf, broken


- 1/4 teaspoon crushed red pepper


- Salt & pepper to taste


- 4 cups chicken broth


- Zest and juice of 1 fresh lemon


- 1/2 cup dried oven tomatoes


- 2 cups fresh spinach, loosely packed


Instructions:

1. In a large saucepan, heat the olive oil over medium heat. Add the shallot and garlic, cooking until soft, about 5 minutes.


2. Stir in the chickpeas, jalapeño chili, oregano, bay leaf, and crushed red pepper. Season with salt and pepper. Cook, stirring frequently, until the herbs are fragrant and the chickpeas are hot and starting to brown, about 5-7 minutes.


3. Pour in the chicken broth, lemon zest, and lemon juice. Bring to a boil, then reduce the heat and simmer until the broth is reduced by half, about 20 minutes.


4. Stir in the dried oven tomatoes, garlic, and spinach. Simmer for an additional 5 minutes.


5. Remove the bay leaf, adjust seasoning with salt and pepper, and serve hot with warm crusty bread.


Difficulty Rating: 4/10
Classification: Main Dish

This Lemon Chickpea & Tomato Stew is not just a meal; it's a heartfelt tribute to family traditions and the joy of sharing a delicious dish with loved ones. Its simple preparation and rich flavor profile make it an ideal choice for any home cook looking to create lasting memories around the dinner table. Enjoy this delightful stew and let it become a cherished part of your own family gatherings.

Read more about Appetizers

Read more about Main Dishes

Read more about Desserts

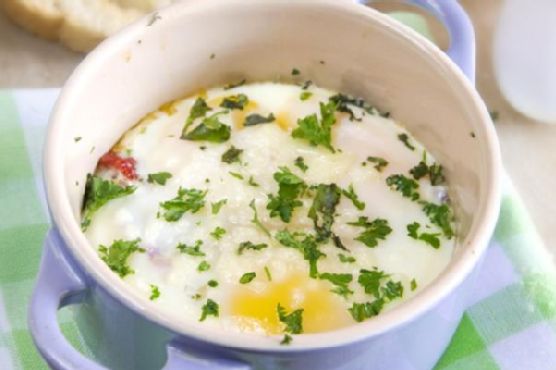
Sun Dried Tomato and Herb Baked Eggs | Made by Meaghan Moineau

Sun Dried Tomato and Herb Baked Eggs | Made by Meaghan Moineau

Title: A Taste of Tradition: Sun Dried Tomato and Herb Baked Eggs
Description: Dive into the heartwarming flavors of our Sun Dried Tomato and Herb Baked Eggs—a simple yet elegant dish that merges the aromatic charm of fresh herbs with the rich, tangy essence of sun-dried tomatoes. Perfect as a main dish for a leisurely brunch, this recipe not only delights the palate but also stirs the soul with memories of family gatherings and cherished traditions.

---


There's something incredibly comforting about a dish that brings back the warmth of family gatherings and the nostalgia of time spent in the kitchen with loved ones. Our Sun Dried Tomato and Herb Baked Eggs is one such recipe—a timeless favorite that has graced our family table for generations, marking countless Sunday brunches and special occasions.


A Family Memory


Growing up, Sunday mornings were a sacred ritual in our household. The kitchen would come alive with the aroma of fresh herbs and the sizzle of olive oil, as my grandmother prepared her signature baked eggs. I fondly remember sitting perched on a stool, watching her every move as she expertly lined the bottom of a ramekin with sun-dried tomatoes, their deep red hues contrasting beautifully against the white porcelain.


"These tomatoes," she would say, "are like little bursts of sunshine captured in a jar." And indeed, they were. Plucked from her garden at the height of summer and preserved with care, those tomatoes carried with them the essence of sunlit days and the promise of comfort in the colder months.


The eggs, nestled atop the tomatoes, were a testament to simplicity—a reminder that the best dishes often require few ingredients, provided they are fresh and full of flavor. As she sprinkled the eggs with freshly chopped basil and parsley, the kitchen filled with an earthy fragrance that was both invigorating and soothing.


The Recipe


Ingredients:

- 2 eggs


- Fresh basil, chopped


- Fresh parsley, chopped


- Olive oil


- Sun-dried tomatoes


Instructions:

1. Preheat your oven to 350°F (175°C).


2. Generously coat the inside of a ramekin or oven-safe dish with olive oil.


3. Line the bottom of the dish with sun-dried tomatoes.


4. Carefully crack two eggs over the tomatoes, ensuring the yolks remain intact.


5. Sprinkle with freshly chopped basil and parsley to taste.


6. Bake uncovered for 15-20 minutes, or until the egg whites are firm.


7. Serve immediately, garnished with additional herbs if desired.


As the eggs bake, the sun-dried tomatoes infuse the dish with their rich, tangy flavor, while the herbs add a layer of freshness that elevates the entire experience. Served straight from the oven, these baked eggs are a testament to the beauty of uncomplicated, wholesome cooking.


Difficulty and Classification


This dish is a breeze to prepare, with a difficulty rating of just 3 out of 10. Its simplicity makes it an ideal main dish for brunch, perfect for both novice cooks and seasoned culinary enthusiasts. Whether you're recreating cherished family memories or starting new traditions of your own, these Sun Dried Tomato and Herb Baked Eggs are sure to become a beloved staple in your kitchen.


---


So gather your loved ones, set the table, and let the heartwarming flavors of this classic dish transport you to a place where food is not just nourishment, but a celebration of family and tradition.

Read more about Appetizers

Read more about Main Dishes

Read more about Desserts

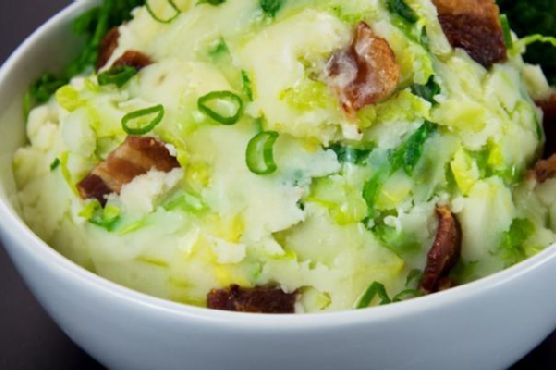
Colcannon | Made by Meaghan Moineau

Colcannon | Made by Meaghan Moineau

A Taste of Tradition: Colcannon, A Hearty Irish Classic


Recreating Family Memories with Every Bite


Colcannon, a traditional Irish dish, is more than just a meal; it's a cherished piece of my family history. This comforting blend of creamy mashed potatoes and cabbage takes me back to my grandmother's kitchen, a place filled with laughter, storytelling, and the warmth of a hearty meal shared among loved ones.


Ingredients You'll Need:


- 2 rashers of optional bacon


- Butter


- 1 head of cabbage


- Stems of green onions


- Milk


- Fresh parsley


- Pepper


- Potatoes


- Salt


A Step-by-Step Guide to Making Colcannon:


1. Prepare the Cabbage: Start by cutting into the top of the cabbage, hollowing it out while leaving 3-4 outer leaves intact. Reserve the hollowed-out portion for later use.
2. Cook the Cabbage: Plunge the hollowed-out cabbage head into a large pot of boiling water. Let it simmer for about 5 minutes or until it is tender-crisp, ensuring it maintains its shape. Quickly cool it in cold water, then invert and drain.
3. Chop and Stir Fry: Chop the reserved cabbage pieces until you have about 1 1/2 cups. Stir fry them in butter along with the green onions until they are tender and set aside.
4. Mash the Potatoes: Boil the potatoes until tender, then mash them, incorporating milk, salt, and pepper to taste.
5. Combine: Stir in the sautéed cabbage mixture and add a sprinkle of fresh parsley for garnish.

A Dish Steeped in Nostalgia


I vividly remember the first time I helped my grandmother make Colcannon. The kitchen was filled with the savory aroma of butter and onions sizzling in the pan. My grandmother, with her gentle hands, showed me how to hollow out the cabbage, a task I found both fascinating and challenging. The kitchen was a flurry of activity, with my cousins setting the table and my grandfather recounting tales of his youth in Ireland.


As we sat down to enjoy the meal, I realized that Colcannon was not just food; it was a vessel of memories, stories, and traditions passed down through generations. Each bite was a reminder of who we were and where we came from, a connection to our roots and to each other.


Difficulty Rating: 4/10


Colcannon is a straightforward dish that even novice cooks can master with a bit of practice. The most challenging part might be hollowing out the cabbage, but with patience, it becomes an enjoyable task.


Classification: Main Dish


Colcannon is hearty and filling, making it a perfect main dish that embodies the essence of comfort food. It pairs beautifully with meats like ham or sausages, but it can also stand alone as a satisfying vegetarian meal.


Conclusion


Recreating this traditional Colcannon recipe allows me to honor my family's heritage while creating new memories in my own kitchen. Each time I prepare it, I am reminded of the love, warmth, and laughter that filled my grandmother's home. I hope this recipe brings the same joy and connection to your family table, creating new stories and memories for generations to come.

Read more about Appetizers

Read more about Main Dishes

Read more about Desserts

Berry & Ricotta Danishes | Made by Meaghan Moineau

Berry & Ricotta Danishes | Made by Meaghan Moineau

Sweet Nostalgia: Crafting Perfect Berry & Ricotta Danishes


A Delicious Journey Down Memory Lane


*Discover the magic of homemade Berry & Ricotta Danishes with this easy-to-follow recipe that brings a touch of nostalgia to your table. Perfect for dessert lovers and food enthusiasts alike, these delightful pastries are sure to become a family favorite.*


---


Ingredients


- Poached Berries: Blueberries, strawberries, and other berries of choice
- Glaze: Icing sugar, fresh lemon juice
- Ricotta Filling: Ricotta cheese, egg yolk, castor sugar, vanilla extract, lemon zest
- Pastry: Puff pastry, flour, water
- Optional Decorations: Additional poached berries, icing sugar
Difficulty: 4/10
Classification: Dessert

---


Instructions


1. Poach the Berries: Place a mix of your favorite berries in a saucepan over medium-low heat. Sprinkle with castor sugar and add a splash of water. Cover with a lid and gently shake to coat the berries. Poach for about 5 minutes until they soften but still hold their shape. Set aside to cool.
2. Preheat the Oven: Set your oven to 180°C (350°F) to prepare for baking.
3. Make the Ricotta Filling: In a mixing bowl, combine ricotta cheese, egg yolk, castor sugar, vanilla extract, and lemon zest. Mix well with a wooden spoon until thoroughly combined. Set aside.
4. Prepare the Glaze: In a small bowl, mix icing sugar and fresh lemon juice. Stir until smooth and set aside.
5. Prepare the Pastry: Remove puff pastry from the refrigerator. Cut into 10 rectangles, each measuring 8cm x 6cm (3" x 2.5"). Place 5 rectangles on a lined baking sheet, leaving space between them. Brush edges lightly with water.
6. Assemble the Danishes: Cut smaller rectangles from the remaining 5 pieces, leaving frames about 1.5cm (1/2") wide. Place these frames on top of the pastry bases. Fill the centers with 3-4 tablespoons of ricotta mixture and top with poached berries.
7. Bake: Bake in the preheated oven for 15 to 18 minutes, until the pastry puffs up and turns golden brown. Remove and cool on a wire rack.
8. Finish and Serve: Top with remaining poached berries and sprinkle with icing sugar just before serving.

---


A Sweet Family Memory


Growing up, Sunday afternoons at my grandmother's house were a cherished tradition, where the aroma of freshly baked pastries filled the air. Her kitchen was a haven of warmth and love, and her berry danishes were the highlight of our visits. I remember peeking into the oven, eagerly anticipating that first bite.


Grandma would let me help with the simpler tasks – arranging the berries and dusting the pastries with icing sugar. It was in those moments that I learned the power of food to bring people together, to create memories that last a lifetime. The sweet, tangy taste of the ricotta filling, combined with the juiciness of the berries, was something magical. Every time I bake these danishes, I’m transported back to those sunny afternoons, surrounded by family, laughter, and the smell of home.


---


Whether you're a seasoned baker or just starting out, these Berry & Ricotta Danishes offer a delightful experience. With their flaky puff pastry, creamy ricotta filling, and juicy berries, they are sure to enchant your taste buds and evoke the warmth of cherished family memories. Enjoy making them and, most importantly, enjoy sharing them with those you love.

Read more about Appetizers

Read more about Main Dishes

Read more about Desserts

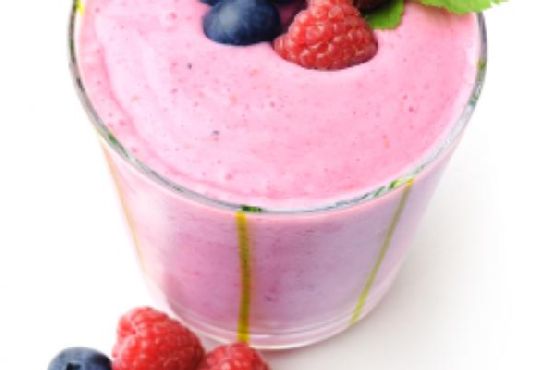
Green Tea Fruit Medley Smoothie | Made by Meaghan Moineau

Green Tea Fruit Medley Smoothie | Made by Meaghan Moineau

A Sip of Nostalgia: Green Tea Fruit Medley Smoothie


Description: Dive into the refreshing world of our Green Tea Fruit Medley Smoothie, a vibrant concoction that seamlessly blends the health benefits of green tea with the sweetness of fresh berries and pineapple juice. This easy-to-make smoothie is perfect for those who crave a flavorful, nutrient-packed drink that evokes cherished family memories. Ideal as a light appetizer or an energizing dessert, our smoothie recipe will transport you back to simpler times with just one sip.

---


Ingredients


- 1 cup boiling water


- 3 Bigelow Green tea bags


- 1 cup fresh berries (such as strawberries, blueberries, or raspberries)


- 1 cup pineapple juice


- 1 cup vanilla yogurt


- 1 cup ice cubes


Instructions


1. Prepare the green tea by steeping 3 Bigelow Green tea bags in 1 cup of boiling water for 5 minutes.


2. Carefully squeeze out the tea bags to extract all the flavor, then discard the bags.


3. In a blender, combine the prepared tea, fresh berries, pineapple juice, vanilla yogurt, and ice cubes.


4. Blend the mixture until smooth and creamy.


5. Pour into glasses and enjoy immediately for the freshest taste.


A Nostalgic Family Memory


Growing up, summers at my grandparents' house were nothing short of magical. Nestled in the heart of the countryside, their home was surrounded by lush berry bushes that seemed to stretch for miles. As kids, my siblings and I spent our days picking berries under the warm sun, competing to see who could fill their basket the fastest.


One particularly hot afternoon, we returned to the house, our faces and fingers stained with berry juice. Grandma greeted us with a smile and a new treat in mind—a cooling smoothie made from our freshly picked berries. She added her own special twist with a splash of pineapple juice and the aromatic touch of green tea, which she swore by for its health benefits. The blend was finished with a dollop of creamy vanilla yogurt and a handful of ice cubes, creating a smoothie that was both refreshing and revitalizing.


Every sip of that vibrant Green Tea Fruit Medley Smoothie was a burst of flavor, capturing the essence of summer in a glass. It became a cherished tradition, a symbol of our summers together, and a treasured memory that I carry with me to this day. Now, I recreate this smoothie to transport myself back to those carefree days, sharing it with my own family and keeping the legacy alive.


Difficulty Rating


Difficulty: 2/10


Classification: Appetizer/Dessert

This Green Tea Fruit Medley Smoothie is simple to prepare, making it a great option for both beginners and seasoned cooks looking for a quick, healthy treat. Whether enjoyed as a light appetizer or a refreshing dessert, it promises to be a hit with family and friends alike.

Read more about Appetizers

Read more about Main Dishes

Read more about Desserts