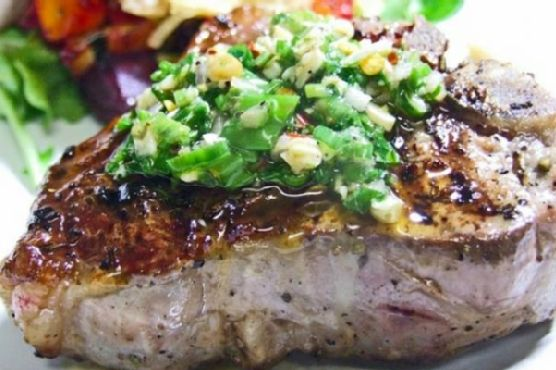
Pan Seared Lamb Loin With Chimichurri & Roasted Trio Squash Salad With Goat Cheese and Pinenuts
Intro
There’s a certain magic that fills the air when the holidays come around. The aroma of spices, the warmth of the kitchen, and the laughter of family gathered around the table create memories that last a lifetime. I vividly recall the first time I prepared this Pan Seared Lamb Loin with Chimichurri and Roasted Trio Squash Salad for my family. My grandmother, a culinary wizard in her own right, stood beside me, sharing tips and stories from her own kitchen adventures. That day, the recipe became more than just a meal; it became a family tradition.
Why You’ll Love It
This dish is a symphony of flavors and textures that will leave your taste buds dancing. The lamb loin, perfectly seared and seasoned, is juicy and tender, while the chimichurri adds a vibrant, herbaceous punch. Paired with a roasted trio squash salad, creamy goat cheese, and crunchy pinenuts, this meal is a celebration of fresh, wholesome ingredients. Whether you’re hosting a dinner party or simply want to treat yourself, this recipe is sure to impress.
Ingredients
- Cilantro
- Extra virgin olive oil
- Flat leaf parsley
- Garlic clove
- Black ground pepper
- Kosher salt and pepper
- Lamb loin chops
- Lemon
- Mint
- Pinenuts
- Red pepper flakes
- Shallot
Instructions
- Preheat your oven to 400°F.
- For the chimichurri, combine cilantro, flat leaf parsley, garlic clove, black ground pepper, and red pepper flakes in a large bowl. Mix well and season with kosher salt and pepper to taste.
- Heat a large, heavy-bottomed pan with extra virgin olive oil over medium-high heat.
- Season each side of the lamb loin chops with salt and pepper generously.
- Once the oil is hot and slightly smoking, sear the lamb loin chops for about 2 minutes on each side.
- Transfer the pan to the preheated oven to finish cooking. Refer to the following times for your preferred doneness:
- Rare: 2-3 minutes
- Medium rare: 6-8 minutes
- Medium: 9-11 minutes
- Well done: 12-14 minutes
- Remember, the lamb will continue to cook after you remove it from the oven, so plan accordingly.
Tips
To ensure the lamb is perfectly seared, make sure your pan is hot enough before adding the chops. A little smoke is a good indicator. Also, allow the meat to rest for a few minutes after cooking to retain its juices.
Variations & Substitutions
If you’re looking to add a twist to this dish, consider using basil in place of cilantro for a sweeter chimichurri. For a nut-free option, omit the pinenuts or replace them with sunflower seeds. You can also swap the goat cheese for feta or blue cheese for a different flavor profile.
Storage
Store any leftovers in an airtight container in the refrigerator for up to 3 days. The lamb can be reheated gently in a pan over low heat or in a preheated oven at 300°F until warmed through.
FAQ
Can I prepare the chimichurri in advance?
Absolutely! The chimichurri can be made up to 2 days in advance. Store it in the refrigerator in an airtight container to allow the flavors to meld together beautifully.
What can I serve with this dish?
This lamb dish pairs wonderfully with a side of roasted potatoes or a light green salad. A glass of red wine, such as a Cabernet Sauvignon or Malbec, would complement the flavors beautifully.
Is this recipe suitable for a special occasion?
Definitely! This recipe is elegant and flavorful, making it perfect for a special occasion or a festive gathering. Your guests will be impressed by the vibrant flavors and beautiful presentation.
Nutrition
This dish is a good source of protein, essential fatty acids, and various vitamins and minerals from the fresh herbs and vegetables. The use of extra virgin olive oil adds heart-healthy monounsaturated fats.
Conclusion
Bringing together the luscious flavors of pan-seared lamb loin and the refreshing zest of chimichurri, this dish is more than just a meal—it’s an experience. Whether you’re sharing it with loved ones or savoring it in solitude, this recipe is destined to become a favorite. From my kitchen to yours, happy cooking!
Related update: Pan Seared Lamb Loin With Chimichurri & Roasted Trio Squash Salad With Goat Cheese and Pinenuts
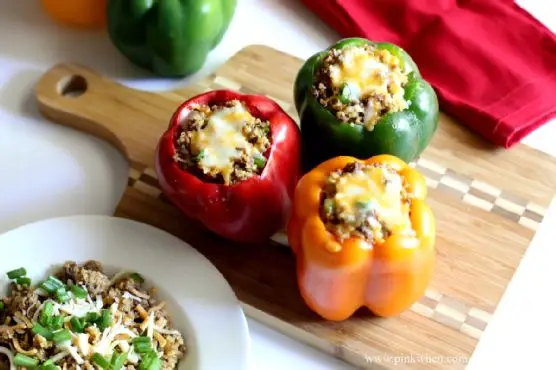
Related update: Ground Turkey Stuffed Peppers