Brussel Sprouts in Bacon and Garlic Sauce | Made by Meaghan Moineau

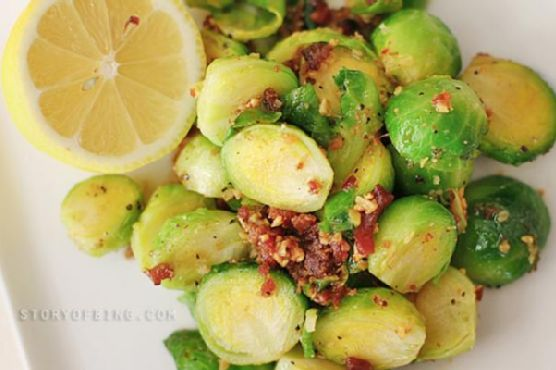
Brussel Sprouts in Bacon and Garlic Sauce

Intro

When I think of family gatherings during the festive season, one particular dish always stands out in my memory: Brussel Sprouts in Bacon and Garlic Sauce. This recipe was a staple at our holiday table, lovingly prepared by my grandmother. I remember sitting in her cozy kitchen, stealing crispy bacon bits while she wasn’t looking, and watching in awe as she transformed humble ingredients into a dish that even the pickiest eater couldn’t resist. Today, I’m delighted to share this beloved recipe with you, hoping it brings as much warmth and joy to your table as it did to ours.

Why You’ll Love It

This dish is a perfect blend of savory and tangy flavors that complement the natural taste of brussel sprouts. The bacon and garlic sauce add richness, while a hint of lemon juice brightens the dish. It’s quick and easy to prepare, making it an excellent side dish for busy weeknights or special occasions. Plus, the crispy bacon bits add a delightful texture that even those who usually shy away from green vegetables will enjoy.

Ingredients

  • 250g whole brussel sprouts
  • 1/2 teaspoon salt
  • 4 cups water
  • 1 tablespoon salted butter
  • 1 tablespoon minced garlic
  • 1 tablespoon bacon bits
  • Salt and pepper to taste
  • 1 teaspoon lemon juice

Instructions

  1. Wash the brussel sprouts thoroughly and remove any old, hard outer leaves.
  2. Bring 4 cups of water to a boil in a saucepan and add 1/2 teaspoon of salt.
  3. Add the brussel sprouts to the boiling water and cook at medium heat for 4 minutes, or until they are tender but still slightly crunchy.
  4. Drain the brussel sprouts and set them aside.
  5. Return the saucepan to the hot stove and add 1 tablespoon of butter.
  6. While the butter is melting, cut the brussel sprouts in half.
  7. Add 1 tablespoon of minced garlic to the melted butter and sauté for a few seconds until the garlic is fragrant but not brown.
  8. Return the cut brussel sprouts to the saucepan and toss them lightly in the garlic-butter sauce.
  9. Add 1 tablespoon of bacon bits and toss to combine. For convenience, I always keep a jar of ready-to-use bacon bits in the fridge, but freshly pan-fried and crumbled bacon works just as well.
  10. Season to taste with salt and pepper. I personally love using Masterfoods Garlic Pepper for an extra flavor kick.
  11. Add a squeeze of fresh lemon juice (about 1 teaspoon) for a tangy finish.
  12. Toss everything together once more and serve. For an extra touch, garnish with toasted almond flakes or serve with fresh lemon wedges on the side.

Tips

To ensure your brussel sprouts are perfectly cooked, check them after 4 minutes of boiling. They should be tender but still retain a bit of crunch. Overcooking can lead to mushy sprouts, which we want to avoid. If you prefer a smokier flavor, try using smoked bacon bits. Remember, fresh lemon juice is key; it brightens the dish and balances the savory elements beautifully.

Variations & Substitutions

If you’re vegetarian or looking to reduce your meat intake, you can substitute the bacon bits with smoked paprika or sun-dried tomatoes for a similar depth of flavor. For a nutty crunch, consider adding toasted pine nuts or walnuts instead of almond flakes. If garlic isn’t your favorite, shallots or onions can also complement the sprouts nicely. Feel free to experiment with different herbs like thyme or rosemary for an aromatic twist.

Storage

Store any leftovers in an airtight container in the refrigerator for up to 3 days. To reheat, simply warm them in a skillet over medium heat until heated through. You can also use a microwave, though the skillet method will help retain their texture better. Unfortunately, this dish doesn’t freeze well, as the texture of the brussel sprouts can become unappealing when thawed.

FAQ

Can I use frozen brussel sprouts for this recipe?

Yes, you can use frozen brussel sprouts, but the texture might differ slightly. Make sure to thaw them thoroughly and pat them dry before cooking to remove excess moisture. Adjust the boiling time as needed since frozen sprouts might cook faster.

How do I make this dish vegan?

To make this dish vegan, simply replace the butter with a plant-based alternative and omit the bacon bits. You can use smoked paprika or nutritional yeast to add depth of flavor.

Can I prepare this dish ahead of time?

Yes, you can prepare the brussel sprouts and the garlic sauce a day in advance. Store them separately in the fridge. When ready to serve, reheat the sauce, toss in the brussel sprouts, and add the bacon bits and lemon juice for a fresh finish.

Nutrition

This dish is a great source of fiber, vitamins C and K, and antioxidants from the brussel sprouts. The bacon and butter add a dose of healthy fats, while garlic is known for its immune-boosting properties. Keep in mind that the nutritional content will vary based on the specific brands and quantities used.

Conclusion

Brussel Sprouts in Bacon and Garlic Sauce is a dish that has stood the test of time in my family, bringing smiles and satisfied sighs from everyone around the table. I hope this recipe becomes a cherished favorite in your home as well. Its simplicity and delightful flavors make it a winner for any occasion. So, gather your loved ones, share a meal, and create new memories with this heartwarming dish. Enjoy!

Related update: Brussel Sprouts in Bacon and Garlic Sauce
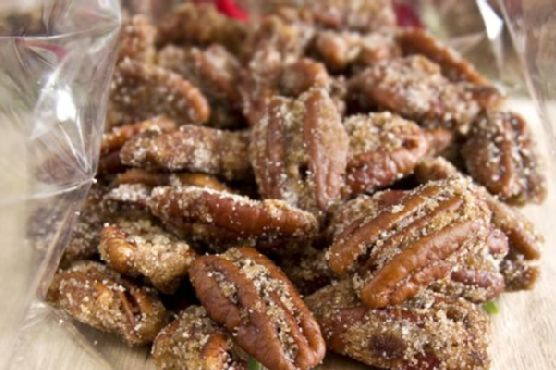
Candied Spiced Pecans | Made by Meaghan Moineau

Candied Spiced Pecans: A Sweet and Savory Delight

Intro

There’s something magical about the aroma of spiced pecans wafting through the house, especially during the holiday season. As a child, I remember my grandmother making batches of these delightful treats for family gatherings. The warmth of the spices combined with the sweetness of the sugar created an irresistible snack that had everyone reaching for more. Today, I’m excited to share this cherished recipe with you, hoping it brings as much joy to your home as it has to ours.

Why You’ll Love It

These Candied Spiced Pecans are a perfect blend of sweet and spicy, offering a crunchy texture that is as satisfying as it is delicious. Whether you’re looking for a quick snack, a topping for salads, or a thoughtful homemade gift, these pecans fit the bill. The combination of spices like cinnamon, cloves, and nutmeg, along with a hint of maple, makes them an irresistible treat that captures the essence of comfort and warmth.

Ingredients

  • 1 tsp allspice
  • 1/2 cup brown sugar
  • 2 tbsp butter
  • 1 tsp cinnamon
  • 1/2 cup granulated sugar
  • 1/4 tsp ground cloves
  • 1 tsp maple extract
  • 1/4 tsp nutmeg
  • 2 cups pecans
  • 1/4 cup water

Instructions

  1. Preheat your oven to 300°F (150°C). Line a cookie sheet with tin foil and coat it with cooking spray. Set aside.
  2. In a shallow bowl, sift together the granulated sugar, cinnamon, allspice, cloves, and nutmeg. Set aside.
  3. In a small bowl, whisk together the maple extract, brown sugar, and water.
  4. Over medium heat, melt the butter in a skillet. Slowly whisk in the brown sugar mixture and bring it to a boil.
  5. Add the pecans to the skillet and stir to coat them thoroughly. Simmer for about 1-2 minutes until well-coated.
  6. Using a slotted spoon, transfer the pecans to the reserved sugar and spice bowl. Coat the pecans evenly with the sugar mixture.
  7. Place the pecans evenly on the prepared cookie sheet and bake for 15 minutes. Stir the pecans and bake for an additional 15 minutes.
  8. Let the pecans cool completely before serving or storing.

Tips

For the best results, make sure to use fresh pecans. Older nuts can lose their natural oils and flavor. Be sure to stir the pecans halfway through the baking process to ensure even coating and roasting. Lastly, allow them to cool completely before storing to maintain their crispiness.

Variations & Substitutions

If you’re looking to switch things up, you can easily substitute walnuts or almonds for the pecans. For a spicier kick, consider adding a pinch of cayenne pepper to the spice mix. If maple extract isn’t available, vanilla extract works as a great alternative, providing a subtly different flavor profile.

Storage

Store your candied spiced pecans in an airtight container at room temperature. They should stay fresh for up to two weeks. You can also freeze them for longer storage, just be sure to let them thaw completely before serving to retain their crisp texture.

FAQ

Can I use salted butter for this recipe?

Yes, you can use salted butter, but it will slightly alter the flavor profile by adding a hint of saltiness. If you prefer to keep the recipe sweet, stick with unsalted butter.

How do I prevent the pecans from sticking together?

Ensure that the pecans are spread out evenly on the baking sheet and stirred halfway through the baking process. This will help prevent clumping and ensure each nut is evenly coated and roasted.

Can I make these pecans in advance?

Absolutely! These candied spiced pecans are perfect for making ahead of time. Just store them in an airtight container as mentioned, and they’ll be ready for any occasion.

Nutrition

While these candied spiced pecans are a treat, they’re also packed with nutrients. Pecans are a great source of healthy fats, fiber, and protein. However, due to the sugar content, it’s best to enjoy them in moderation as part of a balanced diet.

Conclusion

These Candied Spiced Pecans are not just a treat; they’re a tradition that brings warmth and joy to any occasion. Easy to make and incredibly versatile, they’re sure to become a favorite in your home, just as they have in ours. I hope this recipe inspires you to create delicious memories with your loved ones. Enjoy!

Related update: Candied Spiced Pecans

Related update: Medenjaci – Croatian Honey Spice Cookies

Related update: Japanese Gyoza Pot Stickers

Chocolate Peppermint Cookies | Made by Meaghan Moineau

Chocolate Peppermint Cookies

Intro

Chocolate Peppermint Cookies are a holiday favorite in my household, a tradition that brings back fond memories of festive gatherings and cozy winter evenings. I remember the first time I baked these delightful treats was with my grandmother, who had a knack for creating magic in the kitchen. The aroma of chocolate and peppermint swirling through the house signaled the beginning of holiday celebrations. As we sat around the fireplace, enjoying these cookies with a cup of hot cocoa, it felt like all was right with the world. Today, I’m excited to share this cherished recipe with you, so you too can create sweet memories with your loved ones.

Why You’ll Love It

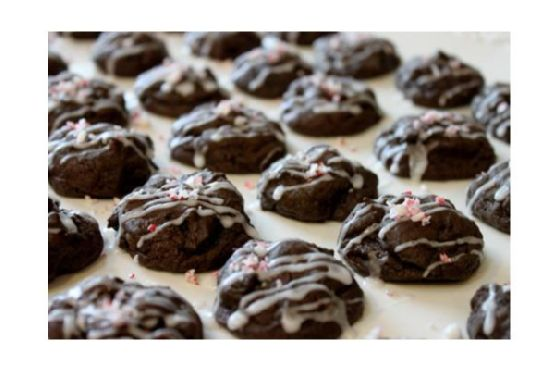
These Chocolate Peppermint Cookies are the perfect blend of rich chocolate and refreshing peppermint. They are soft and chewy with a slight crunch on the outside, making them irresistible to both kids and adults. Whether you’re looking to impress at a holiday party or simply want to treat yourself, these cookies are sure to become a staple in your dessert repertoire. With their delightful glaze and festive flavor, they capture the essence of the holiday season in every bite.

Ingredients

  • 1 teaspoon baking soda
  • 1 cup confectioners sugar
  • 2 large eggs
  • 2 cups all-purpose flour
  • 2 tablespoons half and half
  • 1 cup light brown sugar
  • 1 teaspoon peppermint extract
  • 1/2 teaspoon salt
  • 1 cup sweet semi chocolate chips
  • 1 cup granulated sugar
  • 1 cup unsalted butter, softened
  • 1/2 cup unsweetened cocoa powder
  • 1 teaspoon vanilla extract

Instructions

  1. Preheat your oven to 350 degrees F.
  2. In a medium bowl, sift together the flour, cocoa powder, baking soda, and salt. Set this aside.
  3. In a mixer, beat together the butter with the granulated and light brown sugars until fluffy, about 2 minutes.
  4. Add the eggs one at a time, beating until smooth after each addition and scraping the sides of the bowl as necessary.
  5. Add the vanilla extract and mix well.
  6. On a low speed, gradually beat in the flour mixture a little at a time until well combined.
  7. Gently fold in the chocolate chips with a spatula or wooden spoon.
  8. Drop teaspoons of the batter onto an ungreased cookie sheet, spacing them about 2 inches apart.
  9. Bake the cookies until just cracked on top, about 8 minutes, rotating the pan halfway through the cooking time.
  10. Remove from the oven and flatten the cookies slightly with a spatula. Allow them to cool completely on a wire rack.
  11. For the glaze, mix together the confectioners sugar, peppermint extract, and half and half in a small bowl until smooth.
  12. Transfer the glaze mixture to a medium resealable plastic bag and snip off a tiny bit of the corner.
  13. Drizzle the glaze over the cooled cookies and let them stand until set, about 10-20 minutes.

Tips

To ensure your cookies are perfectly soft and chewy, avoid overbaking. They should just be cracked on top when you take them out of the oven. Also, make sure your butter is at room temperature for easy mixing and a smooth batter. Using a cookie scoop can help in creating uniform cookies, ensuring even baking.

Variations & Substitutions

Feel free to experiment with this recipe to suit your preferences. If you prefer a stronger peppermint flavor, you can increase the peppermint extract in the glaze. For a different twist, try adding crushed candy canes on top of the glaze for extra crunch and color. You can also substitute white chocolate chips for the semi-sweet chocolate chips for a different flavor profile.

Storage

These cookies can be stored in an airtight container at room temperature for up to a week. If you want to enjoy them for longer, they freeze beautifully. Simply layer them between sheets of parchment paper in a freezer-safe container and they’ll keep for up to three months. Thaw at room temperature before serving.

FAQ

Can I use dark chocolate chips instead of semi-sweet?

Absolutely! Dark chocolate chips can provide a richer flavor and work wonderfully in this recipe. Adjust according to your taste preference.

Can I make the dough ahead of time?

Yes, you can prepare the dough in advance and refrigerate it for up to 48 hours. This can actually enhance the flavor as the ingredients have more time to meld together. Just be sure to let the dough come to room temperature before baking.

Nutrition

While these cookies are a treat and should be enjoyed in moderation, they do provide some nutritional value. Each cookie contains approximately 150 calories, 8g of fat, 20g of carbohydrates, and 2g of protein. The exact nutritional content can vary based on specific brands and measurements used.

Conclusion

I hope this Chocolate Peppermint Cookies recipe brings as much joy to your family as it does to mine. Whether you’re baking them for a holiday gathering or simply to indulge your sweet tooth, these cookies are sure to be a hit. With their perfect balance of chocolate and peppermint, they encapsulate the spirit of the season in every bite. Happy baking, and may your home be filled with warmth, love, and delicious cookies this holiday season!

Related update: Chocolate Peppermint Cookies

Related update: Dump Cake

Watercress Salad With Miso-Lime Dressing | Made by Meaghan Moineau

Watercress Salad With Miso-Lime Dressing

Intro

There’s something about the crisp, refreshing bite of a fresh salad that can transport you to a summer day, no matter what the season. This Watercress Salad with Miso-Lime Dressing is not just a dish; it’s a journey back to the lush gardens of my childhood. I fondly remember visiting my grandmother’s garden every summer. Her garden was abundant with vibrant greens, each leaf kissed by the sun. Among the rows of vegetables and herbs, watercress was always my favorite. The spicy, peppery leaves were irresistible, and I would often sneak a handful to munch on while she wasn’t looking. It’s no surprise that watercress remains a beloved ingredient in my kitchen. This recipe is inspired by those summers, combining the freshness of garden greens with a tangy miso-lime dressing that brings everything together in a perfect harmony of flavors.

Why You’ll Love It

This salad is a celebration of flavor and texture. It’s not just a salad; it’s an experience. Here’s why you’ll fall in love with it:

  • Fresh and Nutritious: Packed with vibrant greens and crunchy vegetables, this salad is a powerhouse of nutrients.
  • Easy to Make: With simple steps and readily available ingredients, you can whip this salad up in no time.
  • Flavorful Dressing: The Miso-Lime Dressing is the star, offering a perfect balance of tangy, sweet, and savory flavors.
  • Versatile: Great as a side dish or a light meal, and easily customizable to suit different tastes and dietary needs.

Ingredients

  • Fresh sprouts
  • Fresh mung bean sprouts
  • Entire green onions, sliced
  • Grape tomatoes, halved
  • Diced orange bell pepper
  • Cilantro, chopped
  • Sesame seeds
  • Watercress leaves
  • Miso-lime dressing (recipe follows)
  • Fresh squeezed lime juice
  • Sesame oil
  • White miso

Instructions

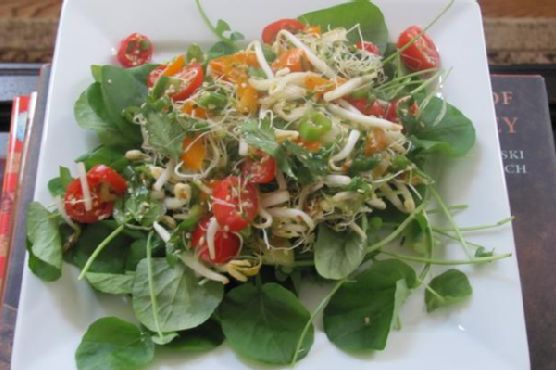
  1. In a large bowl, toss together the fresh sprouts, mung bean sprouts, sliced green onions, grape tomatoes, diced orange bell pepper, chopped cilantro, and sesame seeds.
  2. In a small bowl, whisk together the fresh squeezed lime juice, sesame oil, and white miso to create your Miso-Lime Dressing.
  3. Pour the dressing over the mixed sprouts and vegetables in the large bowl. Toss until everything is evenly coated.
  4. Divide the watercress leaves evenly among four plates, creating a bed for the salad.
  5. Top each plate with the mixed sprout salad, evenly distributing the Miso-Lime Dressing among them.
  6. Serve immediately and enjoy the delicious flavors!

Tips

  • Choose Fresh Ingredients: Fresh, high-quality ingredients make all the difference. Look for crisp, vibrant watercress and sprouts for the best flavor and texture.
  • Miso-Lime Dressing Consistency: Adjust the dressing’s consistency by adding a little water if it’s too thick or more lime juice for extra tang.
  • Toast the Sesame Seeds: For an added depth of flavor, lightly toast the sesame seeds before adding them to the salad.

Variations & Substitutions

Feel free to make this salad your own by experimenting with different ingredients and flavors:

  • Protein Boost: Add grilled chicken, shrimp, or tofu for a more filling meal.
  • Nutty Flavor: Swap sesame seeds for toasted almonds or pine nuts for a different crunch.
  • Spicy Kick: Add a dash of chili flakes or sliced jalapeños for some heat.
  • Other Greens: If watercress is unavailable, arugula or baby spinach make excellent substitutes.

Storage

This salad is best enjoyed fresh, but if you have leftovers, store them in an airtight container in the refrigerator for up to two days. Keep the dressing separate if you plan to store the salad for later, to prevent the greens from wilting.

FAQ

Can I make the dressing ahead of time?

Absolutely! The Miso-Lime Dressing can be made in advance and stored in the fridge for up to a week. Just give it a good shake or stir before using.

Is this salad vegan-friendly?

Yes, this salad is naturally vegan. Just ensure that all your ingredients, especially the miso, are vegan-certified if you follow a strict vegan diet.

Can I use another type of miso?

White miso is recommended for its mild flavor, but if you prefer a stronger taste, yellow or red miso can be used. Keep in mind that they will affect the overall flavor of the dressing.

Nutrition

This refreshing salad is not only delicious but also packed with nutrients. Watercress is a superfood rich in vitamins A, C, and K, while the sprouts provide a good source of protein and fiber. The Miso-Lime Dressing adds a healthy dose of probiotics thanks to the fermented miso, making this dish both tasty and nourishing.

Conclusion

Whether you’re looking to add more greens to your diet or simply searching for a delightful salad to brighten up your meals, this Watercress Salad with Miso-Lime Dressing is a fantastic choice. With its refreshing flavors, easy preparation, and health benefits, it’s a dish that you’ll want to make again and again. I hope this salad brings a bit of the garden’s joy to your table, just as it does to mine. Enjoy every crunchy, flavorful bite!

Related update: Watercress Salad With Miso-Lime Dressing

Related update: Yorkshire Pudding

Related update: Traditional Panzanella

Valentine Hearts | Made by Meaghan Moineau

Valentine Hearts: A Sweet Treat for Your Loved Ones

Intro

Valentine’s Day has always held a special place in my heart. I remember the first time I tried these delightful Valentine Hearts was when I was visiting my grandmother. She had a knack for turning simple ingredients into something extraordinary. As she pulled these puff pastry hearts out of the oven, the warm aroma filled her cozy kitchen. We sat together, enjoying each bite, savoring the sweet and slightly tangy taste of strawberries mingling with creamy crème fraiche and rich chocolate. Now, I make these every year, sharing the love and nostalgia with my family and friends.

Why You’ll Love It

These Valentine Hearts are a perfect blend of simplicity and elegance. Whether you’re an experienced baker or a novice in the kitchen, you’ll find this recipe easy to follow and incredibly rewarding. Here’s why you’ll love making and sharing these with your loved ones:

  • Quick and Easy: With minimal preparation time, you can whip up a batch of these delightful treats in no time.
  • Deliciously Decadent: The combination of flaky pastry, sweet strawberries, creamy crème fraiche, and rich chocolate is nothing short of divine.
  • Visually Stunning: These heart-shaped pastries are not only tasty but also a feast for the eyes, making them perfect for special occasions.
  • Customizable: You can easily adjust the filling to suit your taste or dietary needs.

Ingredients

  • Puff pastry
  • 1 egg for glazing
  • Castor sugar
  • Canned crème fraiche
  • Fresh strawberries
  • Plain chocolate

Instructions

  1. Preheat your oven to 220 degrees C (425 degrees F).
  2. Thaw the puff pastry sheet according to the instructions on the box.
  3. Unroll the pastry sheet and use a heart-shaped cookie cutter to cut out approximately 8 hearts. I find a medium-sized cutter works best.
  4. Prick each heart with a fork to prevent it from puffing up too much.
  5. Brush the hearts with beaten egg and sprinkle lightly with castor sugar.
  6. Place the hearts on a greased baking sheet and bake in the preheated oven for about 10 minutes or until they are risen and golden brown.
  7. Allow the hearts to cool completely on a wire rack.
  8. Once cooled, slice fresh strawberries and split each pastry heart horizontally with a sharp knife.
  9. Sandwich the halves together with crème fraiche and sliced strawberries.
  10. Drizzle melted plain chocolate over the top and dust with a little more castor sugar before serving.

Tips

Here are some tips to ensure your Valentine Hearts turn out perfectly:

  • Keep the Pastry Cold: For the best texture, make sure your puff pastry is cold when you work with it. If it gets too warm, pop it back in the fridge for a few minutes.
  • Even Baking: Rotate your baking sheet halfway through baking to ensure even browning.
  • Sharp Knife: Use a sharp knife to slice the hearts horizontally for a clean cut.

Variations & Substitutions

If you want to put your own twist on these Valentine Hearts, here are some ideas:

  • Fruit Variations: Try using raspberries or blueberries instead of strawberries for a different flavor profile.
  • Chocolate Substitution: White chocolate or milk chocolate can be used in place of plain chocolate for a sweeter option.
  • Dairy-Free Option: Substitute crème fraiche with a dairy-free cream alternative to make these suitable for lactose-intolerant guests.

Storage

These Valentine Hearts are best enjoyed fresh, but if you need to store them, here’s how:

  • Refrigeration: Store any leftovers in an airtight container in the fridge for up to 2 days. The pastry may lose some of its crispness, but they’ll still taste delicious.
  • Freezing: You can freeze the baked hearts without filling. Once completely cool, place them in a freezer-safe bag or container. When you’re ready to serve, thaw them at room temperature and then fill as directed.

FAQ

Can I make Valentine Hearts ahead of time?

Yes, you can prepare the pastry hearts a day in advance and store them in an airtight container once they’re completely cool. Fill them with crème fraiche and strawberries just before serving for the best texture and flavor.

What can I use instead of crème fraiche?

If you can’t find crème fraiche, you can substitute it with whipped cream, mascarpone cheese, or even Greek yogurt for a tangier twist.

Nutrition

While I don’t have exact nutritional information for this recipe, it’s worth noting that these Valentine Hearts are a treat to be enjoyed in moderation. The puff pastry and chocolate contribute to the calorie count, while the strawberries add a dose of vitamins and antioxidants.

Conclusion

Valentine Hearts are more than just a dessert; they’re a token of love and a nostalgic nod to cherished memories. Whether you’re sharing them with a loved one or treating yourself, each bite is a reminder of the joy and warmth that comes from creating something special. I hope this recipe brings as much happiness to your home as it has to mine. Happy baking, and Happy Valentine’s Day!

Related update: Valentine Hearts

Related update: Croissants With Sesame Seeds (Kifli)

Agedashi Tofu | Made by Meaghan Moineau

Agedashi Tofu: A Crispy Delight with a Silken Heart

Intro

There’s something magically comforting about a perfectly prepared dish of Agedashi Tofu. I remember the first time I encountered this delightful appetizer at a cozy Japanese restaurant tucked away in a busy Tokyo street. The warmth of the tofu, crisp on the outside and soft within, felt like a welcoming embrace. As the waiter set down the plate, the steam rose into the air, carrying the tantalizing aroma of fried goodness mixed with a hint of the savory hoisin sauce. That experience is forever etched in my memory as a moment of pure culinary joy. Today, I’m excited to share with you a simple yet authentic recipe for Agedashi Tofu, allowing you to recreate this beautiful dish in your own kitchen.

Why You’ll Love It

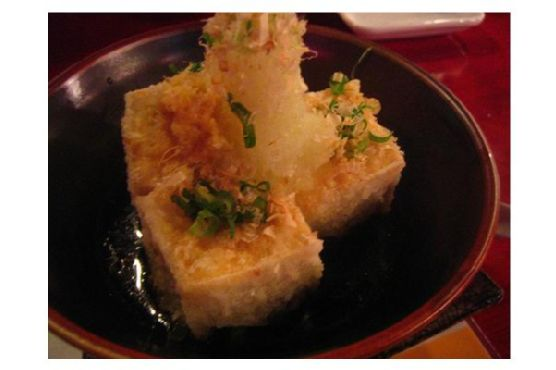
Agedashi Tofu is a dish that truly delights the senses. Its crispy exterior gives way to a soft, creamy interior, creating a contrast that’s both exciting and comforting. The sprinkle of fresh green onions adds a burst of color and a fresh, zesty flavor that complements the rich hoisin sauce perfectly. This recipe is straightforward and quick to prepare, making it an excellent choice for both weekday dinners and special occasions. Whether you’re a seasoned tofu lover or new to this versatile ingredient, this dish is sure to win you over.

Ingredients

  • 1 block silken tofu
  • Cornstarch, for dredging
  • Oil, for frying
  • 2 green onions, finely chopped
  • Hoisin sauce, for drizzling

Instructions

  1. Cut the tofu into 12 equal-sized cubes, handling gently to avoid breaking.
  2. Place the cornstarch on a plate or in a shallow bowl. Dredge each tofu cube in the cornstarch, ensuring all sides are coated thoroughly.
  3. In a medium-sized frying pan, heat enough oil so that the tofu cubes will be half-submerged when placed in the pan. The oil should be hot but not smoking.
  4. Fry the tofu cubes in the hot oil for 3 to 5 minutes on each side, or until they are golden brown and crispy. Avoid overcrowding the pan to ensure even frying.
  5. Once fried, remove the tofu cubes and let them drain on paper towels to remove excess oil.
  6. Place the tofu cubes on a serving dish. Sprinkle the chopped green onions over the top and drizzle with hoisin sauce.
  7. Serve immediately while the tofu is still warm and crispy.

Tips

For the best results, use silken tofu, which provides a creamy texture that contrasts beautifully with the crispy exterior. Be gentle when handling the tofu to keep it from breaking apart. Ensure your oil is hot enough to achieve that perfect crispiness without absorbing too much oil. A quick test is to drop a small piece of tofu into the oil; if it sizzles and rises to the surface, the oil is ready.

Variations & Substitutions

If you’re looking to add a twist to this classic dish, consider these variations:

  • Spicy Kick: Add a dash of chili oil or sprinkle some red pepper flakes on the tofu for a spicy version.
  • Gluten-Free: Substitute the hoisin sauce with a gluten-free alternative or tamari sauce.
  • Extra Flavor: Add a splash of soy sauce or ponzu to the hoisin for additional depth of flavor.

Storage

Agedashi Tofu is best enjoyed fresh for maximum crispiness. However, if you have leftovers, store them in an airtight container in the refrigerator for up to two days. Reheat in a hot pan with a little oil to restore some of the crispiness before serving. Avoid microwaving as it can make the tofu soggy.

FAQ

Can I use firm tofu instead of silken tofu?

While the recipe traditionally uses silken tofu for its creamy texture, you can use firm tofu if you prefer a slightly denser texture. The cooking method remains the same, but you might find the firm tofu easier to handle without breaking.

What oil is best for frying tofu?

Use a neutral oil with a high smoke point, such as vegetable oil, canola oil, or peanut oil. These oils will ensure your tofu crisps up nicely without imparting any unwanted flavors.

Is hoisin sauce necessary, or can I use something else?

Hoisin sauce adds a sweet and savory flavor that complements the tofu well. However, if you prefer a different taste, you can use soy sauce, teriyaki sauce, or even a splash of your favorite dipping sauce to customize the dish to your liking.

Nutrition

This delightful dish is not only tasty but also relatively low in calories, especially when compared to other fried foods. Tofu is a great source of protein and contains essential amino acids. It also provides iron, calcium, and other important minerals, making it a nutritious choice for vegetarians and meat-eaters alike. The key to keeping this dish healthy is to enjoy it in moderation and to thoroughly drain the tofu after frying to remove excess oil.

Conclusion

Agedashi Tofu is a beloved dish in Japanese cuisine, celebrated for its textural contrast and simple yet satisfying flavors. By following this recipe, you can bring a taste of Japan into your home and share a dish that’s sure to become a favorite at your dining table. Whether you’re reminiscing about a past trip or creating new memories with loved ones, this Agedashi Tofu recipe is a warm, inviting choice that promises to delight with every crispy bite. Enjoy!

Related update: Agedashi Tofu

Blackberry Balsamic Drumsticks | Made by Meaghan Moineau

Blackberry Balsamic Drumsticks

Intro

There’s something magical about the combination of sweet and savory that brings back memories of family gatherings and warm summer nights. Growing up, Sundays were reserved for family dinners at my grandmother’s house. She was a culinary wizard who could transform any simple ingredient into a feast fit for royalty. Her secret? A garden brimming with fresh produce and an innate sense for pairing unusual flavors. One summer evening, she introduced us to a dish that would become a family favorite: Blackberry Balsamic Drumsticks. These succulent pieces of chicken, infused with the essence of ripe blackberries and aromatic balsamic vinegar, were a revelation. It’s a dish that not only tantalizes your taste buds but also carries the warmth of those cherished family moments. Today, I’m excited to share this special recipe with you, hoping it brings as much joy to your table as it has to mine.

Why You’ll Love It

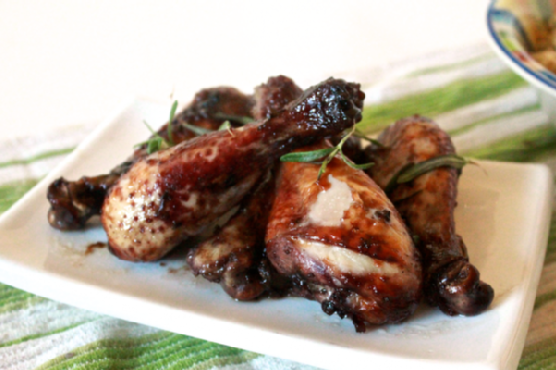
Blackberry Balsamic Drumsticks are a delightful blend of sweet, tangy, and savory flavors that will have your taste buds dancing with joy. The unique combination of fresh blackberries and balsamic vinegar creates a mouthwatering glaze that elevates ordinary chicken drumsticks to a gourmet level. Not only is this dish incredibly tasty, but it’s also easy to prepare, making it perfect for both weeknight dinners and special occasions. The marinade, enriched with rosemary and mustard, infuses the chicken with a depth of flavor that is both comforting and sophisticated. Plus, who doesn’t love a dish that can be prepped in advance and left to marinate while you enjoy your day?

Ingredients

  • 8 skin-on chicken drumsticks
  • 1 cup fresh blackberries
  • 1/4 cup balsamic vinegar
  • 1/4 cup demerara sugar
  • 1 tablespoon fresh rosemary, chopped
  • 2 tablespoons butter
  • 2 tablespoons whole grain mustard
  • Salt and pepper to taste

Instructions

  1. Place blackberries, butter, 1/4 cup water, rosemary, sugar, and vinegar in a small saucepan.
  2. Cook over medium-high heat, stirring occasionally, until the mixture is slightly reduced, about 10-15 minutes.
  3. Remove from heat and stir in mustard, salt, and pepper. Allow the marinade to cool.
  4. Place the drumsticks in a large ziplock bag. Pour the cooled marinade over the top and seal the bag.
  5. Toss to coat the drumsticks evenly with the marinade.
  6. Refrigerate and marinate for 24 hours, allowing the flavors to infuse.
  7. When ready to cook, preheat the oven to 375°F (190°C).
  8. Arrange drumsticks on a cookie sheet lined with tin foil.
  9. Bake for 25 minutes, turning once halfway through the cooking time.
  10. Serve hot with your preferred side dish.

Tips

For the best results, use fresh blackberries when in season. They impart a natural sweetness and vibrant color to the dish. If fresh rosemary isn’t available, dried rosemary can be used, but use only half the amount as dried herbs are more potent. When cooking the marinade, keep an eye on it to prevent it from reducing too much, as it should remain syrupy and flavorful.

Variations & Substitutions

If you’re looking to switch things up, consider these variations:
Spicy Kick: Add a pinch of red pepper flakes to the marinade for a spicy twist.
Herbal Infusion: Substitute thyme or sage for rosemary for a different herbal note.
Sweetness Swap: Honey or maple syrup can be used in place of demerara sugar for a different sweetness profile.
Chicken Cuts: If drumsticks aren’t your preference, this marinade works wonderfully with chicken thighs or wings as well.

Storage

Leftover drumsticks can be stored in an airtight container in the refrigerator for up to 3 days. To reheat, place them in an ovenproof dish and warm at 350°F (175°C) until heated through. For a quick option, you can also microwave them on medium power. The flavors deepen over time, making leftovers equally enjoyable.

FAQ

Can I use frozen blackberries?

Yes, frozen blackberries can be used if fresh ones are unavailable. Ensure they are fully thawed and drained before adding to the marinade to avoid excess liquid.

Is it necessary to marinate the drumsticks for 24 hours?

While marinating for 24 hours yields the best flavor, if you’re short on time, even a few hours will still impart a delicious taste. Aim for at least 4 hours if possible.

Can I grill the drumsticks instead of baking them?

Absolutely! Grilling adds a smoky flavor that complements the sweet and tangy glaze. Grill the drumsticks over medium heat, turning frequently, until cooked through.

Nutrition

While exact nutritional values can vary based on portion size and specific brands of ingredients used, each serving of Blackberry Balsamic Drumsticks is approximately 250 calories. This includes a good amount of protein and some natural sugars from the blackberries and demerara sugar.

Conclusion

Blackberry Balsamic Drumsticks are more than just a meal; they’re a culinary experience that combines the richness of tradition with the excitement of bold flavors. Whether you’re gathering with family or hosting friends, this dish is sure to impress and become a staple in your recipe repertoire. Give it a try, and let the flavors transport you to a place of comfort, warmth, and delightful nostalgia. Happy cooking!

Related update: Blackberry Balsamic Drumsticks

Related update: chettinad egg curry

Blackberry Cobbler | Made by Meaghan Moineau

Blackberry Cobbler: A Timeless Dessert

There’s something magical about the aroma of a blackberry cobbler baking in the oven. It brings back memories of my grandmother’s kitchen, where the warmth of the oven and the sweet, tangy scent of blackberries filled the air. She would always let me help with the mixing, and I remember impatiently waiting for the cobbler to cool just enough to dig in. Today, I’m sharing this cherished recipe that has been passed down through generations, with a few tweaks of my own. I hope it becomes a favorite in your home, just like it is in ours.

Why You’ll Love It

This blackberry cobbler is a crowd-pleaser for several reasons:

  • Simplicity: With just a handful of pantry staples, you can whip up this dessert in no time.
  • Flavor: The combination of sweet and tart blackberries with a buttery, tender crust is irresistible.
  • Versatility: You can enjoy it warm with ice cream or at room temperature for a sweet snack.
  • Nostalgia: It evokes a sense of home and comfort, perfect for family gatherings or a cozy night in.

Ingredients

  • 1 tsp baking powder
  • 2 cups fresh blackberries
  • 1/2 cup butter, melted
  • 1 cup all-purpose flour
  • 1 cup milk
  • 1/4 tsp salt
  • 1 cup sugar

Instructions

  1. Preheat your oven to 375°F (190°C).
  2. In a bowl, combine the blackberries and sugar. Allow them to macerate while you prepare the batter.
  3. In a larger bowl, mix together the flour, baking powder, and salt. Gradually add the milk and stir until smooth.
  4. Stir in the melted butter until the batter is well blended.
  5. Pour the batter into an ungreased baking dish.
  6. Spoon the sugared blackberries evenly over the top of the batter.
  7. Bake in the preheated oven for 45-55 minutes, or until the crust is golden brown and the blackberries are bubbling.
  8. Allow to cool slightly, then serve warm with whipped cream or ice cream for an extra treat.

Tips

  • Use Fresh Berries: Fresh blackberries work best, but if using frozen, thaw and drain them first.
  • Adjust the Sweetness: If you prefer a less sweet dessert, reduce the sugar to 3/4 cup.
  • Watch the Baking Time: Oven temperatures can vary, so start checking the cobbler at 45 minutes.

Variations & Substitutions

If you’re looking to change things up, consider these variations:

  • Mixed Berries: Substitute half of the blackberries with blueberries, raspberries, or strawberries.
  • Gluten-Free: Use a gluten-free flour blend in place of all-purpose flour.
  • Dairy-Free: Replace butter with coconut oil and milk with almond or oat milk.

Storage

Store any leftover cobbler in an airtight container in the refrigerator for up to 3 days. To reheat, warm in a 350°F (175°C) oven for about 10-15 minutes or microwave individual servings for about 30 seconds.

FAQ

Can I make blackberry cobbler ahead of time?

Yes, you can prepare the cobbler a day in advance. Simply bake it, allow it to cool, and store it in the refrigerator. Reheat before serving to enjoy it warm.

What if I don’t have blackberries?

If you don’t have blackberries, feel free to substitute with other berries like blueberries or raspberries. The recipe is quite forgiving and adaptable to different fruits.

Is it necessary to use unsalted butter?

While unsalted butter is recommended to control the saltiness, you can use salted butter. Just reduce the added salt by half to maintain a balanced flavor.

Nutrition

This dessert is a treat, so it’s okay to indulge occasionally. Each serving (based on 8 servings) is roughly estimated to contain:

  • Calories: 280
  • Fat: 12g
  • Carbohydrates: 42g
  • Protein: 3g
  • Sugar: 28g

Conclusion

Blackberry cobbler is more than just a dessert; it’s an experience that brings people together. Whether you’re sharing it at a family gathering or enjoying it on a quiet evening at home, this cobbler is sure to delight. Its simple preparation and delicious flavor make it a must-try recipe. I hope this becomes a staple in your dessert repertoire, bringing as much joy to your table as it does to mine. Enjoy!

Related update: Blackberry Cobbler

Ginger Molasses Rounds | Made by Meaghan Moineau

Ginger Molasses Rounds

Intro

As the days grow shorter and the air crisper, there’s nothing quite like the comfort of a warm, spiced cookie straight out of the oven. These Ginger Molasses Rounds take me back to my grandmother’s kitchen, where the aroma of spices and the sound of laughter filled the air. Every year, as the first leaves turned gold, she would bake these cookies with me, guiding my young hands with her own seasoned ones. The magic of mixing simple ingredients to create something so delightful was a lesson in love and patience. This recipe has been passed down through generations, and it’s my pleasure to share it with you, hoping it brings warmth and joy to your home as it always has to mine.

Why You’ll Love It

These Ginger Molasses Rounds are more than just cookies; they’re little bites of nostalgia and comfort. Here’s why you’ll fall in love with them:

  • Perfectly Spiced: The combination of ginger and cinnamon provides a warming, aromatic flavor that’s perfect for the fall and winter months.
  • Deliciously Chewy: Baking them just right ensures a soft, chewy texture that melts in your mouth.
  • Simple Ingredients: You probably already have most of the ingredients in your pantry!
  • Quick to Make: With a short baking time, these cookies are perfect for last-minute gatherings or a cozy evening treat.

Ingredients

  • 1 teaspoon baking soda
  • 3/4 cup butter, softened
  • 1 teaspoon ground cinnamon
  • 1 egg
  • 2 cups all-purpose flour
  • 1/4 cup additional granulated sugar (for rolling)
  • 1 teaspoon ground ginger
  • 1/4 cup molasses
  • 1/4 teaspoon salt
  • 1 cup granulated sugar

Instructions

  1. Preheat your oven to 350°F (175°C). Line a baking sheet with parchment paper.
  2. In a large bowl, cream together the butter and sugar until light and fluffy.
  3. Beat in the egg and molasses until fully incorporated.
  4. In a separate bowl, whisk together the flour, baking soda, salt, cinnamon, and ginger.
  5. Gradually blend the dry ingredients into the creamed mixture until just combined.
  6. Shape the dough into small balls, about 1 inch in diameter.
  7. Roll each ball in the additional granulated sugar to coat.
  8. Place the balls 2 inches apart on the prepared baking sheet.
  9. Bake for 8-9 minutes, until the cookies are just set and their tops are slightly cracked.
  10. Remove from the oven and let them cool on the baking sheet for a few minutes before transferring to a wire rack to cool completely.

Tips

To achieve the perfect texture, be sure to remove the cookies from the oven while they’re still soft. They’ll continue to firm up as they cool. If you prefer a slightly firmer cookie, you can bake them for an additional minute, but be careful not to overbake, as they can quickly become too hard.

Variations & Substitutions

  • Spice it Up: Add a pinch of nutmeg or cloves for an extra layer of warmth.
  • Whole Wheat Flour: Substitute half of the all-purpose flour with whole wheat flour for a nuttier flavor and added nutrition.
  • Gluten-Free: Use a 1:1 gluten-free baking blend in place of the all-purpose flour for a gluten-free version.
  • Vegan Option: Replace the butter with a vegan buttery spread and the egg with a flax egg (1 tablespoon ground flaxseed mixed with 3 tablespoons water).

Storage

Store these cookies in an airtight container at room temperature for up to a week. For longer storage, you can freeze them for up to three months. To enjoy from frozen, simply let them thaw at room temperature or warm them in a low oven for a few minutes.

FAQ

Can I use blackstrap molasses in this recipe?

Blackstrap molasses has a stronger, more bitter flavor compared to regular molasses, which can affect the taste of these cookies. If you enjoy a more robust molasses flavor, you can use blackstrap, but I recommend sticking with regular molasses for the classic taste.

Why are my cookies not cracking?

If your cookies aren’t cracking, it might be because the dough is too warm. Try chilling the dough for 10-15 minutes before baking. Also, ensure your baking soda is fresh, as it helps create those beautiful cracks on top.

Nutrition

Each cookie (assuming the recipe makes about 24 cookies) contains approximately:

  • Calories: 110
  • Fat: 5g
  • Carbohydrates: 16g
  • Protein: 1g
  • Sugar: 10g

Conclusion

Baking these Ginger Molasses Rounds is more than just making a dessert; it’s creating memories. Whether you share them with loved ones or enjoy them with a warm cup of tea on a quiet afternoon, these cookies are sure to bring a smile to your face. I hope this recipe becomes a cherished part of your family’s traditions, just as it is in mine. Happy baking!

Related update: Ginger Molasses Rounds

Related update: Carrot Cake Snack Bites

Related update: Chocolate Peppermint Cookies

French Indie RPG Wins Presidential Praise | Analysis by Brian Moineau

A tiny French studio, a sweeping RPG, and a presidential nod: why Clair Obscur matters

When a relatively small Montpellier studio walks away from The Game Awards with Game of the Year — and the president of France posts public congratulations — you know something cultural has shifted. Clair Obscur: Expedition 33 isn’t just a surprise hit; it’s an example of how narrative ambition, indie craft, and national pride can collide in the most public of ways.

Why Emmanuel Macron’s congratulations feel bigger than a social media shout-out

  • Macron’s Instagram praise came twice: first after the game’s breakout commercial success earlier in 2025 and again following its record-setting haul at The Game Awards in December 2025.
  • His second message called the Game Awards win “a historic first for a French title” and framed the achievement as “great pride for Montpellier and for France.” (videogameschronicle.com)

That tone matters. Political leaders rarely weigh in on entertainment awards unless they see national cultural value — think of film festivals, literature prizes, or sporting victories. Macron’s public recognition signals that big, mainstream gaming moments are now part of national cultural conversation in France, not just niche industry talk.

What Clair Obscur did — and why the industry took notice

  • It swept multiple major categories at The Game Awards 2025, including Game of the Year, Best Narrative, Best Game Direction, Best Art Direction, Best Score and Music, Best RPG, and several indie-focused awards — a historic haul that made it one of the most-awarded games in the ceremony’s history. (gamesradar.com)
  • The game launched from Sandfall Interactive, a modestly sized French studio, and paired strong sales with critical acclaim — the combination that turns a successful release into a conversation starter about how games are made and valued. (en.wikipedia.org)

This mixture of indie origin, artistic ambition, and mainstream recognition complicates the old “indie vs AAA” story. Clair Obscur shows that a focused, coherent vision — and a smart relationship with players and press — can break through award seasons and sales charts alike.

A few broader ripples to watch

  • National industries: Macron’s praise could amplify interest in French game development funding, education, and export programs. Governments often point to cultural wins when arguing for more creative-sector investment. (videogameschronicle.com)
  • Indie visibility: A high-profile indie success re-centers conversations about creative risk, narrative-driven design, and sustainable studio models that avoid exploitative monetization. Industry leaders and fellow developers have publicly lauded Sandfall’s scale and choices. (en.wikipedia.org)
  • Cultural legitimacy: Games increasingly operate in the same cultural register as film and literature. When a president celebrates a title as representative of national audacity and creativity, that feeds broader acceptance of games as art and soft power.

A concise takeaway for readers (and gamers)

  • Clair Obscur: Expedition 33 proves that a small, well-crafted game can win the world’s attention — and win respect at the highest civic levels. That shift benefits players, creators, and national industries that want culture that travels.

My take

There’s a satisfying poetry to this moment: a team of creatives in Montpellier builds something personal and precise, players respond in force, critics reward daring, and a head of state frames it as national pride. That flow — from studio spark to cultural recognition to political acknowledgment — is exactly the arc that helps games move from hobby to heritage. It doesn’t mean every political comment is unalloyed praise (leaders often have complicated relationships with gaming), but Macron’s public congratulations are a reminder that games now live squarely in the lens of culture and diplomacy.

Sources

(Notes: linked articles above provide reporting on Macron’s messages, the Game Awards results, and the cultural response around Sandfall Interactive’s win.)


Related update: We recently published an article that expands on this topic: read the latest post.


Related update: We recently published an article that expands on this topic: read the latest post.


Related update: We recently published an article that expands on this topic: read the latest post.

Prada, Kolhapuri Deal Sparks IP Debate | Analysis by Brian Moineau

A luxury sandal, a centuries‑old craft, and the price of inspiration

Prada's decision to sell a limited run of "Made in India" Kolhapuri‑style sandals for about $930 has reignited a conversation the fashion world keeps circling back to: where does inspiration end and appropriation begin? What started this year as a pair of tan leather sandals on a Milan runway—briefly billed as simply "leather footwear"—became a flashpoint after Indian artisans and commentators pointed out the clear resemblance to Kolhapuri chappals, the handmade sandals from Maharashtra and Karnataka. Prada has since acknowledged the Indian roots of the design and struck a deal to make 2,000 pairs in collaboration with state‑backed artisan bodies, with plans to sell them globally in February 2026. (feeds.bbci.co.uk)

Quick takeaways

  • Prada showcased sandals in Milan that closely resembled traditional Kolhapuri chappals, prompting accusations of cultural appropriation. (feeds.bbci.co.uk)
  • The brand responded by acknowledging the inspiration and signing agreements with two Indian, state‑backed leather development corporations to produce a limited run made in India — 2,000 pairs priced at roughly €800–€930 each — for global sale in February 2026. (reuters.com)
  • The collaboration promises artisan training, short residencies at Prada's academy, and an investment Prada says will run into "several million euros," but questions remain about profit sharing, pricing parity, and long‑term benefits for the craftspeople. (reuters.com)

Why this matters beyond a single product drop

Kolhapuri chappals are not a trendy motif invented last season. They have a long cultural history, a specific geographic origin (GI protection in India since 2019), and are made by artisans from marginalised communities who rely on this craft for livelihoods. When a global luxury house reproduces that aesthetic and ships it out of context—then prices it at nearly 100 times the local market value—voices in India rightly asked for attribution, accountability and a share of the upside. The debate touches on:

  • Cultural heritage and intellectual property: designs tied to communities and places raise questions about recognition and rights. (dw.com)
  • Economic fairness: local Kolhapuri chappals sell for a few dollars in India; Prada’s versions are priced like collectible luxury items. That gap fuels the sense of extraction. (livemint.com)
  • The power dynamics of taste: global brands can amplify or erase origin stories depending on how they choose to tell them. (feeds.bbci.co.uk)

What Prada has done — and what's still missing

The facts Prada and its critics are pointing to are straightforward:

  • Prada publicly acknowledged the Indian inspiration after the backlash and entered talks with local bodies. (feeds.bbci.co.uk)
  • It signed memoranda of understanding with two government‑linked leather industry corporations in Maharashtra and Karnataka to produce 2,000 pairs locally and to run training programs and exchanges. Prada says the project spans three years and includes artisan residencies in Italy. (reuters.com)
  • The launch is slated for February 2026 across 40 Prada stores and online, with each pair priced around €800–€930 (about $930). (reuters.com)

But several sticky issues remain:

  • Profit sharing and pricing: early reporting indicates artisans are being paid better for production work, yet initial agreements reportedly do not include a formal profit‑sharing clause. That leaves open whether artisans will see long‑term revenue proportional to the value their craft helps create. (timesofindia.indiatimes.com)
  • Attribution vs. agency: attribution alone—acknowledging that a design was inspired by Kolhapuri chappals—is not the same as centring the artisans’ perspectives or ceding decision‑making power about how their craft is represented and sold. (dw.com)
  • Scale and authenticity: producing luxury variants for a global market can raise interest and demand, but it can also shift the meaning of a craft and price out local buyers unless carefully managed. (livemint.com)

A timeline to keep in mind

  • June 2025: Prada presented sandals during Milan Fashion Week that reminded many observers of Kolhapuri chappals; social media outcry and industry criticism followed. (feeds.bbci.co.uk)
  • July–December 2025: Prada acknowledged the Indian inspiration and entered talks with Indian artisan bodies and the Maharashtra Chamber of Commerce. Reporting over late 2025 shows the company formalising agreements and planning the limited run and training programs. (feeds.bbci.co.uk)
  • February 2026: Planned global sale of the 2,000 "Made in India" sandals through 40 Prada stores and Prada.com. (reuters.com)

(Those are the dates reported by news outlets; some implementation details and legal agreements may be updated as the project proceeds.)

The broader industry lesson

Big fashion houses will continue to find inspiration in global crafts; the issue is governance. Brands can handle cultural sources in ways that either replicate extractive patterns or help sustain cultural economies. Meaningful models often include:

  • Co‑design and co‑ownership models that give artisans a seat at the table.
  • Transparent, long‑term revenue arrangements (royalties, profit‑shares, co‑brands).
  • Capacity building that respects local production rhythms and markets, not just upscale retooling for export. (timesofindia.indiatimes.com)

Prada’s announced training programs and residencies are notable steps — they could be transformative if implemented with clear, enforceable commitments to artisans’ economic rights and community representation. Without legally binding profit‑share or co‑ownership terms, though, such initiatives risk being framed as goodwill optics rather than structural change. (timesofindia.indiatimes.com)

My take

This moment is a test case. The optics of a heritage craft going from village markets to luxury boutiques—priced at hundreds of times its local value—will always make people uneasy. What matters is whether this ends as a story of appropriation amended with PR, or as a genuine transfer of value and visibility to the communities who stewarded the craft for generations. Prada’s move toward collaboration is better than silence or denial, but the proof will be in published, enforceable terms: transparent payments, profit‑sharing, design credit, and meaningful decision‑making by artisans and their organisations.

If brands want to borrow cultural capital, they must be prepared to share economic capital and power too. That’s not just ethical—it's smart business for a future in which consumers increasingly expect provenance, fairness, and traceability.

Final thoughts

Heritage crafts entering the global luxury ecosystem can create opportunity, but only when reciprocity is institutionalised rather than optional. We should watch the Prada‑Kolhapuri rollout closely between now and February 2026: will the partnership deliver durable income, training that translates into demand for local makers, and formal obligations to share value? If the answer is yes, this could be a model; if not, it will be another reminder that apology and attribution without structural change aren’t enough.

Sources

(Where paywalls or regional access apply, I prioritized reporting from Reuters and BBC for clarity and accessibility.)

Pumpkin French Toast | Made by Meaghan Moineau

Pumpkin French Toast: A Cozy Autumn Breakfast Delight

Intro

There’s something magical about the crispness of fall mornings that calls for a breakfast as comforting as it is delicious. Growing up, I remember the aroma of spices filling our kitchen as my grandmother prepared her famous pumpkin French toast on chilly weekends. The warmth of cinnamon and nutmeg, combined with the sweetness of maple syrup, made those mornings unforgettable. This recipe is a tribute to those cherished memories, bringing the essence of autumn to your breakfast table.

Why You’ll Love It

This Pumpkin French Toast is more than just a breakfast; it’s an experience. The perfect blend of spices and pumpkin puree gives it that quintessential fall flavor, while the crispy exterior and fluffy interior provide a satisfying texture. Whether you’re hosting a brunch or treating yourself to a relaxed morning meal, this recipe is sure to impress. Plus, it’s easy to make and fills your home with an irresistible aroma.

Ingredients

  • Bread (preferably thick slices like brioche or challah)
  • 1/4 cup brown sugar
  • 1 teaspoon cinnamon
  • 4 eggs
  • 1/2 cup maple syrup
  • 1 cup milk
  • 1/4 teaspoon nutmeg
  • 1 teaspoon pumpkin pie spice
  • 1/2 cup pumpkin puree
  • 1 teaspoon vanilla extract

Instructions

  1. In a shallow dish, whisk together the eggs, milk, pumpkin puree, vanilla extract, brown sugar, cinnamon, nutmeg, and pumpkin pie spice until well combined.
  2. Preheat your griddle or skillet to 350 degrees Fahrenheit.
  3. Dip each slice of bread into the egg mixture, ensuring both sides are evenly coated. Allow the bread to soak for a few seconds for maximum flavor absorption.
  4. Place the coated bread slices onto the preheated griddle. Cook each side for 2-3 minutes, or until they are golden brown and cooked through.
  5. Serve the French toast hot, topped with butter and a generous drizzle of maple syrup. For an extra touch, spread some pumpkin butter on top.

Tips

For the best results, use day-old bread, as it absorbs the egg mixture more effectively without becoming overly soggy. If you’re using fresh bread, consider toasting it lightly before dipping. Be sure to adjust the cooking time according to the thickness of your bread slices to ensure even cooking.

Variations & Substitutions

You can easily customize this recipe to suit your tastes or dietary needs. Use almond milk or coconut milk for a dairy-free option, and swap out the brown sugar for coconut sugar or a sugar substitute if desired. Add a handful of chopped nuts or dried cranberries for a delightful texture contrast. For a gluten-free version, use your favorite gluten-free bread.

Storage

Leftover French toast can be stored in an airtight container in the refrigerator for up to 3 days. To reheat, simply place it in a toaster or oven at a low temperature until warmed through. You can also freeze the cooked French toast by laying slices flat on a baking sheet to freeze individually before transferring them to a freezer-safe bag or container. Reheat from frozen using a toaster or oven.

FAQ

Can I make the egg mixture ahead of time?

Yes, you can prepare the egg mixture up to a day in advance. Store it in the refrigerator in a covered container, and give it a good whisk before using it to ensure the spices are evenly distributed.

What kind of bread works best for this recipe?

Thick slices of bread like brioche, challah, or Texas toast are ideal for French toast as they hold up well to the egg mixture and cook evenly. However, feel free to use any bread you have on hand, just keep in mind that the texture may vary.

Can I use canned pumpkin pie filling instead of pumpkin puree?

It’s best to use pumpkin puree for this recipe as pumpkin pie filling contains added sugars and spices that could alter the flavor balance. If pumpkin puree is not available, you can adjust the spices in the recipe to account for the additional flavors in the pie filling.

Nutrition

This recipe is a delightful indulgence, providing a cozy start to your day. While the exact nutritional content will vary based on the type of bread used and toppings added, a serving made with regular bread and maple syrup typically contains around 250-300 calories, with healthy doses of vitamin A from the pumpkin puree.

Conclusion

Pumpkin French Toast is the perfect way to celebrate the flavors of fall. Its rich and comforting taste brings warmth to any morning, making it a favorite for family gatherings and lazy weekends alike. Whether you enjoy it with a cup of hot coffee or a glass of cider, this dish is sure to become a beloved part of your autumn traditions. Give it a try and let the nostalgic aroma of spices transport you to your own cherished memories!

Related update: Pumpkin French Toast

Related update: Banana Blueberry Pancakes

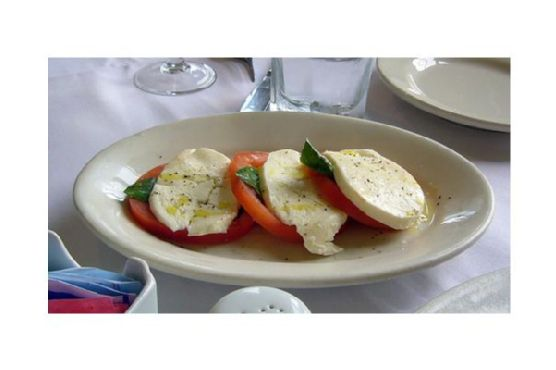
Italian Tomato and Mozzarella Caprese | Made by Meaghan Moineau

Italian Tomato and Mozzarella Caprese

Intro

There’s something truly magical about the simplicity of Italian cuisine. The first time I tasted a Caprese salad was during a family trip to the Amalfi Coast. We were dining al fresco at a quaint little restaurant with views of the sparkling Mediterranean Sea. The sun was setting, casting a golden hue over everything, and the air was rich with the scent of fresh basil and ripe tomatoes. Every bite of that Caprese was an explosion of freshness and flavor, and I’ve been in love with this dish ever since.

Why You’ll Love It

The Italian Tomato and Mozzarella Caprese is a celebration of fresh, high-quality ingredients. It’s a dish that requires minimal preparation but delivers maximum flavor. This easy-to-make salad is perfect for any occasion, whether you’re hosting a summer barbecue, looking for a quick appetizer, or simply craving a taste of Italy. The combination of juicy vine-ripened tomatoes, creamy mozzarella, and fragrant basil, all drizzled with balsamic vinegar and olive oil, is nothing short of divine.

Ingredients

  • Fluid balsamic vinegar
  • Black pepper
  • Fresh basil leaves
  • Kosher salt
  • Olive oil
  • Dry sprinkle of oregano leaves
  • Fresh whole-milk mozzarella
  • Vine-ripened tomatoes

Instructions

  1. On a large platter, arrange sliced tomatoes and drizzle with balsamic vinegar.
  2. Place one basil leaf on top of each tomato slice.
  3. Slice mozzarella and place on top of basil leaves.
  4. Sprinkle oregano, salt, and black pepper on cheese and drizzle with the olive oil.

This recipe yields 4 servings.

Tips

To make the most of your Caprese salad, ensure that your ingredients are as fresh as possible. Look for bright red, firm tomatoes and fresh mozzarella that is soft and slightly springy to the touch. Use high-quality olive oil and balsamic vinegar to enhance the flavors. Remember, the key to a perfect Caprese is balance, so adjust the seasoning to your taste.

Variations & Substitutions

While the classic Caprese is delightful on its own, there are several ways you can mix things up:

  • Avocado: Add slices of ripe avocado for a creamy twist.
  • Pesto: Drizzle a little pesto over the top for an extra burst of basil flavor.
  • Prosciutto: For a heartier salad, add thin slices of prosciutto.
  • Buffalo Mozzarella: Substitute traditional mozzarella with buffalo mozzarella for a richer taste.

Storage

Caprese salad is best enjoyed fresh. However, if you have leftovers, store them in an airtight container in the refrigerator for up to 24 hours. Note that the tomatoes may release some juice, which can affect the texture of the salad. It’s a dish that shines in its freshness, so try to prepare only as much as you plan to eat.

FAQ

Can I make Caprese salad ahead of time?

While it’s best to assemble the salad just before serving, you can prepare the individual components a few hours ahead. Slice the tomatoes and mozzarella and store them separately in the refrigerator. Assemble the salad when you’re ready to serve.

What can I serve with Caprese salad?

Caprese salad is wonderfully versatile and can be served alongside grilled meats, pasta dishes, or crusty bread. It’s also a great addition to a charcuterie board.

Is Caprese salad healthy?

Yes, Caprese salad is a healthy choice. It’s packed with nutrients from the tomatoes and basil, and the mozzarella provides protein and calcium. Just be mindful of the olive oil and cheese if you’re watching your calorie intake.

Nutrition

Each serving of Caprese salad contains approximately:

  • Calories: 250
  • Protein: 12g
  • Fat: 20g
  • Carbohydrates: 8g
  • Fiber: 2g
  • Sugar: 6g

Conclusion

The Italian Tomato and Mozzarella Caprese is more than just a salad; it’s a tribute to the beauty of simple, fresh ingredients. Whether you’re reminiscing about a past Italian getaway or just looking to bring a taste of Italy to your table, this Caprese salad is sure to delight your taste buds. Enjoy each layer, each flavor, and let it transport you to a sun-drenched terrace overlooking the Mediterranean. Buon appetito!

Related update: Italian Tomato and Mozzarella Caprese

Related update: Arame Edamame Cucumber Salad

Related update: Agedashi Tofu

Spiced Apple Cider | Made by Meaghan Moineau

Spiced Apple Cider: A Cozy Autumn Indulgence

Intro

There’s something truly magical about the crisp air of autumn. It takes me back to my childhood days spent at my grandparents’ orchard, where the scent of freshly picked apples mingled with the earthy aroma of fallen leaves. Each visit concluded with a warm mug of spiced apple cider, lovingly prepared by my grandmother. This delightful drink was more than just a beverage; it was a hug in a mug, a symbol of comfort and warmth. Today, I’m sharing a recipe for Spiced Apple Cider that captures that nostalgic essence, perfect for cozy evenings by the fireplace or festive gatherings with loved ones.

Why You’ll Love It

Our Spiced Apple Cider is the epitome of fall in a cup. It’s a tantalizing blend of sweet and spicy flavors that will warm you from the inside out. Here’s why you’ll love it:

  • Easy to Make: With just a handful of ingredients and a few simple steps, you can enjoy a homemade cider that tastes like it simmered all day.
  • Versatile: Perfect for both intimate evenings and large gatherings, this cider can be easily scaled up or down.
  • Customizable: Personalize your cider with a splash of dark rum for an adult twist or keep it non-alcoholic for the whole family to enjoy.

Ingredients

  • 4 cups freshly apple juice
  • 2 cups water
  • 3 cinnamon sticks
  • 1 teaspoon allspice
  • 1 tablespoon freshly grated ginger
  • 1/4 cup maple syrup
  • 1/4 teaspoon ground nutmeg
  • 1 orange, sliced

Instructions

  1. In a large non-reactive pot, combine all the ingredients: apple juice, water, cinnamon sticks, allspice, ginger, maple syrup, nutmeg, and orange slices.
  2. Bring the mixture to a boil over medium-high heat.
  3. Once boiling, let it boil for about 5 minutes.
  4. Cover the pot, reduce the heat, and let it simmer for 30 to 40 minutes, allowing the flavors to meld together.
  5. Line a colander with cheesecloth and strain the cider to remove the solids.
  6. Serve warm. For an adult version, spike with dark rum if desired.

Tips

Here are some tips to ensure your Spiced Apple Cider is perfect every time:

  • Use Fresh Ingredients: Freshly grated ginger and freshly squeezed apple juice can make a significant difference in flavor.
  • Non-Reactive Pot: Using a non-reactive pot such as stainless steel or enamel-coated will prevent any metallic taste from leaching into the cider.
  • Simmer Time: The longer you let it simmer, the more intense the flavors will become. Just be sure not to boil it for too long, or you’ll lose some of the fresh apple flavors.

Variations & Substitutions

The beauty of this Spiced Apple Cider is its versatility:

  • Sugar Substitute: Replace maple syrup with honey or brown sugar for a different sweetness profile.
  • Spice Mix: Add cloves or cardamom for an extra layer of spice.
  • Fruit Infusion: Add cranberries or sliced pears to the simmering cider for additional fruitiness.

Storage

Leftover Spiced Apple Cider can be stored in an airtight container in the refrigerator for up to 5 days. Reheat gently on the stove or in the microwave before serving. For longer storage, consider freezing the cider in a freezable container, leaving room at the top for expansion.

FAQ

Can I make this cider ahead of time?

Absolutely! This cider can be made a day or two in advance and stored in the refrigerator. The flavors will continue to meld, making it even more delicious. Simply reheat before serving.

Is it possible to make this cider in a slow cooker?

Yes, you can easily adapt this recipe for a slow cooker. Combine all the ingredients in the cooker and cook on low for 4-6 hours. Strain and serve as directed.

What can I use as a non-alcoholic substitute for rum?

If you prefer a non-alcoholic version, consider adding a splash of vanilla extract for a warm, aromatic note that complements the spices beautifully.

Nutrition

While the exact nutritional content can vary based on the specific ingredients used, a typical serving of Spiced Apple Cider (without rum) contains approximately:

  • Calories: 120
  • Sugars: 28g
  • Vitamin C: 10% of the Daily Value

Conclusion

Whether you’re reminiscing about fond childhood memories or creating new traditions with your family, this Spiced Apple Cider is sure to become a cherished favorite. With its warm, inviting aroma and rich, comforting taste, it embodies the spirit of autumn. So, wrap yourself in a cozy blanket, pour a steaming mug of cider, and savor the simple pleasures of the season. Enjoy!

Related update: Spiced Apple Cider

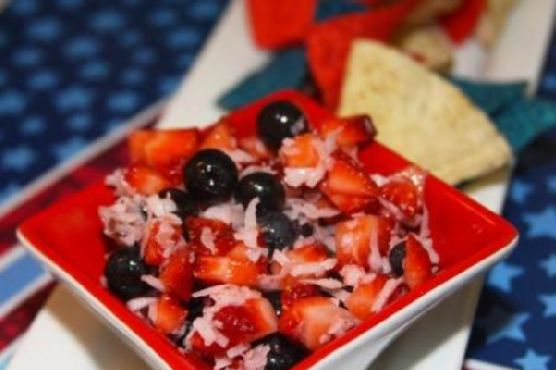
Red, White, and Blue Fruit Salsa | Made by Meaghan Moineau

Red, White, and Blue Fruit Salsa

Intro

There’s something undeniably nostalgic about summer gatherings. The aroma of freshly cut grass, children playing in the backyard, and the delightful chatter of family and friends create an atmosphere that’s hard to beat. One of my fondest memories is of July 4th celebrations at my grandmother’s house. The highlight for me was always the vibrant and refreshing fruit salsa she would make. Her recipe has been passed down to me, and today, I’m thrilled to share this Red, White, and Blue Fruit Salsa with you. It’s a dish that not only celebrates the colors of our flag but also captures the essence of those cherished summer days.

Why You’ll Love It

This Red, White, and Blue Fruit Salsa is a perfect blend of sweet and tangy flavors that will have your taste buds dancing. It’s incredibly easy to make, requiring just a handful of ingredients and minimal preparation time. Whether you’re hosting a summer barbecue, a patriotic holiday party, or simply craving a light and refreshing snack, this salsa is sure to impress. Plus, it’s a healthy alternative to traditional chips and dip, making it a hit with health-conscious guests.

Ingredients

  • 1 cup blueberries
  • 1 cup diced strawberries
  • 1/2 cup sweetened shredded coconut
  • 2 tablespoons lime juice
  • 2 tablespoons strawberry jam
  • Freedom Chips (to serve)

Instructions

  1. In a medium-sized bowl, combine the blueberries, diced strawberries, and sweetened shredded coconut. Gently mix them to ensure an even distribution.
  2. Add the lime juice and strawberry jam to the berry mixture. Stir well until all the ingredients are thoroughly combined.
  3. Cover the bowl with plastic wrap or a lid and refrigerate for at least an hour. This allows the flavors to meld together beautifully.
  4. Once chilled, serve the fruit salsa as an appetizer with Freedom Chips. Enjoy the burst of flavors and the delightful crunch of the chips.

Tips

For the best results, use fresh and ripe berries. Their natural sweetness will enhance the overall flavor of the salsa. If you want to add a bit of spice, consider sprinkling a pinch of chili powder or cayenne pepper into the mix for a subtle kick. Always taste the salsa before serving, as you may want to adjust the lime juice or jam to suit your personal preference.

Variations & Substitutions

Feel free to get creative with this recipe! You can substitute raspberries or blackberries for the blueberries if you prefer a different berry flavor. If you’re not a fan of coconut, try using finely chopped mint leaves instead for a refreshing twist. For a healthier option, use unsweetened shredded coconut. You can also experiment with different jams, such as raspberry or apricot, to change up the flavor profile.

Storage

Store any leftover salsa in an airtight container in the refrigerator for up to three days. Keep in mind that the berries might release some juice over time, so give the salsa a good stir before serving again. Unfortunately, this salsa does not freeze well due to the high water content of the fruit.

FAQ

Can I make this salsa ahead of time?

Absolutely! In fact, making it a day ahead can enhance the flavors even more. Just be sure to store it in the refrigerator and give it a good stir before serving.

What are Freedom Chips?

Freedom Chips are simply tortilla chips, but with a playful and patriotic twist. You can use any brand or make your own at home by cutting tortillas into your desired shape and baking or frying them until crispy.

Is there a way to make this salsa more savory?

Yes! You can add diced avocado, chopped cilantro, or a small amount of finely diced red onion to introduce savory elements to the salsa. These additions will complement the sweetness of the berries beautifully.

Nutrition

This fruit salsa is a nutritious choice, packed with vitamins and antioxidants from the fresh berries. It’s low in calories and contains healthy fats from the coconut. While the exact nutritional content will vary based on portion sizes, you can generally expect a serving to be low in fat and high in vitamin C, making it a guilt-free treat.

Conclusion

Red, White, and Blue Fruit Salsa is more than just a dish; it’s a celebration of summer and all the vibrant flavors it brings. Whether you’re reminiscing about past family gatherings or creating new memories, this salsa is sure to be a hit. Its simplicity, flexibility, and delightful taste make it a must-try for any occasion. So gather your loved ones, prepare this refreshing salsa, and let the festivities begin!

Related update: Red, White, and Blue Fruit Salsa

Related update: Italian Tomato and Mozzarella Caprese

Siew Mai | Made by Meaghan Moineau

Siew Mai: A Delightful Dim Sum Classic

Intro

Growing up, dim sum Sundays were a cherished tradition in my family. We would gather around a bustling table, eagerly anticipating the arrival of steaming bamboo baskets filled with an assortment of dumplings. Among my favorites was siew mai, a delectable pork and shrimp dumpling that quickly won my heart with its savory filling and delightful textures. Today, I’m excited to share my family’s recipe for siew mai, a dish that brings back fond memories and continues to be a beloved part of our dining experience.

Why You’ll Love It

Siew mai is a timeless dish that has captivated taste buds for generations. Here’s why you’ll love making and eating these delicious dumplings:

  • Flavorful Filling: The combination of pork, shrimp, and Chinese sausages creates a savory and satisfying flavor profile.
  • Texture Delight: The tender pork is complemented by the crunch of water chestnuts and the chewy texture of glutinous rice.
  • Customizable: Easily adapt the recipe to suit your taste preferences with variations and substitutions.
  • Perfect for Sharing: These bite-sized delights are perfect for gatherings and will surely impress your guests.

Ingredients

  • Wonton wrappers
  • 700g fatty pork
  • 2 tablespoons corn starch
  • 1 teaspoon salt
  • 1 teaspoon white ground pepper
  • 1/2 teaspoon sugar
  • 1 teaspoon Worcestershire sauce or Maggie Seasoning Sauce
  • 2 tablespoons Shaoxing Huatiao wine
  • 2 tablespoons sesame oil
  • 80g canned water chestnuts
  • 4 large Chinese mushrooms
  • Cooked whole shrimp
  • Carrot
  • 2 lap cheongs (Chinese sausages)
  • Raw glutinous rice
  • Shallots
  • Ginger
  • Cooking oil
  • Dried shrimps
  • Cooked dried scallops
  • Light soy sauce
  • Oyster sauce

Instructions

  1. To prepare the pork filling, mince 700g of pork and place it in a large mixing bowl.
  2. Add 2 tablespoons of corn starch, 1 teaspoon of salt, 1 teaspoon of ground white pepper, 1/2 teaspoon of sugar, 1 teaspoon of Worcestershire sauce, 2 tablespoons of Shaoxing Huatiao wine, and 2 tablespoons of sesame oil. Mix well.
  3. Roughly chop 80g of canned water chestnuts and 4 large Chinese mushrooms into fine pieces. Add to the pork mixture and combine thoroughly.
  4. Finely dice a small carrot to garnish the siew mai later. Set aside.
  5. For the glutinous rice filling, soak 2 lap cheongs in boiling water until the skin separates. Remove the skin and dice the sausages.
  6. In a large saucepan over medium-high heat, pan fry the diced lap cheong until they are golden. Follow the instructions for glutinous rice preparation and stir-fry until fragrant. Add the fried lap cheong pieces and set aside to cool.
  7. Prepare the wonton wrappers by placing a sheet on a flat surface. Place a teaspoon of filling in the center of each wrapper.
  8. Dampen your finger with water and wet the edges of the wonton wrapper. Gather the wrapper around the filling and squeeze gently to seal.
  9. Top each pork siew mai with a shrimp and garnish with chopped carrot.
  10. Place the dumplings in a steamer lined with perforated baking paper. Steam over boiling water for 14-15 minutes or until cooked through.
  11. Serve hot, or freeze uncooked dumplings for later use.

Tips

To ensure the best results when making siew mai, keep these tips in mind:

  • Keep it Tight: Make sure the dumplings are tightly wrapped to prevent them from falling apart while steaming.
  • Use Fresh Ingredients: Fresh shrimp and quality pork make a significant difference in taste.
  • Steam Properly: Ensure steam can circulate by cutting holes in the baking paper lining the steamer.

Variations & Substitutions

Feel free to experiment with these variations to suit your preferences:

  • Vegetarian Siew Mai: Replace meat with chopped vegetables such as mushrooms, carrots, and bamboo shoots.
  • Spicy Twist: Add a dash of chili oil or finely chopped fresh chili for a spicy kick.
  • Flavor Enhancers: Add a touch of grated ginger or garlic for additional depth of flavor.

Storage

Siew mai is best enjoyed fresh, but if you have leftovers, store them in an airtight container in the refrigerator for up to 2 days. To freeze uncooked siew mai, place them on a baking sheet lined with parchment paper, freeze until solid, and then transfer to a freezer-safe container. They can be steamed directly from frozen.

FAQ

Can I make siew mai without shrimp?

Yes, you can omit the shrimp if desired. The pork filling is flavorful enough on its own, or you could increase the amount of pork or add other ingredients like mushrooms for added texture and taste.

What can I use instead of wonton wrappers?

If you don’t have wonton wrappers, you can use dumpling wrappers or even make your own from scratch using flour and water. The texture may vary slightly, but they’ll still be delicious.

Nutrition

While exact nutritional values can vary, siew mai is a protein-rich dish thanks to the pork and shrimp. The inclusion of vegetables like mushrooms and water chestnuts adds fiber and vitamins. Opt for leaner pork cuts to reduce fat content if desired.

Conclusion

Siew mai is more than just a dish; it’s a culinary tradition that brings people together. Whether you’re enjoying it as part of a dim sum spread or making it the star of your meal, siew mai is sure to delight with its savory flavors and satisfying textures. I hope this recipe brings joy to your kitchen and adds a touch of nostalgia to your dining table. Happy cooking!

Related update: Siew Mai

Related update: Red, White, and Blue Fruit Salsa

Related update: Lamb Tagine Stew

Yogurt Marinated Lamb Skewers | Made by Meaghan Moineau

Yogurt Marinated Lamb Skewers

Intro

There’s something magical about the aroma of lamb skewers sizzling over a charcoal grill, filling the air with their mouthwatering scent. This recipe for yogurt marinated lamb skewers takes me back to summers spent at my grandparents’ house. My grandfather, a man of few words, would gather the family around the backyard grill, teaching us the art of cooking over an open flame. Those evenings were filled with laughter, stories, and the irresistible taste of tender lamb infused with the rich flavors of cumin and paprika. It is this cherished memory that I bring to your kitchen with this recipe, perfect for a family gathering or a casual summer evening with friends.

Why You’ll Love It

This recipe is a crowd-pleaser for many reasons. First, the marinade infuses the lamb with a blend of spices that creates a depth of flavor that’s hard to resist. The yogurt not only tenderizes the meat but also adds a subtle tang that balances the spices beautifully. These lamb skewers are easy to prepare, making them ideal for both novice and experienced cooks. Plus, grilling gives the lamb a perfect char that enhances its savory goodness. Whether you’re hosting a barbecue or enjoying a quiet dinner at home, these skewers are sure to become a new favorite.

Ingredients

  • 1/4 cup vegetable oil
  • 2 teaspoons ground cumin
  • 2 pounds leg of lamb, boned and cut into 1-inch cubes
  • 1/2 teaspoon ground nutmeg
  • 1 tablespoon paprika
  • 1 cup plain yogurt
  • 1 teaspoon salt
  • 1 teaspoon ground turmeric

Instructions

  1. Start by boning the leg of lamb and cutting it into 1-inch cubes. This ensures even cooking and allows the marinade to fully penetrate the meat.
  2. In a large bowl, combine the vegetable oil, cumin, nutmeg, paprika, plain yogurt, salt, and turmeric. Mix well until you have a smooth marinade.
  3. Add the lamb cubes to the marinade, ensuring each piece is well coated. Cover the bowl with plastic wrap and refrigerate overnight to let the flavors meld.
  4. When ready to cook, preheat your charcoal grill to medium-high heat.
  5. Thread the marinated lamb cubes onto skewers, leaving a little space between each piece for even cooking.
  6. Place the skewers on the grill and cook for about 7 minutes on each side, or until the lamb reaches your desired level of doneness.
  7. Remove from the grill and let the skewers rest for a few minutes before serving. Enjoy the skewers with a side of your choice, such as a fresh salad or warm pita bread.

Tips

For the best results, use fresh, quality ingredients. If possible, source your lamb from a local butcher to ensure it’s fresh and flavorful. When marinating the lamb, make sure each piece is generously coated. If you don’t have time to marinate overnight, try to allow at least two to four hours for the flavors to develop. If you’re using wooden skewers, soak them in water for about 30 minutes before grilling to prevent them from burning.

Variations & Substitutions

Feel free to customize these skewers to suit your taste. You can substitute chicken or beef for the lamb if you prefer. For a spicier kick, add a pinch of cayenne pepper to the marinade. If you’re looking for a lighter option, swap the yogurt for a dairy-free alternative or use a lemon and olive oil marinade instead. Vegetarians can enjoy this recipe by replacing the lamb with firm tofu or a medley of vegetables like bell peppers, zucchini, and mushrooms.

Storage

Leftover skewers can be stored in an airtight container in the refrigerator for up to three days. To reheat, place them in a preheated oven at 300°F (150°C) until warmed through, or microwave them for a quick and easy meal. You can also freeze the marinated lamb before grilling. Be sure to store it in a freezer-safe container, and it will keep for up to two months. Thaw the lamb in the refrigerator overnight before grilling.

FAQ

Can I use a gas grill instead of a charcoal grill?

Absolutely! While a charcoal grill imparts a unique smoky flavor, a gas grill is a convenient alternative. Simply preheat the gas grill to medium-high heat and follow the same cooking instructions. You may need to adjust the cooking time slightly, so keep an eye on the lamb to avoid overcooking.

What should I serve with these lamb skewers?

These skewers pair wonderfully with a variety of sides. Consider serving them with a fresh cucumber and tomato salad, roasted vegetables, or a hearty grain like couscous or quinoa. A side of tzatziki sauce or hummus can also complement the flavors beautifully.

Nutrition

This recipe is rich in protein and offers a good balance of healthy fats and carbohydrates. Lamb is an excellent source of vitamins and minerals such as vitamin B12, zinc, and iron. If you’re watching your calorie intake, consider pairing the skewers with a light salad or grilled vegetables for a well-rounded meal.

Conclusion

These yogurt marinated lamb skewers are a delicious homage to the flavors of my childhood, and I hope they bring as much joy to your table as they have to mine. They’re a testament to the beauty of simple, well-prepared ingredients that come together to create something truly special. Whether you’re a seasoned cook or just starting out, this recipe is sure to impress and delight. Happy grilling!

Related update: Yogurt Marinated Lamb Skewers

Related update: Kk's Fish Tacos

K‑Shaped Recovery: Winners and Losers | Analysis by Brian Moineau

Why everyone’s talking about the “K‑shaped” economy — and why it should make you think twice

You’ve probably heard the phrase “K‑shaped recovery” a few times lately — and not just from economists. It’s showing up in corporate earnings calls, news headlines, and even at kitchen‑table conversations. The image is simple: a K, with one arm shooting up and the other slumping down. But the real story behind that picture is messy, emotional, and getting more relevant to daily life than many of us expected.

What the K really means

  • The upper arm of the K represents higher‑income households: incomes, asset values and spending are rising for people who own lots of stocks, real estate or high‑paying jobs tied to tech and finance.
  • The lower arm represents lower‑ and middle‑income households: wage growth is weak, price pressure (rent, groceries, energy) bites harder, and many people have less ability to spend or save.
  • The result: headline GDP and stock indices can look healthy while large swaths of Americans feel stuck or squeezed.

This isn’t a new concept — economists used “K‑shaped” during the pandemic to describe divergent recoveries. What’s changed is how sharply the split has re‑emerged in 2025 as asset prices and AI‑sector gains lift wealth at the top while pay and hiring cool off for lower‑wage workers.

How we got here: context that matters

  • Pandemic-era policies, huge fiscal responses, shifting labor markets and record‑high tech valuations created a period where asset owners got a disproportionate share of the gains.
  • In 2023–24 some lower‑wage workers saw real wage improvements, narrowing the gap briefly — but that momentum faded in 2025 as inflation‑adjusted wage growth slowed more for the bottom quartile than for the top.
  • The AI boom and heavy corporate investment in data centers and infrastructure have powered big gains for a few companies (and their shareholders) without producing broad wage gains or mass hiring in many sectors.
  • Consumer spending overall continues, but a growing share comes from higher‑income households; lower‑income spending lags, which reshuffles which businesses win and which struggle.

Who’s winning and who’s losing

  • Winners:
    • Households that own stocks and other financial assets. The stock market and gains tied to the AI winners have boosted wealth for the top slice of Americans.
    • Companies that sell premium goods and services to affluent buyers. Luxury retail and high‑end travel show resilience even when mass‑market demand softens.
  • Losers:
    • Lower‑wage workers in retail, hospitality and entry‑level services where hiring and pay growth have cooled.
    • Businesses that rely on broad, volume‑based spending by younger and lower‑income consumers (certain fast‑casual restaurants, budget retailers, travel tailored to younger demographics).

Why this pattern matters beyond headlines

  • Fragile consumer demand: If lower‑ and middle‑income households pull back sharply, overall spending — and corporate revenue — could fall, potentially causing a feedback loop that hits hiring and investment.
  • Policy risks: If policymakers respond by cutting rates or changing tax rules to stoke growth, the effects may again flow unevenly and could widen the gap unless targeted measures accompany them.
  • Social and political consequences: Persistent divergence heightens concerns about affordability, social mobility and the role of public policy in redistributing opportunity.

Signals to watch next

  • Wage growth by income quartile (are lower‑income wages improving or stagnating?)
  • Consumer spending breakdowns by income (is spending concentration at the top growing?)
  • Hiring trends in low‑wage industries (is employment cooling or recovering?)
  • Corporate capex in AI and how much of that translates into broader hiring
  • Stock market concentration vs. household participation (who holds the gains?)

A few practical takeaways

  • For workers: Skills and mobility matter. Sectors tied to AI, cloud infrastructure, health care and trade‑sensitive manufacturing may offer different pathways than retail or entry‑level hospitality.
  • For savers and investors: Recognize concentration risk. Heavy reliance on a handful of tech winners can be rewarding — and risky — if broader demand softens.
  • For businesses: Reassess customer segmentation. Firms that depended on volume from younger or lower‑income consumers may need to tweak pricing, value propositions, or product mix.
  • For policymakers: Monitoring and targeted supports (training, childcare, housing affordability) will be essential to prevent a K‑shaped boom from calcifying into longer‑term inequality.

A few numbers that make it real

  • Bank of America card data (October 2025) showed higher‑income households’ spending grew noticeably faster than lower‑income households (roughly 2.7% vs. 0.7% year‑over‑year in October).
  • Federal Reserve data has long shown stock ownership is heavily concentrated; recent analyses report that the top 10% of households own the vast majority of equities, which amplifies asset‑price gains for the wealthy.
    (These figures help explain why stock rallies lift the top arm of the K much more than they lift the bottom.)

My take

We’re living in an economy that can look simultaneously strong and fragile — strong for people whose wealth is tied to rising assets and fragile for those whose day‑to‑day living depends on wages and price stability. The “K” is a useful shorthand, but it’s not destiny. Policy choices, corporate strategies, and investment in people’s skills and safety nets will decide whether that divergence narrows or becomes structural. If you care about sustainable growth that doesn’t leave large groups behind, pay attention to the signals above — and to how policies shift in the next year.

Sources


Related update: We recently published an article that expands on this topic: read the latest post.


Related update: We recently published an article that expands on this topic: read the latest post.

Mashed Sweet Potatoes | Made by Meaghan Moineau

Mashed Sweet Potatoes

Intro

There’s something uniquely comforting about a warm dish of mashed sweet potatoes. This recipe takes me back to my grandmother’s kitchen, where the sweet aroma of spices filled the air during the holiday season. As a child, I would watch her expertly blend the ingredients with her wooden spoon, creating a side dish that was both simple and divine. Today, I’m excited to share this family favorite with you, adding a modern twist that enhances the classic flavors without losing its nostalgic essence.

Why You’ll Love It

This mashed sweet potato recipe is a delightful blend of sweet and spicy, creamy and smooth. It’s packed with flavor thanks to a unique blend of spices, including cinnamon, cardamom, and a hint of cayenne pepper that gives it just the right amount of kick. The addition of maple syrup and orange zest elevates the natural sweetness of the potatoes, making it a perfect side dish for any occasion. Whether you’re serving it at a festive gathering or a simple weeknight dinner, these mashed sweet potatoes are sure to become a staple in your recipe collection.

Ingredients

  • 4 large sweet potatoes, peeled and cubed
  • 2 tablespoons brown sugar
  • 3 tablespoons butter
  • 1/2 teaspoon ground cardamom
  • 1/4 teaspoon cayenne pepper
  • 1 teaspoon ground cinnamon
  • 1/4 cup cream
  • 1 teaspoon kosher salt
  • 2 tablespoons maple syrup
  • 1 tablespoon orange zest
  • 1 teaspoon vanilla extract

Instructions

  1. Place the peeled and cubed sweet potatoes in a large pot of boiling water. Cook until they are tender, about 20 minutes. Drain and return them to the pot.
  2. Mash the sweet potatoes until they are well broken up. If you prefer a smoother consistency, you can use an electric mixer.
  3. In a small bowl, mix together the cinnamon, cayenne pepper, cardamom, orange zest, and brown sugar. Set aside.
  4. Add the butter, cream, vanilla extract, and maple syrup to the mashed sweet potatoes. Mix well until fully combined.
  5. Incorporate the cinnamon sugar mixture into the sweet potatoes, stirring until smooth and well blended.
  6. Season with kosher salt to taste. Serve warm and enjoy!

Tips

For the best texture, make sure your sweet potatoes are cooked until they are very tender. This will make mashing much easier and result in a creamier consistency. When mashing, avoid overworking the potatoes as this can make them gummy. If you’re using an electric mixer, use it on a low setting.

Variations & Substitutions

If you’re looking to make this dish vegan, simply swap out the butter and cream for your favorite plant-based alternatives. Coconut cream and vegan butter work particularly well. For a different flavor profile, try adding a splash of bourbon or a handful of toasted pecans for extra crunch.

Storage

Store any leftover mashed sweet potatoes in an airtight container in the refrigerator for up to four days. Reheat them gently on the stovetop or in the microwave, adding a splash of cream or milk to restore their creamy consistency. These mashed sweet potatoes also freeze well for up to two months; just make sure to thaw them overnight in the refrigerator before reheating.

FAQ

Can I make mashed sweet potatoes ahead of time?

Yes, this dish can be prepared a day in advance. Simply follow the instructions and store the mashed sweet potatoes in the refrigerator. Reheat them on the stove or in the oven before serving, adding a little extra cream or milk to maintain their texture.

What can I serve with mashed sweet potatoes?

Mashed sweet potatoes are a versatile side dish that pairs well with a variety of main courses. They’re perfect alongside roasted turkey, glazed ham, or grilled chicken. For a vegetarian option, consider serving them with a hearty lentil stew or a fresh salad.

Nutrition

This recipe is not only delicious but also provides a good dose of vitamins and minerals. Sweet potatoes are rich in vitamin A, vitamin C, and potassium, making them a nutritious addition to your meal. Each serving of this dish contains approximately 200 calories, 8 grams of fat, and 30 grams of carbohydrates.

Conclusion

These mashed sweet potatoes are not just a side dish; they’re a tradition, a comfort food, and a crowd-pleaser. With their rich flavor and creamy texture, they are sure to become a beloved part of your culinary repertoire. Whether you’re preparing them for a special holiday meal or a cozy family dinner, they promise warmth and satisfaction in every bite. I hope you enjoy this recipe as much as my family has over the years!

Related update: Mashed Sweet Potatoes

Curry Leaves Potato Chips | Made by Meaghan Moineau

Curry Leaves Potato Chips

Intro

There’s something magical about the aroma of freshly fried snacks wafting through the house, a nostalgic scent that takes me back to my grandmother’s kitchen. I recall afternoons spent by her side, watching her deft hands transform humble ingredients into delightful treats. Among her many specialties, one stood out – her irresistible Curry Leaves Potato Chips. This recipe, a cherished family heirloom, combines the earthy goodness of potatoes with the aromatic punch of curry leaves, creating a snack that’s both comforting and exciting. Today, I’m excited to share this beloved recipe with you, hoping it brings the same warmth and joy to your home as it does to mine.

Why You’ll Love It

These Curry Leaves Potato Chips are a perfect blend of simplicity and flavor. They come together with minimal ingredients and effort, yet deliver a taste that’s anything but ordinary. The crispy, golden potatoes are seasoned to perfection with a hint of heat from the chili powder, while the fried curry leaves add an aromatic twist that elevates this snack to gourmet status. Whether you’re looking for a quick bite during movie night or a unique appetizer for a gathering, these chips are sure to impress both you and your guests.

Ingredients

  • Potatoes, peeled
  • Plain chili powder
  • Curry leaves
  • Salt
  • Oil for frying

Instructions

  1. Start by wiping or patting the peeled potatoes dry with a clean kitchen towel. This is crucial to ensure that the chips turn out crispy.
  2. Slice the potatoes thinly and evenly for consistent cooking. A mandoline slicer can be particularly useful here.
  3. In a large mixing bowl, toss the potato slices with a dash of chili powder and salt, making sure each slice is well-coated.
  4. Heat oil in a deep pan or fryer over medium heat. To check if the oil is ready, drop a small piece of potato into it; it should sizzle immediately.
  5. Fry the potato slices in batches, ensuring they are not overcrowded, which helps them cook evenly and become crunchy.
  6. Once the chips are golden and crispy, remove them with a slotted spoon and place them on a paper towel-lined plate to drain excess oil.
  7. In the same oil, carefully fry the curry leaves until they are crispy. This should only take a few seconds.
  8. Scoop out the fried curry leaves and generously sprinkle them over the potato chips.
  9. Gently crush the curry leaves over the chips and toss everything together to distribute the flavors evenly.

Tips

For the best results, ensure that the potato slices are as dry as possible before frying. This prevents the oil from splattering and helps achieve that coveted crunch. Adjust the amount of chili powder to suit your heat preference, and feel free to experiment with additional spices like garlic powder or paprika for a personalized touch.

Variations & Substitutions

If you’re looking to switch things up, consider using sweet potatoes instead of regular potatoes for a naturally sweeter chip that pairs beautifully with the savory curry leaves. Alternatively, you can substitute the curry leaves with rosemary or thyme for a different herbaceous note. For those avoiding fried foods, try baking the potato slices in the oven at 400°F (200°C) until crispy, though the texture will differ slightly from the fried version.

Storage

Store any leftover chips in an airtight container at room temperature. They should remain crispy for up to three days. If they begin to lose their crunch, a quick reheat in the oven at 350°F (175°C) can help restore their original texture.

FAQ

Can I use a different type of potato for this recipe?

Yes, you can. While russet potatoes are ideal for their starch content, which contributes to crispiness, you can experiment with other varieties like Yukon gold or red potatoes. Keep in mind that the texture and flavor may vary slightly.

How can I make this recipe healthier?

To make a healthier version, consider air-frying or baking the potato slices instead of deep-frying. You can also reduce the amount of salt and chili powder used, or substitute them with low-sodium and less spicy alternatives.

Nutrition

The nutritional value of these chips will depend on the amount of oil absorbed during frying, but generally, they are a source of carbohydrates from the potatoes, with added vitamins and minerals from the curry leaves. If you’re mindful of your oil intake, consider opting for a heart-healthy oil like olive or avocado oil.

Conclusion

Curry Leaves Potato Chips are more than just a snack; they’re a culinary journey that brings together flavors and memories from the past. As you savor each crispy bite, I hope you feel the same sense of nostalgia and joy that this recipe has brought to my family for generations. So, gather your loved ones, share the chips, and create new memories around this delightful and aromatic treat. Happy cooking!

Related update: Curry Leaves Potato Chips

Related update: Mashed Sweet Potatoes