Summer Fruit Sangria | Made by Meaghan Moineau

Summer Fruit Sangria: A Refreshing Delight for Warm Days

Intro

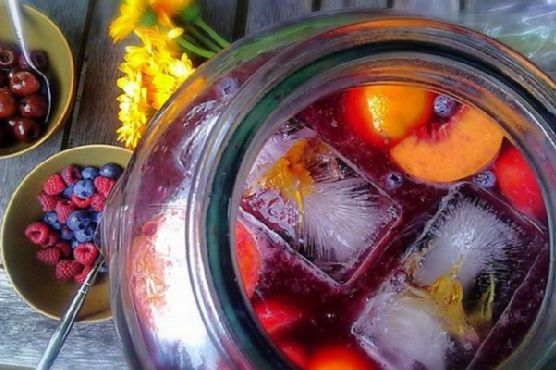
There’s something magical about the long, sun-drenched days of summer that calls for a refreshing, fruity drink in hand. For me, nothing captures the essence of summer more than a chilled glass of homemade sangria. I vividly remember the first time I tasted this delightful concoction. It was a balmy afternoon at my grandmother’s house, where the garden was in full bloom, and the air smelled of sweet blossoms. She poured me a glass of her special summer fruit sangria, brimming with vibrant colors and flavors. That moment, with its playful mix of citrus and berries, became a cherished memory, a taste of joy and sunshine. Today, I’m excited to share with you this beloved recipe, hoping it brings as much happiness to your table as it has to mine.

Why You’ll Love It

Summer Fruit Sangria is the quintessential drink for any warm-weather gathering. Here’s why you’ll fall head over heels for this delightful beverage:

  • Easy to Make: With just a handful of ingredients and simple steps, it’s a breeze to prepare.
  • Vibrant and Refreshing: The combination of juicy fruits and rich red wine creates an irresistible, refreshing blend.
  • Perfect for Entertaining: Whether you’re hosting a backyard BBQ or a casual get-together, sangria is always a crowd-pleaser.
  • Customizable: You can tailor it to your taste with different fruits and spirits.
  • Make-Ahead: Prepare it the day before, letting the flavors meld beautifully overnight.

Ingredients

  • 1 bottle of dry red table wine
  • 1/4 cup brandy
  • 1/4 cup triple sec
  • 1/2 cup orange juice
  • 1/4 cup simple syrup
  • 2 ripe peaches, sliced
  • 1 orange, sliced
  • 1 cup raspberries
  • 1 cup blueberries
  • Ice, for serving

Instructions

  1. In a large jug or beverage container, combine the bottle of dry red table wine, brandy, and triple sec.
  2. Add the orange juice and simple syrup, stirring gently to blend.
  3. Introduce the sliced peaches, orange, raspberries, and blueberries into the mixture. Stir well to ensure the fruit is evenly distributed.
  4. Cover the jug and refrigerate for at least 24 hours. This resting time allows the flavors to meld and develop beautifully.
  5. When ready to serve, give the sangria a gentle stir and pour it over ice in individual glasses.

Tips

For the best sangria experience, keep these tips in mind:

  • Choose a wine you enjoy drinking on its own; its flavor will be prominent in the sangria.
  • For a less sweet version, reduce the amount of simple syrup or omit it entirely.
  • Use ripe, in-season fruits for the best flavor and juiciness.
  • Chill your wine and fruit beforehand to speed up the refrigeration process.

Variations & Substitutions

One of the joys of making sangria is its versatility. Here are some variations and substitutions to consider:

  • Fruits: Try adding strawberries, cherries, or pineapple for a tropical twist.
  • Wine: Swap the red wine for a white wine or rosé for a lighter version.
  • Spirits: Replace brandy with rum or vodka for a different kick.
  • Sparkling Sangria: Just before serving, top each glass with a splash of club soda or sparkling water for some fizz.

Storage

Sangria is best enjoyed within a couple of days. Store any leftovers in the refrigerator, covered. Be sure to remove any ice before storing to prevent dilution. The flavors will continue to develop, but the freshness of the fruit is best within the first couple of days.

FAQ

Can I use frozen fruit in sangria?

Yes, frozen fruit can be a convenient and budget-friendly option. It can also help chill the sangria, eliminating the need for extra ice. Just be aware that frozen fruit may release more juice, slightly altering the flavor balance.

What type of wine is best for sangria?

Opt for a dry red wine like a Cabernet Sauvignon, Merlot, or Tempranillo. These wines offer a rich flavor that complements the sweetness of the fruit and other ingredients. However, feel free to experiment with your favorite variety.

Can sangria be made non-alcoholic?

Absolutely! Substitute the wine with a combination of grape juice and cranberry juice, and leave out the spirits. You can still enjoy the fruity, refreshing essence of sangria without the alcohol.

Nutrition

While sangria is a delightful treat, it’s essential to enjoy it in moderation. The nutritional content will vary based on the specific ingredients and quantities used. Typically, a serving of sangria contains around 150-200 calories, depending on the sweetness and type of wine. Remember, the addition of fruits contributes vitamins and antioxidants, making it a slightly healthier indulgence.

Conclusion

Summer Fruit Sangria is more than just a beverage; it’s a celebration of summer’s bounty, a nod to carefree days, and the joy of sharing moments with loved ones. Whether you’re sipping it by the pool or serving it at a festive gathering, this sangria will surely bring smiles and sunshine to your day. So, gather your ingredients, embrace the simplicity of the process, and let the flavors transport you to a summer paradise. Cheers to good times and great company!

Related update: Summer Fruit Sangria

Related update: Lemon Drop Jello Shots

Related update: Spiced Apple Cider

Amaranth and Roast Veggie Salad | Made by Meaghan Moineau

Amaranth and Roast Veggie Salad

Intro

There’s something magical about family gatherings, where the kitchen becomes a hub of activity, and the aroma of delicious dishes wafts through the air. I vividly remember one summer evening when my grandmother introduced us to a unique and delightful salad that quickly became a family favorite. Her secret? A generous helping of amaranth paired with roasted vegetables. Today, I’m excited to share this heartfelt recipe with you: Amaranth and Roast Veggie Salad. It’s a dish that not only fills the belly but also warms the soul, much like those cherished family moments.

Why You’ll Love It

This Amaranth and Roast Veggie Salad is a perfect blend of textures and flavors. The nutty amaranth pairs beautifully with the sweetness of roasted vegetables and the fresh peppery bite of rocket leaves. This salad is not only delicious but also packed with nutrients, making it an ideal choice for a healthy meal. Whether you’re looking for a satisfying lunch, a vibrant side dish, or a contribution to a potluck, this salad fits the bill. Plus, it’s vegan and gluten-free, catering to a wide range of dietary preferences.

Ingredients

  • 1 cup amaranth
  • 2 tablespoons basil-infused olive oil
  • 1 bell pepper
  • 1 cup diced pumpkin
  • 1 red onion
  • Handful of rocket leaves
  • 1 teaspoon herbal salt
  • 1 punnet baby tomatoes

Instructions

  1. Cook the amaranth with about a cup of water in a saucepan. Bring it to a boil, then reduce the heat and simmer until the water is absorbed and the amaranth reaches a sticky consistency. This usually takes about 15-20 minutes.
  2. Preheat your oven to 200°C (392°F).
  3. Roughly cut the onion into chunks.
  4. Place the diced pumpkin and onion chunks onto a tinfoil-lined baking tray.
  5. Drizzle the basil-infused olive oil over the vegetables and sprinkle them with herbal salt and a pinch of pepper.
  6. Roast the vegetables in the oven for about 30 minutes, or until the edges of the pumpkin become crispy. Stir occasionally to ensure even roasting.
  7. About 5 minutes before the veggies are done, add the baby tomatoes to the tray, allowing them to roast until just blistered.
  8. Once the veggies are roasted, remove them from the oven and combine them with the cooked amaranth in a large bowl.
  9. Gently tear a few rocket leaves and add them to the bowl.
  10. Toss everything together until well mixed. Serve the salad warm and enjoy!

Tips

To make the most of this recipe, consider these helpful tips:

  • Make sure to rinse the amaranth thoroughly before cooking to remove any bitterness.
  • If you prefer a little more crunch, add some toasted nuts or seeds like sunflower or pumpkin seeds.
  • For an extra burst of flavor, try adding a splash of balsamic vinegar or a squeeze of lemon juice just before serving.

Variations & Substitutions

This recipe is versatile and can be adapted to suit your taste preferences or the ingredients you have on hand.

  • Grains: If you don’t have amaranth, quinoa or couscous can be great substitutes.
  • Vegetables: Feel free to add other vegetables like zucchini or sweet potatoes for variety.
  • Herbs: If basil-infused olive oil isn’t available, use regular olive oil with a handful of fresh basil leaves instead.

Storage

This salad is best enjoyed fresh, but it can be stored in an airtight container in the refrigerator for up to 3 days. If you plan to store it, wait to add the rocket leaves until just before serving to keep them from wilting.

FAQ

Can I make this salad ahead of time?

Yes, you can prepare the components of the salad ahead of time. Cook the amaranth and roast the vegetables a day in advance, then store them separately in the fridge. Assemble the salad with fresh rocket leaves just before serving.

Is amaranth gluten-free?

Yes, amaranth is naturally gluten-free, which makes it a fantastic choice for those following a gluten-free diet. It’s also rich in protein and fiber, adding nutritional value to the salad.

Can I use canned tomatoes instead of fresh?

While fresh baby tomatoes are recommended for their vibrant flavor and texture, you can use canned diced tomatoes in a pinch. Drain them well and add them to the salad at the end.

Nutrition

This Amaranth and Roast Veggie Salad is a nutritious meal option. It’s high in protein and fiber from amaranth, packed with vitamins from the vegetables, and offers healthy fats from the olive oil. Each serving provides essential nutrients that support overall health and wellness.

Conclusion

There you have it, a warm and hearty Amaranth and Roast Veggie Salad that’s sure to impress your taste buds and nourish your body. This recipe combines the simplicity of wholesome ingredients with the vibrant flavors of roasted vegetables, making it a delightful addition to any meal. Whether you’re reminiscing about family gatherings or creating new memories, this salad is a perfect companion. Enjoy it with loved ones, and don’t forget to share your own twists and variations in the comments below!

Related update: Amaranth and Roast Veggie Salad

Related update: Chicken Parmesan Patty- Eat As A Burger OR On Pasta

Related update: Pear Salad With Walnuts and Blue Cheese

Hush Puppies | Made by Meaghan Moineau

Deliciously Crispy Hush Puppies

Intro

Ah, hush puppies! Just the mention of these golden, crispy delights brings back fond memories of summer barbecues at my grandparents’ house in the deep South. I can vividly remember sitting on the porch, the warm evening breeze on my face, while my grandmother expertly fried up a batch of hush puppies in her old cast-iron skillet. The aroma was irresistible, and the taste, simply unforgettable. These small, round cornmeal-based fritters have a unique charm, drawing people together with their simple yet satisfying flavor. Today, I’m excited to share this cherished family recipe with you, so you too can create wonderful memories over a plate of freshly made hush puppies.

Why You’ll Love It

Hush puppies are the perfect side dish for any occasion. Whether you’re hosting a fish fry, a barbecue, or just looking for a quick snack, these delicious morsels are sure to be a hit. Here’s why you’ll love them:

  • Quick and Easy: With a prep time of just 15 minutes, you can have a batch ready in no time.
  • Simple Ingredients: Made with pantry staples, you probably already have everything you need.
  • Crispy Exterior, Soft Interior: The perfect combination of textures makes every bite satisfying.
  • Versatile: Hush puppies pair well with a variety of meals and can be customized to your liking.

Ingredients

  • 1 cup cornmeal
  • 1 cup all-purpose flour
  • 1 tablespoon baking powder
  • 1 teaspoon salt
  • 1 egg
  • 1/2 cup milk
  • 1 small onion, finely chopped
  • Oil, for frying

Instructions

  1. Place the cornmeal, flour, baking powder, and salt into a large mixing bowl and stir until well combined.
  2. In a medium mixing bowl, crack the egg and beat it with a fork until it is well mixed. Add the chopped onion and milk to the egg and mix well.
  3. Pour the egg, milk, and onion mixture into the cornmeal and flour mixture. Stir until the batter is smooth and well combined.
  4. In a deep-fat fryer or a heavy skillet, pour in enough oil to fill 2-3 inches. Heat the oil over medium-high heat.
  5. Once the oil is hot, carefully drop heaping teaspoons of batter into the pan. You may fry 5-6 hush puppies at a time.
  6. The hush puppies will sink at first, then rise to the surface. Fry until they are golden brown, about 1-2 minutes.
  7. Use a slotted spoon to remove the hush puppies from the oil and let them drain on paper towels.
  8. Serve warm and enjoy!

Tips

For the best results, make sure your oil is hot before adding the batter. This ensures a crispy exterior without absorbing too much oil. If your hush puppies are browning too quickly, reduce the heat slightly.

Variations & Substitutions

Feel free to get creative with your hush puppies! Here are a few ideas:

  • Spicy Kick: Add a diced jalapeño or a pinch of cayenne pepper to the batter for a spicy version.
  • Cheesy Delight: Mix in a handful of shredded cheddar cheese for a cheesy twist.
  • Herb Infusion: Add chopped fresh herbs like parsley or chives for an herby flavor.
  • Gluten-Free: Replace the all-purpose flour with a gluten-free flour blend to make them gluten-free.

Storage

If you have leftovers (which is rare!), store them in an airtight container in the refrigerator for up to 3 days. To reheat, place them in a preheated oven at 350°F (175°C) for about 10 minutes until warmed through and crisp.

FAQ

Can I make hush puppies in advance?

While hush puppies are best enjoyed fresh, you can prepare the batter in advance and store it in the refrigerator for up to 24 hours. Just give it a good stir before frying.

Can I freeze hush puppies?

Yes, you can freeze cooked hush puppies. Allow them to cool completely, then place them in a single layer on a baking sheet and freeze until solid. Transfer to a freezer bag and store for up to 3 months. Reheat in the oven at 350°F (175°C) until heated through.

What can I serve with hush puppies?

Hush puppies are a versatile dish that pairs well with many meals. They are a classic accompaniment to fried fish, but also go well with barbecue, soups, or salads.

Nutrition

While hush puppies are a delicious treat, they are fried and should be enjoyed in moderation. Here’s a rough estimate of the nutritional value per serving (3 hush puppies):

  • Calories: 150
  • Fat: 7g
  • Carbohydrates: 18g
  • Protein: 3g

Conclusion

There’s something incredibly comforting about homemade hush puppies. Their crispy exterior and fluffy interior make them an irresistible treat that brings back cherished memories of family gatherings and Southern hospitality. Whether you’re serving them at a barbecue, a seafood feast, or just as a snack, they are sure to be a crowd-pleaser. I hope this recipe brings as much joy to your kitchen as it has to mine. Enjoy every crispy bite!

Related update: Hush Puppies

Related update: Easy Chicken Wings

Roasted Red Pepper & Tomato Salsa | Made by Meaghan Moineau

Roasted Red Pepper & Tomato Salsa

Intro

There’s something truly special about making salsa from scratch, especially when it’s a vibrant, flavor-packed Roasted Red Pepper & Tomato Salsa. This recipe takes me back to sunny afternoons at my grandmother’s house, where she would whip up her legendary salsa for our family gatherings. I remember the smell of roasting peppers wafting through the kitchen and the laughter of my cousins as we devoured bowls of the salsa with crispy corn chips. Today, I’m excited to share this cherished recipe with you, bringing a taste of my family’s tradition into your home.

Why You’ll Love It

This Roasted Red Pepper & Tomato Salsa is a game-changer for your appetizer spread. It’s not just about the bold flavors of roasted peppers and tomatoes, but also the delightful hint of smokiness and the fresh kick from cilantro and lime juice. This salsa is perfect for any occasion, whether you’re hosting a summer barbecue, enjoying a cozy night in, or just want to elevate your snack game. Plus, it’s naturally vegan and gluten-free, making it a crowd-pleaser for all your guests.

Ingredients

  • Fresh cilantro
  • Cumin
  • Garlic
  • Jalapeno pepper
  • Lime (juice)
  • Olive oil
  • Onion
  • Red bell pepper
  • Smoked salt (I used sea salt)
  • Tomatoes

Instructions

  1. Preheat your oven to broil.
  2. Cut the tomatoes in half and the onions in quarters. Arrange them on a tin-foil lined baking sheet.
  3. Add the red bell pepper, whole garlic cloves (with skin), and jalapeno pepper to the baking sheet.
  4. Drizzle the vegetables with a bit of olive oil and sprinkle with salt.
  5. Broil for 10 minutes, or until the skin on the tomatoes and peppers begins to char.
  6. Allow the vegetables to cool for 5 minutes.
  7. Remove the skins from the tomatoes, pepper, and garlic.
  8. Place all the vegetables (except for the cilantro and lime) into a food processor.
  9. Pulse 2-4 times, ensuring the salsa remains a bit chunky.
  10. Transfer the mixture to a bowl and toss with fresh cilantro and lime juice.
  11. Add cumin and salt to taste.
  12. Serve with corn chips or toasted pita chips.

Tips

To make the most of this salsa, choose ripe tomatoes and a vibrant red bell pepper. The quality of your produce will significantly impact the flavor. If you prefer a milder salsa, remove the seeds from the jalapeno pepper before roasting. When broiling, keep an eye on your vegetables to avoid burning; a slight char is all you need for that smoky flavor.

Variations & Substitutions

This recipe is incredibly versatile. If you want to add a bit more heat, consider adding a serrano pepper or two. For a sweeter twist, try incorporating roasted corn kernels or diced mango. If cilantro isn’t to your taste, fresh parsley can be a great substitute, bringing a different but equally fresh flavor to the salsa.

Storage

Store any leftover salsa in an airtight container in the refrigerator for up to 5 days. The flavors will meld and deepen over time, making it even more delicious the next day. Just give it a good stir before serving.

FAQ

Can I freeze this salsa?

Yes, you can freeze this salsa! Place the salsa in a freezer-safe container, leaving some room for expansion, and freeze for up to 3 months. Thaw overnight in the refrigerator before serving. Keep in mind that the texture may change slightly after freezing, but the flavor will remain delightful.

Can I make this salsa ahead of time?

Absolutely! This salsa can be made a day or two in advance. Store it in the refrigerator, and the flavors will continue to develop, making it even more flavorful when you’re ready to serve.

What can I serve with this salsa besides chips?

This salsa is incredibly versatile and pairs well with many dishes. Try it as a topping for grilled chicken or fish, mix it into a taco filling, or use it as a flavorful addition to scrambled eggs or an omelet. The possibilities are endless!

Nutrition

This salsa is not only delicious but also a healthy option. Packed with vitamins from the fresh vegetables, it’s low in calories and fat. The olive oil adds a touch of healthy fats, and the spices provide additional health benefits, making this salsa a guilt-free indulgence.

Conclusion

Roasted Red Pepper & Tomato Salsa is a delightful addition to any meal or gathering, bringing a burst of flavor and a touch of nostalgia to your table. Whether you’re a salsa aficionado or trying your hand at making salsa from scratch for the first time, this recipe is sure to please. Gather your ingredients, fire up your broiler, and enjoy the process of creating this vibrant, flavorful salsa that will have everyone coming back for more. Enjoy!

Related update: Roasted Red Pepper & Tomato Salsa

Mexi-Chicken Roll Ups | Made by Meaghan Moineau

Mexi-Chicken Roll Ups

Intro

Welcome to a journey of flavors that dance right off the plate into your heart. Mexi-Chicken Roll Ups have been a beloved staple in my family for years. I remember the first time I tasted this dish at my grandmother’s house; the warmth of the kitchen, the sizzle of chicken in the oven, and the aromatic scent of cilantro and cumin wafting through the air. It was a chilly Sunday afternoon, and we gathered around the table, eagerly awaiting the feast. From that day on, this recipe has been a cherished family tradition, and I’m thrilled to share it with you today.

Why You’ll Love It

Mexi-Chicken Roll Ups are more than just a meal; they’re an experience. This dish is perfect for any occasion, whether it’s a family dinner, a potluck, or even a casual weeknight meal. Here’s why you’ll fall in love with it:

  • Flavorful and Satisfying: The combination of tender chicken, creamy sauce, and crunchy tortilla topping provides a delightful contrast in textures and flavors.
  • Easy to Make: With simple steps and readily available ingredients, this recipe is straightforward and foolproof.
  • Customizable: You can easily tweak the ingredients to suit your tastes or dietary needs.

Ingredients

  • 8 oz cream cheese
  • 1 cup salsa verde
  • 1 bunch cilantro, chopped
  • 1 tsp cumin
  • 1 tsp garlic powder
  • 4 chicken breasts
  • 1 cup fresh spinach
  • 1 cup shredded pepper jack cheese
  • 1 cup crushed tortilla chips

Instructions

  1. Preheat your oven to 350°F (175°C).
  2. Flatten out the chicken breasts to about 1/4″ thickness using a meat mallet or a rolling pin between sheets of wax paper.
  3. In a blender or food processor, combine cream cheese, salsa verde, chopped cilantro, cumin, and garlic powder to form a smooth sauce.
  4. Spread a generous spoonful of the sauce across each chicken breast.
  5. Top each breast with a layer of fresh spinach leaves and then sprinkle with shredded pepper jack cheese.
  6. Carefully roll each chicken breast closed. Secure with toothpicks if necessary.
  7. Place the crushed tortilla chips in a shallow dish and roll each chicken breast in the chips to coat evenly.
  8. Arrange the roll-ups in a baking dish, cover with foil, and bake for 30 to 35 minutes or until the chicken is cooked through and no longer pink in the center.
  9. Remove the foil for the last 5 minutes of baking to allow the tortilla chips to become crispy.
  10. Let cool slightly before serving. Enjoy!

Tips

  • For easier rolling, ensure your chicken breasts are thin and even. This will also help them cook more uniformly.
  • To save time, use pre-shredded cheese and pre-washed spinach.
  • If you don’t have a meat mallet, you can use a heavy skillet to flatten the chicken.

Variations & Substitutions

This recipe is incredibly versatile. Here are a few ideas to make it your own:

  • Cheese: Substitute pepper jack with cheddar or mozzarella for a different flavor profile.
  • Spiciness: Add chopped jalapeños to the cream cheese mixture for extra heat.
  • Herbs: Swap cilantro with parsley if you’re not a fan of its distinctive taste.

Storage

Leftover Mexi-Chicken Roll Ups can be stored in an airtight container in the refrigerator for up to 3 days. To reheat, place in the oven at 300°F (150°C) until warmed through. You can also freeze the roll-ups before baking. Simply thaw in the refrigerator overnight before cooking.

FAQ

Can I use a different type of meat?

Absolutely! This recipe works well with turkey or pork tenderloin. Adjust the cooking time as needed to ensure the meat is fully cooked.

What can I serve with Mexi-Chicken Roll Ups?

These roll-ups pair wonderfully with a side of Spanish rice, black beans, or a simple green salad. You can also serve them with guacamole or sour cream for dipping.

Is there a vegetarian option?

To make this dish vegetarian, substitute the chicken with large portobello mushrooms or zucchini slices. Adjust the baking time accordingly.

Nutrition

Each serving of Mexi-Chicken Roll Ups is packed with protein and flavor. While exact values depend on portion sizes, a typical serving provides approximately:

  • Calories: 450
  • Protein: 35g
  • Carbohydrates: 15g
  • Fat: 28g
  • Fiber: 3g

Conclusion

Mexi-Chicken Roll Ups are a delightful way to bring a taste of Mexican-inspired cuisine into your home. Whether you’re hosting a dinner party or looking for a comforting family meal, this dish is sure to impress. The combination of creamy, spicy, and crunchy elements will make it a favorite for years to come. I hope you enjoy making and eating this dish as much as my family has throughout the years. Bon appétit!

Related update: Mexi-Chicken Roll Ups

Red Quinoa and Roasted Cauliflower Salad | Made by Meaghan Moineau

Red Quinoa and Roasted Cauliflower Salad

Intro

There’s something magical about the aroma of roasted cauliflower wafting through the kitchen. It transports me back to my grandmother’s cozy home, where the warmth of her cooking would fill every corner. She had a knack for taking simple ingredients and transforming them into something extraordinary. Inspired by her love for hearty, wholesome meals, I’ve created this Red Quinoa and Roasted Cauliflower Salad. It’s a dish that combines textures and flavors beautifully, making it a family favorite.

Why You’ll Love It

This salad is a delightful medley of nutty quinoa, sweet and chewy dried apricots, crunchy walnuts, and tangy feta cheese. The roasted cauliflower adds a savory depth, while the fresh green onions and parsley bring a burst of freshness. It’s a versatile dish that can be served warm or cold, making it perfect for any season. Whether you’re looking for a nutritious lunch, a side dish for dinner, or a potluck star, this salad fits the bill. Plus, it’s packed with protein, fiber, and healthy fats, ensuring you feel satisfied and nourished.

Ingredients

  • 1 head of cauliflower
  • 1 cup red quinoa
  • 1/2 cup walnuts, chopped
  • 1/2 cup dried apricots, chopped
  • 1/2 cup feta cheese, crumbled
  • 4 green onions, sliced
  • 1/4 cup fresh parsley, chopped
  • Salt and pepper to taste
  • Juice of 1/2 a lemon
  • 2 tablespoons olive oil

Instructions

  1. Cook the quinoa according to package directions. Set aside to cool slightly.
  2. Preheat the oven to 400°F (200°C).
  3. Cut the head of cauliflower into florets.
  4. Toss the cauliflower florets with olive oil, salt, and pepper. Arrange them on a baking sheet in a single layer.
  5. Roast the cauliflower in the preheated oven for 20 minutes or until tender and golden brown.
  6. Meanwhile, crumble the feta cheese and prepare the remaining ingredients: chop the walnuts, dried apricots, green onions, and parsley.
  7. In a large bowl, combine the cooked quinoa, roasted cauliflower, walnuts, apricots, feta cheese, green onions, and parsley.
  8. Drizzle with extra virgin olive oil and the juice from half a lemon. Toss to combine.
  9. Season with additional salt and pepper to taste.
  10. Serve immediately warm or chill in the refrigerator and serve cold.

Tips

For the best results, ensure your cauliflower florets are evenly coated in olive oil and spread out on the baking sheet to roast evenly. You can toast the walnuts for an extra layer of flavor. Simply place them in a dry skillet over medium heat, stirring frequently until fragrant. Be careful not to burn them! Finally, if you’re serving the salad cold, allow the flavors to meld by refrigerating it for at least an hour before serving.

Variations & Substitutions

This salad is highly adaptable to your preferences or dietary needs. You can swap the red quinoa for white or black quinoa, or even use farro or barley for a different grain base. If you’re not a fan of walnuts, try using almonds or pecans instead. For a vegan version, omit the feta cheese or replace it with a plant-based alternative. You can also add more veggies, like roasted cherry tomatoes or bell peppers, for extra color and nutrients.

Storage

This salad stores beautifully, making it an excellent option for meal prep. Place the salad in an airtight container and refrigerate for up to 4 days. If you’ve dressed the salad, the flavors will intensify over time, which many find delicious. However, if you prefer a fresher taste, consider storing the dressing separately and mixing it in just before serving.

FAQ

Can I make this salad ahead of time?

Absolutely! This salad is ideal for making ahead. Prepare all the components and combine them just before serving. This will keep the flavors vibrant and the textures perfect.

Is there a way to add more protein to this salad?

Yes, you can add grilled chicken, chickpeas, or tofu for additional protein. These options complement the existing flavors well and make the salad more filling.

What can I serve with this salad?

This salad is quite versatile and pairs well with grilled meats, such as chicken or fish. It’s also a great side dish for a barbecue or a potluck.

Nutrition

This Red Quinoa and Roasted Cauliflower Salad is not only delicious but also nutritious. It’s rich in plant-based protein from quinoa, healthy fats from walnuts and olive oil, and fiber from the cauliflower and dried apricots. It’s a well-rounded meal that will keep you energized and satisfied.

Conclusion

Whether you’re reminiscing about family meals or creating new memories, this Red Quinoa and Roasted Cauliflower Salad is a dish that brings people together. Its harmonious blend of flavors and textures makes it a standout choice for any occasion. I hope this recipe becomes a staple in your kitchen, just as it is in mine. Enjoy the journey of cooking and savor every bite!

Related update: Red Quinoa and Roasted Cauliflower Salad

Related update: Hush Puppies

Related update: Amaranth and Roast Veggie Salad

Caramel ice cream | Made by Meaghan Moineau

Decadent Homemade Caramel Ice Cream

Intro

There’s something truly magical about homemade ice cream, especially when it’s infused with the rich, buttery flavor of caramel. This recipe for caramel ice cream takes me back to summers spent in my grandmother’s kitchen, where the aroma of simmering sugar and cream would fill the air. We’d gather around the table eagerly waiting for the first scoop of freshly churned ice cream, savoring every bite as if it were a treasure. Today, I’m thrilled to share this delightful recipe that promises to evoke the same warm memories and smiles in your home.

Why You’ll Love It

This caramel ice cream is a creamy, indulgent treat that’s surprisingly simple to make. Its rich flavor profile will satisfy any sweet tooth, and the smooth texture is perfect for hot summer days or as a dessert for a cozy night in. Whether you’re an ice cream aficionado or a caramel lover, this recipe is sure to become a family favorite.

Ingredients

  • 2 cups sugar
  • 1 cup water, divided
  • 4 large eggs
  • 1 cup powdered sugar
  • 2 cups heavy cream
  • 1/2 teaspoon salt
  • 1 teaspoon vanilla extract

Instructions

  1. In a large skillet, combine the sugar and 1/2 cup of water over medium-high heat. Stir occasionally, allowing the sugar to dissolve and the mixture to come to a boil.
  2. Continue boiling the sugar mixture for about 5 minutes until it reaches a dark brown color. Be careful not to burn it.
  3. Remove the skillet from the heat and gradually stir in the remaining 1/2 cup of water. Allow the caramel to cool to room temperature and set aside.
  4. In a medium bowl, beat the eggs for 3 minutes until they are thick and light yellow in color.
  5. Gradually beat in the powdered sugar until well combined.
  6. Stir in the heavy cream, salt, and vanilla extract.
  7. Gently stir in the caramel mixture until smooth.
  8. Cover the mixture and chill in the refrigerator for at least 4 hours or overnight.
  9. Pour the chilled mixture into an ice cream machine and churn according to the manufacturer’s instructions until frozen.
  10. Transfer the ice cream to a plastic container and place it in the freezer for at least an hour before serving.
  11. Before serving, let the ice cream sit at room temperature for 5-10 minutes to reach the perfect scooping consistency.

Tips

For best results, serve your caramel ice cream in chilled glass or porcelain bowls. Use a hot, dry ice cream scoop for the perfect scoop every time—simply dip the scoop in boiling water and wipe it dry before using.

Variations & Substitutions

If you’re looking to switch things up, consider adding a pinch of sea salt to the caramel for a salted caramel twist. Alternatively, you could swirl in some chocolate chips or nuts during the churning process for added texture and flavor. For those who prefer a lighter version, substitute half of the heavy cream with milk.

Storage

Store your caramel ice cream in an airtight container in the freezer. It will keep for up to two weeks, although we doubt it will last that long! Just be sure to allow it to soften at room temperature before scooping.

FAQ

Can I make this recipe without an ice cream machine?

Yes! If you don’t have an ice cream machine, simply pour the mixture into a shallow dish and place it in the freezer. Stir every 30 minutes for the first few hours to break up ice crystals, then freeze until firm.

How can I prevent ice crystals from forming?

To prevent ice crystals, ensure that your mixture is thoroughly chilled before churning. Using an ice cream machine also helps achieve a smoother texture by churning air into the mixture as it freezes.

Nutrition

This recipe yields approximately 8 servings. Each serving contains about:

  • Calories: 350
  • Fat: 22g
  • Carbohydrates: 38g
  • Protein: 4g

Conclusion

Making caramel ice cream from scratch is a rewarding experience that brings joy to both the cook and those lucky enough to enjoy the results. With its rich flavor and creamy texture, this recipe is sure to become a staple in your culinary repertoire. Whether you’re serving it at a family gathering or enjoying a quiet night in, this homemade treat is sure to impress. So, gather your ingredients, channel your inner chef, and let the magic of caramel ice cream unfold in your kitchen!

Related update: Caramel ice cream

Avocado Nests | Made by Meaghan Moineau

Avocado Nests: A Delightful and Nutritious Breakfast

Intro

Growing up, Sunday mornings were always special in our household. My grandmother had a knack for turning simple ingredients into something extraordinary, and her Avocado Nests were no exception. The vibrant green of the avocado paired with the golden hue of hash browns and the savory goodness of bacon and eggs was a sight to behold. It was a dish that brought the family together, and to this day, it evokes cherished memories of laughter and love shared around the breakfast table.

Why You’ll Love It

This Avocado Nests recipe is more than just a feast for the eyes. It combines the creamy richness of avocados with the satisfying crunch of hash browns and the savory flavor of bacon, creating a harmonious blend of textures and tastes. The addition of deviled eggs brings an unexpected twist, elevating this dish to a new level of deliciousness. Whether you’re preparing a cozy breakfast for your family or impressing guests at brunch, Avocado Nests are sure to delight everyone at the table.

Ingredients

  • 2 ripe avocados
  • 4 hardboiled eggs
  • 2 cups frozen hash browns
  • 4 slices bacon
  • 2 tablespoons mayonaise (or cream cheese)
  • Salt and pepper to taste

Instructions

  1. Cook the frozen hash browns according to the package directions until they are golden and crispy. Set aside.
  2. Cut the bacon slices into thin strips and cook them in a skillet over medium heat until crispy, or bake them in the oven at 400°F (200°C) for about 15 minutes. Drain on a paper towel.
  3. To make the deviled eggs, carefully peel the hardboiled eggs and slice them in half lengthwise. Remove the yolks and place them in a bowl. Mix the yolks with mayonaise or cream cheese until smooth, then season with salt and pepper. Spoon or pipe the mixture back into the egg white halves.
  4. Cut the avocados in half lengthwise, remove the seeds, and gently peel the skin.
  5. On a serving plate, create a bed of hash browns and sprinkle the cooked bacon strips over them.
  6. Carefully place the deviled eggs into the seed cavity of each avocado half.
  7. Rest the filled avocado halves on the bed of hash browns and bacon, and serve immediately.

Tips

For the best results, use ripe but firm avocados to ensure they hold their shape. If you prefer a smokier flavor, consider using smoked bacon. Use a piping bag for a neater presentation of the deviled egg filling. To save time, you can prepare the deviled eggs and cook the bacon the night before.

Variations & Substitutions

Feel free to customize the Avocado Nests to suit your taste. For a vegetarian version, omit the bacon and add sautéed mushrooms or roasted bell peppers. If you’re looking to cut down on carbs, you can substitute the hash browns with a bed of fresh arugula or mixed greens. For a spicier kick, add a dash of hot sauce or a sprinkle of cayenne pepper to the deviled egg mixture.

Storage

Avocado Nests are best enjoyed fresh, but if you have leftovers, store them in an airtight container in the refrigerator for up to two days. To prevent the avocados from browning, you can brush them with a little lemon juice before storing. Reheat the hash browns and bacon in a skillet to restore their crispiness before serving.

FAQ

Can I make the deviled eggs in advance?

Yes, you can prepare the deviled eggs up to two days ahead of time. Store them in an airtight container in the refrigerator until you’re ready to assemble the dish.

What can I use instead of mayonnaise for the deviled eggs?

If you’re not a fan of mayonnaise, cream cheese or Greek yogurt are excellent substitutes that will provide a similar creamy texture.

Nutrition

While it’s difficult to provide precise nutritional information without exact measurements, Avocado Nests are generally a good source of healthy fats from the avocados, protein from the eggs, and essential nutrients from the bacon and hash browns. For those watching their calorie intake, consider using turkey bacon and reducing the amount of hash browns.

Conclusion

Avocado Nests are a delightful way to elevate your breakfast or brunch game. With their eye-catching presentation and mouthwatering flavors, they are sure to become a favorite in your household, just as they have in mine. I hope this recipe brings as much joy to your table as it has to ours. Enjoy these little nests of goodness and the memories they create with your loved ones.

Related update: Avocado Nests

Related update: Mexi-Chicken Roll Ups

French Toast Croissants with Strawberries | Made by Meaghan Moineau

French Toast Croissants with Strawberries

Intro

There’s something magical about the aroma of freshly cooked French toast wafting through the kitchen. It takes me back to those lazy Sunday mornings at my grandmother’s house, where breakfast was an event to be savored. Instead of traditional bread, today we’re giving this classic breakfast staple a delightful twist by using croissants. The rich, buttery layers of croissants make them the perfect canvas for this sweet, eggy delight. Paired with fresh strawberries and a hint of orange, this dish elevates any breakfast or brunch spread.

Why You’ll Love It

This recipe combines the best of both worlds: the indulgence of a French pastry and the comforting familiarity of French toast. Here’s why you’ll fall in love with these French Toast Croissants with Strawberries:

  • Rich Flavor: The croissants’ buttery layers absorb the egg mixture beautifully, creating a rich and satisfying taste.
  • Easy to Make: With simple ingredients and straightforward instructions, this recipe is perfect for both beginners and seasoned cooks.
  • Versatile: Whether you’re making a special breakfast or a fancy brunch, this dish fits the bill.
  • Seasonal Freshness: The addition of fresh strawberries brings a burst of color and flavor, making it a perfect dish for spring and summer.

Ingredients

  • Butter
  • Split plain croissants
  • Eggs
  • Milk
  • Orange peel
  • Powdered sugar
  • Fresh strawberries

Instructions

  1. In a small mixer bowl, beat together all orange butter ingredients at medium speed, scraping the bowl often, until light and fluffy (about 1 to 2 minutes); set aside.
  2. In a pie pan, stir together milk, eggs, and 1 teaspoon of orange peel.
  3. In a 10-inch skillet or griddle, melt 2 tablespoons of butter over medium heat.
  4. Dip 4 croissant halves into the egg mixture, turning to coat both sides. Place croissant halves, cut side down, in the skillet.
  5. Cook, turning once, until golden brown (3 to 4 minutes on each side). Remove to a serving platter and keep warm.
  6. Repeat with the remaining 2 tablespoons of butter and 4 croissant halves.
  7. Dust croissant halves with powdered sugar and serve with orange butter and fresh strawberries.

Tips

  • Use Day-Old Croissants: Slightly stale croissants will absorb the egg mixture better without becoming too soggy.
  • Keep Warm: To keep the croissants warm while you finish cooking, place them in a preheated oven at a low temperature.
  • Don’t Overcrowd the Pan: Cook the croissants in batches if necessary to ensure even cooking.

Variations & Substitutions

If you’re looking to customize your French toast croissants, here are a few ideas:

  • Fruity Variations: Swap strawberries with blueberries, raspberries, or sliced bananas for a different flavor profile.
  • Nutty Addition: Sprinkle chopped nuts like almonds or pecans for added crunch.
  • Dairy-Free Option: Use almond milk or coconut milk instead of regular milk for a dairy-free version.

Storage

French Toast Croissants are best enjoyed fresh, but if you have leftovers, store them in an airtight container in the refrigerator for up to two days. Reheat in a preheated oven at 350°F until warmed through, or use a toaster oven for added crispiness.

FAQ

Can I make the orange butter ahead of time?

Yes, you can prepare the orange butter ahead of time and store it in the refrigerator. Just make sure to bring it to room temperature before serving so it spreads easily.

Can I freeze French Toast Croissants?

While it’s possible to freeze them, the texture might change slightly. If you choose to freeze, wrap each croissant tightly in plastic wrap and place in a freezer-safe bag. Thaw in the fridge overnight before reheating.

What can I serve with French Toast Croissants?

This dish pairs wonderfully with a side of crispy bacon or sausage. A refreshing fruit salad or a glass of freshly squeezed orange juice complements the meal beautifully.

Nutrition

While I don’t have exact nutritional information, this dish is indulgent and should be enjoyed as a treat. For lighter options, consider reducing the amount of butter or powdered sugar, or serving with a fresh fruit salad.

Conclusion

French Toast Croissants with Strawberries is a delightful twist on a classic breakfast favorite that promises to add a touch of elegance to your morning routine. Whether you’re enjoying a cozy family breakfast or hosting a brunch with friends, this dish is sure to impress. The combination of buttery croissants, sweet strawberries, and fragrant orange butter creates a symphony of flavors that’ll transport you straight to a Parisian café. So, grab your apron and treat yourself to this indulgent breakfast experience!

Related update: French Toast Croissants with Strawberries

Related update: Caramel ice cream

Related update: Banana Blueberry Pancakes

Creamy Potato Salad with Cashew Dressing and Fresh Basil | Made by Meaghan Moineau

Creamy Potato Salad with Cashew Dressing and Fresh Basil

Intro

There’s something deeply comforting about a bowl of potato salad. For me, it evokes memories of summer picnics with my family, where the air was filled with laughter and the smell of blooming flowers. My grandmother used to make her signature potato salad, which was a staple at every family gathering. Over the years, I’ve experimented with different variations, and today’s recipe combines those nostalgic flavors with a modern twist: a creamy cashew dressing, fresh basil, and vibrant vegetables. It’s a dish that bridges the gap between my childhood memories and my current culinary adventures.

Why You’ll Love It

This Creamy Potato Salad with Cashew Dressing and Fresh Basil is a delightful fusion of flavors and textures that offers something for everyone. It’s creamy yet light, thanks to the velvety cashew dressing, and it’s packed with fresh, vibrant ingredients. The combination of baby potatoes and fresh herbs creates a refreshing taste, while the addition of peas and kalamata olives adds a subtle complexity. Whether you’re looking for a side dish for your next barbecue or a comforting meal on its own, this potato salad is sure to please.

Ingredients

  • 1 cup almond milk
  • 2 pounds baby potatoes
  • 1 cup fresh basil leaves
  • 1/4 cup fresh chives, chopped
  • 1/4 cup fresh mint leaves, chopped
  • 1/4 cup trimmed fresh parsley, chopped
  • 1 cup fresh peas
  • 1/4 teaspoon black fresh ground pepper
  • 1 tablespoon dijon honey mustard
  • Juice of one lemon
  • 1/2 cup kalamata olives, pitted and sliced (optional)
  • 2 tablespoons nutritional yeast
  • 1/4 cup olive oil
  • 1 cup raw cashews, soaked for at least 2 hours
  • 2 tablespoons rice vinegar
  • 1 teaspoon sea salt
  • 1 tablespoon dijon grain mustard

Instructions

  1. Bring the baby potatoes to a boil in a large pot of water. Reduce the heat to medium and cook until they are fork-tender, about 10 to 12 minutes. Do not overcook.
  2. Drain the potatoes well and let them cool for 10 minutes or longer. Transfer them to a large bowl along with the peas, basil leaves, and olives if using.
  3. To make the dressing, combine the soaked cashews, almond milk, olive oil, rice vinegar, nutritional yeast, dijon honey mustard, dijon grain mustard, lemon juice, sea salt, and black pepper in a small blender or food processor. Pulse until smooth. If the dressing is too thick, add a bit more olive oil or almond milk.
  4. Taste the dressing for seasoning and adjust the nutritional yeast, salt, and pepper to taste.
  5. Toss the potatoes with the dressing until they are well coated.
  6. Garnish with fresh chives, mint, and parsley before serving.

Tips

For the best results, use baby potatoes as they have a creamy texture and cook evenly. Be sure to soak the raw cashews beforehand, as this will ensure the dressing is smooth and velvety. If you’re short on time, you can use frozen peas, but fresh peas will provide a firmer texture and sweeter flavor.

Variations & Substitutions

If you prefer a spicier flavor, consider adding a pinch of cayenne pepper or red pepper flakes to the dressing. You can also substitute the almond milk with another plant-based milk of your choice, such as oat or soy milk. For a more Mediterranean twist, add sun-dried tomatoes or artichoke hearts to the salad.

Storage

This potato salad can be stored in an airtight container in the refrigerator for up to 3 days. The flavors will meld together over time, making it even more delicious the next day. However, it’s best enjoyed fresh to maintain the vibrant texture of the herbs and peas.

FAQ

Can I make this salad ahead of time?

Yes, you can prepare the salad a day in advance. Simply store the potatoes and dressing separately and combine them just before serving to keep the potatoes from absorbing too much moisture and becoming mushy.

Is this salad suitable for vegans?

Absolutely! This salad is entirely plant-based, making it a wonderful option for vegans and anyone looking to incorporate more plant-based meals into their diet.

Can I use regular mustard instead of dijon?

While dijon mustard adds a specific tangy flavor, you can substitute it with regular mustard in a pinch. Keep in mind that the overall taste might differ slightly.

Nutrition

This salad is not just delicious but also packed with nutrients. It’s rich in healthy fats from the cashews and olive oil, vitamins from the fresh herbs and peas, and fiber from the potatoes. It’s a wholesome dish that satisfies both your taste buds and nutritional needs.

Conclusion

This Creamy Potato Salad with Cashew Dressing and Fresh Basil is more than just a side dish; it’s a testament to the power of fresh, wholesome ingredients coming together to create something truly special. Whether you’re reminiscing about family gatherings or simply looking for a new favorite recipe, this salad promises to be a delightful addition to your culinary repertoire. Gather your ingredients, channel your inner chef, and enjoy the comforting flavors of this vibrant potato salad.

Related update: Creamy Potato Salad with Cashew Dressing and Fresh Basil

Related update: Red Quinoa and Roasted Cauliflower Salad

Caramel Macchiato Cake | Made by Meaghan Moineau

Caramel Macchiato Cake

Intro

There’s something magical about the aroma of coffee and caramel mingling in the air. It takes me back to lazy Sunday afternoons at my grandmother’s house, where the fragrant scent of freshly brewed coffee and the sweet promise of caramel treats filled the kitchen. Inspired by those cherished memories, this Caramel Macchiato Cake captures the essence of those moments in a delectable dessert that combines the rich flavors of coffee, chocolate, and caramel. Whether you’re a coffee lover or a dessert enthusiast, this cake is designed to bring warmth and joy to your table.

Why You’ll Love It

This Caramel Macchiato Cake is more than just a cake; it’s an experience. Here are a few reasons why you’ll fall head over heels for this delightful dessert:

  • Rich and Flavorful: The combination of chocolate, coffee, and caramel creates a symphony of flavors that dance on your taste buds.
  • Perfect for All Occasions: Whether it’s a birthday, a family gathering, or just a treat for yourself, this cake is sure to impress.
  • Easy to Make: With a few simple ingredients and steps, you’ll have a show-stopping dessert without spending hours in the kitchen.

Ingredients

  • Butter
  • Condensed milk
  • White corn syrup
  • Unflavored gelatin powder
  • Chocolate cake mix
  • Granulated sugar
  • Heavy whipping cream
  • Coffee
  • Powdered sugar
  • Water

Instructions

  1. Make the Cake Layers: Follow the chocolate cake box instructions to make three layers. Add an extra box of mix if needed to ensure you have enough batter for three layers. Add the instant coffee directly to the batter, stir, and let it sit for a few minutes to allow the coffee to dissolve.
  2. Divide the batter evenly into three 8-inch cake pans. Bake according to the box instructions.
  3. Once the cakes are cool, place a large plate on top of each pan and invert so that the plate is on the bottom. Tap the top of the pan a few times and gently wiggle to remove the pan from the cake. Repeat for the other two layers. Wrap the cake layers in plastic wrap and refrigerate for at least 2 hours or overnight.
  4. Make the Caramel: In a small saucepan over medium-low heat, combine the butter, condensed milk, white corn syrup, and granulated sugar. Stir and cook until the mixture reaches a dark golden brown color, stirring frequently to prevent burning.
  5. Once the caramel is ready, let it cool slightly before using it to layer and top the cake.
  6. Layer the cake with caramel and frosting of your choice, and drizzle more caramel on top for a beautiful finish.

Tips

To ensure your Caramel Macchiato Cake turns out perfectly, consider these helpful tips:

  • Chill the Cake Layers: Chilling the cake layers makes them easier to handle and frost.
  • Keep an Eye on the Caramel: Caramel can go from perfect to burnt quickly, so stir continuously and watch for the color change.
  • Use Quality Coffee: The coffee flavor is essential in this cake, so use a good quality coffee for the best results.

Variations & Substitutions

Feel free to make this cake your own by trying out some of these variations and substitutions:

  • Chocolate Variation: Add chocolate chips to the batter for extra chocolatey goodness.
  • Nutty Twist: Sprinkle chopped nuts between the layers for added texture and flavor.
  • Alternative Frosting: Try a cream cheese frosting for a tangy contrast to the sweet caramel.
  • Dairy-Free: Use dairy-free substitutes for butter and cream to make the cake suitable for those with dairy allergies.

Storage

To store your Caramel Macchiato Cake, wrap it tightly in plastic wrap or place it in an airtight container. It can be stored at room temperature for up to 3 days or in the refrigerator for up to a week. For longer storage, wrap the cake in plastic wrap and aluminum foil, then freeze for up to 3 months. Thaw in the refrigerator before serving.

FAQ

Can I use instant coffee instead of brewed coffee?

Yes, you can use instant coffee. Simply dissolve it in a bit of hot water before adding it to the batter for a stronger coffee flavor.

How do I prevent my caramel from burning?

Keep the heat on medium-low and stir the caramel constantly. Watch for the color change to a dark golden brown and remove it from heat immediately once it reaches that point.

Nutrition

This Caramel Macchiato Cake is a decadent treat, perfect for special occasions. While it’s not the lowest in calories, it is certainly rich in flavor and satisfaction. Enjoy a slice in moderation as part of a balanced diet.

Conclusion

The Caramel Macchiato Cake is a celebration of flavors and a delightful nod to the cherished memories of cozy afternoons filled with the aroma of coffee and caramel. Whether you’re making it for a special occasion or simply to enjoy a slice of comfort, this cake is sure to become a favorite. So gather your ingredients, embrace the warmth of your kitchen, and create a dessert that will surely bring smiles and sweet memories to those who share it with you.

Related update: Caramel Macchiato Cake

Gluten Free Profiteroles | Made by Meaghan Moineau

Gluten Free Profiteroles

Intro

There’s something truly magical about the delicate crunch and soft, airy center of a well-made profiterole. Growing up, my grandmother used to make these delightful little puffs for special occasions, filling them with sweetened cream and drizzling them with chocolate. The kitchen would fill with the rich aroma of baking pastry, a scent that still transports me back to those cozy family gatherings. Now, with this gluten free version, I’m excited to share a recipe that brings the same joy and nostalgia, but without the gluten.

Why You’ll Love It

This gluten free profiterole recipe is a game-changer for anyone with gluten sensitivities. Not only does it deliver the classic texture and taste you love, but it’s also surprisingly simple to make. You’ll appreciate that the ingredients are likely already in your pantry and the method doesn’t require any fancy equipment. Whether you’re a seasoned baker or new to the kitchen, this recipe is designed to be approachable and rewarding.

Ingredients

  • Butter
  • Egg
  • Gluten free flour
  • Xanthan gum
  • Milk
  • Salt
  • Sugar
  • Water

Instructions

  1. Preheat oven to 375°F.
  2. Sift the flour, xanthan gum, salt, and sugar together 3-4 times. Set aside in a handy location close to the stove.
  3. Break the egg into a measuring cup and whisk to combine. Set aside.
  4. Prepare your hand mixer so that it is ready when needed.
  5. Measure milk and water into a deep heavy-bottomed pan. Cut butter into small chunks and add to the milk mixture. Heat gently until all the butter has melted.
  6. Increase heat on the butter-milk mixture until it comes to a rolling boil. Remove from heat and pour the flour mixture into the milk mixture all at once. Beat vigorously with a wooden spoon.
  7. Return to a low heat and continue beating with the wooden spoon until the flour forms a smooth paste and has come cleanly off all the sides and bottom (should be shiny and smooth). Avoid overcooking this paste as the buns will become heavy.
  8. Remove from heat and slowly pour the egg into the mixture, beating well with the hand mixer. Be careful not to make the paste too runny. The amount of egg required depends on the humidity, so add in small quantities. Continue to beat until shiny and stiff.
  9. The paste should be firm but elastic and should be able to stand on its own when dropped by spoonfuls. This paste may be kept for a couple of hours covered with a damp cloth. It can also be frozen and used successfully.
  10. Prepare a cookie sheet by running it under cold water, shaking excess water off, but leaving it damp. Use two baking sheets to protect the bottom of each puff from burning.
  11. Place tablespoons of the mixture about 10 cm apart (the choux will double to triple in size).
  12. Bake for 20-25 minutes, until the exterior is golden. Do not open the oven for the first 15 minutes. Choux needs to be golden; otherwise, they will collapse as they cool.
  13. When done, remove from the sheet to a baking rack, piercing with a toothpick to allow steam to escape. Choux pastry may be reheated for about 10 minutes to crisp them up again.

Tips

For the best results, make sure all your ingredients are at room temperature before you begin. This helps everything combine more smoothly. Also, keep an eye on the humidity levels in your kitchen; this can affect how much egg you need to add to your dough.

Variations & Substitutions

Feel free to get creative with your fillings! Traditional cream or custard are always hits, but consider experimenting with flavored creams like coffee or chocolate. For a dairy-free version, substitute the milk and butter with plant-based alternatives.

Storage

Store any leftover profiteroles in an airtight container at room temperature for up to two days. They can also be frozen for longer storage—just thaw and reheat them in the oven to regain their crispness.

FAQ

Can I make these profiteroles ahead of time?

Yes, you can make the choux pastry ahead of time and store it covered with a damp cloth for a few hours, or freeze them for later use. Just reheat in the oven before serving to ensure they are crisp.

What if I don’t have xanthan gum?

If you don’t have xanthan gum, you can try using guar gum or psyllium husk as an alternative. These help provide the necessary elasticity in gluten free baking.

Nutrition

Profiteroles are a treat and should be enjoyed in moderation. The exact nutritional content will vary based on the size of your profiteroles and the type of filling used. However, they are relatively low in sugar and can fit into a balanced diet when enjoyed as an occasional indulgence.

Conclusion

This gluten free profiterole recipe is a beautiful way to bring a touch of elegance to your dessert table. With the perfect balance of crispness and airiness, these treats are sure to impress your family and friends, gluten free or not. Enjoy the process of making them and savor every bite of nostalgia they bring. Happy baking!

Related update: Gluten Free Profiteroles

Related update: Creamy Potato Salad with Cashew Dressing and Fresh Basil

Mashed Potatoes with Garlic, Sage & Goat Cheese | Made by Meaghan Moineau

Mashed Potatoes with Garlic, Sage & Goat Cheese

Intro

There’s something truly comforting about a bowl of creamy mashed potatoes. For me, it brings back memories of Sunday family dinners at my grandmother’s house. The kitchen would be filled with the savory aroma of garlic and sage, enticing everyone to gather around the table. Her secret ingredient? A dash of tangy goat cheese that elevated the dish to something extraordinary. Today, I’m excited to share this cherished recipe with you, hoping it becomes a staple in your home just as it has been in mine.

Why You’ll Love It

This mashed potato recipe is not just any side dish; it’s a rich and flavorful experience. The creaminess of the goat cheese blends perfectly with the earthy notes of sage, creating a dish that’s both comforting and sophisticated. It’s the ideal side for your holiday gatherings, yet simple enough for a weeknight meal. Plus, with just a handful of ingredients, it’s as easy to prepare as it is delicious.

Ingredients

  • 4 large baking potatoes, peeled and cubed
  • 3 cloves of garlic, minced
  • 1 Chavrie goat cheese pyramid (or 5 oz of any soft goat cheese)
  • 2 tablespoons olive oil
  • 2 teaspoons fresh sage, finely chopped
  • Salt and black pepper to taste

Instructions

  1. In a medium saucepan, cook the potatoes in salted water until tender, about 15 minutes.
  2. Drain the potatoes and return them to the saucepan.
  3. While still warm, add the olive oil, garlic, and Chavrie Goat Cheese.
  4. Whip the potatoes with handheld mixers until the ingredients are blended and the desired consistency is obtained.
  5. Season with salt and black pepper to taste.
  6. Garnish with fresh sage before serving.

Tips

For perfectly fluffy mashed potatoes, make sure to thoroughly drain them before adding other ingredients. If you prefer a smoother texture, you can pass the potatoes through a ricer before mixing. Adjust the amount of garlic and sage according to your taste preference. Remember, the goat cheese adds a unique tang, so you may need less salt than usual.

Variations & Substitutions

If goat cheese isn’t to your liking, you can substitute it with cream cheese or even a bit of sour cream for a similar creamy texture. For a vegan version, use a vegan cream cheese alternative and replace the olive oil with a vegan butter. You can also experiment with different herbs like rosemary or thyme for a new flavor profile.

Storage

Store any leftover mashed potatoes in an airtight container in the refrigerator for up to three days. Reheat gently on the stove or in the microwave, adding a splash of milk or broth to restore the creamy texture. Unfortunately, mashed potatoes don’t freeze well as they can become grainy, so it’s best to enjoy them fresh.

FAQ

Can I prepare this dish in advance?

Yes, you can prepare the mashed potatoes a day in advance. Simply store them in the fridge and reheat before serving. Adding a little extra olive oil or milk when reheating can help maintain their creaminess.

What is the best potato type for mashing?

For the creamiest mashed potatoes, use starchy potatoes like Russets or Yukon Golds. They break down easily and absorb flavors well, resulting in a smooth, fluffy texture.

Can I make this recipe without a mixer?

Absolutely! While a mixer makes the job easier, you can use a potato masher or even a fork. The texture will be more rustic, which some people prefer.

Nutrition

This dish is not only delicious but also nutritious. The potatoes provide a good source of vitamins C and B6, while the goat cheese adds protein and calcium. Just be mindful of portion sizes if you’re watching your calorie intake, as the cheese and olive oil can add up.

Conclusion

Mashed Potatoes with Garlic, Sage & Goat Cheese is a dish that brings warmth and flavor to any table. Whether it’s a holiday feast or a simple family dinner, this recipe promises to be a crowd-pleaser. I hope you enjoy this family favorite as much as we do. Don’t forget to share your creations with us and let us know how it turned out!

Related update: Mashed Potatoes with Garlic, Sage & Goat Cheese

Spicy Coconut French Toast | Made by Meaghan Moineau

Spicy Coconut French Toast

Intro

Growing up, Sunday mornings in my family were synonymous with the enticing aroma of French toast wafting through the house. My grandmother would always prepare a classic version that was simple yet utterly delightful. However, as I grew older and started experimenting with flavors, I found that adding a hint of spice and a tropical twist transformed this beloved breakfast staple into something truly extraordinary. And thus, the Spicy Coconut French Toast was born—a dish that combines the warmth of nostalgia with a burst of exciting flavors, perfect for any brunch table.

Why You’ll Love It

This Spicy Coconut French Toast is a delightful departure from the traditional. Here’s why it will become a favorite in your home:

  • Unique Flavor Profile: The combination of coconut and a hint of cayenne pepper adds a surprising yet harmonious twist to the classic French toast.
  • Perfect for Special Occasions: Whether it’s a weekend brunch or a special breakfast gathering, this dish is sure to impress your guests.
  • Simple Ingredients: Despite its gourmet appearance, this recipe uses everyday ingredients that you likely already have in your pantry.
  • Quick and Easy: It takes just a few steps to prepare, making it ideal for both leisurely mornings and busy days.

Ingredients

  • 4 large eggs
  • 1 loaf French bread, sliced thickly
  • Oil for frying
  • 1/2 teaspoon ground cayenne pepper
  • 1/4 cup maple syrup
  • 1/4 teaspoon nutmeg
  • Pinch of salt
  • 1 tablespoon sugar
  • 1 cup sweetened shredded coconut
  • 1 teaspoon vanilla extract
  • 1 cup whole milk

Instructions

  1. Heat a large skillet over medium heat.
  2. In a baking dish or large bowl, whisk together the milk, eggs, salt, vanilla extract, sugar, cayenne pepper, and nutmeg.
  3. Pour the shredded coconut onto a plate.
  4. Pour enough oil into the skillet to completely coat the bottom.
  5. Dip each slice of bread into the egg mixture, allowing it to soak for 15-20 seconds per side.
  6. Then, dip the soaked bread slices into the coconut, ensuring an even coat on both sides.
  7. Once the oil is hot, start frying one slice as a test batch. Cook for 1 minute on each side, watching for a crispy golden-brown crust. The coconut may turn a deep brown, but avoid letting it burn.
  8. If the coconut browns before the crust forms, reduce the heat slightly. Add more oil as needed and continue frying the remaining slices.
  9. Serve warm with maple syrup and fresh berries for a delightful breakfast experience.

Tips

  • Use stale bread if possible, as it soaks up the egg mixture better without getting too soggy.
  • Adjust the amount of cayenne pepper to suit your spice preference.
  • Test the oil temperature by dropping a small piece of bread into it. If it sizzles and browns slowly, it’s ready.

Variations & Substitutions

  • Dairy-Free Version: Substitute whole milk with almond milk or coconut milk for a dairy-free alternative.
  • Gluten-Free Option: Use gluten-free bread to accommodate dietary restrictions.
  • Extra Spice: Add a pinch of cinnamon for an additional layer of warmth and spice in the flavor.

Storage

Store any leftover French toast in an airtight container in the refrigerator for up to 2 days. To reheat, place the slices in a toaster oven or on a skillet over medium heat until warmed through. Avoid microwaving to retain the crispy texture.

FAQ

Can I make this recipe ahead of time?

While it’s best enjoyed fresh, you can prepare the egg mixture and slice the bread the night before. Store them separately and quickly assemble and fry the French toast in the morning for a quick breakfast.

What can I serve with Spicy Coconut French Toast?

This dish pairs beautifully with fresh fruit, crispy bacon, or a dollop of whipped cream. For a more savory option, consider serving it with scrambled eggs or a sausage link.

Nutrition

Each serving of Spicy Coconut French Toast provides approximately:

  • Calories: 350
  • Protein: 8g
  • Carbohydrates: 45g
  • Fat: 15g
  • Sugar: 14g

Note: Nutritional values are estimates and can vary based on specific ingredients and preparation methods.

Conclusion

Spicy Coconut French Toast is a delightful fusion of sweet, spicy, and tropical flavors that will make your breakfast or brunch spread truly special. Its crispy exterior and soft, flavorful interior create a perfect bite every time. Whether you’re making it for your family or serving it at a gathering, this dish is bound to become a cherished favorite. So gather your ingredients, fire up the skillet, and indulge in a breakfast experience that’s both comforting and exciting. Enjoy!

Related update: Spicy Coconut French Toast

Related update: French Toast Croissants with Strawberries

Asian Salmon Burgers With Tangy Ginger Lime Sauce | Made by Meaghan Moineau

Asian Salmon Burgers With Tangy Ginger Lime Sauce

Intro

There’s something undeniably comforting about sinking your teeth into a well-crafted burger. For me, it brings back fond memories of summer evenings spent with my family in our backyard. My father, the grill master, would whip up his signature dishes, and one day, he introduced us to these delightful Asian Salmon Burgers. The combination of fresh salmon with a tangy ginger lime sauce became an instant favorite. Today, I’m excited to share this family recipe with you all, hoping it brings the same joy and deliciousness to your home as it did to ours.

Why You’ll Love It

These Asian Salmon Burgers are not just another burger recipe. They are a delightful fusion of flavors and textures that will tantalize your taste buds. The fresh salmon, rich with omega-3 fatty acids, brings a tender and juicy bite, while the ginger lime sauce adds a perfect zing that complements the savory burger. Whether you’re looking for a healthy alternative to traditional beef burgers or simply want to try something new, these salmon burgers are a must-try!

Ingredients

  • 4 burger buns
  • 1/4 cup fresh basil, chopped
  • 2 cloves garlic, minced
  • 2 green onions, finely sliced
  • 1 lime, juiced
  • 1/2 cup mayonnaise
  • 2 tablespoons oyster sauce
  • 1 teaspoon powdered ginger
  • 1 pound salmon, skin removed
  • 2 tablespoons sesame oil
  • 1/4 cup sour cream
  • 2 tablespoons soy sauce

Instructions

  1. Cut the salmon into large hunks and run it through a food processor until no large pieces remain.
  2. Add to the salmon the soy sauce, garlic, ginger, oyster sauce, green onion, and basil.
  3. Combine ingredients well and form 4 large patties from the mixture.
  4. Heat up the sesame oil in a large frying pan on medium-high heat and add in the patties.
  5. Cook for about 10 minutes, flipping once halfway through.
  6. To make the sauce, mix the mayonnaise, sour cream, lime juice, and a pinch of ginger until smooth.
  7. Pour a spoonful of sauce over the top of the finished salmon burger and serve inside a toasted bun.

Tips

For the best results, use fresh salmon. It enhances the flavor and texture of the burger. If you don’t have a food processor, you can finely chop the salmon with a sharp knife. Be sure to toast your buns for extra flavor and crunch. Lastly, don’t overcook the salmon patties; they should be juicy and slightly pink in the center.

Variations & Substitutions

If you want to switch things up, consider using shrimp instead of salmon for a different seafood twist. You can also add some heat by including a teaspoon of sriracha or chili flakes to the sauce. For a gluten-free option, serve the patties on lettuce wraps instead of buns. If you prefer a different herb, cilantro works wonderfully in place of basil.

Storage

These salmon burgers are best enjoyed fresh, but if you have leftovers, store the patties in an airtight container in the refrigerator for up to 2 days. The sauce can be refrigerated separately in a small container. To reheat, gently warm the patties in a skillet over low heat until heated through.

FAQ

Can I freeze the salmon patties?

Yes, you can freeze the uncooked salmon patties. Place them on a baking sheet lined with parchment paper and freeze until solid. Once frozen, transfer the patties to a freezer-safe bag or container. They can be stored for up to 3 months. Thaw in the refrigerator before cooking.

What can I serve with these salmon burgers?

These burgers pair wonderfully with a light and fresh salad, sweet potato fries, or a simple coleslaw. You can also serve them with grilled vegetables for a wholesome meal.

Nutrition

This recipe provides a nutritious meal option rich in protein and omega-3 fatty acids, which are beneficial for heart health. Salmon is also a great source of vitamin D and B vitamins. Remember to adjust portion sizes to fit your dietary needs.

Conclusion

These Asian Salmon Burgers with Tangy Ginger Lime Sauce are a delicious way to enjoy a healthy and satisfying meal. With their vibrant flavors and simple preparation, they make an excellent choice for family dinners or entertaining guests. I hope you enjoy making and savoring these burgers as much as my family has over the years. Bon appétit!

Related update: Asian Salmon Burgers With Tangy Ginger Lime Sauce

Related update: Avocado Nests

Avocado Chicken Salad | Made by Meaghan Moineau

Avocado Chicken Salad: A Fresh and Flavorful Delight

Intro

There’s something undeniably nostalgic about a well-crafted salad. As a child, I fondly remember summer afternoons at my grandmother’s house, where the scent of fresh herbs from her garden filled the air. She would often prepare a simple yet delightful chicken salad, serving it with a smile that made every bite taste like home. Inspired by those cherished memories, I’ve crafted this Avocado Chicken Salad that combines the creamy richness of avocado with succulent chicken, topped with a zesty and refreshing dressing. It’s a dish that brings back those warm, comforting moments with every mouthful.

Why You’ll Love It

This Avocado Chicken Salad is more than just a meal; it’s a symphony of flavors and textures that will tantalize your taste buds. Here’s why you’ll fall in love with it:

  • Fresh and Nutritious: Packed with healthy fats from avocados and lean protein from chicken, this salad is a nutritious powerhouse.
  • Quick and Easy: With simple ingredients and straightforward steps, you can whip up this delicious salad in no time.
  • Customizable: Whether you’re serving it as a light lunch or a hearty dinner, this salad can be easily adjusted to fit your preferences.
  • Great for Meal Prep: Prepare it in advance for a convenient grab-and-go meal during the busy week.

Ingredients

  • 2 ripe avocados, cut into cubes
  • 1 cup cherry tomatoes, halved
  • 2 tablespoons extra virgin olive oil
  • Juice of 2 limes
  • 3 tablespoons mayonnaise
  • 1 teaspoon black pepper, plus more to taste
  • 4 cups shredded mixed salad greens
  • 2 skinless, boneless chicken breasts
  • Salt, to taste

Instructions

  1. Season the chicken breasts with a pinch of salt and pepper. Place in a pot of boiling water and cook until fully cooked through, about 15-20 minutes. Remove from water, let cool, then cut into cubes. Set aside.
  2. In a large bowl, place the shredded mixed salad greens. Drizzle with olive oil and lime juice, tossing well to coat the leaves evenly.
  3. Divide the dressed salad greens into two serving bowls.
  4. Evenly distribute the cubed avocados, cubed chicken, and halved cherry tomatoes on top of the salad in each bowl.
  5. Drizzle the mayonnaise over the top, and finish with a dash of black pepper.
  6. Serve immediately and enjoy the fresh, vibrant flavors!

Tips

For the best results, use ripe avocados that yield slightly to gentle pressure. If you’re making this salad ahead of time, prepare the ingredients separately and combine them just before serving to maintain the freshness and texture of the salad.

Variations & Substitutions

Feel free to get creative with this salad! Here are some variations and substitutions you might consider:

  • Add Crunch: Toss in some roasted nuts or seeds for an added crunch and a boost in nutrition.
  • Herbal Twist: Fresh herbs like cilantro or basil can elevate the flavors of the salad.
  • Protein Alternatives: For a different protein source, substitute the chicken with grilled shrimp or chickpeas for a vegetarian option.
  • Dairy-Free Option: Swap mayonnaise with a dairy-free yogurt or avocado-based dressing.

Storage

To store, keep the salad components separate in airtight containers in the refrigerator for up to 3 days. Assemble the salad just before serving to ensure the flavors remain vibrant and the ingredients stay fresh.

FAQ

Can I use leftover chicken for this salad?

Absolutely! Using leftover roasted or grilled chicken is a great way to save time and reduce waste. Just ensure the chicken is well-seasoned to enhance the overall flavor of the salad.

What can I do to prevent the avocados from browning?

To keep avocados from browning, squeeze a little extra lime juice over them. The acidity in the lime juice will slow down the oxidation process, keeping your avocados looking fresh and green.

Nutrition

This Avocado Chicken Salad is not only delicious but also nutritious. Each serving is packed with healthy fats, lean protein, and a variety of vitamins and minerals from the fresh vegetables. It’s a wholesome, balanced meal that will keep you energized and satisfied.

Conclusion

There you have it, a delightful Avocado Chicken Salad that’s both a treat for the taste buds and a nod to the comforting salads from my childhood. Whether you’re enjoying it on a sunny afternoon or packing it for a nutritious lunch, this salad is sure to become a favorite in your culinary repertoire. So gather your ingredients, take a trip down memory lane, and savor the simple pleasures of this fresh and flavorful dish. Bon appétit!

Related update: Avocado Chicken Salad

Baked Caramel Custard | Made by Meaghan Moineau

Baked Caramel Custard: A Sweet Journey Back in Time

Intro

There’s something magical about the aroma of caramel wafting through the kitchen. It transports me back to my grandmother’s cozy home, where weekends were filled with warmth and the promise of something sweet baking in the oven. Her Baked Caramel Custard was a family favorite, a simple yet elegant dessert that graced our table on special occasions and ordinary days alike. Each spoonful was a creamy, dreamy reminder of home, love, and the art of simple cooking. Today, I invite you to join me on this nostalgic journey and create your own sweet memories with this timeless recipe.

Why You’ll Love It

This Baked Caramel Custard is a delightful dessert that blends the rich, buttery flavor of caramel with the smoothness of custard. It’s not only a treat for the palate but also a feast for the eyes with its glossy, amber top. This recipe is perfect for those who appreciate simple ingredients coming together to create something extraordinary. Whether you’re new to custard-making or a seasoned pro, this recipe is easy to follow and promises a dessert that’s as satisfying to make as it is to eat.

Ingredients

  • Egg substitute
  • 1 egg yolk
  • Evaporated skim milk
  • Port wine
  • Skim milk
  • Sugar plus
  • Sugar
  • Vanilla

Instructions

  1. Preheat the oven to 350°F (175°C).
  2. Scald the evaporated skim milk and skim milk together in a heavy saucepan. Remove from heat and set aside.
  3. In a skillet over medium heat, caramelize the sugar until it melts and turns a golden brown.
  4. Slowly add the milk mixture to the caramelized sugar, stirring constantly until the sugar dissolves completely.
  5. In a medium bowl, beat the egg substitute and egg yolk together until lemon-colored.
  6. Add the milk mixture, port wine, and vanilla to the eggs, stirring well to combine.
  7. Pour the custard mixture into 6 custard cups and place them in a baking dish.
  8. Add boiling water to the baking dish, ensuring the water reaches halfway up the sides of the cups.
  9. Bake in the preheated oven for 35 to 40 minutes, or until the custards are set.
  10. Remove the custard cups from the oven and chill completely in the refrigerator.
  11. Once chilled, place a dessert plate on top of each custard cup and invert to serve.

Tips

For the perfect caramel, keep a close eye on the sugar as it melts. It can go from golden to burnt very quickly, so be ready to remove it from the heat as soon as it reaches the desired color. Additionally, when adding the milk to the caramel, pour slowly to avoid splattering and ensure a smooth mixture.

Variations & Substitutions

If you’re looking to adapt this recipe, consider using almond milk in place of skim milk for a nutty flavor. For a boozy twist, swap out the port wine for a favorite liqueur. You can also add a pinch of sea salt to the caramel for a salted caramel version that balances sweet with savory.

Storage

Store any leftover custard in the refrigerator, covered, for up to three days. This dessert is best enjoyed chilled, so feel free to prepare it a day in advance for a fuss-free treat.

FAQ

Can I make this custard without the egg substitute?

Yes, you can replace the egg substitute with an additional egg yolk if you prefer a richer custard.

How do I know when the custard is set?

The custard is set when it jiggles slightly in the center but is firm around the edges. A knife inserted into the center should come out clean.

Nutrition

This recipe yields six servings, with each serving being approximately 1/2 cup. While specific nutritional values will vary depending on ingredient brands and substitutions, this custard is generally lower in fat due to the use of skim milk and egg substitutes. It’s a delightful indulgence that can fit into a balanced diet.

Conclusion

Baked Caramel Custard is more than just a dessert; it’s a comforting reminder of simpler times and the joy of creating something special from everyday ingredients. Whether you’re making it for a family gathering or a quiet night in, this recipe is sure to delight and impress. So grab your apron, preheat the oven, and let the sweet journey begin!

Related update: Baked Caramel Custard

Related update: Gluten Free Profiteroles

Related update: Wild Blueberry Lemon Muffins

Rustic Brie Toasts with Wild Mushroom, Cranberry and Shallot | Made by Meaghan Moineau

Rustic Brie Toasts with Wild Mushroom, Cranberry, and Shallot

Intro

There’s something remarkably comforting about the scent of earthy mushrooms mingling with the crisp sweetness of cranberries and the savory richness of melted brie. This recipe for Rustic Brie Toasts with Wild Mushroom, Cranberry, and Shallot captures the essence of autumn in every bite. I remember my grandmother preparing something similar during our family gatherings in the fall. She’d gather us around her long wooden table, the fireplace crackling in the background, and serve these toasty delights as a warm-up to our festive meals. The aroma alone would draw us in, and the first bite was always a revelation of flavors. These toasts are a nod to those cherished moments and are perfect for sharing new memories with loved ones.

Why You’ll Love It

This recipe is a perfect blend of savory and sweet, offering a gourmet twist on the classic toast. The combination of creamy brie with the nuttiness of wild mushrooms and the tartness of cranberries creates a complex flavor profile that’s sure to impress. Not only are these toasts a breeze to make, but they also serve as an elegant appetizer for any occasion. Whether you’re hosting a dinner party or enjoying a quiet night by the fireplace, these toasts will elevate your dining experience.

Ingredients

  • Diced wild mushrooms
  • Diced shallot
  • 1/4 cup dried cranberries (juice sweetened if possible)
  • Fresh thyme
  • Rustic baguette
  • Olive oil
  • Wedge of beautiful brie cheese
  • Salt and pepper

Instructions

  1. Start by preheating your oven to 350 degrees Fahrenheit.
  2. While the oven is preheating, heat the olive oil in a sauté pan over medium heat.
  3. Add the diced shallot, wild mushrooms, cranberries, and a few sprigs of fresh thyme to the pan.
  4. Sauté the mixture for a few minutes until the shallot begins to wilt and the mushrooms are tender.
  5. Season with salt and pepper to taste and set aside to cool.
  6. Slice a rustic baguette into 12 pieces.
  7. Place a slice of brie on each piece of bread.
  8. Top each toast with a spoonful of the cranberry, mushroom, and shallot mixture.
  9. Arrange the toasts on an oiled cookie sheet.
  10. Bake the toasts for 15 minutes or until the brie just begins to melt.
  11. Remove from oven and serve warm. Enjoy!

Tips

  • For a more intense flavor, allow the mushroom mixture to marinate for an hour before assembling the toasts.
  • Use a sharp knife or serrated bread knife to ensure clean slices of baguette.
  • Consider using a mix of wild mushrooms for a more complex flavor profile.

Variations & Substitutions

If you prefer a different cheese, camembert can be a lovely substitute for brie, offering a similar creamy texture. For those who enjoy a bit of heat, consider adding a pinch of red pepper flakes to the mushroom mixture. If you’re avoiding gluten, opt for gluten-free bread or crackers.

Storage

While these toasts are best enjoyed fresh, any leftovers can be stored in an airtight container in the refrigerator for up to two days. To reheat, place them back in the oven at a low temperature until warmed through. Avoid microwaving, as this can make the bread soggy.

FAQ

Can I prepare the mushroom mixture in advance?

Yes, you can prepare the mushroom mixture a day in advance. Store it in an airtight container in the refrigerator and assemble the toasts just before baking.

What type of cranberries should I use?

For this recipe, juice-sweetened dried cranberries add just the right amount of sweetness. However, you can use regular dried cranberries if you prefer.

Is there a way to make this recipe vegan?

Absolutely! Replace the brie with a vegan cheese alternative and use olive oil or vegan butter for sautéing.

Nutrition

This appetizer is a delightful treat but remember that it is rich and indulgent. Each toast provides a balance of carbohydrates from the baguette, healthy fats from the olive oil and cheese, and a touch of sweetness from the cranberries. Consume in moderation as part of a balanced diet.

Conclusion

Rustic Brie Toasts with Wild Mushroom, Cranberry, and Shallot are a wonderful way to celebrate the flavors of the season. They’re simple to prepare, yet sophisticated enough to make any occasion feel special. Whether you’re rekindling old traditions or starting new ones, these toasts are sure to bring warmth and joy to your table. Enjoy them with a glass of your favorite wine or a mug of hot cider for a truly cozy experience. Bon appétit!

Related update: Rustic Brie Toasts with Wild Mushroom, Cranberry and Shallot

Related update: Roasted Red Pepper & Tomato Salsa

Carrot and Coriander Soup | Made by Meaghan Moineau

Carrot and Coriander Soup

Intro

There’s something undeniably comforting about a warm bowl of soup that not only satiates hunger but also soothes the soul. Growing up, I remember visiting my grandmother’s house on crisp autumn afternoons, where the inviting aroma of her signature carrot and coriander soup would welcome us at the door. It was more than just a meal; it was a hug in a bowl, filled with love and warmth that transcended generations. Today, I want to share this beloved recipe with you, so you can bring a bit of that warmth into your home too.

Why You’ll Love It

This carrot and coriander soup is not just a simple recipe; it’s an experience. Here’s why you’ll adore it:

  • Flavor-packed: The natural sweetness of carrots combines beautifully with the citrusy hint of orange juice and the earthy warmth of coriander.
  • Healthy: Packed with vitamins and antioxidants, this soup is as nourishing as it is delicious.
  • Easy to make: With just a handful of ingredients and simple steps, you’ll have a stunning soup on your table in no time.
  • Versatile: Perfect as a starter, side, or even as a light main dish.

Ingredients

  • 6 large carrots, peeled and roughly chopped
  • 1 large onion, chopped
  • 2 tablespoons olive oil
  • 1 teaspoon ground coriander
  • 1/2 cup fresh orange juice
  • 4 cups water
  • Salt, to taste
  • Pepper, to taste
  • Fresh coriander, for garnish

Instructions

  1. In a deep pot, heat the olive oil over medium heat. Add the chopped onions and sauté until they are soft and translucent.
  2. Stir in the carrots, allowing them to cook and soften slightly, about 5 minutes.
  3. Add the water, salt, and pepper. Cover the pot and let it simmer until the carrots are fully cooked and tender, about 20-25 minutes.
  4. Stir in the orange juice and ground coriander, letting it cook for an additional 2 minutes to blend the flavors.
  5. Carefully puree the soup in a blender until smooth and creamy. Adjust seasoning if necessary.
  6. Garnish with fresh coriander and serve the soup hot.

Tips

  • For an extra creamy texture, add a splash of coconut milk or cream before blending.
  • Use fresh coriander for garnish to add a pop of color and fresh flavor.
  • Always be cautious when blending hot liquids; allow the soup to cool slightly before blending, and do it in batches if necessary.

Variations & Substitutions

  • Spicy Kick: Add a pinch of cayenne pepper or a dash of hot sauce for a spicy version.
  • Herbal Twist: Try adding thyme or rosemary for an herbal aroma.
  • Low-Carb Option: Substitute half of the carrots with cauliflower for a lower-carb alternative.

Storage

This soup stores wonderfully, making it a great make-ahead option. Allow the soup to cool completely before transferring it to an airtight container. It can be stored in the refrigerator for up to 5 days. For longer storage, freeze the soup for up to 3 months. When ready to enjoy, simply thaw and reheat gently on the stove.

FAQ

Can I use vegetable broth instead of water?

Absolutely! Using vegetable broth will add more depth of flavor to the soup. Just be mindful of the salt content, as broth can be saltier than water.

Is this soup vegan?

Yes, this carrot and coriander soup is naturally vegan as long as you use olive oil for sautéing the onions. It’s a delightful plant-based option that everyone can enjoy.

How can I thicken the soup if needed?

If you prefer a thicker consistency, you can add a small potato when cooking the carrots. The potato will blend into the soup, adding body and creaminess without altering the flavor.

Nutrition

This wholesome soup is low in calories and high in nutrients. Carrots are an excellent source of beta-carotene, fiber, vitamin K1, and antioxidants. The addition of orange juice provides a boost of vitamin C. Overall, it’s a heartwarming dish that’s both nutritious and delightful.

Conclusion

Carrot and coriander soup is a classic recipe that brings warmth and joy to any table. Whether you’re looking to recreate a nostalgic family recipe or simply want to enjoy a healthy, delicious meal, this soup is sure to become a favorite in your household. Gather your ingredients, follow the simple steps, and indulge in the comforting flavors of this delightful soup. Bon appétit!

Related update: Carrot and Coriander Soup

Related update: Asian Salmon Burgers With Tangy Ginger Lime Sauce

Related update: Mashed Potatoes with Garlic, Sage & Goat Cheese

Related update: Baked Scallops With Parma Ham

Vegan Strawberry Shortcake served with Vegan Whipped Cream | Made by Meaghan Moineau

Vegan Strawberry Shortcake Served with Vegan Whipped Cream

Introduction

There’s something magical about the first bite of a strawberry shortcake that transports me back to my grandmother’s kitchen. I remember those warm summer evenings when we would gather around the wooden table, eagerly awaiting her famous dessert. Her recipe was a family treasure, but as I’ve embraced a plant-based lifestyle, I’ve recreated this classic with a vegan twist. Today, I’m thrilled to share this Vegan Strawberry Shortcake recipe served with a luscious vegan whipped cream. It’s a dessert that captures the essence of summer and love in every bite.

Why You’ll Love It

This Vegan Strawberry Shortcake is not only a delightful treat for the taste buds but also a heartwarming nod to traditional desserts with a modern, plant-based spin. Here’s why you’ll love it:

  • Simple Ingredients: Made with pantry staples, this recipe is both accessible and economical.
  • Quick and Easy: With minimal prep and bake time, you can whip up this dessert in under an hour.
  • Perfectly Balanced: The sweetness of the strawberries and the lightness of the shortcake are perfectly complemented by the creamy, dreamy vegan whipped topping.
  • Family-Friendly: This is a dessert that everyone, regardless of dietary preferences, can enjoy together.

Ingredients

  • 1 cup flour
  • 1/2 cup almond meal
  • 1/4 cup turbinado sugar
  • 1 teaspoon baking soda
  • 1/4 teaspoon salt
  • 3/4 cup almond milk
  • 1 teaspoon apple cider vinegar
  • 1/4 cup vegetable oil
  • Tiny drop of almond extract
  • 1 pint fresh strawberries, sliced
  • Vegan whipped cream (store-bought or homemade)

Instructions

  1. Preheat your oven to 400 degrees F (200 degrees C).
  2. Add the sliced strawberries to a glass bowl and refrigerate until ready to use.
  3. In a medium-sized bowl, combine the flour, almond meal, baking soda, and salt. Mix well.
  4. In a small bowl, combine 1 teaspoon of water with the turbinado sugar, stirring slightly to help dissolve the sugar.
  5. In a large bowl, whisk together the almond milk, apple cider vinegar, vegetable oil, sugar mixture, and almond extract.
  6. Make a well in the center of the dry ingredients and gradually add the wet ingredients. Mix until just combined.
  7. Line two baking sheets with parchment paper.
  8. Drop the batter by generous tablespoons onto the sheets, spacing them a few inches apart. You should aim for 5 per baking sheet.
  9. Bake for 10-12 minutes, or until the shortcakes are just slightly golden.
  10. Allow the shortcakes to cool completely before slicing them in half with a serrated knife.
  11. Add a generous dollop of vegan whipped topping to the bottom half of each shortcake, followed by a spoonful of strawberries.
  12. Top with the remaining shortcake half, adding a bit more whipped topping and a few strawberries on top.
  13. Serve on individual dessert plates and enjoy!

Tips

  • Chill Your Tools: For an extra fluffy whipped topping, chill your mixing bowl and beaters in the freezer for about 10 minutes before whipping.
  • Use Fresh Strawberries: Fresh, ripe strawberries will yield the best flavor. Avoid using frozen strawberries as they can become mushy.
  • Don’t Overmix: When combining wet and dry ingredients, mix just until combined to ensure light and fluffy shortcakes.

Variations & Substitutions

This recipe is versatile and can be easily adapted to suit your preferences or dietary needs:

  • Replace almond milk with any other non-dairy milk, such as soy or oat milk.
  • Substitute almond meal with oat flour for a nut-free version.
  • For a citrus twist, add a teaspoon of lemon zest to the batter.
  • Experiment with different fruits such as blueberries or raspberries for a new flavor profile.

Storage

These shortcakes are best enjoyed fresh, but if you have leftovers, store them in an airtight container at room temperature for up to 2 days. Assemble with the whipped topping and strawberries just before serving to maintain their texture and freshness. The vegan whipped cream can be stored in the refrigerator for up to 3 days.

FAQ

Can I make the shortcakes gluten-free?

Yes, you can substitute the all-purpose flour with a gluten-free flour blend. Ensure the blend contains xanthan gum to help mimic the texture of traditional flour.

What can I use instead of turbinado sugar?

If turbinado sugar is not available, you can use coconut sugar or light brown sugar as a substitute. Both will provide a similar flavor and texture.

How can I make homemade vegan whipped cream?

To make homemade vegan whipped cream, chill a can of full-fat coconut milk overnight. Scoop out the solid cream and whip it with a little powdered sugar and vanilla extract until fluffy.

Nutrition

Each serving of Vegan Strawberry Shortcake contains approximately:

  • Calories: 250
  • Fat: 12g
  • Carbohydrates: 32g
  • Protein: 4g
  • Fiber: 3g
  • Sugar: 14g

Conclusion

Whether you’re a seasoned vegan or simply looking to explore plant-based desserts, this Vegan Strawberry Shortcake is sure to delight. With its light and airy texture, juicy strawberries, and creamy topping, it’s a recipe that embodies the joy of summer. Gather your loved ones, share a slice, and create new sweet memories that will last a lifetime. Enjoy!

Related update: Vegan Strawberry Shortcake served with Vegan Whipped Cream

Related update: Baked Caramel Custard