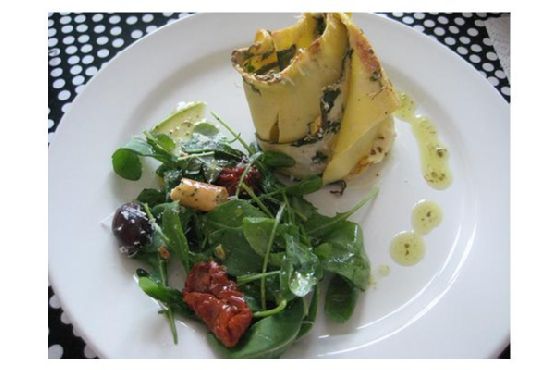
Chicken Roll-Ups With Feta Cheese and Arugula | Made by Meaghan Moineau
Title: A Taste of Tradition: Chicken Roll-Ups with Feta Cheese and ArugulaDescription: Dive into the delightful flavors and heartwarming memories with our Chicken Roll-Ups with Feta Cheese and Arugula. This simple yet elegant dish combines tender chicken, peppery arugula, and creamy feta, making it a perfect main dish for any occasion.
---
When it comes to family gatherings, the kitchen has always been the heart of our home. I have vivid memories of bustling around with my grandmother, the aroma of fresh ingredients wafting through the air as we prepared meals infused with love and tradition. One dish that holds a special place in my heart is the Chicken Roll-Ups with Feta Cheese and Arugula. This recipe, passed down through generations, is a testament to the simplicity and elegance of classic home cooking.
Ingredients:
- Chicken breast cutlets
- Coarse salt and ground pepper
- Baby arugula
- Feta cheese
- Olive oil
Instructions:
1. Prepare the Chicken:
Begin by seasoning the chicken breast cutlets with coarse salt and ground pepper. This simple seasoning allows the natural flavors of the chicken to shine through, creating a delicious base for our roll-ups.
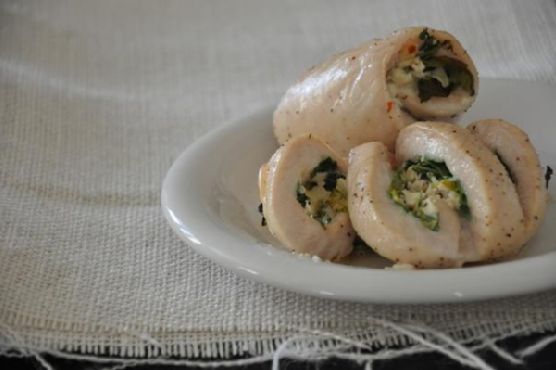
2. Assemble the Roll-Ups:
Layer each cutlet with a generous handful of baby arugula. The arugula adds a peppery freshness that perfectly complements the creamy feta cheese. Crumble the feta in the center of each cutlet, ensuring every bite is filled with cheesy goodness.
3. Roll and Secure:
Starting with the narrow end, roll up the chicken tightly. Secure each roll-up with a toothpick to ensure they hold their shape during cooking.
4. Cook to Perfection:
Heat olive oil in a large nonstick ovenproof skillet over medium-high heat. Swirl the oil to coat the bottom of the pan evenly. Place the chicken roll-ups seam side down and cook until golden brown, about 1 to 2 minutes. Turn the chicken to ensure even cooking.
5. Bake Until Done:
Transfer the skillet to a preheated oven and cook until the chicken is opaque throughout, approximately 10 to 12 minutes. The result is tender, juicy chicken infused with the flavors of arugula and feta.
6. Serve and Enjoy:
Remove the toothpicks and slice the chicken crosswise for an elegant presentation, if desired. Serve warm and enjoy the delightful combination of flavors.
A Nostalgic Memory:
As a child, I remember eagerly helping my grandmother prepare this dish for Sunday dinners. Her kitchen was a sanctuary of warmth and laughter, where stories were shared and memories were made. She would tell tales of her own childhood, where her mother would prepare similar dishes using fresh ingredients from their backyard garden. As we rolled up each chicken cutlet, I felt connected to the past, knowing that I was part of a culinary tradition that spanned generations.
This recipe is more than just a dish; it’s a piece of our family history. The combination of juicy chicken, tangy feta, and peppery arugula brings back fond memories of those cherished family gatherings. Every bite is a reminder of the love and tradition that binds us together.
Difficulty Rating:
- Difficulty: 4/10
- Classification: Main Dish
Create your own family memories with this simple yet flavorful Chicken Roll-Ups with Feta Cheese and Arugula. Perfect for a cozy dinner or a special occasion, this dish is sure to become a beloved tradition in your home as well.