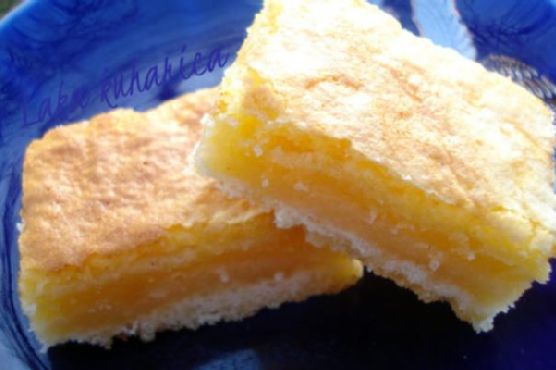
Lemon square bars | Made by Meaghan Moineau
Title: Zesty Lemon Square Bars: A Nostalgic Dessert to Brighten Your DayDescription: Dive into the refreshing world of lemon square bars, a classic dessert that's both delightful and timeless. This blog post will guide you through crafting these tangy treats with ease, while sharing a heartwarming family memory that makes them even more special. Rated a 4 out of 10 for difficulty, these lemon bars are perfect for dessert lovers seeking a simple yet satisfying bake.
---
Zesty Lemon Square Bars: A Nostalgic Dessert to Brighten Your Day
If there's one dessert that has the magical ability to transport me back to my childhood, it's lemon square bars. The tangy zest of lemon combined with a buttery crust and a sweet, chewy topping was a staple in my grandmother's kitchen, and each bite was like a time capsule filled with love and laughter. Today, I'm sharing not just a recipe, but a piece of my family's history that I hope will bring joy to your home as well.
Ingredients You'll Need:
- 2 cups all-purpose flour
- ½ cup confectioners' sugar
- 1 cup unsalted butter, melted
- 1 teaspoon vanilla essence
- 2 cups granulated sugar
- 4 large eggs
- 1 teaspoon baking powder
- ½ cup fresh lemon juice
- 2 tablespoons grated lemon rind
- A pinch of nostalgia (optional, but highly recommended!)
Instructions:
1. Craft the Crust:
Begin by preheating your oven to 170°C (340°F). In a medium-sized bowl, combine 2 cups of flour with the confectioners' sugar. Blend in the melted butter and vanilla essence, stirring until the mixture forms a soft dough. Press this dough evenly into the bottom of a greased 9x13 inch pan. Bake for 15 minutes or until the crust is golden and firm to the touch.
2. Prepare the Filling:
While the crust bakes, whip up the lemony filling. In a large bowl, beat the eggs until they are light and frothy. In a separate bowl, mix together the granulated sugar, baking powder, and ½ cup of flour, ensuring there are no lumps. Gradually stir this sugar mixture into the beaten eggs. Add the lemon juice and lemon rind, mixing until well combined.
3. Assemble and Bake:
Pour the lemon mixture over the pre-baked crust, spreading it evenly. Return the pan to the oven and bake for an additional 30 minutes, or until the lemon topping is set and slightly golden. Allow the bars to cool completely before slicing them into perfectly tangy squares.
A Slice of Family Memory:
Every summer, my family would gather at my grandmother's house for our annual reunion. The highlight was always her legendary lemon square bars, which she would bake in abundance to satisfy our eager appetites. We would sit on her porch, the scent of fresh lemons wafting through the air, as we shared stories and laughter. Those sun-drenched afternoons, filled with the sound of cicadas and the taste of these sweet treats, are memories I cherish deeply. Each bite now reminds me of those precious moments and the warmth of family.
Difficulty Rating: 4/10
Classification: Dessert
These lemon square bars are a testament that sometimes the simplest recipes bring the most joy. With their vibrant citrus flavor and buttery goodness, they are sure to become a beloved addition to your dessert repertoire. Whether you're hosting a family gathering or simply craving a sweet treat, these bars promise a burst of sunshine in every bite. Enjoy baking, and may your kitchen be filled with the same happiness and warmth that my grandmother's once was.