Baked Indian Samosas | Made by Meaghan Moineau

Picture this: It’s a blustery Tuesday evening, and I’ve just come home from work, craving something warm and savory to take the chill off. The kind of dish that fills the house with tantalizing aromas and makes you feel like you’re getting a hug from the inside. Enter my baked Indian samosas — golden, flaky, and just spicy enough to keep things interesting. These little parcels of joy are surprisingly easy to whip up, even on a weeknight, thanks to the magic of puff pastry. And trust me, your taste buds won’t know what hit them. Plus, they’re baked, not fried, so we can feel a little virtuous, right? These samosas have become my go-to comfort food, especially when I want to impress without too much hassle. Jump to Recipe

What You’ll Need

The ingredient list is refreshingly straightforward, and chances are you already have most of this in your pantry.

  • Puff pastry
  • 1 egg
  • Water
  • 1 russet potato, peeled and diced
  • Salt
  • 2 bay leaves
  • 1 teaspoon coriander seeds, divided
  • 1 teaspoon black peppercorns
  • 1 teaspoon red chili flakes
  • 1 skinless boneless chicken breast
  • 1/2 cup diced mango
  • 1/4 cup peas
  • Juice of 1 lime
  • 2 tablespoons chipotle sauce
  • 1 teaspoon cumin seeds
  • 1/4 cup chopped cilantro leaves
  • Black salt and pepper, to taste

How to Make Baked Indian Samosas

  1. Preheat your oven to 425 degrees F. This is your golden ticket to perfectly baked samosas.
  2. In a small saucepan, combine the diced potato and enough cold water to cover. Add a generous pinch of salt. Bring it to a boil over medium heat, then reduce to a simmer until the potato is tender, about 12 to 15 minutes.
  3. In another pot, bring 4 cups of water to a simmer. Toss in a pinch of salt, the bay leaves, 1 teaspoon of coriander seeds, peppercorns, chili flakes, and the chicken breast. Let it simmer until the chicken is cooked through, about 8 to 10 minutes.
  4. Drain the cooked potato and mash it until smooth. Shred the chicken finely. Combine both in a large mixing bowl.
  5. Add the peas, diced mango, lime juice, chipotle sauce, remaining coriander seeds, cumin, cilantro, and salt and pepper to the bowl. Mix everything together until well incorporated, using a spoon or your hands. Taste and adjust the seasoning as needed.
  6. Roll out the puff pastry slightly to flatten the seams. Use a paring knife to cut the dough into 8 (7-inch wide) rounds. Cut each round into 2 semicircles.
  7. Place a tablespoon of filling in the center of each semicircle. Keep a small bowl of water nearby. Dip your finger in the water and run it along the edges of the dough.
  8. Fold the left corner over the filling in a triangular motion, landing the corner on the bottom right. Repeat with the other corner, then squeeze the bottom shut. Seal with water and press with a fork for good measure.
  9. Arrange the samosas on a lightly greased baking sheet. In a small bowl, whisk together the egg with 1 teaspoon of water. Brush the tops of the samosas with this egg wash.
  10. Bake for 15 minutes at 425 degrees F, then lower the heat to 375 degrees F and bake for another 10 minutes. If you’re feeling adventurous, flip them just before turning the heat down.
  11. Serve warm with your favorite chutney and bask in the deliciousness.

Cook’s Notes

The magic of these samosas is in their versatility. You can make the filling a day in advance, which makes assembly a breeze on a busy day. Just keep it chilled in an airtight container. As for leftovers, if there are any, you can store them in the fridge for up to three days. Reheat them in the oven to restore their crispness — microwaving makes them soggy, and nobody wants that. One common mistake is overfilling the samosas, which can lead to leaks. Less is more here, trust me.

Make It Your Own

  • Swap the chicken breast for crispy tofu for a vegetarian version that’s equally satisfying.
  • Replace the mango with diced apples for a subtly sweet twist.
  • Add a handful of chopped spinach to sneak in some greens.
  • For a spicier kick, mix in some diced jalapeños with the filling.

If you try this, I’d love to hear how it turns out — drop a comment or tag me! Nothing makes my day like seeing your kitchen adventures. Enjoy your samosa-making journey!

Related update: Baked Indian Samosas

Authentic Jamaican Curry Chicken | Made by Meaghan Moineau

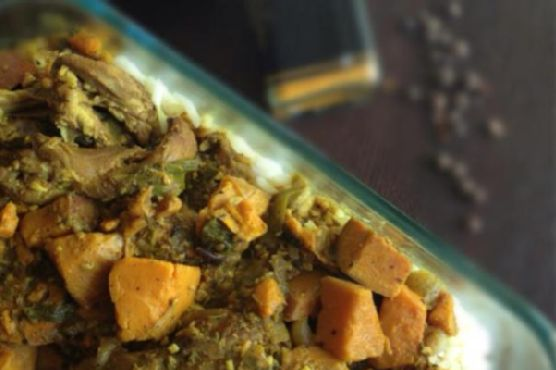
It was a dreary Tuesday evening, and I had just returned from a long day at work. I found myself staring blankly at my pantry, half-open bags of this and that strewn about, when I remembered the pack of chicken thighs in the fridge. But not just any chicken thighs — these were destined for something special. The craving hit me like a gentle nudge: Jamaican Curry Chicken. It’s the dish that wraps you up in warmth, filling the air with spices and familiarity. Perfect for a weeknight when you crave something that tastes like a sunny island vacation, yet is simple enough to pull together without a culinary degree. By the time the onions were sizzling, I already felt the day’s stress melting away. You’ve got to try this — it’s comforting yet vibrant, like a hug in a bowl.

Jump to Recipe

What You’ll Need

I bet you already have half of these tucked away in your pantry! The magic here lies in a blend of spices and fresh ingredients that create an unmistakable aroma and flavor.

  • Skinless chicken thighs
  • Curry powder
  • Allspice
  • Coconut oil
  • Garlic cloves
  • Green bell pepper
  • Onion
  • Black pepper
  • Salt
  • Scallions
  • Scotch bonnet pepper (or a substitute if you’re not a spice warrior)
  • Sweet potatoes
  • Thyme
  • Water

How to Make Authentic Jamaican Curry Chicken

  1. In a large bowl, season your chicken thighs with curry powder, allspice, minced garlic, chopped green bell pepper, diced onion, black pepper, salt, chopped scallions, and thyme. Toss everything together, ensuring each piece is coated. Let this marinate in the fridge for up to 2 hours — or if you’re a planner, overnight.
  2. Heat up the coconut oil in a Dutch oven over high heat. Remove the chicken from the marinade (but keep that marinade handy) and add the chicken pieces to the pot. Sear them until they are browned and beautiful on each side, about 10 minutes. Listen for that lovely sizzle and watch them turn a glorious golden brown.
  3. Once the chicken is seared, add in the remaining marinade, the whole scotch bonnet pepper, and the water. Cover the pot and bring it all to a fierce boil.
  4. Now, add the diced sweet potatoes. Reduce the heat to a gentle simmer and let it all stew for about an hour. Stir occasionally until the sauce thickens up nicely, coating the chicken and potatoes with its rich, spicy goodness.

Cook’s Notes

Okay, here’s the deal: this dish is forgiving, but there are a few things to keep in mind. Don’t skip the marination; it’s where the magic really begins. If you’re short on time, even 30 minutes can make a difference. Watch the heat when you’re frying the chicken; too hot, and you’ll lose those wonderful juices. For leftovers (if there are any!), store in an airtight container in the fridge for up to three days. Reheat gently on the stove or microwave to preserve that tender, juicy texture.

Make It Your Own

Here are a few swaps and twists to consider:

  • Swap the chicken for crispy tofu if you’re going plant-based. Just make sure you press the tofu first to get rid of excess moisture.
  • If sweet potatoes aren’t your style, try regular potatoes or even carrots for a different kind of sweetness and texture.
  • Substitute the scotch bonnet pepper with a milder pepper if you’re not into too much heat, like a jalapeño or even a bit of cayenne pepper.
  • Add a can of drained chickpeas for extra protein and fiber, making this dish even heartier.

If you try this, I’d love to hear how it turns out — drop a comment or tag me! It’s a dish that’s close to my heart, and I hope you’ll find it as joyful as I do.

Related update: Authentic Jamaican Curry Chicken

Related update: Neoguri (Spicy Seafood Ramen)

Slow Cooker Chicken Taco Soup | Made by Meaghan Moineau

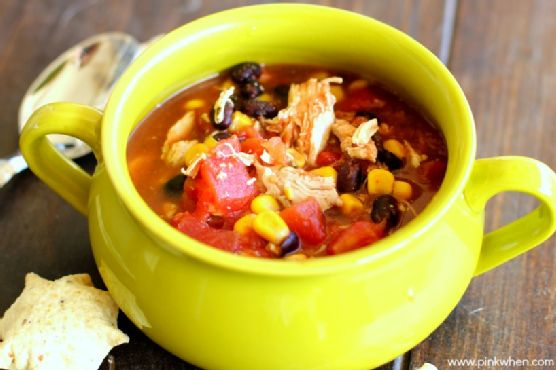
Late Tuesday evening, I found myself staring at a practically empty fridge, wondering how I could possibly conjure dinner without running to the store. You know those days when you’re mentally exhausted, and the idea of chopping, sautéing, and stirring feels like climbing Everest? That’s when I remembered my trusty slow cooker chicken taco soup, a lifesaver when I need something comforting without the fuss. This dish is the perfect blend of hearty and healthy, and the best part? You probably have most of the ingredients sitting in your pantry right now. With a little prep and a warm bowl of this soup, my chaotic day began to melt away.

Jump to Recipe

What You’ll Need

This recipe keeps things simple with ingredients you can always rely on. Chances are you already have most of this stashed away.

  • Canned black beans, drained and rinsed
  • Canned diced tomatoes (or fire-roasted for extra flavor)
  • Canned chili beans in sauce
  • Canned whole kernel corn, drained
  • Red onion, diced
  • Skinless boneless chicken breasts
  • Optional toppings: crushed tortilla shells, shredded cheddar cheese, sour cream

How to Make Slow Cooker Chicken Taco Soup

  1. Start by adding the canned black beans, diced tomatoes, chili beans, and whole kernel corn to your slow cooker. Give it a gentle stir to combine all those colorful ingredients.
  2. Next, add the diced red onion. It will soften and sweeten as it cooks, adding a subtle depth to your soup.
  3. Place the skinless boneless chicken breasts right on top of the bean and vegetable mixture. No need to cut them up; they’ll be tender and easy to shred once cooked.
  4. Cover your slow cooker and set it on low for 8 hours. If you’re in a hurry, you can crank it up to high and shave the cooking time down to 4 hours.
  5. Once the cooking is done, carefully remove the chicken breasts, shred them using two forks, and return them to the pot. Stir everything together until it’s all well-mixed and piping hot.
  6. Serve steaming bowls of this inviting soup with a sprinkle of crushed tortilla shells, a sprinkling of shredded cheddar cheese, and a dollop of sour cream for extra deliciousness.

Cook’s Notes

This soup is pretty forgiving, meaning it’s hard to mess up, but here are a few tips to ensure it turns out perfect every time. Rinsing the black beans is key to reducing excess salt. If you’re using fire-roasted tomatoes, consider skipping the added chili powder, as they bring their own smokiness. This soup stores wonderfully, so make a big batch! It’ll last in the fridge for up to three days, or you can freeze it for up to three months. Simply reheat on the stovetop or in the microwave when you need a quick, soothing dinner.

Make It Your Own

  • Vegetarian Version: Swap the chicken for crispy tofu. Cook the tofu separately and stir it in just before serving.
  • Spicy Kick: Amp up the heat by adding a diced jalapeño or a teaspoon of cayenne pepper when you add the red onion.
  • Cheesy Delight: Stir in a cup of shredded Monterey Jack cheese just before serving for an extra creamy finish.
  • Fresh Finish: Add a squeeze of lime and a handful of fresh cilantro right before serving for a zesty, fresh lift.

If you try this, I’d love to hear how it turns out — drop a comment or tag me! Enjoy your warm bowl of comfort, knowing that you’ve nailed dinner with minimal effort. Happy cooking!

Related update: Slow Cooker Chicken Taco Soup

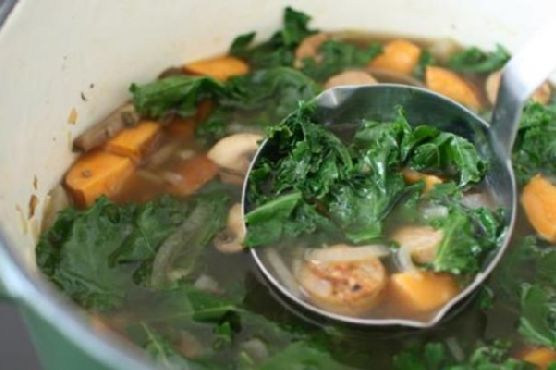
Kale and Roasted Sweet Potato Soup with Chicken Sausage | Made by Meaghan Moineau

It was one of those chilly Tuesday evenings when the weather outside felt like soup, but my pantry felt like a question mark. You know those nights, right? I stood there juggling the idea of ordering takeout, but something about my half-full fridge whispered potential. A couple of sweet potatoes and a bundle of kale caught my eye, and suddenly the idea of a warm, hearty soup started bubbling up in my mind. Enter this Kale and Roasted Sweet Potato Soup with Chicken Sausage — the ultimate weeknight comfort food. It’s got the coziness factor cranked up to eleven and requires nothing fancy, just real, wholesome ingredients that bring all the comfort without complicating your life.

Jump to Recipe

What You’ll Need

It’s one of those recipes where you might already have most things on hand, and if not, everything is effortlessly sourced. You’ll love how these simple ingredients come together into something so soul-satisfying.

  • 2 medium sweet potatoes, peeled and cubed
  • 1 large yellow onion, diced
  • 1 bunch of kale, roughly chopped
  • 8 oz mushrooms, sliced
  • 12 oz chicken sausage, sliced
  • 4 cups chicken stock
  • 3 cloves garlic, minced
  • 1 tsp dried thyme
  • 1 tsp ground coriander
  • 1/2 tsp chili flakes (adjust to taste)
  • Sea salt and freshly cracked black pepper to taste
  • 3 tbsp olive oil

How to Make Kale and Roasted Sweet Potato Soup with Chicken Sausage

  1. Preheat your oven to 400°F (200°C). Spread the cubed sweet potatoes in a baking pan and toss them with a sprinkle of salt, pepper, and a drizzle of olive oil. Roast for 20-25 minutes until they’re soft and starting to caramelize. The edges should be just turning golden.
  2. While the sweet potatoes are roasting, heat a generous splash of olive oil in a dutch oven over medium heat. Add the chicken sausage slices and cook them until they’re just starting to brown and the kitchen smells like heaven.
  3. Toss in the diced onion and sliced mushrooms. Cook for about 3-5 minutes until the onion is translucent and the mushrooms are soft and juicy.
  4. Stir in the minced garlic, thyme, coriander, a pinch of sea salt, and black pepper. Let it all mingle and meld for about a minute – the aroma should be irresistible by now.
  5. Pour in the chicken stock and bring everything to a gentle boil. Once it’s bubbling, lower the heat and let it simmer for about 5-10 minutes. This is where the flavors start to truly develop.
  6. Add the roasted sweet potatoes and chopped kale to the pot. Press the kale down with your spoon so it’s submerged in the broth. Cook for another 3-5 minutes until the kale is tender and vibrantly green.

Cook’s Notes

So, let’s talk about those sweet potatoes. Roasting them until they’re golden gives the soup a deeper, more robust flavor that’s totally worth the extra step. Plus, they hold their shape better than if you were to just boil them.

This soup keeps well in the fridge for about 3 days, which makes it perfect for meal prep. Just be aware that the kale might lose a bit of its texture, but it’ll still be tasty. For leftovers, gently reheat on the stove or in the microwave.

If you’re in a rush, you can skip the roasting and just simmer the sweet potatoes with the broth, but seriously, when you’ve got the time, roast them. Your taste buds will thank you.

Make It Your Own

  • Swap the chicken sausage with crispy tofu for a vegetarian version that’s every bit as delicious and hearty.
  • Replace kale with spinach if that’s what you’ve got, but add it closer to the end as it wilts much faster.
  • Add a cup of cooked quinoa or farro to make the soup even more filling – perfect for those extra chilly nights.
  • Spike the broth with a tablespoon of soy sauce for an umami boost that’ll have everyone asking for seconds.

If you try this, I’d love to hear how it turns out — drop a comment or tag me! Sharing these kitchen adventures with you means the world to me. Happy cooking, and may your soup be ever comforting!

Related update: Kale and Roasted Sweet Potato Soup with Chicken Sausage

Related update: Slow Cooker Chicken Taco Soup

Related update: Pan Seared Salmon

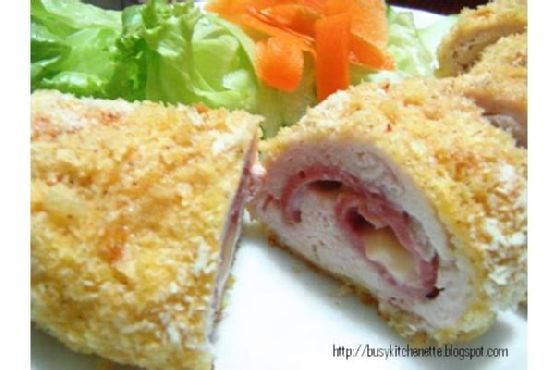
Easy Chicken Cordon Bleu | Made by Meaghan Moineau

Easy Chicken Cordon Bleu

Intro

There’s something about the aroma of a good Chicken Cordon Bleu that always takes me back to my grandmother’s kitchen. I remember sitting on a stool, watching her skillfully roll each chicken breast, the aroma of melting cheese filling the air. Her version of this classic dish was something I looked forward to every Sunday dinner. Today, I’ve taken that cherished recipe and added a few personal touches, making it even easier for you to bring a piece of that nostalgia into your own home.

Why You’ll Love It

This Easy Chicken Cordon Bleu recipe is perfect for a cozy dinner at home or a special occasion. Its simplicity doesn’t compromise its flavor. You’ll love how the juicy chicken breast wraps around savory ham and oozy cheddar cheese, all encased in a crispy breadcrumb coating. It’s a dish that’s as delightful to make as it is to eat, and it doesn’t require any fancy cooking techniques. Plus, it’s customizable to your taste preferences, making it a versatile addition to your recipe arsenal.

Ingredients

  • 4 skinless boneless chicken breasts
  • 4 slices of ham
  • 8 sticks of cheddar cheese (or more, if you’re a cheese lover!)
  • Salt, to taste
  • Ground peppercorn, to taste
  • 1 cup bread crumbs
  • 1/2 cup all-purpose flour
  • 2 eggs, beaten
  • Butter

Instructions

  1. Preheat your oven to 180°C (350°F).
  2. Gently pound the chicken breasts to about 1/4 inch thickness using a meat mallet. This ensures even cooking and makes it easier to roll.
  3. Season both sides of the chicken with salt and ground peppercorn.
  4. Place 1 slice of ham and 2 sticks of cheddar cheese on top of each breast. Feel free to add more cheese if desired!
  5. Roll up each breast tightly and secure with a toothpick to hold the shape.
  6. Dredge each rolled chicken breast in flour, ensuring it’s lightly coated.
  7. Brush each roll with beaten eggs, then roll in bread crumbs for a crispy coating.
  8. Brush a baking pan with olive oil and place the chicken rolls inside.
  9. Bake in the preheated oven for about 20 minutes.
  10. Layer each roll with butter cubes. Allow the butter to melt on top, infusing the rolls with its flavor and aroma.
  11. Bake for another 15 minutes, or until the chicken is cooked through and the coating is golden brown.
  12. Remove from the oven and let rest for a few minutes before serving with your favorite sauce.

Tips

For the best results, make sure to pound the chicken thinly and evenly. This not only helps with rolling but also ensures the chicken cooks evenly. If you’re a cheese enthusiast like me, don’t hesitate to add a bit more cheese for an extra gooey center. Lastly, using fresh breadcrumbs can elevate the texture of the crust, giving it a superior crunch.

Variations & Substitutions

Feel free to experiment with different types of cheese; Swiss cheese or Gruyère can be excellent substitutes for cheddar. For a healthier twist, you can use whole wheat breadcrumbs or almond flour instead of regular bread crumbs. If you prefer a different type of meat, turkey breast is a great alternative to chicken.

Storage

Leftover Chicken Cordon Bleu can be stored in an airtight container in the refrigerator for up to 3 days. To reheat, place the rolls in a preheated oven at 175°C (350°F) until warmed through. Avoid microwaving as it can make the breadcrumb coating soggy.

FAQ

Can I prepare Chicken Cordon Bleu ahead of time?

Yes, you can prepare the rolls ahead of time and store them in the refrigerator for up to 24 hours before baking. This makes it a great dish for entertaining, as you can do all the prep work in advance.

What sauce pairs well with Chicken Cordon Bleu?

A creamy Dijon mustard sauce or a simple white wine sauce pairs wonderfully with Chicken Cordon Bleu. The tanginess of the mustard complements the richness of the chicken and cheese perfectly.

Can I freeze Chicken Cordon Bleu?

Absolutely! Once the chicken rolls are assembled, wrap them tightly in plastic wrap and freeze for up to 2 months. When you’re ready to cook, thaw them in the refrigerator overnight before baking.

Nutrition

This recipe serves four and provides approximately 400 calories per serving, with 25g of protein, 20g of fat, and 30g of carbohydrates. Please note that these values can vary based on the specific brands and quantities used.

Conclusion

This Easy Chicken Cordon Bleu recipe is not just a nod to a timeless classic but also a celebration of flavors and memories. It’s perfect for a family dinner or an impressive dish for guests. With its crispy exterior and melty interior, it’s bound to become a beloved favorite in your household, just as it has in mine. Enjoy the process, and don’t forget to savor every bite!

Related update: Easy Chicken Cordon Bleu

Related update: Kielbasa With Brussels Sprouts In Mustard Cream Sauce

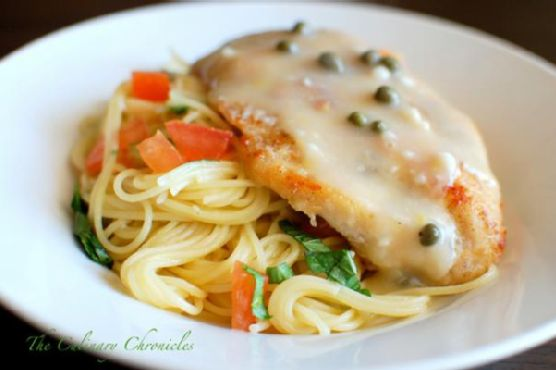
Chicken Piccata With Angel Hair Pasta | Made by Meaghan Moineau

Chicken Piccata With Angel Hair Pasta

Intro

There’s a magic that happens in the kitchen when the tangy zest of lemon meets the briny burst of capers, all wrapped around a perfectly sautéed chicken breast. Chicken Piccata has been a beloved classic in my family for years. I remember my grandmother preparing this dish on Sunday afternoons, her kitchen filled with laughter and the intoxicating aroma of fresh herbs and citrus. The simplicity of the ingredients is what makes this dish shine, creating a harmony of flavors that dance on your taste buds.

Why You’ll Love It

This Chicken Piccata with Angel Hair Pasta is more than just a meal; it’s an experience. The combination of tender chicken, silky pasta, and a rich, lemony sauce is pure comfort food at its best. It’s a dish that feels both indulgent and light, perfect for a cozy family dinner or a special occasion. Plus, it’s quick to prepare, making it ideal for weeknight dinners without sacrificing flavor or elegance.

Ingredients

  • All-purpose flour
  • Angel hair pasta
  • Boneless chicken breast
  • Capers
  • Chicken broth
  • Fresh basil
  • Diced garlic cloves
  • Black kosher salt and pepper
  • Lemon zest
  • Lemons
  • Olive oil
  • Red chili flakes
  • Diced roma tomatoes
  • Unsalted butter

Instructions

  1. Place 1/2 cup of flour in a shallow dish. Using a sharp knife, slice the chicken breast in half. Place a piece of wax paper on top of each piece of chicken and pound with a kitchen mallet until it is about 1/4 inch thin. Season the chicken well with salt and pepper.
  2. Take the chicken and roll it into the flour, using your fingers to assist in adhering it to the meat. Carefully shake off excess flour. Repeat with the second piece of chicken.
  3. In a large skillet, heat 2 tablespoons of olive oil over medium heat. Slide chicken into the skillet and sauté on each side until it becomes golden brown, about 3-4 minutes each side. Once the chicken is done, transfer to a clean plate and tent with a sheet of aluminum foil.
  4. Begin boiling the pasta.
  5. Using the same skillet, add remaining olive oil and sauté garlic until it becomes aromatic but not browned. Add chili flakes, capers, lemon juice, lemon slices, zest, and chicken broth.
  6. Use a wooden spoon to scrape off the tasty brown bits from the bottom of the skillet. Raise the temperature to medium-high heat and allow the liquid to reduce by almost half.
  7. While the liquid is reducing, use a fork to mash together remaining 1 tablespoon of flour and butter in a small bowl. Whisk it into the reducing liquid and allow to cook for 1-2 minutes. Be sure to whisk out any lumps of flour. Check for seasonings and adjust with salt/pepper accordingly.
  8. Drain the cooked pasta. Toss the pasta in the lemon caper sauce, tomatoes, and basil, reserving a few spoonfuls of sauce. Check for seasonings and adjust with salt/pepper accordingly.
  9. Plate pasta and top each with a piece of chicken. Spoon extra lemon caper sauce over the chicken and pasta. Serve immediately.

Tips

For the best results, use fresh lemons and freshly ground pepper. The quality of these ingredients can greatly enhance the flavor of the final dish. Also, be sure to pound the chicken evenly to ensure even cooking. If you don’t have a kitchen mallet, a rolling pin will work in a pinch. Finally, don’t skip the step of tenting the chicken with foil; it helps keep the chicken moist and warm while you prepare the sauce.

Variations & Substitutions

For a gluten-free version, substitute the all-purpose flour with a gluten-free alternative. If you’re not a fan of capers, you can replace them with sliced green olives for a different kind of briny kick. For a vegetarian twist, replace the chicken with thick slices of portobello mushrooms, and use vegetable broth instead of chicken broth.

Storage

Leftovers can be stored in an airtight container in the refrigerator for up to 3 days. To reheat, warm gently on the stove over low heat, adding a splash of chicken broth or water to keep the pasta from drying out. Avoid reheating in the microwave, as it can make the chicken tough.

FAQ

Can I use a different type of pasta?

Absolutely! While angel hair pasta pairs beautifully with the sauce, feel free to use spaghetti, linguine, or any pasta of your choice. Just keep in mind that thicker pastas may need a little more sauce to coat them well.

What can I serve with Chicken Piccata?

This dish pairs wonderfully with a simple green salad or roasted vegetables. A slice of crusty bread is also perfect for soaking up any extra sauce. If you want to add a touch of indulgence, a glass of crisp white wine complements the lemony flavors elegantly.

Is Chicken Piccata spicy?

The red chili flakes add a subtle heat to the dish, but it’s not overwhelmingly spicy. If you prefer a milder dish, simply reduce or omit the chili flakes. Conversely, if you love a bit of heat, feel free to increase the amount to taste.

Conclusion

Chicken Piccata with Angel Hair Pasta is a delightful blend of flavors that brings a touch of gourmet to any meal. It’s a dish that not only satisfies the palate but also brings back cherished memories of family gatherings and home-cooked meals. Whether you’re a seasoned home cook or just starting out, this recipe is a keeper. I hope this becomes a cherished recipe in your home, as it has in mine. Enjoy every bite!

Related update: Chicken Piccata With Angel Hair Pasta

Butchers Reinvent Menus as Beef Costs Soar | Analysis by Brian Moineau

When the Price of a Ribeye Rises, Small Butchers Reinvent the Counter

It used to be that a stroll into the neighborhood butcher meant two things: a chat with someone who knew the cut by name, and the smell of fresh meat ready for the weekend grill. Lately, that stroll comes with sticker shock. As beef prices climb to multi‑decade highs, small butcher shops are quietly reshaping how they sell, what they recommend, and how they keep customers coming back.

Why this matters now

  • Ground beef and steak prices climbed to record levels in 2025, driven by shrinking U.S. cattle herds, drought, higher feed and production costs, and other supply‑chain strains. (cbsnews.com)
  • Unlike large grocery chains with buying power and vertical integration, independent butchers rely on local supply and customer trust — two things that feel fragile when the cost of a pound of meat jumps dramatically. (cbsnews.com)

If you buy meat regularly — or run a small meat business — this is more than an economic headline. It changes weekly shopping lists, family dinners, and the way small food retailers position themselves in a competitive market.

How small butcher shops are adapting

Butchers are leaning into the advantages they have: craft, relationship, knowledge. The ways they’re responding fall into a few practical, customer‑facing moves:

  • Recommend cheaper cuts and show how to cook them

    • Educating customers about braises, slow roasts, and mince versus steak helps shoppers stretch a dollar without sacrificing flavor. (cbsnews.com)
  • Offer more value through portioning and combo packs

    • Smaller, recipe‑focused packs or mixed‑protein bundles let households get a taste of beef without buying an expensive whole cut.
  • Promote alternative proteins and mixed dishes

    • Increased suggestion of pork, chicken, plant‑based options, and blends (e.g., beef‑pork blends for meatloaf) helps retain customers who want familiar flavors at lower cost. (cbsnews.com)
  • Lean on relationships and local sourcing narratives

    • Customers are willing to pay a premium for traceability and trust; butchers emphasize provenance, seasonal availability, and chef‑style guidance.
  • Adjust pricing strategies and special offers

    • Time‑limited sales, loyalty deals, and highlighting lower‑cost cuts for weeknight meals help balance margins and foot traffic.

The supply picture behind the counter

To make sense of a butcher’s new pitch, you need the behind‑the‑scenes context:

  • Herds are smaller. The U.S. cattle inventory fell to its lowest levels in decades after years of drought and higher costs, shrinking the supply pipeline from ranch to retail. (axios.com)

  • It takes time to rebuild herds. Biological realities and feeding cycles mean relief won’t be immediate; even when ranchers expand, it can be years before more beef reaches grocery aisles. (farmprogress.com)

  • Policy, trade, and extreme weather add volatility. Tariffs, import/export shifts, and persistent climate stressors have amplified price swings for both cattle and feed. (cbsnews.com)

That combo explains why prices remain elevated even when ranchers or processors tweak production: the whole chain is interdependent and slow to rebalance.

For shoppers: smart moves at the meat counter

If you’re feeling the pinch, small changes at the store (or in your kitchen) can reduce cost without losing satisfaction:

  • Ask your butcher for weeknight‑friendly cuts (chuck, brisket, round) and simple recipes for braising or slow cooking.
  • Buy larger, less‑processed cuts and portion at home — it’s often cheaper per pound and gives leftovers for sandwiches or tacos.
  • Mix proteins in recipes (half beef, half turkey or pork) for flavor and savings.
  • Consider frozen or vacuum‑sealed bargains for longer shelf life and bulk savings.
  • Build rapport with a local butcher: they’ll tip you off on sales, day‑of‑cut discounts, or creative substitutions.

For butchers: business lessons from a beef squeeze

Independent meat sellers can survive and even strengthen their position by leaning into differentiation:

  • Become an educator: host demos, share recipes, and show cooking techniques to make lower‑cost cuts desirable.
  • Diversify inventory: sell more pork, poultry, value‑added items, and prepared foods to smooth revenue.
  • Strengthen supply relationships: local sourcing and cooperative purchasing can reduce exposure to volatile national markets.
  • Use storytelling: provenance and trust are powerful — customers pay for connection and honesty.
  • Innovate pricing and packaging: meal‑kits, subscription boxes, and mixed‑protein bundles increase convenience and perceived value.

What this trend might mean longer term

  • Beef may remain relatively expensive for months or years as herd recovery and supply‑chain fixes take hold. (farmprogress.com)
  • Consumer habits can shift permanently: when families learn new ways to cook cheaper cuts or embrace other proteins, demand patterns change.
  • Smaller shops that pivot effectively could win loyal customers who value expertise and personalized service — but those who cling to old assortments may lose traffic.

What to remember

  • Beef prices rose due to tight supply, drought impacts, and production costs; relief will be gradual. (axios.com)
  • Small butchers are responding by educating customers, promoting alternatives, and rethinking packaging and pricing. (cbsnews.com)
  • Practical consumer choices (different cuts, mixing proteins, buying larger portions) can blunt the sting of higher prices.

Final thoughts

Higher beef prices are reshaping more than grocery bills — they’re nudging everyday cooking toward resourcefulness and creativity. That’s a win for home cooks who learn to coax flavor from unexpected cuts, and for independent butchers who double down on craft and customer relationships. In a world where supply shocks and climate stressors are increasingly common, the butcher’s counter is quietly becoming a classroom in resilience.

Sources

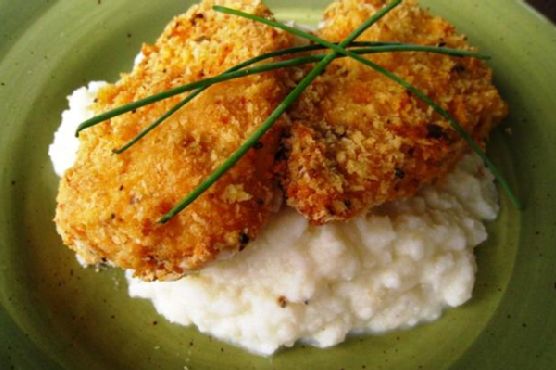
Baked Fried Chicken With Cauliflower Mash | Made by Meaghan Moineau

Baked Fried Chicken With Cauliflower Mash | Made by Meaghan Moineau

Title: Crispy Baked Fried Chicken with Cauliflower Mash: A Healthier Twist on a Family Classic
Description:

Indulge in the comforting flavors of crispy fried chicken without the guilt. Our Baked Fried Chicken with Cauliflower Mash offers a nutritious upgrade to a beloved family classic, combining the rich tastes of buttermilk-marinated chicken with a creamy cauliflower mash. Discover the secrets to this wholesome main dish, perfect for a cozy family dinner.


---


A Taste of Nostalgia: Baked Fried Chicken with Cauliflower Mash


There's something inherently comforting about the aroma of fried chicken wafting through the house. It has a way of bringing back memories of family gatherings, laughter, and shared stories around the dinner table. For us, this Baked Fried Chicken with Cauliflower Mash isn't just a meal; it's a nostalgic journey back to weekends spent at Grandma's house.


Ingredients:
- Marinade:

- 1 cup buttermilk


- 1 tablespoon dijon mustard


- 2 tablespoons fresh lemon juice


- 1 teaspoon cayenne pepper


- 2 garlic cloves, minced


- Salt and pepper to taste


- Chicken:

- 4 skinless boneless chicken breasts, filleted and halved


- Breading:

- 1 cup whole wheat panko


- 1/4 cup flour


- 1/4 cup grated parmesan cheese


- 1 teaspoon paprika


- 1/2 teaspoon thyme


- 1 tablespoon lemon peel


- Cauliflower Mash:

- 1 large head cauliflower, chopped


- 1/4 cup low fat sour cream


- 1/4 cup low fat ricotta cheese


- Salt and pepper to taste


Instructions:
1. Marinating the Chicken:

- Begin by filleting the chicken breasts to make thinner pieces, then cut each piece in half again for smaller portions.


- In a large bowl, whisk together buttermilk, dijon mustard, lemon juice, cayenne pepper, minced garlic, salt, and pepper.


- Add the chicken to the marinade, ensuring each piece is well-coated. For the best flavor, chill the chicken overnight. If you're pressed for time, it's okay to proceed with cooking immediately.


2. Preparing the Breading:

- Preheat your oven to 450°F (232°C).


- In another large bowl, combine whole wheat panko, flour, parmesan cheese, paprika, thyme, and lemon peel.


- Place a wire rack on top of a baking sheet to allow for even cooking.


- Remove the marinated chicken from the bowl, letting any excess marinade drip off.


- Dredge each piece in the breading mixture and transfer it to the wire rack. Repeat with all chicken pieces.


- Lightly spray the tops of the chicken with olive oil to enhance crispiness.


3. Baking:

- Bake the chicken in the preheated oven for about 20-25 minutes, or until golden brown and cooked through.


4. Making the Cauliflower Mash:

- While the chicken bakes, steam the cauliflower until tender.


- In a blender or food processor, blend the cooked cauliflower, sour cream, ricotta cheese, salt, and pepper until smooth and creamy.


5. Serving:

- Serve the baked fried chicken hot, accompanied by a generous scoop of cauliflower mash.


A Family Memory:

Growing up, weekends at Grandma's were synonymous with the tantalizing smell of fried chicken. It was a family tradition to gather in the kitchen, each of us taking turns to help in preparing the feast. Grandma would always have a secret ingredient she never disclosed, making her chicken uniquely hers. This baked version, with its healthier twist, keeps the spirit of those gatherings alive in our household. The creamy cauliflower mash serves as a modern nod to her legendary mashed potatoes, allowing us to enjoy those flavors with a touch of nostalgia.


Rating and Classification:
- Difficulty: 5/10
- Classification: Main Dish

Whether you're revisiting cherished family memories or creating new ones, this Baked Fried Chicken with Cauliflower Mash brings warmth and joy to any table. Enjoy the crispy, flavorful goodness of a traditional favorite, reimagined for a healthier lifestyle.

Read more about Appetizers

Read more about Main Dishes

Read more about Desserts

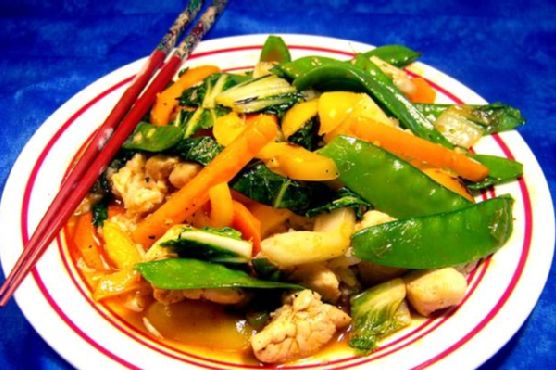
Chili-Garlic Stir Fry | Made by Meaghan Moineau

Chili-Garlic Stir Fry | Made by Meaghan Moineau

Title: Spice Up Your Dinner: A Heartwarming Chili-Garlic Stir Fry
Description: Dive into a world of vibrant flavors and cherished family memories with our Chili-Garlic Stir Fry recipe. This delightful main dish is a harmonious blend of colorful vegetables, succulent chicken, and a savory sauce with a kick of heat. Perfect for a cozy family dinner or a solo indulgence, this stir fry is both a feast for the senses and a touchstone to nostalgic family moments. With a difficulty rating of 4 out of 10, it’s an ideal choice for both novice and seasoned home chefs looking to bring something special to the table.

---


When I think of comfort food, my mind drifts back to my grandmother's kitchen, where the air was always filled with the tantalizing aroma of sizzling ingredients and the warm laughter of family. One dish that stands out in my memory is her Chili-Garlic Stir Fry, an unassuming yet flavorful creation that brought us all together, especially on those cozy Sunday afternoons.


The magic began with the rich scent of sesame oil heating in her well-loved wok, a cue for us kids to gather around the table in anticipation. The sizzle of skinless boneless chicken breast meeting the pan was music to our ears, a promise of the delicious meal to come. As the chicken cooked to perfection, my grandmother would share stories of her own childhood, weaving tales that seemed as vibrant as the vegetables she skillfully chopped: crisp bok choy, sweet snow peas, crunchy carrots, and the vibrant yellows and oranges of bell peppers.


While we waited, the kitchen would fill with a new aroma—the pungent, mouthwatering smell of garlic sautéing in sesame oil. It was then that she would whisk together the sauce, a delicate balance of low sodium chicken broth, cooking sherry, and just the right amount of Sriracha for that extra kick. Watching her stir the sauce into a thick, glossy coating was like watching an artist at work, each movement deliberate and filled with love.


Finally, the moment we all waited for: the melding of flavors. The chicken and vegetables reunited in the wok, green onions adding their fresh, sharp note alongside the leafy tops of the bok choy. The sauce enveloped everything, transforming individual ingredients into a cohesive, delectable masterpiece.


Now, as I recreate this Chili-Garlic Stir Fry in my own kitchen, I am reminded not only of the deliciousness of the dish but of the joy and togetherness it represents. It's a testament to how food can transcend taste, becoming a bridge to memories and a celebration of family.


Ingredients:

- 3 teaspoons sesame oil, divided


- 1 pound skinless boneless chicken breast, sliced


- 1 bunch bok choy, stalks and leaves separated


- 1 cup snow peas


- 1 cup carrots, julienned


- 1 yellow bell pepper, sliced


- 1 orange bell pepper, sliced


- 3 green onions, chopped


- 1 cup low sodium chicken broth


- 2 tablespoons cooking sherry


- 2 teaspoons cornstarch


- 1 tablespoon Sriracha


- 3 cloves garlic, minced


Instructions:

1. In a wok or large skillet, heat 1 teaspoon of sesame oil over medium-high heat. Add the chicken and sauté until cooked through. Set aside and cover to keep warm.


2. Using the same pan, heat another teaspoon of sesame oil over medium-high heat. Add the bok choy stalks, carrots, and snow peas. Sauté until just tender, about 3-4 minutes. Set aside and cover.


3. In a medium bowl, whisk together the chicken broth, cooking sherry, cornstarch, and Sriracha until smooth.


4. Heat the final teaspoon of sesame oil in the pan over medium-high heat. Add the garlic and sauté until fragrant, about 30 seconds to 1 minute.


5. Pour the sauce mixture into the pan, bringing it to a boil. Stir continuously until it thickens, about 2 minutes.


6. Return the chicken and vegetables to the pan, adding in the bok choy leaves and green onions. Stir everything together until well-coated and heated through, about 2-3 minutes.


7. Serve hot, garnished with additional green onions if desired.


This Chili-Garlic Stir Fry is more than just a meal; it's a slice of family heritage, a dish that invites you to create your own memories around the dinner table. Whether serving it as a quick weeknight dinner or as part of a larger family gathering, this dish is sure to become a beloved tradition in your home, too.

Read more about Appetizers

Read more about Main Dishes

Read more about Desserts

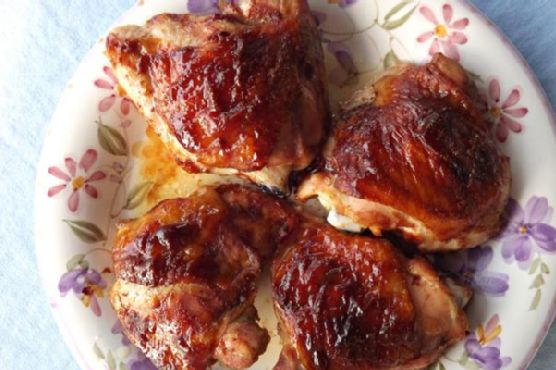
BBQ” Style Chicken Thighs | Made by Meaghan Moineau

BBQ” Style Chicken Thighs | Made by Meaghan Moineau

Title: "Savor the Flavor of Family: BBQ-Style Chicken Thighs Recipe"
Description: Dive into a heartwarming tale and a deliciously simple recipe for BBQ-Style Chicken Thighs, a dish that brings families together around the dinner table. With a blend of tangy, sweet, and savory flavors, this main dish is perfect for any occasion, carrying a legacy of love and tradition. Difficulty: 3/10.

---


BBQ-Style Chicken Thighs: A Taste of Family Tradition


In the world of culinary creations, some dishes are more than just a meal; they’re a journey back in time, a connection to cherished memories. Our BBQ-Style Chicken Thighs are one such dish, melding the flavors of tangy ketchup, savory soy sauce, and the sweet allure of brown sugar into a symphony of taste that dances on your palate.


Ingredients:

- Bone-in chicken thighs


- 1 cup ketchup


- 2 tablespoons soy sauce


- 1 tablespoon Worcestershire sauce


- 2 tablespoons lemon juice


- 3 tablespoons brown sugar


- 1 teaspoon garlic powder


- Salt and black pepper to taste


Instructions:

1. Preheat your oven to 375°F (190°C).


2. In a small bowl, combine the ketchup, soy sauce, Worcestershire sauce, lemon juice, brown sugar, garlic powder, salt, and black pepper. Mix until well-blended to create a rich and flavorful BBQ sauce.


3. Clean and pat dry the chicken thighs, ensuring they are ready to absorb all the flavorful goodness.


4. Place the chicken thighs in a baking dish and generously rub them all over with the prepared BBQ sauce, ensuring each piece is well-coated.


5. Place the dish in the oven and bake for 40-45 minutes, or until the chicken is cooked through and the sauce has caramelized to perfection.


A Nostalgic Family Tale:

As the aroma of BBQ-Style Chicken Thighs wafts through the kitchen, I am transported back to Sunday afternoons at Grandma's house. The entire family would gather around the long, wooden dining table, a centerpiece of laughter and love. Grandma, with her warm smile and ever-present apron, would prepare this dish with the kind of care that only a grandmother can provide.


The recipe, passed down from her mother, was always a highlight. We would sit eagerly, watching as she mixed the sauce with a practiced hand, telling stories of how her mother used to make the same dish during family picnics in the old backyard. The tangy scent of Worcestershire mingled with the sweetness of brown sugar, creating an irresistible aroma that filled the air.


When the chicken finally emerged from the oven, its skin crispy and glistening, we dug in with gusto. Each bite was a testament to the legacy of love, tradition, and togetherness that our family cherished. Those days, filled with shared stories and hearty laughter, are memories I hold dear, and each time I prepare this dish, I feel a piece of that warmth enveloping me.


Difficulty: 3/10
Classification: Main Dish

This BBQ-Style Chicken Thighs recipe is not only easy to make but also a delightful way to bring the family together, sharing in a meal that resonates with history and heart. Whether you're looking to create new memories or relive cherished ones, this dish is sure to become a staple at your table. Enjoy the flavors, and may they bring you as much joy and connection as they have brought to my family.


---


Conclusion:

Cooking is more than just a necessity; it's an art form, a way to connect with the past while creating a future filled with new memories. Our BBQ-Style Chicken Thighs are a testament to this, offering a deliciously simple way to bring warmth and togetherness to your home. So, gather your loved ones, share the stories, and savor every bite of this delectable dish.

Read more about Appetizers

Read more about Main Dishes

Read more about Desserts

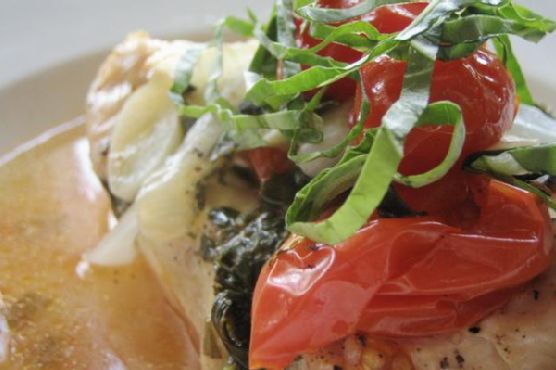
Chicken En Papillote With Basil and Cherry Tomatoes | Made by Meaghan Moineau

Chicken En Papillote With Basil and Cherry Tomatoes | Made by Meaghan Moineau

A Taste of Memories: Chicken En Papillote With Basil and Cherry Tomatoes


Description

Discover the culinary magic of Chicken En Papillote With Basil and Cherry Tomatoes, a dish that not only delights the palate but also stirs the heart with familial nostalgia. This elegantly simple main dish, infused with the fragrant aroma of fresh basil and the sweet tang of cherry tomatoes, is perfect for a cozy family dinner or an intimate gathering with friends. Dive into the recipe, reminisce about cherished family moments, and create new memories around the table.

---


Ingredients

- 2 skinless, boneless chicken breasts

- Salt and pepper, to taste


- 2 tablespoons olive oil


- 1 onion, thinly sliced


- 1 garlic clove, minced


- 1/4 cup white wine


- 4 to 5 cherry tomatoes, halved


- 6 to 8 fresh basil leaves


- Fresh basil chiffonade, for garnish


Instructions

1. Preheat your oven to 400 degrees Fahrenheit (200 degrees Celsius).

2. Season the chicken breasts with salt and pepper and place each on its own parchment sheet.


3. Drizzle the chicken with olive oil, then top with sliced onion, minced garlic, cherry tomatoes, and fresh basil leaves.


4. Pour a splash of white wine over the chicken and vegetables.


5. Wrap the parchment tightly around the contents, folding the edges to create a secure package. Use kitchen twine to tie the package closed.


6. Place the parchment packages on a cookie sheet and bake in the preheated oven for 35 to 40 minutes, or until a meat thermometer reads 165 degrees Fahrenheit when inserted into the chicken.


7. Carefully unwrap the packages, taking in the aromatic steam, and serve hot, garnished with fresh basil chiffonade.


A Nostalgic Family Memory

I still remember the first time my grandmother made this delightful dish. It was a warm summer evening, and our entire family had gathered at her cozy country home for a weekend retreat. The kitchen was bustling with laughter and the clinking of dishes, while the air was filled with the inviting scent of fresh basil from her little garden out back.

As she prepared the Chicken En Papillote, Grandma shared stories of her childhood in Italy, where she first learned to cook with herbs and fresh ingredients. I sat at the kitchen table, watching her nimble hands wrap the parchment around the chicken, creating little parcels of love and flavor.


When she finally opened the packages, the room was filled with a fragrant cloud that made everyone’s mouth water. The dish was a hit, and to this day, whenever I make Chicken En Papillote, I am transported back to that summer evening, surrounded by family and the warmth of Grandma's stories.


Difficulty Rating: 4/10

This recipe is surprisingly easy to prepare, yet it impresses with its presentation and depth of flavor. It's perfect for cooks of all skill levels who want to create a memorable meal with minimal fuss.

Classification: Main Dish


Experience the joy of cooking and the warmth of family with this delightful Chicken En Papillote With Basil and Cherry Tomatoes. Whether you're reminiscing about past gatherings or creating new traditions, this dish is sure to become a beloved staple in your culinary repertoire.

Read more about Appetizers

Read more about Main Dishes

Read more about Desserts

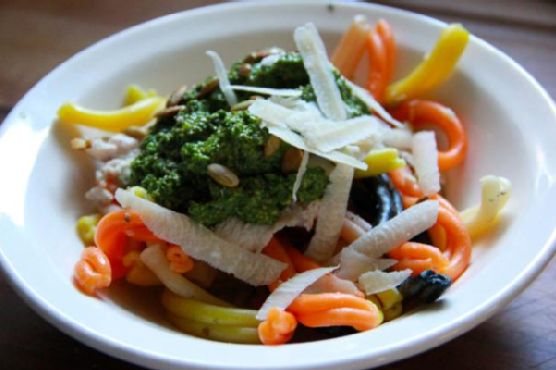
Spinach & Toasted Pumpkin Seed Pesto Pasta | Made by Meaghan Moineau

Spinach & Toasted Pumpkin Seed Pesto Pasta | Made by Meaghan Moineau

Spinach & Toasted Pumpkin Seed Pesto Pasta: A Taste of Home in Every Bite


Description: Discover the delightful harmony of flavors in our Spinach & Toasted Pumpkin Seed Pesto Pasta. This main dish is an exquisite combination of tender chicken, vibrant spinach, and nutty pumpkin seeds, all enveloped in a creamy pesto sauce. Perfect for a family gathering or a cozy weekday dinner, this recipe is sure to transport you back to cherished family meals filled with laughter and love.

---


A Family Tradition on a Plate


There's something magical about a dish that can evoke memories of family gatherings and joyful times spent around the dinner table. For me, Spinach & Toasted Pumpkin Seed Pesto Pasta isn't just a recipe; it's a nostalgic journey back to my grandmother's warm kitchen, where the scent of lemon and garlic danced in the air, and the sounds of clinking cutlery and laughter filled the room.


Growing up, family dinners were a cherished tradition. My grandmother had an incredible knack for turning simple ingredients into something extraordinary, and this pasta dish was one of her specialties. I remember watching her skillfully toast pumpkin seeds until they were golden and fragrant, a ritual that always fascinated me. The kitchen would come alive with the vibrant green of baby spinach and parsley, while the zest of fresh lemon added a burst of sunshine to her pesto.


Each time I prepare this dish, I'm reminded of those special evenings spent with family. The recipe has become a staple in our household, a comforting reminder of where we've come from and the shared moments that bind us together.


Ingredients


- 2 chicken breast halves


- Juice of 1 lemon


- Cooking fat (such as olive oil or butter)


- Dry salt


- 4 cups baby spinach


- Zest of 1 lemon


- 1/2 cup olive oil


- 3 green scallions, chopped


- 3 cloves garlic


- 1/2 cup pumpkin seeds


- 1/4 cup fresh parsley


- Salt to taste


- 12 oz colorful pasta


- 1/2 tbsp coarse salt


- Shavings of parmesan for serving


Instructions


1. Cook the Pasta:

- Begin by boiling water in a large pot. Add a pinch of salt and a drizzle of olive oil to prevent the pasta from sticking. Once the water is boiling, add the pasta, stir, and reduce the heat to medium. Cook according to package instructions, usually 9-12 minutes. Drain and set aside.


2. Prepare the Chicken:

- While the pasta is cooking, heat cooking fat in a skillet over medium heat. Season the chicken breast halves with salt, pepper, and dry oregano. Place the chicken in the heated skillet and cook for 1 minute on each side.


- Add the juice of 1 lemon to the skillet, reduce the heat to medium/low, and continue cooking, turning occasionally, until fully cooked (about 10-12 minutes). Set aside.


3. Toast the Pumpkin Seeds:

- If toasting pumpkin seeds, sprinkle 1/2 tbsp of coarse salt in a small skillet over medium heat. Add the pumpkin seeds and toast for a few minutes, stirring frequently, until they crack and turn golden. Turn off the heat and let them cool in the skillet. Remove seeds from the salt before using.


4. Make the Pesto:

- Reserve 1-2 tbsp of pumpkin seeds for garnish. Combine the remaining pumpkin seeds, baby spinach, lemon zest, olive oil, scallions, garlic, parsley, and a pinch of salt in a food processor. Pulse a few times, then blend until the pesto reaches a pancake batter-like consistency. Add more olive oil or lemon juice if needed.


5. Assemble the Dish:

- Slice or dice the cooked chicken breasts. In serving bowls, layer the pasta, chicken, pesto, a sprinkle of pumpkin seeds, and shaved parmesan.


A Dish to Savor


This Spinach & Toasted Pumpkin Seed Pesto Pasta is more than just a meal; it's a tribute to the family traditions that bring us together. As you take your first bite, savor the blend of flavors and the memories they inspire. And for a fun challenge, try saying "Spinach & Pumpkin Seed Pesto Chicken Pasta Bowl" three times fast—it's as delightful as the dish itself!


Difficulty: 6/10
Category: Main Dish

Enjoy this culinary journey, and may it fill your home with the warmth and love of family traditions, just as it has mine.

Read more about Appetizers

Read more about Main Dishes

Read more about Desserts

Easy Chicken with White Wine Sauce | Made by Meaghan Moineau

Easy Chicken with White Wine Sauce | Made by Meaghan Moineau

Savory Simplicity: Easy Chicken with White Wine Sauce


A Flavorful Family Favorite


Description

Indulge in the savory simplicity of our Easy Chicken with White Wine Sauce. This delightful main dish combines tender chicken breast halves with a rich, flavorful sauce that brings elegance to any dinner table in no time. With a difficulty rating of just 3 out of 10, this dish is perfect for both novice cooks and seasoned chefs seeking a quick yet impressive meal. Read on to discover how this recipe transforms simple ingredients into a nostalgic culinary masterpiece.

---


Ingredients


- 2 tablespoons olive oil


- 4 skinless, boneless chicken breast halves


- 1 shallot, finely chopped


- 1 teaspoon fresh thyme leaves


- 1/2 cup dry white wine


- 1/4 cup flavor-concentrated chicken broth


Instructions


1. Prepare the Chicken: Heat the olive oil in a 10-inch skillet over medium heat. Add the chicken breast halves and cook for 10 minutes, ensuring they are well browned on both sides. Remove the chicken from the skillet and set aside.
2. Create the Sauce Base: In the same skillet, add the chopped shallot and fresh thyme leaves. Cook and stir for about 30 seconds until the shallot is fragrant.
3. Deglaze and Reduce: Pour in the dry white wine and let it cook for 2 minutes, allowing the mixture to reduce by half. The wine's acidity will deglaze the pan, lifting those delicious brown bits from the bottom.
4. Enhance with Broth: Stir in the flavor-concentrated chicken broth, combining it well with the reduced wine mixture.
5. Finish Cooking the Chicken: Return the browned chicken to the skillet. Cook for an additional 5 minutes, or until the chicken is cooked through and tender.
6. Serve and Enjoy: Once done, plate the chicken and drizzle the luscious sauce over each piece. Garnish with a sprinkle of fresh thyme leaves for an extra touch of elegance.

---


A Nostalgic Tale


The aroma of chicken sizzling in a skillet always takes me back to Sunday dinners at my grandmother's house. Every week, like clockwork, she would prepare this Easy Chicken with White Wine Sauce, filling her cozy kitchen with the comforting scent of thyme and shallots.


As a child, I would watch her with awe, my eyes wide as she expertly cooked the chicken until perfectly golden brown. Her secret, she would whisper, was in the sauce—a blend of dry white wine and concentrated chicken broth that would transform the simple dish into something extraordinary.


Years later, I found myself replicating this recipe in my own kitchen. The first bite transported me back to those cherished moments with family, reminding me of the warmth and love that came with every meal.


Now, I pass this recipe on to you, hoping it brings as much joy and nostalgia to your table as it has to mine. So gather your loved ones, and let this dish become a part of your culinary traditions.


---


Conclusion


This Easy Chicken with White Wine Sauce is more than just a meal—it's a journey through flavors and memories. Whether you're cooking for a special occasion or a weeknight dinner, this dish promises to impress with its delicate balance of simplicity and sophistication. Enjoy creating new memories with a recipe that's as comforting as it is delicious. Bon appétit!

Read more about Appetizers

Read more about Main Dishes

Read more about Desserts

Herb and Cheddar Cordon Bleu | Made by Meaghan Moineau

Herb and Cheddar Cordon Bleu | Made by Meaghan Moineau

Herb and Cheddar Cordon Bleu: A Flavorful Twist on a Classic Dish


A Hearty Main Dish That Brings Back Warm Family Memories


Herb and Cheddar Cordon Bleu isn't just a meal; it's a culinary journey back to those cherished family gatherings, where the aroma of baked chicken and herbs filled the air, and laughter echoed through the dining room. This delicious main dish combines the comforting flavors of cheddar cheese and deli ham with a crispy herb-infused crust, offering a delightful twist on the classic cordon bleu. Whether you're hosting a dinner party or simply want to treat your family to something special, this dish is sure to impress.


Ingredients:


- 4 chicken breasts


- 4 slices of deli ham


- 4 slices of cheddar cheese


- 1 cup breadcrumbs


- 1 teaspoon dried marjoram


- 1 teaspoon dried parsley


- 1 teaspoon dried rosemary


- 1 egg


- 1/2 cup flour


- Salt and pepper to taste


Instructions:


1. Preparation: Pre-heat your oven to 350°F (about 176°C). Place the chicken breasts between two slices of wax paper and flatten them with a rolling pin or meat mallet until they are about a quarter of an inch thick.
2. Assembly: Lay a slice of ham and a slice of cheddar cheese on each chicken breast. Roll the chicken breast as tightly as possible, securing with toothpicks or small skewers if necessary.
3. Breading Stations: Beat the egg in a shallow baking dish. Prepare two additional "stations" using foil or other dishes: one for the flour and another for the mixture of dried herbs and breadcrumbs.
4. Coating: Coat the rolled chicken breasts in flour, then dip them into the egg mixture. Finally, press them into the mixture of dried herbs and breadcrumbs until they are completely covered on all sides.
5. Baking: Place the chicken in an oiled (or buttered) baking dish and bake for about 30 minutes, or until the chicken is cooked through and the breadcrumb crust is golden brown.

A Nostalgic Story:


Every Sunday, my family would gather at my grandmother’s house for a hearty lunch. It was a tradition that brought us all together, no matter how busy life got. I vividly remember the first time Grandma served her special Herb and Cheddar Cordon Bleu. As the dish emerged from the oven, the kitchen was filled with the enticing aroma of rosemary and cheddar, a scent that felt like a warm hug.


Grandma would always tell us stories as we ate, tales of her childhood and how she learned to cook from her own mother. The Herb and Cheddar Cordon Bleu was a recipe she'd innovated herself, inspired by the classic cordon bleu but with her own herbaceous twist. It was her way of adding a little piece of herself to each meal. We all looked forward to those Sundays, not just for the delicious food but for the love and laughter that always accompanied them.


Difficulty Level: 5/10


This dish is moderately easy to prepare, making it perfect for both novice and seasoned cooks. With a little patience, you can master this recipe and create a memorable meal that your family will love.


Conclusion:


Herb and Cheddar Cordon Bleu is more than just a dish; it’s a celebration of flavors and family memories. It brings together the richness of cheddar, the savory taste of ham, and the fragrant herbs in a beautifully baked chicken roll that is sure to become a favorite at your dinner table. Whether you're cooking for loved ones or simply wanting to treat yourself, this dish is a delightful reminder that the best meals are the ones shared with those you care about.

Read more about Appetizers

Read more about Main Dishes

Read more about Desserts

Herb and Cheddar Cordon Bleu | Made by Meaghan Moineau

Herb and Cheddar Cordon Bleu | Made by Meaghan Moineau

Title: Savoring Tradition: Herb and Cheddar Cordon Bleu
Description: Dive into a heartwarming family recipe that brings the comfort of home to your kitchen. Our Herb and Cheddar Cordon Bleu is a savory main dish that combines the richness of cheddar cheese, the smoky tenderness of deli ham, and the aromatic blend of herbs, providing an unforgettable culinary experience. Join us as we explore this dish that has been passed down through generations, complete with a nostalgic family story that adds a pinch of love to every bite.

---


Herb and Cheddar Cordon Bleu: A Taste of Family Legacy

There is something about the combination of herbs and cheddar that speaks directly to the heart. Every time I prepare this Herb and Cheddar Cordon Bleu, I am transported back to Sunday afternoons spent in my grandmother's kitchen, where the air was always filled with the comforting aroma of her culinary creations.


Ingredients You'll Need:

- 4 chicken breasts


- 4 slices of deli ham


- 4 slices of cheddar cheese


- 1 cup of breadcrumbs


- 1 teaspoon of dried marjoram


- 1 teaspoon of dried parsley


- 1 teaspoon of dried rosemary


- 1 egg


- 1/2 cup of flour


- Salt and pepper to taste


Instructions:
1. Preheat and Prep: Preheat your oven to 350°F (about 176°C). Take the chicken breasts and place them between two slices of wax paper. Using a rolling pin or meat mallet, flatten them until they're about a quarter of an inch thick.
2. Layer and Roll: On each flattened chicken breast, place a slice of ham and a slice of cheddar cheese. Roll each chicken breast as tightly as possible, securing with toothpicks or small skewers if needed.
3. The Coating Process: In a shallow baking dish, beat the egg. Prepare two more stations with foil or dishes: one for flour and another for a mixture of dried herbs and breadcrumbs. Coat each rolled chicken breast in flour, dip in the egg mixture, then press into the breadcrumb and herb mixture until fully covered.
4. Bake to Perfection: Place the prepared chicken in an oiled or buttered baking dish. Bake for about 30 minutes, or until the chicken is cooked through and the coating is golden brown.
A Bite of Nostalgia:

Growing up, Sunday dinners were a cherished tradition in our family. My grandmother, the matriarch of our culinary clan, would often prepare this Herb and Cheddar Cordon Bleu, filling her cozy kitchen with its irresistible scent. As a child, I would stand by her side, eagerly watching her every move, hoping to someday recreate her magic. The warmth of her kitchen, the gentle hum of her stories, and the love she infused into every dish were the soul of our family gatherings.


This dish, much like the memories it holds, is simple yet deeply satisfying. The medley of herbs and cheese wrapped in succulent chicken transports me back to those joyful Sundays, surrounded by laughter and love.


Difficulty Rating: 6/10
Category: Main Dish

Our Herb and Cheddar Cordon Bleu is a delightful nod to family traditions, perfect for any gathering that calls for warmth and nostalgia. Whether you're creating new memories or savoring old ones, this dish is sure to become a beloved staple in your home, too.

Read more about Appetizers

Read more about Main Dishes

Read more about Desserts

Chinese Potstickers | Made by Meaghan Moineau

Chinese Potstickers | Made by Meaghan Moineau

Deliciously Nostalgic: Crafting Perfect Chinese Potstickers at Home


Description

Dive into the rich flavors and textures of Chinese potstickers, a delightful culinary journey wrapped in a delicate dumpling. This detailed guide not only provides a step-by-step recipe but also shares a heartwarming family story that will inspire you to bring a taste of tradition to your kitchen. Perfect as an appetizer or a savory snack, these potstickers will soon become a family favorite.

---


A Taste of Tradition: Chinese Potstickers


The sizzling sound of dumplings hitting the hot pan, the aroma of sesame oil wafting through the kitchen, and the anticipation of that first bite—making Chinese potstickers is more than just preparing a meal; it's about creating memories. For me, these potstickers are a culinary heirloom passed down through generations, each fold and pleat crafted with love.


Ingredients


- 200g lean ground pork (or substitute with ground chicken)


- 100g canned water chestnuts, chopped (or substitute with spinach or cabbage)


- 1 teaspoon sea salt


- 1 teaspoon fine sugar


- 1/2 teaspoon black ground pepper


- 2 teaspoons light soy sauce


- 2 teaspoons sesame oil


- 1 tablespoon Shaoxing Huatiao wine


- 2-3 tablespoons finely chopped scallions


- Dumpling wrappers (thawed if frozen)


- Plain flour for dusting


- 2-3 tablespoons vegetable oil


- 1/3 cup water


Instructions


1. Prepare the Filling:

- In a large mixing bowl, combine the ground pork with sea salt, sugar, ground pepper, soy sauce, sesame oil, and Shaoxing Huatiao wine.


- Add the chopped water chestnuts to the mixture. For a twist, you can use spinach or cabbage instead.


- Stir in the finely chopped scallions and mix all ingredients well.


2. Assemble the Dumplings:

- Dust your working surface with flour. Carefully separate the dumpling wrappers and lay them out.


- Place about 1.5 teaspoons of the pork filling in the center of each wrapper.


- Lightly wet the edges of the wrapper with water. Bring the edges together and pinch at the center.


- Create pleats on one side of the dumpling, folding towards the center and pinching to seal. Repeat on the other side, ensuring three pleats per side.


3. Cooking the Potstickers:

- Heat vegetable oil in a frying pan over high heat.


- Place the dumplings flat-side down in the pan and fry until the bottoms are golden brown.


- Add water, cover the pan, and steam for 4-5 minutes. Remove the cover and let them crisp up for another minute.


4. Serving Suggestion:

- Serve the potstickers with a vinegar dip made of balsamic or black Chinese vinegar and thinly sliced ginger. Enhance the dip with soy sauce, chili oil, or sesame oil for extra flavor.


A Family Memory


Growing up, Sunday afternoons were reserved for dumpling-making in my grandmother's kitchen. Her nimble fingers would work magic, transforming simple ingredients into delectable bites. As children, my siblings and I would gather around the table, our hands dusted with flour, trying to mimic her expert pleats. Laughter and stories filled the room, each dumpling a testament to our shared love and heritage. These potstickers are more than a dish; they're a connection to those cherished days, a reminder that food has the power to bring families together.


Difficulty: 6/10

Classification: Appetizer


Creating Chinese potstickers is a rewarding experience that combines the art of cooking with the joy of tradition. Whether you're new to dumpling-making or a seasoned pro, this recipe promises delicious results that will delight your senses and bring a touch of nostalgia to your dining table. Enjoy!

Read more about Appetizers

Read more about Main Dishes

Read more about Desserts

Chicken Piccata With Angel Hair Pasta | Made by Meaghan Moineau

Chicken Piccata With Angel Hair Pasta | Made by Meaghan Moineau

Zesty Chicken Piccata With Angel Hair Pasta: A Timeless Family Classic


Description


Discover the tangy and savory delight of Chicken Piccata with Angel Hair Pasta, a dish that balances bright citrus notes with the richness of a buttery sauce, all harmonized with tender chicken and delicate pasta. This main dish not only promises a burst of flavor but also serves as a nostalgic journey back to family gatherings marked by laughter, love, and unforgettable meals. Perfect for a weeknight dinner or a special occasion, this recipe is rated 6/10 in difficulty and will leave your taste buds dancing with joy.


---


A Walk Down Memory Lane


Growing up, Sunday dinners were a cherished tradition in our family. My grandmother would spend the afternoon bustling around the kitchen, her apron dusted with flour and a twinkle in her eye as she orchestrated the meal that would bring us all together. Chicken Piccata with Angel Hair Pasta was a staple, a dish that magically combined her Sicilian roots with a touch of modern flair.


I remember the way the kitchen smelled, the citrusy aroma of fresh lemons mingling with the savory scent of sautéed garlic and olive oil. As children, my cousins and I would gather around the table, eagerly awaiting the moment when she would place the steaming platter before us. Each bite was a revelation—the tangy capers popping against the tender chicken and the delicate strands of pasta soaking up the rich, buttery sauce.


Those evenings were filled with stories and laughter, the kind of moments that linger long after the plates have been cleared. To this day, every time I prepare this dish, I can almost hear my grandmother's gentle laughter and feel the warmth of those family gatherings. It's more than just a meal; it's a connection to the past, a way to keep those precious memories alive.


---


Ingredients


- 1 cup all-purpose flour


- 8 oz angel hair pasta


- 2 boneless chicken breasts


- 2 tablespoons capers


- 1 cup chicken broth


- Fresh basil, chopped


- 2 diced garlic cloves


- Black kosher salt and pepper to taste


- Zest and juice of 2 lemons


- 3 tablespoons olive oil, divided


- 1 teaspoon red chili flakes


- 2 diced Roma tomatoes


- 3 tablespoons unsalted butter


---


Instructions


1. Prepare the Chicken:

Place 1 cup of flour in a shallow dish. Using a sharp knife, slice each chicken breast in half. Cover each piece with wax paper and use a kitchen mallet to pound them to about ½ inch thick. Season the chicken generously with salt and pepper. Coat the chicken pieces in flour, shaking off any excess.


2. Cook the Chicken:

In a large skillet, heat 2 tablespoons of olive oil over medium heat. Add the chicken to the skillet and sauté each side until golden brown, about 3-4 minutes per side. Once cooked, transfer the chicken to a clean plate and cover with aluminum foil.


3. Boil the Pasta:

Begin boiling the angel hair pasta according to package instructions.


4. Make the Sauce:

Using the same skillet, add the remaining olive oil and sauté the garlic until aromatic, avoiding browning. Add red chili flakes, capers, lemon juice, lemon slices, zest, and chicken broth. Use a wooden spoon to scrape up any brown bits from the skillet. Increase heat to medium-high and allow the liquid to reduce by half.


5. Finish the Sauce:

In a small bowl, mash together 1 tablespoon of flour and the butter. Whisk into the reducing liquid, cooking for 1-2 minutes. Ensure the sauce is smooth and adjust seasoning with salt and pepper.


6. Combine Everything:

Drain the cooked pasta and toss it in the lemon caper sauce with tomatoes and basil, reserving a few spoonfuls of sauce. Adjust seasoning if needed.


7. Serve:

Plate the pasta and top each serving with a piece of chicken. Spoon the reserved lemon caper sauce over the chicken and pasta. Serve immediately.


---


Conclusion


Recreate this delicious Chicken Piccata with Angel Hair Pasta and transport yourself to a place where every meal becomes a memory worth savoring. Whether you're sharing it with family or enjoying a quiet evening at home, this dish promises to delight with its robust flavors and heartwarming nostalgia.

Read more about Appetizers

Read more about Main Dishes

Read more about Desserts

Instant Pot Chicken Tacos | Made by Meaghan Moineau

Instant Pot Chicken Tacos | Made by Meaghan Moineau

Instant Pot Chicken Tacos: A Quick, Flavorful Feast for the Whole Family


Description


Discover the magic of Instant Pot Chicken Tacos, a delicious and easy meal that brings families together. With simple ingredients like chicken breasts, purple onion, and canned salsa, this dish transforms into a mouthwatering main course that's sure to please. Perfect for busy weeknights or a casual dinner party, these tacos capture the essence of home-cooked comfort food in a fraction of the time. Dive into this recipe and enjoy a taste of nostalgia with every bite.


A Nostalgic Family Memory


Growing up, Taco Tuesdays were a cherished tradition in our household. As the sun dipped below the horizon, casting a warm glow over our kitchen, my siblings and I would gather around the table, eagerly awaiting the sizzling sounds and tantalizing aromas that filled the air. Mom would always make her signature chicken tacos, a recipe passed down from her grandmother. The kitchen buzzed with laughter and stories as we chopped fresh onions and seasoned the chicken with care.


One particular Tuesday stands out in my memory. It was a chilly autumn evening, and the first hint of winter's bite was in the air. Mom had recently received an Instant Pot as a gift, and she was eager to try it out with our beloved taco recipe. We were skeptical at first—could this new gadget really recreate the flavors we held so dear?


As the Instant Pot worked its magic, we shared stories of past family adventures and dreamed of future ones. The smell of seasoned chicken and salsa wafted through the room, and our mouths watered in anticipation. When the timer finally beeped, signaling the end of the cooking process, we gathered around as Mom carefully lifted the lid.


The result was nothing short of spectacular. The chicken was tender and infused with the rich flavors of taco seasoning and salsa. As we bit into our tacos, the familiar taste of lime juice and savory chicken transported us back to a simpler time. That evening, we realized that while the method had changed, the heart of our family tradition remained unchanged.


Recipe


Ingredients


- 2 chicken breasts


- Black pepper


- 1 tablespoon taco seasoning


- 1 purple onion, sliced


- 1 cup canned salsa


- 2 tablespoons lime juice


Instructions


1. Season both sides of the chicken breasts with black pepper and taco seasoning.


2. Place the seasoned chicken into the bottom of the Instant Pot.


3. Top the chicken with sliced purple onion and canned salsa.


4. Secure the Instant Pot lid into the lock position.


5. Select the Poultry setting and set the timer for 12 minutes.


6. Once cooking is complete, allow the Instant Pot to naturally release pressure for 20 minutes.


7. Carefully remove the chicken from the Instant Pot and shred it using two forks.


8. Sprinkle the shredded chicken with lime juice for added zest.


9. Serve over rice or with warm tortillas for a delightful taco experience.


Difficulty Rating


This recipe is rated a 3 out of 10 for difficulty, making it an ideal choice for cooks of all skill levels. Its simplicity and efficiency make it a fantastic option for those new to using an Instant Pot or anyone looking for a quick, satisfying meal.


Classification


Instant Pot Chicken Tacos are classified as a Main Dish, perfect for family dinners or entertaining guests with minimal fuss.


---


Embrace the ease and flavor of Instant Pot Chicken Tacos, and create new family memories with this delightful dish. Whether you're a seasoned cook or just starting out, this recipe is sure to become a beloved staple in your culinary repertoire.

Read more about Appetizers

Read more about Main Dishes

Read more about Desserts

Quick and Easy Southwestern Corn Chowder | Made by Meaghan Moineau

Quick and Easy Southwestern Corn Chowder | Made by Meaghan Moineau

Title: A Hearty Bowl of Comfort: Quick and Easy Southwestern Corn Chowder
Description: Dive into the warmth of Southwestern flavors with this Quick and Easy Corn Chowder. Perfect for busy weeknights, this delightful dish combines vibrant vegetables, tender chicken, and creamy cheese for a soul-satisfying experience. Join me as I share my personal family memories tied to this comforting meal.

---


As the leaves begin to turn and the air becomes crisp, there's nothing quite like a warm, hearty soup to bring comfort to both the body and soul. Our Quick and Easy Southwestern Corn Chowder is not just a dish; it's a bowl of memories, nostalgia, and love. This flavorful chowder combines the earthy sweetness of fresh corn with the gentle heat of chili flakes, making it a perfect companion for cozy evenings.


Nostalgic Family Memory:

Growing up, my family always gathered around the kitchen on Sunday evenings to prepare meals together. It was a sacred ritual, a time to connect after our busy weeks. My grandmother, with her worn-out apron and gentle smile, was the maestro of our kitchen symphony. She had an uncanny ability to turn simple ingredients into something magical, and her Southwestern Corn Chowder was no exception.


I fondly remember the aroma of onions and peppers gently sweating in the Dutch oven, filling the house with an inviting warmth. As a child, my job was to carefully measure the corn kernels, making sure not to spill any on our kitchen floor—a task I took very seriously. The heart of our chowder was always the fresh corn, harvested from our backyard garden, adding a touch of sweetness that only nature can provide.


As my grandmother stirred the pot, she would share stories of her childhood, tales of her family's own kitchen gatherings in the Southwest. Each spoonful of chowder was a journey back to those stories, a connection to our roots and a reminder of the love that bound us together. Now, every time I make this dish, I feel her presence in the kitchen, guiding me, just as she did all those years ago.


Recipe Details:
Ingredients:

- 2 tablespoons butter


- 1 cup cheddar cheese (optional)


- 1 teaspoon chili flakes


- 4 cups yellow fresh corn kernels


- 1 green bell pepper, diced


- 1 cup half and half


- 1 red bell pepper, diced


- Salt and pepper to taste


- 2 cups cooked shredded chicken


- 1 cup sweet onions, diced


- 4 cups vegetable stock


Instructions:

1. In a Dutch oven, melt the butter over medium heat. Add the diced sweet onions and bell peppers, along with a pinch of salt. Sweat the vegetables until the onions become translucent and fragrant.


2. Sprinkle in the chili flakes, allowing them to release their warmth into the mix.


3. Pour in the vegetable stock, followed by the fresh corn kernels and shredded chicken. Stir to combine and bring the mixture to a gentle simmer. Cover and let it simmer for about 10 minutes, allowing the flavors to meld.


4. Once the chowder has simmered, reduce the heat and stir in the half and half. If desired, add the cheddar cheese, stirring until melted and incorporated.


5. Season with salt and pepper to taste, adjusting to your preference.


6. Serve hot, garnished with additional cheese or fresh herbs if desired.


Difficulty Rating: 3/10
Classification: Main Dish

This Southwestern Corn Chowder is more than just a meal; it’s a tradition, a family heirloom passed down through generations, warming hearts and homes with its rich flavors and cherished memories. Enjoy this dish with your loved ones and create your own stories to share around the dinner table.


---


Let us know how this recipe turned out for you and share your own kitchen memories in the comments below!

Read more about Appetizers

Read more about Main Dishes

Read more about Desserts

Curry-Braised Chicken | Made by Meaghan Moineau

Curry-Braised Chicken | Made by Meaghan Moineau

Title: Curry-Braised Chicken: A Comforting Culinary Journey
Description: Dive into the fragrant world of Curry-Braised Chicken, a dish that marries rich flavors with tender textures. Perfect for cozy family dinners or special gatherings, this curry-infused delight will transport you to a warm kitchen filled with laughter and nostalgia. Discover the recipe, memories, and more as we explore this delectable main dish.

---


Curry-Braised Chicken: A Comforting Culinary Journey


There’s something comforting about a dish that fills the home with an aroma so inviting, it feels like a warm hug. Curry-Braised Chicken is one such dish, a symphony of flavors that dances across your palate and evokes memories of family gatherings and heartfelt conversations. Let's dive into this comforting recipe and relive the cherished memories it brings.


Ingredients


- Basmati Rice
- 2 tablespoons Brown Sugar
- 2 tablespoons Fish Sauce
- 2 tablespoons Fresh Lime Juice
- 1 Bell Pepper, sliced
- Salt, to taste
- 4 Skinless Boneless Chicken Breasts, halved
- 1 can (13.5 oz) Unsweetened Coconut Milk
- 2 tablespoons Vegetable Oil
- 3 tablespoons Yellow, Red, or Green Curry Paste

Instructions


1. Preheat the Oven: Start by preheating your oven to 325 degrees Fahrenheit.
2. Prepare the Chicken: Slice the chicken breasts in half for even cooking. Dust them with salt and pepper.
3. Brown the Chicken: Heat the vegetable oil over medium-high heat in a Dutch oven. Brown the chicken for 1-2 minutes on each side in batches. Set aside once done.
4. Create the Curry Base: Add the curry paste to the same Dutch oven. Use a wooden spoon to break up any large pieces and incorporate the paste into the hot oil.
5. Add Coconut Milk: Pour in the coconut milk, using the wooden spoon to release any browned bits of chicken from the bottom of the pot.
6. Flavor it Up: Stir in the fish sauce and brown sugar, ensuring everything is well combined.
7. Bake: Cover the Dutch oven and place it in the oven. Bake for 45-55 minutes, or until the chicken is fully cooked and no longer pink.
8. Final Touch: Just before serving, stir in the fresh lime juice to lend a zesty finish.
9. Serve: Plate the Curry-Braised Chicken with cooked basmati rice and bell pepper slices for a complete meal.

A Nostalgic Memory


Every time I prepare this dish, I am whisked back to a lively kitchen bustling with family members during the holiday season. My grandmother, with her warm smile and gentle guidance, would orchestrate our culinary endeavors. As the curry simmered, stories of our heritage were shared, bridging generations. This dish, with its rich aroma and tantalizing flavors, became a symbol of unity and warmth — a reminder that food is not just sustenance, but a vessel for love, laughter, and legacy.


Difficulty: 4/10


While the steps are straightforward, the key lies in patience and allowing the flavors to meld together harmoniously in the oven. This main dish is approachable for cooks of all levels, making it a perfect choice for a comforting family meal.


---


Curry-Braised Chicken is more than just a recipe; it's a journey through flavors and family history. Whether you're new to the kitchen or an experienced cook, this dish promises a delightful experience that warms both the heart and soul. Enjoy this culinary adventure and create your own memories to treasure for years to come.

Read more about Appetizers

Read more about Main Dishes

Read more about Desserts