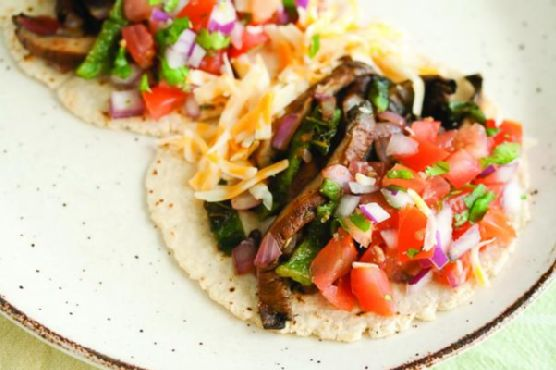
The Secret to Easy Skillet Filet Mignon Steak Tacos
Intro
There’s something magical about a warm, cozy evening spent around the kitchen table with family and friends. Growing up, my mother used to make the most delightful tacos, and they were always the highlight of our gatherings. The aroma of sizzling steak and freshly heated tortillas would fill the house, drawing everyone to the kitchen. Inspired by those cherished family moments, I’ve crafted a recipe for easy skillet filet mignon steak tacos that brings a touch of elegance to the classic taco night.
This dish combines the luxury of filet mignon with the comforting flavors of traditional tacos. You’ll find that this recipe is not only easy to make but also incredibly satisfying, perfect for a cozy dinner or a festive gathering.
Why You’ll Love It
These filet mignon steak tacos are a delightful fusion of simplicity and sophistication. Here’s why they’ll become a favorite in your household:
- Quick and Easy: With just a few steps, you can whip up a gourmet meal in under 30 minutes.
- Flavorful and Tender: The filet mignon is cooked to perfection, offering a tender and juicy bite every time.
- Customizable: Whether you prefer your tacos loaded or simple, you can easily adjust the toppings to suit your taste.
- Perfect for Any Occasion: Whether it’s a weeknight dinner or a special event, these tacos are sure to impress.
Ingredients
- Sour cream
- Olive oil (extra virgin)
- Filet mignon steaks
- Guacamole
- Cracked black pepper
- Shredded cheddar cheese
- White corn tortillas
Instructions
- Heat the skillet on medium to low heat.
- Rub the steaks with olive oil and season with cracked black pepper.
- Slowly cook the filets until they have reached your desired specifications. For medium doneness, cook for about 7 minutes on each side.
- Remove the filets from the heat and slice thinly and lengthwise.
- Use a clean skillet over medium heat to warm up the corn tortillas.
- Top the tortillas with steak, guacamole, sour cream, and shredded cheese.
Tips
To ensure your steak is perfectly cooked, use a meat thermometer. For medium doneness, aim for an internal temperature of 145°F (63°C). Let the steak rest for a few minutes before slicing to retain its juices.
Always warm your tortillas before serving. This not only enhances their flavor but also makes them more pliable, preventing them from breaking when you fold them.
Variations & Substitutions
Feel free to experiment with different toppings like fresh cilantro, diced tomatoes, or pickled onions for added flavor. If you prefer a different cheese, try using Monterey Jack or queso fresco for a unique twist.
If filet mignon isn’t available, you can substitute with sirloin or ribeye, although the cooking times may vary slightly.
Storage
Store any leftover steak in an airtight container in the refrigerator for up to 3 days. Reheat gently in a skillet to avoid overcooking. The tortillas and toppings should be stored separately to maintain freshness.
FAQ
Can I use a different type of tortilla?
Absolutely! While white corn tortillas provide a traditional touch, flour tortillas or even whole wheat options can be used as well. Just keep in mind the flavor and texture differences.
How can I make these tacos spicier?
Add a kick to your tacos by incorporating sliced jalapeños, a sprinkle of cayenne pepper, or a spicy salsa as a topping. Adjust the spice level to suit your taste preferences.
Nutrition
Each serving of these tacos is a balanced blend of protein, healthy fats, and carbs. The filet mignon offers a rich source of protein, while the olive oil provides heart-healthy fats. Remember to enjoy in moderation, especially if you’re watching your calorie intake.
Conclusion
These easy skillet filet mignon steak tacos are a delightful way to elevate your taco night with minimal effort. Whether you’re reminiscing about family gatherings or creating new memories, this recipe is sure to become a favorite. Enjoy the rich flavors and tender textures with each bite, and don’t forget to share the love with those around your table. Happy cooking!
Related update: The Secret to Easy Skillet Filet Mignon Steak Tacos
Related update: Pasta with Peas and Italian Sausage