Coconut Guava Ice cream | Made by Meaghan Moineau

Coconut Guava Ice cream | Made by Meaghan Moineau

Title: Tropical Bliss: Crafting Coconut Guava Ice Cream with a Nostalgic Twist


Description:

Dive into the world of tropical flavors with our Coconut Guava Ice Cream recipe. This dessert, rich with the creamy goodness of coconut milk and the exotic sweetness of guava, will transport you to sun-kissed beaches and family gatherings. Easy to make yet bursting with flavor, it's the perfect ending to any meal.

---


Introduction

There's something undeniably enchanting about tropical flavors. They have the power to whisk you away, if only for a moment, to sun-drenched beaches and swaying palm trees. Coconut Guava Ice Cream is one such treat that not only captivates the taste buds but also carries a story of familial warmth and nostalgia.

A Nostalgic Tale

I remember my grandmother's kitchen, a place where the air was always perfumed with the scent of fresh fruit and homemade treats. One summer, during a family reunion, she introduced us to her version of Coconut Guava Ice Cream. It was a revelation—a creamy, fruity concoction that had everyone clamoring for more. The kitchen buzzed with laughter and chatter as we all took turns churning the ice cream by hand, a labor of love that brought us closer together. Those days spent with family around the table, sharing stories and scoops of this delightful ice cream, remain some of my fondest memories.

Recipe: Coconut Guava Ice Cream


Ingredients:

- 1 can of coconut milk

- 1/2 cup of condensed milk


- 2 ripe guavas, peeled and de-seeded


- 1/2 cup of blueberries


- 1/4 cup of crushed peanuts


Instructions:

1. Prepare the Coconut Milk: Place the can of coconut milk in the freezer and allow it to solidify. This typically takes 4-6 hours, depending on your freezer's temperature.
2. Separate the Coconut Milk: Once frozen, open the can completely. The milk and coconut water will have separated, with the coconut water appearing clearer. Use a sharp knife to cut through the frozen block, separating the milk from the water.
3. Blend the Ingredients: Place the frozen coconut milk in a blender. Add the condensed milk and chopped, de-seeded guavas. Blend for 3-5 minutes, pausing at intervals to ensure a smooth consistency.
4. Mix in Blueberries: Pour the blended mixture into a bowl, stir in the blueberries, and ensure they are evenly distributed.
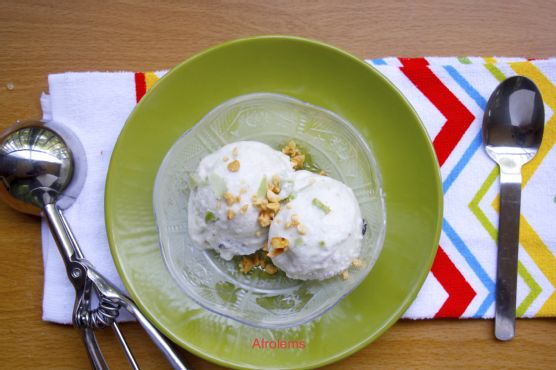
5. Freeze and Serve: Transfer the mixture to a freezer-safe container. Allow it to freeze for 3-6 hours until firm. Serve garnished with crushed peanuts for added texture and flavor.

Conclusion

Creating Coconut Guava Ice Cream is more than just making a dessert; it's a journey into the tropical paradise of flavors and memories. With each spoonful, you're not only savoring the rich blend of coconut and guava but also a slice of cherished family moments.

Difficulty: 4/10


Classification: Dessert


This Coconut Guava Ice Cream is a breeze to make, offering a delightful escape to tropical indulgence with minimal effort. Whether you're crafting it for a special occasion or simply treating yourself, this ice cream is sure to become a staple in your culinary repertoire.

Read more about Appetizers

Read more about Main Dishes

Read more about Desserts

Blackberry Peach Betty | Made by Meaghan Moineau

Blackberry Peach Betty | Made by Meaghan Moineau

Title: Nostalgia in Every Bite: The Comforting Delight of Blackberry Peach Betty
Description: Dive into the heartwarming world of Blackberry Peach Betty, a dessert that not only tantalizes the taste buds but also brings cherished family memories to life. This easy-to-make slow cooker recipe combines the sweet and tangy flavors of peaches and blackberries with the comforting crunch of graham cracker crumbs. Perfect for any gathering, this dessert will transport you back to simpler times with each delicious bite.

---


When I think of desserts that evoke a sense of warmth and nostalgia, Blackberry Peach Betty instantly comes to mind. This delightful dish, with its harmonious blend of juicy peaches and tart blackberries, is more than just a sweet treat—it's a thread that ties my family together through shared memories and cherished moments.


Ingredients You'll Need:

- 1 can of peach pie filling


- 2 cups of frozen blackberries


- 1 tablespoon of butter, melted


- 1 cup of graham cracker crumbs


- 1 teaspoon of ground cinnamon


- ¼ cup of sugar


Instructions:

1. Begin by spraying your slow cooker with cooking spray to prevent sticking, then set it aside.


2. In a medium-sized bowl, mix together the peach pie filling, frozen blackberries, sugar, and ground cinnamon. This will be the fragrant fruit base of your Betty.


3. Pour half of the fruit mixture into the bottom of the slow cooker, and top with half of the graham cracker crumbs and a drizzle of melted butter. Repeat with the remaining fruit, crumbs, and butter to create layers of flavor and texture.


4. Cover the slow cooker and let it work its magic on low for 3-4 hours. The slow, gentle heat will meld the ingredients into a warm, bubbling dessert.


5. Once done, serve it hot over a scoop of French vanilla ice cream. The contrast of the warm Betty and the cold ice cream is simply irresistible.


A Trip Down Memory Lane:

Growing up, my family gatherings were often centered around the kitchen, where the aroma of various dishes would fill the air. One summer evening, my grandmother introduced us to Blackberry Peach Betty. I remember her explaining how, during her own childhood, this dessert was her mother's way of making the most of the season's bounty. It quickly became a staple at our family reunions, with my grandmother sharing stories of her youth as we savored each spoonful. The warmth of the dessert mirrored the warmth of our family bonds, creating a tradition that I now share with my own children.


Difficulty: 3/10
Classification: Dessert

Blackberry Peach Betty is a testament to the beauty of simple ingredients coming together to create something extraordinary. It's a dessert that doesn't demand much from the cook, yet offers so much in return. Whether you're making it for a special occasion or just to indulge in a bit of nostalgia, this dish never fails to deliver both comfort and joy.

Read more about Appetizers

Read more about Main Dishes

Read more about Desserts

Spicy Indian-Style Hummus | Made by Meaghan Moineau

Spicy Indian-Style Hummus | Made by Meaghan Moineau

Title: Spicy Indian-Style Hummus: A Flavorful Fusion of Tradition and Taste
Description: Dive into the vibrant world of Indian-inspired cuisine with our Spicy Indian-Style Hummus. This unique take on a classic dip combines traditional hummus ingredients with the robust flavors of Indian spices, creating a dish that's both familiar and exotic. Perfect as an appetizer, this easy-to-make recipe brings a touch of nostalgia to your table, reminiscent of cherished family gatherings. Rated 4 out of 10 on the difficulty scale, this dish promises to be a delightful addition to your culinary repertoire.

---


Spicy Indian-Style Hummus: A Family Favorite with a Twist

There's something inherently comforting about recipes that remind us of home. For me, hummus has always been one of those dishes. Growing up, our kitchen was a melting pot of flavors, with my Indian heritage blending seamlessly with my love for international cuisine. This Spicy Indian-Style Hummus is a testament to that fusion, a dish that brings together the best of both worlds.


Ingredients:

- 1 cup dried chickpeas


- 1 pinch asafetida


- 1/2 teaspoon cayenne


- 2 tablespoons fresh chives, chopped


- 1 tablespoon fresh ginger, minced


- 2 tablespoons fresh parsley, chopped


- 2 cloves garlic, minced


- 1 teaspoon ground coriander


- 1 teaspoon ground cumin


- 1/2 teaspoon black fresh ground pepper


- Juice of 1 lemon


- 1/4 cup olive oil (plus more if needed)


- 1-2 red and green fresh chilies, chopped


- 1 teaspoon sea salt


- 1/4 cup tahini


- 1/2 teaspoon turmeric


Instructions:
1. Prep the Chickpeas: Begin by rinsing the chickpeas thoroughly. Soak them for 8 hours or overnight in several inches of water, adding a bit of yogurt whey or lemon juice to aid in softening them.
2. Cook the Chickpeas: Drain and rinse the soaked chickpeas, then transfer them to a large saucepan. Cover them with fresh water, bring to a boil, and then reduce the heat to medium-low. Cover and simmer for 1 to 1 1/2 hours, or until the beans are buttery soft. Drain them completely.
3. Blend the Ingredients: In a food processor, combine the cooked chickpeas with asafetida, cayenne, chives, ginger, parsley, garlic, coriander, cumin, black pepper, lemon juice, olive oil, chilies, sea salt, tahini, and turmeric. Process until you achieve a thick, smooth paste. For a thinner consistency, add more olive oil or a bit of water.
4. Serve: This recipe makes approximately 3 cups of hummus. Serve it as a delicious appetizer with fresh vegetables, pita bread, or crackers.
Family Memory:

Every summer, our family would gather at my grandparents' house for a weekend filled with laughter, stories, and, of course, food. My grandmother, with her eclectic mix of recipes, would always surprise us with something new. One year, she introduced us to her Spicy Indian-Style Hummus. I remember her bustling around the kitchen, explaining how the spices she used reminded her of her childhood in India. As we sat around the table, dipping warm, crusty bread into the hummus, I realized that food was more than just sustenance. It was a bridge connecting us to our past, a way to share and preserve cherished memories.


Difficulty Rating: 4/10
Classification: Appetizer

This Spicy Indian-Style Hummus is not just a dish; it's a journey through flavors and time, weaving together the threads of tradition and personal history. Whether you're hosting a gathering or simply looking to spice up your snack game, this hummus is sure to be a hit. Enjoy!

Read more about Appetizers

Read more about Main Dishes

Read more about Desserts

Spinach Cheese Tortellini | Made by Meaghan Moineau

Spinach Cheese Tortellini | Made by Meaghan Moineau

Title: Spinach Cheese Tortellini: A Nostalgic Family Feast
Description: Dive into the heartwarming world of homemade comfort food with our Spinach Cheese Tortellini recipe. Packed with rich flavors and a touch of nostalgia, this delightful dish brings together the creamy goodness of cheese tortellini and the fresh vibrancy of spinach in a tomato-infused sauce. Perfect for family gatherings or a cozy night in, this recipe is sure to become a cherished favorite.

---


Spinach Cheese Tortellini: A Nostalgic Family Feast


When I think of family gatherings around our dining table, the comforting aroma of Spinach Cheese Tortellini always springs to mind. It is a dish that has woven itself into the fabric of our family memories, a delicious centerpiece that brings us together time and time again.


Ingredients:


- 1 tablespoon butter
- 1 can of tomatoes (with juice)
- 1 package fresh dried cheese tortellini
- 1 teaspoon cumin
- 1 teaspoon dried basil
- 1 tablespoon flour
- 2 cloves garlic, minced
- 1 teaspoon garlic powder
- 1/2 cup heavy cream
- 1 cup milk
- 2 tablespoons olive oil
- 1 diced onion
- 1 teaspoon onion powder
- 1 teaspoon oregano
- 1/2 cup fresh parmesan cheese, grated
- 1 tablespoon raw sugar
- 1/2 teaspoon red pepper flakes
- Salt and pepper to taste
- 2 cups fresh spinach
- 1 teaspoon thyme

Instructions:


1. Prepare Tortellini: Follow the package instructions to cook the tortellini. Set aside.
2. Sauté Aromatics: In a large stainless steel pan, heat olive oil and butter over medium heat. Add diced onions and cook until soft and translucent, about 3-4 minutes. Stir in minced garlic and cook for an additional minute.
3. Create Tomato Base: Pour in the canned tomatoes, including their juice, and season with salt, pepper, garlic powder, onion powder, red pepper flakes, thyme, oregano, cumin, dried basil, and raw sugar. Simmer for 5 minutes, allowing the flavors to meld.
4. Add Spinach: Introduce the spinach leaves to the pan, cover with a lid, and let them wilt. Stir occasionally and add water 1/4 cup at a time if the mixture becomes too dry.
5. Prepare Cream Sauce: In a small bowl, whisk together flour, milk, and cream until smooth. Pour this mixture into the pan with the tomato and spinach. Stir in the parmesan cheese, combining everything thoroughly.
6. Combine & Serve: Using a slotted spoon, transfer the cooked tortellini into the pan. Gently mix everything with a wooden spoon to prevent tearing the pasta. Heat until everything is warmed through. Serve immediately, garnished with extra parmesan cheese and fresh basil.

A Family Memory


Growing up, I remember my grandmother bustling around the kitchen, her apron dusted with flour and the kitchen alive with the scents of garlic and herbs. Spinach Cheese Tortellini was her signature dish, one that she would prepare for every special occasion. I vividly recall sitting on the countertop, eagerly watching her every move, hoping to absorb her culinary magic.


The clinking of her wooden spoon against the stainless steel pan was a comforting symphony, and the sight of fresh spinach wilting into the bubbling tomato sauce was nothing short of mesmerizing. When it was finally time to eat, the whole family would gather around, laughter and stories flowing as freely as the wine.


This dish, with its rich, creamy texture and vibrant flavors, was more than just a meal; it was a vessel for love and connection, a reminder of the simple joys of family and home.


Difficulty: 5/10


Classification: Main Dish


Whether you're cooking for a crowd or simply indulging in a bit of culinary nostalgia, this Spinach Cheese Tortellini offers a taste of home, wrapped in warmth and memories. Enjoy!

Read more about Appetizers

Read more about Main Dishes

Read more about Desserts

Spare Ribs | Made by Meaghan Moineau

Spare Ribs | Made by Meaghan Moineau

Title: Unraveling the Secret of Perfect Spare Ribs: A Journey of Flavor and Family Memories


Description: Dive into the world of exquisite flavors with our Spare Ribs recipe, a culinary delight that promises to tantalize your taste buds. Accompanied by a heartwarming family story, this dish is not just a meal; it’s a journey through cherished memories, perfect for any gathering. Prepare to create a masterpiece that’s easy to make yet rich in flavor.

---


Unraveling the Secret of Perfect Spare Ribs: A Journey of Flavor and Family Memories


There’s something undeniably special about cooking a dish that has been passed down through generations. The smoky aroma, the sticky glaze, and the tender bite of perfectly cooked spare ribs can transport you to a different time and place. Today, I’m excited to share not just a recipe but a piece of my family history, woven into every bite of these delectable spare ribs.


Ingredients:

- 2 tablespoons of oil

- 3 tablespoons of clear honey


- 2-inch piece of fresh ginger root, grated


- 4 tablespoons of dark soy sauce


- 3 tablespoons of hoisin sauce


- 1 teaspoon of five-spice powder


- 3 garlic cloves, minced


- 2 pounds of spare ribs


Instructions:

1. Preparation: Preheat your oven to 400 degrees Fahrenheit. While the oven heats, combine the oil, honey, ginger, soy sauce, hoisin sauce, five-spice powder, and minced garlic in a jug. Mix well to create a flavorful marinade.
2. Marinating the Ribs: Place the spare ribs in a large dish and pour the marinade over them. Ensure the ribs are well-coated, then cover and refrigerate. For the best results, let the ribs marinate overnight, allowing the flavors to fully penetrate the meat.
3. Cooking the Ribs: Remove the ribs from the marinade and place them on a rack in a roasting pan. Cook in the preheated oven for about 45 minutes, turning them halfway through to achieve an even cook and a beautifully caramelized exterior.
4. Serving: Once cooked, allow the ribs to cool slightly. They can be served warm, but they’re equally delightful when enjoyed cold, making them a versatile dish suitable for any occasion.

A Nostalgic Family Memory

The scent of these spare ribs always takes me back to summers at my grandparents' house. Each year, the family would gather for a reunion, a tradition that brought relatives from near and far to share stories, laughter, and, of course, delicious food. My grandmother was the orchestrator of these gatherings, and her spare ribs were the star of the spread.

I remember being just tall enough to peer over the kitchen counter, watching her expertly mix the marinade. The kitchen would be filled with the rich aroma of ginger and garlic mingling with the sweet and savory notes of soy and hoisin. As the ribs marinated, we'd sit at the kitchen table, shelling peas and sharing stories of yesteryears.


When the ribs finally emerged from the oven, beautifully caramelized and glistening, they were more than just a meal—they were a celebration of family and tradition. Even now, as I prepare this recipe in my own kitchen, I feel a connection to those joyful days, the flavors acting as a bridge to cherished memories.


Difficulty Rating: 3/10

Classification: Main Dish

Crafting these spare ribs is a straightforward process, yet the flavors achieved are nothing short of extraordinary. Whether you’re a seasoned cook or a beginner eager to impress, this recipe is your ticket to creating a dish that’s sure to become a favorite at your family’s table. Enjoy the journey of flavors and the stories that come with each bite.

Read more about Appetizers

Read more about Main Dishes

Read more about Desserts

Chipotle Cheese Stuffed Black Bean Burgers with Avocado Creme | Made by Meaghan Moineau

Chipotle Cheese Stuffed Black Bean Burgers with Avocado Creme | Made by Meaghan Moineau

Title: Savor the Spice: Chipotle Cheese Stuffed Black Bean Burgers with Avocado Crème


Description:

Dive into a world of zesty flavors and creamy textures with our Chipotle Cheese Stuffed Black Bean Burgers with Avocado Crème. This satisfying vegetarian dish combines the earthiness of black beans, the smoky heat of chipotle, and the lusciousness of cream cheese. Topped with a refreshing avocado crème, these burgers promise a taste adventure in every bite.

The Recipe: A Culinary Adventure


Ingredients:

- 1 can black beans, drained

- 1 small yellow onion, diced


- 1 cup diced mushrooms


- 1 egg


- 1/2 cup panko bread crumbs


- 1 tsp cumin


- 1 tsp chipotle chili powder


- Salt and pepper to taste


- Olive oil


- 1/4 cup cream cheese spread


- Hamburger buns


- Sliced cheese (optional)


- Fresh spinach and tomato slices


Avocado Crème:

- 1 ripe avocado


- 1/2 cup sour cream


- 1 tbsp lime juice


- Sea salt to taste


Instructions:

1. Prepare the Veggies: Heat a swirl of olive oil in a skillet over medium heat. Add the diced onions and mushrooms. Sauté until softened, seasoning with salt and pepper. Remove from heat and set aside.
2. Create the Burger Mix: In a medium bowl, mash the drained black beans with a fork. Stir in the sautéed onions and mushrooms, followed by the egg and panko bread crumbs. Mix in the cumin and chipotle chili powder until well combined.
3. Form the Patties: Divide the mixture into equal portions, shaping them into patties. Make a small indent in the center of each patty and add a spoonful of cream cheese spread. Carefully mold the patty around the cream cheese, ensuring it's sealed.
4. Cook the Patties: Heat a skillet over medium heat with a swirl of olive oil. Cook the patties in batches, about 4 minutes per side, until browned and cooked through. If desired, add sliced cheese on top during the last minute of cooking and cover the skillet to melt the cheese.
5. Prepare the Avocado Crème: In a food processor or blender, combine the avocado, sour cream, lime juice, and sea salt. Blend until smooth and creamy. Adjust seasoning to taste.
6. Assemble the Burgers: Place each hot cooked burger on an open toasted bun. Top with fresh spinach and tomato slices, and a generous scoop of avocado crème. Finish with the top bun and serve immediately.

A Nostalgic Family Memory:


Growing up, summer barbecues were more than just meals; they were family reunions where laughter filled the air and stories were shared over the grill's sizzling symphony. My grandmother, with her knack for inventive cooking, introduced these chipotle cheese-stuffed black bean burgers as a vegetarian twist to our traditional meat-heavy lineup. I remember her explaining how she discovered the idea while experimenting with her garden's harvest. The smoky aroma mingled with the scent of fresh-cut grass, as she deftly assembled each burger with love and precision. The addition of her special avocado crème was a revelation, a creamy, tangy topping that brought everything together. These burgers became a family favorite, a reminder of those warm summer days spent in the backyard, creating memories that would last a lifetime.


Difficulty Rating:

5/10 - Perfect for a home cook looking to impress without the stress.

Classification:

Main Dish

This recipe is not just a meal; it's an experience—a homage to flavors that bring people together and create lasting memories. Enjoy the adventure of cooking and savor every bite!

Read more about Appetizers

Read more about Main Dishes

Read more about Desserts

Stuffed zucchini with rice and mushroom | Made by Meaghan Moineau

Stuffed zucchini with rice and mushroom | Made by Meaghan Moineau

Title: Reliving Family Moments with Stuffed Zucchini Delight
Description: Discover the heartwarming story behind our Stuffed Zucchini with Rice and Mushroom recipe. This flavorful main dish combines fresh ingredients and cherished memories, offering a delightful culinary experience that resonates with every bite.

---


In the hustle and bustle of modern life, there’s nothing quite like a dish that transports you back to simpler times. Our Stuffed Zucchini with Rice and Mushroom is more than a recipe; it's a gateway to cherished family memories and the warmth of shared meals. This main dish, with a difficulty rating of 6 out of 10, beautifully marries the earthy flavors of mushrooms and fresh zucchini with the comforting notes of cheese and rice.


A Taste of Nostalgia


Growing up, my grandmother’s kitchen was the heart of our family. It was a place where stories were shared, and laughter echoed over the simmering pots. Every Sunday, the air would fill with the irresistible aroma of her signature stuffed zucchini. As a child, I would eagerly watch her deftly prepare the ingredients, mesmerized by her skill and love for cooking.


The ritual began with her selecting the freshest zucchinis from her garden, a task she deemed sacred. Her hands, though aged, moved with the grace of experience as she hollowed out the zucchinis, creating the perfect vessels for the savory filling. This was no ordinary dish; it was a celebration of flavors, a symphony of textures brought together by the rich tomato sauce that lovingly embraced each stuffed zucchini.


The Ingredients of a Memory


- Fresh Zucchinis: The canvas of our dish, bringing a fresh, garden-fresh taste.
- Rice: The heart of the stuffing, providing a comforting, starchy bite.
- Mushrooms: Offering an earthy depth that complements the zucchinis beautifully.
- Cheese: Melting into the filling, adding a creamy richness.
- Flour & Oil: Essential for binding and creating a light, crispy texture.
- Garlic & Red Onion: Aromatic essentials that infuse the dish with flavor.
- Bell Pepper: A colorful addition that adds a sweet, vibrant crunch.
- Salt & Tomato Sauce: The finishing touches, enhancing and enveloping each stuffed zucchini in a tangy embrace.

Bringing the Dish to Life


Although the full instructions can be found at myzucchinirecipes.com, the essence of this dish lies in its simplicity and the love with which it's made. As you prepare this recipe, let yourself be guided by the aromas and flavors, creating not just a meal, but a memory.


The Legacy Continues


Today, when I prepare Stuffed Zucchini with Rice and Mushroom, I feel my grandmother's presence in every step. It’s not just the taste that brings her back; it’s the act of creating, of sharing, and of remembering where we come from. This dish is more than a family favorite; it’s a legacy passed down through generations, a testament to the enduring power of food to connect us with those we love.


So, gather your ingredients, and embark on this culinary journey. As you savor each bite of this delicious main dish, may you feel the warmth of family and the echoes of laughter from kitchens past.

Read more about Appetizers

Read more about Main Dishes

Read more about Desserts

Chocolatey Overnight Oats with Strawberries | Made by Meaghan Moineau

Chocolatey Overnight Oats with Strawberries | Made by Meaghan Moineau

A Sweet Start to Your Day: Chocolatey Overnight Oats with Strawberries


Description: Discover the perfect blend of indulgence and nutrition with our Chocolatey Overnight Oats with Strawberries. This delightful recipe combines the rich flavors of cocoa and the natural sweetness of strawberries, creating a breakfast that feels like a treat yet fuels your day. Easy to prepare and full of wholesome ingredients, this dish will be a favorite for the entire family.

---


A Nostalgic Twist on Breakfast: Family Memories in a Jar


Growing up, breakfast was always a special time in our household. It was the one moment when the kitchen buzzed with the sound of clinking spoons and laughter, and the aroma of freshly prepared meals wafted through the air. Among the many beloved dishes, my grandmother's overnight oats held a special place in our hearts.


Every Sunday evening, my grandmother would gather my siblings and me around the kitchen table. We’d watch in awe as she expertly mixed the ingredients, her hands moving with the grace and precision that only years of practice could perfect. She would regale us with stories of her childhood, tales of summer mornings spent picking strawberries at the local farm. Those strawberries, juicy and red, were the crowning glory of our breakfast oats.


My grandmother always insisted on using cocoa powder, explaining that the chocolatey richness reminded her of the sweet treats her mother used to make on special occasions. As we layered the oats and strawberries into jars, she would remind us that food was more than just sustenance; it was a way to cherish memories and create new ones.


Fast forward to today, and I find myself recreating this cherished recipe for my own family. Each bite transports me back to those warm kitchen gatherings, filled with love, laughter, and the comforting taste of chocolate and strawberries. This dish is not just a breakfast—it's a tradition passed down through generations, a testament to the enduring bond of family.


---


Chocolatey Overnight Oats with Strawberries Recipe


Ingredients:

- 1 cup oatmeal

- 1 ½ cups almond milk


- 2 tablespoons chia seeds


- 2 tablespoons cocoa powder


- ¼ cup non-fat Greek yogurt


- 1-2 tablespoons agave nectar (to taste)


- Fresh strawberries, sliced


Instructions:

1. In a mixing bowl, combine oatmeal, almond milk, chia seeds, cocoa powder, non-fat Greek yogurt, and agave nectar. Stir until well mixed.

2. In a jar or airtight container, spoon a layer of the oatmeal mixture.


3. Add a layer of sliced strawberries on top.


4. Repeat with another layer of oatmeal and strawberries.


5. Finish with a final layer of the oatmeal mixture.


6. Seal the container and refrigerate overnight.


7. In the morning, enjoy your delicious, ready-to-eat breakfast!


Difficulty Rating: 2/10


Classification: Dessert


---


This delightful recipe is not only easy to make but also a beautiful way to start your day with a touch of nostalgia. Whether you are reliving cherished family memories or creating new ones, these Chocolatey Overnight Oats with Strawberries are sure to become a beloved staple in your home. Enjoy the perfect blend of flavors and the heartwarming reminder that the best meals are those shared with loved ones.

Read more about Appetizers

Read more about Main Dishes

Read more about Desserts

Classic French Onion Soup | Made by Meaghan Moineau

Classic French Onion Soup | Made by Meaghan Moineau

Title: Savoring Tradition: The Art of Crafting Classic French Onion Soup
Description: Uncover the rich, aromatic layers of Classic French Onion Soup, a comforting embrace of caramelized onions and melted gruyere cheese. Join us as we delve into a nostalgic family tradition, sharing heartwarming memories and a step-by-step guide to mastering this quintessential French delicacy. Perfect as a comforting appetizer, this dish is sure to bring a touch of elegance and warmth to your table.

---


The Aroma of Memories: Crafting Classic French Onion Soup

There’s something uniquely comforting about the rich, savory aroma of Classic French Onion Soup simmering on the stove. For many, it conjures memories of cozy family gatherings and heartwarming conversations. In our family, this dish is more than just a meal; it’s a cherished tradition passed down through generations, each spoonful steeped in love and nostalgia.


I vividly remember my grandmother’s kitchen, the air thick with the scent of caramelized onions and the subtle tang of sherry. She would spend hours perfecting her French Onion Soup, her dedication evident in every meticulous stir of the pot. The kitchen, bathed in a golden glow, became a sanctuary where stories were shared, laughter echoed, and bonds were strengthened.


Ingredients:

- Salted butter


- 4 large yellow onions, thinly sliced


- 2 tablespoons flour


- 1/2 cup sherry


- 6 cups beef broth


- 4 sprigs fresh thyme


- 2 sprigs fresh parsley


- 1 bay leaf


- Salt and pepper to taste


- 1 French crusty baguette, sliced


- 1 cup shredded gruyere cheese


Instructions:
1. Begin with the Onions: Preheat your oven to 400°F (200°C). In a large Dutch oven, melt the butter over medium heat. Add the sliced onions and sprinkle with flour. Reduce the heat to medium-low, allowing the onions to cook slowly for about 45 minutes. Stir occasionally, ensuring they become tender and golden in color. If they begin to cook too quickly, lower the heat further.
2. De-glaze and Simmer: Once the onions reach the desired caramelization, de-glaze the pan with sherry, scraping up any flavorful bits from the bottom. Pour in the beef broth and bring the mixture to a boil over medium heat.
3. Infuse with Flavor: Add the fresh thyme, parsley, bay leaf, salt, and pepper, adjusting to taste. Reduce the heat and let the soup simmer gently for 15 minutes, allowing the flavors to meld beautifully.
4. Prepare the Bread: While the soup simmers, prepare the bread. Spray a cookie sheet with cooking spray. Butter the baguette slices and bake them in the preheated oven for 5-10 minutes until they are very dry and slightly toasted. Set aside.
5. Assemble and Serve: Remove the herb stalks and bay leaf from the soup. Ladle portions into four oven-safe ramekins. Top each with a slice of crusty French bread and a generous sprinkle of shredded gruyere cheese. Place the ramekins on a cookie sheet and bake uncovered at 400°F for 5-10 minutes until the cheese is bubbling. For a perfect finish, broil for one minute to achieve a beautifully browned top. Serve warm and savor the memories infused in each bite.
A Family Tradition

Each time I prepare this dish, I’m transported back to those cherished moments in my grandmother’s kitchen. The soup, with its rich flavors and comforting warmth, serves as a culinary bridge between past and present, connecting our family across generations. It’s more than just a meal; it’s a celebration of tradition, love, and the simple joys of sharing good food with loved ones.


Difficulty Rating: 6/10
Classification: Appetizer

Embark on this flavorful journey and experience the joy of crafting Classic French Onion Soup, a dish that promises to warm your heart and soul, just as it has ours for many years.

Read more about Appetizers

Read more about Main Dishes

Read more about Desserts

Banana Pudding Cake | Made by Meaghan Moineau

Banana Pudding Cake | Made by Meaghan Moineau

Banana Pudding Cake: A Nostalgic Dessert Delight


Description: Dive into the creamy and rich layers of Banana Pudding Cake, a dessert that perfectly marries the flavors of ripe bananas, velvety custard, and luscious whipped cream. This recipe is a delightful journey that not only satisfies your sweet tooth but also brings back cherished family memories.

---


A Slice of Nostalgia: The Banana Pudding Cake Story


There's something uniquely comforting about desserts that carry a sense of nostalgia. For me, the Banana Pudding Cake isn't just a treat; it's a time machine that takes me back to my grandmother's cozy kitchen. I remember the warm summer afternoons spent there, the windows open, letting in a gentle breeze mixed with the sweet aroma of bananas and vanilla.


Every family gathering was incomplete without this cake. My grandmother had a magical way of making everyone feel welcome, and her Banana Pudding Cake was the star of every reunion. As a child, I would watch her with wide eyes as she carefully layered the cake, custard, and bananas with the precision of an artist. She'd always let me sprinkle the crumbled vanilla wafers—a task I took on with great pride.


One memorable summer, my little brother decided to be my grandmother's "official helper." His enthusiasm was infectious, and he took his role very seriously, even if it meant sneaking a few banana slices into his mouth when he thought no one was looking. We laughed, chatted, and enjoyed the simple joy of creating something delicious together.


The cake wasn't just a dessert; it was a symbol of love, laughter, and family unity. Even now, whenever I make this Banana Pudding Cake, I feel a connection to those joyful days, making it a perfect recipe to share at gatherings or to simply enjoy a taste of the past.


---


Ingredients


- 1 ½ teaspoons baking powder


- 3 ripe bananas, sliced


- 2 tablespoons cocoa powder


- 4 egg yolks


- 6 eggs (4 separated, 2 whole)


- 1 cup all-purpose flour


- 1 cup heavy whipping cream


- 2 cups milk


- 1 ½ cups powdered sugar


- ¼ teaspoon salt


- 1 package vanilla pudding mix


- 1 ½ cups sugar


- 2 teaspoons vanilla extract


- 1 box vanilla wafers, crumbled


- Whipped cream (for topping)


---


Instructions


1. Prepare the Cake Batter

- In a large bowl, beat egg yolks with sugar and set aside.


- In the bowl of an electric mixer, whip egg whites until stiff. Add baking powder, processed wafers, and cocoa to the egg yolk mixture.


- Drop about 1/4 of the egg whites into the larger bowl and fold lightly. Fold in the remaining whites carefully.


- Line a jellyroll sheet pan with parchment paper covering all sides and spray with non-stick floured baking spray. Spread cake batter onto paper, covering the entire pan.


- Bake in a preheated oven at 350°F (175°C) for 15-20 minutes. Let cake cool completely on the sheet (at least 30 minutes to an hour).


2. Make the Custard

- As the cake cools, mix sugar, flour, and salt in the top of a double boiler. Blend in egg yolks and milk.


- Cook, uncovered, over boiling water, stirring constantly for 10 to 12 minutes or until thickened. Remove from heat and stir in vanilla.


3. Assemble the Cake

- Once the cake is cooled, carefully lift the parchment paper, remove from the pan, and place on a flat surface. Cut into three even pieces starting from the short end.


- Place the first layer of cake on a serving platter. Spread half of the custard over the top, then cover with one third of the banana slices. Sprinkle with one third of the crumbled wafers.


- Top with the next piece of cake and repeat, reserving a few bananas and crumbled cookies.


- Spread the final amount of custard onto the top layer of cake, and refrigerate the whole cake for at least 2 hours or until ready to serve.


4. Make the Whipped Cream Topping

- Just before serving, make the whipped cream topping. Combine all ingredients together in a large mixing bowl until cream thickens and becomes stiff.


- Spread whipped cream on the cake and top with remaining banana and wafers.


*Pro Tip:* To keep the bananas fresh and prevent browning, sprinkle them with a bit of lemon juice and store in an airtight container until ready to use.


---


Difficulty: 6/10
Category: Dessert

Whether you're looking to create new memories or relive old ones, this Banana Pudding Cake is sure to become a beloved addition to your dessert repertoire. Enjoy every slice with the warmth of family and the sweetness of nostalgia.

Read more about Appetizers

Read more about Main Dishes

Read more about Desserts

Cranberry Margarita | Made by Meaghan Moineau

Cranberry Margarita | Made by Meaghan Moineau

Title: Sip Into the Past: The Enchanting Cranberry Margarita
Description: Discover the tantalizing flavors of the Cranberry Margarita, a cocktail that marries the tartness of fresh cranberries with the smooth warmth of tequila. This delightful drink is perfect for holiday gatherings or cozy evenings by the fire. Immerse yourself in a nostalgic family story and learn how to recreate this magical beverage that’s sure to impress your guests.

---


As the leaves begin to carpet the ground in hues of orange and gold, and the crisp autumn air fills our lungs, my mind always drifts back to cherished family gatherings around the holidays. One particular memory stands out from the rest: the Cranberry Margarita, a cocktail that became an unexpected star at a family Thanksgiving many years ago.


The year was 1995, and my grandmother, known for her culinary prowess and love for experimenting with flavors, decided to surprise us with a unique cocktail creation. The Cranberry Margarita was born out of her desire to blend the traditional warmth of the holidays with a refreshing twist. As the family trickled in from the cold, Grandma stood in the kitchen, her apron dusted with sugar, and a glint of excitement in her eye.


The preparation was a ritual in itself. Fresh cranberries bubbled in a saucepan, their tartness tempered by the citrusy sweetness of orange juice. The aroma filled the kitchen, a fragrant reminder of the season. With her trusty blender, Grandma transformed the cooked cranberries into a vibrant puree, the heart of her masterpiece.


The Cranberry Margarita quickly became a family favorite, and as I take my first sip each year, I'm transported back to that cozy kitchen, surrounded by laughter and the comforting chaos of family. This cocktail isn't just a drink; it's a vessel of nostalgia, a reminder of the warmth and love that defined our family gatherings.


Cranberry Margarita Recipe
Ingredients:

- Fresh cranberries


- Grand Marnier


- Orange juice


- Light Karo syrup


- Sugar


- Tequila


Instructions:

1. In a saucepan over medium heat, melt a cup of sugar in the orange juice. Add the cranberries, reserving some for the skewers, and cook over low heat for 10 minutes. Set aside and let it cool.


2. Blend the cooked cranberries in a blender, then strain to make the puree.


3. In a shaker, add crushed ice, 1 1/2 ounces of tequila, 1/2 ounce of Grand Marnier, and 2 ounces of cranberry puree. Shake to mix.


4. Skewer several cranberries onto 10 skewer sticks, leaving enough skewer exposed on one end.


5. Lightly brush each cranberry skewer with Karo syrup and then sprinkle extra sugar over them.


6. Place the cranberry swizzle sticks on wax paper and put them in the freezer to set.


7. Pour the drink into a sugar-rimmed martini glass and add a cranberry swizzle stick for garnish.


(Note: Nutritional information does not include sugar on the rim.)


Difficulty Rating: 4/10
Classification: Appetizer

This Cranberry Margarita is more than just a cocktail; it's a celebration of tradition and innovation. It's the perfect way to kick off a festive gathering, offering a burst of flavor that echoes the joy and warmth of family reunions. So, this holiday season, raise a glass to the past, and create new memories with this delightful concoction. Cheers!

Read more about Appetizers

Read more about Main Dishes

Read more about Desserts

The Secret to Easy Skillet Filet Mignon Steak Tacos | Made by Meaghan Moineau

The Secret to Easy Skillet Filet Mignon Steak Tacos | Made by Meaghan Moineau

Title: Unveiling the Secret to Easy Skillet Filet Mignon Steak Tacos: A Culinary Masterpiece
Description: Dive into the exquisite world of gourmet tacos with our Easy Skillet Filet Mignon Steak Tacos recipe. Perfectly seasoned and cooked filet mignon pairs beautifully with creamy guacamole, tangy sour cream, and sharp cheddar cheese, all nestled in warm white corn tortillas. This dish is not just a meal; it's an experience that will transport you back to cherished family gatherings. Easy to prepare yet sophisticated in flavor, these tacos are the perfect main dish for any occasion.

---


Who doesn't love tacos? They are versatile, flavorful, and bring people together in a way that few other foods can. But when you elevate the humble taco with luxury ingredients like filet mignon, you create something truly special. This recipe for Easy Skillet Filet Mignon Steak Tacos not only satisfies your cravings but also evokes heartwarming memories of family gatherings.


A Nostalgic Trip Down Memory Lane

Growing up, Sunday dinners were a sacred ritual in my family. My grandmother would spend the entire afternoon preparing a feast that would bring us all together. One of her most beloved dishes was her special steak tacos. I can still remember the aroma of sizzling steak filling the kitchen, mingling with the warmth of laughter and stories shared around the dinner table.


My grandmother had a knack for turning a simple meal into a grand celebration. Her tacos, much like these Easy Skillet Filet Mignon Steak Tacos, were more than just food; they were a symbol of love and togetherness. Every bite was a reminder of those cherished moments spent with family, making memories that would last a lifetime.


Ingredients:

- 2 filet mignon steaks


- Olive oil extra virgin


- Cracked black pepper


- White corn tortillas


- Guacamole


- Sour cream


- Shredded cheddar cheese


Instructions:
1. Prepare the Skillet: Heat a skillet over medium to low heat. This gentle heat ensures the steaks cook evenly without losing their tenderness.
2. Season the Steaks: Rub the filet mignon steaks with extra virgin olive oil and season generously with cracked black pepper. This simple seasoning allows the natural flavors of the steak to shine.
3. Cook the Steaks: Place the steaks in the heated skillet. For medium doneness, cook each side for about 7 minutes, adjusting as necessary for your preferred level of doneness. The key is to cook them slowly to maintain their juicy tenderness.
4. Slice the Steaks: Once cooked to perfection, remove the steaks from the heat and let them rest for a few minutes. Then, slice them thinly and lengthwise for easy taco assembly.
5. Warm the Tortillas: In a clean skillet over medium heat, warm the white corn tortillas until they're soft and pliable.
6. Assemble the Tacos: Generously top each tortilla with slices of steak. Add dollops of guacamole and sour cream, then sprinkle with shredded cheddar cheese for that perfect cheesy finish.
A Delicious Main Dish

These Easy Skillet Filet Mignon Steak Tacos are more than just a meal; they're an invitation to gather around the table, share stories, and create new memories. Rated at a difficulty level of 4 out of 10, this dish is accessible to both seasoned cooks and kitchen novices alike. Perfect as a main dish, it's sure to impress your family and friends with its gourmet appeal and nostalgic charm.


As you savor each bite, may you be reminded of the simple joys of life and the power of food to bring us together. Enjoy!

Read more about Appetizers

Read more about Main Dishes

Read more about Desserts

Cajun Potato Wedges | Made by Meaghan Moineau

Cajun Potato Wedges | Made by Meaghan Moineau

Title: Crispy Cajun Potato Wedges: A Hearty Side with a Dash of Nostalgia
Description: Dive into the world of bold flavors with our Cajun Potato Wedges recipe. Perfectly seasoned and oven-baked to crispy perfection, this dish is a delightful journey down memory lane. Whether served as a tempting appetizer or a satisfying side dish, these wedges promise to be a hit at any gathering.

---


When it comes to comfort food, there's something undeniably satisfying about the humble potato. Its versatility and heartiness have made it a staple in kitchens around the globe. Among the myriad ways to prepare potatoes, Cajun Potato Wedges stand out with their robust flavors and crispy texture. But beyond the spices and the crunch, this dish holds a special place in my heart, evoking fond memories of Sunday afternoons at my grandmother's house.


A Walk Down Memory Lane

Every Sunday, our family would gather at Grandma's cozy home, the air thick with the aroma of her delicious cooking. Among the many dishes that graced her table, her Cajun Potato Wedges were always my favorite. As a child, I would watch in awe as she skillfully sliced the russet potatoes into perfect wedges, her hands moving with the practiced ease of someone who had done this a thousand times before.


While the potatoes baked, she'd regale us with stories of her youth, tales rich with laughter and life lessons. The kitchen, warm and inviting, was the heart of our family, where we shared not just meals but also moments of joy and connection. The spicy aroma of cayenne pepper, garlic powder, and paprika would fill the room, mingling with the sound of our chatter and laughter.


The Recipe: Cajun Potato Wedges

*Ingredients:*


- 4 russet potatoes


- 2 tablespoons olive oil


- 1 teaspoon cayenne pepper


- 1 teaspoon garlic powder


- 1 teaspoon onion powder


- 1 teaspoon paprika


- 1 teaspoon Italian seasoning


- 1 teaspoon salt


- 1/2 teaspoon pepper


*Instructions:*


1. Preheat your oven to 425 degrees Fahrenheit.


2. Slice the potatoes into ½-inch thick wedges, ensuring each piece is about half the length of the potato.


3. In a small bowl, create your spice mixture by combining cayenne pepper, garlic powder, onion powder, paprika, Italian seasoning, salt, and pepper.


4. Spray a cookie sheet with olive oil cooking spray. Arrange the potato wedges on the sheet and toss them with olive oil to ensure an even coating.


5. Sprinkle the spice mixture generously over the potatoes and toss them again to distribute the seasoning evenly.


6. Bake the wedges for 25 minutes, then flip them over and bake for an additional 5 minutes to achieve that perfect crispy finish.


Difficulty: 3/10
Category: Appetizer

These Cajun Potato Wedges are more than just a side dish; they are a testament to the power of food to bring people together. Each bite carries the warmth of family gatherings and the joy of shared stories. Whether you're preparing them for a casual get-together or a special occasion, these wedges are sure to be a crowd-pleaser, evoking smiles and perhaps even a sense of nostalgia.


So, next time you're in the mood for something flavorful and comforting, give this recipe a try. Who knows, it might just become a cherished tradition in your family too.

Read more about Appetizers

Read more about Main Dishes

Read more about Desserts

Avocado, Corn, Tomato and Tortilla Soup | Made by Meaghan Moineau

Avocado, Corn, Tomato and Tortilla Soup | Made by Meaghan Moineau

Title: A Taste of Togetherness: Avocado, Corn, Tomato, and Tortilla Soup
Description: Dive into the comforting flavors of our Avocado, Corn, Tomato, and Tortilla Soup, a simple yet delightful main dish that brings warmth and nostalgia to your table. With fresh ingredients and a heartwarming backstory, this recipe is perfect for family gatherings or a quiet evening at home.

---


When the days grow shorter and the air crisper, my family and I find ourselves naturally gravitating towards the kitchen, seeking out dishes that warm the soul and ignite cherished memories. One such recipe that stands out in my mind is the Avocado, Corn, Tomato, and Tortilla Soup—a dish that has become a staple in our family gatherings.


Ingredients:

- 4 cups chicken stock


- Salt and black pepper, to taste


- 1 cup frozen corn kernels


- 1 red onion, thinly sliced


- 1 cup cooked shredded chicken


- Juice of 1 lime


- 2 avocados, diced


- 3 roma tomatoes, diced


- 1/4 cup whole cilantro leaves


- Tortilla chips, for garnish


Instructions:

1. In a small saucepan, bring the chicken stock to a simmer over medium heat. Season with salt and pepper to taste.


2. Stir in the corn and onion, cooking for about 1 minute to soften.


3. Add the shredded chicken to the saucepan and bring the mixture back to a boil.


4. Stir in the lime juice, then remove the saucepan from the heat.


5. Divide the diced avocado, roma tomatoes, and cilantro leaves between two soup bowls.


6. Ladle the hot stock over the ingredients in the bowls, ensuring the solids are equally divided.


7. Garnish each bowl with a generous handful of tortilla chips and enjoy.


A Nostalgic Family Memory:

Growing up, the kitchen was always the heart of our home. I vividly recall the first time my grandmother introduced me to this colorful and fragrant soup. It was a chilly autumn evening, and we were gathered in her cozy kitchen, the windows fogged with warmth and the aroma of simmering stock filling the air.


As she guided me through the recipe, step by step, my grandmother shared stories of her childhood in Mexico, where fresh ingredients were always at the forefront of her family's meals. The vibrant colors of the avocados, tomatoes, and cilantro reminded her of the lively markets she frequented with her mother. With each spoonful of soup, I felt a connection to my heritage, a sense of belonging that transcended generations.


This dish has become more than just a meal; it's a cherished tradition, a reminder of the love and stories passed down through the years. Every time I prepare this soup, I am transported back to that evening, surrounded by family, laughter, and the comforting embrace of a shared meal.


Difficulty Rating: 4/10
Classification: Main Dish

This Avocado, Corn, Tomato, and Tortilla Soup is not only a simple and quick recipe but also a vessel for family memories and traditions. Whether you're hosting a gathering or enjoying a quiet night in, this soup offers a taste of togetherness that warms both the body and soul.

Read more about Appetizers

Read more about Main Dishes

Read more about Desserts

Peanut Butter Banana French Toast | Made by Meaghan Moineau

Peanut Butter Banana French Toast | Made by Meaghan Moineau

Title: Nostalgic Mornings: The Irresistible Charm of Peanut Butter Banana French Toast
Description:

Discover the magic of Peanut Butter Banana French Toast, a delightful breakfast dish that's sure to evoke cherished family memories. This easy-to-follow recipe combines the creamy richness of peanut butter and bananas with the warm, aromatic spices of nutmeg and cinnamon, creating a symphony of flavors that will transport you back to simpler times. Perfect for a cozy morning or a special brunch, this dish is both a treat for the taste buds and a trip down memory lane.


---


Peanut Butter Banana French Toast: A Journey Back Home


There's something inherently comforting about the aroma of French toast sizzling on a skillet. For me, it's a scent that instantly transports me back to Saturday mornings at my grandmother's house. Her kitchen was a symphony of delightful aromas, the air filled with the warm, sweet smell of cinnamon and the subtle hint of nutmeg. These mornings were the highlight of my childhood weekends, and the star of the show was always her Peanut Butter Banana French Toast.


Ingredients:

- Bread (preferably thick slices like brioche or challah)

- Peanut butter


- 1/2 banana, sliced


- 1 whole egg


- A splash of orange juice


- A pinch of ground nutmeg


- A pinch of ground cinnamon


- A dash of cayenne pepper


- Maple syrup (for serving)


- Confectioners' sugar (optional, for garnish)


- Additional banana slices (for garnish)


Instructions:

1. Prepare the Sandwich: Start by spreading a generous layer of peanut butter on one slice of bread. Arrange banana slices over the peanut butter, then top with another slice of bread to create a sandwich.
2. Create the Egg Mixture: In a shallow bowl, whisk together the egg, a splash of orange juice, ground nutmeg, ground cinnamon, and a dash of cayenne pepper. This mixture will add a delightful depth of flavor to your French toast.
3. Dip the Sandwich: Heat a skillet over medium heat and add a tablespoon of butter. Dip the prepared sandwich into the egg mixture, ensuring both sides are well-coated.
4. Cook to Perfection: Place the sandwich in the hot skillet. Cook for about one minute on each side, or until the bread is golden brown and the peanut butter begins to melt.
5. Serve and Enjoy: Transfer the French toast to a plate. Ladle with maple syrup, sprinkle with confectioners' sugar, and garnish with additional banana slices for an extra touch of sweetness.

A Trip Down Memory Lane


Every bite of this Peanut Butter Banana French Toast brings back vivid memories of laughter-filled mornings with my family. My grandmother, the orchestrator of these culinary symphonies, would hum softly as she cooked, the very embodiment of love and warmth. Her kitchen was more than just a place to prepare meals; it was a sanctuary where stories were shared, and bonds were strengthened. This dish, with its creamy peanut butter and sweet banana, remains a beloved heirloom of those mornings, a recipe passed down through the generations, each bite a comforting reminder of home.


Difficulty: 3/10


This recipe is delightfully simple and perfect for cooks of all levels, making it an excellent choice for a relaxed weekend breakfast or a nostalgic brunch gathering.


Classification: Main Dish


While traditionally considered a breakfast item, this Peanut Butter Banana French Toast is hearty enough to be enjoyed as a main dish, offering a perfect balance of sweet and savory flavors that satisfy any time of day.


---


Indulge in this heartwarming dish, and let it become a cherished part of your family's weekend tradition, just as it was in mine.

Read more about Appetizers

Read more about Main Dishes

Read more about Desserts

The Secret to Easy Skillet Filet Mignon Steak Tacos | Made by Meaghan Moineau

The Secret to Easy Skillet Filet Mignon Steak Tacos | Made by Meaghan Moineau

Title: Unlocking the Flavor: Easy Skillet Filet Mignon Steak Tacos
Description: Dive into the culinary delight of Skillet Filet Mignon Steak Tacos, a dish that combines the gourmet essence of filet mignon with the casual comfort of tacos. This recipe offers a flavor-packed experience that is simple to prepare, making it perfect for any occasion. With easy-to-follow instructions, this dish will become a favorite in your household. Relish the nostalgia of family gatherings filled with laughter and the aroma of sizzling steak.

---


The Secret to Easy Skillet Filet Mignon Steak Tacos


In the heart of every family kitchen, there are recipes that evoke cherished memories. For me, this recipe for Skillet Filet Mignon Steak Tacos transports me back to summer evenings spent with my family. The sizzle of the steak in the skillet would fill our home with an irresistible aroma, setting the stage for an evening of laughter and storytelling around the dinner table.


Ingredients:

- 2 filet mignon steaks

- Olive oil extra virgin, for rubbing


- Cracked black pepper, to taste


- Sour cream


- Guacamole


- Shredded cheddar cheese


- White corn tortillas


Instructions:

1. Begin by heating a skillet on medium to low heat. While the skillet warms up, take the filet mignon steaks and rub them generously with extra virgin olive oil. Season with cracked black pepper to your liking.

2. Place the steaks in the skillet and let them cook slowly, ensuring they reach your desired level of doneness. For a perfectly medium steak, cook for about 7 minutes on each side. Remember, patience is key to achieving that tender, juicy texture.


3. Once the filets are cooked to perfection, remove them from the heat and let them rest for a few minutes. Then, slice them thinly and lengthwise to prepare for taco assembly.


4. In a clean skillet over medium heat, warm up the white corn tortillas. This step is crucial for bringing out their natural flavor and making them pliable for folding.


5. Now comes the fun part—assembling your tacos! Top each warm tortilla with slices of the tender filet mignon, a dollop of creamy guacamole, a spoonful of sour cream, and a sprinkle of shredded cheddar cheese. The combination of these ingredients creates a symphony of flavors and textures.


A Nostalgic Family Memory:

I vividly recall the first time we made these tacos as a family. It was a warm summer evening, and my dad had just returned from a fishing trip with the biggest smile on his face. Although no fish made it to the table that night, he insisted on cooking these steak tacos. We gathered around the kitchen island, chatting and laughing as we each took turns slicing the steaks and warming the tortillas. It was a simple meal, but it brought us closer, reminding us that the best moments in life are often shared over a delicious meal.

Difficulty Rating: 3/10

This recipe is straightforward and perfect for cooks of all skill levels, making it an ideal choice for a relaxed family dinner or a small gathering with friends.

Classification: Main Dish

These Skillet Filet Mignon Steak Tacos serve as an impressive main dish, combining elegance and ease in every bite.

---


Whether you're creating new memories or reminiscing about past family gatherings, these Skillet Filet Mignon Steak Tacos offer a delicious journey of flavors that will surely become a staple in your culinary repertoire. Enjoy the simplicity and savor the taste of this delightful dish!

Read more about Appetizers

Read more about Main Dishes

Read more about Desserts

HomeMade Hashbrowns with Spinach and Carrots | Made by Meaghan Moineau

HomeMade Hashbrowns with Spinach and Carrots | Made by Meaghan Moineau

Title: A Nostalgic Twist on a Classic: Homemade Hashbrowns with Spinach and Carrots


Description:

Dive into the comforting embrace of homemade hashbrowns, enhanced with the vibrant flavors of spinach and carrots. Perfect as an appetizer or a hearty main dish, this recipe brings back cherished family memories with every bite.

---


There’s something profoundly comforting about the sizzle of hashbrowns hitting a hot pan. The aroma alone evokes memories of Sunday brunches spent with family, where laughter was as abundant as the delicious food on the table. This recipe for Homemade Hashbrowns with Spinach and Carrots is not just a delightful twist on a classic; it's a journey back to those cherished moments.


Ingredients:

- 2 large potatoes, grated

- 1 cup fresh spinach leaves, chopped


- 1 medium onion, finely chopped


- 1 carrot, grated


- 1/2 teaspoon red chilli powder


- 2 tablespoons cornflour


- Salt, to taste


- Oil, for shallow frying


Instructions:

1. In a large bowl, combine the grated potatoes, chopped spinach, finely chopped onion, and grated carrot. Add 1/2 teaspoon of salt and mix well to ensure all the ingredients are well incorporated.

2. Squeeze the veggie mixture gently to remove all excess moisture. This step is crucial for achieving crispy hashbrowns.


3. Add red chilli powder and cornflour to the mixture. Adjust the salt by tasting, ensuring a perfect balance of flavors.


4. Form the mixture into small patties, pressing them firmly to hold their shape.


5. Heat oil in a pan over medium-high heat for shallow frying. Carefully place the patties into the hot pan, allowing them to brown for a few minutes on each side.


6. Once both sides are browned, reduce the heat to medium. Continue cooking until the hashbrowns are cooked through and crispy.


7. Serve hot and enjoy!


---


A Family Memory:


As a child, Sunday mornings were my favorite. The kitchen would come alive with the sounds and smells of breakfast being prepared. My grandmother was the mastermind behind these culinary experiences, and her hashbrowns were legendary. She would always add a little something extra to her recipes—whether it was a handful of fresh spinach from her garden or a dash of spice—which made each bite memorable.


One particular Sunday, I remember standing on a stool beside her, watching as she expertly mixed the ingredients and formed perfect patties. She handed me a small piece of dough, encouraging me to make my own. My creation was a lopsided attempt, but she placed it in the pan with the same care as the others.


Years later, I find myself recreating those mornings in my own kitchen. Each time I make these hashbrowns, I'm reminded of her gentle guidance and the warmth of family gatherings. It’s a simple dish, yet it carries the weight of tradition and the joy of shared meals.


Difficulty Rating: 4/10


This recipe is straightforward and perfect for both novice and seasoned cooks who appreciate the simplicity of a well-made dish.


Classification: Appetizer/Main Dish


Whether served as a starter or the main event, these hashbrowns with spinach and carrots are sure to become a beloved addition to your culinary repertoire. Enjoy them as a standalone dish or pair them with your favorite breakfast accompaniments.

Read more about Appetizers

Read more about Main Dishes

Read more about Desserts

Pork Carnitas Tacos | Made by Meaghan Moineau

Pork Carnitas Tacos | Made by Meaghan Moineau

Unforgettable Pork Carnitas Tacos: A Taste of Tradition and Togetherness


A Culinary Journey Down Memory Lane


There's something truly magical about the way food can evoke cherished memories and transport us back to special moments spent with loved ones. In our family, Pork Carnitas Tacos have always held a special place in our hearts. Not only is this dish a tantalizing blend of flavors and textures, but it also serves as a delicious reminder of countless family gatherings, where the kitchen buzzed with laughter and the air was filled with the irresistible aroma of simmering pork and fresh cilantro.


The Recipe: Pork Carnitas Tacos


Difficulty: 6/10
Category: Main Dish

Ingredients:

- 2 cups water

- 3 lbs lean pork butt


- 4 cloves garlic, minced


- Sea salt and ground pepper to taste


- 2 tablespoons olive oil


- 1 cup orange juice


- 1 cup milk


- Corn tortillas


- Salsa fresca


- 2 ripe avocados, sliced


- Fresh cilantro, chopped


- 1 onion, finely chopped


- 2 limes, sliced into wedges


Instructions:

1. Prepare the Pork:

In a large Dutch oven, combine the pork, garlic, sea salt, ground pepper, and water. Bring the mixture to a boil, then reduce the heat, cover, and let it simmer over medium-low heat for 45 minutes to one hour. This slow cooking process ensures the meat becomes tender and infused with the aromatic flavors of garlic and spices.


2. Shred and Brown the Pork:

Once cooked, drain the pork well. Allow it to cool until it's manageable, then shred the meat by hand or with the tines of a fork, discarding any remaining fat. Return the shredded pork to the Dutch oven, heating the olive oil over medium heat. Add the orange juice and milk, cooking until the liquid evaporates and the pork is beautifully browned. Season with additional salt and pepper to taste.


3. Prepare the Toppings:

Chop the onion and cilantro, and slice the avocado and limes. Place each in small individual bowls for an inviting serving presentation.


4. Assemble the Tacos:

Heat the corn tortillas in a dry frying pan to keep them warm and pliable. For each taco, stack two tortillas and layer them with warm carnitas. Top with chopped cilantro, onion, avocado slices, and a squeeze of fresh lime juice for that perfect burst of citrusy brightness.


A Nostalgic Family Memory


Growing up, weekends at Grandma's house were synonymous with the sizzle of carnitas on the stove. I remember sitting on a stool by the kitchen counter, watching in awe as she effortlessly transformed simple ingredients into a feast that brought us all together. The highlight of those afternoons was gathering around the table, each of us eagerly assembling our tacos, swapping stories, and savoring the rich, savory flavors that felt like a warm embrace.


Even as I recreate this dish today, I can almost hear the echoes of playful banter and feel the familial warmth that made those gatherings so special. Pork Carnitas Tacos are more than just a meal; they are a bridge to the past, a reminder of the joy that comes from shared moments and the love that binds us together.


Conclusion


Pork Carnitas Tacos are a delightful main dish that combines the heartiness of seasoned pork with the freshness of vibrant toppings. With a difficulty rating of 6/10, it's a recipe that balances simplicity with a touch of culinary finesse. Whether you're creating new memories or reliving cherished ones, these tacos promise to bring a touch of tradition and a whole lot of flavor to your table. So gather your loved ones, roll up your sleeves, and let the delicious journey begin!

Read more about Appetizers

Read more about Main Dishes

Read more about Desserts

Moroccan Chicken Pitas | Made by Meaghan Moineau

Moroccan Chicken Pitas | Made by Meaghan Moineau

Title: A Taste of Tradition: Moroccan Chicken Pitas
Description: Embark on a flavorful journey with our Moroccan Chicken Pitas, a recipe steeped in rich spices and cherished family memories. Discover how to create this enticing main dish that marries the vibrant flavors of Morocco with a personal touch of nostalgia.

---


A Culinary Adventure: Moroccan Chicken Pitas


When the aroma of paprika, coriander, and cinnamon fills the kitchen, it takes me back to sunny afternoons at my grandmother's house. Our family would gather around the backyard grill, eagerly awaiting the delicious spread that promised to transport us to the bustling souks of Marrakesh. Today, I'm thrilled to share with you our cherished family recipe for Moroccan Chicken Pitas—a dish that's as heartwarming as it is flavorful.


Ingredients:


- For the Chicken:

- Skinless boneless chicken breasts


- 1 teaspoon paprika


- 1 teaspoon coriander


- 1/2 teaspoon cinnamon


- 1 teaspoon cumin


- 1/4 teaspoon cayenne pepper


- 2 cloves garlic, minced


- 1 teaspoon ginger, grated


- Salt to taste


- 2 tablespoons olive oil


- Fresh Italian parsley, finely chopped


- For the Tabbouleh:

- 1 cup cooked quinoa


- 1 can diced petite tomatoes, drained


- 1 yellow onion, diced


- Juice of 1 lemon


- 1/2 cup diced Medjool dates


- 2 tablespoons olive oil


- Sea salt to taste


- For the Yogurt Sauce:

- 1 cup Greek yogurt


- 1/2 cucumber, diced


- Fresh mint, chopped


- Juice of 1 lemon


- Additional:

- Pita bread, halved and split open


Instructions:


1. Prepare the Chicken:

Combine paprika, coriander, cinnamon, cumin, cayenne pepper, garlic, ginger, and salt in a bowl. Mix well to create a fragrant spice blend. Place chicken breasts on a cutting board and pound to about 1/2 inch thick using a meat mallet. Generously rub the spice mixture over all sides of the chicken breasts. Cover and refrigerate for at least an hour to allow the flavors to meld.


2. Make the Tabbouleh:

In a large bowl, combine cooked quinoa, diced tomatoes, onion, lemon juice, Medjool dates, olive oil, and sea salt. Stir well to integrate all the ingredients. Adjust salt and oil to your liking. Cover and chill in the refrigerator while the chicken marinates.


3. Prepare the Yogurt Sauce:

In a separate bowl, combine Greek yogurt, diced cucumber, mint, and lemon juice. Stir to combine and refrigerate until ready to serve.


4. Grill the Chicken:

Preheat your grill to medium heat. Grill the marinated chicken breasts until fully cooked, about 16 minutes, ensuring some crispy edges form for added flavor. Once cooked, let them rest for a few minutes before slicing.


5. Assemble the Pitas:

Take the halved pita bread and fill each with slices of grilled chicken, a generous helping of tabbouleh, and a dollop of the refreshing yogurt sauce.


Nostalgic Family Story:


This dish always reminds me of family gatherings at my grandmother's home. She had a magical way of bringing everyone together with her cooking. I vividly remember my cousins and I playing in the garden while the adults chatted around the grill. The smell of the spices wafted through the air, creating an atmosphere of warmth and anticipation. My grandmother would always remind us that food is not just about nourishment—it's about connection and creating memories. These Moroccan Chicken Pitas are more than just a recipe; they are a piece of our family's history, a tradition we continue to savor and celebrate.


Recipe Difficulty: 6/10


Classification: Main Dish

---


Whether you're introducing your family to the vibrant flavors of Morocco or simply looking to add a new favorite to your meal rotation, these Moroccan Chicken Pitas promise an unforgettable dining experience. Enjoy the journey and create your own cherished memories with every bite.

Read more about Appetizers

Read more about Main Dishes

Read more about Desserts

Overnight Oatmeal | Made by Meaghan Moineau

Overnight Oatmeal | Made by Meaghan Moineau

Title: Waking Up to Warmth: The Joy of Overnight Oatmeal and Family Memories
Description: Discover the heartwarming simplicity of overnight oatmeal, a dish that cooks itself while you dream. This easy, nostalgic recipe combines dried cranberries, figs, and creamy half-and-half with hearty steel-cut oats to create a breakfast that feels like a warm hug. Perfect for busy mornings, this recipe will fill your home with comforting aromas and your heart with cherished memories.

---


Overnight Oatmeal: A Bowl of Memories and Morning Comfort

There’s something magical about waking up to the inviting aroma of a delicious breakfast ready to enjoy. Overnight oatmeal, with its rich blend of dried cranberries, figs, and creamy half-and-half, is more than just a meal—it's a memory. This recipe is simple enough for beginners and offers a delightful way to start your day. Rated at a mere 2 out of 10 in difficulty, this dish is classified as a Main Dish, making it an effortless yet satisfying breakfast option.


Ingredients:

- 1 cup dried cranberries


- 1 cup dried figs, chopped


- 2 cups half-and-half


- 1 cup steel-cut oats


- 4 cups water


Instructions:

1. In a crock-pot, combine all ingredients and set to low heat.


2. Cover and let cook for 8 to 9 hours.


3. Stir and remove to serving bowls.


This method works best if started before you go to bed. By morning, your oatmeal will be warm, creamy, and ready to serve, yielding four hearty servings.


A Nostalgic Family Memory

Growing up, breakfast was a cherished ritual in our household. I vividly remember the first time my grandmother introduced us to overnight oatmeal during one of our annual family reunions. Nestled in her cozy kitchen, she shared stories of how her own mother would prepare this simple yet nourishing meal. As she spoke, the crock-pot quietly worked its magic, filling the air with the warm, sweet scent of oats mingling with fruits.


Each morning of that reunion was a delightful surprise, waking up to the comforting smell of oatmeal that promised a day filled with laughter and love. We would gather around the table, bowls in hand, and delight in the creamy texture of the oats, the tangy burst of cranberries, and the subtle sweetness of figs. It was more than just breakfast; it was a time capsule that connected us across generations.


The beauty of this overnight oatmeal lies not only in its simplicity but in its ability to create a sense of nostalgia and togetherness. It’s a reminder that the best memories are often made around the breakfast table, where stories are shared, and bonds are strengthened.


Conclusion

In the hustle and bustle of modern life, it's comforting to know that some things remain timeless. Overnight oatmeal is one such treasure—easy to prepare, rich in flavor, and full of nostalgia. Whether you're looking to relive cherished family memories or create new ones with your own children, this recipe offers a heartwarming start to your day. So, set your crock-pot tonight and wake up to a bowl of comfort and joy.

Read more about Appetizers

Read more about Main Dishes

Read more about Desserts