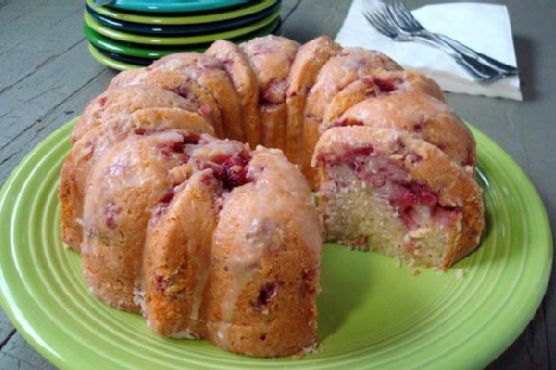
Fresh Strawberry Yogurt Cake | Made by Meaghan Moineau
Title: "Sweet Memories: The Timeless Delight of Fresh Strawberry Yogurt Cake"Description: Dive into the heartwarming flavors of our Fresh Strawberry Yogurt Cake, a dessert that effortlessly marries the sweetness of strawberries with the tangy zest of lemon. This delightful treat not only tantalizes your taste buds but also evokes cherished family memories. With a difficulty rating of 6 out of 10, it's the perfect dessert to impress your loved ones.
---
A Taste of Nostalgia: Fresh Strawberry Yogurt Cake
There's something inherently special about a recipe that transcends generations, weaving itself into the tapestry of family memories. For me, the Fresh Strawberry Yogurt Cake is not just a dessert—it's a portal to cherished times spent in my grandmother's cozy kitchen.
Ingredients:
- 2 cups flour, plus an additional ¼ cup
- 1 teaspoon baking soda
- ½ teaspoon salt
- Zest of 1 lemon
- ¾ cup butter, softened
- 1 ½ cups sugar
- 3 large eggs
- 1 tablespoon lemon juice, plus 2 tablespoons for the glaze
- 1 cup plain vanilla yogurt
- 1 ½ cups diced fresh strawberries
- 1 cup powdered sugar
Instructions:
1. Preheat your oven to 325°F (163°C) and prepare a 10-inch Bundt pan by greasing and flouring it.
2. Sift together 2 cups of flour, baking soda, and salt. Add the lemon zest to this mixture and set aside.
3. In a separate bowl, use an electric mixer to cream together the butter and sugar until the mixture is light and fluffy.
4. Beat in the eggs one at a time, ensuring each is well incorporated before adding the next. Stir in 1 tablespoon of lemon juice.
5. Gradually mix in the flour mixture and the yogurt, alternating between the two until just incorporated.
6. Toss the diced strawberries with the remaining ¼ cup of flour and gently fold them into the batter.
7. Pour the batter into the prepared Bundt pan and bake for 60 minutes, or until a toothpick inserted into the center comes out clean.
8. Allow the cake to cool in the pan for 10 minutes before transferring it to a wire rack to cool completely.
9. Once cooled, whisk together the remaining 2 tablespoons of lemon juice with the powdered sugar, and drizzle this glaze over the top of the cake.
A Journey Back in Time:
As a child, summers meant endless days at my grandparents' farmhouse. Nestled amidst lush strawberry fields, it was a haven of laughter and love. My grandmother, a wizard in the kitchen, would often invite me to help her bake. The Fresh Strawberry Yogurt Cake was her signature dessert, always made with strawberries freshly plucked from the backyard.
I remember the excitement of picking strawberries with my little hands, my grandmother’s gentle guidance ensuring I chose only the ripest ones. The kitchen would soon be filled with the comforting aroma of the cake as it baked, mingling with the sweet, tangy scent of lemon and vanilla.
Once the cake was ready, the whole family would gather around the table. Each slice was a reminder of the love and warmth that my grandmother infused into her cooking. Today, as I prepare this cake for my own family, I am transported back to those idyllic summer days. It’s a recipe I treasure, not only for its deliciousness but for the cherished memories it brings back.
Conclusion:
The Fresh Strawberry Yogurt Cake is more than a delightful dessert; it’s a tribute to family traditions and the joy of shared experiences. With a difficulty rating of 6 out of 10, this dessert is accessible yet impressive, perfect for family gatherings or a sweet treat to end a meal. Whether you're making it for the first time or the hundredth, this cake promises to be a delightful journey through flavors and memories.