“`html
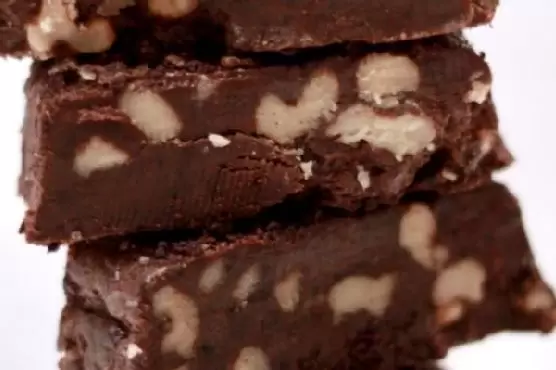
No-Bake Fudge Brandy Brownies
Intro
I still remember the first time I tasted these luxurious no-bake fudge brandy brownies. It was at a family gathering during the summer when my grandmother decided to introduce us to her secret recipe. The blend of rich chocolate, a hint of brandy, and the crunch from walnuts was a revelation. She shared the story of how she stumbled upon this recipe during her travels in Europe, and how it became a family favorite. Since then, these brownies have been a staple at our gatherings, and I am thrilled to share this delightful dessert with you.
Why You’ll Love It
These no-bake fudge brandy brownies are a perfect blend of easy preparation and decadent taste. Here’s why you will fall in love with them:
- Quick to Make: With no baking required, you can whip these up in no time.
- Rich and Decadent: The combination of chocolate, condensed milk, and brandy creates a fudgy, indulgent treat.
- Customizable: You can easily adjust the ingredients to suit your taste preferences.
- Perfect for Any Occasion: Whether it’s a casual get-together or a formal dinner, these brownies are sure to impress.
Ingredients
- 1 cup brandy
- 1/2 cup butter
- 1 can condensed milk
- 2 cups Oreo crumbs (set aside a tablespoon or two for garnish)
- 1 teaspoon vanilla extract
- 1 cup walnuts, chopped
Instructions
- In a pan, melt chocolate morsels and butter on low heat for about a minute or until completely melted. Stir occasionally. Remove from heat.
- In a large bowl, mix Oreo crumbs (set aside a tablespoon or two) and walnuts.
- Add condensed milk, vanilla extract, and chocolate mixture to the bowl. Mix well.
- Add brandy and mix thoroughly. For an extra kick, consider adding another half a tablespoon of brandy.
- Line your container with foil or grease it with butter and sugar. Press the mixture firmly onto the bottom of the container.
- Garnish with reserved Oreo crumbs on top.
- Refrigerate for about two hours before serving. Enjoy!
Tips
To ensure your brownies have the perfect texture, make sure your chocolate mixture is fully melted and smooth before mixing it with the other ingredients. For a nuttier flavor, toast the walnuts lightly before adding them to the mix.
Variations & Substitutions
Feel free to get creative with this recipe:
- Alcohol-Free: Substitute the brandy with orange juice or milk for a non-alcoholic version.
- Nut-Free: Omit the walnuts if you have a nut allergy, or replace them with dried fruit for a chewy texture.
- Different Cookies: Swap Oreo crumbs for graham crackers or digestive biscuits for a different base flavor.
Storage
Store these brownies in an airtight container in the refrigerator for up to one week. You can also freeze them for up to three months. Simply thaw them in the fridge overnight before serving.
FAQ
Can I use a different type of alcohol?
Absolutely! Feel free to experiment with different spirits. Rum or whiskey can also add a unique flavor to these brownies.
What can I use instead of foil to line my container?
You can use parchment paper or a silicone baking mat as alternatives to foil. They work just as well and make it easy to remove the brownies from the container cleanly.
Do I have to use Oreo crumbs for the base?
Not at all! While Oreo crumbs add a delicious chocolatey flavor, you can use any cookie crumbs you prefer, such as graham crackers or vanilla wafers.
Nutrition
While these brownies are a treat and should be enjoyed in moderation, they are a good source of energy due to the combination of fats and sugars. If you’re looking to make them a bit healthier, consider reducing the amount of butter or using a low-fat alternative.
Conclusion
These no-bake fudge brandy brownies are a testament to the fact that delicious desserts don’t have to be complicated. They’re a perfect way to indulge your sweet tooth while impressing your family and friends. I hope this recipe brings you as much joy and warmth as it has brought to my family over the years. Happy no-baking!
“`
Related update: No-Bake Fudge Brandy Brownies
Related update: 10 Minute Brownies