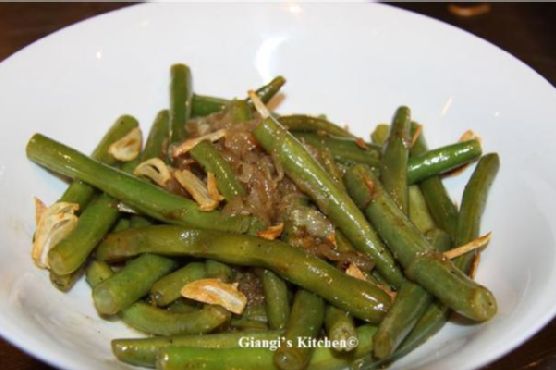
Green Beans with Garlic Chips | Made by Meaghan Moineau

Green Beans with Garlic Chips | Made by Meaghan Moineau

Title: Savoring Simplicity: A Nostalgic Journey with Green Beans and Garlic Chips
Description: Dive into the delightful world of Green Beans with Garlic Chips, a dish that perfectly balances simplicity and flavor. Join us as we explore this mouthwatering recipe that brings back cherished family memories while serving as the perfect appetizer for any occasion.

---


There's something undeniably comforting about the sizzle of garlic in a skillet, a sound that instantly transports me back to leisurely Sunday afternoons in my grandmother's kitchen. Her kitchen was a sanctuary filled with laughter, a warm embrace of aromas, and the promise of a meal made with love. Among her numerous culinary delights, Green Beans with Garlic Chips stood out, a dish so simple yet so profoundly satisfying.


Ingredients:

- 4 tablespoons olive oil


- 4 garlic cloves, thinly sliced


- 1 pound trimmed green beans


- 2 tablespoons unsalted butter


- 1 large yellow onion, thinly sliced


- Salt and pepper to taste


- 1 tablespoon apple cider vinegar


- 1 tablespoon white balsamic vinegar


Instructions:
1. Golden Garlic Magic: Begin by heating the olive oil in a heavy skillet over medium heat. Add the thinly sliced garlic cloves and cook, stirring occasionally, until they turn a beautiful golden hue. The aroma will start to fill the kitchen, reminiscent of my grandmother's kitchen, where the smell of garlic meant something special was coming. Once golden, remove the garlic with a slotted spoon and let them rest on a paper towel to transform into crisp garlic chips.
2. Onion Symphony: To the fragrant oil, add the unsalted butter, allowing it to melt over medium heat. Introduce the sliced yellow onion, seasoning with a pinch of salt and pepper. Sauté until the onions turn translucent and begin to show hints of gold, much like those long summer evenings spent at the family table.
3. Bean Bliss: Add the trimmed green beans to the skillet, stirring occasionally to ensure they soak up the flavors of garlic and onion. This step always reminds me of how my grandmother would gently guide me, teaching the importance of patience in cooking and in life.
4. Vinegar Vibes: Stir in both apple cider vinegar and white balsamic vinegar, adding a tangy depth to the dish. Season with additional salt and pepper to your liking. The balance of flavors—sweet, tangy, and savory—creates a symphony in the pan, a reflection of childhood harmony and family unity.
5. Final Flourish: Transfer the green beans to a serving dish and sprinkle generously with those magical garlic chips. Each bite is a delightful crunch, a burst of nostalgia that brings a smile to my face as I remember shared stories and laughter across generations.
Difficulty: 3/10
Classification: Appetizer

This dish, while simple to prepare, carries with it the weight of cherished memories and the warmth of family gatherings. It's a testament to how food can transcend time, connecting us to those we love and the moments we hold dear. So gather around the table, serve up this delightful appetizer, and let the flavors transport you to a place of comfort and joy.
Read more about Appetizers

Read more about Main Dishes

Read more about Desserts

Avocado Nests | Made by Meaghan Moineau

Avocado Nests | Made by Meaghan Moineau

Title: "Avocado Nests: A Deliciously Nostalgic Culinary Experience"
Description: Dive into a world of flavor with our Avocado Nests, a recipe that combines the creamy richness of avocados with the savory crunch of bacon and hash browns. Perfect as a main dish or a hearty appetizer, this dish is not only delectable but also evokes heartwarming family memories.

---


There's something inherently comforting about the aroma of sizzling bacon and the creamy texture of avocados. These are not just ingredients; they are the essence of cherished family gatherings and nostalgic Sunday brunches. Today, I am thrilled to share with you a recipe that holds a special place in my heart: Avocado Nests.


Ingredients:

- Avocados


- Hardboiled eggs


- Frozen hash browns


- Bacon


- Mayonnaise or cream cheese


- Salt and pepper


Instructions:
1. Cook the Hash Browns: Follow the directions on the package to achieve crispy, golden perfection. The hash browns will serve as the crunchy base for our avocado nests.
2. Prepare the Bacon: Cut the bacon slices into thin strips. You can either bake or fry them, depending on your preference. The goal is to get them crispy enough to sprinkle over the hash browns.
3. Make Deviled Eggs: Slice the hardboiled eggs in half and remove the yolks. Mix the yolks with a bit of mayonnaise or cream cheese, and season with salt and pepper to taste. Fill the egg white halves with the yolk mixture.
4. Prepare the Avocados: Cut the avocados in half, remove the seed, and gently peel off the skin. Each half will cradle a deviled egg, fitting perfectly into the seed cavity.
5. Assemble the Dish: Place a generous layer of hash browns on a serving plate and sprinkle with crispy bacon strips. Nestle the avocado halves on top, each filled with a deviled egg, and serve immediately.
A Nostalgic Family Memory:

Growing up, Sunday brunch was a sacred tradition in our family. My grandmother, a culinary enthusiast, always had a knack for creating dishes that were as heartwarming as they were delicious. One of her signature creations was the Avocado Nests. I still remember her teaching me how to perfectly peel the avocados without bruising the delicate flesh. We’d laugh and chat in the kitchen, the smell of bacon wafting through the air, as she shared stories from her own childhood.


These avocado nests were more than just a meal; they were a symbol of togetherness. Every bite was a burst of flavor, a combination of creamy, salty, and crunchy that brought our family closer together around the table. To this day, preparing this dish brings back those cherished memories, making it a beloved addition to our family meals.


Difficulty Rating: 4/10
Classification: Main Dish/Appetizer

Simple yet sophisticated, Avocado Nests are an excellent choice for those seeking a dish that is both easy to prepare and impressive to serve. Whether you’re hosting a brunch or looking for a light main dish, this recipe is sure to delight your taste buds and warm your heart. Enjoy the comforting flavors and the nostalgia that comes with every bite!

Read more about Appetizers

Read more about Main Dishes

Read more about Desserts

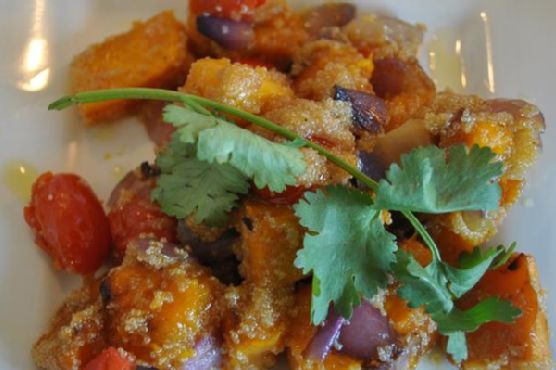
Amaranth and Roast Veggie Salad | Made by Meaghan Moineau

Amaranth and Roast Veggie Salad | Made by Meaghan Moineau

Title: A Taste of Home: The Nostalgic Amaranth and Roast Veggie Salad
Description: Dive into the heartwarming world of our Amaranth and Roast Veggie Salad, a recipe that blends wholesome ingredients with cherished family memories. This dish, rich in nutrients and flavors, is a delightful addition to your table as an appetizer or a light main dish. With a difficulty rating of 3 out of 10, it's perfect for both novice and seasoned cooks looking to create something special yet simple.

---


A Taste of Home: The Nostalgic Amaranth and Roast Veggie Salad

Growing up, Sunday family dinners were always an affair to remember. The kitchen buzzed with activity, as laughter and the aroma of roasting vegetables filled the air. My grandmother, the culinary maestro of our family, often whipped up her signature Amaranth and Roast Veggie Salad. This dish was more than just a meal; it was a comforting embrace, a nostalgic reminder of the warmth and love that surrounded our family gatherings.


Ingredients:

- 1 cup amaranth


- 2 tablespoons basil-infused olive oil


- 1 bell pepper, sliced


- 1 cup diced pumpkin


- 1 red onion, roughly chopped


- A handful of rocket leaves


- Herbal salt, to taste


- 1 punnet baby tomatoes


Instructions:
1. Cook the Amaranth: Begin by cooking the amaranth with about a cup of water. Allow it to simmer until it reaches a sticky consistency, a texture that beautifully binds the salad together.
2. Prepare the Veggies: Roughly chop the red onion and dice the pumpkin. Spread them on a tinfoil-lined baking tray.
3. Season and Roast: Drizzle the basil-infused olive oil over the onion and pumpkin. Sprinkle generously with herbal salt and pepper. Place the tray in a hot oven, roasting until the edges of the pumpkin turn irresistibly crispy. Just before the roasting is complete, add the punnet of baby tomatoes for a burst of flavor.
4. Assemble the Salad: Once the veggies are roasted to perfection, mix them with the cooked amaranth. Tear a few rocket leaves and toss them into the salad for a fresh, peppery touch.
5. Serve and Enjoy: Serve the salad warm, allowing the flavors to meld together into a harmonious medley.
A Family Tradition

As I recreate this salad today, I'm transported back to those Sunday dinners, where my grandmother would share stories of her youth while expertly preparing each ingredient. The simplicity of this dish, combined with its rich flavors, never failed to bring our family together. Each bite was a celebration of love, tradition, and the joy of cooking with fresh, wholesome ingredients.


Difficulty Rating: 3/10

This Amaranth and Roast Veggie Salad is an easy-to-make dish that promises to delight your taste buds while evoking fond memories of family and togetherness. Whether you're serving it as a hearty appetizer or a light main dish, this salad is sure to become a cherished addition to your culinary repertoire. Enjoy a slice of nostalgia with every bite, and perhaps, create some new family memories of your own.

Read more about Appetizers

Read more about Main Dishes

Read more about Desserts

Creamy Vegan Coleslaw Dressed with Avocado | Made by Meaghan Moineau

Creamy Vegan Coleslaw Dressed with Avocado | Made by Meaghan Moineau

Title: A Nostalgic Twist on Creamy Vegan Coleslaw: Avocado Dressing Delight
Description: Dive into a refreshing and creamy vegan coleslaw that's not only delicious but also easy to prepare. Our recipe, dressed with a luscious avocado blend, is perfect for any occasion. Let this dish transport you back to fond family memories with every bite.

---


Creamy Vegan Coleslaw Dressed with Avocado: A Taste of Home

When I think back to the summers spent at my grandmother's house, I am enveloped in a wave of nostalgia, the scent of fresh grass, and the sound of laughter echoing through the backyard. These memories are often accompanied by the taste of her famous coleslaw—a staple at every family gathering. While her version was a traditional one, I’ve created a vegan adaptation that pays homage to those cherished moments while offering a modern twist.


This *Creamy Vegan Coleslaw Dressed with Avocado* is more than just a side; it’s a connection to those joyful summers. The creamy avocado dressing, with its vibrant green hue and rich flavor, is a delightful replacement for traditional mayo, making it a healthier and vegan-friendly option.


Ingredients:

- 1 ripe avocado


- 2 cups shredded green cabbage


- 1 cup shredded carrot


- 1 tablespoon celery seed


- 2 tablespoons cider vinegar


- 1 tablespoon coconut sugar


- 1 teaspoon dijon mustard


- 2 tablespoons fresh chives, chopped


- 1 teaspoon ground cumin


- Juice of 1 lemon


- 2 tablespoons nutritional yeast


- 1 poblano pepper, finely chopped


- Freshly ground black pepper


- Sea salt to taste


Instructions:

1. In a large bowl, combine the shredded cabbage, shredded carrot, and chopped poblano pepper. Sprinkle with the celery seed and fresh chives.


2. In a small food processor, pulse together the avocado, cider vinegar, coconut sugar, dijon mustard, ground cumin, lemon juice, and nutritional yeast until well blended and creamy. Season with sea salt and black pepper to taste.


3. Pour the avocado dressing over the vegetable mixture and toss until everything is well coated.


4. Serve immediately for a crunchy texture or let it chill for an hour to let the flavors meld beautifully.


A Family Memory:

Every summer, my grandmother’s backyard transformed into a hub of activity, filled with family members and friends. Her coleslaw was always the star of the spread, a recipe passed down and perfected through generations. I remember her standing in the kitchen, apron on, mixing ingredients with a smile, while we children played tag on the lawn. It was in these moments that I learned the importance of family and tradition.


This vegan version, with its creamy avocado dressing, keeps the spirit of her dish alive while embracing my dietary choices. It's a dish that bridges the past and present, blending tradition with modernity, just like those precious summer days.


Difficulty Rating: 3/10
Classification: Appetizer

Whether you're looking to relive some family memories or create new ones, this creamy vegan coleslaw is sure to be a hit. Its simplicity and flavor make it a perfect addition to any meal, reminding us that sometimes, the best recipes are those that connect us to the ones we love. Enjoy every bite, and may it bring warmth and nostalgia to your table.

Read more about Appetizers

Read more about Main Dishes

Read more about Desserts

Hasselback Potatoes | Made by Meaghan Moineau

Hasselback Potatoes | Made by Meaghan Moineau

Title: "Golden Memories: The Timeless Joy of Hasselback Potatoes"
Description: Dive into the heartwarming world of Hasselback Potatoes, a delightful dish that combines simplicity with elegance. With a crisp exterior and a tender interior, this recipe is sure to become a family favorite. As you follow these easy steps, let the nostalgic aroma transport you to cherished family gatherings. Discover the magic of this classic side dish that pairs perfectly with any meal.

---


Golden Memories: The Timeless Joy of Hasselback Potatoes

In the tapestry of culinary traditions, few dishes evoke as much warmth and nostalgia as Hasselback Potatoes. This simple yet elegant side dish is more than just a feast for the taste buds; it's a journey back to cherished family gatherings, where the kitchen was the heart of the home. With its origins rooted in Swedish cuisine, the Hasselback Potato has transcended borders to become a beloved staple on dining tables worldwide.


Ingredients:

- 4 large potatoes


- 4 tablespoons of butter, melted


- 1/4 cup of breadcrumbs


- 1/4 cup of grated parmesan cheese


- Salt to taste


Instructions:
1. Preheat and Prep: Begin by preheating your oven to 425°F (220°C). As the warmth fills your kitchen, imagine the generations before you who relied on the comforting glow of an oven to create memorable meals.
2. Slice with Care: Carefully slice each potato crosswise at 1/8-inch intervals, ensuring you cut to within 1/4 inch of the bottom. This technique creates the iconic fan-like appearance that makes Hasselback Potatoes so visually appealing. As you slice, recall family members gathered around the table, eagerly awaiting the feast to come.
3. Arrange and Drizzle: Arrange the potatoes in a buttered roasting pan. Drizzle 2 tablespoons of melted butter evenly over them and sprinkle with salt. Bake for 25 minutes, allowing the kitchen to fill with the rich aroma of butter and potatoes—a scent that has the power to bring back memories of home.
4. Add the Crunch: After the initial bake, sprinkle the potatoes with breadcrumbs and drizzle with the remaining melted butter. Return them to the oven for another 25 minutes. This step ensures a delightful crunch with every bite.
5. Cheesy Finish: Finally, sprinkle the potatoes with parmesan cheese, baste them with butter from the pan, and bake for an additional 5 minutes. As the cheese melts and turns golden, it adds a layer of savory goodness that is simply irresistible.
A Nostalgic Story:

Growing up, Sunday dinners were a sacred ritual in our family. The bustling kitchen was a symphony of clattering pots, the sizzle of butter, and the laughter of loved ones. Hasselback Potatoes were always a star of these gatherings. I vividly remember my grandmother standing by the old wooden counter, her hands deftly slicing the potatoes with precision. She would tell stories of her childhood, of Sundays spent in her mother’s kitchen, surrounded by the same comforting smells and sounds.


As we sat around the table, our plates piled high with golden Hasselbacks, I felt a deep connection to my heritage. Each bite was a taste of history, a thread that wove together generations. Even now, as I prepare Hasselback Potatoes for my own family, I am reminded of those cherished Sundays, the warmth of the kitchen, and the love that filled our home.


Difficulty Rating: 3/10
Classification: Side Dish

Hasselback Potatoes are a testament to the beauty of simplicity. With minimal ingredients and effortless preparation, this dish is perfect for both novice and seasoned cooks. Whether served as a side dish at a festive gathering or a quiet family dinner, Hasselback Potatoes bring a touch of elegance and a wealth of memories to any occasion. As you enjoy this timeless dish, may it fill your heart and home with warmth and joy.

Read more about Appetizers

Read more about Main Dishes

Read more about Desserts

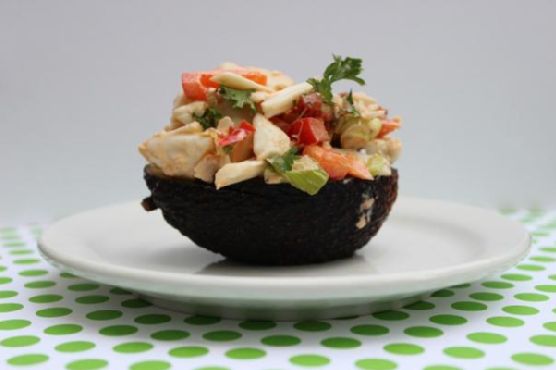
Spicy Lump Crab and Avocado Salad | Made by Meaghan Moineau

Spicy Lump Crab and Avocado Salad | Made by Meaghan Moineau

Title: A Taste of Nostalgia: Spicy Lump Crab and Avocado Salad
Description: Dive into a flavorful fusion of tender lump crabmeat and creamy avocados with our Spicy Lump Crab and Avocado Salad. This dish, enriched with the zest of fresh lemon juice and a kick of sriracha, is a perfect blend of spice and freshness. Ideal for both a sophisticated appetizer and a light main dish, this recipe holds a special place in my heart, evoking cherished family gatherings by the sea.

---


A Taste of Nostalgia: Spicy Lump Crab and Avocado Salad

As the warm breeze carried the scent of the ocean, our family would gather at the seaside cottage every summer. The sound of waves crashing against the shore was the perfect backdrop for our family tradition—an indulgent feast featuring the Spicy Lump Crab and Avocado Salad. This dish, with its vibrant colors and tantalizing flavors, became a staple at our gatherings, etching unforgettable memories into our hearts.


The Essence of the Dish

Our Spicy Lump Crab and Avocado Salad is a delightful combination of succulent lump crabmeat, creamy avocados, and a spicy dressing that tantalizes the taste buds. The dish is a symphony of textures, with the smoothness of the avocado complementing the delicate sweetness of the crab. The addition of sriracha chile sauce adds a fiery kick, balanced by the tangy freshness of lemon juice.


Ingredients:

- 2 ripe avocados


- 1 red bell pepper, finely chopped


- Fresh parsley, chopped


- 1 tablespoon fresh lemon juice


- 1 pound lump crabmeat


- 2 tablespoons mayonnaise


- Salt and pepper, to taste


- 2 scallions, finely sliced


- 1 tablespoon sriracha chile sauce


- 1 teaspoon Worcestershire sauce


Instructions:
1. Prepare the Spicy Sauce: In a small bowl, combine the mayonnaise, sriracha chile sauce, Worcestershire sauce, lemon juice, salt, and pepper. Stir until well blended, and set aside to let the flavors meld.
2. Mix the Crab Salad: In a medium bowl, gently toss together the crabmeat, scallions, red bell pepper, and fresh parsley. Be careful to maintain the integrity of the crab lumps. Lightly fold in the spicy sauce, ensuring an even coating without breaking the crabmeat.
3. Prepare the Avocados: Slice the avocados in half and remove the pit. Trim a small section from the bottom of each half so they sit flat on a plate. Brush or pour lemon juice over the cut surfaces to prevent browning.
4. Assemble and Serve: Place the avocado halves on a serving plate and generously fill each center with the crab salad. Serve immediately for the freshest flavor.
A Family Memory

Every year, as we prepared this dish, my grandmother would recount the story of how she first learned the recipe from a local fisherman during her honeymoon. She spoke of the joy of discovering new flavors and the warmth of sharing food with loved ones. As we savored each bite, it felt like a tribute to her adventurous spirit and love for family gatherings.


The Spicy Lump Crab and Avocado Salad is more than just a dish; it's a bridge to cherished memories and a reminder of the simple joys in life.


Difficulty Rating: 4/10
Classification: Appetizer or Light Main Dish

This recipe is relatively easy to prepare, making it accessible even for novice cooks. Whether you serve it as an appetizer or a light main dish, it's guaranteed to be a hit, resonating with the warmth of familial love and the excitement of summer days by the sea.

Read more about Appetizers

Read more about Main Dishes

Read more about Desserts

Pink Grapefruit Slaw | Made by Meaghan Moineau

Pink Grapefruit Slaw | Made by Meaghan Moineau

Title: Refreshing Memories: The Joy of Pink Grapefruit Slaw
Description: Discover the vibrant flavors of Pink Grapefruit Slaw, a delightful mix of tangy and sweet that will transport you back to cherished family gatherings. This easy-to-make appetizer is perfect for adding a splash of color and nostalgia to your dining table.

---


A Nostalgic Journey with Pink Grapefruit Slaw

There’s something undeniably soothing about the familiar aroma of a dish that takes you back to simpler times—like the Pink Grapefruit Slaw my grandmother used to make during those long, sun-drenched summer afternoons. As a child, I remember eagerly watching her in the kitchen, marveling at how effortlessly she combined ingredients to create something magical.


The recipe was always a highlight at our family picnics, a beacon of freshness amidst the array of hearty dishes. My grandmother had a knack for infusing love into her cooking, and her Pink Grapefruit Slaw was no exception. The tangy sweetness of the grapefruit paired with the crunch of fresh cabbage and the subtle bite of red onion created a symphony of flavors that danced on our taste buds.


As the adults chatted and the children played, I would sneak into the kitchen to watch her skillfully zest the grapefruit, her hands moving with practiced precision. She would smile at me, her eyes twinkling with a secret only we shared—the joy of creating something beautiful together.


Recipe: Pink Grapefruit Slaw
Ingredients:

- Black pepper


- 1 pink grapefruit


- 2 cups green shredded cabbage


- 2 tablespoons light mayonnaise


- 1 small red onion, thinly sliced


- Salt


- 1-2 teaspoons sugar (to taste)


Instructions:

1. In a small bowl or measuring cup, combine 2 tablespoons of light mayonnaise, 3 tablespoons of fresh grapefruit juice (from just a segment or two), 1-2 teaspoons of sugar, 1 teaspoon of grapefruit zest, salt, and black pepper. Whisk the mixture until it's well blended.


2. In a large bowl, combine 2 cups of shredded green cabbage, the remaining sections of the pink grapefruit, and the thinly sliced red onion.


3. Pour the dressing over the cabbage mixture and toss everything together until it’s well coated.


4. Garnish with parsley if desired, and serve immediately to enjoy the flavors at their peak freshness.


Difficulty: 3/10
Classification: Appetizer

This Pink Grapefruit Slaw is a testament to the beauty of simple, fresh ingredients coming together to create a dish that’s both delicious and nostalgic. Whether you’re preparing it for a family gathering or a solo lunch, this slaw is sure to evoke fond memories and perhaps inspire new traditions for years to come.

Read more about Appetizers

Read more about Main Dishes

Read more about Desserts

Shrimp & Orzo | Made by Meaghan Moineau

Shrimp & Orzo | Made by Meaghan Moineau

Title: "Savoring Tradition: Shrimp & Orzo Delight with a Nostalgic Twist"
Description:

Embark on a culinary journey with our delectable Shrimp & Orzo recipe, a dish that beautifully marries the vibrant flavors of the Mediterranean with the comforting warmth of home-cooked meals. This main dish, rated a 7 out of 10 on the difficulty scale, is perfect for a cozy family dinner or a casual get-together with friends. Follow along as we not only guide you through creating this sumptuous dish but also share a cherished family memory that brings this recipe to life.


---


A Nostalgic Journey Through Shrimp & Orzo

Every family has a dish that stirs up a fond memory, and for mine, it’s the delightful Shrimp & Orzo. This dish isn’t just a meal; it’s a tapestry of flavors woven with the threads of family tradition and love.


I vividly remember the first time my grandmother introduced this recipe to our family table. It was a balmy summer evening, one of those nights where the air was thick with the scent of blooming jasmine and the distant sound of cicadas. Our family gathered in her sun-dappled kitchen, a place that felt like the heart of our home. The faint sizzle of olive oil hitting the hot Dutch oven announced the beginning of our culinary adventure.


As my grandmother stirred the diced onion and fennel bulb, she regaled us with stories from her childhood, tales of seaside summers where shrimp were abundant and laughter even more so. Those evenings were always special, the kitchen alive with laughter, the clinking of glasses, and the anticipation of yet another unforgettable meal.


---


Recipe: Shrimp & Orzo
Ingredients:

- 1 can diced tomatoes


- 1/2 cup dry white wine


- 1 fennel bulb, diced


- 1/2 cup crumbled feta cheese


- 2 tablespoons fresh parsley, divided


- 4 cloves of garlic, minced


- Lemon wedges for serving


- 2 cups low sodium chicken broth


- 2 tablespoons olive oil


- 1 diced onion


- 1 teaspoon dried oregano


- 1 1/2 cups orzo pasta


- 1/4 teaspoon crushed red pepper flakes


- Salt & pepper to taste


- 1 pound large shrimp, peeled and deveined


- 1/2 cup water


Instructions:

1. Preheat your oven to 400 degrees F. Season the shrimp with salt and pepper, then refrigerate until ready to use. Grease a 13x9-inch baking dish.


2. Heat the olive oil in a large Dutch oven over medium-high heat until shimmering. Add the onion, fennel bulb, and 1/2 teaspoon salt. Cook, stirring frequently, until the vegetables are softened and starting to brown around the edges, about 10 minutes.


3. Stir in the minced garlic and crushed red pepper flakes, and cook until the garlic becomes very fragrant, about 30 seconds.


4. Add the orzo to the vegetables, stirring to coat with oil. Continue cooking, stirring frequently, for about 4 minutes, until the orzo has a toasty aroma.


5. Pour in the white wine, cooking and stirring constantly, until the liquid evaporates, about 1 minute.


6. Add the chicken broth, water, and 1/4 teaspoon salt. Bring to a boil, then reduce the heat and simmer until the orzo is almost tender, about 12 minutes, stirring frequently to prevent sticking.


7. Remove from heat and stir in the shrimp, tomatoes, oregano, and 1 tablespoon of parsley.


8. Transfer the mixture to the prepared baking dish and sprinkle with feta cheese.


9. Bake for about 20 minutes, until the shrimp is cooked through and the feta is lightly browned.


10. Before serving, sprinkle with the remaining parsley and the reserved fennel fronds. Serve with lemon wedges.


---


Creating Shrimp & Orzo is more than just assembling ingredients; it's about reliving cherished memories and crafting new ones. Each bite is a tribute to family, tradition, and the joy of sharing a meal with the ones you love. So, gather around the table, share stories, and savor the exquisite flavors of this timeless dish.

Read more about Appetizers

Read more about Main Dishes

Read more about Desserts

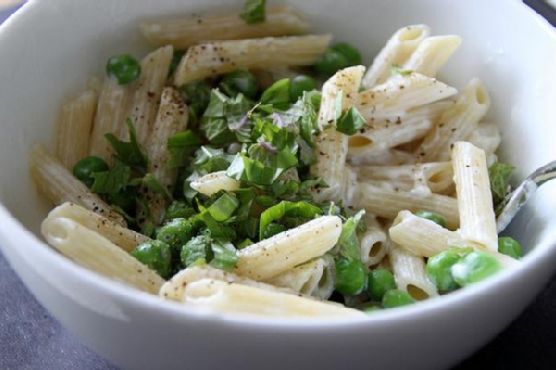
Penne with Goat Cheese and Basil | Made by Meaghan Moineau

Penne with Goat Cheese and Basil | Made by Meaghan Moineau

Title: A Taste of Home: Penne with Goat Cheese and Basil
Description: Dive into the delightful simplicity of Penne with Goat Cheese and Basil, a dish that promises to bring comfort and nostalgia to your dining table. This easy yet flavorful main dish is perfect for any occasion, whether you're a seasoned cook or a kitchen novice.

---


There's something magical about the aroma of fresh basil mingling with the creamy tang of goat cheese. It takes me back to warm summer evenings at my grandmother's house, where the air was always filled with laughter and the scent of herbs from her garden. This dish, Penne with Goat Cheese and Basil, is not only a nod to those cherished moments but also a testament to the power of simple ingredients to create something truly special.


Ingredients:

- Penne pasta


- Fresh basil leaves


- Goat cheese


- Olive oil


- Salt and pepper


Instructions:

1. Begin by cooking the penne pasta according to the package directions. The key is to achieve that perfect al dente texture, where each piece offers a slight bite yet is tender enough to soak up the flavors.


2. While the pasta cooks, take a generous bunch of basil leaves and arrange them in a neat stack. Roll them up tightly like a cigar and cut crosswise to create beautiful, fragrant ribbons using the classic chiffonade technique.


3. Once the pasta is cooked and drained, toss it with a drizzle of olive oil and crumbled goat cheese. Allow it to cool for a few minutes, letting the cheese melt slightly and coat the pasta in a creamy embrace.


4. Finally, add your basil chiffonade, a pinch of salt, and freshly cracked pepper. Toss everything together gently, ensuring each piece of penne is enveloped in the harmonious blend of flavors.


5. Serve immediately and savor each bite, perhaps with a glass of chilled white wine or a summery iced tea.


A Nostalgic Note:

This dish always takes me back to those family gatherings at grandma's. I remember the way she would wander through her garden, snipping fresh basil with a pair of well-used scissors, smiling as she handed me the fragrant leaves. We'd cook together, her guiding hands showing me the chiffonade technique, her voice blending with the sounds of the bustling kitchen. The simple act of preparing and sharing a meal was her way of teaching us about love and togetherness.


Difficulty Rating: 3/10
Classification: Main Dish

Whether you're looking to impress guests with minimal effort or simply want to treat yourself to a comforting meal, Penne with Goat Cheese and Basil is the perfect choice. Its simplicity is its strength, allowing the fresh, vibrant ingredients to shine. Give it a try, and perhaps you'll create a new memory of your own to cherish.

Read more about Appetizers

Read more about Main Dishes

Read more about Desserts

Broccoli Rabe and Breaded Veal Scallopini | Made by Meaghan Moineau

Broccoli Rabe and Breaded Veal Scallopini | Made by Meaghan Moineau

Title: "Savoring Heritage: Broccoli Rabe and Breaded Veal Scallopini"
Description:

Dive into the rich flavors of Broccoli Rabe and Breaded Veal Scallopini, a dish that marries tradition with taste. This main dish, rated 6 out of 10 in difficulty, offers a delightful culinary journey. Join us as we explore the steps to create this masterpiece, infused with a nostalgic family memory that brings warmth to every bite.


---


Broccoli Rabe and Breaded Veal Scallopini: A Taste of Tradition

In the heart of our family kitchen, where laughter mingled with the aroma of simmering dishes, Broccoli Rabe and Breaded Veal Scallopini took center stage. It was a dish that whispered stories of heritage, of Sundays spent around the table, and of the hands that lovingly prepared it. Today, I invite you to recreate this beloved recipe, a culinary heirloom that promises to enchant your taste buds and warm your soul.


Ingredients:

- Broccoli rabe


- Butter


- Egg


- Olive oil


- Salt and pepper


- Yellow onion


- Garlic clove


- Bread crumbs


- Veal scallopini


- Tomatoes


Instructions:
1. Prepare the Broccoli Rabe:

Begin by washing and steaming the broccoli rabe for a few minutes. This step can be done in a pressure cooker for efficiency. The vibrant greens are the perfect complement to the savory veal.


2. Sauté the Aromatics:

Thinly slice the yellow onion. Peel and halve the garlic clove, removing the stem. Heat 1-2 tablespoons of olive oil in a deep pan. Sauté the onion and garlic on medium heat until translucent, releasing their fragrant aroma.


3. Cook the Vegetables:

Add the steamed broccoli rabe to the pan, cover with a lid, and let it cook for a few more minutes. As the flavors meld together, cut the tomatoes into wedges and add them to the pan. Cook for several additional minutes, seasoning with salt and pepper to taste.


4. Prepare the Veal Scallopini:

Season each scallopini with salt and pepper. Dip them in beaten egg, ensuring an even coat. Follow by dipping them in bread crumbs, pressing down to cover evenly.


5. Pan Fry the Veal:

In another pan, melt a generous amount of butter. Pan fry the breaded veal scallopini over high heat, cooking for 1-2 minutes on each side. Add more butter before flipping, as the bread crumbs will absorb it, ensuring a golden, crispy finish.


A Nostalgic Family Memory:

As a child, Sundays meant gathering in my grandmother's cozy kitchen. The clatter of pots and pans was the soundtrack to our family stories, and Broccoli Rabe and Breaded Veal Scallopini was always the star of the meal. I remember my grandmother's skilled hands, dusted with flour, as she taught me the art of breading the veal, her stories weaving into the fabric of our family's culinary history. The dish was more than just food; it was a connection to our roots, a tapestry of flavors that told the story of our heritage.


Difficulty Rating: 6/10

This dish, while requiring attention to detail, is a rewarding culinary endeavor that even intermediate cooks can master. It stands proudly as a main dish, perfect for family gatherings or a special Sunday dinner.


Conclusion:

Broccoli Rabe and Breaded Veal Scallopini is more than just a recipe; it's a journey through time, a celebration of flavors that transcends generations. As you prepare this dish, may it bring you the same joy and nostalgia it has brought to our family table. Bon appétit!

Read more about Appetizers

Read more about Main Dishes

Read more about Desserts

Roasted Acorn Squash Stuffed with spicy Biryani (Veg/vegan) | Made by Meaghan Moineau

Roasted Acorn Squash Stuffed with spicy Biryani (Veg/vegan) | Made by Meaghan Moineau

Title: A Flavorful Journey: Roasted Acorn Squash Stuffed with Spicy Biryani
Description: Discover the aromatic allure of Roasted Acorn Squash Stuffed with Spicy Biryani, a delightful vegan dish that marries the nutty sweetness of squash with the rich, spicy flavors of biryani. Explore a heartwarming family memory tied to this dish, learn step-by-step instructions, and find out why this recipe is a show-stopping main dish perfect for any occasion.

---


A Flavorful Journey: Roasted Acorn Squash Stuffed with Spicy Biryani


The kitchen was always the heart of our home, especially during the vibrant chaos of family gatherings. I vividly remember the aromatic symphony of spices wafting through the air as my grandmother prepared her signature dish: Roasted Acorn Squash Stuffed with Spicy Biryani. This dish was more than just a meal; it was a celebration of flavors and memories woven together, bringing everyone closer with each bite.


Ingredients


- 2 acorn squashes, halved and seeds removed


- 1 cup basmati rice, soaked in water


- 1 cup water


- 1-2 tbsp garam masala


- 1 red onion, diced


- 1 cup sweet peppers, diced


- A handful of cashew nuts


- A pinch of saffron


- A bunch of cilantro, chopped


- 1 tbsp biryani paste (recipe below)


- 1 onion, sliced into rounds


- Salt, to taste


- Black coarse pepper, to taste


- PAM Original Flavor spray


- 2 tbsp vegetable oil


- 1 white onion, diced


- 1 beefsteak tomato, diced


- 3 cloves garlic, minced


- 1 inch ginger, grated


- 1 tsp chili powder


Biryani Paste Recipe:

- 2 tbsp vegetable oil


- 1 onion, finely chopped


- 2 cloves garlic, minced


- 1 inch ginger, grated


- 1 tsp chili powder


- Salt, to taste


Instructions


1. Preheat and Roast:

Preheat the oven to 400°F (200°C). On a baking sheet, place the acorn squash halves cut side up. Spray lightly with PAM and sprinkle with garam masala. Broil until tender and charred, about 10-15 minutes.


2. Prepare Filling:

While the squashes are roasting, heat a large skillet over medium heat. Spray with PAM and add vegetable oil. Sauté the cashews until fragrant and slightly darkened. Add the red onion and sweet peppers, sprinkle with black pepper, and cook until soft, about 5-7 minutes.


3. Toast the Rice:

Drain the soaked basmati rice and add it to the skillet. Sauté for 5-7 minutes to toast the rice.


4. Cook the Rice:

Remove the squash from the oven and let it cool for a few minutes. Score the flesh into small cubes, avoiding cutting through the skin. Scoop out the cubes into a bowl and set aside. Keep the squash shells for later use.


5. Combine Ingredients:

Add 1 cup of water and a pinch of saffron to the rice. Cover and cook on medium-low heat for about 15 minutes until the rice is cooked through. Add the cubed squash and biryani paste, tossing gently. Mix in 3/4 of the chopped cilantro and taste for salt and flavor.


6. Prepare Onion Topping:

In a small skillet, spray with PAM and set over medium-high heat. Add the onion slices and sauté until golden brown, about 4-5 minutes.


7. Assemble and Serve:

Fill each squash shell with the rice mixture, mounding it slightly over the top. Top each with a sautéed onion round and sprinkle with the remaining cilantro. Serve with yogurt or raita for a cooling contrast.


A Nostalgic Memory


Each time I prepare this dish, I'm transported back to my grandmother's kitchen. The way she meticulously balanced spices, the laughter echoing through the house, and the joy of sharing a meal with loved ones are memories that linger with every bite. This dish, like a warm embrace, brings our family together, weaving a tapestry of tradition and flavor that transcends generations.


Difficulty Rating


Difficulty: 6/10
Classification: Main Dish

Roasted Acorn Squash Stuffed with Spicy Biryani is an inviting main dish that combines the warmth of family traditions with the vibrant flavors of Indian cuisine. Its moderate difficulty level makes it an achievable yet impressive addition to any dinner table. Enjoy this culinary journey that will surely create new memories alongside cherished old ones.

Read more about Appetizers

Read more about Main Dishes

Read more about Desserts

Sweet Corn Pudding | Made by Meaghan Moineau

Sweet Corn Pudding | Made by Meaghan Moineau

Title: Sweet Corn Pudding: A Cozy Comfort Dish with a Dash of Nostalgia
Description: Indulge in the creamy, savory goodness of Sweet Corn Pudding—a perfect side dish that combines the sweetness of corn with the rich flavors of cheese and jalapeño peppers. Dive into this heartwarming recipe that not only delights the palate but also brings back cherished family memories.

---


Sweet Corn Pudding Recipe


Difficulty Level: 5/10
Category: Side Dish

Ingredients

- 2 tablespoons butter

- 1 small onion, finely chopped


- 2 cloves garlic, minced


- 4 ears of corn, kernels removed


- 2 tablespoons all-purpose flour


- 1 cup heavy cream


- 1 cup cooked grits


- 2 tablespoons canned jalapeño peppers, chopped


- Salt, to taste


- Black pepper, to taste


- 2 large eggs, beaten


- 1 cup white shredded cheddar cheese


Instructions


1. Preheat the Oven: Set your oven to 425°F (218°C).
2. Sauté Aromatics: In a heavy-bottomed pot over medium heat, melt the butter. Add the onion and garlic, cooking until fragrant and translucent, about 3 minutes.
3. Add Corn: Stir in the corn kernels and cook for an additional 3 minutes, allowing the natural sweetness of the corn to develop.
4. Incorporate Flour and Cream: Sprinkle in the flour, stirring constantly for 1 minute, then gradually add the heavy cream. Continue stirring until the mixture comes to a gentle boil.
5. Blend and Season: Add the cooked grits, then remove the pot from heat. Stir in the jalapeño peppers, and season generously with salt and black pepper. Using a hand-held immersion blender, puree the mixture slowly while adding the beaten eggs until fully incorporated.
6. Bake to Perfection: Pour the smooth corn mixture into an ovenproof dish. Generously sprinkle the top with shredded cheddar cheese. Bake for 25-30 minutes, or until the center puffs up and the top turns a delicious golden brown.

---


A Taste of Nostalgia


The aroma of this Sweet Corn Pudding always transports me back to our family gatherings on summer evenings. I remember my grandmother standing by the stove, her apron dusted with flour, humming softly as she stirred the pot. The kitchen would fill with the comforting scent of sautéed onions and garlic, a symphony of familiar smells that signaled something special was about to be served.


We'd gather around the dining table, the centerpiece a bubbling dish of corn pudding, its golden top glistening under the soft light. Each bite was a blend of creamy corn and spicy jalapeño, a perfect harmony that mirrored the laughter and warmth shared among us. This dish wasn't just food; it was a vessel of memories, a reminder of summers spent together, and the love that was woven into each meal.


---


Conclusion


Sweet Corn Pudding is more than just a dish; it’s a culinary embrace that brings together the sweetness of corn, the richness of cream, and a hint of jalapeño heat. Perfect as a side for family dinners or festive occasions, this recipe is sure to become a cherished part of your own family traditions. So, gather your ingredients and create not just a meal, but a memory.

Read more about Appetizers

Read more about Main Dishes

Read more about Desserts

Fig, Apple, and Arugula Salad | Made by Meaghan Moineau

Fig, Apple, and Arugula Salad | Made by Meaghan Moineau

Title: A Taste of Nostalgia: Fig, Apple, and Arugula Salad
Description: Dive into the nostalgic flavors of a Fig, Apple, and Arugula Salad, a dish that combines the natural sweetness of figs and apples with the peppery bite of arugula. This recipe is not just a treat for the taste buds but also a journey down memory lane, bringing back cherished family moments. Discover how the blend of simple ingredients can create a symphony of flavors in your mouth. Perfect as an appetizer, this salad rates a 3 out of 10 in difficulty, making it accessible to chefs of all levels.

---


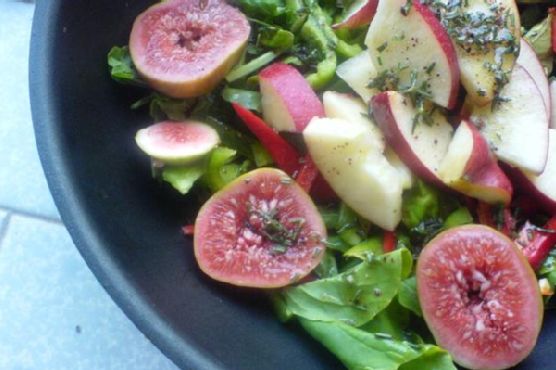
Growing up, Sunday afternoons at my grandmother's house were a cherished family tradition. The kitchen was always abuzz with the sounds of laughter, clinking pots, and the aromatic promise of delicious meals. One of my favorite dishes from those days was a simple yet unforgettable Fig, Apple, and Arugula Salad. It was a dish that my grandmother always prepared with a twinkle in her eye, knowing it was a family favorite.


The magic of this salad lies in its harmonious balance of flavors. The peppery bite of arugula, also known as roquette lettuce, forms the base of the dish, offering a fresh and slightly bitter contrast to the sweetness of ripe figs and crisp apples. My grandmother always insisted on using the juiciest apples and perfectly ripe figs, ensuring each bite was a burst of natural sweetness.


To add a touch of vibrant color and a hint of spice, she would include slices of red and green peppers, their crunch adding another layer of texture to the salad. The dressing was a simple yet elegant concoction of olive oil, maple syrup, fresh rosemary, and a pinch of sumac powder. This combination brought a delightful zesty tang, enhancing the flavors without overpowering the natural taste of the fruits and vegetables.


The process was straightforward: chop the fruits and vegetables into bite-sized morsels and combine them in a large bowl. The dressing, a masterpiece of simplicity, was reserved until the very moment we were ready to eat, ensuring the salad remained crisp and fresh.


As I recreate this dish today, the memories come flooding back—sitting around the table, sharing stories, and relishing the taste of a salad that was much more than just a dish; it was a symbol of family, love, and tradition.


This Fig, Apple, and Arugula Salad is classified as an appetizer, perfect for whetting the appetite before a main course. With a difficulty rating of just 3 out of 10, it's an easy and delightful way to bring a touch of nostalgia to your table. Whether you're preparing it for a family gathering or a quiet dinner at home, this salad is sure to be a hit, just as it was in my grandmother's kitchen so many years ago.


For those interested in seeing the dish in all its vibrant glory, you can find a photo of the salad [here](http://rawgirlinmumbai.blogspot.com/2011/01/fig-apple-and-roquette-salad.html). Enjoy crafting this beautiful and flavorful dish that is as much a feast for the eyes as it is for the palate.

Read more about Appetizers

Read more about Main Dishes

Read more about Desserts

Hard-Boiled Egg Gratin In A Bechamel Sauce | Made by Meaghan Moineau

Hard-Boiled Egg Gratin In A Bechamel Sauce | Made by Meaghan Moineau

A Nostalgic Twist on Comfort Food: Hard-Boiled Egg Gratin in a Bechamel Sauce


Discover the Heartwarming Delight of a Family Favorite


In the world of culinary delights, few dishes evoke a sense of nostalgia quite like a good old-fashioned gratin. Today, we're diving into a recipe that has stood the test of time in my family: Hard-Boiled Egg Gratin in a Bechamel Sauce. This comforting, flavorful dish is not only a feast for the taste buds but also a journey down memory lane. With its creamy bechamel sauce, rich gruyère cheese, and perfectly hard-boiled eggs, this recipe is sure to become a staple in your home as it is in mine.


Ingredients


- Butter


- Eggs


- Flour


- Gruyère cheese


- Milk


- Nutmeg


- Onion


- White salt and pepper


Instructions


1. Hard-Boil the Eggs: Start by bringing a saucepan of salted water to a boil. Gently add the eggs, reduce the heat, and let them simmer for 10 minutes. Once done, transfer the eggs to cold water until they are just cool enough to handle. This makes peeling them a breeze. A little trick I learned from my grandmother: roll the eggs with the palm of your hand on a hard surface to crack the shell, then peel them under a slow stream of running water. Reserve the eggs in a bowl of warm water.
2. Cook the Onion: Melt some butter in a saucepan or small frying pan over low heat. Add the onion and cook, stirring frequently, until it's tender but not colored.
3. Prepare the Bechamel Sauce: In a medium heavy-bottomed saucepan, melt the butter over low heat. Add the flour and whisk for about 2 minutes, being careful not to let it color. Gradually whisk in the milk and bring to a boil, whisking constantly to prevent lumps. Season with nutmeg, salt, and pepper to taste. Reduce the heat and simmer for 10 minutes, whisking constantly and scraping the bottom and sides of the pan to keep the sauce smooth. Stir in the cooked onions and let it cook for an additional 5 minutes.
4. Assemble the Gratin: Preheat your grill. Slice the eggs into 1 cm (0.4 inch) thick slices. Spread a thin layer of the bechamel sauce over the bottom of your gratin dish. Layer the egg slices over the sauce and coat them with the remaining sauce. Sprinkle with grated gruyère cheese, then grill, turning the dish if necessary to ensure an evenly golden-brown top. Serve immediately.

A Family Memory


This dish always takes me back to Sunday afternoons at my grandmother's house. She would prepare her kitchen with the aroma of melted butter and onions, a scent that still makes me feel at home. My siblings and I would gather around, watching her every move, eager to learn the secrets of her cooking. The moment she pulled the gratin from the oven, with its golden-brown crust and bubbling cheese, we knew we were in for a treat. Sharing this meal brought us closer, and each bite was a reminder of the warmth of family and tradition.


Difficulty: 6/10


Classification: Main Dish


Hard-Boiled Egg Gratin in a Bechamel Sauce is more than just a meal—it's a journey back to simpler times, a celebration of comfort and family. Whether you're looking for a hearty main dish or a nostalgic culinary adventure, this recipe is sure to delight both the palate and the heart. So, gather your loved ones, roll up your sleeves, and create your own cherished memories with this timeless classic.

Read more about Appetizers

Read more about Main Dishes

Read more about Desserts

Vegetarian Christmas wreath | Made by Meaghan Moineau

Vegetarian Christmas wreath | Made by Meaghan Moineau

Title: A Festive Delight: Crafting a Vegetarian Christmas Wreath
Description: Embrace the holiday spirit with this delightful Vegetarian Christmas Wreath, a vibrant and healthy appetizer that elevates your festive table. Packed with fresh broccoli, juicy cherry tomatoes, and creamy cheese, this dish isn't just a feast for the eyes; it's a nostalgic journey back to cherished family gatherings. Discover the secrets to creating this culinary masterpiece and bring a touch of warmth and color to your Christmas celebrations.

---


As the holiday season approaches, many of us find ourselves reminiscing about the cherished memories and traditions that make this time of year so special. For me, one dish that encapsulates the joy of Christmas is the Vegetarian Christmas Wreath. Not only is it a visual masterpiece, but its fresh and savory flavors bring back memories of family gatherings filled with laughter and warmth.


A Nostalgic Journey

Every Christmas, my family would gather in my grandmother’s cozy kitchen, the heart of our home during the festive season. My grandmother, a culinary wizard in her own right, introduced us to the Vegetarian Christmas Wreath when I was a child. The dish became an instant favorite, not just for its vibrant colors and enticing flavors, but for the way it brought us all together. I recall the bustling kitchen, the aroma of fresh vegetables, and the joyous chatter as we eagerly awaited the unveiling of our family’s festive wreath.


Creating the Wreath:

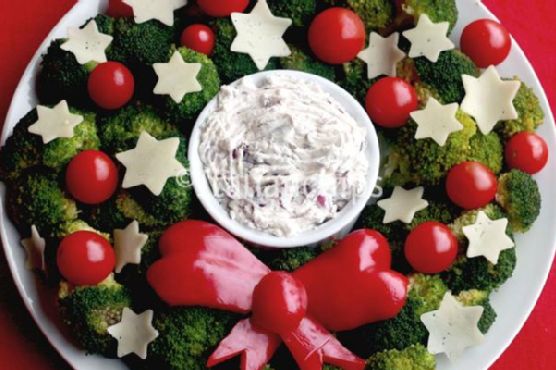
To recreate this delightful appetizer, you'll need a handful of simple yet flavorful ingredients: fresh broccoli florets, juicy cherry tomatoes, creamy cheese, a crisp red bell pepper, tangy cream cheese, mayonnaise, dried dill, dried garlic, savory olives, and a fresh scallion for garnish.


1. Blanching the Broccoli: Start by washing the broccoli and cutting the florets into bite-sized pieces. Fill a large pan with water and bring it to a boil. Once boiling, add the broccoli florets. While they're cooking, prepare a bowl filled with ice water. After two minutes of boiling, swiftly transfer the broccoli to the ice water to preserve its vibrant green color.
2. Preparing the Dip: As the broccoli cools, combine the cream cheese, mayonnaise, dried dill, and dried garlic to create a creamy dip. Let it chill in the fridge for at least three hours to allow the flavors to meld beautifully.
3. Assembling the Wreath: On a large white plate, place a ramekin at the center for the dip. Arrange the broccoli florets around the ramekin to form the wreath, adding cherry tomatoes for bursts of color. Use star-shaped cookie cutters to slice the cheese into festive shapes, and strategically place them on the wreath. Finally, cut the red bell pepper into strips to craft a decorative ribbon, completing your edible masterpiece.
Buon Appetito!

Serving this dish is not merely about enjoying a delicious appetizer; it's about creating an experience that brings loved ones together, evoking fond memories and starting new traditions. Whether you're hosting a grand feast or a cozy family dinner, the Vegetarian Christmas Wreath is sure to impress and delight.


Difficulty Rating: 5/10
Classification: Appetizer

This dish requires a bit of preparation but is straightforward enough for cooks of all abilities. Its simplicity is part of its charm, allowing you to enjoy the creative process without stress.


As you gather with family and friends this holiday season, consider adding the Vegetarian Christmas Wreath to your menu. It's a dish that symbolizes togetherness, joy, and the spirit of Christmas, reminding us that the best ingredients in any recipe are love and laughter.

Read more about Appetizers

Read more about Main Dishes

Read more about Desserts

Easy Gluten Free Vegetarian Pasta Salad | Made by Meaghan Moineau

Easy Gluten Free Vegetarian Pasta Salad | Made by Meaghan Moineau

Title: A Taste of Summer: Easy Gluten-Free Vegetarian Pasta Salad
Description: Discover the fresh and vibrant flavors of our Easy Gluten-Free Vegetarian Pasta Salad. This delightful dish combines the zesty tang of oranges with the sweetness of fresh grapes, creating a refreshing and healthy meal perfect for any occasion. Join us as we explore the simplicity of this recipe and share a cherished family memory that makes this salad truly special.

---


A Taste of Summer: Easy Gluten-Free Vegetarian Pasta Salad

There’s something nostalgically comforting about a good pasta salad, especially when it’s easy to prepare and packed with flavor. Our Easy Gluten-Free Vegetarian Pasta Salad is a celebration of simple, wholesome ingredients that come together in perfect harmony. With gluten-free pasta as its base, this dish is perfect for those with dietary restrictions without compromising on taste.


Ingredients:

- Gluten-free pasta


- Plain Greek yogurt


- Orange zest


- Fresh orange juice


- Olive oil


- Fresh grapes


- Fresh cilantro


- Sea salt


- Black pepper


Instructions:

1. Cook the gluten-free pasta according to package directions. Drain and set aside to cool for 10 minutes.


2. In a large bowl, combine all ingredients; gently toss to combine.


3. Transfer pasta salad to four serving bowls.


4. Serve chilled.


Difficulty Rating: 3/10
Classification: Main Dish

---


A Nostalgic Family Memory

Every summer, my family would gather at my grandmother’s house for a weekend of laughter, games, and of course, delicious food. The backyard was always buzzing with the playful sounds of cousins chasing each other, while the adults lounged under the shade of the old oak tree, sharing stories and reminiscing about days gone by.


Among the array of dishes that adorned the picnic table, my grandmother’s pasta salad was always a standout. Her secret? A splash of fresh orange juice and a sprinkle of orange zest, which she believed added a bit of sunshine to each bite.


This recipe is my tribute to those cherished summer afternoons. As I prepare the salad, I’m reminded of the joy and warmth that filled those days, the citrusy aroma of oranges mingling with the fresh scent of cilantro, and the sweet taste of grapes bursting with flavor.


Each bite of this salad takes me back to those sunlit afternoons, with the gentle rustle of leaves in the breeze and the comforting presence of family by my side. It’s a reminder that the simplest dishes, made with love and shared with those we hold dear, often become the most memorable.


Whether you’re hosting a summer gathering or simply craving a light and refreshing meal, this Easy Gluten-Free Vegetarian Pasta Salad is sure to delight. It’s a dish that not only satisfies the palate but also nourishes the soul with its simplicity and the memories it evokes.


Enjoy this delightful salad chilled, and let each bite transport you to a place of warmth, joy, and togetherness.

Read more about Appetizers

Read more about Main Dishes

Read more about Desserts

Quick and Easy Scallop Pasta | Made by Meaghan Moineau

Quick and Easy Scallop Pasta | Made by Meaghan Moineau

Title: Savor the Sea: Quick and Easy Scallop Pasta Recipe
Description: Dive into the delicious simplicity of our Quick and Easy Scallop Pasta, where succulent scallops meet the aromatic allure of garlic and white wine, all wrapped up in the comforting embrace of Japanese ramen noodles. Perfect for a weeknight dinner or an elegant weekend meal, this dish is a seafood lover's dream. With a difficulty rating of just 4 out of 10, even novice cooks can bring this Main Dish to life in their own kitchens. Join us on this culinary adventure and discover a recipe that’s not just about food, but also family, nostalgia, and the joy of shared meals.

---


A Taste of the Past: Family Memories with Scallop Pasta

Growing up, Sundays were always special in our household. They were the days when the entire family gathered around the dining table, sharing laughter and stories, and of course, savoring a delicious meal. My grandmother, an extraordinary cook, would often prepare a seafood feast, and scallop pasta was always a crowd favorite. As a child, I remember the anticipation that built as the rich aroma of garlic and butter wafted through the house, signaling that dinner was almost ready.


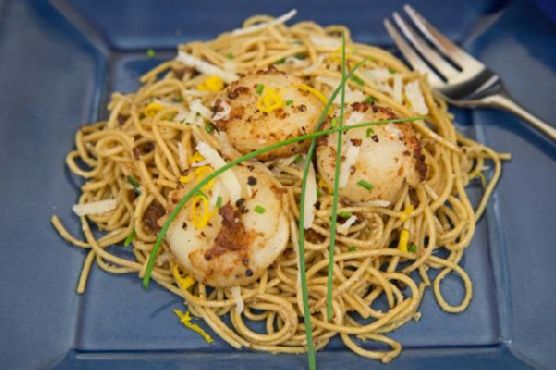
I learned the art of cooking scallops from watching her. She would expertly pat them dry, sprinkle a touch of salt and pepper, and sear them to perfection, creating a delectable golden crust. Her secret was the splash of sauvignon blanc that deglazed the pan, infusing the dish with a depth of flavor that was nothing short of magical.


As we sat around the table, the clinking of forks and contented sighs filled the air. The pasta, twirled expertly around our forks, was coated in a luscious sauce that brought together the briny scallops, nutty parmesan, and the subtle bite of fresh chives. Each bite was a harmonious blend of flavors, a testament to my grandmother's culinary skills and her love for her family.


Creating Your Own Scallop Pasta Experience
Ingredients:

- Dry scallops


- Dry Japanese ramen noodles


- Garlic


- Sesame oil


- Sauvignon blanc white wine


- Unsalted butter


- Parmesan cheese


- Round chives


- Lemon zest


- Fresh sea salt


Instructions:

1. Begin by patting the room temperature scallops dry with a paper towel. Season both sides with fresh sea salt, pepper, and granulated garlic.


2. Boil the ramen noodles for four minutes, then drain, rinse, and shake them dry. Set aside until needed.


3. Heat sesame oil in a 12-inch non-stick sauté pan over medium-high heat. Once hot, add the scallops, cooking them for three minutes on one side until they develop a golden-brown crust. Carefully flip and cook for another three minutes. Remove the scallops and keep them warm in a low-temperature oven.


4. Reduce the pan heat to medium and add minced garlic, cooking for about 1 to 1½ minutes until fragrant.


5. Carefully pour in the sauvignon blanc white wine, deglazing the pan by stirring up the browned bits from the scallops. Add the butter, stirring until it melts and combines with the wine to create a rich pan sauce.


6. Return the pasta to the pan, along with chopped chives and grated parmesan cheese. Mix thoroughly to combine all the flavors.


Serving Suggestion:

Finish your dish with a sprinkle of lemon zest for a fresh, zesty kick. Serve immediately, garnished with additional chives and a light dusting of parmesan cheese for a touch of elegance.


---


Whether you're creating new memories with loved ones or enjoying a quiet dinner for one, this Quick and Easy Scallop Pasta will bring a touch of nostalgia and joy to your table. Bon appétit!

Read more about Appetizers

Read more about Main Dishes

Read more about Desserts

Winter Kimchi | Made by Meaghan Moineau

Winter Kimchi | Made by Meaghan Moineau

Title: Embrace the Cold: Crafting Winter Kimchi to Warm Your Soul
Description: Discover the art of making Winter Kimchi, a cherished family recipe that combines tradition, flavor, and nostalgia. Dive into this step-by-step guide to creating a tangy, spicy delight that’s perfect for warming up those chilly winter days.

---


As the frost begins to lace the windows and winter's chill settles in, there’s nothing quite like the comforting embrace of a traditional dish that warms you from the inside out. For my family, that dish has always been Winter Kimchi. Its bold flavors and vibrant colors have long been a staple at our table, bringing both warmth and a touch of spice to our coldest months.


Ingredients:

- 1 large napa cabbage, quartered


- Brine solution (water with salt)


- 1 bowl of cooked rice


- 1 radish, julienned


- 2 spring onions, chopped


- 1 bulb of garlic, cloves separated


- 1 tablespoon of sugar


- 2 tablespoons of Korean gochujang paste


- 1 tablespoon of chili flakes


- 1 can of fermented baby shrimps or cincalok


- 2 tablespoons of fish sauce


Instructions:

1. Begin by soaking the quartered napa cabbage in a brine solution for 4 hours. To ensure even soaking, weigh the cabbage down with a heavy plate.


2. Once the cabbage is well-brined, remove it from the solution and drain thoroughly.


3. In a food processor, combine the garlic cloves, cooked rice, fermented shrimp, fish sauce, sugar, gochujang paste, and chili flakes. Blend until you achieve a smooth paste.


4. Stir in the chopped spring onions into the paste to add a fresh, vibrant note.


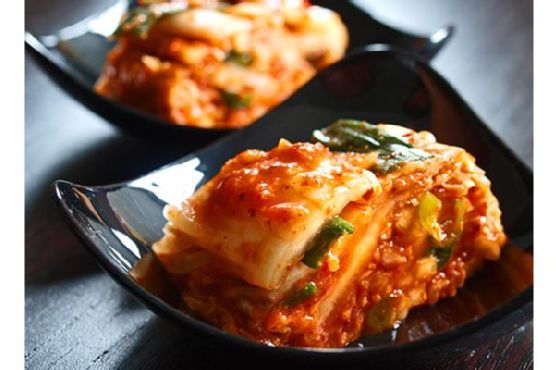
5. Carefully stuff the napa cabbage with the spicy paste, making sure to get in between the individual leaves and coating every inch of the cabbage thoroughly.


6. Place your stuffed cabbage into an airtight container. Allow the kimchi to sit at room temperature for a day, then transfer it to the fridge to ferment for at least a week. For the best flavor, I recommend waiting around three weeks before diving in.


A Taste of Nostalgia:

Every winter, as the first snowflakes began to fall, my grandmother would gather the family around the kitchen table for the annual kimchi-making ritual. The kitchen would be filled with the pungent aroma of garlic and spices, mingling with the laughter and chatter of loved ones. As a child, I would watch in awe as my grandmother's skilled hands expertly layered the fiery red paste between the cabbage leaves, transforming simple ingredients into a dish that was nothing short of magical.


For us, Winter Kimchi was more than just food—it was a connection to our heritage, a symbol of resilience against the winter cold, and a reminder of the warmth of family bonds. Each bite was a sensory journey, a dance of flavors that told stories of the past and hopes for the future.


Difficulty: 6/10
Classification: Appetizer

Creating Winter Kimchi is a delightful adventure that marries tradition with creativity. Whether you're new to kimchi-making or a seasoned pro, the experience is both rewarding and deeply satisfying. As you savor each spicy, tangy bite, may it bring you as much warmth and joy as it has brought my family over the years.

Read more about Appetizers

Read more about Main Dishes

Read more about Desserts

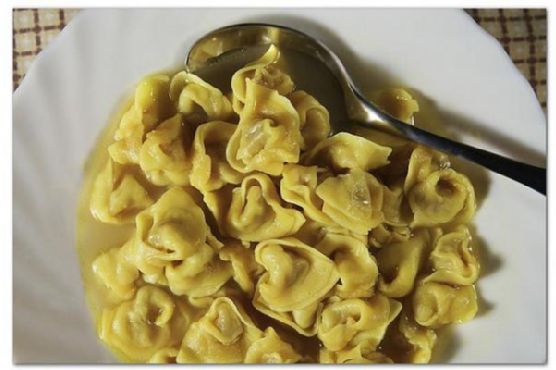
Tortellini In Brodo | Made by Meaghan Moineau

Tortellini In Brodo | Made by Meaghan Moineau

Title: A Taste of Tradition: Reliving Family Memories with Tortellini In Brodo
Description: Dive into the comforting world of Tortellini In Brodo, a classic Italian dish that combines simplicity with rich flavors. This heartwarming recipe not only serves as a perfect main dish but also unlocks cherished family memories. Join me as I share the recipe, a personal story, and tips to recreate this delightful meal at home.

---


Tortellini In Brodo: A Soupy Embrace of Tradition


There's something magical about the aroma of simmering chicken stock and the tender pockets of tortellini floating within. For me, Tortellini In Brodo is more than just a meal; it's a fragrant journey back to my grandmother's kitchen in the heart of winter. As the snowflakes danced outside, we gathered around the dining table, eagerly anticipating the soul-warming bowls that awaited us.


Ingredients You'll Need:

- Chicken stock

- Fresh lemon juice


- Lemon zest


- Parmigiano-Reggiano


- Salt and pepper


- Frozen tortellini


Instructions to Warm the Heart:

1. Begin by heating your chicken stock to a gentle boil. The rich aroma will soon fill your kitchen, much like it did in my grandmother's.

2. Add the frozen tortellini. As they cook, they absorb the savory essence of the broth, transforming into delightful morsels of comfort.


3. Once cooked, ladle the steaming soup into bowls. The warmth seems to wrap around you like a cozy blanket.


4. Squeeze fresh lemon juice into each bowl, stirring gently to incorporate the tangy brightness.


5. Grate a generous amount of Parmigiano-Reggiano on top, allowing the cheese to melt ever so slightly into the broth.


6. Finish with a sprinkle of lemon zest, freshly ground salt, and pepper for that perfect balance of flavors.


7. Serve immediately, and watch as smiles light up around the table.


A Nostalgic Family Memory:


Every spoonful of Tortellini In Brodo transports me back to those cherished winter evenings with my family. My grandmother, a beacon of warmth and love, would often share stories of her childhood in Italy as we savored each bite. Her stories were as rich as the broth itself, weaving tales of her youthful adventures and the traditional Italian recipes passed down through generations. This dish was more than sustenance; it was a connection to our heritage, a reminder of where we came from, and a testament to the love that binds us.


As I prepare this dish today, I find joy in the continuity of tradition, knowing that I am creating new memories while honoring the old. It's a simple recipe, yet its impact is profound, reminding us that the essence of family is captured in the meals we share.


Recipe Difficulty: 3/10


Classification: Main Dish


Whether you're a seasoned cook or a kitchen novice, Tortellini In Brodo is a delightful recipe that promises to bring warmth and joy to your home. Embrace the simplicity, savor the flavors, and as you do, may you create your own treasured memories with those you love.

Read more about Appetizers

Read more about Main Dishes

Read more about Desserts

Baked Ziti Or Rigatoni | Made by Meaghan Moineau

Baked Ziti Or Rigatoni | Made by Meaghan Moineau

Title: "Baked Ziti Bliss: A Nostalgic Journey Through Flavor and Family"
Description: Dive into the heartwarming world of Baked Ziti, a comforting Italian classic that brings families together. Explore this simple yet flavorful recipe, perfect for any occasion, and discover a cherished family story that highlights the joy and connection this dish brings to our lives.

---


Baked Ziti: A Taste of Tradition and Togetherness

When the aroma of Baked Ziti wafts through the house, it signals more than just a hearty Italian meal; it marks a gathering, a celebration, and a rekindling of memories. This classic dish, rich with creamy ricotta, tangy spaghetti sauce, and melty mozzarella, is more than just a recipe—it's a tradition that has warmed our family's table for generations.


Ingredients:

- Cooked ziti or rigatoni


- 1 egg, beaten


- 1 cup grated Parmesan cheese, divided


- 1 cup ricotta cheese


- 2 cups shredded mozzarella cheese


- 2 cups spaghetti sauce, divided


Instructions:
1. Combine and Create: In a large mixing bowl, combine the cooked ziti, beaten egg, 1/2 cup of Parmesan cheese, ricotta cheese, shredded mozzarella, and 1 1/2 cups of spaghetti sauce. Stir until all ingredients are evenly mixed.
2. Layer and Love: Spread 1/2 cup of spaghetti sauce on the bottom of a 2 1/2 quart baking dish, ensuring the base is nicely coated. Pour in the ziti mixture, spreading it evenly across the dish. Top with the remaining 1 1/2 cups of spaghetti sauce, ensuring every nook and cranny is covered.
3. Finish with Flair: Sprinkle the remaining 1/2 cup of Parmesan cheese over the top, creating a delightful cheesy crust as it bakes.
4. Bake to Perfection: Preheat your oven to 375 degrees Fahrenheit. Bake for 30 minutes or until the top is slightly browned and bubbling with cheesy goodness.
A Family Story to Savor:

Growing up, Baked Ziti was not just a meal; it was an event. I remember my grandmother's kitchen, a warm haven filled with the laughter of cousins and the comforting hum of family chatter. Every Sunday, she would prepare this dish with love and patience, her hands deftly mixing the ingredients while sharing stories from her own childhood in Italy.


One particular Sunday stands out in my memory. It was a rare snowy day, and the world outside was blanketed in white. As the snow softly fell, we gathered around the dining table, eager to dive into the steaming dish that promised warmth and fullness. With each bite, the room filled with satisfied murmurs and the kind of contentment that only a family meal could bring.


Now, every time I prepare Baked Ziti, I'm transported back to that snow-kissed afternoon, to the coziness of my grandmother's kitchen, and to the enduring bond that food has the power to create.


Difficulty: 3/10
Classification: Main Dish

Whether you're a seasoned cook or new to the kitchen, Baked Ziti offers a straightforward yet rewarding culinary experience. It's a dish that invites you to gather your loved ones and savor not only its rich flavors but also the precious moments spent together. So, roll up your sleeves, embrace the nostalgia, and enjoy a plate of Baked Ziti bliss.

Read more about Appetizers

Read more about Main Dishes

Read more about Desserts