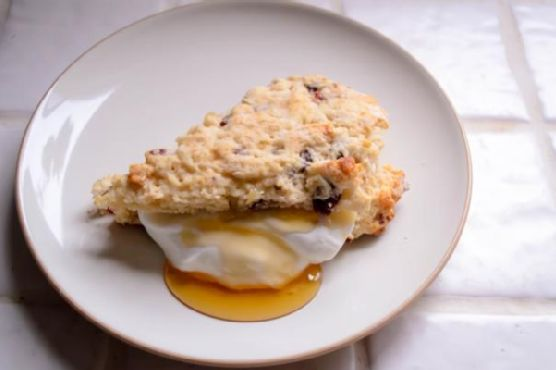
It was one of those rainy Tuesday afternoons where the chilly wind made its way through every crack in my window, and all I could think about was something warm and cozy to fill my kitchen with delicious smells. I found myself rummaging through my pantry, pulling out half-used bags of dried fruits and a forgotten jar of candied ginger. Instantly, the idea of scones popped into my head—specifically, Dried Fruit and Ginger Scones. This recipe is perfect for those moments when you crave a little treat that’s impressively tasty but doesn’t demand hours in the kitchen. The best part? I promise you, they’re so easy to make, you’ll almost feel like you’re cheating.
Jump to Recipe
What You’ll Need
The ingredient list is delightfully simple. Chances are, you already have most of these items tucked away in your kitchen.
- Flour
- Cake flour
- Baking powder
- Butter
- Heavy cream
- Whole milk
- Salt
- Turbinado sugar
- Dried apples
- Dried cranberries
- Candied ginger
How to Make Dried Fruit and Ginger Scones
- Position a rack in the middle of your oven and preheat to 425°F. If you’re feeling fancy and using a pizza stone, pop it in the oven to preheat too. Otherwise, line a cookie sheet with parchment paper—you’re ready to go.
- In a medium bowl, whisk together the flours, baking powder, 3 tablespoons of the sugar, and salt. It should look like a soft, powdery snow drift.
- Cut in the butter using a pastry blender, two knives, or your fingers, until you have pea-sized butter pieces that make the mixture look a bit like coarse sand with pebbles. Don’t worry if it looks a bit odd; this is what you want!
- Pour in the cream and milk (or go all in with just cream if you’re feeling decadent) and stir with a fork. You’re aiming for a sticky, shaggy dough that’s evenly moist.
- Add in the fruits and ginger. Work the mixture just enough to spread the goodies evenly, breaking up any ginger clumps. Expect your hands to get a little messy.
- Turn the sticky dough onto a floured surface, sprinkling a bit more flour on top. Pat it into a circle about 1-inch thick. Resist the urge to over-flour; we don’t want tough scones.
- Flour a pizza cutter or a sharp knife and slice the dough circle into 8 equal wedges. Flour in between cuts if things get sticky.
- With a bench scraper, spatula, or your brave hands, transfer the scones to your baking vessel. Leave a half-inch space between them so they can sashay their way to deliciousness.
- Sprinkle the tops with the remaining tablespoon of sugar. Bake for 13-15 minutes, until the tops are a lovely light golden and the scones smell irresistible.
- Let them cool on the baking sheet for at least 10 minutes—it’s tempting, but worth the wait. Enjoy them warm or after they’ve cooled. Both ways are pure bliss.
Cook’s Notes
These scones are pretty forgiving. The key is not to overwork the dough, which keeps them tender and fluffy. If you don’t have cake flour, all-purpose flour works too—just be a bit gentler when mixing. They’re best the day they’re made, but you can store them in an airtight container for a day or two. Reheat them in a warm oven if you want to revive that fresh-from-the-oven vibe. If you’re prepping ahead, you can freeze the unbaked scones; just add a couple of extra minutes to the baking time.
Make It Your Own
- Nutty Twist: Swap half of the dried fruits for chopped toasted almonds or walnuts for a crunchy surprise.
- Chocolate Indulgence: Substitute the candied ginger with dark chocolate chips for a sweet, rich variation.
- Zesty Citrus: Add finely grated orange or lemon zest to the dough for a refreshing aromatic lift.
- Herbal Infusion: Replace dried cranberries with dried cherries and throw in a teaspoon of dried rosemary for a sweet-herbaceous combo.
If you try this, I’d love to hear how it turns out—drop a comment or tag me! Your kitchen adventures make this foodie journey so much more fun. Happy baking!
Related update: Dried Fruit and Ginger Scones
Related update: Chouquettes
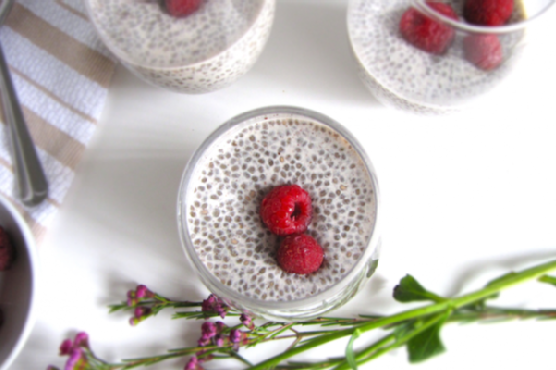
So there I was, rummaging through my pantry on a Sunday night, searching for something—anything—that could pass as a make-ahead breakfast for the hectic week ahead. You know how it is, right? That moment when you realize you’ve spent a little too much time on the couch binge-watching your favorite series and now the thought of meal-prepping feels like climbing Everest. Enter: chia seed pudding. Honestly, it’s like a little miracle in a bowl. Quick to put together, almost zero cleanup, and it somehow feels like a treat even though it’s packed with all the good stuff. And did I mention it requires zero effort in the morning? Just grab and go. Trust me, once you try this, you’ll wonder how you ever lived without it.
Jump to Recipe
What You’ll Need
This chia seed pudding is all about simplicity, and chances are you already have most of these in your kitchen.
- 2 tablespoons black chia seeds
- 1 cup almond milk
- 1 tablespoon raw agave syrup
- 1/4 teaspoon vanilla extract
- Pinch of salt
- Garnish: raspberries or your favorite berries
How to Make Chia Seed Pudding
- Start by grabbing a small bowl or a mason jar—whatever works for you. Pour in the almond milk, then add the chia seeds, giving them a gentle stir to ensure they begin to soak up the liquid.
- Add the raw agave syrup to the mix. Stirring slowly, add the vanilla extract and a pinch of salt. The salt might seem odd, but trust me, it balances the sweetness perfectly.
- Keep stirring until everything’s combined and the chia seeds are evenly distributed. Cover the bowl or jar, and place it in the fridge overnight. This is when the magic happens—let the chia seeds work their gelling wonder.
- In the morning, check the consistency. If it’s too thick for your liking, stir in a bit more almond milk. Top with fresh raspberries or any berries you fancy, and voilà—breakfast is served!
Cook’s Notes
Here’s the deal: chia seeds can be a little finicky when it comes to absorbing liquid. If you find your pudding too runny, just add a bit more chia seed, stir, and let it sit for another hour. For those of us who love a thicker consistency, you might try reducing the almond milk slightly. And if mornings are as hectic for you as they are for me, make a couple of these at once—they keep well in the fridge for up to four days.
Make It Your Own
- Coconut Dream: Swap almond milk for coconut milk and top with shredded coconut and pineapple chunks.
- Chocolate Indulgence: Mix in a tablespoon of cocoa powder and finish with dark chocolate shavings on top.
- Nutty Flavor: Replace almond milk with cashew milk and add a handful of chopped nuts on top.
- Berry Bonanza: Go wild with mixed berries for a burst of color and flavor.
If you try this, I’d love to hear how it turns out—drop a comment or tag me! Can’t wait to see your delicious creations and don’t forget to enjoy every spoonful. Happy breakfast prepping!
Related update: Chia Seed Pudding
Related update: Dried Fruit and Ginger Scones
Related update: Baked Oatmeal with Dried Cranberries

I was having one of those days where everything seemed to go sideways. You know the kind — you spill your morning coffee, forget your umbrella, and then it starts pouring on your way home. I needed a pick-me-up, pronto. That’s when I remembered these Flour-Less Peanut Butter Cookies. They’re everything I needed: sweet, comforting, and ridiculously easy to make. The best part? You can whip them up with just a few pantry staples, and they’re done in under 20 minutes. Perfect for those days when you need a win, no matter how small.
Jump to Recipe
What You’ll Need
The beauty of these cookies lies in their simplicity. Chances are you have these ingredients tucked away in your kitchen already. Here’s what you need:
- Peanut butter – smooth or chunky, your call
- Honey – adds the perfect sweetness
- Egg – binds it all together
- Baking soda – gives them a little lift
- Vanilla extract – just a splash for depth
How to Make Flour-Less Peanut Butter Cookies
- Preheat your oven to 350°F (175°C). This is crucial to get that perfectly soft center.
- In a large mixing bowl, combine the peanut butter, honey, egg, baking soda, and vanilla extract. Stir until everything is smooth and well-blended.
- Using a spoon, drop dollops of the dough onto a lightly greased cookie sheet. Keep them about 2 inches apart since they’ll spread a little.
- Bake for about 12 minutes. You’ll know they’re ready when the edges are set but the centers are still soft to the touch.
- Let the cookies cool on the sheet for a few minutes, then transfer them to a rack to cool completely. They’ll firm up as they cool, so resist the urge to eat them straight away!
Cook’s Notes
These cookies are incredibly forgiving, but a few tips can ensure they turn out perfect every time. If your peanut butter is particularly oily, give it a good stir before measuring. When mixing, ensure everything is well-combined but don’t overdo it; overmixing can make the cookies tough. If you like your cookies on the sweeter side, you can increase the honey slightly or add a touch of sugar.
Store these cookies in an airtight container at room temperature for up to a week — if they last that long! You can also freeze the dough balls to bake later; just add a couple of minutes to the baking time.
Make It Your Own
Want to mix things up? Here are some tasty variations:
- Chocolate Lovers: Stir in some chocolate chips or chunks before baking for a rich, decadent treat.
- Nuts About Nuts: Swap half the peanut butter for almond butter for a nutty twist.
- Spice It Up: Add a sprinkle of cinnamon or a pinch of cayenne for a warm, spicy note.
- Salty Sweet: Top each cookie with a sprinkle of sea salt right before baking for that perfect salty-sweet balance.
If you try this, I’d love to hear how it turns out — drop a comment or tag me! There’s nothing better than sharing a little cookie joy. Happy baking!
Related update: Flour-Less Peanut Butter Cookies
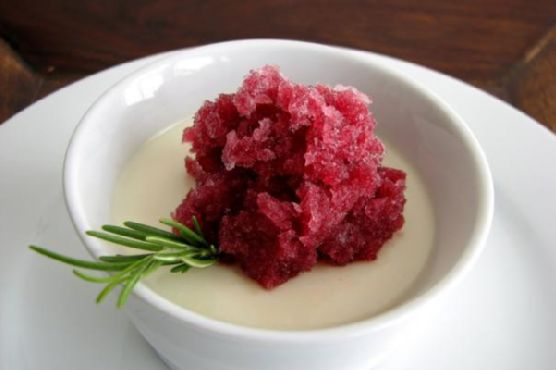
Picture this: It’s a Friday evening, and I’ve just survived one of those weeks where everything feels a bit too much. You know the kind — when the emails pile up and the laundry threatens to become sentient. I’m in the kitchen with my favorite playlist crooning in the background, a glass of wine in hand, and the distinct sense that I need something special, yet fuss-free, to round off this week. Enter: Apothic Granita and Vanilla Panna Cotta. This dessert is my secret weapon; it’s deceptively simple yet so elegant that it could grace any dinner party table. Think of it as a little gift to yourself — creamy, dreamy panna cotta topped with a refreshing, slightly boozy granita that feels like a grown-up snow cone. Trust me, it’s the perfect ending to an imperfect week.
Jump to Recipe
What You’ll Need
The beauty of this recipe is that it feels luxurious while using ingredients you might already have lurking in your pantry. Let’s check the list:
- 1 cup Apothic Red wine
- 1 tablespoon crème de cassis liqueur
- 2 tablespoons sugar
- 1 teaspoon fresh lemon juice
- 1 sprig fresh rosemary
- 1 teaspoon whole black peppercorns
- 1 envelope (2 1/4 teaspoons) unflavored Knox powdered gelatin
- 1 cup half and half
- 1 cup heavy cream
- 1/4 cup sugar
- 1 vanilla bean, split and seeds scraped
- 1/4 cup cold water
How to Make Apothic Granita and Vanilla Panna Cotta
- Start with the granita: In a saucepan over medium-low heat, combine the Apothic Red wine, crème de cassis, 2 tablespoons of sugar, lemon juice, rosemary, and peppercorns. Let it simmer gently for 10 to 15 minutes until the kitchen is filled with a fragrant aroma and the sugar has dissolved completely.
- Once the mixture is infused, remove it from the heat and allow it to cool to room temperature. This is your golden moment of patience — let those flavors meld!
- After cooling, strain the mixture into a shallow airtight container, ensuring all the solids are removed. Cover and place it in the freezer for about 2 hours, or until it’s frozen but not rock solid.
- While the granita is freezing up its magic, let’s tackle the panna cotta. Sprinkle the gelatin over the cold water in a small bowl and let it bloom — this means it should look like a soft, jiggly sponge.
- In another saucepan, combine the half and half, heavy cream, and 1/4 cup of sugar. Add the split vanilla bean and its seeds, then bring the mixture to a gentle simmer over medium heat, stirring occasionally. You’re looking for the moment where it’s steaming but not yet boiling.
- Remove from heat and whisk in the bloomed gelatin until fully dissolved, ensuring a silky smooth texture. Strain the mixture into cups or molds of your choosing, then chill in the refrigerator for at least 4 hours or until set.
- To finish the granita, use a fork to scrape the surface into icy crystals. It should remind you of a snow cone, but with a sophisticated twist.
- Serve the panna cotta topped with a generous scoop of granita, and get ready to impress yourself or any guest lucky enough to join.
Cook’s Notes
Keep an eye on the simmering wine mixture. If it reduces too much, you’ll end up with concentrated flavors that might overpower the delicate panna cotta. If you’re planning ahead, the panna cotta can be made a day in advance and kept chilled. As for leftovers, the granita can be stored in the freezer in an airtight container for up to a week. Just remember to give it a good scrape before serving again.
Make It Your Own
- Swap the Apothic Red: Try a different red wine for a unique flavor profile — maybe a Merlot or Zinfandel.
- Berry Burst: Add a handful of fresh berries to the granita mixture before freezing for a fruity twist.
- Vanilla Twist: Use vanilla extract instead of a vanilla bean if you’re in a pinch, but reduce it to one teaspoon.
- Herbal Infusion: Replace rosemary with fresh thyme for a fresh take on the herbal notes.
If you try this, I’d love to hear how it turns out — drop a comment or tag me! If your week has been anything like mine, this might just be the sweet escape you need.
Related update: Apothic Granita and Vanilla Panna Cotta
Related update: Flour-Less Peanut Butter Cookies

Picture this: It’s one of those afternoons when the craving for something sweet is impossible to ignore. Not just any sweet, but a slice of cake smothered in creamy, luscious frosting. I was halfway through baking a batch of cupcakes when disaster struck—no frosting in sight! With minutes to spare, I whipped out this trusty Old Fashioned Vanilla Buttercream Frosting recipe, and voilà, my cupcakes were saved. It’s quick and easy, with ingredients you probably have on hand, and it never fails to impress with its smooth, rich texture. Plus, there’s something about homemade frosting that just feels like a hug in dessert form.
Jump to Recipe
What You’ll Need
I love this recipe because it uses simple ingredients that work magic together. Chances are you already have most of this sitting in your pantry or fridge:
- Solid vegetable shortening
- Butter
- Vanilla extract
- Confectioners sugar
- Milk
How to Make Old Fashioned Vanilla Buttercream Frosting
- In a large mixing bowl, cream the butter and shortening together using an electric mixer. You’re aiming for a smooth, unified blend that’s a pale yellow in color.
- Add the vanilla extract, and continue mixing. The aroma will instantly start to fill your kitchen.
- Gradually sift in the confectioners sugar, adding it one cup at a time. Beat on medium speed, and scrape down the sides and bottom of the bowl often. This ensures everything is well incorporated.
- Once all the sugar is mixed in, the icing will seem a bit dry—don’t worry, this is normal!
- Add the milk to the mixture. Beat on medium speed for about 3 minutes. You’re looking for a light, fluffy texture that’s easy to spread.
- Keep the icing covered with a damp cloth until you’re ready to use it. This prevents it from drying out.
Cook’s Notes
A little tip I’ve picked up: Keeping the mixing bowl in the fridge when you’re not using it helps maintain the frosting’s consistency, especially if your kitchen tends to be on the warmer side. If you’re making this ahead of time, store it in an airtight container in the fridge for up to a week. When you’re ready to use it, just give it a quick re-whip in your mixer to bring back its creamy texture. Also, be generous with that vanilla—for that classic flavor, it’s key!
Make It Your Own
Here are a few fun variations to try if you’re feeling adventurous:
- Swap out the vanilla for almond extract for a nutty twist.
- Add a few tablespoons of cocoa powder to create a chocolate buttercream.
- Substitute the milk with heavy cream for a richer, thicker frosting.
- Mix in some food coloring to match the theme of your dessert or party.
If you try this, I’d love to hear how it turns out—drop a comment or tag me! There’s nothing more rewarding than seeing your creations come to life. Enjoy every sweet, frosted bite!
Related update: Old Fashioned Vanilla Buttercream Frosting
Related update: Apothic Granita and Vanilla Panna Cotta
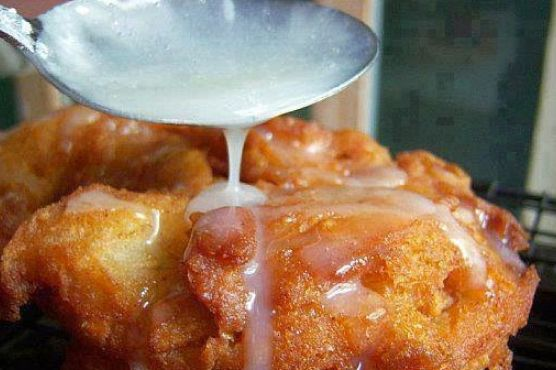
So last Tuesday, I found myself staring at a bowl full of apples on my countertop, leftovers from my overly ambitious farmer’s market haul. My mind was set on something sweet and indulgent, but I didn’t want to spend ages prepping a fancy dessert or making a mess of my kitchen. Enter: Easy Homemade Apple Fritters. These little nuggets of joy are perfect for those times when you need a quick treat that feels special but doesn’t involve a ton of effort. They’re crispy on the outside and filled with warm, cinnamon-spiced apple goodness on the inside. Trust me, they’re like a cozy hug on a plate.
Jump to Recipe
What You’ll Need
You’ll love this recipe because chances are, you already have most of the ingredients in your pantry. Plus, it’s really all about letting those apples shine.
- 1 cup all-purpose flour
- 1 apple, peeled, cored, and diced
- 1 teaspoon baking powder
- 1 teaspoon cinnamon
- 1 egg
- 1/3 cup milk
- 1 tablespoon sugar
- 1/4 teaspoon salt
- Oil, for frying (I used vegetable oil)
- 1 cup powdered sugar
- 2 tablespoons milk (for the glaze)
How to Make Easy Homemade Apple Fritters
- In a mixing bowl, whisk together the flour, sugar, salt, baking powder, and cinnamon. You’ll want to inhale deeply because that cinnamon is going to smell divine.
- Gently stir in the milk and egg until the mixture is just combined. Over-mixing is the enemy here! We want it to stay light and fluffy.
- Fold in the diced apple. Make sure those apple pieces are well distributed—every fritter deserves its apple moment!
- Pour oil into a skillet so that it’s about 1 1/2 inches deep. Heat the oil on high. You’ll know it’s ready when a little dough thrown in pops right back up to the surface.
- Carefully drop heaping teaspoons of the dough into the hot oil. Watch them sizzle! Cook until the fritters are brown, about 2 minutes, then flip. Give them another 1-2 minutes to get golden on the other side.
- Transfer the fritters to paper towels to soak up any excess oil. A quick pit stop before they head to a cooling rack.
- For the glaze, stir the powdered sugar and milk together in a small bowl. It’ll be smooth and silky.
- Drizzle the glaze over the fritters. Wait about 3 minutes for the glaze to harden a bit, flip the fritters, and drizzle over the other side. They’re best served warm, so dive in!
Cook’s Notes
Here’s a few things I learned while making these fritters:
- Keep an eye on your oil temperature. If it’s too hot, your fritters will brown too quickly on the outside and stay raw on the inside.
- If you’re making these ahead of time, store them at room temperature in an airtight container for up to a day. Reheat in the oven to crisp them back up.
- Leftovers can be revived by popping them in a toaster oven for a few minutes. They won’t be as good as fresh, but still tasty.
Make It Your Own
- Swap the apple for another fruit like pears or peaches if you’re feeling adventurous!
- Add a pinch of nutmeg or ginger to the batter for an extra layer of spice.
- Try using maple syrup instead of powdered sugar for the glaze for a deeper, richer sweetness.
- For a savory twist, omit the sugar and cinnamon, and add sharp cheddar cheese and bacon bits to the batter.
If you try this, I’d love to hear how it turns out — drop a comment or tag me! Seriously, nothing makes my day more than seeing your kitchen creations. Enjoy every crispy, warm, and cinnamon-sweet bite!
Related update: Easy Homemade Apple Fritters
Related update: Old Fashioned Vanilla Buttercream Frosting
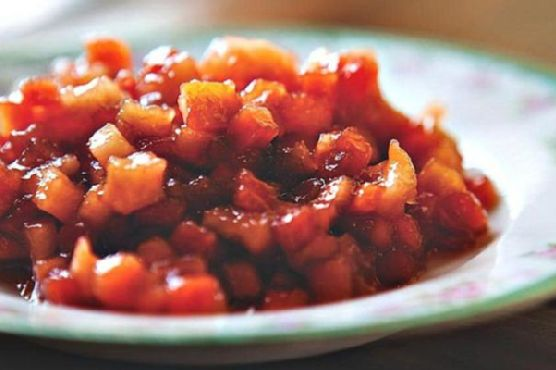
I was standing in my kitchen one chilly October morning, staring at a basket of apples and pears I’d picked up from the farmer’s market the day before. You know those mornings when the air is crisp, and everything feels just a little bit cozier? That’s when it hit me: a warm, spiced fruit compote that could double as a breakfast topping or a dessert treat was exactly what I needed. This Fall Fruit Compote is the kind of recipe that fills your kitchen with the scent of cinnamon and makes you feel like you’re swaddled in a warm blanket. It’s quick to whip up, requires only a few staple ingredients, and the result is pure comfort.
Jump to Recipe
What You’ll Need
The beauty of this recipe is its simplicity — you probably have most of these items on hand already. Here’s what you’ll need to get that cozy feeling wafting through your kitchen:
- 2 tablespoons butter
- 2 cups diced honeycrisp apples
- 2 cups diced pears
- 1/2 cup dried cherries
- 1/4 cup apple cider vinegar
- 1/2 cup apple juice, plus more as needed
- 1/3 cup brown sugar
- 1 cinnamon stick
How to Make Fall Fruit Compote
- Melt the butter in a medium saucepan over high heat. As it melts, breathe in that nutty aroma — that’s your first sign of deliciousness to come.
- Add the diced honeycrisp apples, diced pears, dried cherries, apple cider vinegar, apple juice, brown sugar, and the cinnamon stick. Your kitchen will start smelling like a fall wonderland. Stir everything well.
- Cook for about 5 minutes, letting the fruit soften slightly and the flavors mingle together. You want the liquid to begin bubbling up around the edges.
- Lower the heat to medium and continue to cook for a few more minutes. Keep stirring occasionally until the fruit is tender and the liquid has mostly evaporated. If it seems like the fruit might stick, add a little more apple juice to keep everything cozy and moist.
Cook’s Notes
Let’s talk about a few things that can make or break your compote. First, the type of apple matters — honeycrisps are perfect here for their sweet-tart flavor and firm texture. If you don’t have dried cherries, dried cranberries can step in as a worthy substitute. Remember, the compote will thicken as it cools, so don’t fret if it seems a bit saucy when you take it off the heat. If you’re planning ahead, you can make this compote up to a week in advance and just store it in an airtight container in the fridge. When you’re ready to serve, a gentle reheat on the stove will do the trick. And hey, it’s not just for potato latkes; try it over pancakes, waffles, or even vanilla ice cream!
Make It Your Own
Here are some fun ways to tweak this compote and make it yours:
- Swap the dried cherries for golden raisins for a different layer of sweetness.
- Substitute the apple cider vinegar with balsamic vinegar for a deeper, richer flavor profile.
- Add a splash of bourbon or rum just before serving for a boozy warmth.
- Throw in a handful of chopped walnuts or pecans for a bit of crunch and nutty warmth.
If you try this, I’d love to hear how it turns out — drop a comment or tag me! Your kitchen is about to smell amazing, and I can’t wait for you to experience it. Enjoy every warm, sweet, and spicy bite!
Related update: Fall Fruit Compote
Related update: Broccoli Oatmeal Breakfast Casserole
Related update: Easy Homemade Apple Fritters
Related update: Béarnaise Sauce

It was one of those chaotic Tuesday afternoons when everything seemed to be happening all at once. My inbox was overflowing, the laundry was threatening to become a second couch, and the dog was doing her best to convince me that she hadn’t been fed in weeks with those soulful eyes. As I rummaged through my pantry, I stumbled upon a forgotten stash of chocolate chips and suddenly, the only logical thing to do was to bake. Enter: Neiman Marcus Oatmeal Chocolate Chip Cookies. This recipe is that perfect balance between a comforting classic and a little twist that makes it feel special. It’s the kind of cookie that makes a regular Tuesday feel like a mini celebration. And the best part? These cookies are incredibly easy to whip up, even when life feels a bit like a juggling act.
Jump to Recipe
What You’ll Need
Trust me, chances are you already have most of these hanging out in your kitchen, just waiting to become something amazing.
- 1 cup unsalted butter, softened
- 1 cup granulated sugar
- 1 cup brown sugar, packed
- 2 large eggs
- 1 teaspoon vanilla extract
- 2 cups all-purpose flour
- 2 ½ cups blended oatmeal (measure before blending)
- ½ teaspoon salt
- 1 teaspoon baking powder
- 1 teaspoon baking soda
- 12 ounces chocolate chips
- 1 4-ounce chocolate bar, grated
- 1 ½ cups chopped walnuts
How to Make Neiman Marcus Oatmeal Chocolate Chip Cookies
- Preheat your oven to 375 degrees F. The anticipation of warmth is part of the magic.
- In a large bowl, cream together the butter, granulated sugar, and brown sugar until the mixture is light and fluffy. You’re aiming for a dreamy, creamy consistency here.
- Add in the eggs, one at a time, and beat until just incorporated. Don’t forget the vanilla — it’s the unsung hero that ties everything together.
- Gradually mix in the flour, blended oatmeal, salt, baking powder, and baking soda. The dough will start to smell like a promise of good things to come.
- Fold in the chocolate chips, grated chocolate bar, and walnuts. You’ll want to use a spatula to make sure everything is evenly distributed and each scoop is a treasure trove of goodies.
- Roll the dough into balls and place them about two inches apart on a cookie sheet. This gives them room to spread and become their best cookie selves.
- Bake for about 10 minutes. Keep an eye out for those edges to turn golden and the aroma to fill your kitchen. That’s when you know they’re ready.
Cook’s Notes
Let’s be real — these cookies are hard to mess up. But here are a few thoughts to keep in mind. If your butter isn’t soft enough, you can microwave it for a few seconds, but watch closely — nobody wants half-melted butter. When blending your oatmeal, aim for a texture that’s slightly coarser than flour; it adds a delightful chewiness to the cookies. These cookies are at their most divine fresh out of the oven, but they’ll keep well in an airtight container for up to a week, if they last that long. You can even freeze the dough balls to bake later. Just add a couple of minutes to the bake time.
Make It Your Own
- Swap the walnuts for pecans or almonds if that’s your jam. Each nut brings its own character to the party.
- If you’re not a fan of oats, try substituting with crushed cornflakes for a different kind of crunchy texture.
- Go wild and use white chocolate chips instead of the regular ones if you’re feeling fancy.
- Add a teaspoon of cinnamon or espresso powder for a little extra depth in flavor. It’s like giving your cookies a secret superpower.
If you try this, I’d love to hear how it turns out — drop a comment or tag me! Happy baking, and may your Tuesday be as sweet as these cookies.
Related update: Neiman Marcus Oatmeal Chocolate Chip Cookies
Related update: Fall Fruit Compote

Okay, picture this: It’s a lazy Sunday morning, and the sun is peeking through the kitchen window, but you’re still in your pajamas and not quite ready to embrace the day. You crave something sweet but are not in the mood for a mess of bowls and measuring cups. Enter Blueberry Almond Crescent Rolls, the savior for those who want to feel fancy without the fuss. These little guys are like a bakery treat you can whip up faster than you can say “brunch,” and I promise, they’ll make your kitchen smell like a dream. Plus, they’re guaranteed to impress anyone lounging around in their PJs with you! 🍇🥐
Jump to Recipe
What You’ll Need
This is one of those recipes where you might peek into your pantry and realize you’ve got most of it already. Here’s the lineup:
- 1 can of regular crescent rolls
- 1/4 cup blueberry jam
- 4 ounces cream cheese, softened
- 1/2 cup confectioner’s sugar, divided
- 1/4 teaspoon almond extract, divided
- 1 tablespoon flour
- Pinch of sea salt
- 1 egg
- 1 tablespoon water
- 1 tablespoon milk
- 2 tablespoons turbinado sugar
How to Make Blueberry Almond Crescent Rolls
- Preheat your oven to 375 degrees F. Line a large baking sheet with parchment paper or a silicone baking mat. Trust me, it’s worth it for easy cleanup!
- In the bowl of your stand mixer with the paddle attachment—or just a handheld mixer if you’re like me and can’t be bothered—mix together the cream cheese, blueberry jam, 2 tablespoons of confectioner’s sugar, flour, sea salt, and 1/4 teaspoon of almond extract. Blend until smooth, which should take about 30 seconds.
- Spread your crescent roll wedges out on a clean work surface. You know the drill: take a generous tablespoon of that heavenly cream cheese mixture and plop it on the wide end of each wedge.
- Roll ’em up! Start from the wide end and roll until the narrow end is snug underneath. Nestle them onto your prepared baking sheet.
- Whisk the egg and water together to create an egg wash, then brush it over your crescent rolls. Don’t skip this step—it gives them that gorgeous golden glow.
- Sprinkle with turbinado sugar. This stuff is like edible glitter, trust me.
- Bake for 13-15 minutes, or until they’re puffed and golden. The anticipation will build as your kitchen fills with the scent of warm blueberries and almond.
- While they cool slightly on a wire rack, prepare the glaze. In a medium bowl, combine the remaining 1/2 cup of confectioner’s sugar, remaining 1/4 teaspoon of almond extract, and milk. Whisk until smooth. Taste and add a pinch of sea salt if it’s too sweet for your liking.
- Drizzle that silky glaze over your crescent rolls and serve immediately. Enjoy the blissful combo of flaky, sweet, and creamy!
Cook’s Notes
- Don’t overfill the crescent rolls. It may be tempting, but too much filling can cause a messy overflow.
- If you don’t have turbinado sugar, regular sugar works in a pinch, though it won’t have the same crunch.
- The rolls are best enjoyed fresh but can be stored in an airtight container at room temperature for up to two days.
- For make-ahead magic, prepare the cream cheese filling a day in advance and store it covered in the fridge. Let it come to room temp before using.
Make It Your Own
- Swap the blueberry jam for raspberry or strawberry if that’s more your jam (pun intended!).
- Add a dash of cinnamon to the cream cheese mixture for an extra layer of flavor.
- Use orange marmalade and replace the almond extract with vanilla for a citrusy twist.
- Feeling nutty? Add a sprinkle of chopped almonds inside or on top for added crunch.
If you try this, I’d love to hear how it turns out—drop a comment or tag me! Let’s make every breakfast feel like a special occasion, one crescent roll at a time. 🌟
Related update: Blueberry Almond Crescent Rolls
Related update: Neiman Marcus Oatmeal Chocolate Chip Cookies
Related update: Soft Croatian corn bread – proja
Related update: Avocado Nests

It was one of those sticky summer afternoons when the air conditioner just couldn’t keep up, and I found myself craving something cool and refreshing. I’d been eyeing the basil plants on my kitchen windowsill, their leaves lush and inviting, and it hit me — basil coconut ice cream. It’s a little unusual, sure, but that’s part of its charm. This recipe is perfect when you’re in the mood for something a bit different yet incredibly easy to whip up. If you’re ready for a creamy, herby delight that tastes like a tropical breeze, you’re in the right place.
Jump to Recipe
What You’ll Need
The best part? You probably already have most of these ingredients in your kitchen. Just a few stars of the show to gather up, and you’re all set for a culinary adventure.
- Fresh basil leaves
- Canned full-fat coconut milk
- Honey
- Half & half
- Salt
How to Make Basil Coconut Ice Cream
- Start by heating the coconut milk and half & half in a saucepan over medium-high heat until it’s hot and just beginning to bubble gently. You’ll want to catch it right before a full boil.
- Add in the honey and a pinch of salt, stirring until they dissolve completely, giving the mixture a lovely sweet-salty balance.
- Drop in the fresh basil leaves and stir them through until they wilt down, infusing the liquid with their aromatic goodness. Remove the saucepan from heat.
- Pour the mixture into a blender, and blend until it’s silky smooth and no chunks of basil remain. If your blender leaves bits, strain the mixture through a fine sieve.
- Let the basil-infused cream cool for about 20 minutes, allowing the flavors to deepen.
- Transfer the mixture to a large container, cover, and chill it in the fridge for a few hours until completely cool.
- If you have an ice cream maker, follow your machine’s instructions to churn the mixture. If not, pour it into a freezer-safe container, and stir it every hour for about 8-10 hours to achieve the best texture possible.
Cook’s Notes
Making ice cream at home is as much about patience as it is about flavor. If you can, use fresh basil for the most vibrant taste. You can make the base a day ahead and chill it overnight, which can deepen the flavors even more. When it comes to leftovers, freeze them in a tightly sealed container. Just remember, the ice cream will harden significantly, so let it sit out for 10 minutes before scooping.
- If you don’t have an ice cream maker, don’t fret! While the texture won’t be as smooth, frequent stirring during the freezing phase will help prevent too many ice crystals from forming.
Make It Your Own
- Swap out the basil for mint leaves if you’re craving a more classic flavor combo.
- For a richer taste, replace half of the half & half with heavy cream.
- Substitute honey with maple syrup for a deeper, earthier sweetness.
- If you’re feeling adventurous, toss in a handful of dark chocolate chips during the churning process for a hint of bitterness against the sweetness.
If you try this, I’d love to hear how it turns out — drop a comment or tag me! Whether you’re enjoying it in the heat of summer or dreaming of warmer days, this basil coconut ice cream is sure to be a hit. Enjoy every refreshing scoop!
Related update: Basil Coconut Ice Cream

I was knee-deep in a midwinter slump, the kind where you just crave a burst of sunshine, when I stumbled upon this idea: Braid sweet citrus-flavored licorice. It’s a bit of a departure from your typical licorice, and honestly, it’s more of a pastry with a playful twist. Picture this: a light, flaky puff pastry with a zesty citrus glaze that dances on your taste buds. Perfect for those days when you need a little joy but aren’t in the mood for anything too fussy or time-consuming.
One of the best things about this recipe is its versatility. It’s a delightful treat that can play the part of a breakfast snack, a tea-time companion, or the unexpected star of a dessert platter. The secret weapon here is the citrus glaze, which brings this pastry to life with a sweet-tart zing. If you’ve got some puff pastry lingering in the freezer and a stash of citrus in the fruit bowl, you’re basically halfway there.
Jump to Recipe
What You’ll Need
Chances are you already have most of this sitting in your kitchen. Let’s keep it simple, shall we?
- Puff pastry Buitoni – the flaky base of our braids
- Fresh cream – to add richness to the glaze
- Grand cru muscovado sugar – for that deep, molasses-like sweetness
- Lemon – zest and juice will do wonders here
- Lime – for that extra citrus punch
- Orange – more zest, more flavor
How to Make Braid Sweet Citrus Flavored Licorice
- Roll out the puff pastry and use a sharp knife to etch designs of strips about 10 cm high and 1 cm wide. Precision isn’t key here, just have fun with it.
- Gently twist each strip on itself. It doesn’t have to be perfect; the twists will bake into beautiful, rustic braids.
- Place the twisted strips spaced apart on a sheet of parchment paper. This prevents them from sticking together as they bake.
- Bake in a preheated oven at 200°C for about 12 minutes, or until they’re golden brown and your kitchen smells like heaven.
- While the braids cool on a wire rack, zest your citrus fruits, and set the zest aside.
- Juice the lime, half of the orange, and half of the lemon. Boil the juices until you reduce it down to about two tablespoons of liquid.
- Remove from heat and stir in the cream and brown sugar until it’s well mixed and dreamy.
- Let the glaze cool until it thickens, then brush it generously over the cooled braids.
- Sprinkle the reserved citrus zest over the glazed braids while they’re still a bit wet to ensure it sticks well.
- Allow the glaze to dry on the wire rack until it hardens slightly. Then, go ahead and devour them!
Cook’s Notes
Don’t stress if your twists aren’t perfect—imperfections add character! Make sure to space them well on the parchment paper to allow for expansion. If your glaze seems too runny, let it cool a bit more; it thickens as it cools. Want to save time? You can make the glaze ahead of time and refrigerate it for up to two days. Just warm it slightly before using. Leftovers can be stored in an airtight container for a couple of days, but honestly, they probably won’t last that long.
Make It Your Own
- Try using blood orange instead of the regular orange for a more intense flavor and color.
- Add a splash of vanilla extract to the glaze for a warm, comforting undertone.
- For a spiced twist, sprinkle a little ground cardamom in with your citrus zest.
- If you’re feeling adventurous, drizzle a bit of melted white chocolate over the top once the glaze has set.
If you try this, I’d love to hear how it turns out—drop a comment or tag me! Enjoy the bright and citrusy vibes these braids bring, no matter what the weather outside is doing. Happy baking!
Related update: Braid sweet citrus flavored licorice
Related update: Basil Coconut Ice Cream
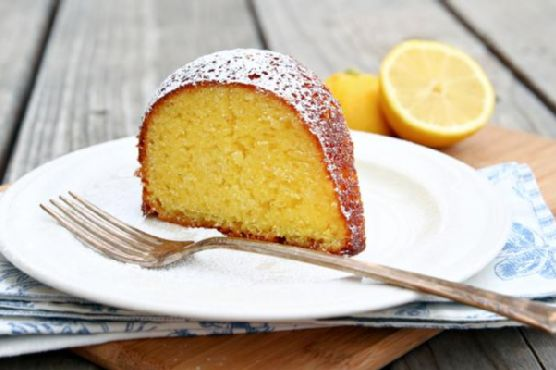
Picture this: it’s a Tuesday evening, and the week is already feeling like one long, chaotic whirlwind. I’m staring at the contents of my pantry, trying desperately to remember that elusive thing called “meal planning.” But instead of a dinner brainstorm, my mind wanders to something sweet and zesty—something that feels like sunshine on a plate. That’s when I remember the Lemonade Bundt Cake, a marvel of citrusy goodness and simplicity. This cake is like a mood booster in dessert form—tangy, moist, and delightfully easy to whip up with a handful of pantry staples. Whether you need a midweek pick-me-up or a show-stealing dessert for your next get-together, this cake is your answer.
Jump to Recipe
What You’ll Need
This recipe is delightfully straightforward, and chances are you already have most of these ingredients in your kitchen. Here’s what you’ll need:
- Lemon cake mix
- Lemon pudding mix
- 3 eggs
- Sour cream
- Vegetable oil
- Water
- Frozen lemonade concentrate
- Powdered sugar
How to Make Lemonade Bundt Cake
- First up, preheat your oven to 350 degrees. Take a moment to prepare your 10-inch bundt pan by greasing and flouring it. Trust me, this little step saves the cake from dreaded sticking disasters later on.
- Next, grab a large mixing bowl and combine the lemon cake mix, lemon pudding mix, eggs, sour cream, vegetable oil, and water. Mix everything together until you have a smooth, luscious batter that smells like pure lemony magic.
- Pour this gorgeous batter into your prepared bundt pan, smoothing the top with a spatula. Pop it into the oven and let it bake for 50-60 minutes. You’ll know it’s done when a toothpick inserted in the center comes out clean and the cake is a lovely golden hue.
- Once baked, let the cake cool in the pan for about 10-15 minutes. During this time, your kitchen will fill with a tantalizing lemony aroma that’s hard to resist.
- While the cake cools, make the glaze by combining the frozen lemonade concentrate with 1 cup of powdered sugar. Stir in more powdered sugar until the glaze reaches your desired consistency—thick enough to coat but still drizzle-friendly.
- Carefully turn your cake out onto a wire rack. Spoon the glaze generously over the top, allowing it to drip down the sides like a candied waterfall. For an added touch, dust the cake with more powdered sugar if you’re feeling fancy.
Cook’s Notes
This cake is as forgiving as it is delicious. You can make it a day ahead, and it will still taste fresh and fabulous. Just cover it tightly and store it at room temperature. If you’re in a rush, speed up the cooling process by placing the cake in the fridge for a few minutes before glazing. One common mistake is overmixing the batter, which can make the cake dense. Mix just until everything is combined, and you’ll be golden. Leftovers (if there are any!) can be kept in an airtight container for up to three days.
Make It Your Own
Here are a few fun ways to switch things up with this recipe:
- Replace the lemon cake mix with a white or vanilla cake mix for a subtler lemon flavor.
- Swap the lemon pudding mix for vanilla pudding mix if you prefer a less tangy cake.
- Add a handful of poppy seeds to the batter for a delightful crunch and a hint of nuttiness.
- For a berry twist, fold in fresh raspberries or blueberries before pouring the batter into the pan.
If you try this, I’d love to hear how it turns out — drop a comment or tag me! This Lemonade Bundt Cake is a little slice of sunshine, and I hope it brightens your day as much as it does mine. Enjoy every zesty bite!
Related update: Lemonade Bundt Cake
Related update: Braid sweet citrus flavored licorice
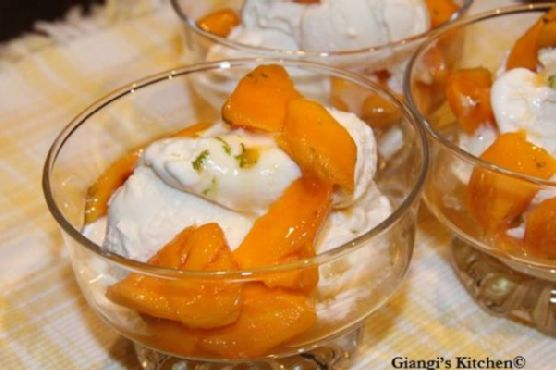
Picture this: It’s a balmy summer evening, and I’m rummaging through my kitchen, desperate for something sweet. There, on the counter, sits a perfectly ripe mango, glistening like it’s daring me to turn it into something spectacular. That’s when it hits me—Mangoes with Rum and Ice Cream. It’s the kind of dessert that feels both indulgent and delightfully easy. The rum-soaked mangoes are a tropical escape with every bite, and the ice cream? Pure creamy bliss. It’s the dessert that says, “I see your heatwave and I raise you a cooling, boozy treat.” Plus, it’s a breeze to whip up, so you can spend less time in the kitchen and more time savoring summer’s finest.
Jump to Recipe
What You’ll Need
If your pantry is anything like mine, you might already have most of what you need. The key is in a few star ingredients that really bring the magic.
- Mangoes – ripe and juicy
- Sugar
- Dark Rum
- Fresh lime juice
- Lime rind
- Vanilla Ice Cream
How to Make Mangoes with Rum and Ice Cream
- Start by peeling your mangoes. Make sure to remove all traces of green-colored flesh; you want the mangoes to be perfectly ripe and sweet.
- Next, slice the mango flesh away from the pit and cut it into pieces about a half-inch thick. Discard the pit and any fibrous bits that might cling to it.
- In a bowl, combine the sugar, dark rum, freshly grated lime rind, and lime juice. Give it a good mix until the sugar starts to dissolve.
- Add the mango slices to the rum mixture. Gently stir so each piece is bathed in that luscious liquid. The aroma will start to swirl around you, making your kitchen smell like a tropical paradise.
- Cover the bowl and let it chill in the fridge for a couple of hours. This wait is key as it allows the flavors to meld beautifully.
- When you’re ready to serve, scoop some vanilla ice cream into chilled glasses. Spoon the rum-soaked mangoes on top, making sure each serving gets a generous amount of the fragrant syrup.
Cook’s Notes
Here’s the thing about this recipe: it’s pretty forgiving. Just make sure your mangoes are ripe; underripe ones can be a bit tart and don’t soak up the rum as well. If you’re in a pinch and can’t find fresh lime, a good quality bottled lime juice will do, but fresh really gives it that zing. For storing leftovers, keep the mango mixture in an airtight container in the fridge, but I doubt there will be any left! The flavors deepen over a day or two, so if you make it ahead, it only gets better. Just store the ice cream separately.
Make It Your Own
- Swap the Rum: If dark rum isn’t your thing, try using coconut rum for a creamy twist.
- Add Some Heat: A pinch of chili flakes can add a surprising kick to the sweet and boozy mixture.
- Try a Sorbet: Replace the vanilla ice cream with a mango or coconut sorbet for a lighter version.
- Go Nutty: Sprinkle some toasted coconut flakes or chopped macadamia nuts over the top for added texture.
If you try this, I’d love to hear how it turns out—drop a comment or tag me! Your feedback and variations are always a treat to read. Enjoy every sweet, boozy bite! 🍨🥭
Related update: Mangoes with Rum and Ice Cream
Related update: Lemonade Bundt Cake
Related update: Eggplant pizzette

It was a typical Wednesday evening, and I found myself rummaging through the pantry, desperately seeking something to satisfy my sweet tooth. The weather outside was chilly, the kind of evening that begged for something cozy and chocolatey. In the midst of my search, I stumbled upon a forgotten container of dark cocoa powder wedged between bags of flour and sugar. It was then that the idea struck me — Chocolate Crinkle Cookies. These cookies are like a warm hug: comforting, slightly crunchy on the outside, chewy on the inside, and oh-so-chocolaty. Perfect for a spontaneous midweek baking session, especially when they’re this easy to make. Within an hour, my kitchen was filled with the scent of rich cocoa, and I knew I’d found my new favorite go-to treat for those cold, restless evenings.
Jump to Recipe
What You’ll Need
Imagine the delight of realizing that you already have most of these ingredients lounging in your pantry. Here’s what you need to create these delightful cookies:
- Vegetable oil – keeps the cookies moist
- Sugar – for sweetness and texture
- Vanilla extract – adds a lovely aroma
- Eggs – the glue that binds
- Dark cocoa powder – the heart of the chocolatey goodness
- Flour – the base of any good cookie
- Baking powder – gives those crinkles their puff
- Confectioners’ sugar – for that signature snowy look
How to Make Chocolate Crinkle Cookies
Ready to dive into the wonderful world of crinkly cookies? Here’s the step-by-step:
- Start by mixing the vegetable oil, sugar, and vanilla extract in a mixing bowl. You’ll know it’s right when the mixture looks like wet sand glistening in the sun.
- Add the eggs one at a time, mixing well after each addition until the batter is silky and smooth.
- Incorporate the dark cocoa powder into the mixture, slowly stirring until it turns into a rich, dark chocolate color.
- Combine the flour and baking powder with the wet ingredients. Continue mixing until you have a smooth dough that’s slightly thicker than cake batter.
- Chill the dough in the refrigerator for at least 4 hours. This step isn’t just a suggestion — it’s crucial for achieving perfect crinkles.
- When you’re ready, preheat your oven to 350°F. Line a cookie sheet with greaseproof paper or a nonstick silicone mat.
- Using an ice cream scooper, scoop out the dough and roll each ball generously in confectioners’ sugar. Make sure they’re well-coated for that iconic crinkle effect.
- Place the dough balls on the cookie sheet, leaving about 2 inches of space between each to allow for spreading.
- Bake for 12 minutes. You’ll know they’re done when the edges are firm and the tops have a cracked, powdered sugar crust.
- Let the cookies cool on the sheet initially, then transfer them to a wire rack to finish cooling completely. This helps them firm up nicely.
Cook’s Notes
Let’s chat kitchen wisdom for a second. The dough is sticky, and that’s normal — resist the urge to add more flour! Chilling the dough helps it firm up enough to handle, so don’t skip that step. If you’re in a pinch, you can speed-chill in the freezer for about 30 minutes. These cookies are best enjoyed fresh, but they’ll keep in an airtight container for about a week. To revive day-old cookies, zap them in the microwave for a few seconds — they’ll taste freshly baked!
Make It Your Own
Feeling adventurous? Here are a few ways to tweak these cookies to suit your mood:
- Swap out the dark cocoa powder for regular cocoa powder if you prefer a milder chocolate flavor.
- Add a teaspoon of espresso powder to the dough for a subtle coffee kick that pairs beautifully with the cocoa.
- Fold in some chocolate chips or chunks just before chilling for an extra burst of chocolate in every bite.
- For a festive twist, mix in a teaspoon of peppermint extract or a handful of crushed candy canes.
If you try this, I’d love to hear how it turns out — drop a comment or tag me! Whether you’re indulging alone or sharing with loved ones, these Chocolate Crinkle Cookies are sure to bring a smile. Happy baking!
Related update: Chocolate Crinkle Cookies
Related update: Mangoes with Rum and Ice Cream
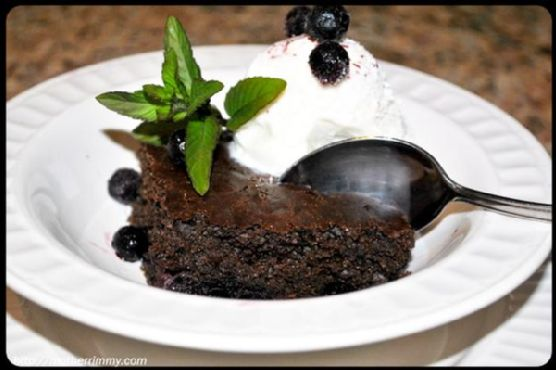
It was one of those days where the clouds just wouldn’t quit, and the afternoon seemed to stretch on forever. I was staring at a ridiculously overripe banana when inspiration struck — not banana bread, but something unexpected, and maybe even a little healthier. That’s when I thought of these Whole Wheat Blueberry Brownies. They’re the perfect mix of indulgence and nourishment, with a tangy twist thanks to the blueberries. A little dense, definitely chocolaty, and oh-so-simple to whip up. You’re gonna love the way the whole wheat adds a subtle nuttiness, and if you happen to have a pint of fresh blueberries sitting around, well then, my friend, you’re in for a treat.
Jump to Recipe
What You’ll Need
Most of these goodies are probably hanging out in your pantry already, just waiting to become besties in this delightful treat. Let’s make it happen:
- 1 cup whole wheat pastry flour
- 1/2 cup cocoa powder
- 1/2 teaspoon salt
- 1/2 teaspoon baking powder
- 1/4 teaspoon baking soda
- 1/2 teaspoon cinnamon
- 1/2 cup sugar
- 1/2 cup brown sugar
- 1 large egg
- 1/2 cup low fat sour cream
- 1/4 cup almond milk
- 1 teaspoon vanilla extract
- 1 cup fresh blueberries
How to Make Whole Wheat Blueberry Brownies
- Preheat your oven to a cozy 350 degrees Fahrenheit. While it warms up, grab an 8 x 8 x 2-inch baking pan and give it a good coat of cooking spray. You don’t want these beauties sticking!
- In one bowl, whisk together the dry stuff: whole wheat pastry flour, cocoa powder, salt, baking powder, baking soda, and cinnamon. Take a moment to marvel at the chocolatey goodness forming already.
- In a separate bowl, beat the egg, then mix in the low fat sour cream, almond milk, and vanilla extract. It should be smooth and slightly glossy.
- Now, gently fold the wet ingredients into the dry mix. Stir until you can no longer see streaks of flour, and everything looks like a harmonious, silky batter.
- Time to bring in the stars of the show — fold in those plump blueberries with the same care you’d show a friend running a relay race. You want them evenly distributed but not squished.
- Pour the batter into your prepared pan, spreading it with a spatula so it’s nice and even. Slide it into your preheated oven and let it bake for 20-25 minutes. You’ll know it’s ready when a toothpick inserted in the center comes out clean.
- Let them cool in the pan for a bit. The waiting is hard, but trust me, it’s worth it for that first bite that won’t burn your tongue.
Cook’s Notes
These brownies are a bit more rustic (in a good way) due to the whole wheat flour. If your taste buds are a little shy of tang, swap the low fat sour cream for full-fat or even Greek yogurt. They’ll keep in an airtight container for about four days, assuming there are any leftovers. If you’re planning ahead, you can make the batter the night before and bake them fresh in the morning. Just fold in the blueberries right before you bake!
Make It Your Own
- For a more decadent treat, replace the almond milk with full-fat coconut milk and get a subtle tropical twist.
- Substitute the fresh blueberries with raspberries for a tart and tangy variation that cuts through the chocolate beautifully.
- If you’re feeling nutty, toss in a handful of chopped walnuts or pecans for some extra crunch.
- For a touch of spice, add a pinch of cayenne pepper to the mix. Chocolate and spice are a match made in dessert heaven.
If you try this, I’d love to hear how it turns out — drop a comment or tag me! There’s nothing better than sharing a sweet success. Enjoy every chewy, blueberry-filled bite!
Related update: Whole Wheat Blueberry Brownies
Related update: Chocolate Crinkle Cookies
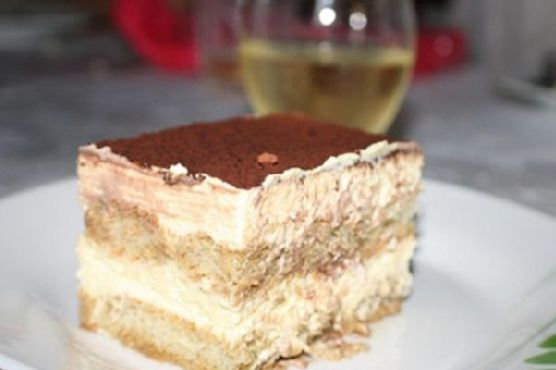
Last Tuesday, in the midst of an unexpected craving for something sweet and slightly elegant, I found myself in a mini kitchen dilemma. I had promised myself a chill evening with something decadent but not labor-intensive. As I rummaged through my pantry, a vision of tiramisu danced through my mind. But not just any tiramisu — a faster, weeknight-friendly version with all the indulgence and none of the fuss. This recipe is my go-to for those dessert emergencies; it’s quick to whip up, doesn’t require baking, and is a surefire way to impress anyone who happens to drop by (or just yourself, let’s be real). It’s creamy, rich, and perfectly layered with just a hint of coffee and liqueur. Trust me, you’ll wonder why you haven’t always made tiramisu this way.
Jump to Recipe
What You’ll Need
If you’re anything like me, you’ll likely find most of these ingredients already nestled in your pantry or fridge. Here’s what you’ll need to create this dreamy dessert:
- Egg yolks – the foundation of our creamy filling.
- Cane sugar – to sweeten things up.
- Mascarpone cheese – the star of the show, lending that iconic tiramisu flavor.
- 35% heavy whipping cream – for that luscious texture.
- Ladyfingers – to soak up all that goodness.
- Rum, brandy, or coffee liqueur – your choice for a boozy touch.
- Coffee – the essential bitter balance.
- Unsweetened cocoa powder – for dusting and drama.
- Vanilla sugar – adds a subtle hint of vanilla without the fuss.
How to Make Fast Tiramisu
- First, brew a fresh cup of coffee and let it cool to room temperature. Once cooled, add a splash of your chosen liqueur for a warm, aromatic twist.
- In a mixing bowl, whip the 35% heavy whipping cream until soft peaks form. If you have vanilla sugar on hand, toss it in for a hint of sweetness. Then, pop it in the fridge to chill.
- In another bowl, beat the egg yolks with 6 tablespoons of cane sugar until the mixture is thick and has taken on a lovely lemon color.
- Fold in the mascarpone cheese into the egg yolk mixture and continue to beat until everything is smooth and well-mixed. Add vanilla sugar if you haven’t already.
- Gently fold in the whipped cream from the fridge, taking care not to deflate the mixture. You want it light and airy.
- Quickly dip each ladyfinger into the cooled coffee mixture, ensuring they’re soaked but not soggy. Arrange them snugly in a 26cm x 40cm pan.
- Spread half of the mascarpone mixture over the ladyfingers, smoothing it out with a spatula.
- Repeat the process with another layer of coffee-soaked ladyfingers, but this time, lay them in the opposite direction.
- Top with the remaining mascarpone mixture, spreading it evenly to cover all the ladyfingers.
- Sprinkle a generous dusting of unsweetened cocoa powder over the top. This not only adds flavor but gives that classic tiramisu look.
- Refrigerate for at least 6 hours to let the flavors meld and the dessert set. Patience is key here!
Cook’s Notes
Chilling is crucial for tiramisu; it allows the flavors to develop and the layers to set, so resist the urge to dive in too early. If you’re in a time crunch, 4 hours will do, but 6 is ideal. This tiramisu keeps well in the fridge for up to 3 days, making it a great make-ahead dessert for gatherings. Just be sure to store it in an airtight container to prevent it from absorbing any fridge odors. When serving, a sharp knife and a clean spatula will ensure neat slices. And while it’s not traditional, a sprinkle of shaved dark chocolate can add a delightful flavor touch.
Make It Your Own
Sometimes, it’s fun to shake things up. Here are a few ideas:
- Swap the coffee for strong chai tea and the liqueur for spiced rum for a chai-inspired twist.
- Use chocolate ladyfingers for an extra hit of cocoa goodness.
- For a non-alcoholic version, substitute the liqueur with vanilla extract for that added depth of flavor.
- Try topping with matcha powder instead of cocoa for a unique, earthy flavor profile.
If you try this, I’d love to hear how it turns out — drop a comment or tag me online! Whether it’s a quiet night in or a dinner party finale, this tiramisu is set to impress. Happy indulging!
Related update: Fast Tiramisu
Related update: Whole Wheat Blueberry Brownies
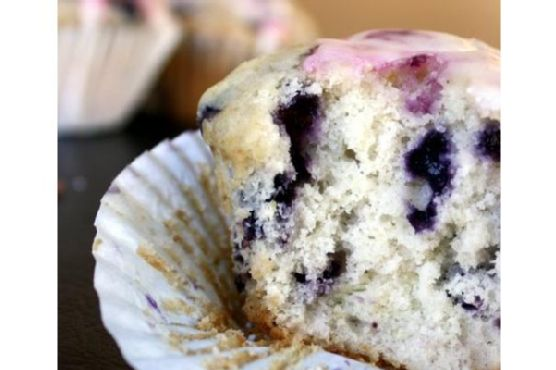
I was having one of those hectic weeks—work deadlines piling up, laundry mountain growing taller by the minute—and all I wanted was a moment of pure joy. Enter my savior: these Wild Blueberry Lemon Muffins. A burst of tart lemon and sweet summer blueberries wrapped up in a soft, buttery muffin. They’re the perfect blend of comforting and feel-good indulgence, but super easy to put together. The best part? They make your kitchen smell like heaven and taste even better! Whether you’re whipping them up for a weekend brunch or a quick weekday treat, these muffins are a little slice of bliss.
Jump to Recipe
What You’ll Need
You’re going to love how most of these ingredients are probably already sitting in your pantry or fridge. Here’s what you need:
- 2 1/2 cups all-purpose flour
- 2 1/2 teaspoons baking powder
- 1/2 teaspoon salt
- 1 cup granulated sugar
- 1/2 cup unsalted butter, softened
- 1 large egg
- 1/2 cup buttermilk
- 1 teaspoon vanilla extract
- 1 tablespoon fresh lemon juice
- 1 tablespoon lemon zest
- 1/8 cup sugar (for mashing with lemon zest)
- 1 can wild blueberries, drained
- 1/2 cup powdered sugar (for glaze)
How to Make Wild Blueberry Lemon Muffins
- Start by preheating your oven to 375°F (190°C). Line 16 muffin cups with paper liners to make cleanup a breeze.
- In a small bowl, mash 1/8 cup sugar with the lemon zest until the sugar is moistened and fragrant. This will amp up the lemony goodness.
- In a medium-sized bowl, whisk together the flour, baking powder, and salt. This dry mix is the backbone of your muffins.
- Using an electric mixer, cream the cup of sugar and butter together until light and fluffy, about 3 minutes. Add the egg, buttermilk, vanilla, and the fragrant lemon sugar, beating each in one at a time.
- Slowly incorporate the flour mixture into the wet ingredients. The batter should be smooth and inviting at this point.
- Gently fold in the wild blueberries with a large spatula. Try not to crush them—you’re aiming for bursts of berry goodness!
- Divide the batter equally into the prepared muffin tins, filling each about 3/4 full. This leaves room for them to rise beautifully.
- Bake in the preheated oven for about 35 minutes, or until a cake tester comes out clean and muffins are golden.
- Let the muffins cool for a few minutes in the pan before transferring them to a wire rack.
- While the muffins cool, whip up your glaze by combining the lemon juice, zest, and powdered sugar. Stir until smooth.
- Spoon about 1 tablespoon of glaze over each muffin, allowing it to drizzle down the sides for that enticing sweet-tangy finish.
Cook’s Notes
If you can, use wild blueberries—they have a more intense flavor and smaller size, making them perfect for muffins. Make sure to drain them well before adding to the batter to keep it from getting too wet. Store your muffins in an airtight container; they stay fresh on the counter for up to three days or can be frozen for up to a month. If you want to prepare ahead, mix the dry ingredients the night before to save time.
Make It Your Own
- Swap canned wild blueberries for fresh ones if they’re in season for a less sugary taste.
- Replace the lemon with orange zest and juice for a citrusy twist.
- Use almond extract instead of vanilla for a nutty undertone.
- Try adding a teaspoon of poppy seeds to the batter for an extra crunch.
If you try this, I’d love to hear how it turns out—drop a comment or tag me on social media! Happy baking, and may your week be as sweet as these muffins.
Related update: Wild Blueberry Lemon Muffins
Related update: Penne Arrabiata
Related update: Fast Tiramisu
Related update: Blueberry Almond Crescent Rolls
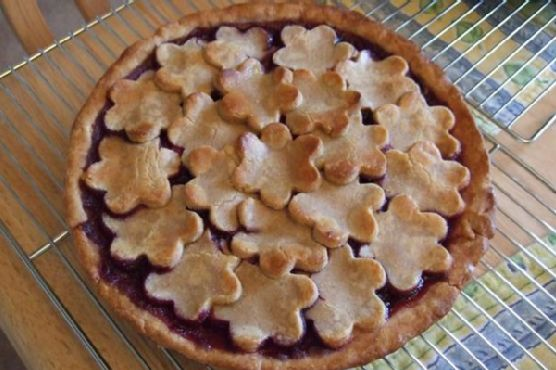
It was one of those lazy Sunday afternoons when the world seemed to move a little slower, a gentle breeze fluttering through the open window, the kind that makes you crave something comforting and sweet but not too complicated. My sweet tooth was whispering “pie” in my ear, but I wasn’t up for a full-blown kitchen marathon. Enter my Cherry-Berry Pie with Agave Nectar All-Butter Crust—a delightful, not-too-sweet pie that’s as satisfying to make as it is to eat. It’s my go-to when I need that perfect mix of summery fruitiness and buttery crust without spending all day in the kitchen. Trust me, this pie is a game-changer, and the addition of agave nectar gives it a uniquely mellow sweetness that pairs beautifully with the tart berries. Jump to Recipe
What You’ll Need
The beauty of this pie is its simple ingredient list, many of which you likely have on hand. Plus, the mix of flours and agave nectar gives the crust an irresistible texture and flavor.
- Agave nectar
- Sweet agave nectar
- Almond flour
- Frozen mixed berries
- Butter
- Frozen cherries
- Coconut flour
- Flour
- Lemon juice
- Orange extract
- Tapioca flour
- Whole wheat pastry flour
How to Make Cherry-Berry Pie With Agave Nectar All-Butter Crust
- Start by making the crust: In a food processor, pulse the dry ingredients about 5-6 times. This helps them blend evenly.
- Add 2 sticks of very cold butter, which you’ve cut into cubes. Pulse until the mixture resembles a very coarse meal, tiny butter bits are a good thing here!
- Add the agave nectar and either the fiore di Sicilia flavoring or its substitute, orange extract, one tablespoon at a time. Watch carefully for the dough to just come together.
- Divide the dough into two parts, one slightly larger than the other. This larger portion will be your base.
- Form each into a flat, round shape, wrap tightly in plastic, and refrigerate for at least 2 hours to let the butter firm up and flavors meld.
- While the dough is chilling, whip up the filling. In a large bowl, combine all the filling ingredients thoroughly. It’s going to be quite soupy, so don’t worry!
- Once the dough has chilled, let it sit out just long enough to be rollable. Roll out the larger dough disk to fit your pie dish, patching as needed.
- Wrap the pie dish with the crust in plastic and chill for another 30 minutes to set.
- Pour the berry filling into the chilled crust, then wrap the whole pie in plastic again and pop it back in the fridge.
- Roll out the remaining dough disk and use cookie cutters to cut pieces for the top crust. Get creative with shapes!
- Remove the pie from the fridge and decorate with your cut-out dough pieces, leaving some gaps for steam to escape.
- Cover the edges with foil to prevent over-browning and bake in a preheated 325°F oven for 40 minutes.
- Remove the foil and continue baking until the top is golden brown and the filling is bubbling enticingly.
- Let the pie cool slightly before slicing in to let the filling set a bit more. Enjoy!
Cook’s Notes
Here’s the scoop: keeping the butter super cold is crucial for that flaky crust we all adore. I like to freeze mine and work quickly to keep it from warming up. If you find the dough a bit too firm after chilling, let it sit out a few minutes until it’s manageable. When it comes to storage, this pie is a champ! Cover it well and it keeps nicely in the fridge for up to 4 days. If you’re making it ahead, bake it a day early; the flavors meld beautifully overnight.
Make It Your Own
Feel free to play around with the recipe a bit to suit your taste or pantry:
- Swap out the frozen cherries for fresh ones if they’re in season; just pit and halve them.
- Try maple syrup instead of agave for a more robust sweetness.
- Use a gluten-free flour blend in place of the wheat and pastry flours for a gluten-free version.
- Add a teaspoon of cinnamon or nutmeg to the filling for a spiced twist.
I hope you give this pie a whirl and let it bring a bit of sunshine into your kitchen. If you try this recipe, I’d love to hear how it turns out—drop a comment or tag me on social media! Happy baking, friends!
Related update: Cherry-Berry Pie With Agave Nectar All-Butter Crust

Picture this: it’s a Wednesday evening, and I’m knee-deep in that midweek slump, feeling like a bit of a sweet escape. The kind where comfort meets simplicity. I glanced at the calendar and saw it was nearing August 10th—National S’mores Day. Immediately, a light bulb moment struck! Why not combine the nostalgia of campfire s’mores with a fruity twist to lift my spirits? Enter: S’mores-n-berry Bars. They’re as indulgent as they sound, with a crispy graham cracker base, rich brownie layer, and gooey marshmallow topping that’s lightly kissed by the oven’s broiler for that perfect toasted finish. It’s the kind of treat that’s easy to whip up, yet impressive enough to satisfy any sweet tooth. Jump to Recipe
What You’ll Need
You probably have most of these ingredients lounging in your pantry already. Here’s what you’ll need:
- 1 box of cooked brownie mix
- 1 egg
- 1 cup graham cracker crumbs
- 2 whole graham crackers
- 1 cup mini marshmallows
- 1/2 cup fresh dried raspberries
- 1/4 cup sugar
- 1/2 cup unsalted butter, melted
- 1/4 cup vegetable oil
- 1/4 cup water
How to Make S’mores-n-berry Bars for National S’mores Day – August 10
- Preheat your oven to 325°F. Line an 8-inch-square baking pan with foil, making sure the foil hangs over the edges for easy removal later. Give it a spritz of nonstick cooking spray to make doubly sure nothing sticks.
- In a medium-sized bowl, combine the melted butter, graham cracker crumbs, and sugar until it resembles wet sand. Press this mixture evenly into the bottom of your prepared pan. Bake for about 20 minutes, or until it looks golden and smells like heaven. Set aside.
- Crank up your oven to 350°F. Meanwhile, grab another bowl and mix together the brownie mix, vegetable oil, water, and egg until smooth. Gently fold in the fresh dried raspberries. Pour this luscious batter over the cooled graham cracker crust.
- Bake the brownie layer for about 25 minutes, or until a toothpick inserted into the center comes out clean. This is your cue to remove it from the oven.
- Break up the two graham crackers into small pieces and scatter them artfully atop the brownie layer.
- Scatter the mini marshmallows over the graham crackers. Return the pan to the oven, this time setting it to broil. Watch carefully, as the marshmallows can quickly go from toasty to burnt in a flash! Once they’re golden and bubbly, pull the pan out.
- Allow the bars to cool completely in the pan. Lift them out using the overhanging foil and cut into squares. Enjoy the ooey-gooey goodness!
Cook’s Notes
These bars are as versatile as they are delicious. The graham cracker crust adds an incredible texture contrast to the fudgy brownie and gooey marshmallow topping. Here are a few tips to ensure they turn out perfect:
- If you prefer a denser brownie, add an extra egg to the brownie mixture.
- Store any leftovers in an airtight container at room temperature for up to 3 days. They’ll stay delicious, though the marshmallows might lose a bit of their chew.
- To make these ahead, you can prepare the graham cracker crust and brownie layer a day in advance. Add the graham crackers and marshmallows just before serving for the best texture.
Make It Your Own
- Nutty Twist: Swap out the raspberries for chopped toasted almonds or pecans for a crunchy surprise.
- Berry Medley: Use a mix of freeze-dried strawberries and blueberries instead of just raspberries for a more fruity experience.
- Chocolate Lovers: Add chocolate chips to the brownie mix for extra gooeyness. You can never have too much chocolate, right?
- Salted Caramel: Drizzle caramel sauce over the marshmallows before broiling. A sprinkle of sea salt can elevate these bars to gourmet status.
If you try this, I’d love to hear how it turns out — drop a comment or tag me! S’mores day or not, these bars are a crowd-pleaser every time.
Related update: S’mores-n-berry Bars for National S’mores Day – August 10
Related update: Cherry-Berry Pie With Agave Nectar All-Butter Crust
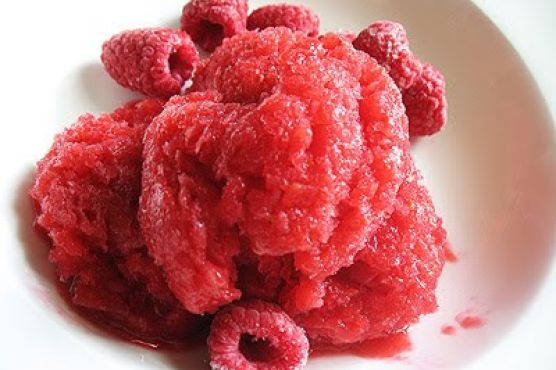
Picture this: it’s a sweltering summer afternoon, and you’re yearning for something refreshing yet a little out of the ordinary. You’ve already got one foot in the kitchen, rifling through the freezer, when you stumble upon a forgotten stash of frozen raspberries. Suddenly, inspiration hits you like a cool breeze. Why not whip up a sorbet that’s as tart as your mood and just a tad mischievous, with a spicy kick to keep things interesting? This Tart Raspberry Sorbet with a Hint of Heat is exactly what you need. It’s the kind of recipe that doesn’t just cool you down but also gives your taste buds a little wake-up call. Plus, it’s ridiculously easy to make—perfect for those moments when you want to impress but can’t be bothered with a culinary masterpiece.
Jump to Recipe
What You’ll Need
You might already have most of these tucked away in your pantry and freezer, which makes this sorbet a breeze to throw together on a whim.
- Frozen raspberries – The star of the show, bringing their tart and vibrant flavor.
- Raspberry jam – For an extra burst of raspberry goodness and a bit of sweetness.
- White grape juice – To lend a subtle sweetness and some liquid gold.
- Cardamom powder – Adds an exotic warmth that pairs beautifully with the raspberries.
- Green chili – Just a little, for that unexpected kick.
- Lime juice – To enhance the tartness and add a citrusy zing.
How to Make Tart Raspberry Sorbet with a Hint of Heat
- In your food processor, combine the frozen raspberries, raspberry jam, and white grape juice. Add a pinch of cardamom powder, a small piece of green chili, and a generous squeeze of lime juice.
- Process the mixture until it’s smooth and vibrant. Listen for the change in sound as the chunks of raspberry become a luscious puree.
- Push the mixture through a fine strainer to remove most of the seeds. This part might seem tedious, but trust me, your teeth will thank you later.
- Transfer the silky mixture to a container, cover, and pop it in the freezer. Every couple of hours, check on it and give it a good stir. This keeps the texture smooth and prevents large ice crystals from forming.
- As the sorbet nears the end of its freezing journey, consider shaping it into enticing balls using an ice cream scoop or a large spoon. It’s not just about looks—it helps the sorbet melt evenly when served.
- Once frozen, let your sorbet thaw for a few minutes before serving. This little pause is crucial, especially if your freezer tends to be overzealous.
Cook’s Notes
Let’s talk about some nuances that can take this sorbet from good to unforgettable. First off, if you’re worried about the heat, start by adding just a sliver of green chili. You can always add more, but you can’t take it out. As for storage, this sorbet keeps well in the freezer for up to two weeks, though it’s best enjoyed within the first few days when the flavors are at their peak.
If you’re planning ahead, make the sorbet the day before you want to serve it. This allows it to firm up perfectly. If you end up with leftovers (unlikely, but it happens), let them soften a bit before diving back in.
Make It Your Own
This sorbet is a canvas for your creativity. Here are a few ideas to make it uniquely yours:
- Swap the raspberries for frozen strawberries for a sweeter, less tart version.
- If you’re a mint fan, add a handful of fresh mint leaves to the food processor for a refreshing twist.
- Looking for an adult-only version? Replace the white grape juice with a splash of Prosecco or a sweet white wine.
- For a nutty contrast, sprinkle a handful of toasted pistachios over your sorbet before serving.
If you try this, I’d love to hear how it turns out—drop a comment or tag me! Your adventures in sorbet-land might just inspire someone else to give it a whirl. Enjoy your chill time!
Related update: Tart Raspberry Sorbet with a Hint of Heat
Related update: S’mores-n-berry Bars for National S’mores Day – August 10
Related update: Pumpkin gnocchi with basil and Parmesan