Quick N’ Easy Basil Pesto | Made by Meaghan Moineau

Quick N' Easy Basil Pesto | Made by Meaghan Moineau

Title: Unleashing the Magic of Quick N' Easy Basil Pesto: A Journey Back to Family Traditions
Description: Dive into the world of vibrant flavors with our Quick N' Easy Basil Pesto recipe. Perfect for any meal, this pesto combines simplicity with nostalgia, transporting you to cherished family gatherings. Learn how to whip up this delightful dish in no time, and discover the heartwarming story behind its place in our family tradition.

---


There's something magical about the scent of fresh basil wafting through the kitchen. Its sweet, peppery aroma takes me back to sunlit afternoons spent in my grandmother's garden, where she would hand me a basket and ask me to pick the freshest basil leaves. These moments, filled with laughter and the promise of a delicious meal, laid the foundation for my love of cooking and family gatherings.


Quick N' Easy Basil Pesto Recipe
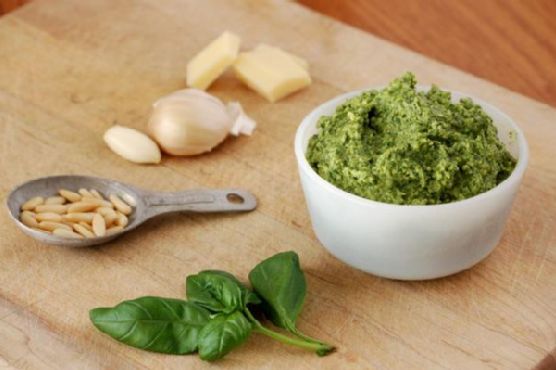

Ingredients:

- Fresh basil leaves

- Olive oil


- Pine nuts


- Garlic


- Parmesan cheese


Instructions:

1. In a food processor, alternate adding the fresh basil leaves, olive oil, pine nuts, garlic, and parmesan cheese until blended smooth.

2. If the pesto isn't the correct consistency, gradually add more olive oil until you achieve the desired texture.


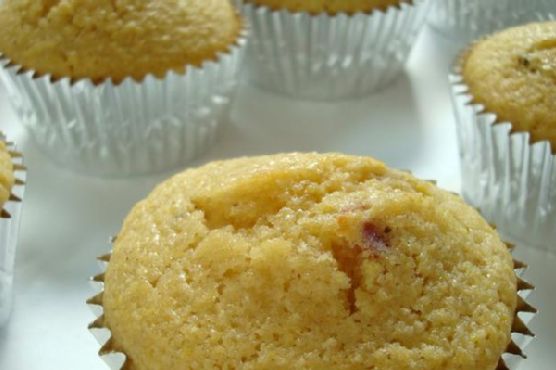
3. Use the pesto within 24 hours or freeze scoops in plastic wrap-lined muffin cups for later use.


Difficulty: 2/10
Classification: Appetizer

Making pesto was always a family affair. I remember sitting on a high stool, barely able to reach the countertop, as my mother and grandmother orchestrated the creation of this vibrant green sauce. The rhythmic hum of the food processor was like a melody that signaled the beginning of something special. As I added each ingredient, I imagined myself as a chef in a bustling Italian kitchen, crafting a masterpiece that would bring my family together.


Pesto, with its rich history and versatility, has always been a staple in our family meals. Whether tossed with pasta, spread on a warm loaf of bread, or used as a dip with fresh vegetables, it never failed to transform a simple dish into something extraordinary. The secret, as my grandmother would say, is in the balance of flavors—each ingredient playing its part harmoniously.


The beauty of this Quick N' Easy Basil Pesto recipe lies not just in its simplicity, but in the memories it evokes. It's a reminder of the warmth of family, the joy of shared meals, and the timeless tradition of passing down recipes from one generation to the next. Every time I make it, I am transported back to those childhood afternoons, filled with love, laughter, and the irresistible aroma of fresh basil.


So, gather your ingredients, invite your loved ones into the kitchen, and create not just a dish, but a memory. With its ease and versatility, this pesto is sure to become a beloved addition to your family table, just as it has been to ours.

Read more about Appetizers

Read more about Main Dishes

Read more about Desserts

Bittersweet chocolate pudding | Made by Meaghan Moineau

Bittersweet chocolate pudding | Made by Meaghan Moineau

Title: Nostalgic Delights: The Bittersweet Chocolate Pudding That Transports You Back in Time
Description: Dive into the heartwarming world of bittersweet chocolate pudding, a dessert that not only tantalizes your taste buds but also evokes cherished family memories. Discover how this simple yet decadent treat, crafted from cocoa powder, cornstarch, and more, can become a staple in your family gatherings. Rated as a 4 out of 10 on the difficulty scale, this dessert is perfect for both novice cooks and seasoned chefs seeking a touch of nostalgia.

---


Nostalgic Delights: The Bittersweet Chocolate Pudding That Transports You Back in Time

There's something incredibly comforting about a rich, velvety bowl of bittersweet chocolate pudding. For many, it's more than just a dessert; it's a portal to cherished family memories and the warmth of home. As the aroma of cocoa and vanilla fills the kitchen, I'm instantly transported back to my grandmother's cozy kitchen, where the magic of pudding-making unfolded.


A Family Tradition

Every Sunday, after a hearty family dinner, my grandmother would bring out her well-worn saucepan, a trusted companion in countless culinary adventures. The recipe was simple—cocoa powder, cornstarch, egg, milk, salt, sugar, unsalted butter, and vanilla extract—but the result was nothing short of magical. As children, my siblings and I would gather around the stove, watching in awe as she expertly whisked the ingredients together.


The moment the milk mixture hit the saucepan, a sense of anticipation filled the air. We knew that soon, the kitchen would be filled with the intoxicating scent of chocolate. The gentle bubbling and thickening of the mixture were signals that the pudding was close to perfection. Once the butter and vanilla were stirred in, the mixture was lovingly poured into molds, each rinsed with cold water to ensure a smooth release.


The Art of Waiting

Chilling the pudding was perhaps the hardest part. As it rested in the refrigerator, we would impatiently count down the minutes, eagerly awaiting the moment we could indulge. But my grandmother always reminded us that patience was a virtue, especially when it came to creating something truly special.


A Bite of Bliss

Finally, the moment would arrive. The pudding, now perfectly set, was gracefully released from its mold onto a plate. The first spoonful was always the best—rich, creamy, and with just the right amount of bittersweet chocolate flavor. It was more than just a dessert; it was a taste of love, crafted with care and shared with family.


Crafting Your Own Memories
Creating your own bittersweet chocolate pudding is a rewarding experience, rated as a 4 out of 10 in difficulty. Whether you're a novice or an experienced cook, this dessert offers a delightful challenge and the opportunity to make your own cherished memories. Simply follow these steps:

1. In a medium saucepan, whisk together the cornstarch, cocoa powder, sugar, and salt.


2. In a separate bowl, combine the milk and egg.


3. Gradually pour the milk mixture into the saucepan, whisking until thoroughly mixed.


4. Heat the mixture over medium heat, stirring constantly until it boils. Cook for 1 minute, then remove from heat.


5. Stir in butter and vanilla extract.


6. Pour the pudding into molds rinsed with cold water and chill until set.


A Sweet Conclusion

Bittersweet chocolate pudding is more than just a dessert—it's an invitation to pause, savor, and celebrate the simple joys of life. Whether you enjoy it alone or share it with loved ones, this pudding is a testament to the power of food to create and evoke precious memories. So, gather your ingredients, embrace the process, and let this delightful dish transport you back to simpler times.

Read more about Appetizers

Read more about Main Dishes

Read more about Desserts

Hot Charlotte Cocktail | Made by Meaghan Moineau

Hot Charlotte Cocktail | Made by Meaghan Moineau

Title: A Sip of Nostalgia: The Hot Charlotte Cocktail
Description: Discover the perfect blend of flavors in the Hot Charlotte Cocktail, a drink that promises to invigorate your senses while transporting you back to cherished family gatherings. With a hint of spice and a touch of elegance, this cocktail is your new go-to for any occasion.

---


In the world of mixology, there are cocktails that simply quench thirst and then there are those that resonate with the soul, invoking memories of laughter-filled evenings and warm family gatherings. The Hot Charlotte Cocktail is one such creation—a delightful concoction that not only tantalizes your taste buds but also brings a sense of nostalgia with every sip.


The Ingredients: A Symphony of Flavors
To craft the Hot Charlotte Cocktail, you'll need the following ingredients:

- Hendrick's Gin


- St. Germain


- Fresh lemon juice


- Cucumber


- Tobasco sauce


Instructions: Crafting Your Nostalgic Sip

1. Begin by taking a cocktail glass and muddling a few slices of cucumber with a dash of Tobasco sauce.


2. Add Hendrick's Gin, St. Germain, and fresh lemon juice to the mix. Shake well to combine the flavors.


3. Strain the mixture over ice to ensure a perfectly chilled experience.


4. Garnish with a cucumber wheel for an elegant finish.


Difficulty Rating: 4/10

The Hot Charlotte Cocktail is accessible to both novice and seasoned cocktail enthusiasts. Its simplicity in preparation makes it an ideal choice for those looking to impress with minimal effort.


Classification: Appetizer

This drink serves as a perfect appetizer, whetting your palate with its refreshing and subtly spicy profile.


A Family Memory: The Tale Behind the Taste

The story of the Hot Charlotte Cocktail is one interwoven with cherished family memories. I remember the first time I tasted this unique blend at a summer family reunion. It was a sweltering afternoon, and the air was filled with the scent of blooming flowers and freshly cut grass. My uncle, the self-proclaimed family bartender, was manning the makeshift bar set up under the old oak tree in our backyard.


He had a knack for creating drinks that mirrored the essence of our family—vibrant, spirited, and full of surprises. As he handed me a glass of the Hot Charlotte, he recounted tales of our grandmother Charlotte, who loved experimenting with homegrown ingredients. The addition of cucumber and Tobasco was his homage to her penchant for bold flavors and the garden she tended with pride.


With each sip of that cocktail, I was transported back to simpler times, surrounded by family, laughter, and the gentle hum of cicadas in the evening air. It's amazing how a single drink can encapsulate the warmth and love of family, turning an ordinary moment into a cherished memory.


Conclusion: Raise a Glass to Timeless Memories

The Hot Charlotte Cocktail is more than just a drink; it's a celebration of the moments that bring us together. Whether you're reminiscing about family gatherings or creating new memories, this cocktail is sure to add a touch of magic to any occasion. So, gather your loved ones, share stories, and raise a glass to the enduring power of nostalgia. Cheers!

Read more about Appetizers

Read more about Main Dishes

Read more about Desserts

Tempered Spicy Potatoes | Made by Meaghan Moineau

Tempered Spicy Potatoes | Made by Meaghan Moineau

Title: "Spice Up Your Table with Tempered Spicy Potatoes: A Taste of Tradition"


---


Description:

Discover the heartwarming flavors of Tempered Spicy Potatoes, a dish that marries simplicity with bold spices. Perfect as an appetizer or a vibrant side, this dish is steeped in family tradition and nostalgia, offering a delicious connection to the past. Follow our easy-to-understand recipe and bring a touch of spice to your dining table.

---


Blog Post:


Embrace the Spice: Tempered Spicy Potatoes

When it comes to comfort food that warms both the heart and the palate, Tempered Spicy Potatoes reign supreme in our family kitchen. This dish, rich with aromatic spices and simple ingredients, is not just about taste—it's a slice of home, a reminder of family gatherings, and the laughter that accompanied them.


A Nostalgic Flavor Journey

Growing up, the aroma of mustard seeds popping in hot oil was a signal that something magical was about to be served. My grandmother, the culinary wizard of the family, would stand by the stove, deftly adding ingredients with a rhythm only experience can bring. The kitchen would fill with the scent of cinnamon and curry leaves, a fragrant prelude to the feast.


Every family celebration was incomplete without these Tempered Spicy Potatoes. As children, we eagerly waited for the fried potato wedges, golden and crispy, to make their way to our plates. It was a dish that bridged generations, with my grandmother passing down her secret tips to my mother, and eventually, to me.


The Recipe: A Spice Symphony
Ingredients:

- 1 cinnamon stick


- A handful of curry leaves


- 1 teaspoon mustard seeds


- Oil for frying


- 2 onions, sliced


- 4-5 parboiled potatoes, cut into wedges


- 1 tablespoon red dried chili flakes


- Salt to taste


- 1/2 teaspoon turmeric


Instructions:
1. Prepare the Potatoes: Start by cutting the parboiled potatoes into wedges. Heat oil in a pan for deep frying and fry the potatoes until they are slightly golden brown. Once done, set aside the fried potatoes.
2. Temper the Spices: In a non-stick frying pan over medium heat, add 1 1/2 tablespoons of oil. Introduce the mustard seeds, cinnamon stick, and curry leaves. Allow the mustard seeds to pop, releasing their nutty aroma.
3. Sauté the Onions: Add the sliced onions to the pan, cooking for about 1 minute until they begin to soften.
4. Combine and Cook: Gently fold in the fried potatoes, turmeric, and salt. Stir fry the mixture on low heat for about 5 minutes, ensuring the onions turn a slight golden brown.
5. Finish with Spice: Sprinkle the red chili flakes over the potatoes and cook for an additional minute, letting the heat and flavor meld.
6. Serve: Enjoy your tempered spicy potatoes warm, accompanied by rice, roti, or fresh bread.
Cooking Difficulty: 3/10
Classification: Appetizer/Side Dish
Savoring Tradition

Every time I prepare Tempered Spicy Potatoes, I'm transported back to those family gatherings, the table laden with food and surrounded by loved ones. It's a dish that not only fills the stomach but also nourishes the soul, a testament to the power of food to connect us with our roots.


Whether you're looking to spice up your meal or create memories of your own, this recipe is sure to delight. So gather your ingredients, and let the flavors lead you on a nostalgic journey.

Read more about Appetizers

Read more about Main Dishes

Read more about Desserts

Green Beans with Garlic Chips | Made by Meaghan Moineau

Green Beans with Garlic Chips | Made by Meaghan Moineau

Title: Savoring Simplicity: A Nostalgic Journey with Green Beans and Garlic Chips
Description: Dive into the delightful world of Green Beans with Garlic Chips, a dish that perfectly balances simplicity and flavor. Join us as we explore this mouthwatering recipe that brings back cherished family memories while serving as the perfect appetizer for any occasion.

---


There's something undeniably comforting about the sizzle of garlic in a skillet, a sound that instantly transports me back to leisurely Sunday afternoons in my grandmother's kitchen. Her kitchen was a sanctuary filled with laughter, a warm embrace of aromas, and the promise of a meal made with love. Among her numerous culinary delights, Green Beans with Garlic Chips stood out, a dish so simple yet so profoundly satisfying.


Ingredients:

- 4 tablespoons olive oil


- 4 garlic cloves, thinly sliced


- 1 pound trimmed green beans


- 2 tablespoons unsalted butter


- 1 large yellow onion, thinly sliced


- Salt and pepper to taste


- 1 tablespoon apple cider vinegar


- 1 tablespoon white balsamic vinegar


Instructions:
1. Golden Garlic Magic: Begin by heating the olive oil in a heavy skillet over medium heat. Add the thinly sliced garlic cloves and cook, stirring occasionally, until they turn a beautiful golden hue. The aroma will start to fill the kitchen, reminiscent of my grandmother's kitchen, where the smell of garlic meant something special was coming. Once golden, remove the garlic with a slotted spoon and let them rest on a paper towel to transform into crisp garlic chips.
2. Onion Symphony: To the fragrant oil, add the unsalted butter, allowing it to melt over medium heat. Introduce the sliced yellow onion, seasoning with a pinch of salt and pepper. Sauté until the onions turn translucent and begin to show hints of gold, much like those long summer evenings spent at the family table.
3. Bean Bliss: Add the trimmed green beans to the skillet, stirring occasionally to ensure they soak up the flavors of garlic and onion. This step always reminds me of how my grandmother would gently guide me, teaching the importance of patience in cooking and in life.
4. Vinegar Vibes: Stir in both apple cider vinegar and white balsamic vinegar, adding a tangy depth to the dish. Season with additional salt and pepper to your liking. The balance of flavors—sweet, tangy, and savory—creates a symphony in the pan, a reflection of childhood harmony and family unity.
5. Final Flourish: Transfer the green beans to a serving dish and sprinkle generously with those magical garlic chips. Each bite is a delightful crunch, a burst of nostalgia that brings a smile to my face as I remember shared stories and laughter across generations.
Difficulty: 3/10
Classification: Appetizer

This dish, while simple to prepare, carries with it the weight of cherished memories and the warmth of family gatherings. It's a testament to how food can transcend time, connecting us to those we love and the moments we hold dear. So gather around the table, serve up this delightful appetizer, and let the flavors transport you to a place of comfort and joy.

Read more about Appetizers

Read more about Main Dishes

Read more about Desserts

Avocado Nests | Made by Meaghan Moineau

Avocado Nests | Made by Meaghan Moineau

Title: "Avocado Nests: A Deliciously Nostalgic Culinary Experience"
Description: Dive into a world of flavor with our Avocado Nests, a recipe that combines the creamy richness of avocados with the savory crunch of bacon and hash browns. Perfect as a main dish or a hearty appetizer, this dish is not only delectable but also evokes heartwarming family memories.

---


There's something inherently comforting about the aroma of sizzling bacon and the creamy texture of avocados. These are not just ingredients; they are the essence of cherished family gatherings and nostalgic Sunday brunches. Today, I am thrilled to share with you a recipe that holds a special place in my heart: Avocado Nests.


Ingredients:

- Avocados


- Hardboiled eggs


- Frozen hash browns


- Bacon


- Mayonnaise or cream cheese


- Salt and pepper


Instructions:
1. Cook the Hash Browns: Follow the directions on the package to achieve crispy, golden perfection. The hash browns will serve as the crunchy base for our avocado nests.
2. Prepare the Bacon: Cut the bacon slices into thin strips. You can either bake or fry them, depending on your preference. The goal is to get them crispy enough to sprinkle over the hash browns.
3. Make Deviled Eggs: Slice the hardboiled eggs in half and remove the yolks. Mix the yolks with a bit of mayonnaise or cream cheese, and season with salt and pepper to taste. Fill the egg white halves with the yolk mixture.
4. Prepare the Avocados: Cut the avocados in half, remove the seed, and gently peel off the skin. Each half will cradle a deviled egg, fitting perfectly into the seed cavity.
5. Assemble the Dish: Place a generous layer of hash browns on a serving plate and sprinkle with crispy bacon strips. Nestle the avocado halves on top, each filled with a deviled egg, and serve immediately.
A Nostalgic Family Memory:

Growing up, Sunday brunch was a sacred tradition in our family. My grandmother, a culinary enthusiast, always had a knack for creating dishes that were as heartwarming as they were delicious. One of her signature creations was the Avocado Nests. I still remember her teaching me how to perfectly peel the avocados without bruising the delicate flesh. We’d laugh and chat in the kitchen, the smell of bacon wafting through the air, as she shared stories from her own childhood.


These avocado nests were more than just a meal; they were a symbol of togetherness. Every bite was a burst of flavor, a combination of creamy, salty, and crunchy that brought our family closer together around the table. To this day, preparing this dish brings back those cherished memories, making it a beloved addition to our family meals.


Difficulty Rating: 4/10
Classification: Main Dish/Appetizer

Simple yet sophisticated, Avocado Nests are an excellent choice for those seeking a dish that is both easy to prepare and impressive to serve. Whether you’re hosting a brunch or looking for a light main dish, this recipe is sure to delight your taste buds and warm your heart. Enjoy the comforting flavors and the nostalgia that comes with every bite!

Read more about Appetizers

Read more about Main Dishes

Read more about Desserts

Brown sugar & Spice Sugar cookie frogs | Made by Meaghan Moineau

Brown sugar & Spice Sugar cookie frogs | Made by Meaghan Moineau

Title: "Jump Into Flavor: Nostalgic Brown Sugar & Spice Sugar Cookie Frogs"
Description: Dive into the world of nostalgic baking with our delightful Brown Sugar & Spice Sugar Cookie Frogs. With a rich blend of spices and a hint of sweetness, these cookies are not just a treat for your taste buds but a journey back to cherished family memories. Perfect for those cozy afternoons when you crave something comforting and delicious. Discover the magic of these charming cookies and learn how to make them at home with our easy-to-follow recipe.

---


Jump Into Flavor: Nostalgic Brown Sugar & Spice Sugar Cookie Frogs

There's something incredibly heartwarming about baking cookies that have a story behind them. The aroma that fills the kitchen, the anticipation of that first bite, and the cherished memories that come flooding back. Our Brown Sugar & Spice Sugar Cookie Frogs are more than just a delightful dessert—they are a portal to nostalgic family gatherings and joyful moments.


A Whisk of Nostalgia:

Growing up, the kitchen was always the heart of our home, especially during the holidays. I vividly remember the laughter and chatter that filled the air as my grandmother and I rolled out cookie dough on the old wooden table. She had a particular fondness for whimsical cookie shapes, and every year, without fail, we would bake her famous "frog" cookies. It wasn't just about baking; it was about the stories she shared of her own childhood, the old family recipes passed down, and the love that went into every batch.


These Brown Sugar & Spice Sugar Cookie Frogs are a tribute to those precious moments. The rich, warming spices of cinnamon, ginger, nutmeg, and allspice, combined with the sweetness of brown sugar, create a flavor profile that's both comforting and irresistible. The subtle crunch of the sugar cookie pairs perfectly with a glass of milk or a cup of tea, making it an ideal treat for any time of day.


Recipe: Brown Sugar & Spice Sugar Cookie Frogs
Ingredients:

- 2 ¾ cups unbleached flour


- 1 teaspoon baking powder


- 1 teaspoon cinnamon


- ½ teaspoon ginger


- ½ teaspoon nutmeg


- ¼ teaspoon allspice


- ¾ cup granulated sugar


- ¾ cup light brown sugar


- 1 cup (2 sticks) butter, softened


- 1 egg


- 1 teaspoon vanilla extract


Instructions:

1. Preheat your oven to 350°F (175°C) and line your baking sheets with parchment paper.


2. In a large bowl, whisk together the flour, baking powder, cinnamon, ginger, nutmeg, and allspice. Set aside.


3. In a separate bowl, cream the granulated sugar, brown sugar, and butter until light and fluffy.


4. Add the egg and vanilla extract to the sugar mixture and mix until well-blended.


5. Gradually add the flour mixture, beating just until combined. Remember to scrape down the bowl to incorporate all ingredients. The dough will be quite thick, so you may need to knead in stray bits of flour by hand.


6. Roll the dough on a floured surface and cut into frog shapes (or any shape you desire).


7. Place the cookies on the prepared baking sheets and bake for 9-12 minutes, depending on the size of your cutter.


8. Allow the cookies to sit for a few minutes on the sheet, then transfer to a cooling rack.


Difficulty Rating: 4/10
Classification: Dessert

These cookies are a delightful way to bring a piece of childhood magic into your home, perfect for sharing with family and friends or enjoying a moment of sweet nostalgia on your own. Whether you're a seasoned baker or a beginner, the simplicity and charm of these cookies make them a joy to create and savor.


So, gather your ingredients, preheat your oven, and let the enchanting aroma of Brown Sugar & Spice Sugar Cookie Frogs fill your kitchen. Relive those cherished memories or create new ones with every delicious bite.

Read more about Appetizers

Read more about Main Dishes

Read more about Desserts

Black Bean Brownies | Made by Meaghan Moineau

Black Bean Brownies | Made by Meaghan Moineau

Title: "Decadent Black Bean Brownies: A Sweet Twist on a Classic Treat"
Description:

Dive into the rich, chocolatey world of Black Bean Brownies—a delightful dessert that combines the wholesome goodness of black beans with the indulgent flavors of cocoa and chocolate. Perfect for health-conscious dessert lovers, these brownies are not only tasty but also packed with protein and fiber. Follow our simple recipe, enriched with a touch of nostalgia, to create a treat that will satisfy your sweet tooth and transport you back to cherished family moments.


---


The Magic of Black Bean Brownies: A Family Tradition

Growing up, weekends at Grandma's house were a treasure trove of aromas and laughter. Her kitchen was a sanctuary where culinary magic came alive with every dish she prepared. Among her beloved recipes, her unique twist on brownies stood out—a recipe that has since become a cherished family tradition. Grandma's Black Bean Brownies were a testament to her creativity and knack for infusing love into every bite.


I still vividly remember the first time I helped her make these brownies. The air was filled with the rich scent of cocoa and the faint hint of espresso, mingling with the warmth of family chatter. My little hands were eager to assist, and Grandma patiently guided me through every step. As I watched her skillfully blend the ingredients, she shared stories of her childhood and the origins of her secret recipe, which she discovered in an old cookbook long forgotten on a dusty shelf.


These brownies were more than a dessert; they were a symbol of family unity and the ingenuity that turned simple pantry staples into something extraordinary. The secret, Grandma revealed, was the black beans—an unexpected ingredient that added a creamy texture and a nutritious twist to the classic chocolate treat.


Recipe: Black Bean Brownies
Ingredients:

- 1 can (15 oz) black beans, drained and rinsed


- 2 tablespoons canola oil


- 1/4 cup unsweetened applesauce


- 2 large eggs


- 1 egg yolk


- 3/4 cup sugar


- 1/3 cup unsweetened cocoa powder


- 1 teaspoon espresso powder


- 1/2 cup semi-sweet chocolate, chopped


- 2 tablespoons unsalted butter


- 1 teaspoon vanilla extract


- 1/4 teaspoon salt


- 1/4 cup all-purpose flour


- 1/4 cup walnuts, chopped (optional)


Instructions:

1. Preheat your oven to 350°F (175°C). Line an 8x8-inch baking pan with foil and coat with nonstick cooking spray.


2. In a food processor, combine the black beans, canola oil, applesauce, eggs, egg yolk, sugar, cocoa powder, and espresso powder. Pulse for about 1 minute, or until the mixture is smooth.


3. In a microwave-safe bowl, combine the chopped chocolate and butter. Microwave for 1 minute, stirring halfway through. Continue stirring until smooth. Allow it to cool slightly.


4. Add the melted chocolate mixture, vanilla extract, and salt to the food processor and pulse to blend.


5. Transfer the batter to a large bowl and stir in the flour until fully incorporated.


6. Spread the batter evenly into the prepared baking pan. Smooth the top with a spatula and sprinkle with walnuts, if desired.


7. Bake for 25 to 30 minutes, or until a toothpick inserted into the center comes out clean. Allow the brownies to cool in the pan on a wire rack for 15 minutes before cutting them into squares.


Difficulty Rating: 4/10
Classification: Dessert

These Black Bean Brownies, enriched with memories and love, have become a staple dessert in our family gatherings, evoking nostalgia with every bite. Whether you're introducing them to your loved ones or savoring them alone, may they bring joy and a touch of that familial warmth to your table. Enjoy!

Read more about Appetizers

Read more about Main Dishes

Read more about Desserts

How to Make the Best Chili | Made by Meaghan Moineau

How to Make the Best Chili | Made by Meaghan Moineau

The Ultimate Comfort: How to Make the Best Chili


Discover the Heartwarming Recipe That's Been a Family Favorite for Generations


Chili holds a special place in many hearts, often evoking memories of cozy family gatherings and the delightful aroma that fills the kitchen on a chilly day. This blog post will guide you through making the best chili you've ever tasted, with a recipe that's easy to follow and bursting with flavor. This hearty dish is the perfect main course to warm your soul and satisfy your taste buds.


Ingredients You'll Need:


- 1 bell pepper, chopped


- 1 can of kidney beans


- 1 can of pinto beans


- 1 pound lean ground beef


- 1 large onion, chopped


- 1 can of tomato juice


- 1 can of tomato paste (optional substitute)


- 2 cups water


- 2 tablespoons chili powder


- 1 teaspoon cayenne pepper


- 1 teaspoon ground cumin


- 1 teaspoon black pepper


- 1 teaspoon oregano


- 1 tablespoon white sugar


Instructions:


1. Brown the Ground Beef: In a deep skillet, brown the lean ground beef over medium heat until it is fully cooked, then drain the excess fat.
2. Combine Ingredients: In a large pot over high heat, add the cooked ground beef, tomato juice, kidney beans, pinto beans, water, and tomato paste. Stir in the chili powder, cumin, black pepper, oregano, sugar, cayenne pepper, chopped bell pepper, and onions.
3. Bring to a Boil: Allow the mixture to come to a boil, stirring occasionally.
4. Simmer: Once boiling, reduce the heat and let it simmer uncovered for 2 hours. This allows the flavors to meld perfectly, creating a rich and savory chili.

A Nostalgic Memory


I vividly remember the first time I helped my grandmother make this chili. It was a cold winter evening, and the snow was gently falling outside. The kitchen was warm and inviting, filled with laughter and the comforting aroma of simmering spices. My grandmother handed me a wooden spoon, and with her guidance, I stirred the pot, watching as the ingredients melded into a rich, hearty stew. We shared stories and sipped hot cocoa while the chili simmered, creating a cherished memory that I hold dear to this day. Every time I prepare this dish, I'm transported back to that cozy kitchen, surrounded by love and the promise of a delicious meal shared with family.


Difficulty Rating: 4/10


With its straightforward instructions and readily available ingredients, this chili recipe is perfect for cooks of all skill levels. The most challenging part is waiting patiently as the chili simmers, allowing the flavors to develop fully.


Classification: Main Dish


This chili is more than just a meal—it's an experience. Perfect for family dinners, potlucks, or anytime you crave something hearty and satisfying. Serve it with a side of cornbread or over a bed of rice for an even heartier meal.


Conclusion


Making the best chili doesn't have to be complicated. With this simple recipe, you can create a dish that's not only delicious but also steeped in tradition and nostalgia. Whether you're a seasoned chef or a novice cook, this chili will become a staple in your kitchen, bringing warmth and joy to your family for years to come. So, grab your ingredients and get ready to savor the ultimate comfort food!

Read more about Appetizers

Read more about Main Dishes

Read more about Desserts

Cranberry Margarita | Made by Meaghan Moineau

Cranberry Margarita | Made by Meaghan Moineau

Title: "Cranberry Margarita: A Festive Twist on a Classic Cocktail"
Description: Discover the perfect blend of tart cranberries and smooth tequila with our Cranberry Margarita recipe. This drink not only delights the taste buds but also brings back cherished family memories. Perfect for holiday gatherings, this cocktail is sure to impress your guests. Easy to prepare and beautifully garnished with sugared cranberry swizzle sticks, it's an elegant addition to any festive occasion.

---


A Festive Cranberry Margarita: Bringing Back Holiday Cheer


As the leaves turn golden and the air becomes crisp, there’s one thing that always signals the start of the holiday season in my family: the making of our beloved Cranberry Margarita. This cocktail has become more than just a drink; it’s a staple of our holiday gatherings, a symbol of joy and togetherness.


Ingredients


- Fresh Cranberries: The star of the show, offering a tart and vibrant flavor.
- Grand Marnier: Adds a hint of orange and depth to the cocktail.
- Orange Juice: Provides a fresh and zesty base for the syrup.
- Light Karo Syrup: Used to create a sweet glaze for the cranberry swizzle sticks.
- Sugar: Essential for both the cranberry puree and the sugared glass rim.
- Tequila: The heart of the margarita, bringing warmth and a kick.

Instructions


1. Prepare the Cranberry Puree: In a saucepan over medium heat, melt a cup of sugar in the orange juice. Add the cranberries, reserving some for the skewers, and simmer over low heat for 10 minutes. Allow it to cool before blending the cranberries into a smooth puree. Strain the mixture to achieve a refined texture.
2. Mix the Margarita: In a shaker filled with crushed ice, combine 1 1/2 ounces of tequila, 1/2 ounce of Grand Marnier, and 2 ounces of the cranberry puree. Shake well to mix all the flavors together.
3. Craft the Swizzle Sticks: Skewer several cranberries onto 10 skewer sticks, leaving one end exposed. Lightly brush each skewer with Karo syrup and sprinkle with sugar. Lay the skewers on wax paper and freeze until set.
4. Serve with Style: Pour the margarita into a sugar-rimmed martini glass. Add a frozen cranberry swizzle stick for an elegant garnish.

A Nostalgic Family Memory


I remember the first Thanksgiving my grandmother introduced this Cranberry Margarita to our family tradition. I was just a child, watching in awe as she skillfully crafted each cocktail with love and precision. The kitchen was filled with laughter, the scent of fresh cranberries, and the soft glow of candlelight. As she handed out the vibrant drinks, each adorned with a sparkling cranberry skewer, she shared stories of holidays past, weaving a tapestry of family history with every sip. This drink became synonymous with our family gatherings, a reminder of her warmth and the festive spirit that brings us all together.


Difficulty Rating: 5/10


While the recipe requires a few steps, such as making the cranberry puree and crafting the swizzle sticks, it's straightforward enough for any home bartender. The result is a stunning, flavorful cocktail that’s sure to impress.


Classification: Appetizer


Perfect as a prelude to a holiday meal, this Cranberry Margarita is an appetizer for the senses, whetting the palate with its vibrant flavors and festive presentation.


---


This Cranberry Margarita isn't just a drink; it's a vessel for memories, a tradition that brings warmth and joy to our family gatherings. Whether you're creating new memories or cherishing old ones, this cocktail is the perfect companion for your holiday celebrations. Cheers to family, tradition, and the festive spirit of the season!

Read more about Appetizers

Read more about Main Dishes

Read more about Desserts

Healthy Mint Brownies | Made by Meaghan Moineau

Healthy Mint Brownies | Made by Meaghan Moineau

Indulge in Healthy Mint Brownies: A Nostalgic Treat with a Wholesome Twist


Description


Dive into a world of rich, decadent flavors with our Healthy Mint Brownies—an irresistible dessert that combines the classic delight of mint and chocolate with a nutritious twist. Made with wholesome ingredients like black beans, avocado, and almond milk, these brownies promise a guilt-free indulgence. Whether you’re a seasoned baker or a curious newbie, this recipe will guide you through creating a dessert that is not only delicious but also packed with healthier ingredients. Perfect for every occasion, these brownies will transport you back to fond memories while making new ones.


---


A Family Tradition Reimagined: The Story Behind the Brownies


Growing up, family gatherings were always a cherished time, filled with laughter, stories, and, of course, food. One of the most anticipated treats during these events was my grandmother's mint brownies—a recipe she had perfected over decades. The moment we walked into her kitchen, the air would be filled with the comforting aroma of chocolate and mint, making it impossible to resist sneaking a taste before dinner.


As I grew older and more health-conscious, I wanted to preserve this beloved family tradition while adapting it to align with a more balanced lifestyle. Thus, the Healthy Mint Brownies were born. By incorporating nutrient-rich ingredients like black beans and avocado, and swapping traditional sugar for coconut sugar and powdered xylitol, I was able to recreate the nostalgic flavors of my grandmother’s recipe with a modern, healthful twist.


Every time I prepare this dessert, I’m reminded of those joyful gatherings and the warmth of family. It’s a testament to how food can connect us to our past, while also allowing us to innovate for the future.


---


Ingredients


- 1/4 cup almond milk


- 1/4 cup unsweetened applesauce


- 1 tablespoon ground flax


- 1/2 cup frozen blueberries


- 1 canned whole unsweetened jar pear


- 1 can black beans, drained and rinsed


- 1/4 cup grape seed oil


- 1 tablespoon natural butter extract


- 1 teaspoon vanilla extract


- 1 teaspoon peppermint extract


- 1/2 cup coconut sugar


- 1/2 cup cocoa powder


- 1 teaspoon baking powder


- 1/2 teaspoon baking soda


- 1/4 teaspoon pink salt


- 1/2 cup white rice flour


- 1/2 cup white spelt flour


- 1/2 cup dark chocolate chunks


- 1 ripe avocado


- 1/2 cup full-fat coconut milk or heavy cream


- 1/2 cup powdered xylitol


- Green drop natural food coloring (optional)


- 1/2 cup dark chocolate, melted


- 2 tablespoons oil


---


Instructions


1. Prepare the Flax Mixture: Combine the ground flax, applesauce, and almond milk in a small bowl. Set aside to thicken.
2. Blend the Base: In a food processor, combine the frozen blueberries, canned pear, black beans, and grape seed oil. Pulse until smooth. Add the butter, vanilla, and peppermint extracts, and blend until fully combined.
3. Mix the Dry Ingredients: Transfer the blended mixture to a medium-sized mixing bowl. Add the coconut sugar, cocoa powder, baking powder, baking soda, and pink salt. Mix well.
4. Form the Batter: Add the white rice flour, white spelt flour, and dark chocolate chunks to the mixture and stir until just combined.
5. Bake: Pour the batter into a prepared baking dish and bake at 350°F (175°C) for 44-45 minutes. Allow the brownies to cool for at least 50 minutes, or speed up the cooling process by refrigerating for 20-30 minutes.
6. Create the Mint Filling: In a small bowl, beat the avocado and coconut milk (or heavy cream) on high for about 5 minutes, until fluffy and smooth. Add the powdered xylitol, peppermint extract, and optional food coloring, beating until well incorporated. Spread the filling evenly over the cooled brownies and refrigerate for 10 minutes to firm.
7. Finish with Chocolate: Melt the dark chocolate and mix with oil. Pour over the brownies, spreading quickly and evenly. Return to the fridge for another 5 minutes until the chocolate is set.
8. Serve: Cut the brownies with a sharp knife and serve chilled or at room temperature. Store leftovers in an airtight container in the refrigerator.

---


Difficulty Rating: 4/10


Classification: Dessert


These Healthy Mint Brownies are a delightful and nutritious take on a classic dessert, perfect for any family gathering or personal indulgence. Enjoy the combination of rich chocolate and refreshing mint while reminiscing about cherished family memories.

Read more about Appetizers

Read more about Main Dishes

Read more about Desserts

Peanut Butter Sriracha Cookies | Made by Meaghan Moineau

Peanut Butter Sriracha Cookies | Made by Meaghan Moineau

Spicy Sweet Nostalgia: Peanut Butter Sriracha Cookies


Description: Dive into a culinary adventure with our Peanut Butter Sriracha Cookies — where the classic comfort of peanut butter meets a fiery twist of sriracha. This unique dessert not only satisfies your sweet tooth but also tickles your taste buds with a subtle heat, making it the perfect conversation starter at any gathering. Rated a 4 out of 10 in difficulty, even novice bakers can tackle this recipe with ease. Join us as we blend flavors and memories, creating a treat that's as heartwarming as it is intriguing.

---


A Sweet and Spicy Family Tradition


Growing up, our family kitchen was always a bustling hub of activity. The scent of freshly baked cookies often filled the air, drawing us in like moths to a flame. My grandmother, the culinary maestro of the family, believed that every recipe told a story — and her Peanut Butter Sriracha Cookies were no exception.


It was the summer of my tenth birthday, and as a tradition, my grandmother let me choose the special treat for our annual family picnic. Having recently discovered the joys of spicy foods, I boldly requested a cookie that matched my newfound adventurous palate. With a twinkle in her eye, Grandma nodded and said, "Let's spice things up a little, shall we?"


The kitchen became our playground. As she expertly creamed together the unsalted butter, crunchy peanut butter, and sugars, I watched in awe, eagerly awaiting my turn to contribute. Slowly, she added the sriracha, its vibrant red swirling into the creamy mixture like a secret waiting to be uncovered. I was entrusted with the task of cracking eggs and measuring out vanilla extract — a responsibility I took very seriously.


In another bowl, we mixed the flour, baking powder, baking soda, and salt, the dry ingredients resembling the sands of a distant desert, waiting to be united with our spicy concoction. I held my breath as we combined the two mixtures, the batter rich with promise.


After an hour of chilling, the dough was ready. I gleefully rolled it into balls, dipping each top in granulated sugar before placing them on the cookie sheet. Grandma guided my hands as we pressed a criss-cross pattern into each one, the fork leaving its indelible mark.


As the cookies baked, the sweet and spicy aroma wafted through the house, drawing curious family members into the kitchen. When they finally emerged from the oven, we placed a Hershey's chocolate kiss atop each one, the final touch of sweetness to balance the heat.


The picnic was a resounding success, and the cookies were the star of the show. Family members marveled at the unexpected yet delightful combination of peanut butter and sriracha, each bite evoking laughter and joy. To this day, whenever I bake these cookies, I'm transported back to that sunlit kitchen, the warmth of my grandmother's love, and the magic of flavors coming together to create something truly special.


The Recipe: Peanut Butter Sriracha Cookies


Ingredients:

- Unsalted butter


- Crunchy peanut butter


- Sugar


- Brown sugar


- Sriracha


- Eggs


- Vanilla extract


- Flour


- Baking powder


- Salt


- Baking soda


- Granulated sugar


- Hershey's chocolate kiss (for topping)


Instructions:

1. Cream together butter, peanut butter, and sugars in a large mixing bowl.


2. Gradually add sriracha, eggs, and vanilla extract. Beat until well combined.


3. In a separate bowl, mix flour, baking powder, baking soda, and salt.


4. Gently combine the dry mixture with the peanut butter mixture until well incorporated.


5. Refrigerate the dough for 1 hour.


6. Preheat your oven to 375°F (190°C).


7. Roll dough into 1-inch balls or use a medium-sized cookie scoop.


8. Dip the top of each dough ball into granulated sugar and place on a cookie sheet.


9. Flatten each ball with a fork, creating a criss-cross pattern.


10. Bake for 8-10 minutes, ensuring not to over-bake.


11. Cool on wire racks and top each with a Hershey's chocolate kiss. Enjoy!


Conclusion


Our Peanut Butter Sriracha Cookies are more than just a treat; they are a testament to the joy of culinary experimentation and the power of family traditions. Whether you're a seasoned baker or a newcomer to the kitchen, this recipe offers a delightful challenge with a rewarding payoff. Happy baking!

Read more about Appetizers

Read more about Main Dishes

Read more about Desserts

Amaranth and Roast Veggie Salad | Made by Meaghan Moineau

Amaranth and Roast Veggie Salad | Made by Meaghan Moineau

Title: A Taste of Home: The Nostalgic Amaranth and Roast Veggie Salad
Description: Dive into the heartwarming world of our Amaranth and Roast Veggie Salad, a recipe that blends wholesome ingredients with cherished family memories. This dish, rich in nutrients and flavors, is a delightful addition to your table as an appetizer or a light main dish. With a difficulty rating of 3 out of 10, it's perfect for both novice and seasoned cooks looking to create something special yet simple.

---


A Taste of Home: The Nostalgic Amaranth and Roast Veggie Salad

Growing up, Sunday family dinners were always an affair to remember. The kitchen buzzed with activity, as laughter and the aroma of roasting vegetables filled the air. My grandmother, the culinary maestro of our family, often whipped up her signature Amaranth and Roast Veggie Salad. This dish was more than just a meal; it was a comforting embrace, a nostalgic reminder of the warmth and love that surrounded our family gatherings.


Ingredients:

- 1 cup amaranth


- 2 tablespoons basil-infused olive oil


- 1 bell pepper, sliced


- 1 cup diced pumpkin


- 1 red onion, roughly chopped


- A handful of rocket leaves


- Herbal salt, to taste


- 1 punnet baby tomatoes


Instructions:
1. Cook the Amaranth: Begin by cooking the amaranth with about a cup of water. Allow it to simmer until it reaches a sticky consistency, a texture that beautifully binds the salad together.
2. Prepare the Veggies: Roughly chop the red onion and dice the pumpkin. Spread them on a tinfoil-lined baking tray.
3. Season and Roast: Drizzle the basil-infused olive oil over the onion and pumpkin. Sprinkle generously with herbal salt and pepper. Place the tray in a hot oven, roasting until the edges of the pumpkin turn irresistibly crispy. Just before the roasting is complete, add the punnet of baby tomatoes for a burst of flavor.
4. Assemble the Salad: Once the veggies are roasted to perfection, mix them with the cooked amaranth. Tear a few rocket leaves and toss them into the salad for a fresh, peppery touch.
5. Serve and Enjoy: Serve the salad warm, allowing the flavors to meld together into a harmonious medley.
A Family Tradition

As I recreate this salad today, I'm transported back to those Sunday dinners, where my grandmother would share stories of her youth while expertly preparing each ingredient. The simplicity of this dish, combined with its rich flavors, never failed to bring our family together. Each bite was a celebration of love, tradition, and the joy of cooking with fresh, wholesome ingredients.


Difficulty Rating: 3/10

This Amaranth and Roast Veggie Salad is an easy-to-make dish that promises to delight your taste buds while evoking fond memories of family and togetherness. Whether you're serving it as a hearty appetizer or a light main dish, this salad is sure to become a cherished addition to your culinary repertoire. Enjoy a slice of nostalgia with every bite, and perhaps, create some new family memories of your own.

Read more about Appetizers

Read more about Main Dishes

Read more about Desserts

Creamy Vegan Coleslaw Dressed with Avocado | Made by Meaghan Moineau

Creamy Vegan Coleslaw Dressed with Avocado | Made by Meaghan Moineau

Title: A Nostalgic Twist on Creamy Vegan Coleslaw: Avocado Dressing Delight
Description: Dive into a refreshing and creamy vegan coleslaw that's not only delicious but also easy to prepare. Our recipe, dressed with a luscious avocado blend, is perfect for any occasion. Let this dish transport you back to fond family memories with every bite.

---


Creamy Vegan Coleslaw Dressed with Avocado: A Taste of Home

When I think back to the summers spent at my grandmother's house, I am enveloped in a wave of nostalgia, the scent of fresh grass, and the sound of laughter echoing through the backyard. These memories are often accompanied by the taste of her famous coleslaw—a staple at every family gathering. While her version was a traditional one, I’ve created a vegan adaptation that pays homage to those cherished moments while offering a modern twist.


This *Creamy Vegan Coleslaw Dressed with Avocado* is more than just a side; it’s a connection to those joyful summers. The creamy avocado dressing, with its vibrant green hue and rich flavor, is a delightful replacement for traditional mayo, making it a healthier and vegan-friendly option.


Ingredients:

- 1 ripe avocado


- 2 cups shredded green cabbage


- 1 cup shredded carrot


- 1 tablespoon celery seed


- 2 tablespoons cider vinegar


- 1 tablespoon coconut sugar


- 1 teaspoon dijon mustard


- 2 tablespoons fresh chives, chopped


- 1 teaspoon ground cumin


- Juice of 1 lemon


- 2 tablespoons nutritional yeast


- 1 poblano pepper, finely chopped


- Freshly ground black pepper


- Sea salt to taste


Instructions:

1. In a large bowl, combine the shredded cabbage, shredded carrot, and chopped poblano pepper. Sprinkle with the celery seed and fresh chives.


2. In a small food processor, pulse together the avocado, cider vinegar, coconut sugar, dijon mustard, ground cumin, lemon juice, and nutritional yeast until well blended and creamy. Season with sea salt and black pepper to taste.


3. Pour the avocado dressing over the vegetable mixture and toss until everything is well coated.


4. Serve immediately for a crunchy texture or let it chill for an hour to let the flavors meld beautifully.


A Family Memory:

Every summer, my grandmother’s backyard transformed into a hub of activity, filled with family members and friends. Her coleslaw was always the star of the spread, a recipe passed down and perfected through generations. I remember her standing in the kitchen, apron on, mixing ingredients with a smile, while we children played tag on the lawn. It was in these moments that I learned the importance of family and tradition.


This vegan version, with its creamy avocado dressing, keeps the spirit of her dish alive while embracing my dietary choices. It's a dish that bridges the past and present, blending tradition with modernity, just like those precious summer days.


Difficulty Rating: 3/10
Classification: Appetizer

Whether you're looking to relive some family memories or create new ones, this creamy vegan coleslaw is sure to be a hit. Its simplicity and flavor make it a perfect addition to any meal, reminding us that sometimes, the best recipes are those that connect us to the ones we love. Enjoy every bite, and may it bring warmth and nostalgia to your table.

Read more about Appetizers

Read more about Main Dishes

Read more about Desserts

Hasselback Potatoes | Made by Meaghan Moineau

Hasselback Potatoes | Made by Meaghan Moineau

Title: "Golden Memories: The Timeless Joy of Hasselback Potatoes"
Description: Dive into the heartwarming world of Hasselback Potatoes, a delightful dish that combines simplicity with elegance. With a crisp exterior and a tender interior, this recipe is sure to become a family favorite. As you follow these easy steps, let the nostalgic aroma transport you to cherished family gatherings. Discover the magic of this classic side dish that pairs perfectly with any meal.

---


Golden Memories: The Timeless Joy of Hasselback Potatoes

In the tapestry of culinary traditions, few dishes evoke as much warmth and nostalgia as Hasselback Potatoes. This simple yet elegant side dish is more than just a feast for the taste buds; it's a journey back to cherished family gatherings, where the kitchen was the heart of the home. With its origins rooted in Swedish cuisine, the Hasselback Potato has transcended borders to become a beloved staple on dining tables worldwide.


Ingredients:

- 4 large potatoes


- 4 tablespoons of butter, melted


- 1/4 cup of breadcrumbs


- 1/4 cup of grated parmesan cheese


- Salt to taste


Instructions:
1. Preheat and Prep: Begin by preheating your oven to 425°F (220°C). As the warmth fills your kitchen, imagine the generations before you who relied on the comforting glow of an oven to create memorable meals.
2. Slice with Care: Carefully slice each potato crosswise at 1/8-inch intervals, ensuring you cut to within 1/4 inch of the bottom. This technique creates the iconic fan-like appearance that makes Hasselback Potatoes so visually appealing. As you slice, recall family members gathered around the table, eagerly awaiting the feast to come.
3. Arrange and Drizzle: Arrange the potatoes in a buttered roasting pan. Drizzle 2 tablespoons of melted butter evenly over them and sprinkle with salt. Bake for 25 minutes, allowing the kitchen to fill with the rich aroma of butter and potatoes—a scent that has the power to bring back memories of home.
4. Add the Crunch: After the initial bake, sprinkle the potatoes with breadcrumbs and drizzle with the remaining melted butter. Return them to the oven for another 25 minutes. This step ensures a delightful crunch with every bite.
5. Cheesy Finish: Finally, sprinkle the potatoes with parmesan cheese, baste them with butter from the pan, and bake for an additional 5 minutes. As the cheese melts and turns golden, it adds a layer of savory goodness that is simply irresistible.
A Nostalgic Story:

Growing up, Sunday dinners were a sacred ritual in our family. The bustling kitchen was a symphony of clattering pots, the sizzle of butter, and the laughter of loved ones. Hasselback Potatoes were always a star of these gatherings. I vividly remember my grandmother standing by the old wooden counter, her hands deftly slicing the potatoes with precision. She would tell stories of her childhood, of Sundays spent in her mother’s kitchen, surrounded by the same comforting smells and sounds.


As we sat around the table, our plates piled high with golden Hasselbacks, I felt a deep connection to my heritage. Each bite was a taste of history, a thread that wove together generations. Even now, as I prepare Hasselback Potatoes for my own family, I am reminded of those cherished Sundays, the warmth of the kitchen, and the love that filled our home.


Difficulty Rating: 3/10
Classification: Side Dish

Hasselback Potatoes are a testament to the beauty of simplicity. With minimal ingredients and effortless preparation, this dish is perfect for both novice and seasoned cooks. Whether served as a side dish at a festive gathering or a quiet family dinner, Hasselback Potatoes bring a touch of elegance and a wealth of memories to any occasion. As you enjoy this timeless dish, may it fill your heart and home with warmth and joy.

Read more about Appetizers

Read more about Main Dishes

Read more about Desserts

Spicy Lump Crab and Avocado Salad | Made by Meaghan Moineau

Spicy Lump Crab and Avocado Salad | Made by Meaghan Moineau

Title: A Taste of Nostalgia: Spicy Lump Crab and Avocado Salad
Description: Dive into a flavorful fusion of tender lump crabmeat and creamy avocados with our Spicy Lump Crab and Avocado Salad. This dish, enriched with the zest of fresh lemon juice and a kick of sriracha, is a perfect blend of spice and freshness. Ideal for both a sophisticated appetizer and a light main dish, this recipe holds a special place in my heart, evoking cherished family gatherings by the sea.

---


A Taste of Nostalgia: Spicy Lump Crab and Avocado Salad

As the warm breeze carried the scent of the ocean, our family would gather at the seaside cottage every summer. The sound of waves crashing against the shore was the perfect backdrop for our family tradition—an indulgent feast featuring the Spicy Lump Crab and Avocado Salad. This dish, with its vibrant colors and tantalizing flavors, became a staple at our gatherings, etching unforgettable memories into our hearts.


The Essence of the Dish

Our Spicy Lump Crab and Avocado Salad is a delightful combination of succulent lump crabmeat, creamy avocados, and a spicy dressing that tantalizes the taste buds. The dish is a symphony of textures, with the smoothness of the avocado complementing the delicate sweetness of the crab. The addition of sriracha chile sauce adds a fiery kick, balanced by the tangy freshness of lemon juice.


Ingredients:

- 2 ripe avocados


- 1 red bell pepper, finely chopped


- Fresh parsley, chopped


- 1 tablespoon fresh lemon juice


- 1 pound lump crabmeat


- 2 tablespoons mayonnaise


- Salt and pepper, to taste


- 2 scallions, finely sliced


- 1 tablespoon sriracha chile sauce


- 1 teaspoon Worcestershire sauce


Instructions:
1. Prepare the Spicy Sauce: In a small bowl, combine the mayonnaise, sriracha chile sauce, Worcestershire sauce, lemon juice, salt, and pepper. Stir until well blended, and set aside to let the flavors meld.
2. Mix the Crab Salad: In a medium bowl, gently toss together the crabmeat, scallions, red bell pepper, and fresh parsley. Be careful to maintain the integrity of the crab lumps. Lightly fold in the spicy sauce, ensuring an even coating without breaking the crabmeat.
3. Prepare the Avocados: Slice the avocados in half and remove the pit. Trim a small section from the bottom of each half so they sit flat on a plate. Brush or pour lemon juice over the cut surfaces to prevent browning.
4. Assemble and Serve: Place the avocado halves on a serving plate and generously fill each center with the crab salad. Serve immediately for the freshest flavor.
A Family Memory

Every year, as we prepared this dish, my grandmother would recount the story of how she first learned the recipe from a local fisherman during her honeymoon. She spoke of the joy of discovering new flavors and the warmth of sharing food with loved ones. As we savored each bite, it felt like a tribute to her adventurous spirit and love for family gatherings.


The Spicy Lump Crab and Avocado Salad is more than just a dish; it's a bridge to cherished memories and a reminder of the simple joys in life.


Difficulty Rating: 4/10
Classification: Appetizer or Light Main Dish

This recipe is relatively easy to prepare, making it accessible even for novice cooks. Whether you serve it as an appetizer or a light main dish, it's guaranteed to be a hit, resonating with the warmth of familial love and the excitement of summer days by the sea.

Read more about Appetizers

Read more about Main Dishes

Read more about Desserts

Brown sugar & Spice Sugar cookie frogs | Made by Meaghan Moineau

Brown sugar & Spice Sugar cookie frogs | Made by Meaghan Moineau

Title: Sweet Memories in Every Bite: Brown Sugar & Spice Sugar Cookie Frogs
Description: Dive into the enchanting world of baking with our Brown Sugar & Spice Sugar Cookie Frogs. These delightful treats are more than just cookies; they’re a nostalgic journey back to cherished family gatherings. With a perfect blend of warm spices and a touch of sweetness, these cookies promise to bring warmth and joy to your kitchen. Whether you're a seasoned baker or a beginner, this recipe is sure to captivate your taste buds and your heart.

---


Brown Sugar & Spice Sugar Cookie Frogs: A Recipe Steeped in Family Tradition


Ingredients:


- Unbleached flour


- Baking powder


- Cinnamon


- Ginger


- Nutmeg


- Allspice


- Granulated sugar


- Light brown sugar


- Butter


- Egg


- Vanilla extract


Instructions:


1. Prepare Your Dry Ingredients: Begin by whisking together the flour, baking powder, cinnamon, ginger, nutmeg, and allspice. Set this aromatic mixture aside, letting the spices mingle and infuse their warmth.
2. Creaming Magic: In a separate bowl, cream the granulated sugar and light brown sugar with the butter until light and fluffy. The blend of sugars gives the cookies their distinct, rich flavor.
3. Incorporate Wet Ingredients: Add the egg and vanilla extract to the creamed mixture, mixing until well-blended. The vanilla adds a hint of sweet aroma that perfectly complements the spices.
4. Combine and Conquer: Gradually incorporate the flour mixture into the wet ingredients. Beat just until combined, ensuring to scrape down the bowl, especially the bottom. The dough will be thick; don't hesitate to knead in any stray bits of flour by hand.
5. Shaping Your Frogs: Roll the dough on a floured surface and cut into whimsical frog shapes. Place these playful figures on parchment-lined baking sheets, ready to hop into the oven.
6. Baking to Perfection: Bake in a preheated oven for 9-12 minutes, adjusting the time depending on the size of your cookie cutter. Let them sit on the sheet for a few minutes before transferring them to a cooling rack.

---


A Sweet Nostalgia: The Memory Behind the Recipe


Every time I bake these Brown Sugar & Spice Sugar Cookie Frogs, I am transported back to my grandmother's cozy kitchen. As a child, I’d watch in awe as she effortlessly transformed simple ingredients into magical treats. The aroma of spices wafting through the air was always the first sign that something special was underway.


Grandma had a particular fondness for frogs, often saying they brought good luck. She’d let me help cut out the frog shapes, my small hands struggling to keep the dough intact. We’d laugh at the misshapen ones, claiming they had extra character. Those afternoons filled with laughter and love are some of my most cherished memories.


These cookies were a staple at every family gathering, each bite a reminder of the warmth and joy that surrounded us. Even now, as I bake them for my own family, I feel a connection to those happy days, hoping to create similar memories for my little ones.


---


Difficulty: 3/10


Classification: Dessert


---


Whether you’re creating new memories or reliving old ones, these Brown Sugar & Spice Sugar Cookie Frogs are sure to bring smiles and sweetness to your home. Enjoy the process, savor the flavors, and let the nostalgia wash over you. Happy baking!

Read more about Appetizers

Read more about Main Dishes

Read more about Desserts

Whole Wheat Chocolate Chip Cookies | Made by Meaghan Moineau

Whole Wheat Chocolate Chip Cookies | Made by Meaghan Moineau

Title: Nostalgic Whispers of Warmth: Whole Wheat Chocolate Chip Cookies
Description: Discover the heartwarming joy of baking Whole Wheat Chocolate Chip Cookies with this delightful recipe that marries the rich flavors of dark brown and coconut sugars with the wholesome goodness of whole-wheat flour. These cookies are the epitome of comfort, perfect for a cozy afternoon treat or sharing with loved ones. Alongside the recipe, enjoy a nostalgic tale of family memories that brings a touch of warmth to every bite.

---


Whole Wheat Chocolate Chip Cookies Recipe
Difficulty: 4/10
Category: Dessert
Ingredients:

- 1 teaspoon baking powder


- 1 teaspoon baking soda


- 2 cups chocolate chips


- 1 cup coconut sugar


- 1 cup dark brown sugar


- 2 large eggs


- 1 teaspoon kosher salt


- 1 cup unsalted butter, softened


- 2 teaspoons vanilla extract


- 2 1/2 cups whole-wheat flour


Instructions:
1. Preparation: Begin by placing two racks in the upper and lower thirds of your oven and preheat it to 350°F. Line two baking sheets with parchment paper for easy cleanup.
2. Mix Dry Ingredients: Sift together the baking powder, baking soda, kosher salt, and whole-wheat flour into a large bowl. Pour back any remaining bits into the bowl to ensure no ingredient is left behind.
3. Cream Butter and Sugars: In a standing mixer fitted with a paddle attachment, combine the softened butter, coconut sugar, and dark brown sugar. Beat on low speed until the mixture is smooth and creamy, approximately 2 minutes. Scrape down the sides of the bowl with a spatula.
4. Add Eggs and Vanilla: Incorporate the eggs one at a time, mixing thoroughly after each addition. Stir in the vanilla extract until fully combined.
5. Combine Ingredients: Gradually add the dry ingredient mixture to the wet ingredients. Mix on low speed until just combined, about 30 seconds. Ensure all the flour is incorporated by scraping down the sides and bottom of the bowl.
6. Add Chocolate Chips: Pour in the chocolate chips and mix on low speed until evenly distributed throughout the dough.
7. Shape Cookies: Use a spatula to transfer the dough onto a work surface. Use your hands to fully incorporate all ingredients. Scoop mounds of dough, about 3 tablespoons each, onto the prepared baking sheets, allowing 3 inches of space between each cookie.
8. Bake: Bake the cookies for 16 to 20 minutes, rotating the sheets halfway through for even baking. The cookies should be a beautiful golden brown.
9. Cool and Enjoy: Transfer the cookies, still on the parchment, to a countertop to cool. For an extra touch, sprinkle a pinch of sea salt on top while they are still warm.

These cookies are best enjoyed warm from the oven, but they also freeze well for later indulgence. Simply warm in the microwave for 20-30 seconds to relive the freshly baked experience.


---


A Nostalgic Tale:

Growing up, Saturday afternoons were a sacred time in our family. My grandmother would gather us in her cozy kitchen, the air already fragrant with the anticipation of baking. Her secret to the best chocolate chip cookies was a pinch of love and the patience to let us kids measure out the ingredients with our clumsy hands. As we sifted flour and sneaked chocolate chips when she wasn't looking, stories of her childhood would fill the room, intertwining with our laughter.


These Whole Wheat Chocolate Chip Cookies hold a special place in my heart, as they remind me of those cherished afternoons. The wholesome earthiness of whole-wheat flour combined with the sweetness of chocolate chips is more than just a recipe; it’s a bridge to a simpler time when the world was as warm and inviting as a freshly baked cookie. Every bite takes me back to that kitchen, surrounded by family, where love was the main ingredient in every recipe.


Whether you are creating new memories or revisiting old ones, these cookies are sure to bring a sprinkle of nostalgia and a dollop of comfort to your day.

Read more about Appetizers

Read more about Main Dishes

Read more about Desserts

Homemade Apple Almond Granola Bars | Made by Meaghan Moineau

Homemade Apple Almond Granola Bars | Made by Meaghan Moineau

Title: Crunchy Nostalgia: Homemade Apple Almond Granola Bars
Description: Dive into the comforting embrace of Homemade Apple Almond Granola Bars, a delightful concoction of wholesome ingredients that bring back the warmth of family gatherings. Easy to make and irresistibly tasty, these bars are perfect for breakfast on-the-go or a guilt-free snack.

---


Homemade Apple Almond Granola Bars: A Family Tradition


Growing up, my family always had a knack for turning simple moments into cherished memories. Among these, Saturday mornings were special. The smell of freshly baked goods wafting through the house was our gentle wake-up call, drawing us out of our slumber and into the kitchen where the magic happened.


One of the most beloved recipes that graced our kitchen was the Homemade Apple Almond Granola Bars. These bars were more than just a treat; they were a symbol of togetherness and the perfect embodiment of autumn afternoons spent with family. The combination of rolled oats, sweet honey, and the crunch of almonds brought a comforting warmth that only a homemade recipe could provide.


Ingredients:


- 2 cups rolled oats


- 1/4 cup ground flax seed


- 1/4 cup oat bran


- 1/4 cup wheat bran


- 1/2 teaspoon salt


- 1 teaspoon baking powder


- 1 teaspoon ground cinnamon


- 1/4 cup sugar substitute


- 1/4 cup unsweetened coconut


- 1/2 cup non-fat milk


- 1/4 cup sweet honey


- 1 egg


- 1 teaspoon vanilla extract


- 1 apple, peeled and diced


- 1/2 cup almonds, chopped


Instructions:


1. Preheat your oven to 350°F (175°C) and spray a 9x13 pan with non-stick cooking spray.
2. Combine in a large bowl the oats, flax seed, oat bran, wheat bran, salt, baking powder, cinnamon, sugar substitute, and coconut. Mix until well combined.
3. Add the milk, honey, egg, and vanilla extract to the dry ingredients. Stir until everything is well incorporated.
4. Fold in the diced apple and chopped almonds, ensuring they are evenly distributed throughout the mixture.
5. Press the mixture firmly into the prepared pan, spreading it out evenly.
6. Bake for 15-20 minutes, or until the edges start to brown lightly.
7. Cool for 10 minutes before cutting into bars. Allow to cool completely before serving or storing.

These granola bars are a perfect example of how food can connect us to our roots and to each other. As we savored these bars, my siblings and I would reminisce about the little things that made our weekend mornings special—like the sound of crunching leaves outside or the laughter that filled the room as we enjoyed our breakfast together.


Difficulty: 3/10 - Easy


Classification: Dessert / Snack


Whether you're yearning for a quick snack or a healthy dessert option, these Homemade Apple Almond Granola Bars are sure to satisfy. They're not just a treat; they're a piece of nostalgia, a way to bring a little bit of my family's warmth into your own home.


So, gather your ingredients and invite your loved ones to the kitchen. Create new memories while indulging in the delightful flavors of this cherished family recipe. Enjoy the simple pleasure of homemade goodness, and perhaps, start a new tradition of your own.

Read more about Appetizers

Read more about Main Dishes

Read more about Desserts

Maple-Bacon Corn Muffins | Made by Meaghan Moineau

Maple-Bacon Corn Muffins | Made by Meaghan Moineau

Maple-Bacon Corn Muffins: A Sweet and Savory Delight


Description: Craving a unique twist on a classic comfort food? Our Maple-Bacon Corn Muffins combine the sweet allure of maple syrup with the smoky richness of bacon, creating a mouthwatering balance that captures the essence of home. Perfect as an appetizer or a brunch centerpiece, these muffins are sure to delight your taste buds and warm your heart.

---


A Nostalgic Journey: Family Memories of Maple-Bacon Corn Muffins


Growing up, Saturday mornings in our household were always special. The aroma of freshly brewed coffee would waft through the air, mingling with the irresistible scent of bacon sizzling on the stove. My siblings and I knew that it was time for our beloved family tradition—Maple-Bacon Corn Muffins. This dish holds a cherished place in our hearts, a recipe passed down from my grandmother who had a knack for combining flavors in the most delightful ways.


I remember the excitement of gathering in the kitchen, each of us assigned a task. My brother was in charge of chopping the bacon, my sister whisked the eggs and milk, and I was responsible for stirring the dry ingredients—a job I took very seriously. As we worked, stories flowed as freely as the maple syrup we eagerly poured into the mixture.


Once the muffins were in the oven, the anticipation was palpable. We'd peek through the oven window, watching the muffins rise and turn a perfect golden brown. When the timer chimed, we could hardly wait to liberate the muffins from their tin prisons. Served warm, the first bite was always the best—crispy bacon mingling with the soft, sweet cornmeal, underlined by the deep, rich flavor of maple.


Those mornings were a ritual, a time when our family came together, sharing not just food, but laughter, love, and stories. Even now, as I prepare this dish in my own kitchen, those memories flood back, adding an extra layer of warmth to each batch.


Today, I am thrilled to share this recipe with you, in hopes that it will bring a touch of nostalgia and a whole lot of flavor to your kitchen.


---


Ingredients


- Bacon


- Baking powder


- Butter (melted)


- Eggs


- Flour


- Maple syrup


- Milk


- Salt


- Sugar


- Yellow cornmeal


Instructions


1. Preheat your oven to 400°F.


2. Heat a skillet over medium-high heat. Chop the bacon and cook until slightly crispy. Remove with a slotted spoon and set the skillet aside.


3. In a large bowl, combine all dry ingredients: flour, cornmeal, baking powder, sugar, and salt.


4. Whisk in the milk and eggs until well combined.


5. Stir in the melted butter, maple syrup, and a cup of reserved bacon grease.


6. Add the bacon pieces back into the mixture and stir until evenly distributed.


7. Line a 12-cup muffin tin with muffin liners. Evenly divide the mixture among the liners.


8. Bake for 15 minutes until the muffins are golden brown.


9. Remove from the muffin tin and serve warm. Enjoy!


---


Difficulty: 4/10
Classification: Appetizer

These Maple-Bacon Corn Muffins are more than just a dish; they are a portal to cherished memories and a celebration of comforting flavors. Whether you're sharing them with family or enjoying a quiet morning alone, they promise to bring joy and warmth to any occasion.

Read more about Appetizers

Read more about Main Dishes

Read more about Desserts