Wild Blueberry Lemon Muffins | Made by Meaghan Moineau

Wild Blueberry Lemon Muffins

Intro

There’s something inexplicably comforting about the aroma of freshly baked muffins wafting through the house. It takes me back to Sunday mornings in my grandmother’s cozy kitchen, where the sun would gently stream through the lace curtains, casting delicate patterns on the worn wooden table. Those mornings were filled with the chatter of family and the irresistible scent of golden-brown muffins cooling on the counter. Today, I’m thrilled to share a recipe that captures that warmth and nostalgia: Wild Blueberry Lemon Muffins. These muffins combine the tartness of lemons with the sweet burst of wild blueberries, creating a delightful treat that’s perfect for breakfast, brunch, or any moment in between.

Why You’ll Love It

These Wild Blueberry Lemon Muffins are the embodiment of simple pleasures. Each bite offers a perfect balance of sweetness and tartness, with the wild blueberries providing juicy pops of flavor. The muffins are moist, tender, and crowned with a tangy lemon glaze that elevates them from ordinary to extraordinary. Whether you’re hosting a brunch or looking for a delightful weekday breakfast, these muffins are sure to impress. Plus, they’re incredibly easy to make, requiring just a few staple ingredients and minimal effort.

Ingredients

  • 2 cups all-purpose flour
  • 2 teaspoons baking powder
  • 1/4 teaspoon salt
  • 1/2 cup unsalted butter, softened
  • 1 cup granulated sugar, plus 1/8 cup for lemon zest
  • 1 large egg
  • 1 cup buttermilk
  • 1 teaspoon vanilla extract
  • 1 tablespoon fresh lemon juice
  • 1 tablespoon lemon zest
  • 1 cup canned wild blueberries, drained
  • 1 cup powdered sugar

Instructions

  1. Preheat your oven to 375°F (190°C). Line 16 muffin cups with paper liners.
  2. Mash 1/8 cup of sugar with the lemon zest in a small bowl until the sugar is moistened and fragrant.
  3. In a medium-sized bowl, whisk together the flour, baking powder, and salt. Set aside.
  4. Using an electric mixer, beat 1 cup of sugar and the softened butter together in a large bowl until light and fluffy.
  5. Add the egg to the butter mixture, beating well after each addition.
  6. Mix in the buttermilk, vanilla extract, and lemon sugar gradually, ensuring each ingredient is fully incorporated.
  7. Slowly add the flour mixture to the wet ingredients, mixing until the batter is smooth and free of lumps.
  8. Fold in the wild blueberries gently with a large spatula, being careful not to crush them.
  9. Divide the batter equally among the prepared muffin tins, filling each about 3/4 full.
  10. Bake for about 35 minutes, or until a cake tester inserted into the center of a muffin comes out clean.
  11. Allow the muffins to cool in the pan for a few minutes before transferring them to a wire rack.
  12. Prepare the lemon glaze by combining the lemon juice, remaining lemon zest, and powdered sugar in a small bowl.
  13. Spoon about 1 tablespoon of glaze over each muffin, letting it drip down the sides.

Tips

For the best muffins, ensure your butter is at room temperature before you start. This allows it to incorporate more air, resulting in fluffier muffins. Also, when folding in the blueberries, do so gently to avoid breaking them and turning your batter purple. Finally, don’t skip the glaze—it’s what ties everything together with a delightful zing!

Variations & Substitutions

If you can’t find canned wild blueberries, fresh or frozen ones will work just as well. Just make sure to pat them dry if using frozen to avoid excess moisture. For a dairy-free version, substitute the buttermilk with almond milk mixed with a splash of lemon juice. You can also try adding a handful of chopped nuts, like almonds or walnuts, for some extra texture.

Storage

These muffins are best enjoyed fresh, but they can be stored in an airtight container at room temperature for up to three days. If you want to keep them longer, they freeze beautifully. Just wrap each muffin individually in plastic wrap and place them in a resealable plastic bag. They can be frozen for up to two months. To enjoy, simply thaw at room temperature or warm them in the oven for a few minutes.

FAQ

Can I use regular blueberries instead of wild blueberries?

Absolutely! Regular blueberries can be used as a substitute if wild blueberries aren’t available. Keep in mind that wild blueberries tend to be smaller and more intensely flavored, so you might notice a slight difference in taste and texture with regular blueberries.

How can I make my muffins rise higher?

To achieve higher rising muffins, make sure your baking powder is fresh. Additionally, starting with a higher oven temperature for the first 5 minutes of baking can create a burst of steam, which helps the muffins rise. Then, reduce the temperature to the specified 375°F for the remainder of the baking time.

Can I make these muffins gluten-free?

Yes, you can make these muffins gluten-free by using a gluten-free all-purpose flour blend. Ensure the blend contains xanthan gum or a similar binding agent, which helps mimic the texture of traditional flour.

Nutrition

Each muffin is approximately 210 calories, with 8g of fat, 32g of carbohydrates, and 2g of protein. The nutritional content can vary slightly based on ingredient brands and portion sizes.

Conclusion

These Wild Blueberry Lemon Muffins are more than just a treat; they’re a little piece of nostalgia wrapped in a paper liner. With their sunny lemon flavor and sweet blueberries, they’re sure to brighten any day. Whether you enjoy them with a cup of tea or as a grab-and-go breakfast, these muffins are a delightful reminder of the simple joys in life. I hope this recipe brings as much joy to your kitchen as it has to mine. Happy baking!

Related update: Wild Blueberry Lemon Muffins
Swiss Chard Wraps | Made by Meaghan Moineau

Swiss Chard Wraps

Intro

There’s something magical about the simplicity and freshness of handmade wraps, especially when they bring back memories of sunny days spent in the garden with my grandmother. As a child, I would watch her transform vibrant, crisp produce into delightful meals, and her swiss chard wraps always stood out as a favorite. The rich greens of the chard leaves, paired with the vibrant colors of fresh vegetables, made each bite a burst of flavor and nostalgia. Today, I want to share with you this cherished recipe, hoping it brings as much joy to your table as it always has to mine.

Why You’ll Love It

These Swiss Chard Wraps are not only visually stunning but also packed with nutrients and flavor. The combination of fresh vegetables with a hint of spicy peanut vinaigrette makes them a delightful and healthy option for lunch or dinner. They are perfect for those who are looking for a gluten-free and vegan-friendly meal that doesn’t compromise on taste. Whether you’re serving them as a side to your favorite protein or enjoying them on their own, these wraps are sure to satisfy.

Ingredients

  • Dried swiss chard leaves
  • Orange cauliflower
  • Olive oil
  • Garlic
  • Salt
  • Fresh basil
  • Zucchini
  • Red bell pepper
  • Avocado
  • Trader Joe’s spicy peanut vinaigrette

Instructions

  1. Chop off the stems of the swiss chard at the point where it meets the leaf. You could stem the swiss chard entirely, but I like leaving a bit of stem with the leaves to give better structure to the wraps.
  2. Chop the cauliflower into small pieces and pulse them in a food processor until it looks like rice. I usually pulse the cauliflower florets and the stalk together.
  3. Place the olive oil in a sauté pan over medium-high heat. Once the pan is hot, add the garlic and let it fry for about a minute or two, or until the garlic starts to brown.
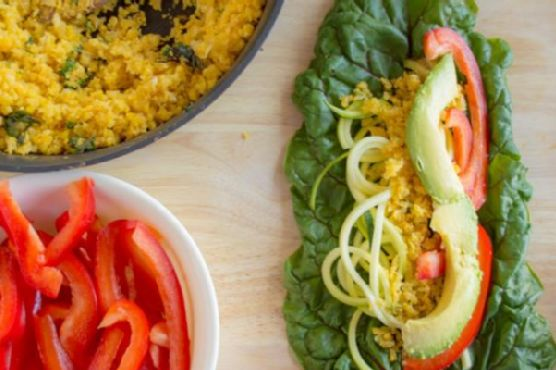
  4. Add the pulsed cauliflower rice and cook it for about 2-3 minutes. The cauliflower should turn into a vibrant yellow-orange color when it is cooked.
  5. Add a pinch of salt and chopped basil to the cauliflower and stir.
  6. Spiralize the zucchini with Blade B to create zucchini noodles. If you do not have a spiralizer, just create zucchini ribbons with a vegetable peeler.
  7. To assemble the wraps, place a large leaf flat down. Add a bit of sautéed cauliflower, zucchini noodles, red pepper, and avocado along the swiss chard stalk.
  8. Drizzle a bit of vinaigrette on top of the vegetables and wrap everything up.
  9. Enjoy these wraps as a side to your favorite protein! Feel free to dip these wraps in more sauce.
  10. These wraps are best consumed when they are freshly made. Refrigerate any leftovers in an airtight container.

Tips

For the best results, ensure your swiss chard leaves are fresh and dry. This will make them easier to work with and keep your wraps from becoming soggy. Be gentle when wrapping to avoid tearing the leaves, and feel free to secure them with toothpicks if needed.

Variations & Substitutions

If swiss chard isn’t available, you can substitute with large kale or cabbage leaves. For those who enjoy a bit more heat, consider adding sliced jalapeños or a sprinkle of chili flakes. The vinaigrette can also be swapped out for your favorite dressing if you prefer a different flavor profile.

Storage

These wraps are best enjoyed fresh, but if you have leftovers, store them in an airtight container in the refrigerator for up to two days. When ready to eat, let them sit at room temperature for a few minutes for the best texture.

FAQ

Can I prepare the ingredients ahead of time?

Yes, you can prepare the cauliflower rice and chop the vegetables ahead of time. Store them in separate containers in the fridge to keep everything fresh. Assemble the wraps just before serving for the best results.

What can I serve with these wraps?

These wraps pair beautifully with grilled chicken or tofu for added protein. A side of quinoa or a light soup would also complement the meal nicely.

Are these wraps suitable for meal prep?

While these wraps are best consumed fresh, you can prepare the components in advance and assemble them when you’re ready to eat. This will help maintain their texture and flavor.

Nutrition

Each wrap is packed with vitamins and minerals from the fresh vegetables, providing a healthy dose of fiber, antioxidants, and healthy fats, particularly from the avocado and olive oil. It’s a low-calorie meal that’s both satisfying and nourishing.

Conclusion

Swiss Chard Wraps are a delightful way to enjoy a fresh, nutritious meal that’s easy to prepare and full of flavor. I hope this recipe brings a touch of sunshine to your kitchen and inspires you to get creative with your wraps. Whether you’re reminiscing about gardening days gone by or creating new memories with your loved ones, these wraps are sure to become a favorite in your home. Enjoy every bite!

Related update: Swiss Chard Wraps

Related update: Cajun Potato Wedges

Marinated Flat Iron Steak | Made by Meaghan Moineau

Marinated Flat Iron Steak: A Flavorful Delight

Intro

There’s something incredibly nostalgic about the sizzle of a steak hitting a hot grill. Growing up, summer evenings were often spent in the backyard with my family, gathered around the barbecue as the aroma of marinated meat filled the air. My dad would always let me help prepare the marinade, and I remember the joy of mixing the ingredients together, the sharp tang of balsamic vinegar mixing with the earthy aroma of fresh herbs. This Marinated Flat Iron Steak recipe brings back those cherished memories and promises to create new ones for your family and friends.

Why You’ll Love It

This Marinated Flat Iron Steak recipe is a delicious blend of simplicity and flavor, perfect for weeknight dinners or weekend gatherings. Here’s why you’ll love it:

  • Quick and Easy: With a straightforward marinade and minimal prep time, this recipe fits perfectly into busy schedules.
  • Flavorful: The combination of balsamic vinegar, dijon mustard, and fresh herbs infuses the steak with a vibrant taste.
  • Versatile: Whether you’re hosting a summer barbecue or looking for a cozy indoor dinner, this steak is a crowd-pleaser.
  • Memorable: Each bite is a reminder of sunny days and joyful gatherings, making it not just a meal, but a shared experience.

Ingredients

  • Balsamic vinegar
  • Dijon mustard
  • Flat iron steak
  • Garlic cloves
  • Ginger
  • Fresh herbs: rosemary
  • Lemon zest
  • Lemons
  • Mayonnaise
  • Olive oil
  • Salt and pepper

Instructions

  1. Cut the flat iron steak lengthwise to form two equal strips.
  2. In a large baking pan or Ziploc bag, combine balsamic vinegar, dijon mustard, minced garlic, grated ginger, chopped fresh rosemary, lemon zest, juice of the lemons, mayonnaise, olive oil, salt, and pepper to form the marinade.
  3. Add the steak strips to the marinade, ensuring they are well-coated. Cover, or seal the bag, and place in the refrigerator for at least an hour, or overnight for deeper flavor.
  4. Preheat your BBQ to high heat. Once hot, place the marinated steaks on the grill.
  5. Cover and cook for 3 minutes on one side.
  6. Flip the steaks and cook the other side for another 3 minutes, or until they reach your desired level of doneness.
  7. Remove from the grill and let the steaks rest for 5 minutes before slicing and serving.

Tips

To ensure your steak is perfectly cooked and flavorful, consider these tips:

  • Marinate Longer: For a more intense flavor, let the steak marinate overnight.
  • Room Temperature: Allow the steak to come to room temperature before grilling for even cooking.
  • Rest the Meat: Letting the steak rest after cooking will help retain its juices, ensuring a juicy bite.

Variations & Substitutions

This recipe is wonderfully adaptable to suit your tastes and dietary needs:

  • Herbs: Swap rosemary for thyme or oregano for different herbal notes.
  • Citrus Twist: Use lime or orange zest instead of lemon for a different citrus profile.
  • Spicy Kick: Add a pinch of red pepper flakes to the marinade for some heat.
  • Dietary Adjustments: For a dairy-free version, ensure your mayonnaise is plant-based.

Storage

If you have leftovers, store them properly to maintain their flavor:

  • Refrigeration: Store cooked steak in an airtight container in the refrigerator for up to 3 days.
  • Freezing: You can freeze the cooked steak for up to 2 months. Wrap it tightly in plastic wrap and place in a freezer-safe bag.
  • Reheating: Reheat gently in a skillet over medium heat or in the oven to prevent the steak from drying out.

FAQ

Can I use a different cut of steak?

Absolutely! While flat iron steak is great due to its tenderness and flavor, you can use this marinade with other cuts like flank steak, skirt steak, or even ribeye. Just adjust the cooking time based on the thickness and type of steak.

What side dishes pair well with this steak?

This steak pairs wonderfully with a variety of sides. Consider serving it with grilled vegetables, a fresh garden salad, or creamy mashed potatoes for a complete meal.

How do I know when the steak is done?

Use a meat thermometer to check the internal temperature. For medium-rare, aim for 135°F (57°C), for medium 145°F (63°C), and for well-done, 160°F (71°C). Remember that the steak will continue to cook a bit as it rests.

Nutrition

While the exact nutrition can vary based on the size of your steak and the exact amount of marinade, a typical serving of this marinated flat iron steak provides essential nutrients like protein, healthy fats from olive oil, and vitamins from the herbs and lemon. It’s a wholesome choice that fits well into a balanced diet.

Conclusion

Creating delicious meals that bring people together is a true joy, and this Marinated Flat Iron Steak recipe is perfect for just that. With its rich flavors and simple preparation, it’s sure to become a favorite at your table, just as it has been at mine. Whether you’re reminiscing about past gatherings or creating new memories, this dish is a wonderful way to celebrate the joy of cooking and sharing good food with loved ones.

Related update: Marinated Flat Iron Steak

Related update: Swiss Chard Wraps

Related update: Baked Tortellini In Red Sauce

Rotisserie Chicken and Bean Tostadas | Made by Meaghan Moineau

Rotisserie Chicken and Bean Tostadas

Intro

Every summer, my family would gather in my grandmother’s backyard for a weekend barbecue. The air was always filled with the sound of laughter and the mouthwatering aroma of her famous tostadas sizzling on the grill. These weren’t just any tostadas; they were a medley of flavors that united us all. Today, I’m excited to share a version of this beloved recipe with you: Rotisserie Chicken and Bean Tostadas. This dish not only reminds me of those cherished family moments but also provides a quick and delicious meal that can be whipped up on a busy weeknight.

Why You’ll Love It

These Rotisserie Chicken and Bean Tostadas are a delightful twist on a classic Mexican favorite. They’re perfect for when you want something delicious, yet easy to prepare. The combination of crunchy corn tortillas, creamy refried beans, savory chicken, and fresh toppings creates a symphony of textures and flavors. Plus, the use of a store-bought rotisserie chicken means minimal cooking time, allowing you more moments to savor and less time in the kitchen.

Ingredients

  • Shredded rotisserie chicken
  • Corn tortillas
  • Canned refried beans
  • Diced tomato
  • Jalapeño
  • Shredded iceberg lettuce
  • Cotija cheese
  • Lime
  • Guacamole
  • Salsa

Instructions

  1. Preheat your oven to 350 degrees Fahrenheit.
  2. Place the corn tortillas on a cookie sheet and bake them for 16-17 minutes, or until the edges brown and curl.
  3. Allow the cooked tortillas to cool at room temperature.
  4. To build the tostadas, start by spreading 1-2 tablespoons of refried beans on each tortilla.
  5. Top each tortilla with a handful of shredded rotisserie chicken, shredded iceberg lettuce, diced tomato, and guacamole.
  6. Drizzle each tostada with the juice of one lime wedge.
  7. Sprinkle generously with cotija cheese.
  8. Drizzle with salsa and garnish with slices of jalapeño.
  9. Serve the tostadas open-faced. This recipe makes 6 tostadas, with a serving size of 2 tostadas per person.

Tips

For the crispiest tostadas, make sure your tortillas are spaced apart on the baking sheet to allow for even browning. Additionally, if you prefer a more intense lime flavor, consider zesting some lime over the tostadas for an extra zing. Lastly, for a bit of smoky flavor, lightly grill the tortillas before baking them.

Variations & Substitutions

If you’re looking to switch things up, there are plenty of ways to customize these tostadas. Try using flour tortillas for a softer base or swap the rotisserie chicken with grilled shrimp for a seafood twist. For those who prefer a vegetarian option, substitute the chicken with sautéed mushrooms or grilled vegetables. If cotija cheese is unavailable, feta or queso fresco work as excellent alternatives.

Storage

While these tostadas are best enjoyed fresh, any leftovers can be stored. Keep the toppings and toasted tortillas separate to prevent sogginess. Store the tortillas in an airtight container at room temperature and refrigerate the toppings in separate containers. Reheat the tortillas in the oven for a few minutes before assembling your tostadas again.

FAQ

Can I make the tostadas ahead of time?

Yes, you can prepare the individual components ahead of time. Bake the tortillas and store them in an airtight container. Prepare the toppings and store them in the fridge. Assemble the tostadas just before serving for the best texture and flavor.

What can I serve with these tostadas?

These tostadas pair well with a side of Mexican rice or a refreshing bean salad. If you’re hosting a party, consider serving them alongside a platter of chips, salsa, and guacamole for a complete Mexican-inspired feast.

Nutrition

Each serving of two tostadas is an excellent source of protein and fiber, thanks to the chicken and beans. The fresh vegetables add a boost of vitamins, while the cheese provides calcium. For a lighter version, you can reduce the amount of cheese and guacamole used.

Conclusion

Rotisserie Chicken and Bean Tostadas offer a delicious journey through flavors and textures, reminiscent of cherished family gatherings. Whether you’re making them for a weeknight dinner or a festive occasion, they promise to bring joy and satisfaction to the table. I hope this recipe becomes a part of your family’s cherished memories, just as it has been for mine. Enjoy every crunchy, flavorful bite!

Related update: Rotisserie Chicken and Bean Tostadas

Related update: Marinated Flat Iron Steak

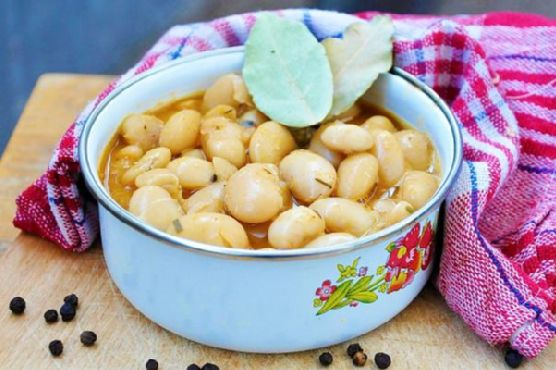
The Perfect Butter Beans Stew | Made by Meaghan Moineau

The Perfect Butter Beans Stew

Intro

Welcome to a cozy corner of my kitchen, where the aroma of simmering stews fills the air and warms the soul. Today, I’m thrilled to share with you a recipe that holds a special place in my heart: The Perfect Butter Beans Stew. This dish is more than just a meal; it’s a comforting embrace on a chilly day, a nostalgic reminder of family gatherings and heartwarming stories shared around the dinner table.

When I was a child, my grandmother’s kitchen was the heartbeat of our home. I remember watching her effortlessly create magic in her pots, her hands moving deftly, her eyes alight with joy. The butter beans stew was a family favorite, a recipe passed down through generations, each iteration lovingly tweaked and perfected. Today, I’m excited to pass this cherished recipe on to you, hoping it will bring the same warmth and joy to your home as it has to mine.

Why You’ll Love It

This butter beans stew is a celebration of simple, wholesome ingredients coming together to create a symphony of flavors. Here’s why you’ll love it:

  • Hearty and Nutritious: Packed with protein-rich butter beans and a medley of aromatic spices, this stew is both satisfying and nourishing.
  • Simple Ingredients: You’ll find most of these ingredients in your pantry, making it an accessible dish for any day of the week.
  • Versatile: Enjoy it as a standalone meal, or serve it as a side dish with your favorite protein.
  • Comforting: Perfect for those colder months when you crave a warm, home-cooked meal.

Ingredients

  • 1 cup dry lima beans, soaked overnight
  • 2 diced onions
  • 3 garlic cloves, minced
  • 1 teaspoon dry tarragon
  • 1 tablespoon canned fresh tarragon
  • 2 teaspoons sweet paprika
  • 2 bay leaves
  • 3 tablespoons unrefined sunflower oil
  • 1 teaspoon ground pepper
  • Salt to taste

Instructions

For the full step-by-step instructions, including tips and techniques to perfect this dish, please visit my blog at http://gourmandelle.com/the-perfect-butter-beans-stew/.

Tips

  • Soak the Beans: Don’t skip soaking the butter beans overnight. This step ensures they cook evenly and reach the perfect, tender texture.
  • Season Generously: Don’t be shy with the spices. The tarragon and paprika are key to developing the stew’s rich, savory flavor.
  • Simmer Slowly: Allow the stew to simmer on low heat. This slow cooking process melds the flavors beautifully.

Variations & Substitutions

Feel free to customize this stew to suit your taste preferences or dietary needs:

  • Vegetarian Option: For a vegetarian version, replace the unrefined sunflower oil with olive oil, and enhance the flavor with vegetable broth instead of water.
  • Spicy Kick: Add a pinch of chili flakes or a dash of hot sauce if you prefer your stews with a bit of heat.
  • Herb Variations: Swap the tarragon with rosemary or thyme for a different herbaceous note.

Storage

This butter beans stew stores beautifully, making it a perfect make-ahead meal:

  • Refrigerator: Store in an airtight container in the fridge for up to 4 days.
  • Freezer: For longer storage, freeze the stew in individual portions. It will keep well for up to 3 months.
  • Reheating: Reheat gently on the stove over low heat, adding a splash of water or broth if needed to adjust the consistency.

FAQ

Can I use canned beans instead of dried?

Yes, you can use canned butter beans as a convenient alternative. Simply rinse and drain them before adding them to the stew. Keep in mind that the cooking time will be reduced since canned beans are pre-cooked.

What can I serve with butter beans stew?

This stew pairs wonderfully with crusty bread, rice, or quinoa. A fresh green salad or roasted vegetables also complement the rich flavors of the stew beautifully.

Nutrition

This butter beans stew is a nutritious powerhouse, offering a good balance of protein, fiber, and essential vitamins. While the exact nutrition will vary based on portion size, here’s a rough estimate per serving:

  • Calories: Approximately 250-300 calories
  • Protein: 12-15 grams
  • Fiber: 8-10 grams
  • Fat: 10 grams

Conclusion

The Perfect Butter Beans Stew is more than a recipe; it’s a culinary journey back to simpler times, filled with warmth and love. As you savor each spoonful, may it bring you the same comfort and joy it has brought my family for generations. I hope this stew becomes a staple in your kitchen, weaving its way into your cherished food memories. Thank you for joining me on this delicious adventure. Happy cooking!

Related update: The Perfect Butter Beans Stew

Related update: Chicken Suya

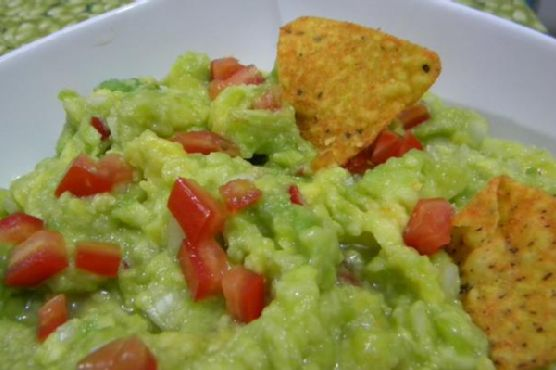
Guacamole | Made by Meaghan Moineau

The Best Homemade Guacamole

Intro

There’s nothing quite like the taste of fresh guacamole. I remember the first time I tried it at a family gathering when I was a child. The creamy texture combined with a hint of spice and citrusy notes was unlike anything I’d tasted before. My uncle, who had just returned from a trip to Mexico, made a batch for us, and since then, guacamole has been a staple at all our family gatherings. Today, I’ll share with you my take on this classic recipe, inspired by that nostalgic experience.

Why You’ll Love It

This guacamole recipe is perfect for any occasion. Whether you’re hosting a party, enjoying a quiet night in, or looking for a healthy snack, this guacamole will be your go-to. The creamy texture of the avocados paired with the freshness of herbs like cilantro, basil, and oregano creates a perfect balance of flavors. Plus, it’s quick and easy to make!

Ingredients

  • 3 ripe Haas avocados
  • 1/4 cup finely chopped onion
  • 1 jalapeño pepper, seeded and minced
  • 2 tablespoons fresh cilantro, chopped
  • 1/2 teaspoon salt
  • 1/4 teaspoon black pepper
  • 2 tablespoons fresh lime juice
  • 1 tablespoon fresh basil, chopped
  • 1 tablespoon fresh oregano, chopped

Instructions

  1. Cut the avocados in half lengthwise. Remove the pit by driving a chef’s knife into it and twisting gently to loosen.
  2. Scoop the avocado flesh out of the skin and into a mixing bowl.
  3. Using a fork, mash the avocado to your desired consistency.
  4. Add the chopped onion, jalapeño, cilantro, basil, and oregano to the mashed avocado.
  5. Mix until all the ingredients are well incorporated.
  6. Season the guacamole with salt, black pepper, and lime juice to taste.
  7. Serve immediately or chill for a more pronounced flavor.
  8. If not serving immediately, store in the refrigerator with plastic film wrap pressed onto the surface of the guacamole to prevent browning.

Tips

When choosing avocados, look for ones that are slightly soft to the touch but not mushy. A ripe avocado will yield gently to pressure. To prevent the guacamole from turning brown, ensure the plastic wrap is touching the entire surface of the guacamole. This minimizes air contact, which causes oxidation.

Variations & Substitutions

Feel free to customize your guacamole. For a spicier kick, leave the seeds in the jalapeño or add a dash of cayenne pepper. If you’re not a fan of cilantro, you can omit it or replace it with parsley. For a twist, try adding diced tomatoes or roasted corn for extra texture and flavor.

Storage

Store leftover guacamole in an airtight container in the refrigerator. Press a piece of plastic wrap directly onto the surface before sealing to keep it fresh for up to two days. Remember, the sooner you enjoy it, the better it tastes!

FAQ

Can I make guacamole in advance?

Yes, you can prepare guacamole a few hours in advance. Just make sure to store it with plastic wrap pressed against the surface to prevent browning. The lime juice also helps preserve its vibrant color.

What can I serve with guacamole?

Guacamole is incredibly versatile. Serve it with tortilla chips, as a topping for tacos, or alongside grilled chicken or fish. It’s also a great addition to sandwiches and burgers for an extra burst of flavor.

Nutrition

Avocados are packed with healthy fats, fiber, and essential nutrients. This guacamole recipe is not only delicious but also offers a good source of vitamins C, E, K, and B-6, as well as potassium and folate. Enjoy it as a healthy snack or as part of a balanced meal.

Conclusion

Whether you’re a long-time fan of guacamole or trying it for the first time, this recipe is sure to become a favorite. Its simplicity and freshness make it a standout dish that’s perfect for any occasion. So gather your ingredients and enjoy a taste of this classic, nostalgic treat. Remember, the best dishes are those shared with family and friends. Happy guacamole making!

Related update: Guacamole

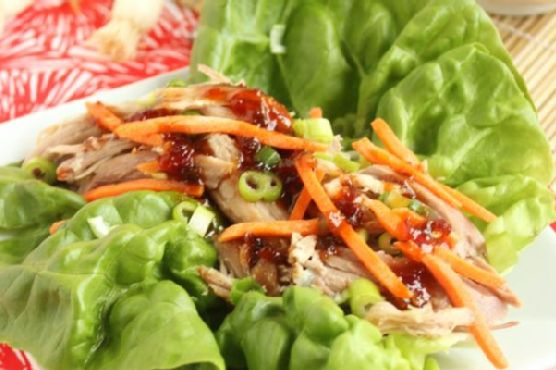
Slow Cooker Kahlua Pork with Sweet Chili Pineapple Sauce | Made by Meaghan Moineau

Slow Cooker Kahlua Pork with Sweet Chili Pineapple Sauce

Intro

There’s something magical about the aroma of a slow-cooked meal wafting through the house, especially when it’s a dish that has been a family favorite for generations. I can still vividly recall the Sunday afternoons at my grandmother’s house, where family gatherings were synonymous with her signature Kahlua Pork. As kids, we would eagerly await the moment when the tender, flavorful pork would be served, accompanied by the sweet and tangy pineapple sauce. This recipe is my homage to those cherished memories, with a modern twist that brings the flavors to life in a convenient slow-cooker format.

Why You’ll Love It

This Slow Cooker Kahlua Pork with Sweet Chili Pineapple Sauce is the perfect blend of savory and sweet, with a hint of smokiness that makes it irresistible. It’s incredibly easy to prepare, requiring minimal effort but delivering maximum flavor. The slow cooker does all the hard work, breaking down the pork until it’s melt-in-your-mouth tender. The sweet chili pineapple sauce adds a zesty kick that perfectly complements the richness of the pork. Whether you’re hosting a gathering or just want a comforting meal for the family, this dish is sure to become a staple in your home.

Ingredients

  • 4 lbs pork butt
  • 2 tablespoons liquid smoke
  • 1 tablespoon regular sea salt
  • 1 cup pineapple juice
  • 1/4 cup rice vinegar
  • 1/4 cup honey
  • 2 tablespoons garlic chili sauce
  • 2 tablespoons hoisin sauce

Instructions

  1. Place the pork, fat side up, in the slow cooker.
  2. Using a fork, pierce the roast all over and pour the liquid smoke over it to coat.
  3. Sprinkle the sea salt evenly over the roast and cover.
  4. Cook on low for 10 hours, until the meat begins to fall apart when shredded with a fork.
  5. In a small saucepan, whisk together the pineapple juice, rice vinegar, honey, chili sauce, and hoisin sauce.
  6. Bring the mixture to a boil and cook the sauce until reduced by half, stirring frequently with a heat-resistant spatula.
  7. Set aside the sauce once reduced.
  8. When the roast is done, transfer to a cutting board and shred the meat using two forks.
  9. Return the shredded meat back to the slow cooker and serve immediately with the sauce.

Tips

For best results, choose a pork butt with good marbling, as the fat will render down during cooking, keeping the meat juicy and flavorful. If you prefer a bit of spice, feel free to adjust the amount of garlic chili sauce to your liking. Keep an eye on the sauce as it reduces to ensure it doesn’t burn, and remember to stir frequently.

Variations & Substitutions

If you’re looking for a different flavor profile, you can substitute the hoisin sauce with soy sauce for a less sweet, more savory sauce. For a tropical twist, try adding crushed pineapples to the sauce during the reduction process. Vegetarians can swap the pork for jackfruit, which mimics the texture of shredded meat and absorbs flavors beautifully.

Storage

Leftovers can be stored in an airtight container in the refrigerator for up to 4 days. Reheat gently on the stovetop or in the microwave, adding a splash of water or pineapple juice to keep the meat moist. You can also freeze the pork and sauce in separate containers for up to 3 months. Thaw in the refrigerator overnight before reheating.

FAQ

Can I use a different cut of pork?

Yes, you can use pork shoulder or pork loin as alternatives. However, keep in mind that pork loin is leaner and may not be as tender as pork butt or shoulder. Adjust the cooking time accordingly and monitor the tenderness of the meat.

What can I serve with this dish?

This Kahlua Pork pairs wonderfully with steamed rice or a side of roasted vegetables. For a complete Hawaiian-inspired meal, consider serving it with macaroni salad and coleslaw.

Is there a way to make it in the oven?

Absolutely! Preheat your oven to 325°F (165°C). Follow the preparation steps and place the pork in a roasting pan. Cover tightly with foil and bake for 5-6 hours, until the pork is tender and easily shredded.

Nutrition

This dish is a source of protein and offers a delightful balance of sweet and savory flavors. The sauce contains natural sweetness from honey and pineapple juice, making it more nutrient-dense than sugar-laden alternatives. If you’re watching your sodium intake, consider using a reduced-sodium soy sauce in place of hoisin sauce.

Conclusion

This Slow Cooker Kahlua Pork with Sweet Chili Pineapple Sauce is a testament to the power of simple ingredients and traditional cooking methods. It’s a dish that brings people together, creating a sense of warmth and nostalgia with every bite. Whether it’s for a special occasion or a cozy family dinner, this recipe is sure to become a beloved fixture in your culinary repertoire. Enjoy the flavors, and may it bring as much joy to your table as it has to mine!

Related update: Slow Cooker Kahlua Pork with Sweet Chili Pineapple Sauce

Related update: Creamy White Chili

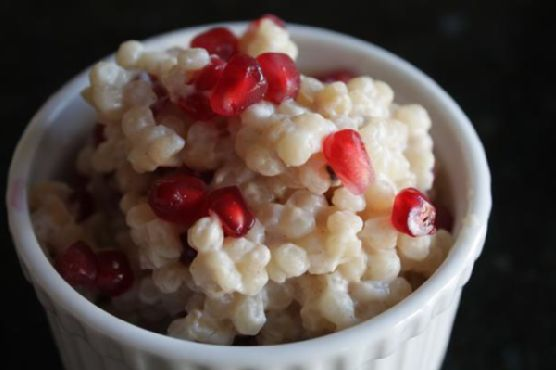
Coconut Israeli Couscous Studded With Pomegranate | Made by Meaghan Moineau

Coconut Israeli Couscous Studded With Pomegranate

Intro

Growing up, I remember the sweet scent of cinnamon and coconut wafting through our kitchen during family gatherings. These were the times when my grandmother would prepare her famous coconut couscous, a dish so comforting and aromatic that it became a family tradition. It wasn’t just a meal; it was a vessel of memories, filled with laughter and warmth. Today’s recipe, Coconut Israeli Couscous Studded with Pomegranate, is a tribute to those cherished moments. It’s a dish that combines the creamy texture of coconut milk with the delightful surprise of pomegranate seeds, creating a symphony of flavors that will dance on your palate.

Why You’ll Love It

This recipe is a beautiful fusion of flavors and textures. The soft, chewy Israeli couscous absorbs the rich, creamy coconut milk, while the pomegranate seeds add a burst of freshness and color. The subtle hint of cardamom and cinnamon brings warmth and depth, making this dish a perfect addition to any meal. Whether you’re looking for a unique side dish or a comforting main course, you’ll fall in love with this coconut couscous.

Ingredients

  • 1 cup milk
  • 1 can (13.5 oz) unsweetened coconut milk
  • 3 green cardamom pods
  • 1/2 teaspoon ground cinnamon
  • 2 tablespoons sugar
  • 1 cup Israeli couscous
  • Seeds from half a pomegranate

Instructions

  1. Smash the cardamom pods open with the flat side of your knife, just like you would with a garlic clove.
  2. In a saucepan, combine the milk, coconut milk, and cardamom. Place over low heat and bring to just below a boil, stirring occasionally. It should become slightly foamy.
  3. Strain out the cardamom pods since the shells are not so pleasant to eat.
  4. Add the Israeli couscous to the saucepan and simmer on low for 10-12 minutes, until all the liquid is absorbed. The couscous should be tender but still have some chew to it.
  5. Stir in the ground cinnamon, sugar, and pomegranate seeds. Mix well to combine.

Tips

For best results, use fresh pomegranate seeds. They add a delightful crunch and freshness to the dish. If you find the couscous is absorbing the liquid too quickly, feel free to add a bit more milk to ensure it cooks evenly. Always taste and adjust the sweetness to your preference.

Variations & Substitutions

If you don’t have pomegranate seeds on hand, or if you’re not a fan, you can easily substitute them with raisins or dried cranberries. Both options will add a lovely sweetness and chewy texture. For a nutty twist, sprinkle some toasted almonds or pistachios on top before serving.

Storage

Store any leftover couscous in an airtight container in the refrigerator for up to 3 days. To reheat, simply add a splash of milk to the couscous and heat it gently on the stovetop, stirring occasionally.

FAQ

Can I use regular couscous instead of Israeli couscous?

Yes, you can use regular couscous, but be aware that the cooking time will be shorter, and the texture will be different. Israeli couscous is larger and chewier, which makes it an excellent choice for this creamy dish.

Is there a substitute for coconut milk?

If you’re not a fan of coconut milk or have an allergy, you can use almond milk or cashew milk as an alternative. Keep in mind, though, that the coconut flavor is integral to the dish’s profile, so the result will be slightly different.

How can I make this dish vegan?

To make this recipe vegan, replace the regular milk with a plant-based milk of your choice, such as almond or oat milk. The rest of the ingredients are already plant-based, making this a simple adjustment.

Nutrition

While I don’t have an exact nutritional breakdown for this dish, it’s worth noting that coconut milk adds healthy fats, and pomegranate seeds are rich in antioxidants. This dish offers a good balance of carbohydrates, fats, and a touch of sweetness.

Conclusion

Coconut Israeli Couscous Studded with Pomegranate is more than just a meal; it’s an experience. Each bite is a trip down memory lane, bringing warmth and joy to your table. Easy to prepare yet rich in flavor, this dish is perfect for both special occasions and simple family dinners. Enjoy the comforting taste and let it create new memories for you and your loved ones. Happy cooking!

Related update: Coconut Israeli Couscous Studded With Pomegranate

Related update: Osso Buco

Square Deviled Eggs | Made by Meaghan Moineau

Square Deviled Eggs: A Fun Twist on a Classic Appetizer

Intro

There is something truly delightful about deviled eggs. They are a timeless appetizer, cherished at family gatherings, holiday dinners, and picnics alike. As a child, I remember standing on a stool in my grandmother’s kitchen, watching her expertly prepare deviled eggs. The aroma of boiled eggs mingled with the tangy scent of mustard filled the air, and I was entranced by the magic of this simple dish. Today, I’m excited to share a unique twist on this classic recipe: Square Deviled Eggs. Perfect for surprising your guests or adding a touch of whimsy to your dining table, these square-shaped delights are not only fun to make but also utterly delicious!

Why You’ll Love It

Square Deviled Eggs are not just a visual treat; they also offer a delightful culinary experience. Here’s why you’ll love them:

  • Fun and Unique: The square shape adds a playful twist to the traditional deviled egg, making it a conversation starter at any gathering.
  • Kid-Friendly: The creamy filling is soft and mild, making it a hit with children and adults alike.
  • Versatile: Perfect for parties, picnics, or as a unique addition to your holiday spread.

Ingredients

  • Medium-sized cooked eggs
  • Cream cheese
  • Ham

Instructions

  1. Begin by preparing your hard-boiled eggs. Place the eggs in a saucepan and cover them with cold water.
  2. Bring the water to a boil over medium heat. Once boiling, let the eggs cook for 5 minutes.
  3. Remove the saucepan from heat and let the eggs stand covered in hot water for 10 minutes.
  4. Once cooled, peel the eggs.
  5. To create the square shape, use an Egg cuber or Square Egg Press (see note below for purchase options). Slide each peeled egg into the press and screw the top down gently, pushing the egg into the corners.
  6. Allow the eggs to cool completely before removing them from the mold. For the best results, use medium-sized eggs.
  7. For the filling, mash the egg yolks with cream cheese and finely chopped ham until smooth and creamy.
  8. Carefully fill the square-shaped egg whites with the creamy yolk mixture. Serve chilled.

Tips

Here are some tips to ensure your Square Deviled Eggs turn out perfectly every time:

  • Plan Ahead: If you plan to serve these at a party, consider investing in multiple egg cubers to save time.
  • Egg Size: Medium-sized eggs work best to fit into the egg press molds.
  • Cooling Time: Make sure the eggs are completely cooled before removing them from the mold for a perfect square shape.

Variations & Substitutions

If you’re looking to mix things up, consider these variations and substitutions:

  • Spicy Twist: Add a dash of hot sauce or sprinkle of cayenne pepper to the filling for a spicy kick.
  • Vegetarian Option: Omit the ham and add finely chopped herbs like dill or chives for a refreshing flavor.
  • Cheese Lovers: Substitute cream cheese with a sharp cheddar for an extra cheesy flavor.

Storage

Store any leftover Square Deviled Eggs in an airtight container in the refrigerator for up to two days. For best quality, consume them as soon as possible. The texture and flavor are at their peak when fresh.

FAQ

Where can I purchase an Egg cuber or Square Egg Press?

Egg cubers or square egg presses are available online through major retailers such as Amazon or specialty kitchen stores. They are an affordable and fun addition to your kitchen tools.

Can I make Square Deviled Eggs in advance?

Yes, you can prepare the eggs and filling in advance. Simply store them separately in the refrigerator and assemble just before serving.

Nutrition

Square Deviled Eggs are a nutritious appetizer option. The eggs provide a good source of protein, while cream cheese and ham add a touch of richness. For a lighter version, consider using low-fat cream cheese.

Conclusion

Square Deviled Eggs are sure to bring joy and surprise to your dining table. Whether you’re hosting a party, enjoying a picnic, or simply looking for a fun way to enjoy a classic dish, these eggs are a delightful choice. With a touch of nostalgia and a modern twist, they are perfect for all occasions. So grab your Egg cuber, invite your loved ones, and enjoy this whimsical take on an old favorite!

Related update: Square Deviled Eggs

Related update: Guacamole

Related update: Easy Thanksgiving Entertaining

Tomato Cutlets | Made by Meaghan Moineau

Tomato Cutlets: A Savory Delight

Intro

Growing up, summers were synonymous with the sweet aroma of fresh tomatoes ripening on the vine in my grandmother’s garden. I vividly recall the warmth of the sun on my face as I plucked those vibrant, juicy beefsteak tomatoes, their fragrance wafting through the air, promising a delectable treat. One of my cherished memories is watching my grandmother transform these garden-fresh tomatoes into golden, crispy cutlets. Today, I am excited to share this cherished family recipe with you, bringing a taste of those sun-drenched summer days into your kitchen.

Why You’ll Love It

This Tomato Cutlets recipe is a delightful fusion of crispy textures and savory flavors, perfect for a light lunch or an elegant appetizer. Whether you’re a seasoned cook or a kitchen novice, you’ll appreciate the simplicity and versatility of this dish. The combination of fresh ingredients and easy preparation makes it a go-to recipe for any occasion. Plus, it’s a great way to enjoy the seasonal bounty of tomatoes and eggplants.

Ingredients

  • 2 baby eggplants, halved
  • 2 large beefsteak tomatoes, sliced
  • 1 cup Italian bread crumbs
  • 2 eggs, beaten
  • Juice of 1 lemon
  • 2 tablespoons olive oil
  • 2 tablespoons Italian fresh parsley, chopped
  • Salt and pepper to taste
  • 1/4 cup fresh Romano cheese, grated

Instructions

  1. Prepare your ingredients by slicing the beefsteak tomatoes and beating the eggs in a shallow bowl. Place the Italian bread crumbs in another shallow dish.
  2. Dip each tomato slice into the egg wash and then coat it with the bread crumbs. Repeat this process if you have extra egg wash and bread crumbs for a thicker crust.
  3. Heat a large frying pan over medium heat and add the olive oil. Once the oil is hot, carefully place the prepared tomato slices in the pan.
  4. Cook the tomato slices for about 3-4 minutes on each side, or until they achieve a nice golden color. Gently flip them halfway through cooking.
  5. After removing the tomato slices from the pan, add the halved baby eggplants. Sprinkle them with salt and pepper to taste.
  6. Sauté the eggplants on one side until they are golden, about 3-4 minutes, then turn and sauté the other side.
  7. Plate the tomato cutlets and eggplants, and finish with a garnish of chopped parsley, a squeeze of lemon juice, and a generous sprinkle of grated Romano cheese.

Tips

For the best results, use ripe, firm beefsteak tomatoes. The firmer the fruit, the better it will hold up during cooking. Additionally, ensure the oil is hot before frying to achieve that perfect golden crust. If you find the cutlets are browning too quickly, adjust the heat to medium-low to ensure even cooking.

Variations & Substitutions

If you prefer a gluten-free version, substitute the Italian bread crumbs with gluten-free bread crumbs. For a vegan twist, replace the eggs with a plant-based egg substitute or a mixture of water and flour to help the bread crumbs adhere to the tomatoes. You can also experiment with spices in the bread crumbs, such as garlic powder or paprika, for an extra kick of flavor.

Storage

These Tomato Cutlets are best enjoyed fresh to maintain their crispy texture. However, if you have leftovers, store them in an airtight container in the refrigerator for up to 2 days. Reheat them in a preheated oven at 350°F (175°C) for about 10 minutes to regain some of their crispiness.

FAQ

Can I use other types of tomatoes for this recipe?

Yes, you can use other types of tomatoes, such as Roma or heirloom. However, beefsteak tomatoes are preferred for their size and firm texture, which hold up well during frying.

What can I serve with Tomato Cutlets?

Tomato Cutlets pair beautifully with a fresh green salad or a side of pasta. They also make a great topping for a sandwich or a burger for a unique twist.

Can I prepare the cutlets in advance?

You can prepare the tomatoes and eggplants ahead of time and store them separately in the refrigerator. When you’re ready to serve, simply fry them up fresh for the best texture and flavor.

Nutrition

While specific nutritional values will vary based on portion sizes and exact brands used, these Tomato Cutlets are generally a good source of Vitamin C from the tomatoes and healthy fats from the olive oil. Using fresh ingredients ensures a wholesome and delicious dish without unnecessary additives.

Conclusion

There’s something magical about turning simple, fresh ingredients into a dish that delights the senses. These Tomato Cutlets not only bring a taste of summer to your table but also provide a comforting, nostalgic culinary experience. Whether you’re preparing them for family, friends, or simply treating yourself, this recipe is sure to become a beloved staple in your kitchen. Enjoy the warm, crispy goodness and the nostalgic flavors of this timeless dish.

Related update: Tomato Cutlets

Related update: Square Deviled Eggs

Smoky Chicken Tacos | Made by Meaghan Moineau

Smoky Chicken Tacos

Intro

There’s something magical about gathering around the dinner table with loved ones, sharing a meal that brings both comfort and delight. I remember my grandmother’s kitchen, filled with the rich aroma of spices and the sizzle of something delicious on the stove. It was in her cozy kitchen that I first fell in love with the art of cooking, learning the beauty of simple ingredients transformed into something extraordinary.

Today, I’m excited to share a recipe that embodies that same warmth and joy: Smoky Chicken Tacos. This dish is a celebration of bold flavors and vibrant colors, a true fiesta on your plate. Whether you’re hosting a casual dinner or simply craving something deliciously satisfying, these tacos are sure to become a family favorite.

Why You’ll Love It

Smoky Chicken Tacos are not only incredibly tasty, but they’re also easy to make and perfect for any occasion. The combination of tender chicken, fresh veggies, and creamy toppings creates a delightful balance of textures and flavors. The smokiness from the spices pairs perfectly with the bright, zesty notes from the lime, making each bite a true taste experience. Plus, they’re customizable, so everyone can enjoy them just the way they like!

Ingredients

  • 4 skinless boneless chicken breasts
  • 2 tablespoons extra virgin olive oil (evoo)
  • 1 teaspoon chili powder
  • 1 teaspoon cumin
  • 1 teaspoon garlic powder
  • 1 teaspoon onion powder
  • Salt and pepper to taste
  • 2 limes (juice of one, extra for serving)
  • 8 corn tortillas
  • 2 cups shredded cabbage
  • 1 cup cooked corn
  • 1 red onion, thinly sliced
  • 1-2 jalapeno peppers, sliced
  • 2 roma tomatoes, diced
  • 1 avocado, sliced
  • Fresh cilantro, chopped
  • Salsa, for serving
  • Sour cream, for serving

Instructions

  1. Preheat your oven to 400 degrees Fahrenheit.
  2. In a small bowl, combine the chili powder, cumin, garlic powder, onion powder, salt, and pepper.
  3. Rub the chicken breasts with the extra virgin olive oil and coat evenly with the spice mixture on both sides.
  4. Place the seasoned chicken on a baking sheet and bake in the preheated oven for 20-25 minutes, or until cooked through and juices run clear.
  5. Once done, remove the chicken from the oven and squeeze the juice of one lime over the cooked chicken. Let it rest for a few minutes before slicing.
  6. While the chicken rests, warm the corn tortillas in a dry skillet over medium heat until pliable.
  7. Assemble the tacos by layering slices of chicken, shredded cabbage, cooked corn, red onion, jalapeno slices, roma tomatoes, and avocado in the corn tortillas.
  8. Garnish with fresh cilantro and an extra squeeze of lime juice.
  9. Serve with salsa and sour cream on the side. Enjoy!

Tips

For the juiciest chicken, let it rest for a few minutes after baking before slicing. This allows the juices to redistribute, ensuring each bite is moist and flavorful. Also, warming your tortillas properly can make a huge difference in the overall texture of your tacos, so don’t skip that step!

Variations & Substitutions

Feel free to customize these tacos to suit your taste. You can substitute chicken with beef or turkey for a different protein base. For a vegetarian option, swap the chicken for roasted vegetables or black beans. Add a handful of cheese if you like extra creaminess, or switch up the toppings with your favorite taco additions like pickled onions or hot sauce.

Storage

If you have leftovers, store the chicken and toppings separately in airtight containers in the refrigerator. They should keep well for up to three days. To reheat, warm the chicken in a skillet over medium heat until heated through, and enjoy assembling fresh tacos again!

FAQ

Can I use flour tortillas instead of corn tortillas?

Absolutely! While corn tortillas add a traditional touch and a slightly different texture, flour tortillas work just as well and are just as delicious.

What can I serve with these tacos?

These tacos pair wonderfully with a side of Mexican rice or a simple salad. You could also serve them with chips and guacamole for a complete Mexican meal experience.

How can I make these tacos spicier?

If you love heat, consider adding more jalapeno slices, a sprinkle of cayenne pepper in the spice mix, or a spicy salsa to your tacos.

Nutrition

Each serving of these smoky chicken tacos is packed with protein and fresh vegetables, making them a nutritious choice for any meal. Depending on the toppings and accompaniments, the calorie count can vary, but sticking with fresh, whole ingredients ensures a wholesome and balanced meal.

Conclusion

Smoky Chicken Tacos are more than just a meal; they’re a culinary experience that brings people together with every bite. Whether you’re reminiscing about family dinners past or creating new memories with friends and loved ones, these tacos are sure to bring joy and satisfaction to your table. So gather your ingredients, invite your favorite people, and savor the delightful flavors of this simple yet spectacular dish.

Related update: Smoky Chicken Tacos

Related update: Spinach and Gorgonzola Stuffed Flank Steak

Banana Blueberry Pancakes | Made by Meaghan Moineau

Banana Blueberry Pancakes

Intro

There’s something incredibly comforting about the aroma of pancakes sizzling on a Sunday morning. Growing up, weekends were a special time in our household, and my mom’s banana blueberry pancakes were a tradition that never failed to bring the family together. As a child, I would eagerly help mash the bananas, my little hands sticky with sweet fruit, while my mom expertly flipped each pancake to golden perfection. Those mornings, filled with laughter and the sweet scent of pancakes, remain some of my fondest memories. I’m thrilled to share this beloved recipe with you, hoping it will create equally delicious memories in your home.

Why You’ll Love It

These banana blueberry pancakes are a delightful blend of natural sweetness and fruity goodness, offering a wholesome start to your day. The combination of ripe bananas and juicy blueberries creates a flavor explosion with every bite, while coconut flour adds a subtle nuttiness and a gluten-free twist. Whether you’re looking for a hearty breakfast or a comforting brunch option, these pancakes are sure to please. Plus, they are easy to make, requiring simple ingredients and minimal preparation time, making them perfect for both busy mornings and leisurely weekend brunches.

Ingredients

  • 4 whole eggs
  • 1 cup water
  • 2 tablespoons liquid coconut oil
  • ½ cup coconut flour
  • 1 teaspoon cream of tartar
  • 1 teaspoon ground cinnamon
  • 2 ripe bananas, mashed
  • 1 cup frozen blueberries

Instructions

  1. Beat the eggs for 1 minute in a medium-sized bowl until they are light and frothy.
  2. Add the water, coconut oil, and coconut flour to the eggs. Whisk together until the mixture is smooth and well combined.
  3. Allow the batter to sit for 5 minutes to let the coconut flour absorb the liquid and expand.
  4. Stir in the cream of tartar, ground cinnamon, and mashed bananas. Whisk until the batter is smooth.
  5. Gently fold in the frozen blueberries using a spatula, ensuring they are evenly distributed throughout the batter.
  6. Heat a little oil, butter, or a combination of both in a skillet over medium to low heat.
  7. Ladle about 1/2 cup of batter for each pancake onto the skillet, spreading it out to form a circle.
  8. Cook the pancakes for about 5 minutes on one side, or until bubbles form on the surface and the edges are set.
  9. Carefully flip the pancakes and cook the other side until golden brown and cooked through.
  10. Repeat the process with the remaining batter to make approximately 8 pancakes.
  11. Serve the pancakes warm, drizzled with maple syrup, and enjoy!

Tips

For the perfect pancakes, make sure your skillet is well-heated before you start cooking. This ensures a nice, even browning. If the batter seems too thick after resting, you can add a little more water, a tablespoon at a time, until you reach your desired consistency. Be gentle when folding in the blueberries to avoid breaking them and turning your batter blue!

Variations & Substitutions

If you’re looking to switch things up, consider adding a handful of chopped nuts, such as walnuts or pecans, for added crunch. You can also substitute the coconut flour with almond flour if you prefer, though the texture might be slightly different. For a vegan version, replace the eggs with a flaxseed egg substitute and use a plant-based oil.

Storage

These pancakes store well in the refrigerator for up to 3 days. Simply place them in an airtight container. To reheat, warm them in a skillet over low heat or in the microwave. You can also freeze the pancakes for up to 2 months. Separate each pancake with parchment paper and store them in a freezer-safe container or bag.

FAQ

Can I use fresh blueberries instead of frozen?

Absolutely! Fresh blueberries work just as well in this recipe. Just be sure to rinse and dry them thoroughly before folding them into the batter.

What can I use if I don’t have cream of tartar?

If you don’t have cream of tartar on hand, you can substitute it with 1 1/2 teaspoons of baking powder. This will help the pancakes rise and achieve a fluffy texture.

Are these pancakes gluten-free?

Yes, these banana blueberry pancakes are gluten-free, thanks to the use of coconut flour. Just ensure that all your ingredients, including baking powder, are certified gluten-free if you have a severe allergy or sensitivity.

Nutrition

Each pancake is packed with nutrients and flavor. While the exact nutrition will vary based on the ingredients and portion sizes, these pancakes are a good source of protein from the eggs, healthy fats from the coconut oil, and fiber from the coconut flour and blueberries. Plus, they’re naturally sweetened with bananas, making them a healthier choice for breakfast.

Conclusion

Banana blueberry pancakes are more than just a meal; they’re a hug on a plate, a reminder of cozy mornings and cherished family traditions. Whether you’re making them for a special occasion or just to brighten up a weekday morning, these pancakes are sure to be a hit. I hope this recipe brings as much joy to your kitchen as it does to mine. Happy cooking!

Related update: Banana Blueberry Pancakes

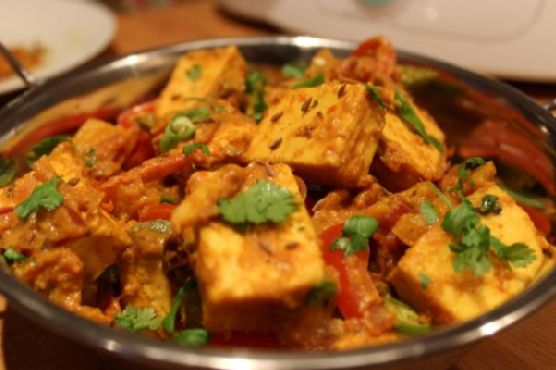
Paneer jalfrezi | Made by Meaghan Moineau

Paneer Jalfrezi: A Flavorful Journey to Spice and Comfort

Intro

Paneer Jalfrezi is more than just a dish; it’s a vibrant tapestry of flavors that brings together the essence of Indian cooking. This dish takes me back to my childhood, where Sunday lunch was a family affair, and the aroma of spices would fill the house. My grandmother would stand at the stove, her hands moving expertly, creating magic in the form of Paneer Jalfrezi. It was the first “grown-up” dish I learned to cook, and every time I make it, I’m transported back to those cozy afternoons filled with laughter and love.

Why You’ll Love It

Paneer Jalfrezi is a delightful combination of fresh vegetables and soft paneer, enveloped in a symphony of spices. Here’s why this dish will win you over:

  • Quick and Easy: Ready in under 30 minutes, it’s perfect for a weeknight dinner.
  • Customizable Heat: Adjust the level of spiciness according to your preference.
  • Vegetarian Delight: A protein-rich meal that satisfies both vegetarians and non-vegetarians alike.
  • Rich in Flavor: The dish boasts a perfect balance of tangy, sweet, and spicy notes.

Ingredients

  • 200g paneer, cubed
  • 2 tbsp oil, divided
  • 1 tsp cumin seeds
  • 3 medium tomatoes, 2 roughly chopped and 1 cut into strips
  • 1 large onion, half roughly chopped and half sliced
  • 1 red bell pepper, sliced
  • 1 green bell pepper, sliced
  • 1/2 tsp turmeric powder
  • 1 tsp chilli powder
  • 2-3 green chillies, chopped
  • 2-3 Kashmiri red dried chillies
  • 1 inch ginger, finely sliced
  • 1 tsp garam masala
  • 1/2 tsp sugar
  • 1 tsp vinegar
  • Fresh coriander leaves for garnish
  • Salt to taste

Instructions

  1. Roughly chop half an onion and 2 tomatoes.
  2. Heat 1 tbsp oil in a non-stick pan. Add the onions and fry until lightly brown.
  3. Add the tomatoes and cook for 2-3 minutes until soft. Remove from heat, let cool, and blend into a puree.
  4. In the same pan, heat 1 tbsp oil on medium heat. Add cumin seeds and let them sputter.
  5. Add the Kashmiri red chillies and sliced ginger, frying for 30-45 seconds.
  6. Add turmeric powder, sliced onions, bell peppers, chilli powder, salt, and two-thirds of the chopped green chillies. Fry for 3-4 minutes.
  7. Add the paneer cubes and cook on low heat for 5 minutes.
  8. Add the tomato puree, garam masala, and sugar. Simmer for 2 minutes.
  9. Stir in the tomato strips and toss well.
  10. Finish with vinegar and garnish with remaining green chillies and fresh coriander.

Tips

Here are some tips to ensure your Paneer Jalfrezi turns out perfect every time:

  • Use fresh, firm paneer for the best texture.
  • If you prefer a creamier texture, add a splash of cream before serving.
  • For a smokier flavor, lightly char the bell peppers before adding them to the dish.

Variations & Substitutions

Feel free to experiment with this Paneer Jalfrezi recipe:

  • Vegan Option: Substitute paneer with firm tofu for a vegan version.
  • Extra Veggies: Add mushrooms or zucchini for added nutrition and texture.
  • Spice Level: Adjust the number of chillies to increase or decrease the heat.

Storage

Store any leftovers in an airtight container in the refrigerator for up to 3 days. Reheat gently on the stove or in the microwave, adding a splash of water to maintain moisture.

FAQ

Can I make Paneer Jalfrezi ahead of time?

Yes, you can prepare the dish a day in advance. The flavors deepen overnight, making it even more delicious the next day. Just be sure to store it properly in the refrigerator.

What can I serve with Paneer Jalfrezi?

Paneer Jalfrezi pairs beautifully with naan, roti, or steamed basmati rice. A side of yogurt or raita helps balance the heat of the dish.

Is Paneer Jalfrezi spicy?

It can be spicy due to the chillies, but you can easily adjust the spice level to your liking by adding more or fewer chillies.

Nutrition

This dish is a good source of protein, thanks to the paneer, and is rich in vitamins from the fresh vegetables. It’s a wholesome and satisfying meal that fits well into a balanced diet. For those watching their calorie intake, use less oil or opt for low-fat paneer.

Conclusion

Paneer Jalfrezi is a dish that celebrates the vibrant flavors of Indian cuisine. It’s a comforting meal that brings warmth to the table and joy to the heart. Whether you’re a seasoned cook or a beginner, this recipe is a delightful journey into the world of spices and flavors. I hope it becomes as cherished in your home as it is in mine. Enjoy every bite of your delicious creation!

Related update: Paneer jalfrezi

Related update: Mediterranean eggplants

Zabaglione with Roasted Plums | Made by Meaghan Moineau

Zabaglione with Roasted Plums

Intro

There’s something incredibly comforting about the gentle sizzle of plums roasting in the oven, their sweet fragrance perfuming the entire kitchen. Zabaglione with Roasted Plums is a dessert that transports me back to my childhood, where Sunday afternoons were spent in my grandmother’s cozy kitchen. She would prepare this delightful treat as the sun dipped below the horizon, its warmth mirrored by the glow of her smile. This dessert is not just a dish; it is a cherished memory passed down through generations, capturing the essence of Italian comfort food.

Why You’ll Love It

This Zabaglione with Roasted Plums is a dessert that will captivate your senses with its delightful blend of flavors and textures. The creamy, frothy zabaglione pairs perfectly with the juicy, caramelized plums, creating a harmonious balance of sweetness and tartness. It’s an elegant yet simple dessert that is sure to impress your guests, yet easy enough to make for a special family dinner. The aromatic brandy adds a sophisticated touch, while the hint of salt enhances the natural sweetness of the plums. This dish is a testament to the beauty of Italian culinary tradition, bringing warmth and joy to any occasion.

Ingredients

  • Italian plums
  • Sugar
  • Egg yolks
  • Mixed plum brandy
  • Kosher salt

Instructions

  1. Preheat your oven to 400°F (200°C).
  2. Place the plums on a rimmed cookie sheet lined with parchment paper for easier cleanup.
  3. Sprinkle the plums with 2 tablespoons of sugar.
  4. Roast the plums in the oven until they are browning and tender but not falling apart, about 15 minutes.
  5. Meanwhile, bring about 2 inches of water to a bare simmer in a saucepan over medium-high heat. Reduce the heat to maintain a bare simmer.
  6. In a round-bottomed metal mixing bowl, combine the egg yolks, remaining 4 tablespoons of sugar, mixed plum brandy, and a pinch of kosher salt. Whisk thoroughly.
  7. Set the bowl over the simmering water, ensuring the base of the bowl does not touch the water, and whisk continuously.
  8. The egg yolks will begin to froth, lighten, and grow greatly in volume. If you sense that the yolks are at risk of scrambling, quickly remove the bowl from the heat and whisk to cool slightly, then continue.
  9. When soft peaks form, after 5 to 10 minutes, the zabaglione is done.
  10. Transfer the zabaglione to a clean bowl, cover, and refrigerate.
  11. To serve, place 6 plum halves in the bottom of each of 4 glasses. Give the zabaglione a quick whisk and spoon it on top of the plums.
  12. Serve immediately and enjoy!

Tips

For the perfect zabaglione, it’s crucial to maintain a gentle heat under the bowl to prevent the eggs from scrambling. If you don’t have a round-bottomed mixing bowl, a regular metal bowl can work, but be extra cautious with the heat. Whisking continuously is key to achieving that light, airy texture. Additionally, using a good quality plum brandy will enhance the flavor profile, creating a more refined dessert experience.

Variations & Substitutions

If Italian plums are not in season, you can substitute them with other stone fruits such as peaches or nectarines. For a non-alcoholic version, replace the plum brandy with a splash of vanilla extract and a little extra sugar for sweetness. You can also experiment with different types of sugar, like brown sugar or honey, to add a different depth of flavor to the dessert.

Storage

This dessert is best enjoyed fresh, but if you have leftovers, store the zabaglione and roasted plums separately in airtight containers in the refrigerator. They will keep for up to two days. Before serving, give the zabaglione a gentle whisk to restore its creamy consistency. Avoid freezing the zabaglione, as it can affect the texture.

FAQ

Can I make zabaglione without alcohol?

Yes, you can make a non-alcoholic version of zabaglione by substituting the plum brandy with a splash of vanilla extract and a little extra sugar to maintain the sweetness. This will still give you a deliciously creamy dessert without the alcohol.

What can I serve with zabaglione and roasted plums?

Zabaglione with roasted plums pairs beautifully with a crisp biscotti or a light almond cookie for added texture. You could also serve it alongside a scoop of vanilla ice cream or a dollop of whipped cream for an extra indulgent treat.

Nutrition

This dessert provides a delightful balance of flavors with a moderate calorie count, making it a perfect treat for special occasions. The plums offer a good source of vitamins and antioxidants, while the eggs provide protein. However, due to the sugar and brandy, it’s best enjoyed in moderation.

Conclusion

Zabaglione with Roasted Plums is more than just a dessert; it’s a celebration of flavors and a testament to the joy of cooking with love. Whether you’re rekindling cherished memories or creating new ones, this dish is sure to become a beloved part of your culinary repertoire. With its delicate sweetness and rich flavors, it’s a perfect way to end any meal. Enjoy this little taste of Italy and share it with those you love.

Related update: Zabaglione with Roasted Plums

Related update: Home made coffee ice cream

Skillet Chili Mac | Made by Meaghan Moineau

Skillet Chili Mac

Intro

There’s something wonderfully nostalgic about a hearty skillet meal. I still remember the first time my grandmother made her famous chili mac for a family gathering. The aroma of spices filled the house, and the sound of sizzling beef could be heard from the kitchen. We all gathered around the table, eager to dig into the warm, comforting dish that had become a family favorite over the years. Today, I’m sharing a modern twist on that cherished recipe: Skillet Chili Mac. This one-pan wonder is perfect for busy weeknights or when you crave something satisfying and delicious.

Why You’ll Love It

This Skillet Chili Mac has everything you could want in a comforting meal. It’s incredibly easy to prepare, making it ideal for those hectic evenings when time is scarce. The savory combination of spices, tender macaroni, and gooey cheese creates a symphony of flavors in every bite. Plus, it’s a one-pan dish, which means minimal cleanup—more time to relax and enjoy your meal with family or friends.

Ingredients

  • 2 tablespoons canola oil
  • 1 pound lean ground beef
  • 1 onion, diced
  • 2 tablespoons chili powder
  • 1 teaspoon ground cumin
  • 1/4 teaspoon cayenne pepper
  • Salt & pepper, to taste
  • 3 garlic cloves, minced
  • 1 tablespoon brown sugar
  • 1 can (15 ounces) tomato sauce
  • 1 1/2 cups water
  • 1 1/2 cups whole grain macaroni
  • 2 cups shredded cheddar cheese

Instructions

  1. Heat the canola oil in a large (12-inch) nonstick skillet over medium-high heat.
  2. Add the ground beef, onion, chili powder, cumin, cayenne, and 1/2 teaspoon salt. Cook, breaking up the meat into small pieces, until it loses all the pink color, about 5 minutes.
  3. Add the minced garlic and cook until fragrant, about 30 seconds.
  4. Stir in the brown sugar, tomato sauce, water, and macaroni. Bring the mixture to a boil.
  5. Cover and cook, stirring often and adjusting the heat to maintain a lively simmer, until the macaroni is tender, about 10 minutes.
  6. Season with additional salt and pepper if needed.
  7. Off the heat, stir in half of the shredded cheese. Sprinkle the remaining cheese on top.
  8. Let the dish rest for a few minutes to allow the cheese to melt before serving.

Tips

For the best results, use freshly shredded cheddar cheese; it melts more smoothly than pre-shredded varieties. If you prefer a spicier dish, feel free to increase the amount of cayenne pepper or add a dash of hot sauce. Remember to stir the macaroni occasionally while cooking to prevent it from sticking to the skillet.

Variations & Substitutions

Feel free to customize this recipe to suit your taste preferences. You can substitute ground turkey or chicken for the beef if you prefer a lighter option. For a vegetarian version, try using canned beans like kidney or black beans in place of the meat. You could also add in some chopped bell peppers or corn for extra color and flavor.

Storage

Store any leftovers in an airtight container in the refrigerator for up to 3 days. To reheat, gently warm the chili mac on the stovetop over low heat, adding a splash of water if needed to loosen the sauce. You can also reheat it in the microwave, stirring occasionally to ensure even heating.

FAQ

Can I make this dish ahead of time?

Yes, you can prepare Skillet Chili Mac ahead of time. Simply cook the dish as directed, then allow it to cool completely before storing it in the refrigerator. When ready to serve, reheat it on the stovetop or in the microwave until warmed through.

What can I serve with Skillet Chili Mac?

This dish is quite filling on its own, but you can pair it with a simple side salad or some steamed vegetables for a complete meal. A slice of crusty bread or cornbread also makes a great accompaniment for soaking up any extra sauce.

Nutrition

This recipe is a well-balanced meal, offering a good amount of protein from the ground beef and cheese, complex carbohydrates from the whole grain macaroni, and vitamins from the onion and tomato sauce. For those watching their sodium intake, consider using a low-sodium tomato sauce and adjusting the added salt to your preference.

Conclusion

Skillet Chili Mac is a delightful and comforting dish that’s sure to become a staple in your meal rotation. Its rich flavors and easy preparation make it a winner for any occasion. Whether you’re reminiscing about cherished family gatherings or creating new memories around the dinner table, this recipe is sure to bring warmth and satisfaction to all who enjoy it. So grab your skillet and get ready to whip up a delicious meal that everyone will love!

Related update: Skillet Chili Mac

Related update: Paneer jalfrezi

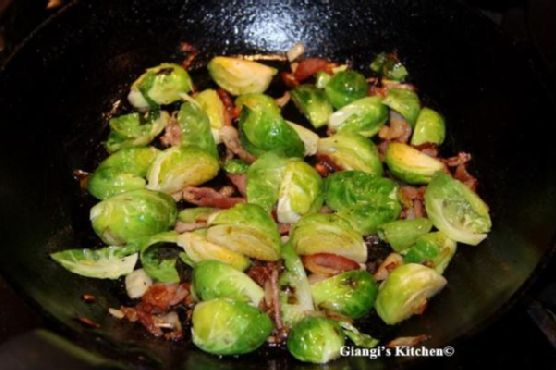
Brussels Sprouts with Bacon and Shallots | Made by Meaghan Moineau

Brussels Sprouts with Bacon and Shallots

Intro

When I think about comforting meals that bring warmth and joy to the table, my mind inevitably drifts to the savory delight of Brussels Sprouts with Bacon and Shallots. This dish always takes me back to my grandmother’s cozy kitchen during the holidays. The aroma of sizzling bacon mixed with the earthy scent of Brussels sprouts would fill the air, and I couldn’t wait to dig in. This recipe is a family treasure, one that I’m excited to share with you today. Whether you’re gathering with loved ones or seeking a delicious side for a weeknight dinner, this recipe is bound to become a new favorite.

Why You’ll Love It

This recipe is a celebration of flavors and textures. The salty crispiness of bacon complements the tender, slightly bitter Brussels sprouts, while the shallots add a mild sweetness that rounds everything out beautifully. A touch of lemon juice brightens the dish, enhancing its flavors and making it irresistibly delicious. It’s quick and easy to prepare, making it perfect for busy days. More than just a side dish, it’s a crowd-pleaser that could easily steal the spotlight at any meal.

Ingredients

  • Bacon
  • Trimmed Brussels sprouts
  • Lemon juice
  • Salt and pepper
  • Shallot

Instructions

  1. In a large skillet, place the bacon and cook until golden brown. Ensure the bacon is crispy to add a nice crunch to the dish.
  2. Add the shallots to the skillet and cook until they become tender and slightly caramelized, enhancing their natural sweetness.
  3. Add the Brussels sprouts to the mix. Increase the heat to high and sauté them until they develop a nice golden exterior, which will give them a delightful texture.
  4. Finish the dish by squeezing fresh lemon juice over the ingredients. Season with salt and pepper to taste.
  5. Serve immediately and enjoy the burst of flavors!

Tips

For the best results, choose fresh Brussels sprouts that are firm and bright green. When trimming them, make sure to remove any yellow or wilted outer leaves. If you prefer, you can cut the Brussels sprouts in half to speed up the cooking process and increase the surface area for browning.

Variations & Substitutions

If you’re looking to add a twist to this classic recipe, consider the following variations:

  • Vegetarian Option: Replace the bacon with smoked paprika for a similar smoky flavor without the meat.
  • Additional Veggies: Incorporate other vegetables like sliced carrots or bell peppers for added color and nutrition.
  • Cheesy Twist: Sprinkle some grated Parmesan cheese over the top before serving for an extra layer of flavor.

Storage

Store any leftovers in an airtight container in the refrigerator for up to 3 days. To reheat, simply place them back in a skillet over medium heat until warmed through. Avoid using a microwave, as it may make the Brussels sprouts soggy.

FAQ

Can I use frozen Brussels sprouts for this recipe?

While fresh Brussels sprouts are recommended for the best texture and flavor, you can use frozen ones in a pinch. Just make sure to thaw and dry them thoroughly before cooking to avoid excess moisture.

What can I pair with Brussels Sprouts with Bacon and Shallots?

This dish pairs wonderfully with roasted chicken, pork chops, or grilled steak. It also complements vegetarian mains like a creamy risotto or a hearty grain salad.

Nutrition

This dish is rich in vitamins K and C due to the Brussels sprouts, and offers a good source of protein from the bacon. While it is relatively low in carbohydrates, it is important to consume it in moderation if you are watching your sodium intake, as bacon can be quite salty. Pairing it with a balanced meal will ensure a nutritious dining experience.

Conclusion

Brussels Sprouts with Bacon and Shallots is more than just a recipe; it’s a comforting reminder of home-cooked meals shared with family. The blend of flavors and textures makes it a versatile dish that can complement any meal or shine on its own. I hope this recipe brings as much joy to your table as it has to mine. Happy cooking!

Related update: Brussels Sprouts with Bacon and Shallots

Related update: Root Vegetable Rosemary Gratin

Fall Fruit Compote | Made by Meaghan Moineau

Fall Fruit Compote

Intro

There’s something magical about fall—the crisp air, the vibrant colors, and the comforting aroma of spices and fruits mingling together. Growing up, fall was always my favorite season. I remember sitting in my grandmother’s cozy kitchen, the windows fogging up as she cooked her famous fruit compote. The sweet and tangy smell would waft through the house, inviting everyone to gather around the table. Her secret? A touch of apple cider vinegar that added just the right amount of zing. Now, I carry on her tradition with my own version of this delightful Fall Fruit Compote, and I can’t wait to share it with you!

Why You’ll Love It

This Fall Fruit Compote is a hug in a bowl. Whether you’re serving it up as a side dish, a topping for potato latkes, or simply enjoying it on its own, this recipe is sure to warm your heart and soul. Here’s why you’ll absolutely love it:

  • Easy to Make: With just a few simple steps, you can have this delicious compote ready in no time.
  • Versatile: Serve it warm or cold, with breakfast or dessert—it complements any meal!
  • Full of Fall Flavors: The combination of apples, pears, and cinnamon captures the essence of autumn in every bite.
  • Customizable: Easily adjust the sweetness or tweak the spices to suit your taste.

Ingredients

  • 1 tablespoon butter
  • 2 cups diced honeycrisp apples
  • 1 cup diced pears
  • 1/2 cup dried cherries
  • 1 tablespoon apple cider vinegar
  • 1 cup apple juice, plus more as needed
  • 1/4 cup brown sugar
  • 1 cinnamon stick

Instructions

  1. Melt the butter in a medium saucepan over high heat.
  2. Add the diced apples, pears, cherries, vinegar, apple juice, brown sugar, and cinnamon stick.
  3. Cook for 5 minutes, stirring occasionally.
  4. Lower the heat to medium and cook for a few minutes more, until the fruit is tender and the liquid has boiled away.
  5. If necessary, add a bit more apple juice to keep the fruit from scorching.
  6. Remove the cinnamon stick and serve warm, ideally with potato latkes or your favorite dish.

Tips

Here are a few tips to ensure your compote turns out perfectly:

  • Choose the Right Apples: Honeycrisp apples are ideal for this recipe as they hold their shape well and add a natural sweetness.
  • Monitor the Liquid: Keep an eye on the liquid level to prevent the fruit from burning. Add more apple juice as needed.
  • Adjust Sweetness: Feel free to add more or less brown sugar based on your preference.

Variations & Substitutions

One of the best things about this compote is its adaptability. Here are some variations and substitutions you might consider:

  • Fruit Variations: Swap out the pears for peaches or add cranberries for a tart twist.
  • Sugar Alternatives: Use maple syrup or honey instead of brown sugar for a different sweetness profile.
  • Spice It Up: Add a pinch of nutmeg or cloves for extra warmth.

Storage

This delicious compote can be stored in an airtight container in the refrigerator for up to a week. Reheat gently on the stove or in the microwave before serving. You can also freeze it for up to three months—just thaw and warm it before enjoying.

FAQ

Can I use fresh cherries instead of dried?

Yes, fresh cherries can be used, though they will add more moisture to the compote. You might need to reduce the amount of apple juice slightly to compensate.

Is there a way to make this recipe vegan?

Absolutely! Simply substitute the butter with a plant-based alternative, such as coconut oil or vegan butter, and you’re good to go.

Can I make this compote in advance?

Definitely! This compote tastes even better the next day, as the flavors have more time to meld together. Just store it in the fridge and reheat when you’re ready to serve.

Nutrition

This Fall Fruit Compote is not only delicious but also packed with nutrients. Apples and pears are high in fiber and vitamin C, while cherries add antioxidants. While it does include sugar, you can easily adjust the amount to fit your dietary needs.

Conclusion

There you have it—a warm, comforting dish that captures the essence of fall in every bite. Whether you’re gathering with family or simply indulging in a cozy night at home, this Fall Fruit Compote is sure to be a hit. I hope it brings as much joy to your table as it does to mine. Happy cooking!

Related update: Fall Fruit Compote

Related update: Zabaglione with Roasted Plums

Broccolini Quinoa Pilaf | Made by Meaghan Moineau

Broccolini Quinoa Pilaf

Intro

There’s something incredibly comforting about dishes that marry simplicity with wholesome flavors. Growing up, my grandmother’s kitchen was a haven of delightful aromas and hearty meals. One of my all-time favorites was her pilaf, a dish that brought the family together around the dining table. Inspired by those cherished memories, I’ve crafted a modern twist on a classic with this Broccolini Quinoa Pilaf. It’s a recipe that not only pays homage to my grandmother’s culinary legacy but also brings a fresh, nutritious element to the table.

Why You’ll Love It

This Broccolini Quinoa Pilaf is a delightful fusion of textures and flavors. You’ll love how the nutty quinoa pairs with the tender-crisp broccolini, creating a satisfying bite with every forkful. The addition of garlic and onions offers a savory depth, while the walnuts add a pleasant crunch. It’s a dish that’s not only nutritious but also visually appealing, perfect for a weeknight dinner or a special gathering.

Ingredients

  • 1 bunch broccolini, trimmed
  • 1 garlic clove, minced
  • 2 tablespoons olive oil
  • 1 medium onion, diced
  • 1 cup quinoa, rinsed
  • 2 cups vegetable broth
  • 1/2 cup walnuts, roughly chopped
  • Salt and pepper, to taste

Instructions

  1. In a large pan with a lid, heat olive oil over medium-high heat.
  2. Add onions and cook for 1 minute.
  3. Add garlic and cook until onions are translucent and garlic is fragrant.
  4. Add quinoa to the pan, stir to combine.
  5. Slowly add in the broth and bring to a boil.
  6. Cover and reduce heat to low, cook for 15 minutes.
  7. In the last 2-3 minutes of cooking, add in broccolini on top of the quinoa (do not stir) and cover.
  8. Uncover and toss broccolini and quinoa together.
  9. Season to taste with salt and pepper. Add walnuts and serve hot.

Tips

For the best results, ensure that you rinse the quinoa well before cooking to remove any bitterness. Also, make sure to monitor the broccolini and add it in the last few minutes to maintain its vibrant color and crispness. If you like a bit of heat, consider adding a pinch of red pepper flakes along with the garlic.

Variations & Substitutions

This recipe is incredibly versatile. You can substitute broccolini with regular broccoli or even asparagus based on what’s available. If you’re looking for a protein boost, consider adding chickpeas or grilled chicken. For a nut-free version, you can replace walnuts with pumpkin seeds or omit them altogether.

Storage

Store any leftovers in an airtight container in the refrigerator for up to 3 days. This pilaf reheats well, making it a great option for meal prep. Simply warm it up on the stove or in the microwave, adding a splash of broth or water to bring back its moisture.

FAQ

Can I use frozen broccolini?

Yes, you can use frozen broccolini if fresh is not available. Just be sure to thaw and drain it well before adding it to the pilaf to avoid excess moisture.

Is this dish suitable for a gluten-free diet?

Absolutely! Quinoa is naturally gluten-free, making this pilaf a perfect option for those following a gluten-free diet.

What can I serve with Broccolini Quinoa Pilaf?

This pilaf pairs wonderfully with grilled proteins like chicken, fish, or tofu. You can also serve it alongside a fresh salad for a complete and balanced meal.

Nutrition

This Broccolini Quinoa Pilaf is a nutritious dish that offers a good balance of macronutrients. It’s high in protein and fiber thanks to the quinoa and broccolini, while the walnuts provide healthy fats. It’s a great option for those looking to enjoy a wholesome and satisfying meal.

Conclusion

Broccolini Quinoa Pilaf is more than just a meal; it’s a connection to memories of family gatherings and love shared over a table. It’s a dish that brings warmth, nourishment, and a touch of nostalgia with every bite. Whether you’re making it for a busy weeknight or a leisurely weekend dinner, this recipe is sure to become a beloved staple in your culinary repertoire. Enjoy!

Related update: Broccolini Quinoa Pilaf

Related update: Fall Fruit Compote

Related update: Skillet Chili Mac

Baked Scallops With Parma Ham | Made by Meaghan Moineau

Baked Scallops With Parma Ham

Intro

There’s a certain kind of magic that happens when you combine the delicate sweetness of scallops with the rich, savory notes of Parma ham. This recipe for Baked Scallops with Parma Ham transports me back to my childhood, when my family would gather around the table for Sunday dinners. My grandmother, an enthusiastic cook with a love for simple yet elegant dishes, would often prepare this delightful starter. The aroma of garlic and parsley mingling with the salty scent of the sea would fill the kitchen, creating an atmosphere of warmth and togetherness. Today, I’m excited to share that same sense of comfort and joy with you through this recipe.

Why You’ll Love It

This dish is a celebration of flavors and textures that complement each other beautifully. The tender, juicy scallops provide a perfect canvas for the crispy, savory topping made from Parma ham and breadcrumbs. With just a handful of ingredients, this recipe is not only delicious but also incredibly easy to prepare. Whether you’re hosting a dinner party or simply want to treat yourself, these baked scallops are sure to impress. Plus, they’re ready in under 30 minutes, making them an excellent choice for both special occasions and weeknight dinners.

Ingredients

  • Fresh big scallops
  • Parma ham
  • 1 garlic clove
  • Dried breadcrumbs
  • Parsley
  • Olive oil
  • Bell pepper

Instructions

  1. Preheat your oven to 410°F (210°C / T 7).
  2. In a food processor, mix together the breadcrumbs, Parma ham, garlic, parsley, and 1 teaspoon of olive oil until you have a coarse, crumbly mixture.
  3. Fold a piece of kitchen paper, pour 1 teaspoon of olive oil on it, and use it to grease an oven rack.
  4. Place the scallops on the greased rack and top each one with a generous spoonful of the Parma ham mixture.
  5. Drizzle a dash of olive oil on top of each scallop.
  6. Bake in the preheated oven for about 8 minutes, or until the topping is crispy and golden brown.
  7. Serve immediately as a starter, accompanied by a few leaves of lamb’s lettuce or rocket if desired.

Tips

For the best results, use fresh scallops rather than frozen ones. Fresh scallops have a sweeter, more delicate flavor that pairs perfectly with the robust Parma ham. If you’re using frozen scallops, be sure to thaw them completely and pat them dry before cooking to prevent excess moisture from affecting the dish.

To achieve an even crispier topping, consider lightly toasting the breadcrumbs in a dry pan before adding them to the food processor. This step is optional but can add a lovely depth of flavor.

Variations & Substitutions

If you’re looking to mix things up, there are plenty of variations you can try with this recipe. Consider adding a pinch of red pepper flakes to the breadcrumb mixture for a hint of heat. Alternatively, swap the parsley for fresh basil or chives for a different herbal note.

For those who prefer a non-pork option, substitute the Parma ham with turkey bacon or prosciutto. Each will offer a slightly different flavor profile while maintaining the dish’s savory richness.

Storage

While these scallops are best enjoyed fresh, you can store any leftovers in an airtight container in the refrigerator for up to two days. To reheat, place them in a preheated oven at 350°F (175°C) for about 5 minutes, or until warmed through. Avoid using the microwave, as it can make the scallops rubbery.

FAQ

Can I use frozen scallops for this recipe?

Yes, you can use frozen scallops, but be sure to thaw them completely and pat them dry before cooking. This step ensures that the scallops don’t release too much moisture during baking, which can affect the texture.

What can I serve with baked scallops?

Baked scallops make an excellent starter served with a simple salad of lamb’s lettuce or rocket. For a more substantial meal, consider pairing them with a side of creamy risotto or garlic butter pasta.

How do I know when the scallops are cooked?

The scallops are done when they’re opaque and slightly firm to the touch. Be careful not to overcook them, as they can become tough and chewy. The baking time in this recipe is just right for achieving perfectly cooked scallops.

Nutrition

While I don’t have the exact nutritional breakdown, this dish is generally low in carbohydrates and high in protein, making it a great option for those following a low-carb or keto-friendly diet. The combination of olive oil and seafood provides healthy fats, while the parsley adds a touch of freshness and vitamins.

Conclusion

Baked Scallops with Parma Ham is a dish that’s as delightful to the palate as it is to the soul. With its roots in family tradition and its simplicity in preparation, it’s a recipe that invites you to savor every moment, from the aromatic anticipation in the kitchen to the first delicious bite. Whether you’re creating new memories or reliving cherished ones, I hope this recipe brings a touch of warmth and elegance to your table. Happy cooking!

Related update: Baked Scallops With Parma Ham

Related update: Savory Slow Roasted Tomatoes with Filet of Anchovy

Easy Chicken Wings | Made by Meaghan Moineau

Easy Chicken Wings

Intro

There’s something undeniably comforting about enjoying a plate of homemade chicken wings. When I was a child, my family had a tradition of gathering around the kitchen on Sunday afternoons to cook together. My grandmother would always be in charge of the chicken wings, skillfully mixing her secret sauce that had everyone licking their fingers with delight. These moments were filled with laughter, stories, and the irresistible aroma of cooking chicken wings. Today, I’m excited to share with you a recipe for Easy Chicken Wings that captures those cherished family memories and delivers the same deliciousness with a simple yet flavorful twist.

Why You’ll Love It

This Easy Chicken Wings recipe is a crowd-pleaser for numerous reasons. It’s quick to prepare, making it perfect for those spontaneous cravings or last-minute gatherings. The combination of sweet, smoky, and spicy flavors ensures every bite is a taste sensation. Plus, it’s versatile enough to accommodate various dietary preferences with simple substitutions. Whether you’re hosting a party, watching the big game, or simply want a comforting meal, these chicken wings are sure to become a favorite in your household.

Ingredients

  • Chicken wings & drumettes
  • Ketchup
  • Smoky BBQ sauce
  • Honey
  • Sesame oil
  • Capsico sauce
  • Oil for frying

Instructions

  1. Clean and wash the chicken wings and drumettes under running water, then pat them dry with paper towels.
  2. Heat oil in a pan over medium heat. Once the oil is hot, add the chicken wings and fry for 3-4 minutes or until they are golden brown. Remove from the oil and set aside.
  3. In another pan, combine ketchup, smoky BBQ sauce, honey, sesame oil, and Capsico sauce. Stir the mixture over medium flame for a few minutes until it becomes sticky and thickens.
  4. Add the fried wings into the sauce and toss them together until they are thoroughly coated with the sauce.
  5. Serve hot with your favorite dips and enjoy!

Tips

For the best results, ensure your oil is hot before adding the chicken wings to prevent them from becoming greasy. You can test this by dropping a small piece of bread into the oil; if it sizzles and browns quickly, the oil is ready. Additionally, patting the chicken wings dry before frying helps in achieving a crispy texture.

Variations & Substitutions

If you prefer a less spicy version, you can reduce or omit the Capsico sauce. For those who enjoy extra heat, consider adding a pinch of cayenne pepper to the sauce. To make this dish gluten-free, ensure that your BBQ sauce and ketchup are gluten-free certified. You might also try substituting maple syrup for honey to create a slightly different sweetness profile.

Storage

These chicken wings are best enjoyed fresh, but if you have leftovers, store them in an airtight container in the refrigerator for up to 3 days. To reheat, place them in an oven preheated to 350°F (175°C) for about 10 minutes, or until heated through. This will help maintain their crispiness.

FAQ

Can I bake these chicken wings instead of frying them?

Absolutely! To bake, preheat your oven to 400°F (200°C) and place the wings on a baking sheet lined with parchment paper. Bake for 25-30 minutes, flipping halfway through, until they are golden and cooked through. Then follow the remaining steps to coat them in the sauce.

What can I serve with these chicken wings?

These wings pair wonderfully with a variety of sides. Consider serving them with celery and carrot sticks, a classic coleslaw, or even a fresh garden salad. For dipping, ranch or blue cheese dressing adds a creamy complement to the spicy wings.

Nutrition

While I don’t have exact nutritional information for this recipe, chicken wings are a good source of protein. Keep in mind that frying adds additional calories, so if you’re watching your intake, baking might be a better option. Adjust the sauce quantities to suit your dietary needs, especially if reducing sugar or sodium is a priority.

Conclusion

These Easy Chicken Wings are more than just a dish; they’re a gateway to fond memories and joyous gatherings. With their delightful flavor and simple preparation, they are sure to become a staple in your kitchen. Whether you’re reliving old traditions or creating new ones, this recipe is a testament to the joy of sharing good food with loved ones. I hope you find as much pleasure in making and enjoying these wings as I have. Happy cooking!

Related update: Easy Chicken Wings