Avocado and Orange Salad With Orange-Ginger Dressing | Made by Meaghan Moineau
A Taste of Sunshine: Avocado and Orange Salad With Orange-Ginger Dressing
A Fresh and Vibrant Twist on Tradition
In the heart of summer, when the sun casts its golden rays and the air buzzes with the sounds of nature, there's nothing quite like a refreshing salad to bring a burst of flavor to your table. Our Avocado and Orange Salad with Orange-Ginger Dressing is a celebration of vibrant colors and zesty tastes—a dish that promises to delight your senses. This simple yet elegant appetizer is not only a feast for the eyes but also a symphony of flavors that dance on your palate. With ingredients like creamy avocados, juicy oranges, and a tangy ginger dressing, this salad is both nourishing and uplifting.
Ingredients
- 2 ripe avocados, sliced
- 3 juicy oranges, segmented (reserve the juice from the leftover)
- 2 green onions, finely chopped
- 1/4 cup of fresh orange juice
- 2 tablespoons lemon juice
- 1 teaspoon fresh ginger paste
- 1 tablespoon agave syrup
- 2 tablespoons olive oil
- Salt and pepper to taste
Instructions
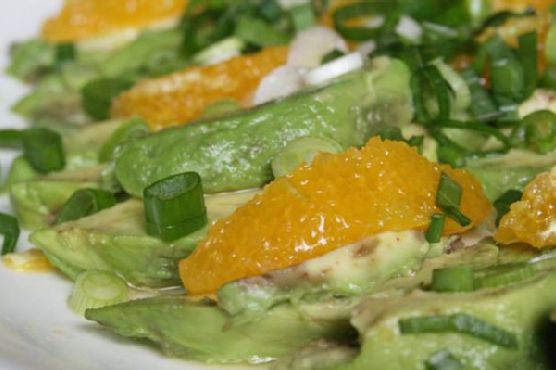
1. Prepare the Salad Base: Arrange the avocado and orange slices, overlapping each other, on a platter. Squeeze the juice from the leftover orange over the arranged slices. This not only adds a layer of flavor but also prevents the avocados from browning.
2. Add a Touch of Crunch: Sprinkle the finely chopped green onions over the salad. Add a pinch of salt to taste.
3. Chill: Cover the platter with cling film and refrigerate until you’re ready to serve. Chilling enhances the flavors and refreshes the salad.
4. Make the Dressing: In a blender, combine the orange juice, lemon juice, fresh ginger paste, agave syrup, and olive oil. Blend until smooth. Season with salt and pepper to taste.
5. Serve: Just before serving, pour the orange-ginger dressing over the salad. Allow it to soak in the flavors for a few minutes, and then serve immediately.
A Nostalgic Twist
This salad takes me back to my grandmother's sunlit kitchen, where the scent of oranges and ginger would fill the air. Every summer, our family would gather at her place for an afternoon of laughter and stories. As kids, we’d run around her garden, the sun warming our skin, while the adults prepared a feast inside. This salad was always part of the spread—a tradition that brought us together, a dish that spoke of simplicity and love.
I remember sitting at the dining table, the coolness of the salad a perfect contrast to the warmth of the day, the flavors reminding me of those endless summers and the joy of family. It's more than just a dish; it's a memory, a piece of nostalgia that I cherish with every bite.
Difficulty and Classification
With its straightforward preparation and minimal cooking required, this Avocado and Orange Salad earns a 3 out of 10 on the difficulty scale. It's a perfect appetizer, ideal for those who wish to enjoy a sophisticated yet easy-to-prepare dish that captures the essence of summer.
---
Whether you're hosting a dinner party or simply enjoying a quiet meal at home, this Avocado and Orange Salad with Orange-Ginger Dressing is a delightful addition to any menu. Its fresh ingredients and vibrant flavors make it a standout appetizer that will leave your guests craving more. So, gather your loved ones, share stories, and let this salad be a part of your cherished memories.