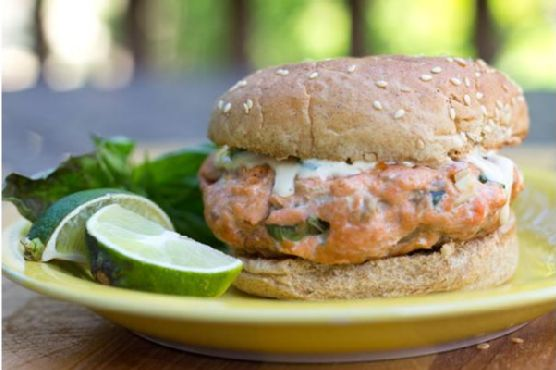
Asian Salmon Burgers With Tangy Ginger Lime Sauce
Intro
There’s something undeniably comforting about sinking your teeth into a well-crafted burger. For me, it brings back fond memories of summer evenings spent with my family in our backyard. My father, the grill master, would whip up his signature dishes, and one day, he introduced us to these delightful Asian Salmon Burgers. The combination of fresh salmon with a tangy ginger lime sauce became an instant favorite. Today, I’m excited to share this family recipe with you all, hoping it brings the same joy and deliciousness to your home as it did to ours.
Why You’ll Love It
These Asian Salmon Burgers are not just another burger recipe. They are a delightful fusion of flavors and textures that will tantalize your taste buds. The fresh salmon, rich with omega-3 fatty acids, brings a tender and juicy bite, while the ginger lime sauce adds a perfect zing that complements the savory burger. Whether you’re looking for a healthy alternative to traditional beef burgers or simply want to try something new, these salmon burgers are a must-try!
Ingredients
- 4 burger buns
- 1/4 cup fresh basil, chopped
- 2 cloves garlic, minced
- 2 green onions, finely sliced
- 1 lime, juiced
- 1/2 cup mayonnaise
- 2 tablespoons oyster sauce
- 1 teaspoon powdered ginger
- 1 pound salmon, skin removed
- 2 tablespoons sesame oil
- 1/4 cup sour cream
- 2 tablespoons soy sauce
Instructions
- Cut the salmon into large hunks and run it through a food processor until no large pieces remain.
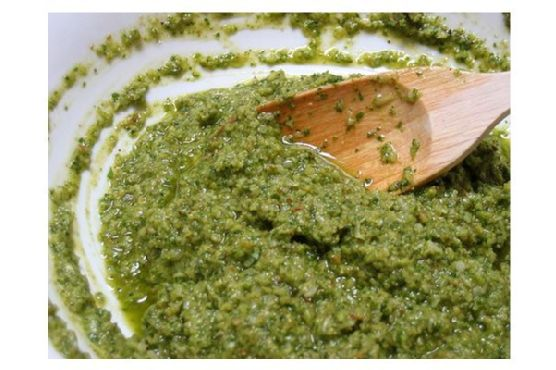
- Add to the salmon the soy sauce, garlic, ginger, oyster sauce, green onion, and basil.
- Combine ingredients well and form 4 large patties from the mixture.
- Heat up the sesame oil in a large frying pan on medium-high heat and add in the patties.
- Cook for about 10 minutes, flipping once halfway through.
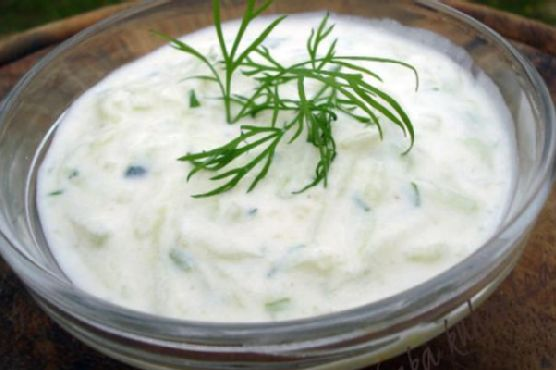
- To make the sauce, mix the mayonnaise, sour cream, lime juice, and a pinch of ginger until smooth.
- Pour a spoonful of sauce over the top of the finished salmon burger and serve inside a toasted bun.
Tips
For the best results, use fresh salmon. It enhances the flavor and texture of the burger. If you don’t have a food processor, you can finely chop the salmon with a sharp knife. Be sure to toast your buns for extra flavor and crunch. Lastly, don’t overcook the salmon patties; they should be juicy and slightly pink in the center.
Variations & Substitutions
If you want to switch things up, consider using shrimp instead of salmon for a different seafood twist. You can also add some heat by including a teaspoon of sriracha or chili flakes to the sauce. For a gluten-free option, serve the patties on lettuce wraps instead of buns. If you prefer a different herb, cilantro works wonderfully in place of basil.
Storage
These salmon burgers are best enjoyed fresh, but if you have leftovers, store the patties in an airtight container in the refrigerator for up to 2 days. The sauce can be refrigerated separately in a small container. To reheat, gently warm the patties in a skillet over low heat until heated through.
FAQ
Can I freeze the salmon patties?
Yes, you can freeze the uncooked salmon patties. Place them on a baking sheet lined with parchment paper and freeze until solid. Once frozen, transfer the patties to a freezer-safe bag or container. They can be stored for up to 3 months. Thaw in the refrigerator before cooking.
What can I serve with these salmon burgers?
These burgers pair wonderfully with a light and fresh salad, sweet potato fries, or a simple coleslaw. You can also serve them with grilled vegetables for a wholesome meal.
Nutrition
This recipe provides a nutritious meal option rich in protein and omega-3 fatty acids, which are beneficial for heart health. Salmon is also a great source of vitamin D and B vitamins. Remember to adjust portion sizes to fit your dietary needs.
Conclusion
These Asian Salmon Burgers with Tangy Ginger Lime Sauce are a delicious way to enjoy a healthy and satisfying meal. With their vibrant flavors and simple preparation, they make an excellent choice for family dinners or entertaining guests. I hope you enjoy making and savoring these burgers as much as my family has over the years. Bon appétit!
Related update: Asian Salmon Burgers With Tangy Ginger Lime Sauce
Related update: Avocado Nests