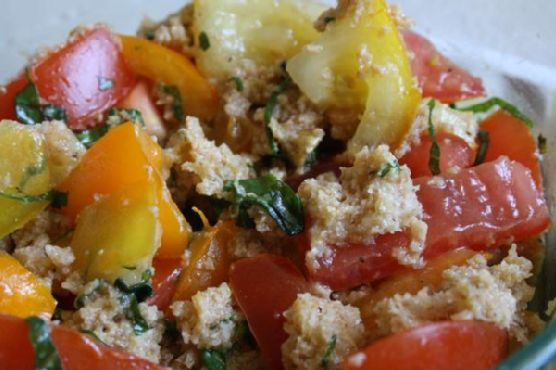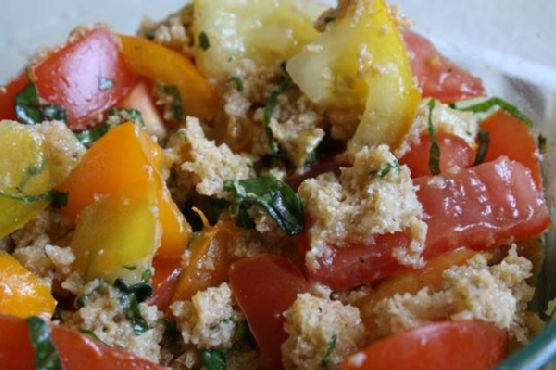
Traditional Panzanella | Made by Meaghan Moineau

Traditional Panzanella Recipe: A Taste of Italian Summer

Introduction

There’s something truly magical about the simplicity of Italian cuisine, and nothing epitomizes this more than the traditional Panzanella. I remember the first time I tasted this delightful Tuscan bread salad; it was a warm summer afternoon in Florence, sitting in a quaint trattoria with my grandmother. The vibrant colors of the fresh tomatoes, the aroma of basil, and the satisfying crunch of day-old bread soaked in olive oil and vinegar created an unforgettable symphony of flavors. This dish not only filled our bellies but also our hearts with cherished memories. I hope this recipe brings a little piece of Italy to your table and becomes a staple in your home, just as it has in mine.

Why You’ll Love It

Traditional Panzanella is a celebration of the freshest ingredients and the beauty of rustic cooking. Here’s why it’s sure to become a favorite:

  • Simple Ingredients: Made with just a handful of pantry staples and fresh produce, this recipe is all about quality ingredients shining through.
  • Quick and Easy: With minimal preparation and no cooking required, this dish is perfect for those hot summer days when you want something light yet satisfying.
  • Versatile and Adaptable: Easily customizable to suit your taste preferences, Panzanella is a great way to use up any leftover bread or vegetables you have on hand.
  • Healthy and Delicious: Packed with fresh vegetables and healthy fats from olive oil, it’s a nutritious option for any meal.

Ingredients

  • Six slices of day-old Tuscan bread
  • Extra virgin olive oil
  • Fresh basil leaves
  • One red onion
  • Red wine vinegar
  • Salt and pepper, to taste
  • Four ripe tomatoes

Instructions

  1. In a bowl, combine the bread with water and let it stand for at least 20 minutes or until it’s soft.
  2. Drain the bread and squeeze out as much water as you can. Crumble the bread and place it in a serving bowl.
  3. Scatter the tomatoes, onions, and chopped basil over the top of the bread.
  4. Dress the Panzanella with extra-virgin olive oil and vinegar. Season with salt and pepper and toss well.
  5. Taste and adjust the seasoning with more oil, salt, and vinegar according to your preference.
  6. Leave the Panzanella to stand for 15 minutes to allow the flavors to meld together. Serve at room temperature.

Tips

  • Choose the right bread: A rustic, crusty bread like Tuscan or sourdough works best. It should be slightly stale for the perfect texture.
  • Use the best tomatoes: Opt for ripe, juicy tomatoes for the best flavor. Heirloom varieties can add beautiful color and taste.
  • Let it rest: Allow the salad to sit for at least 15 minutes before serving to let the flavors meld.

Variations & Substitutions

Panzanella is incredibly adaptable, so feel free to make it your own:

  • Add protein: Include grilled chicken or tuna for a more substantial meal.
  • Incorporate more veggies: Cucumbers, bell peppers, or even olives can add extra flavor and texture.
  • Herb it up: Try adding parsley, oregano, or mint for a different aromatic profile.

Storage

Panzanella is best enjoyed fresh, but if you have leftovers, store them in an airtight container in the refrigerator for up to 2 days. Note that the bread will continue to absorb the dressing and may become softer. If you plan on making it ahead, keep the bread separate and combine just before serving.

FAQ

Can I use fresh bread instead of day-old bread?

While day-old bread is traditional and helps to achieve the right texture, you can use fresh bread in a pinch. Simply toast it lightly to dry it out before soaking.

Is there a gluten-free option for Panzanella?

Yes, you can make a gluten-free version by using gluten-free bread. Ensure the bread is sturdy enough to hold up to the soaking process.

Can I prepare Panzanella in advance?

It’s best to prepare Panzanella fresh to maintain the texture of the bread. However, you can chop the vegetables and prepare the dressing ahead of time, then combine just before serving.

Nutrition

This traditional Panzanella is a nutritious option that offers a balance of carbohydrates, healthy fats, and fresh vegetables. A typical serving provides approximately:

  • Calories: 250
  • Fat: 15g
  • Carbohydrates: 26g
  • Protein: 4g
  • Fiber: 3g

Conclusion

Traditional Panzanella is more than just a salad; it’s a testament to the beauty of simple, fresh ingredients coming together to create something extraordinary. Whether you’re enjoying it as a light lunch, a side dish, or a main course with added protein, this Tuscan classic is sure to delight your taste buds and transport you to a sun-drenched Italian countryside. Share it with loved ones, and create your own cherished memories around the table. Enjoy!

Related update: Traditional Panzanella

Related update: Zucchini Ribbon Caper Salad

Italian Beef Braciole | Made by Meaghan Moineau

Italian Beef Braciole

Intro

Italian Beef Braciole is a classic dish that brings back fond memories of Sunday dinners at my grandmother’s house. The aroma of simmering marinara sauce mixed with the rich scent of beef and herbs would fill the kitchen, creating an atmosphere of warmth and love. My grandmother would often regale us with tales of her own childhood in Italy, where this dish was a family favorite, passed down through generations. Today, I share with you this cherished recipe, hoping it brings as much joy to your table as it has to ours.

Why You’ll Love It

This Italian Beef Braciole is more than just a meal; it’s an experience. The tender beef, flavorful stuffing, and rich sauce create a symphony of flavors that are sure to please your taste buds. Whether you’re a seasoned cook or a novice in the kitchen, this dish is surprisingly approachable and rewarding. Perfect for a cozy family dinner or an impressive dish to serve guests, Braciole is a true testament to the beauty of Italian cuisine.

Ingredients

  • Round steak
  • Prosciutto
  • Genoa salami
  • Fresh bread crumbs
  • Italian fresh parsley
  • Romano cheese
  • Olive oil
  • Garlic
  • Cooked marinara sauce
  • Red wine

Instructions

  1. Pound the beef between two sheets of plastic wrap with a meat tenderizer mallet until about 1/4 inch thick, being careful to prevent holes or tears in the meat. Any holes that do happen can be patched with a piece of prosciutto or salami during the next step.
  2. Place the prosciutto and salami in a single layer over the beef. If there are any holes or thin places in the beef, make sure to place the meat over those areas.
  3. Spread the breadcrumbs over the salami in an even layer, leaving an inch on all sides to make rolling the meat easier.
  4. Sprinkle the cheese over the breadcrumbs and drizzle 2 tablespoons of the olive oil over all.
  5. Carefully fold the edges over and begin to roll the beef. Tie the roll in several places with kitchen twine and gently rub the outside of the roll with the remaining oil.
  6. Heat a non-stick skillet over medium-high heat. With the aid of tongs, sear the roll all over, including the ends, until nicely browned all over.
  7. While the meat is browning, heat the marinara sauce, garlic, and wine in a Dutch oven or pan large enough to hold the size of the roll.
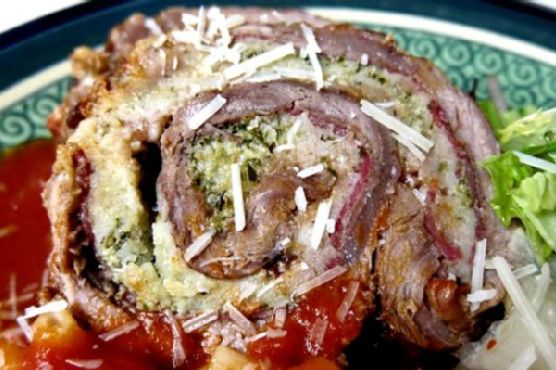
  8. Place the browned braciole in the sauce and bring to a gentle simmer. Cover and braise, over low heat until tender. The braciole in the photograph took 3 hours until a fork inserted into the meat slid in easily.
  9. When tender, carefully remove the beef roll from the sauce and set on a platter. Let the roll cool for about 5-10 minutes and remove the string.
  10. Slice the braciole and serve with pasta or gnocchi with the sauce over the top and plenty of parmesan cheese.

Tips

To ensure your beef braciole turns out perfectly every time, consider these tips:

  • Use a sharp knife to slice the beef if it’s not pre-sliced. This will help achieve uniform thickness.
  • Allow the braciole to rest before slicing to ensure it holds its shape.
  • Feel free to adjust the amount of filling based on your preference for more or less stuffing.

Variations & Substitutions

Italian Beef Braciole is versatile, and you can make it your own by experimenting with different ingredients:

  • Try using pancetta instead of prosciutto for a different flavor profile.
  • Substitute pecorino cheese for romano if you prefer a milder taste.
  • For a spicy kick, add red pepper flakes to the breadcrumb mixture.

Storage

Store any leftover braciole in an airtight container in the refrigerator for up to 3 days. Reheat gently in the oven or on the stovetop to maintain its tenderness. This dish can also be frozen for up to 2 months; just be sure to thaw it thoroughly before reheating.

FAQ

Can I prepare the braciole ahead of time?

Yes, you can assemble the braciole a day in advance. Keep it wrapped in plastic wrap in the refrigerator, and then proceed with the browning and braising steps when ready to cook.

What can I serve with braciole?

Braciole pairs beautifully with pasta, gnocchi, or even a simple side of sautéed greens. Don’t forget the crusty bread to soak up the delicious sauce!

Is there a non-alcoholic substitution for the red wine?

If you prefer not to use wine, you can substitute beef broth or a mixture of grape juice and vinegar for a similar depth of flavor.

Nutrition

While specific nutritional information will vary based on portion size and exact ingredients used, Italian Beef Braciole is a protein-rich dish often balanced with healthy fats from olive oil and essential nutrients from the herbs and sauce. Enjoy it as part of a balanced meal with plenty of vegetables.

Conclusion

Italian Beef Braciole is not just a recipe, it’s a tradition—a way to bring the warmth and richness of Italian cooking into your home. Whether you’re cooking for family, friends, or just yourself, this dish is sure to impress and comfort. I hope this recipe brings as much joy to your home as it has to mine. Buon appetito!

Related update: Italian Beef Braciole

Polla alla Parmigiana: Chicken Parmesan | Made by Meaghan Moineau

Polla alla Parmigiana: Chicken Parmesan

Intro

There’s something truly magical about the aroma of a classic Chicken Parmesan wafting through the kitchen. As a child, Sundays at Nonna’s house meant gathering around the table for a meal that always included her famous Polla alla Parmigiana. The sizzle of the chicken frying, the rich, tangy tomato sauce, and the gooey, melted mozzarella all combined to create a dish that was more than just food—it was a symbol of love and family. Today, I’m thrilled to share this recipe with you so that you can bring a piece of that cherished tradition into your own home.

Why You’ll Love It

This recipe for Chicken Parmesan is a true classic, beloved for its crispy exterior and tender, juicy chicken inside. It’s a versatile dish that can be served over pasta, alongside a fresh salad, or even in a hearty sandwich. The combination of flavors from the seasoned breadcrumbs, the herb-infused tomato sauce, and the creamy mozzarella cheese make it a guaranteed crowd-pleaser. Plus, it’s easier to make than you might think, and with a few simple tips, you’ll have a restaurant-quality dish ready in no time.

Ingredients

  • 1 cup dry bread crumbs
  • 2 eggs
  • 1/2 cup flour
  • 1 teaspoon dry marjoram
  • 8 ounces fresh mozzarella, sliced
  • 1/4 cup oil (vegetable or olive oil)
  • 1/2 cup panko breadcrumbs
  • 1/4 cup grated parmesan cheese
  • 1 bell pepper, diced (optional)
  • Salt to taste
  • 4 skinless, boneless chicken breasts
  • 2 cups tomato sauce

Instructions

  1. Preheat your oven to 350°F (175°C).
  2. Pound the chicken breasts until they are even and about 1/2 inch thick.
  3. In a shallow dish, combine the flour, salt, and pepper.
  4. In a second dish, beat the eggs with 1 tablespoon of water.
  5. In a third dish, combine the bread crumbs, panko, marjoram, and parmesan cheese.
  6. Coat the chicken on both sides with the flour mixture, shaking off any excess.
  7. Dip both sides of the chicken into the egg mixture.
  8. Dredge both sides in the bread crumbs mixture, pressing lightly to adhere.
  9. Heat the oil in a large sauté pan over medium-high heat.
  10. Cook the breaded chicken for 2 to 3 minutes on each side, until golden brown.
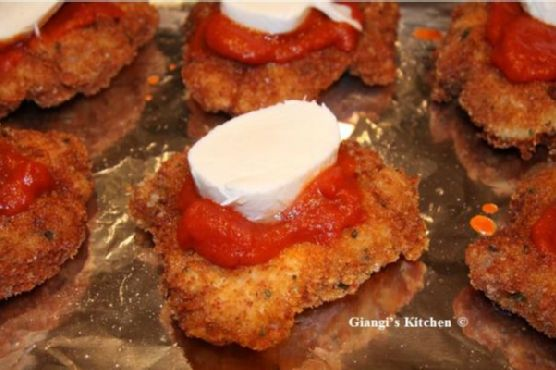
  11. Remove the chicken and place it on a baking sheet.
  12. Smear tomato sauce over each piece of chicken and top with a slice of mozzarella.
  13. If using, sprinkle the diced bell pepper over the top for added flavor.
  14. Bake in the oven until the mozzarella has melted, about 10-15 minutes.

Tips

For the crispiest Chicken Parmesan, make sure not to overcrowd the pan while frying. This ensures that the chicken cooks evenly and maintains its crispy coating. When choosing mozzarella, fresh mozzarella will give you the best texture and flavor, but pre-sliced mozzarella can work in a pinch. Don’t forget to let the chicken rest for a few minutes before serving, as this helps retain juices and enhances the overall flavor.

Variations & Substitutions

If you’re looking to switch things up, try adding a layer of sautéed mushrooms or spinach between the chicken and the tomato sauce for added depth. For a gluten-free version, substitute the regular breadcrumbs and panko with gluten-free versions. You can also replace the chicken with eggplant slices for a vegetarian take on this classic dish.

Storage

Leftover Chicken Parmesan can be stored in an airtight container in the refrigerator for up to 3 days. To reheat, place it in a preheated oven until warmed through. Avoid microwaving, as it can cause the breading to become soggy. If you plan to freeze it, it’s best to do so before adding the tomato sauce and cheese. Simply freeze the breaded chicken, and when ready to eat, add the sauce and cheese before baking.

FAQ

Can I use chicken thighs instead of breasts?

Yes, you can use chicken thighs if you prefer. Just make sure they are boneless and pounded to an even thickness for even cooking.

What type of tomato sauce should I use?

Feel free to use your favorite store-bought tomato sauce or make your own if you have time. A sauce with garlic and basil works particularly well with this dish.

How can I make this dish healthier?

For a lighter version, try baking the breaded chicken instead of frying it. You can also use whole wheat breadcrumbs and low-fat mozzarella to reduce calories.

Nutrition

While exact nutritional content can vary based on specific ingredients and portion sizes, a typical serving of Chicken Parmesan (including sauce and cheese) contains approximately 400-500 calories, 30g of protein, 20g of fat, and 30g of carbohydrates. Keep in mind that these values can change based on any variations or substitutions you make.

Conclusion

Polla alla Parmigiana, or Chicken Parmesan, is more than just a meal—it’s a delightful experience that brings people together. Whether you’re cooking for a special occasion or simply enjoying a comforting dinner at home, this recipe is sure to impress with its rich flavors and satisfying textures. I hope this family favorite finds a place at your table and brings as much joy to your home as it has to mine. Buon appetito!

Related update: Polla alla Parmigiana: Chicken Parmesan

Related update: Japanese Mabo Tofu With Eggplant

Italian Tomato and Mozzarella Caprese | Made by Meaghan Moineau

Italian Tomato and Mozzarella Caprese

Intro

There’s something truly magical about the simplicity of Italian cuisine. The first time I tasted a Caprese salad was during a family trip to the Amalfi Coast. We were dining al fresco at a quaint little restaurant with views of the sparkling Mediterranean Sea. The sun was setting, casting a golden hue over everything, and the air was rich with the scent of fresh basil and ripe tomatoes. Every bite of that Caprese was an explosion of freshness and flavor, and I’ve been in love with this dish ever since.

Why You’ll Love It

The Italian Tomato and Mozzarella Caprese is a celebration of fresh, high-quality ingredients. It’s a dish that requires minimal preparation but delivers maximum flavor. This easy-to-make salad is perfect for any occasion, whether you’re hosting a summer barbecue, looking for a quick appetizer, or simply craving a taste of Italy. The combination of juicy vine-ripened tomatoes, creamy mozzarella, and fragrant basil, all drizzled with balsamic vinegar and olive oil, is nothing short of divine.

Ingredients

  • Fluid balsamic vinegar
  • Black pepper
  • Fresh basil leaves
  • Kosher salt
  • Olive oil
  • Dry sprinkle of oregano leaves
  • Fresh whole-milk mozzarella
  • Vine-ripened tomatoes

Instructions

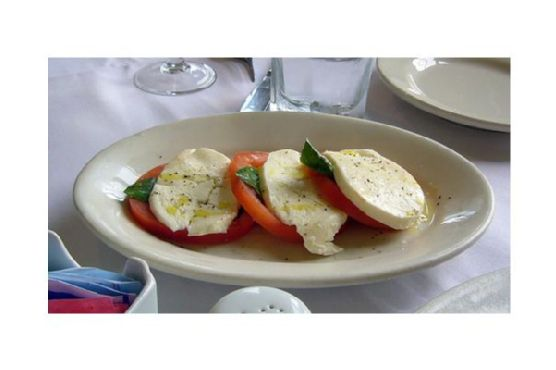
  1. On a large platter, arrange sliced tomatoes and drizzle with balsamic vinegar.
  2. Place one basil leaf on top of each tomato slice.
  3. Slice mozzarella and place on top of basil leaves.
  4. Sprinkle oregano, salt, and black pepper on cheese and drizzle with the olive oil.

This recipe yields 4 servings.

Tips

To make the most of your Caprese salad, ensure that your ingredients are as fresh as possible. Look for bright red, firm tomatoes and fresh mozzarella that is soft and slightly springy to the touch. Use high-quality olive oil and balsamic vinegar to enhance the flavors. Remember, the key to a perfect Caprese is balance, so adjust the seasoning to your taste.

Variations & Substitutions

While the classic Caprese is delightful on its own, there are several ways you can mix things up:

  • Avocado: Add slices of ripe avocado for a creamy twist.
  • Pesto: Drizzle a little pesto over the top for an extra burst of basil flavor.
  • Prosciutto: For a heartier salad, add thin slices of prosciutto.
  • Buffalo Mozzarella: Substitute traditional mozzarella with buffalo mozzarella for a richer taste.

Storage

Caprese salad is best enjoyed fresh. However, if you have leftovers, store them in an airtight container in the refrigerator for up to 24 hours. Note that the tomatoes may release some juice, which can affect the texture of the salad. It’s a dish that shines in its freshness, so try to prepare only as much as you plan to eat.

FAQ

Can I make Caprese salad ahead of time?

While it’s best to assemble the salad just before serving, you can prepare the individual components a few hours ahead. Slice the tomatoes and mozzarella and store them separately in the refrigerator. Assemble the salad when you’re ready to serve.

What can I serve with Caprese salad?

Caprese salad is wonderfully versatile and can be served alongside grilled meats, pasta dishes, or crusty bread. It’s also a great addition to a charcuterie board.

Is Caprese salad healthy?

Yes, Caprese salad is a healthy choice. It’s packed with nutrients from the tomatoes and basil, and the mozzarella provides protein and calcium. Just be mindful of the olive oil and cheese if you’re watching your calorie intake.

Nutrition

Each serving of Caprese salad contains approximately:

  • Calories: 250
  • Protein: 12g
  • Fat: 20g
  • Carbohydrates: 8g
  • Fiber: 2g
  • Sugar: 6g

Conclusion

The Italian Tomato and Mozzarella Caprese is more than just a salad; it’s a tribute to the beauty of simple, fresh ingredients. Whether you’re reminiscing about a past Italian getaway or just looking to bring a taste of Italy to your table, this Caprese salad is sure to delight your taste buds. Enjoy each layer, each flavor, and let it transport you to a sun-drenched terrace overlooking the Mediterranean. Buon appetito!

Related update: Italian Tomato and Mozzarella Caprese

Related update: Arame Edamame Cucumber Salad

Related update: Agedashi Tofu

Linguine with Prawns, Fresh Tomatoes and Spinach | Made by Meaghan Moineau

Linguine with Prawns, Fresh Tomatoes, and Spinach

Intro

Every time I prepare this delightful dish of Linguine with Prawns, Fresh Tomatoes, and Spinach, I’m transported back to the heartwarming summer evenings spent at my grandmother’s seaside cottage. The aroma of fresh tomatoes simmering with garlic and herbs would waft through the air, mingling with the salty sea breeze. My grandmother, with her apron dusted with flour, would beckon us to the table with a warm smile, serving up plates of her lovingly prepared pasta. This recipe is a tribute to those cherished memories, and I’m thrilled to share it with you.

Why You’ll Love It

This dish is a celebration of fresh, vibrant flavors and simple ingredients that come together to create a symphony of taste and texture. The juicy prawns add a delightful sweetness, complemented by the rich, buttery sauce that clings to every strand of linguine. The fresh tomatoes provide a burst of acidity, while the spinach gives it a nutritious punch. It’s a versatile recipe that’s easy enough for a weeknight meal but elegant enough to impress guests at a dinner party.

Ingredients

  • 300g fresh baby spinach, stems removed
  • 400g linguine (or fettuccine)
  • 2 garlic cloves, minced
  • 3 tablespoons olive oil
  • 2 tablespoons freshly chopped parsley
  • 400g fresh prawns, peeled and deveined
  • Salt and pepper to taste
  • 4 fresh tomatoes, chopped
  • 2 tablespoons unsalted butter
  • 1/3 cup white wine

Instructions

  1. Cook the linguine according to package directions until al dente. Drain and set aside.
  2. In a large skillet over medium heat, melt the butter with the olive oil.
  3. Add the chopped tomatoes, parsley, and garlic to the skillet. Sauté until the tomatoes are slightly tender, about 3-4 minutes.
  4. Add the spinach and white wine to the skillet, and cook until the spinach is wilted.
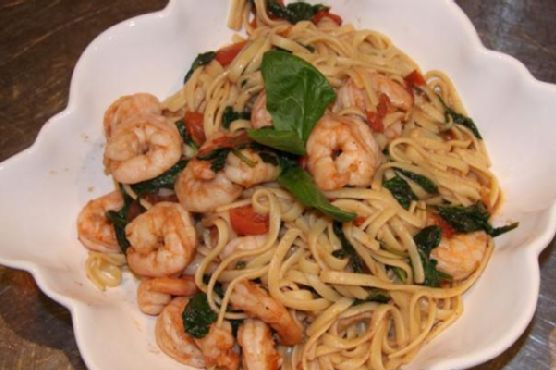
  5. Add the prawns to the skillet and sauté until they turn pink, about 3-5 minutes.
  6. Season with salt and pepper to taste.
  7. Add the cooked linguine to the skillet, tossing to coat the pasta in the sauce.
  8. Serve hot, garnished with additional parsley if desired.

Tips

For the best results, use the freshest ingredients you can find. Fresh prawns and ripe tomatoes will make a significant difference in flavor. Also, remember to not overcook the prawns as they can become tough and chewy. If you prefer a spicier kick, consider adding a pinch of red pepper flakes when sautéing the garlic and tomatoes. This dish is best served immediately, as the pasta can absorb the sauce and become dry if left for too long.

Variations & Substitutions

If you’re looking to switch things up, consider these variations:

  • Vegetarian Option: Omit the prawns and add more vegetables like zucchini or bell peppers for a vegetarian version.
  • Whole Wheat Pasta: Substitute regular linguine with whole wheat pasta for a healthier option.
  • Cheese Lover’s Delight: Sprinkle some grated Parmesan cheese over the dish just before serving for an added layer of flavor.

Storage

While this dish is best enjoyed fresh, you can store leftovers in an airtight container in the refrigerator for up to 2 days. To reheat, add a splash of water or white wine to the pasta and warm it gently in a skillet over low heat. This will help to prevent the pasta from drying out.

FAQ

Can I use frozen prawns?

Yes, you can use frozen prawns if fresh ones are not available. Just make sure to thaw them completely and pat them dry with paper towels before cooking to remove excess moisture.

What type of white wine should I use?

A dry white wine, such as Sauvignon Blanc or Pinot Grigio, pairs beautifully with this dish. Avoid sweet wines as they can alter the flavor profile of the sauce.

Nutrition

This dish is a good source of protein and vitamins, thanks to the prawns and spinach. It provides a balanced meal with carbohydrates from the pasta and healthy fats from the olive oil. However, if you’re watching your calorie intake, consider reducing the amount of butter used.

Conclusion

Incorporating the essence of seaside dining, this Linguine with Prawns, Fresh Tomatoes, and Spinach is a dish that brings the comforting flavors of a coastal Italian meal to your kitchen. It’s not just a recipe, but a journey back to cherished memories, and an opportunity to create new ones with your loved ones. Whether you’re serving it for a special occasion or simply indulging in a delicious homemade meal, this dish is sure to become a favorite in your culinary repertoire. Enjoy the delightful blend of flavors and happy cooking!

Related update: Linguine with Prawns, Fresh Tomatoes and Spinach

Related update: Lamb & Sweet Potato Pot Pie

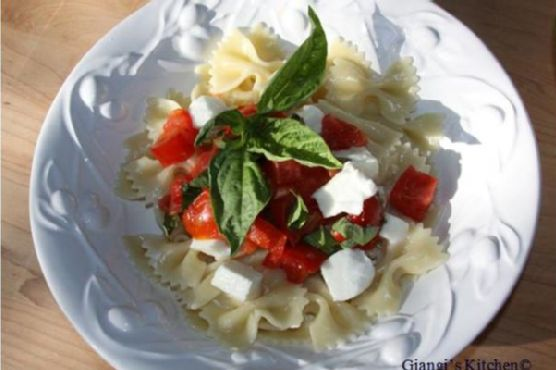
Farfalle with fresh tomatoes, basil and mozzarella | Made by Meaghan Moineau

Farfalle with Fresh Tomatoes, Basil, and Mozzarella

Intro

Farfalle with fresh tomatoes, basil, and mozzarella is a delightful dish that brings the vibrant flavors of summer to your table, no matter the season. I remember the first time I tasted this dish; it was during a family trip to the sun-drenched coast of Italy. We stumbled upon a quaint restaurant nestled in a village overlooking the azure waters. The aroma of fresh basil and juicy tomatoes wafted through the air as we sat down to eat. To this day, every bite takes me back to that sunlit afternoon, surrounded by laughter and the gentle sea breeze.

Why You’ll Love It

This dish is the epitome of simplicity and taste. Not only is it quick and easy to prepare, but it also bursts with freshness and flavor. The combination of al dente farfalle pasta with the creamy mozzarella and the aromatic basil creates a symphony of tastes that is both comforting and invigorating. It’s perfect for a weeknight dinner or an elegant lunch gathering. Plus, it’s vegetarian-friendly and can be easily adapted to suit various dietary needs.

Ingredients

  • Farfalle pasta (preferably Barilla)
  • Fresh basil leaves
  • Diced mozzarella
  • Olive oil
  • Salt and pepper
  • Tomatoes
  • Unsalted butter

Instructions

  1. Boil a large pot of salted water and cook the pasta according to the package directions.
  2. When the pasta is done, drain it, place it back in the cooking pan, and add the butter.
  3. In a large skillet, sauté the tomatoes with the olive oil for 5 minutes.
  4. Remove the skillet from the heat and add the basil.
  5. In a large bowl, combine the pasta and the sautéed tomatoes, mixing well.
  6. Add the mozzarella and give it a final light folding.
  7. Serve immediately and enjoy!

Tips

For the best results, use the freshest ingredients you can find. Fresh basil and ripe tomatoes will make a significant difference in the flavor of the dish. Also, remember to cook the pasta al dente for that perfect texture. If you love a bit of spice, consider adding a pinch of red pepper flakes to the olive oil when sautéing the tomatoes.

Variations & Substitutions

Feel free to experiment with this recipe by adding your favorite ingredients. You can substitute the farfalle with any pasta shape you have on hand, like penne or fusilli. For a heartier meal, consider adding grilled chicken or shrimp. If you’re looking to cut down on dairy, swap the mozzarella with a vegan cheese alternative. You can also add more vegetables, such as roasted red peppers or zucchini, to boost the nutritional value and add more color to the dish.

Storage

If you have leftovers, store them in an airtight container in the refrigerator for up to 3 days. To reheat, gently warm the pasta on the stove with a splash of olive oil or in the microwave. Note that the texture of mozzarella may change slightly after refrigeration, but the dish will still be delicious.

FAQ

Can I use other types of pasta for this recipe?

Absolutely! While farfalle is recommended for its delightful texture, you can use any pasta you prefer or have on hand. Penne, fusilli, or even spaghetti would work just as well.

Is it okay to use dried basil instead of fresh?

While fresh basil offers the best flavor and aroma, you can use dried basil in a pinch. Just remember that dried herbs are more concentrated, so use about a third of the amount compared to fresh.

Nutrition

This dish is not only tasty but also nutritious. It’s a good source of carbohydrates from the pasta, healthy fats from the olive oil, and protein from the mozzarella. Additionally, the tomatoes and basil provide vitamins and antioxidants. One serving of this dish (based on four servings total) contains approximately 400 calories, 20 grams of fat, 30 grams of carbohydrates, and 15 grams of protein. Please note that these values may vary based on specific ingredient brands and serving sizes.

Conclusion

Farfalle with fresh tomatoes, basil, and mozzarella is a timeless recipe that brings together simple ingredients to create an extraordinary meal. It’s a dish that’s easy enough for novice cooks yet sophisticated enough to impress your guests. Whether you’re reminiscing about a past vacation or simply wanting to enjoy a taste of Italy at home, this dish is sure to become a staple in your culinary repertoire. Enjoy the vibrant flavors and the delightful memories each bite brings.

Related update: Farfalle with fresh tomatoes, basil and mozzarella

Related update: Glazed pork chops

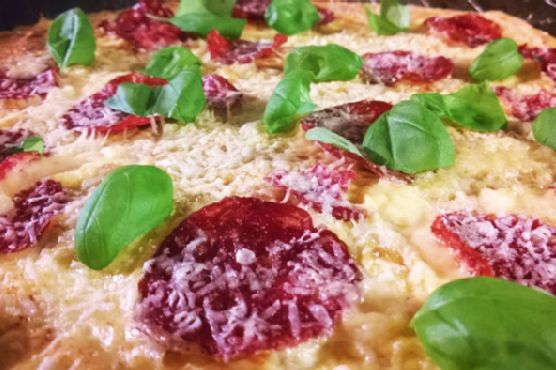
Pittata – Pizza Frittata | Made by Meaghan Moineau

Pittata – Pizza Frittata: A Delicious Twist on Classic Breakfast

Intro

Growing up, Sunday mornings were a sacred time in our household. The aroma of freshly brewed coffee mingled with the sounds of sizzling bacon, creating a comforting symphony that signaled the start of a leisurely day. My mother, with her extraordinary culinary skills, would whisk together the most delightful dishes, but there was one that always stood out – the pittata. A clever blend of pizza and frittata, this dish was the embodiment of indulgence and creativity. Today, I’m thrilled to share this cherished recipe with you, bringing a piece of my family tradition to your kitchen.

Why You’ll Love It

The pittata is a versatile dish that combines the best of two worlds: the savory satisfaction of pizza and the fluffy, protein-packed delight of a frittata. It’s perfect for breakfast, brunch, or even a light dinner, offering a filling meal that’s both quick to prepare and utterly delicious. Whether you’re hosting a gathering or simply looking to treat yourself, this dish is sure to impress with its simple ingredients and depth of flavor.

Ingredients

  • 6 large eggs
  • 1/4 cup fresh basil, chopped
  • 1/4 cup milk (optional)
  • 1/2 cup grated parmesan cheese
  • 1/4 cup sliced pepperoni
  • 1/2 cup shredded mozzarella cheese
  • Salt and pepper to taste
  • Cooking fat (e.g., olive oil, butter)

Instructions

  1. Preheat your oven to ~450°F (230°C), using the top heat setting only.
  2. On the stove, heat your choice of cooking fat in a large oven-safe skillet over medium heat.
  3. In a bowl, beat the eggs with milk, salt, pepper, and any herbs or spices you desire.
  4. Add any additional ingredients (except cheese) to the skillet. For this recipe, we keep it simple, but feel free to include cooked or quick-cooking vegetables like bell peppers.
  5. Pour the egg mixture into the skillet, tilting it to evenly distribute around any add-ins.
  6. Distribute the shredded mozzarella cheese and pepperoni slices over the egg mixture.
  7. Allow the eggs to cook on the stove until the edges are set, leaving the center slightly jiggly.
  8. Generously top with parmesan cheese.
  9. Transfer the skillet to the preheated oven and bake until the eggs are puffed, browned, and the center is firm.
  10. Remove from the oven and let the pittata cool for a couple of minutes before slicing into wedges.

Tips

For the best results, ensure that your skillet is well-greased to prevent sticking. Keep an eye on the pittata as it bakes; it can go from perfectly puffed to overcooked quickly. Use a toothpick to check that the center is set if you’re unsure. Lastly, let it rest slightly before serving; this makes cutting it into neat wedges much easier.

Variations & Substitutions

One of the joys of a pittata is its adaptability. Feel free to experiment with different herbs, spices, or cheeses. Swap pepperoni for sausage, or go vegetarian with mushrooms and spinach. For a dairy-free option, skip the milk and use a plant-based cheese alternative. The possibilities are endless, ensuring every pittata is a unique creation.

Storage

Store any leftover pittata in an airtight container in the refrigerator for up to three days. To reheat, warm it in the oven or a skillet over low heat until heated through, or microwave individual slices for about 30 seconds. For longer storage, freeze individual portions and reheat directly from frozen for a quick and easy meal.

FAQ

Can I make the pittata ahead of time?

Yes, you can prepare the pittata a day in advance. Simply follow the instructions until baking, then cover and refrigerate the skillet. When ready to bake, allow it to come to room temperature before placing it in the oven.

What can I serve with pittata?

Pittata pairs beautifully with a simple green salad, fresh fruit, or crusty bread. For a heartier meal, consider serving it with roasted potatoes or a side of bacon or sausage.

Is there a way to make it spicier?

For a spicier kick, add crushed red pepper flakes, diced jalapeños, or a splash of your favorite hot sauce to the egg mixture before cooking.

Nutrition

While the exact nutritional content will vary with portion sizes and specific ingredients used, a typical slice of pittata (1/6 of the whole) provides approximately 200 calories, 15g of protein, and 15g of fat, making it a hearty, satisfying dish that’s also relatively low in carbohydrates.

Conclusion

The pittata is more than just a meal; it’s a nod to creativity and the joy of cooking. Whether you’re reliving cherished memories or creating new ones, this dish is sure to become a staple in your recipe repertoire. I hope you find as much comfort and joy in making and sharing this dish as I have over the years. Bon appétit!

Related update: Pittata – Pizza Frittata

Related update: Mixed Berry Yogurt with Almonds

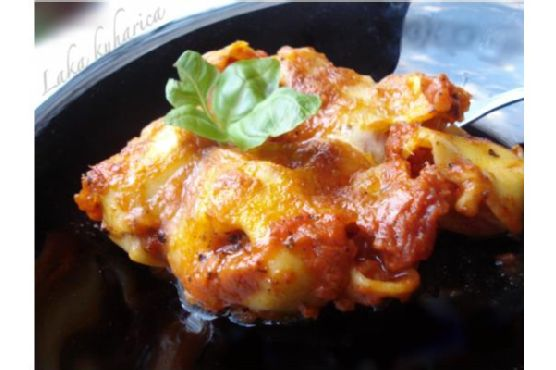
Baked Tortellini In Red Sauce | Made by Meaghan Moineau

Baked Tortellini In Red Sauce

Intro

Growing up, Sunday family dinners were a beloved ritual in our home. The tantalizing aroma of tomatoes and garlic simmering on the stove would draw everyone into the kitchen, setting the stage for an evening of laughter, stories, and delicious food. One of my all-time favorite dishes from those cherished meals was my grandmother’s Baked Tortellini in Red Sauce. With its warm, comforting flavors and perfectly baked, cheesy top, it’s a dish that brings back fond memories each time I make it. Today, I’m thrilled to share this beloved recipe with you, hoping it becomes a staple in your home too.

Why You’ll Love It

This Baked Tortellini in Red Sauce is the epitome of comfort food, combining the richness of a homemade tomato sauce with the creamy, satisfying texture of cheese-filled tortellini. It’s a dish that feels both indulgent and heartwarming, perfect for a cozy family dinner or a special gathering with friends. The ingredients are simple, yet they come together to create a symphony of flavors with every bite. Plus, it’s easy to prepare, making it perfect for those busy weeknights when you crave something homemade without the fuss.

Ingredients

  • 2 cloves garlic, minced
  • 1/2 cup grated Grana Padano cheese
  • 1 cup coarsely grated mozzarella
  • 2 tablespoons olive oil
  • 1 medium onion, chopped
  • 1 teaspoon dried oregano
  • Salt and pepper to taste
  • 1 teaspoon sugar
  • 2 cans (14 ounces each) chopped tomatoes with juice
  • 1 pound fresh tortellini

Instructions

  1. Preheat your oven to 240°C (464°F) and lightly oil a baking dish.
  2. In a large pan, heat the olive oil over medium heat. Add the chopped onion and minced garlic, sautéing for about 5 minutes until the onion is translucent.
  3. Season the onion and garlic with salt, pepper, and dried oregano.
  4. Add the chopped tomatoes and their juice to the pan. Stir to combine and season again with salt, pepper, and oregano.
  5. Bring the mixture to a boil, then sprinkle in the sugar and reduce the heat. Let it simmer on low heat for 20 minutes, allowing the flavors to meld. Adjust seasoning to taste.
  6. While the sauce is simmering, bring a pot of salted water to a boil. Plunge the fresh tortellini into the boiling water and cook just until they float to the surface. Drain and return them to the pot.
  7. Toss the cooked tortellini with the tomato sauce, ensuring each piece is well coated.
  8. Transfer the tortellini and sauce mixture to the prepared baking dish. Sprinkle evenly with the grated Grana Padano and mozzarella cheese.
  9. Bake in the preheated oven for 20-25 minutes, until the cheese is golden and bubbly and the surface is well baked.
  10. Remove from the oven and let the dish stand for 5 minutes before serving. Enjoy with a fresh green salad for a complete meal.

Tips

For an even richer flavor, consider adding a splash of red wine to the tomato sauce as it simmers. If you prefer a spicier kick, a pinch of red pepper flakes can elevate the dish nicely. Remember to taste and adjust the seasoning of the sauce before combining it with the pasta.

Variations & Substitutions

Feel free to customize this recipe to suit your taste or dietary needs. Substitute the Grana Padano cheese with Parmesan for a slightly different flavor. For a vegetarian version, ensure your tortellini is filled with cheese or vegetables. You can also add sautéed mushrooms or spinach for an extra layer of flavor and nutrition.

Storage

Leftovers can be stored in an airtight container in the refrigerator for up to 3 days. To reheat, simply place the tortellini in a preheated oven at 180°C (356°F) until warmed through, or microwave individual portions until hot.

FAQ

Can I use frozen tortellini instead of fresh?

Yes, you can use frozen tortellini. Simply follow the package instructions for cooking time, and proceed with the recipe as directed.

Is it possible to make this dish ahead of time?

Absolutely! You can prepare the tomato sauce and cook the tortellini ahead of time. Combine them in the baking dish, cover and refrigerate for up to a day. When ready to serve, sprinkle with cheese and bake as directed, adding a few extra minutes to the baking time if needed.

Nutrition

While the exact nutritional information will vary based on the brands and specific ingredients used, a generous serving of this baked tortellini dish is a good source of protein and calcium, thanks to the cheese and pasta. For those watching their sodium intake, consider using low-sodium canned tomatoes and adjusting the amount of salt added throughout the recipe.

Conclusion

There’s something truly special about a dish that can transport you back in time, evoking memories of family gatherings and cherished moments. This Baked Tortellini in Red Sauce is not only a simple, satisfying meal but also a culinary hug that brings warmth and comfort to the table. Whether you’re making it for your family or sharing it with friends, it’s sure to become a favorite in your home, just as it has in mine. Enjoy every bite and the memories it creates!

Related update: Baked Tortellini In Red Sauce

Related update: Liz's Lomo Saltado

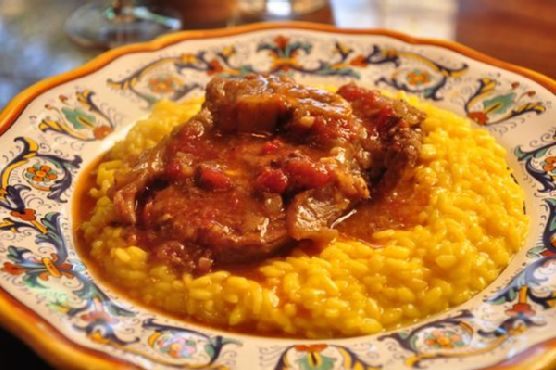
Osso Buco | Made by Meaghan Moineau

Osso Buco: A Timeless Italian Classic

Intro

There’s something magical about the aroma of a slowly simmering pot of osso buco. It takes me back to my grandmother’s kitchen, where the warmth and comfort of her delicious meals enveloped us like a loving embrace. She would often prepare osso buco on special Sundays, filling the house with the tantalizing scent of veal shanks melding with fresh herbs and zesty lemon. Those cherished family gatherings, filled with laughter and stories, remain etched in my heart. Today, I’m excited to share this classic Italian recipe with you, hoping it becomes a beloved favorite in your home just as it is in mine.

Why You’ll Love It

Osso buco is not just a dish; it’s an experience. This traditional Italian stew is a beautiful blend of flavors and textures that will transport you to the heart of Italy. The slow-cooked veal shanks become incredibly tender, with the marrow adding a rich depth to the sauce. The citrusy hint of lemon rind and the fresh burst of parsley elevate the dish, making it a perfect balance of hearty and fresh. Whether you’re hosting a dinner party or enjoying a cozy night in, this dish is sure to impress and satisfy.

Ingredients

  • 4 veal shanks
  • 1/4 cup fresh parsley, chopped
  • Rind of 1 lemon, grated
  • 1/2 cup flour, for dredging
  • 1 bell pepper, chopped
  • 2 tablespoons olive oil
  • 2 cloves garlic, minced
  • 1 onion, finely chopped
  • 2 cups chicken stock
  • 1 cup dry white wine
  • 1 cup tomato sauce

Instructions

  1. Dredge the veal shanks in seasoned flour, shaking off any excess.
  2. Heat the olive oil in a large, deep pan over medium heat. Add the veal shanks and sauté until they are lightly browned on all sides. Remove and set aside.
  3. In the same pan, add the garlic and onion. Sauté until the onion is translucent, about 5 minutes.
  4. Return the veal shanks to the pan. Pour the boiling chicken stock, white wine, and tomato sauce over the meat.
  5. Cover the pan and let it simmer on low heat for about 1 1/2 hours, or until the meat is tender and falling off the bone.
  6. Just before serving, stir in the chopped parsley and grated lemon rind.
  7. Serve the osso buco over a bed of saffron rice, allowing the sauce to soak into the grains.

Tips

For the best results, use high-quality veal shanks with a good amount of marrow. This will enhance the flavor of the dish. Be patient while simmering the osso buco; the longer it cooks, the more tender the meat will become. Make sure to taste the sauce and adjust the seasoning as needed, adding salt and pepper to your preference.

Variations & Substitutions

If veal isn’t to your taste or is unavailable, you can substitute with beef shanks. They offer a similar texture and richness. For a different flavor profile, consider adding a splash of balsamic vinegar or a teaspoon of rosemary. If you prefer a thicker sauce, mix a tablespoon of cornstarch with cold water and stir it into the sauce towards the end of cooking.

Storage

Osso buco keeps well and can be refrigerated in an airtight container for up to three days. To reheat, gently warm it on the stovetop over low heat or in the microwave. This dish also freezes beautifully. Simply allow it to cool completely before transferring to a freezer-safe container. It will keep in the freezer for up to three months. Thaw overnight in the refrigerator before reheating.

FAQ

Can I prepare osso buco in advance?

Absolutely! In fact, osso buco often tastes even better the next day as the flavors have more time to meld together. You can prepare it a day ahead and store it in the refrigerator. Simply reheat before serving.

What should I serve with osso buco?

Osso buco is traditionally served with risotto alla Milanese, a saffron-infused risotto. However, you can also pair it with creamy mashed potatoes, polenta, or a simple crusty bread to soak up the delicious sauce.

Nutrition

This dish is rich in protein and provides a good amount of iron and zinc, thanks to the veal. While it is a hearty dish with some fat content, you can balance it with a side of vegetables or a fresh salad. The use of fresh herbs and lemon also adds vitamin C and antioxidants, contributing to a well-rounded meal.

Conclusion

Osso buco is a dish that brings people together, fostering a sense of warmth and community. With its rich flavors and comforting presence, it’s a meal that turns ordinary occasions into special ones. Whether it’s a Sunday family dinner or a festive gathering, this Italian classic is sure to leave a lasting impression. I hope this recipe becomes as cherished in your culinary repertoire as it is in mine. Enjoy the journey of creating and savoring this timeless dish, and may it fill your home with love and delicious memories.

Related update: Osso Buco

Related update: Slow Cooker Kahlua Pork with Sweet Chili Pineapple Sauce

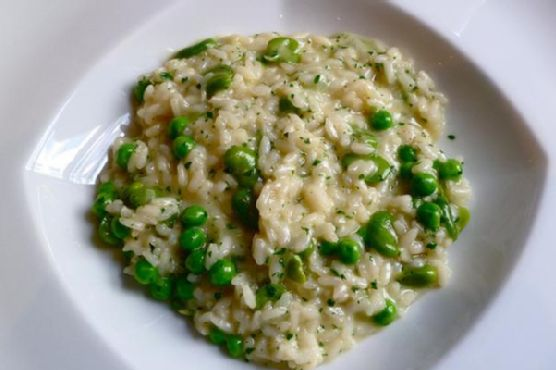
Risotto With Fresh Peas | Made by Meaghan Moineau

Risotto With Fresh Peas: A Creamy, Comforting Delight

Intro

There’s something undeniably comforting about a warm bowl of risotto, especially when it’s made with fresh, vibrant peas. I vividly recall spending weekends in my grandmother’s kitchen, where the scent of simmering onions and garlic would fill the air as she prepared her signature risotto. It was a dish that brought our family together, and every bite seemed to tell a story of love and tradition. Today, I’m excited to share this beloved recipe with you, hoping it brings as much joy to your table as it has to mine.

Why You’ll Love It

This risotto with fresh peas is more than just a meal; it’s an experience. The creamy texture of the arborio rice, the subtle sweetness of the peas, and the richness of Parmesan cheese create a symphony of flavors that are both luxurious and comforting. Whether you’re making it for a special occasion or a simple weeknight dinner, this dish is sure to impress. Plus, it’s a fantastic way to incorporate more vegetables into your diet while indulging in a bit of decadence.

Ingredients

  • Chicken stock
  • Butter
  • Extra virgin olive oil
  • Onions
  • Garlic cloves
  • Arborio rice
  • Dry white wine
  • Peas
  • Parmesan cheese
  • Bay leaf
  • Salt and pepper

Instructions

  1. Melt butter in a heavy large saucepan over medium heat, then add extra virgin olive oil, bay leaf, and onions. Season with salt and pepper.
  2. Cook until onions are translucent, then add minced garlic. Sauté until tender, roughly 8 minutes.
  3. Stir in the arborio rice and toast it for a few minutes, ensuring each grain is coated.
  4. Add the dry white wine and cook until the liquid is absorbed, stirring often, about 2 minutes.
  5. Add 1 cup of hot chicken broth at a time, allowing the liquid to be absorbed before adding more. Stir often. This should be done over medium-low heat and will take about 28 minutes.
  6. Continue adding 1 cup of chicken broth roughly every 3 minutes, cooking the rice until it’s tender and the mixture is creamy.
  7. Stir in the fresh peas, Parmesan cheese, and additional salt and pepper to taste. Cook until the mixture has absorbed all the liquid and doubled in size.
  8. Let cool slightly before serving. Be warned: it might not last long, as it’s irresistibly delicious!

Tips

For the best results, use high-quality ingredients. Fresh peas will give a burst of flavor and color, while freshly grated Parmesan will melt beautifully into the risotto. Make sure to keep stirring; this is key to achieving that creamy texture. If you find your risotto is drying out, a splash of broth or water will help bring it back to life.

Variations & Substitutions

If you’re looking to switch things up, consider these variations. For a vegetarian version, substitute vegetable stock for chicken stock. Add a handful of sautéed mushrooms for an earthy depth, or stir in some cooked shrimp for a seafood twist. If you’re a fan of herbs, a sprinkle of fresh thyme or basil can add a delightful aromatic note.

Storage

Store any leftover risotto in an airtight container in the refrigerator for up to 3 days. To reheat, add a splash of chicken stock or water to loosen the texture and warm gently over the stove or in the microwave. While risotto is best enjoyed fresh, these storage tips will help maintain its wonderful flavor and texture.

FAQ

Can I use frozen peas instead of fresh peas?

Absolutely! If fresh peas are not available, frozen peas are a perfect substitute. Just be sure to thaw them before adding to the risotto to ensure even cooking.

What can I use instead of arborio rice?

For the classic creamy texture, arborio rice is ideal due to its high starch content. However, you can also use other short-grain rice varieties like carnaroli or vialone nano, which will yield similar results.

Is it necessary to use wine in the recipe?

While wine adds a lovely depth of flavor, you can skip it if preferred or replace it with additional broth. The dish will still be delicious!

Nutrition

While exact nutritional values can vary based on ingredients and portion sizes, this risotto is a well-balanced dish. It offers carbohydrates from the rice, protein from the cheese and stock, and vitamins from the peas. Using olive oil and moderate amounts of cheese keeps it relatively heart-healthy.

Conclusion

This risotto with fresh peas is a dish that embodies comfort and sophistication in every bite. Whether you’re crafting it for a family dinner or a special gathering, it’s sure to become a favorite. It’s a reminder of the joy and warmth that comes from sharing a homemade meal with loved ones. I hope this recipe finds a cherished place in your culinary repertoire, just as it has in mine.

Related update: Risotto With Fresh Peas

Related update: Barbecued Baby Back Pork Ribs and Bush's Grillin' Beans

Zabaglione with Roasted Plums | Made by Meaghan Moineau

Zabaglione with Roasted Plums

Intro

There’s something incredibly comforting about the gentle sizzle of plums roasting in the oven, their sweet fragrance perfuming the entire kitchen. Zabaglione with Roasted Plums is a dessert that transports me back to my childhood, where Sunday afternoons were spent in my grandmother’s cozy kitchen. She would prepare this delightful treat as the sun dipped below the horizon, its warmth mirrored by the glow of her smile. This dessert is not just a dish; it is a cherished memory passed down through generations, capturing the essence of Italian comfort food.

Why You’ll Love It

This Zabaglione with Roasted Plums is a dessert that will captivate your senses with its delightful blend of flavors and textures. The creamy, frothy zabaglione pairs perfectly with the juicy, caramelized plums, creating a harmonious balance of sweetness and tartness. It’s an elegant yet simple dessert that is sure to impress your guests, yet easy enough to make for a special family dinner. The aromatic brandy adds a sophisticated touch, while the hint of salt enhances the natural sweetness of the plums. This dish is a testament to the beauty of Italian culinary tradition, bringing warmth and joy to any occasion.

Ingredients

  • Italian plums
  • Sugar
  • Egg yolks
  • Mixed plum brandy
  • Kosher salt

Instructions

  1. Preheat your oven to 400°F (200°C).
  2. Place the plums on a rimmed cookie sheet lined with parchment paper for easier cleanup.
  3. Sprinkle the plums with 2 tablespoons of sugar.
  4. Roast the plums in the oven until they are browning and tender but not falling apart, about 15 minutes.
  5. Meanwhile, bring about 2 inches of water to a bare simmer in a saucepan over medium-high heat. Reduce the heat to maintain a bare simmer.
  6. In a round-bottomed metal mixing bowl, combine the egg yolks, remaining 4 tablespoons of sugar, mixed plum brandy, and a pinch of kosher salt. Whisk thoroughly.
  7. Set the bowl over the simmering water, ensuring the base of the bowl does not touch the water, and whisk continuously.
  8. The egg yolks will begin to froth, lighten, and grow greatly in volume. If you sense that the yolks are at risk of scrambling, quickly remove the bowl from the heat and whisk to cool slightly, then continue.
  9. When soft peaks form, after 5 to 10 minutes, the zabaglione is done.
  10. Transfer the zabaglione to a clean bowl, cover, and refrigerate.
  11. To serve, place 6 plum halves in the bottom of each of 4 glasses. Give the zabaglione a quick whisk and spoon it on top of the plums.
  12. Serve immediately and enjoy!

Tips

For the perfect zabaglione, it’s crucial to maintain a gentle heat under the bowl to prevent the eggs from scrambling. If you don’t have a round-bottomed mixing bowl, a regular metal bowl can work, but be extra cautious with the heat. Whisking continuously is key to achieving that light, airy texture. Additionally, using a good quality plum brandy will enhance the flavor profile, creating a more refined dessert experience.

Variations & Substitutions

If Italian plums are not in season, you can substitute them with other stone fruits such as peaches or nectarines. For a non-alcoholic version, replace the plum brandy with a splash of vanilla extract and a little extra sugar for sweetness. You can also experiment with different types of sugar, like brown sugar or honey, to add a different depth of flavor to the dessert.

Storage

This dessert is best enjoyed fresh, but if you have leftovers, store the zabaglione and roasted plums separately in airtight containers in the refrigerator. They will keep for up to two days. Before serving, give the zabaglione a gentle whisk to restore its creamy consistency. Avoid freezing the zabaglione, as it can affect the texture.

FAQ

Can I make zabaglione without alcohol?

Yes, you can make a non-alcoholic version of zabaglione by substituting the plum brandy with a splash of vanilla extract and a little extra sugar to maintain the sweetness. This will still give you a deliciously creamy dessert without the alcohol.

What can I serve with zabaglione and roasted plums?

Zabaglione with roasted plums pairs beautifully with a crisp biscotti or a light almond cookie for added texture. You could also serve it alongside a scoop of vanilla ice cream or a dollop of whipped cream for an extra indulgent treat.

Nutrition

This dessert provides a delightful balance of flavors with a moderate calorie count, making it a perfect treat for special occasions. The plums offer a good source of vitamins and antioxidants, while the eggs provide protein. However, due to the sugar and brandy, it’s best enjoyed in moderation.

Conclusion

Zabaglione with Roasted Plums is more than just a dessert; it’s a celebration of flavors and a testament to the joy of cooking with love. Whether you’re rekindling cherished memories or creating new ones, this dish is sure to become a beloved part of your culinary repertoire. With its delicate sweetness and rich flavors, it’s a perfect way to end any meal. Enjoy this little taste of Italy and share it with those you love.

Related update: Zabaglione with Roasted Plums

Related update: Home made coffee ice cream

Chicken Parmesan Patty- Eat As A Burger OR On Pasta | Made by Meaghan Moineau

Chicken Parmesan Patty – Eat As A Burger OR On Pasta

Intro

There’s something about the aroma of Italian seasonings and the rich, comforting taste of a classic Chicken Parmesan that brings back fond memories of family gatherings in my grandmother’s cozy kitchen. I remember the sound of laughter echoing through the house and the sight of her expertly preparing meals that would warm our hearts and fill our bellies. This Chicken Parmesan Patty recipe is a tribute to those cherished moments, offering the same delightful flavors in a versatile form. You can enjoy it nestled in a soft burger bun or served atop a bed of pasta for a delicious meal that is as comforting as it is satisfying.

Why You’ll Love It

This Chicken Parmesan Patty is perfect for those busy weeknights when you crave something delicious yet easy to prepare. The patties are packed with flavor, thanks to a mix of Italian seasoning, garlic, and onion, and they are wonderfully juicy thanks to the addition of ground chicken and egg. Plus, whether you decide to savor them as burgers or paired with pasta, these patties are sure to be a hit with the whole family. Their versatility means you can switch up your meal presentation without compromising on taste.

Ingredients

  • 1 cup whole wheat bread crumbs, divided
  • 1 egg
  • 1/2 cup fresh mozzarella, sliced
  • 2 cloves garlic, minced
  • 1 lb ground chicken
  • 2 tablespoons olive oil
  • 1 small onion, chopped and divided
  • 1/2 teaspoon pepper
  • 1 teaspoon sea salt
  • 1 teaspoon Italian seasoning blend

Instructions

  1. Preheat your oven to 400°F (200°C).
  2. In a large mixing bowl, combine the ground chicken, egg, 1/2 cup of the bread crumbs, half of the chopped onion, minced garlic, Italian seasoning, salt, and pepper.
  3. Mix the ingredients thoroughly until well combined.
  4. Shape the mixture into 6-8 patties, depending on your preferred size.
  5. Place the remaining bread crumbs on a plate and coat each patty evenly.
  6. Arrange the breaded patties on a sheet pan and drizzle them with olive oil.
  7. Bake in the preheated oven for about 20 minutes or until cooked through and golden brown.
  8. Top each patty with a slice of fresh mozzarella cheese and return to the oven for an additional 5 minutes, until the cheese is melted and bubbly.

Tips

For the best results, ensure that your patties are of even thickness so they cook uniformly. If you have time, let the patties rest in the refrigerator for about 30 minutes before cooking to help them hold their shape better. When drizzling olive oil, try to distribute it evenly to achieve a nice crispy texture on the outside.

Variations & Substitutions

If you prefer a spicier kick, add a pinch of red pepper flakes to the chicken mixture. To make a gluten-free version, substitute the whole wheat bread crumbs with gluten-free breadcrumbs. You could also experiment by adding some freshly chopped basil or parsley for an aromatic touch. For a creamier texture, mix a tablespoon of ricotta cheese into the chicken mixture before shaping the patties.

Storage

Store any leftover patties in an airtight container in the refrigerator for up to 3 days. To reheat, place them in a preheated oven at 350°F (175°C) for about 10 minutes, or until they are heated through. You can also freeze the patties for up to 2 months; just make sure to wrap them tightly in plastic wrap or aluminum foil before placing them in a freezer-safe bag.

FAQ

Can I use ground turkey instead of ground chicken?

Yes, ground turkey can be a great substitute for ground chicken in this recipe. It will yield a similar texture and flavor, and it’s just as nutritious.

How can I serve these patties as a burger?

To serve these patties as a burger, simply place them in a toasted burger bun. Top with your favorite condiments such as marinara sauce, fresh basil, or sliced tomatoes, and enjoy with a side of your choice.

What type of pasta pairs well with these patties?

These Chicken Parmesan Patties pair beautifully with a variety of pasta types. Consider serving them over spaghetti, penne, or fettuccine, topped with marinara sauce and a sprinkle of Parmesan cheese for a complete meal.

Nutrition

These patties are not only delicious but also packed with protein. Each serving contains approximately 220 calories, 15g of protein, 10g of fat, and 15g of carbohydrates. They’re a nutritious choice that fits well into a balanced diet.

Conclusion

This Chicken Parmesan Patty recipe is a delightful fusion of classic Italian flavors with modern culinary convenience. Whether you’re enjoying them as a hearty burger or a comforting pasta dish, these patties are sure to become a staple in your meal rotation. They bring the warmth and nostalgia of a cherished family recipe straight to your table, offering not just sustenance, but a taste of home. Bon appétit!

Related update: Chicken Parmesan Patty- Eat As A Burger OR On Pasta

Related update: Broccolini Quinoa Pilaf

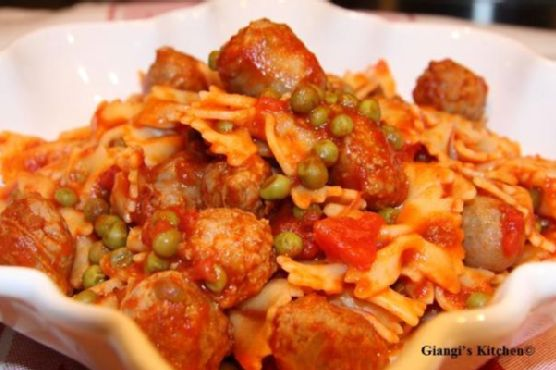
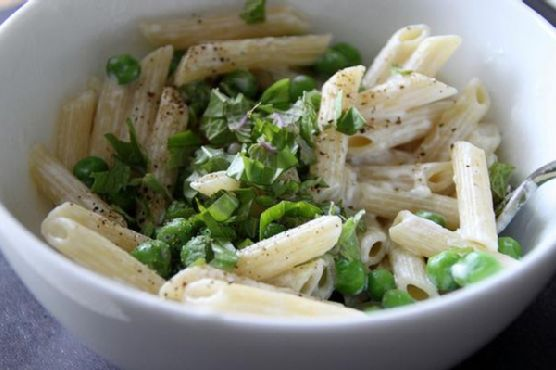
Pasta with Peas and Italian Sausage | Made by Meaghan Moineau

Pasta with Peas and Italian Sausage

Intro

There’s something incredibly comforting about a hearty pasta dish, especially one that brings back memories of family gatherings around a bustling kitchen. For me, Pasta with Peas and Italian Sausage is not just a recipe; it’s a treasured memory of Sunday dinners at my grandmother’s house, where the aroma of sizzling sausages and simmering tomatoes would fill the air, coaxing everyone to the table. This simple yet flavorful dish has always been a favorite, and I’m thrilled to share it with you. Whether you’re cooking for a large family dinner or a cozy night in, this pasta dish is sure to bring warmth and joy to your table.

Why You’ll Love It

This Pasta with Peas and Italian Sausage recipe is more than just a meal—it’s a celebration of flavors and textures. You’ll love how the sweetness of the peas perfectly complements the savory Italian sausage, while the farfalle pasta catches every bit of the rich tomato sauce. It’s a dish that comes together effortlessly, making it perfect for busy weeknights or leisurely weekends. With its vibrant colors and mouth-watering aroma, this pasta is sure to become a staple in your home.

Ingredients

  • 1 tablespoon olive oil
  • 4 Italian sweet sausages, casings removed
  • 1 cup frozen peas
  • 1 can (14 oz) canned tomatoes, chopped
  • 1/2 cup Pomi strained tomato sauce
  • 12 oz farfalle pasta
  • 2 tablespoons butter
  • Salt and pepper to taste

Instructions

  1. Begin by cooking the farfalle pasta according to the package directions until al dente. Drain and set aside.
  2. In a very large skillet, heat the olive oil over medium heat. Add the sausage meat and sauté until it is slightly browned all over.
  3. Add the frozen peas, canned tomatoes, and Pomi strained tomato sauce to the skillet. Stir well to combine.
  4. Season the mixture with salt and pepper to taste. Lower the heat to medium and let it cook for another 10 to 15 minutes, allowing the flavors to meld together.
  5. Once the sauce is ready, add the cooked pasta to the skillet along with the butter. Toss everything together until the pasta is well coated in the sauce.
  6. Serve hot, garnished with freshly grated parmesan cheese if desired.

Tips

For the best results, use high-quality Italian sausages, as they bring a rich flavor to the dish. If you prefer a spicier kick, you can use hot Italian sausages instead of sweet ones. Also, don’t be afraid to adjust the amount of peas to suit your taste; their sweetness balances the savory elements beautifully. Lastly, remember to reserve a bit of pasta water before draining, just in case you need to loosen the sauce a little when tossing it with the pasta.

Variations & Substitutions

This recipe is quite versatile, allowing for plenty of creative variations. If you’re looking for a vegetarian option, simply omit the sausage and add more peas or other vegetables like bell peppers or zucchini. You can also substitute the farfalle pasta with any other pasta shape you have on hand, such as penne or rigatoni. For a creamier sauce, consider adding a splash of heavy cream or a dollop of ricotta cheese just before serving.

Storage

Leftovers can be stored in an airtight container in the refrigerator for up to 3 days. To reheat, simply warm the pasta in a skillet over medium heat, adding a splash of water or broth to loosen the sauce if needed. This dish is also freezer-friendly; just be sure to let it cool completely before transferring it to a freezer-safe container. It can be frozen for up to 2 months. Thaw overnight in the refrigerator before reheating.

FAQ

Can I use fresh peas instead of frozen?

Absolutely! Fresh peas can be a delightful addition. Simply blanch them in boiling water for a few minutes before adding them to the sauce. This will ensure they remain tender and vibrant.

What can I use instead of Pomi strained tomato sauce?

If you don’t have Pomi strained tomato sauce, you can use any high-quality tomato puree or passata. The key is to ensure it’s a smooth, rich tomato sauce to complement the chunky canned tomatoes.

Is this dish spicy?

This recipe is not inherently spicy, as it uses sweet Italian sausage. However, you can adjust the spice level by using hot Italian sausage or adding a pinch of red pepper flakes to the sauce for an extra kick.

Nutrition

This hearty pasta dish is packed with protein from the sausages and peas, providing a satisfying and balanced meal. The tomatoes add a dose of vitamin C, while the pasta offers plenty of energy-boosting carbohydrates. As always, moderation is key, especially if you’re watching your calorie intake.

Conclusion

Pasta with Peas and Italian Sausage is a dish that embodies comfort and nostalgia, bringing together simple ingredients to create something truly special. Whether you’re reconnecting with family traditions or starting new ones, this recipe is sure to become a beloved favorite. I hope it brings as much joy and warmth to your home as it has to mine. Happy cooking!

Related update: Pasta with Peas and Italian Sausage

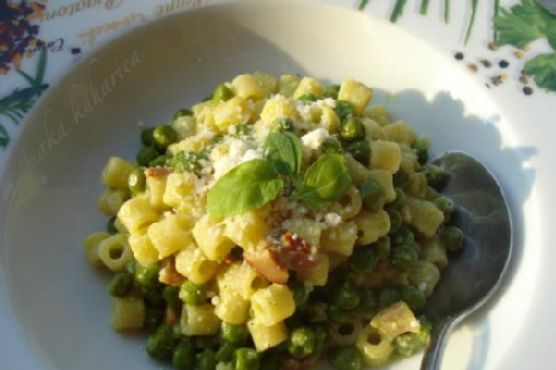
Ditalini with peas | Made by Meaghan Moineau

Ditalini with Peas: A Cozy Italian Classic

Intro

Growing up, Sundays at my grandmother’s house were a time of laughter, family, and, most importantly, the comforting aroma of her hearty Italian cooking. Among the delightful array of dishes she would prepare, Ditalini with Peas was my absolute favorite. This simple yet flavorful pasta dish, dotted with sweet peas and enriched with creamy ricotta, brings back fond memories of sitting at her rustic kitchen table, eagerly awaiting my bowl of goodness. Today, I am thrilled to share this cherished recipe with you, hoping it brings warmth and joy to your family meals just as it has to mine.

Why You’ll Love It

This Ditalini with Peas recipe is a beautiful blend of flavors and textures that makes it irresistible. You’ll love it because:

  • Simple Ingredients: You don’t need a long list of fancy ingredients to create something delicious.
  • Quick and Easy: Perfect for a weeknight dinner, this dish comes together in under 30 minutes.
  • Family-Friendly: Its mild flavors and creamy texture make it a hit with both kids and adults.
  • Customizable: Easily adaptable to suit dietary preferences or ingredient availability.

Ingredients

  • Coarse sea salt
  • Ditalini pasta
  • Freshly ground black pepper
  • Ham, diced
  • 2 tablespoons olive oil
  • 1 medium onion, finely chopped
  • Pancetta, diced
  • Parmesan or Grana Padano cheese, grated
  • Ricotta cheese
  • 1 teaspoon turmeric in 2 ladles of water
  • 1 cup peas (fresh or frozen)

Instructions

  1. In a large sauté pan, place the chopped onion in cold olive oil. Soften the onion without letting it color by adding a teaspoon of water occasionally. Cook until the onion becomes wilted and opaque, about 10 minutes.
  2. Add the peas to the pan and pour in enough water to just cover them. Season with coarse sea salt and freshly ground black pepper. Cook until the peas are tender, approximately 5 to 15 minutes for fresh peas, depending on their freshness and size, or 10 minutes for frozen peas.
  3. Just before the peas are fully cooked, add the diced pancetta and ham. Stir everything together and then turn off the heat.
  4. Stir in the turmeric water and incorporate the ricotta cheese by sieving it through a colander. Allow the ricotta to melt into the cooking liquids, creating a golden sauce. Keep the mixture warm until the pasta is ready.
  5. Meanwhile, cook the ditalini pasta according to the manufacturer’s instructions. Drain the pasta, reserving some of the cooking water.
  6. Immediately toss the cooked pasta in the sauté pan, ensuring it is thoroughly coated with the sauce. If the sauce seems dry, add a bit of the reserved pasta cooking water to loosen it.
  7. Serve immediately, topped with grated Parmesan or Grana Padano cheese.

Tips

  • Use fresh peas: If possible, try to use fresh peas for the best texture and flavor. However, frozen peas work well too.
  • Adjust seasoning: Taste the sauce before serving and adjust the salt and pepper to your preference.
  • Don’t overcook the pasta: Ditalini should be cooked al dente to avoid a mushy texture when mixed with the sauce.

Variations & Substitutions

This Ditalini with Peas recipe is versatile! Here are some variations and substitutions you might enjoy:

  • Vegetarian Option: Omit the pancetta and ham for a meat-free version. Add sliced mushrooms or sun-dried tomatoes for extra flavor.
  • Spicy Twist: Add a pinch of red pepper flakes or a dash of hot sauce for a subtle kick.
  • Cheese Lovers: For an extra cheesy version, mix in some mozzarella or fontina cheese before serving.
  • Gluten-Free: Use your favorite gluten-free pasta instead of traditional ditalini.

Storage

Leftover Ditalini with Peas can be stored in an airtight container in the refrigerator for up to three days. To reheat, add a splash of water or broth to loosen the sauce before microwaving or warming on the stove. For best results, avoid freezing as the texture of the pasta and peas may change.

FAQ

Can I make this dish in advance?

Yes, you can prepare the sauce in advance and store it in the refrigerator for up to two days. When ready to serve, cook the pasta and toss it with the reheated sauce.

What can I use instead of ditalini pasta?

Any small pasta shape, such as macaroni or orzo, can be used as a substitute for ditalini in this recipe. Choose a pasta type that will hold the sauce well.

How can I make this dish more flavorful?

For added depth of flavor, try using chicken or vegetable broth instead of water when cooking the peas. You can also add a splash of white wine to the onion and olive oil mixture for a more robust taste.

Nutrition

This dish is a comforting blend of carbohydrates, protein, and fats. With its moderate portion of cheese and meats, it’s a satisfying meal that can be part of a balanced diet. To lighten it up, consider using low-fat ricotta and reducing the amount of cheese.

Conclusion

Ditalini with Peas is a heartwarming dish that brings people together around the table, much like it did in my grandmother’s kitchen. Its simplicity and rich flavors make it a timeless classic perfect for any occasion. I hope you enjoy making and sharing this recipe with your loved ones, creating your own cherished memories along the way. Buon appetito!

Related update: Ditalini with peas

Related update: Neoguri (Spicy Seafood Ramen)

Related update: Colcannon

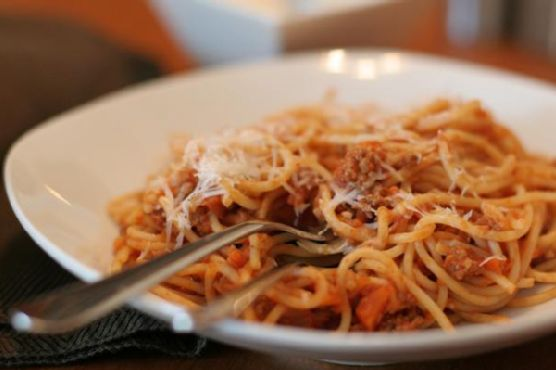
Authentic Bolognese Sauce | Made by Meaghan Moineau

Authentic Bolognese Sauce

Intro

There’s something deeply comforting about a simmering pot of Bolognese sauce on the stove, its rich aromas filling the kitchen and evoking memories of family dinners. Growing up, weekends were synonymous with my grandmother’s Bolognese—an authentic recipe passed down through generations. I fondly recall sitting at the kitchen table, my eyes barely peeking over the edge, watching her expertly chop vegetables and stir the sauce with love and dedication. Today, I’m thrilled to share this cherished recipe with you, hoping it brings warmth to your table and creates new memories with your loved ones.

Why You’ll Love It

This Authentic Bolognese Sauce is a labor of love, but it’s worth every minute of simmering. Here’s why you’ll adore making and eating this classic Italian sauce:

  • Rich Flavor: The combination of pancetta, beef, and aromatic vegetables creates a depth of flavor that is both hearty and inviting.
  • Versatile: While traditionally served with tagliatelle, this sauce pairs beautifully with any pasta, lasagna, or even as a topping for polenta.
  • Family Tradition: It’s a recipe that invites you to slow down, enjoy the cooking process, and share a meal steeped in cultural heritage.

Ingredients

  • 1 carrot, diced
  • 1 celery stalk, diced
  • 1/2 cup dry white wine
  • 2 garlic cloves, minced
  • 1 pound regular ground beef
  • 2 tablespoons olive oil
  • 1 diced onion
  • 4 ounces pancetta, diced
  • 1/2 teaspoon pepper
  • 1 teaspoon salt
  • 2 tablespoons tomato paste
  • 1 cup whole milk

Instructions

  1. In a large skillet, heat the olive oil over medium heat.
  2. Add the pancetta, onion, carrot, celery, and garlic. Cook until the vegetables are soft, about 10-15 minutes, stirring occasionally.
  3. Add the ground beef to the skillet. Cook until it is no longer pink, breaking it up with a wooden spoon as it cooks.
  4. Stir in the dry white wine, allowing it to simmer for about 2 minutes.
  5. Add the whole milk and tomato paste, stirring well to combine.
  6. Season with salt and pepper to taste.
  7. Reduce the heat to low and let the sauce simmer uncovered for 1 hour, or until most of the liquid has been absorbed, stirring occasionally.
  8. Once the sauce has thickened, taste and adjust seasoning if necessary before serving.

Tips

  • Take your time: This sauce benefits from a slow simmer, allowing the flavors to meld beautifully. Resist the urge to rush.
  • Quality ingredients: Use the best quality ingredients you can find, especially when it comes to the wine and beef.
  • Stir occasionally: Make sure to stir the sauce every now and then to prevent it from sticking to the bottom of the skillet.

Variations & Substitutions

While this recipe strives to stay true to its authentic roots, there are always ways to make it your own:

  • Vegetarian Bolognese: Substitute the beef and pancetta with lentils and mushrooms for a hearty vegetarian version.
  • Different Meats: Feel free to use a mix of ground pork and beef for a slightly different flavor profile.
  • Herbs and Spices: Add a bay leaf or a pinch of nutmeg for additional depth.

Storage

Allow the Bolognese sauce to cool completely before storing. Transfer it to an airtight container and refrigerate for up to 3 days. For longer storage, freeze the sauce in airtight containers or freezer bags for up to 3 months. Thaw in the refrigerator overnight before reheating.

FAQ

Can I make this sauce ahead of time?

Absolutely! In fact, Bolognese sauce often tastes even better the next day as the flavors have time to develop further. Simply reheat gently on the stove before serving.

What type of pasta pairs best with Bolognese sauce?

Traditionally, Bolognese sauce is served with tagliatelle, a wide, flat pasta that holds the sauce beautifully. However, it also pairs well with pappardelle, fettuccine, or any pasta you have on hand.

Can I use red wine instead of white?

While white wine is traditional in Bolognese, red wine can be used for a slightly different, richer flavor. Just ensure it’s a dry variety to maintain the sauce’s balance.

Nutrition

This recipe serves approximately 6 people. Each serving contains:

  • Calories: 320
  • Protein: 20g
  • Carbohydrates: 12g
  • Fat: 22g
  • Fiber: 2g

Conclusion

Authentic Bolognese Sauce is more than just a meal—it’s a celebration of tradition, flavor, and the joy of cooking. Whether you’re recreating cherished family memories or crafting new ones, this dish brings warmth and togetherness to any table. I hope this recipe becomes a beloved staple in your home, infusing your kitchen with the same love and care my grandmother infused into hers. Buon appetito!

Related update: Authentic Bolognese Sauce

Related update: Chimichurri Skirt Steak with Grilled Asparagus

Related update: Walnut Pesto

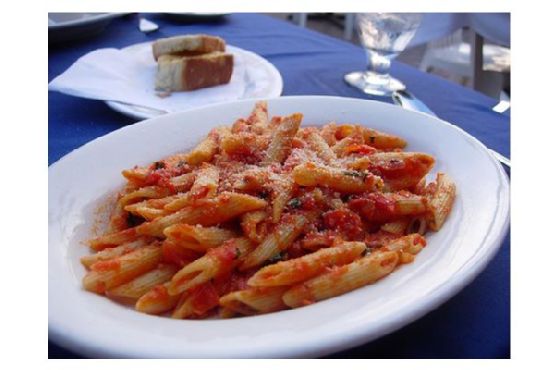
Penne Arrabiata | Made by Meaghan Moineau

Penne Arrabiata | Made by Meaghan Moineau

Title: A Taste of Home: The Timeless Comfort of Penne Arrabiata
Description: Dive into the rich flavors and heartwarming memories of Penne Arrabiata. This classic Italian dish, infused with the vibrant notes of garlic, olive oil, and red peppers, not only satisfies the palate but also brings back cherished family memories. Discover the recipe that's a perfect main dish for any occasion and simple enough for a cozy night in.

---


When the aroma of garlic sizzling in olive oil wafts through the kitchen, I am instantly transported back to my grandmother's bustling kitchen. There, amidst laughter and the clinking of pots, Penne Arrabiata was more than just a meal; it was a cherished tradition. This fiery dish, with its perfect balance of spicy, tangy, and savory notes, encapsulates both the simplicity and depth of Italian cuisine.


Ingredients:

- 1 can whole tomatoes (preferably Pomi, which comes in a box)


- 5 cloves fresh minced garlic


- 3 tablespoons olive oil


- 1 teaspoon dried red peppers


- 2 tablespoons fresh Italian parsley, minced


- Packet of penne pasta


- Fresh basil, coarsely chopped


- A pinch of salt


Instructions:
1. Boil the Pasta: Start by bringing a large pot of salted water to a boil. Add the penne and cook until al dente, which should take about 8-10 minutes. Drain and set aside.
2. Prepare the Sauce: In a large skillet, heat 3 tablespoons of olive oil over medium heat. Add 1 teaspoon of dried red peppers and sauté for about a minute until they release their heat into the oil. Be cautious not to let them burn.
3. Flavor Infusion: Incorporate the minced garlic and 2 tablespoons of fresh parsley into the skillet. Stir continuously until the garlic is fragrant but not browned.
4. Tomato Magic: Add the chopped canned tomatoes to the mixture. Stir well, cover, and let the sauce simmer until it is heated through and slightly thickened.
5. Combine: Once the sauce is ready, add the cooked and drained penne to the skillet. Mix thoroughly to ensure each piece of pasta is coated in the spicy tomato sauce.
6. Finishing Touches: Just before serving, add a generous handful of coarsely chopped fresh basil and a little more parsley for an added burst of flavor and color.
7. Serve Immediately: This dish is best enjoyed hot, straight from the stove to the table.
A Nostalgic Memory:

Every Sunday, our family would gather at my grandmother's house, where Penne Arrabiata was always the centerpiece. Grandma would regale us with tales of her childhood in Italy, where this dish was a staple during festive gatherings. As children, we eagerly watched her expertly toss the pasta in the spicy sauce, waiting for the moment we could dive into our bowls. The lively conversations and shared laughter over this simple yet delectable meal are memories that have stayed with me, encapsulating the warmth and togetherness of family.


Difficulty Rating: 4/10
Classification: Main Dish

Penne Arrabiata is a dish that embodies the heart of Italian cooking—simple ingredients with bold flavors. It's perfect for those seeking comfort in tradition and flavor, offering a taste of Italy with every bite. Whether you're cooking for family or indulging in a solo culinary adventure, this dish promises satisfaction and a touch of nostalgia.

Read more about Appetizers

Read more about Main Dishes

Read more about Desserts

Prosciutto and Mushroom Ravioli With Basil Browned Butter Sauce | Made by Meaghan Moineau

Prosciutto and Mushroom Ravioli With Basil Browned Butter Sauce | Made by Meaghan Moineau

Title: A Taste of Italy: Crafting Prosciutto and Mushroom Ravioli with Basil Browned Butter Sauce
Description: Dive into the heart of Italian cuisine with our Prosciutto and Mushroom Ravioli, bathed in a luscious Basil Browned Butter Sauce. This main dish marries the rich flavors of savory prosciutto, earthy mushrooms, and fresh basil, creating a symphony of tastes that will transport you to a cozy trattoria in Italy. Learn how to master this dish, perfect for special occasions or a delightful family dinner, and discover a cherished family memory that makes this recipe truly special.

---


A Culinary Journey: Prosciutto and Mushroom Ravioli with Basil Browned Butter Sauce


There's something inherently magical about making pasta from scratch. As you knead the dough, feeling its texture change beneath your hands, you're not just creating food; you're crafting an experience. This is especially true with our Prosciutto and Mushroom Ravioli, a dish that encapsulates the warmth and love of home-cooked Italian meals.


Ingredients:


- All-purpose flour


- Butter (for both the filling and sauce)


- Eggs


- Fresh basil


- Garlic


- Diced mushrooms


- Diced onion


- Oregano


- Prosciutto


- Salt


- Fresh spinach


Instructions:


We'll start by creating the foundation of our dish—the ravioli dough. In a food processor, combine all the ravioli ingredients. If the dough resembles pebbles, it needs a bit more moisture; add 1/2-1 tsp of water and mix until it forms a smooth ball. Knead the dough outside the processor for a few minutes, wrap it in plastic, and let it rest for 20 minutes.


While the dough rests, it's time to prepare the flavorful filling. Heat butter in a skillet over medium heat, then add garlic, prosciutto, onions, and mushrooms. Cook until fragrant, seasoning with salt and oregano. Add spinach and allow it to wilt completely before removing from heat.


Once your dough is ready, roll it out to your desired thinness. Cut out your ravioli shapes and fill each with a teaspoon of the prosciutto mixture. Use an egg wash to seal them with another piece of pasta.


Boil water in a pot and cook the ravioli until they float. Meanwhile, prepare the basil browned butter sauce. Melt butter in a pan until golden brown and nutty, then lower the heat and add garlic and basil. Swirl to combine.


Finally, toss the cooked ravioli in the sauce, ensuring they're well-coated. Serve with grated Parmesan or Romano cheese for a touch of indulgence.


A Nostalgic Family Memory


Growing up in a big Italian family, Sunday afternoons were reserved for making pasta. I remember standing on a stool beside Nonna, my tiny hands barely able to grasp the rolling pin. She would tell stories of her own childhood in Italy, where her mother taught her the same recipes. As we filled the ravioli, we'd talk about everything from school to dreams of traveling to Italy. Those afternoons were filled with laughter, flour-dusted clothes, and the promise of a delicious meal shared with loved ones. This dish isn't just about the taste; it's a tribute to those cherished memories and the joy of family.


Difficulty: 7/10


Classification: Main Dish


---


Creating this dish is not just about following a recipe; it's about embracing the tradition and love that comes with it. Whether you're an experienced chef or a beginner, the Prosciutto and Mushroom Ravioli with Basil Browned Butter Sauce is a delightful challenge that promises a rewarding experience with every bite. Enjoy the process, savor the flavors, and most importantly, share it with those you love.

Read more about Appetizers

Read more about Main Dishes

Read more about Desserts

Easy Baked Parmesan Chicken | Made by Meaghan Moineau

Easy Baked Parmesan Chicken | Made by Meaghan Moineau

Title: A Taste of Home: Easy Baked Parmesan Chicken
Description: Discover the comforting flavors of Easy Baked Parmesan Chicken, a dish that brings warmth to your dining table and heart. With its simple preparation and rich taste, this main dish is perfect for busy weeknights or a cozy family dinner. Let the aroma of Italian spices and melted cheese fill your home as you create a meal that's sure to become a family favorite.

---


When it comes to creating meals that evoke warm memories and bring families together, few dishes do it as beautifully as the Easy Baked Parmesan Chicken. This dish is a savory symphony of flavors, combining tender chicken, crispy bread crumbs, and a rich medley of cheeses, all embraced by a hearty pasta sauce. Not only is it a delight to the palate, but it also holds a special place in my heart, reminding me of cherished family gatherings from my childhood.


Ingredients:

- 4 skinless, boneless chicken breast halves


- 1 egg, beaten


- 1 cup Italian bread crumbs


- 1 jar pasta sauce


- 1 cup shredded mozzarella cheese


- 1/2 cup grated Parmesan cheese


Instructions:

1. Preheat your oven to 400 degrees Fahrenheit.


2. Dip each chicken breast half into the beaten egg, ensuring it's fully coated.


3. Dredge the egg-coated chicken in the Italian bread crumbs, pressing gently to adhere.


4. Arrange the breaded chicken breasts in a 13 x 9-inch baking dish.


5. Bake uncovered in the preheated oven for 20 minutes.


6. Remove the dish from the oven and pour the pasta sauce over the chicken.


7. Sprinkle the mozzarella and Parmesan cheeses generously over the sauce-covered chicken.


8. Return the dish to the oven and bake for an additional 10 minutes, or until the chicken reaches an internal temperature of 170 degrees and is no longer pink.


9. Serve immediately, either on its own or over a bed of pasta for a complete meal.


Difficulty: 3/10
Classification: Main Dish
A Nostalgic Family Memory:

As I prepare this dish, I am transported back to my grandmother's cozy kitchen, where the aroma of her famous Baked Parmesan Chicken filled the air. Every Sunday, our family gathered around her large, wooden dining table, eagerly awaiting the meal that was always the highlight of the week. I remember watching in awe as she deftly coated each piece of chicken, her hands moving rhythmically as she hummed a familiar tune.


This dish was more than just a meal; it was a tradition. Each bite was a reminder of the laughter and love that filled the room, the stories shared, and the bonds strengthened. Even now, as an adult, I find myself recreating this recipe for my own family, hoping to pass down not just the taste, but the sentiment of those cherished Sunday afternoons.


Cooking the Easy Baked Parmesan Chicken is more than just about following a recipe; it's about reliving those memories and creating new ones. Whether you're serving it to friends or family, this dish is sure to warm their hearts and become a beloved tradition in your own home.

Read more about Appetizers

Read more about Main Dishes

Read more about Desserts

Farfalle with Shrimps, Tomatoes Basil Sauce | Made by Meaghan Moineau

Farfalle with Shrimps, Tomatoes Basil Sauce | Made by Meaghan Moineau

Title: Farfalle with Shrimps and Tomato Basil Sauce: A Taste of Summer Evenings
Description: Dive into the vibrant flavors of a quintessential Italian dish, Farfalle with Shrimps and Tomato Basil Sauce. This delightful recipe combines the tenderness of fresh shrimps with the aromatic charm of basil and tomatoes, creating a symphony of flavors that whisk you away to warm, sunlit family gatherings. Simple yet sophisticated, this main dish is a culinary ode to cherished memories and is perfect for bringing a touch of nostalgia to your dinner table.

---


Farfalle with Shrimps and Tomato Basil Sauce: A Culinary Journey Back in Time

There’s something truly magical about a dish that can transport you back to a cherished moment in time. For me, Farfalle with Shrimps and Tomato Basil Sauce is not just a meal—it’s a portal to warm summer evenings spent in my grandmother’s cozy kitchen, where the aroma of fresh basil and sizzling butter filled the air.


Ingredients:

- 2 tablespoons of butter


- 400g Farfalle pasta by Barilla


- A handful of fresh basil leaves, roughly torn


- Freshly ground black pepper and salt to taste


- 500g fresh shrimps, cleaned and deveined


- 4 ripe tomatoes, diced


Instructions:

1. Bring a large pot of salted water to a boil and cook the Farfalle pasta according to the package instructions, ensuring it is al dente.


2. While the pasta is cooking, melt the butter in a large frying pan over medium-high heat. Add the diced tomatoes and sauté for about 1 minute, allowing them to release their juices and meld with the butter.


3. Add the cleaned shrimps to the pan and cook until they turn a light pink, which should take about 3-4 minutes. Sprinkle with freshly ground black pepper and salt to taste.


4. Gently stir in the fresh basil leaves, allowing their fragrant oils to infuse the sauce.


5. Once the pasta is ready, drain it and add it directly to the skillet with the shrimps and tomato mixture. Add an extra pat of butter for richness and toss everything together until well combined.


6. Serve immediately while hot, and enjoy a dish that is as comforting as it is delicious.


A Nostalgic Tale:

Growing up, every Sunday was a celebration of family, food, and laughter. My grandmother, a woman whose heart was as vast as her culinary skills, had a way of turning simple ingredients into masterpieces. Her Farfalle with Shrimps and Tomato Basil Sauce was a staple at our gatherings, a dish that brought everyone to the table with eager anticipation.


I remember sitting by the kitchen counter, watching her nimble fingers deftly chop tomatoes and basil picked fresh from her garden. The air would be filled with stories of her own childhood, tales that danced through the kitchen as we waited for the water to boil and the butter to melt.


Each bite of this dish was like a hug from her—a reminder of the love and care she poured into everything she did. Even now, as I recreate this recipe in my own kitchen, I can almost hear her laughter and feel the warmth of those summer evenings. It’s a dish that not only satisfies the palate but also nourishes the soul, reminding me that food is one of the greatest ties that bind us to our past.


Difficulty: 4/10
Classification: Main Dish

Whether you're an experienced chef or a novice in the kitchen, this Farfalle with Shrimps and Tomato Basil Sauce is a delightful journey into the heart of Italian cuisine, rich with flavor and steeped in tradition. It's a meal that invites you to create your own memories, to share stories, and to savor the simple joys of life. Enjoy!

Read more about Appetizers

Read more about Main Dishes

Read more about Desserts

Easy Eggplant Parmesan | Made by Meaghan Moineau

Easy Eggplant Parmesan | Made by Meaghan Moineau

Savoring Simplicity: Easy Eggplant Parmesan for Cozy Family Dinners


Description

Delve into the flavors of Italy with our Easy Eggplant Parmesan recipe—a heartwarming dish that brings the taste of tradition to your table without the fuss. Discover how this delightful main dish, with a difficulty rating of just 4 out of 10, can transform any evening into a memorable culinary experience. Perfect for family gatherings or a comforting solo meal, this recipe is a nod to cherished family memories and the joy of home-cooked meals.

---


A Nostalgic Whiff of Eggplant Parmesan


There's something magical about the aroma of eggplant, cheese, and basil mingling in the oven. It takes me back to Sundays spent in my grandmother's rustic kitchen. As a child, I would eagerly await the moment when the rich scent of eggplant parmesan would signal that dinner was near. My grandmother, with her apron dusted in flour and a perpetual smile, would tell stories of her own childhood in Italy, where eggplants grew abundantly in her family's garden.


Her version of eggplant parmesan was always a labor of love, involving hours of preparation and an unspoken rule that every slice of eggplant be cooked to perfection. My siblings and I would gather around the kitchen table, helping with what little tasks we could manage, like tearing fresh basil leaves or grating cheese. It wasn't just about the food; it was about the laughter, the stories, and the warmth of being together.


This Easy Eggplant Parmesan recipe captures those cherished memories, delivering the same soulful flavors with a fraction of the effort. Whether you’re a seasoned chef or a kitchen novice, its simplicity ensures you can enjoy a taste of Italy right at home.


---


Ingredients


- Olive oil


- 1 onion, finely chopped


- 1 garlic clove, minced


- 2 cups pasta sauce


- 2 medium eggplants, sliced


- 2 cups Italian style cheese, shredded


- Fresh basil leaves, for garnish


---


Instructions


1. Prepare the Eggplant: Preheat your broiler and arrange the eggplant slices on a baking sheet. Brush each slice generously with olive oil. Place under the broiler until the eggplants become soft and tender. Once done, remove them from the oven and allow them to cool slightly.
2. Make the Sauce: In a small saucepan, gently heat the pasta sauce. Meanwhile, heat additional olive oil in a skillet over medium heat. Add the chopped onion and cook for about 5 minutes until translucent. Stir in the minced garlic and sauté for an additional minute. Combine the sautéed onion and garlic with the warm pasta sauce.
3. Assemble the Dish: In an 8 x 6 baking dish, create a layer of eggplant slices. Sprinkle a generous amount of Italian style cheese over the eggplant. Repeat these layers until all the eggplant is used, finishing with a final coating of sauce, fresh basil leaves, and the remaining cheese.
4. Bake: Preheat your oven to 375°F (190°C). Bake the assembled dish for approximately 40 minutes, until the cheese is golden and bubbly.
5. Optional Method: For a richer flavor, you can fry the eggplant slices in olive oil instead of broiling them. If you choose this method, be sure to let them drain on a paper towel to remove excess oil.

---


Enjoy this Easy Eggplant Parmesan as a main dish, either on its own or alongside a fresh salad or crusty bread. With its comforting flavors and simple preparation, it’s a dish that's sure to become a staple in your home, just as it has in ours.

Read more about Appetizers

Read more about Main Dishes

Read more about Desserts