Spicy Lemongrass Soup
Intro
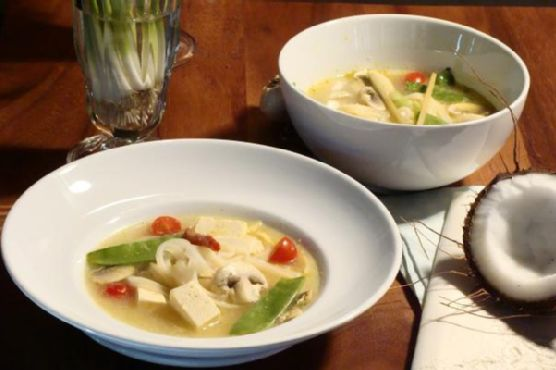
There’s something inherently comforting about a bowl of soup—especially one that’s bursting with complex flavors and a hint of heat. Spicy Lemongrass Soup is a delightful dish that takes me back to my childhood. Growing up, my grandmother would often prepare a steaming pot of soup on chilly days, filling the house with a fragrant aroma that meant warmth and love. Lemongrass was a staple in her kitchen, and its citrusy scent evokes memories of her bustling around, always with a smile and a story. Today, I share with you a modern twist on her classic recipe. This Spicy Lemongrass Soup is not only a tribute to her but also a celebration of flavors that will surely become a favorite in your household too.
Why You’ll Love It
This Spicy Lemongrass Soup is a culinary delight, offering a harmonious blend of flavors that dance on your palate. It’s a perfect balance of spicy, tangy, and savory, with the lemongrass adding a refreshing citrus undertone. This soup is not only delicious but also nourishing, thanks to ingredients like tofu and fresh vegetables. Whether you’re craving something hearty on a cold day or looking for a light yet satisfying meal, this soup ticks all the boxes.
Ingredients
- 2 stalks fresh lemongrass, chopped into 2-inch pieces and sliced down the center
- 4-5 red dried peppers
- 1 knob ginger, grated
- 3 cloves garlic, minced
- 4 cups vegetable broth
- 1 can fresh coconut milk
- 1 cup tofu cubes
- 1 cup snow peas
- 1 cup mushrooms, sliced
- 4 oz rice noodles
- Juice of 1 lime
Instructions
- Chop the lemongrass into 2-inch pieces and slice down the center. Add to a soup pot along with the vegetable broth, coconut milk, garlic, and ginger.
- Bring the mixture to a boil, then reduce the heat and let it simmer on low for 30 minutes. This allows the flavors to meld beautifully.
- Once the broth is done simmering, strain it through cheesecloth to remove the lemongrass stalks and any solid bits. The lemongrass stalks are not edible, a lesson I learned the hard way.
- Return the strained broth to a simmer and add the tofu, mushrooms, snow peas, and rice noodles.
- Add the lime juice. You can add some at the beginning and more at the end before serving for an extra burst of freshness.
- Simmer the soup until the noodles are soft, then garnish with grated ginger or scallions before serving.
Tips
For the best results, use fresh lemongrass and ginger. These ingredients are key to the depth of flavor in this soup. If you’re sensitive to spice, you can reduce the number of dried red peppers or remove them altogether. Taste as you go to adjust the seasoning according to your preference.
Variations & Substitutions
This recipe is quite flexible. Feel free to add more vegetables like bell peppers or carrots for added nutrition. If you’re not a fan of tofu, you can substitute it with chicken or shrimp. For a gluten-free option, ensure that the rice noodles are certified gluten-free.
Storage
This soup stores well in the refrigerator for up to 3 days. Simply transfer it to an airtight container once it’s cooled. Reheat it gently on the stove, adding a splash of water or broth if needed. It can also be frozen for up to 2 months. Thaw overnight in the fridge before reheating.
FAQ
Can I use dried lemongrass instead of fresh?
While fresh lemongrass is preferred for its vibrant flavor, dried lemongrass can be used in a pinch. Use about 1 tablespoon of dried lemongrass for this recipe. Remember to adjust the cooking time as dried lemongrass may require a bit longer to release its flavors.
How can I make this soup more filling?
To make this soup more substantial, consider adding more protein like chicken or shrimp. You can also increase the amount of tofu or include additional vegetables such as bell peppers or carrots. Serving it with a side of crusty bread can also make it a heartier meal.
Nutrition
This Spicy Lemongrass Soup is packed with nutritious ingredients. It’s a great source of protein from the tofu, and rich in vitamins from the vegetables. Coconut milk adds a healthy dose of fats, while lemongrass and ginger provide antioxidants. It’s a well-rounded meal that nourishes the body and soul.
Conclusion
Spicy Lemongrass Soup is more than just a meal; it’s a sensory experience that warms the heart and excites the taste buds. With its rich flavors and comforting warmth, it’s a wonderful dish to share with loved ones or enjoy on your own. Whether it’s a nod to nostalgic family recipes or a new addition to your culinary repertoire, I hope this soup brings joy and deliciousness to your table. Enjoy every spoonful!
Related update: Spicy Lemongrass Soup
Related update: Tortellini In Brodo