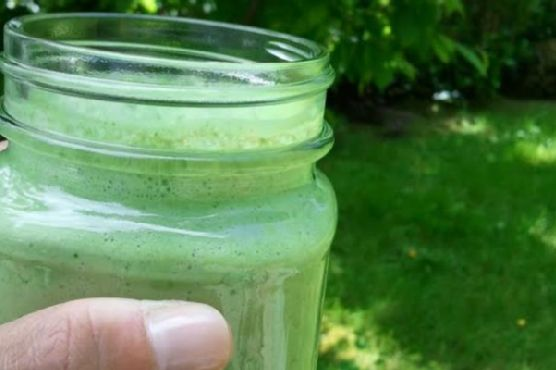
It was one of those mornings where hitting the snooze button was more tempting than ever. The kind of morning where a little pick-me-up is not just a want but a necessity. As I shuffled into the kitchen, I thought about something quick, healthy, and invigorating. Enter the Skinny Green Monster Smoothie. It’s like a jolt of energy in a glass, and it comes together in minutes. Trust me, this smoothie is both a morning lifesaver and a delightful way to sneak in those greens without sacrificing flavor. Just one sip, and you’ll be hooked—it’s the kind of recipe that keeps you coming back, not just for the taste, but for how it makes you feel: ready to tackle anything the day throws at you.
Jump to Recipe
What You’ll Need
I’ve gathered a list of ingredients that are both simple and likely already in your kitchen, so you can whip this up without a special trip to the grocery store. Here’s what you need:
- Frozen banana – it makes the smoothie creamy and naturally sweet.
- Baby spinach – don’t worry, you won’t even taste it!
- Peanut butter – adds a delicious richness and nutty flavor.
- Unsweetened vanilla almond milk – keeps it light and dairy-free.
- Fat-free plain Greek yogurt – for that extra creaminess and a protein boost.
How to Make Skinny Green Monster Smoothie
- Start by placing the frozen banana in your blender. It’s best to break it into chunks so it blends smoothly.
- Add a generous handful of baby spinach. Don’t worry—it’ll blend in seamlessly, giving you all the green goodness without overpowering the taste.
- Spoon in the peanut butter. This is where the magic happens as it brings richness and a subtle sweetness to the mix.
- Pour in the unsweetened vanilla almond milk. This will help everything blend together and give the smoothie a lovely vanilla hint.
- Add the fat-free plain Greek yogurt for an extra creamy texture. This also ups the protein quotient, making the smoothie more filling.
- Blend everything on high until it’s completely smooth and creamy. You should see a beautiful green hue and a velvety texture. If needed, scrape down the sides and blend again.
- Taste and adjust if necessary. Need it a bit sweeter? Add a touch more banana or a splash of honey. Too thick? A little more almond milk will do the trick.
Cook’s Notes
There’s not much that can go wrong with this smoothie, but here are a few pointers to keep it perfect every time. If your blender is having trouble with the frozen banana, let it thaw for a few minutes before blending. This smoothie is best enjoyed fresh, but you can refrigerate leftovers for up to a day. Just give it a good shake or stir before drinking. If you prefer it colder, throw in a few ice cubes before blending, but keep in mind this might dilute the flavors slightly.
Make It Your Own
There are plenty of ways to tweak this smoothie to suit your taste:
- Swap the peanut butter for almond or cashew butter if you’re feeling adventurous.
- Use coconut milk instead of almond milk for a tropical twist.
- Add a scoop of your favorite protein powder to make it a post-workout powerhouse.
- For a berry boost, toss in a handful of frozen blueberries or strawberries.
If you try this, I’d love to hear how it turns out—drop a comment or tag me! Whether you’re rushing out the door or lounging with a good book, this smoothie is a perfect companion. Enjoy and embrace your inner green monster! 🥤💚
Related update: Skinny Green Monster Smoothie
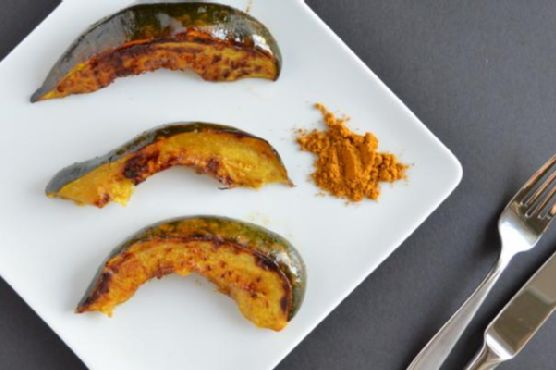
Picture this: It’s a chilly fall evening, and my kitchen still smells like the remnants of the apple pie I baked last weekend. I’m standing in front of the pantry, craving something that’s both cozy and a little unexpected. Ever had those moments where you stare at the ingredients you have and think, “This could either be a disaster or magic”? That was me a few weeks ago, reaching for an acorn squash, some curry powder, and a bottle of maple syrup that I had been saving for pancake Sundays. What came out of that experimental whirlwind was a dish that’s not only delicious but also has become my go-to when I need to impress with minimal effort. It’s sweet, spicy, and roasted to perfection—ideal for spicing up a weeknight or wowing guests without breaking a sweat.
Jump to Recipe
What You’ll Need
This recipe is delightfully simple, and chances are you already have most of these on hand. Here’s what you’ll need:
- Acorn squash – pick one that’s firm and heavy for its size.
- Curry powder – this is where the magic happens, so use your favorite blend.
- Maple syrup – pure, not the pancake kind, for that rich, caramelized finish.
- Olive oil – for that perfect roast.
- Salt – to taste and to enhance all those flavors.
How to Make Maple & Curry Acorn Squash
- Preheat your oven to 400°F (200°C) and line a baking sheet with parchment paper or a silicone mat. This makes cleanup a breeze and prevents any sticky situations.
- Give the acorn squash a good rinse, especially if you plan to eat the skin (which, trust me, you’ll want to after it’s all roasted and crispy).
- Carefully, chop the squash in half and scoop out the seeds. You can use a spoon or an ice cream scoop for this—whichever feels less like wrestling and more like a gentle sweep.
- Slice the squash into one-inch wedges, using the natural grooves as your guide. Not only does this make the pieces look pretty, but it also ensures even cooking.
- In a medium bowl, toss the squash wedges with curry powder, maple syrup, olive oil, and salt. Stir until each piece is glistening with the mixture, and you’re tempted to lick your fingers.
- Arrange the wedges on the prepared baking sheet, cut side down. This helps them get that beautiful golden-brown finish on the edges.
- Bake for 15 minutes, then flip them over with a spatula so both sides get equal love and attention. Bake for another 10 to 15 minutes until they’re tender and can be easily pierced with a fork.
Cook’s Notes
When it comes to choosing the right acorn squash, look for one that feels heavy for its size and has a deep green skin. A few orange patches are okay and can even be a sign of ripeness. If you’re prepping ahead, you can slice the squash a day in advance and keep it in the fridge. Once roasted, these wedges keep well covered in the fridge for up to three days. Just pop them in the oven to reheat and crisp them back up. Be cautious not to over-bake; the squash should be tender but not mushy, and the edges should be caramelized but not burnt.
Make It Your Own
- Switch up the squash: Don’t have acorn squash? Butternut or delicata squash work beautifully too.
- Spice it up: Add a pinch of cayenne pepper to the mix for a spicy kick.
- Play with herbs: Sprinkle some fresh rosemary or thyme over the top before baking for an aromatic twist.
- Sweeten the deal: Drizzle a bit more maple syrup on top right before serving for an extra glossy finish.
If you try this, I’d love to hear how it turns out — drop a comment or tag me! Seriously, nothing makes my day more than seeing someone else enjoy something I whipped up in my kitchen. Happy cooking, and remember, kitchen experiments are just recipes in disguise!
Related update: Maple & Curry Acorn Squash