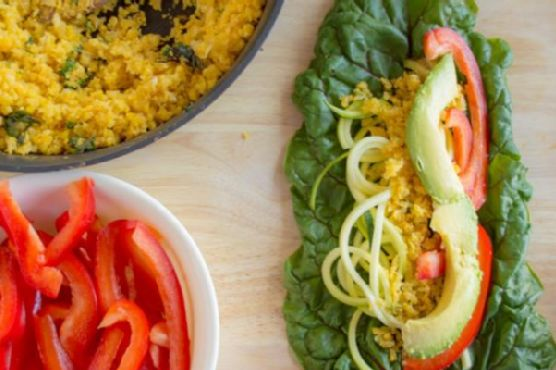
So, the other day, I found myself staring at a lonely bunch of swiss chard in my fridge. You know that moment when you think, “I really should use up those greens before they wilt and vanish into the abyss”? Well, that was me. I wanted something fresh, colorful, and honestly, something quick because who has time on a Tuesday night? Enter, my Swiss Chard Wraps. They’re light, vibrant, and let’s be real, they’re just so satisfying to munch on. These wraps are perfect for those nights when you’re craving something fresh but comforting. Plus, they can totally impress your dinner guests without you breaking a sweat.
Jump to Recipe
What You’ll Need
Most of these ingredients are probably chilling in your kitchen right now — no wild goose chase required. Here’s what you need:
- Dried swiss chard leaves
- Orange cauliflower
- Olive oil
- Garlic
- Salt
- Fresh basil
- Zucchini
- Red bell pepper
- Avocado
- Trader Joe’s spicy peanut vinaigrette
How to Make Swiss Chard Wraps
- First things first, chop off the stems of the swiss chard where they meet the leaf. If you’re feeling adventurous, leave a bit of stem for that extra crunch and structure.
- Take your orange cauliflower, chop it up into small pieces and pulse in a food processor until it resembles rice. Trust me, this orange beauty gives the wraps a gorgeous color and subtle sweetness.
- Heat some olive oil in a sauté pan over medium-high heat. When the oil is shimmering, toss in the garlic. Let it sizzle for a minute or two, releasing that heavenly aroma, until it starts to brown.
- Add the cauliflower rice to the pan. Stir for about 2-3 minutes until it softens and takes on an even more vibrant yellow-orange hue. Season it with a pinch of salt and some fresh basil. Stir it around a bit more so all those flavors mingle.
- Now, spiralize the zucchini using Blade B to make noodles. Don’t worry if you don’t have a spiralizer. Just use a vegetable peeler to create ribbon-like strips.
- To assemble, lay a swiss chard leaf flat. Layer with the sautéed cauliflower, zucchini noodles, red bell pepper slices, and avocado. Drizzle a bit of that spicy peanut vinaigrette over the top.
- Roll it up snugly, and voila! Your wraps are ready to be devoured. Serve them with your favorite protein or just enjoy as is.
Cook’s Notes
These wraps are best when fresh, but if you’ve got leftovers, just pop them in an airtight container and refrigerate them. I’d recommend consuming them within a day to keep the veggies crisp. If you want to prep ahead, you can make the cauliflower rice and spiralize the zucchini a day in advance. Just keep them separated in the fridge and assemble when ready to eat.
Make It Your Own
- Swap the orange cauliflower with purple or white cauliflower for a different hue and flavor profile.
- Try replacing the Trader Joe’s spicy peanut vinaigrette with a tangy balsamic glaze for a sweeter note.
- If you’re feeling like a protein boost, toss in some shredded chicken or crispy tofu.
- For an extra crunch, sprinkle some toasted sesame seeds or chopped nuts over the veggies before wrapping.
Alrighty, that’s all from me! If you give these wraps a whirl, I’d love to hear how they turn out. Drop me a comment or tag me in your wrap-tastic creations! Enjoy every bite, my friends!
Related update: Swiss Chard Wraps

The craving hit me like a ton of bricks on a random Tuesday night. You know the type — the one where you’re suddenly transported to that cozy pub you used to frequent, with a plate of crispy shrimp and a cold drink in hand. However, instead of heading out, I was determined to recreate that same vibe right in my own kitchen. That’s how this Breaded Shrimp and Spicy Mayo Appetizer came to life. It’s the kind of dish that makes you feel like a rockstar chef without creating a mountain of dirty dishes. Trust me, it’s worth every minute you spend on it, especially when you bite into the perfectly crispy shrimp, complemented by the kick of spicy mayo. Whether you’re hosting a small gathering or just treating yourself, this recipe is a keeper.
Jump to Recipe
What You’ll Need
This recipe is delightfully straightforward, and I’m willing to bet you already have most of the ingredients lounging in your pantry. Here’s what you’ll need:
- All-purpose flour
- Bread crumbs
- Chili powder
- Egg
- Garlic powder
- Mayonnaise
- Onion powder
- Suya pepper (your secret weapon for flavor!)
- Salt
- Canned shrimp
- Sriracha sauce
How to Make Breaded Shrimp and Spicy Mayo Appetizer
- Start by peeling and deveining your shrimp. Leave the tail on if you’re feeling fancy — it makes for a great handle.
- Season the shrimp generously with suya pepper, and let them sit for a bit. The spice will do its magic while you prep the rest.
- In a small bowl, whisk the egg until it’s a smooth, sunny yellow, then set it aside for dunking duty.
- In another bowl, mix the all-purpose flour with onion powder, garlic powder, chili powder, and a pinch of salt. This is your flavor-packed coating.
- Take each shrimp and give it a loving coat in the seasoned flour. Dunk it in the egg mixture, making sure it’s fully covered, and finally, roll it in the breadcrumbs.
- Heat up your oil in a pan over medium heat. Once it’s shimmering, it’s time to fry. Place the shrimp in gently, cooking them until they’re golden brown on both sides, filling your kitchen with a mouth-watering aroma.
- For the spicy mayo, mix two tablespoons of mayonnaise with one tablespoon of sriracha sauce until you have a beautifully smooth and spicy dip.
- Serve your crispy shrimp hot, with a generous dollop of spicy mayo on the side. Enjoy the crunch and kick with every bite!
Cook’s Notes
Here are a few things I’ve learned along the way. First, don’t skimp on the seasoning — the suya pepper really elevates the shrimp. Also, make sure your oil is hot enough before you start frying; otherwise, you’ll end up with greasy shrimp instead of crispy perfection. If you’re making this ahead, fry the shrimp and keep them warm in the oven at a low temperature. They’ll stay crisp without drying out. Leftovers (if there are any!) can be stored in an airtight container in the fridge, but they’re best enjoyed fresh.
Make It Your Own
Here are some fun twists for when you’re feeling adventurous:
- Swap the shrimp for crispy tofu if you’re catering to vegetarian friends. The seasoning works well with tofu too!
- Try adding some lemon zest to the bread crumbs for a citrusy zing that pairs beautifully with the spicy mayo.
- If you love garlic, increase the garlic powder in the flour mix and add a dash of fresh minced garlic to the mayo for a garlic-lover’s dream.
- Add a sprinkle of parmesan cheese to the breadcrumbs for a cheesy twist on the classic breading.
If you try this, I’d love to hear how it turns out — drop a comment or tag me on social media! Whether you stick to the script or put your twist on it, I’m excited to see these shrimp bring joy to your table.
Related update: Breaded Shrimp and Spicy Mayo Appetizer
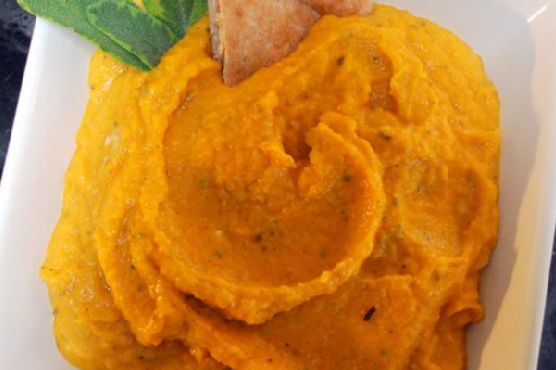
It was one of those chilly fall afternoons when the leaves were swirling outside, and my pantry was looking a bit sparse. I was craving something cozy but hadn’t done a proper grocery run. Luckily, I did have a few seasonal staples on hand, including a couple of butternut squashes that had been staring at me every time I opened the pantry door. A quick rummage through the fridge and spice rack, and voilà! This Roasted Butternut Squash and Sage Dip was born. It’s a creamy, savory dip with just a hint of sweetness from the roasted squash and an earthy touch from the sage. Perfect for those moments when you want to impress without the fuss. Plus, it makes your kitchen smell divine.
Jump to Recipe
What You’ll Need
The beauty of this dip is that it relies on simple, fresh ingredients that you might already have. The key is in the roasting, which brings out all the deep, wonderful flavors.
- Two butternut squash
- Olive oil
- Fresh sage
- Garlic powder
- Fresh ground pepper
- Sea salt
- Onion
- Garlic
- Anchovy (trust me on this one!)
- Goat cheese
How to Make Roasted Butternut Squash and Sage Dip
- Preheat your oven to 350 degrees. This is the perfect time to cozy up and let your kitchen get warm and inviting.
- In a big bowl, mix together some olive oil, fresh sage, a few dashes of salt, pepper, and garlic powder. Toss in the butternut squash cubes, making sure each piece is well-coated with the herby goodness.
- Spread the squash out on a large baking sheet. You want them in a single layer, so they roast up nice and caramelized. Bake for about 30 minutes, or until they are tender and golden at the edges.
- While the squash is doing its thing, sauté chopped onion, anchovy fillets, and garlic in a bit of extra virgin olive oil. Cook them until the onion is soft and the anchovy has melted into the mix. The aroma is heavenly.
- Once the squash is done, let it cool just enough to handle. This way, you’re not nuking your fingers when you move to the next step.
- In a food processor, combine the roasted squash, onion mixture, and about 1/4 cup of crumbled goat cheese. Blend until smooth and creamy. You may need to scrape down the sides a couple of times to get everything evenly mixed.
- Transfer the dip into a pretty bowl because presentation matters! Serve it up with pita wedges, breadsticks, or a colorful array of veggies.
Cook’s Notes
This dip is pretty forgiving and flexible, perfect for those “let’s wing it” cooking sessions. If you’re prepping in advance, you can roast the squash and make the sautéed onion mixture the day before. Just keep them in separate containers in the fridge and blend them up with the cheese when you’re ready to serve. It will keep well in the fridge for about 3 days, though it never lasts that long at my house! If the dip thickens too much after chilling, a splash of olive oil or a bit of warm water stirred in should bring it back to life.
Make It Your Own
This is where the fun begins—don’t be afraid to play around with this recipe!
- Swap the goat cheese for feta if you want a saltier, tangier vibe.
- For a vegan version, skip the anchovy and goat cheese, subbing in roasted red peppers for extra depth.
- Add a pinch of red pepper flakes to the roasting mix for a bit of heat.
- Use sweet potatoes instead of butternut squash for an earthier sweetness.
If you try this, I’d love to hear how it turns out—drop a comment or tag me! Nothing makes me happier than seeing all the delicious ways you bring these recipes to life. Enjoy!
Related update: Roasted Butternut Squash and Sage Dip
Related update: Breaded Shrimp and Spicy Mayo Appetizer
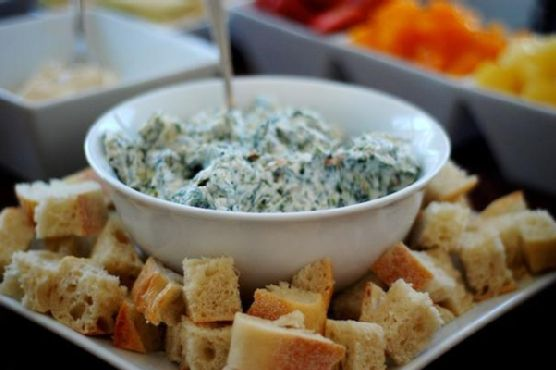
It was one of those evenings when the wind had a bite to it, and all I wanted was something warm and comforting that didn’t require a trip to the store. I peeked into my pantry and there it was — a can of artichoke hearts, a block of cream cheese, and some fresh spinach that had seen better days. It was like they were whispering, “Make something delicious out of us.” And thus, this Warm Spinach Artichoke Dip was born. It’s the kind of dish that’s easy to throw together when you need a little pick-me-up, perfect for snacking or impressing friends without breaking a sweat. The rich, creamy texture and the burst of garlicky goodness is just what you need at the end of a long day.
Jump to Recipe
What You’ll Need
I bet you’ve got most of this stuff in your kitchen already. It’s all about the handful of key players that bring everything together into a cozy, irresistible dip.
- Olive oil
- Artichoke hearts
- Garlic
- Red chili flakes
- Salt
- Baby spinach
- Cream cheese
- Parmesan cheese
- Lemon juice
- Black pepper
How to Make Warm Spinach Artichoke Dip
- Start by placing the olive oil, artichoke hearts, garlic, red chili flakes, and a pinch of salt in a small pot. Cover it up and let it simmer on low heat for an hour. Your kitchen will smell fantastic, a hint that you’re on the right track.
- Once the artichokes are fragrant, add the baby spinach to the pot. Cover it again and steam the leaves for about 2 minutes, just until they wilt and turn a vibrant green.
- Transfer everything from the pot into a food processor. Add the cream cheese, parmesan cheese, and a splash of lemon juice. Pulse until the mixture is chunky but well-combined, a texture that promises every scoop will be packed with flavor.
- Finally, garnish with a sprinkle of black pepper and serve it up with some warm, crusty bread — because trust me, you’ll want something sturdy to scoop up all that goodness.
Cook’s Notes
This dip is pretty forgiving, but here are some tips to keep it extra tasty. Make sure to simmer the artichokes long enough to really let the flavors meld. You can make this dip ahead of time and store it in the fridge for a couple of days. When you’re ready to serve, just reheat gently on the stove. If you find yourself with leftovers (unlikely, but possible), they make a killer sandwich spread or a pasta sauce with a bit of extra cream or milk.
Make It Your Own
- Swap the artichoke hearts for marinated artichokes if you want a little extra zing to your dip.
- Mix in some crispy bacon bits for a smoky touch that complements the creamy base.
- Use feta cheese instead of parmesan for a tangy twist.
- Add a handful of chopped sun-dried tomatoes for a burst of sweetness and color.
If you try this, I’d love to hear how it turns out — drop a comment or tag me! Whether it becomes your go-to for cozy nights in or a star at your next gathering, I hope this dip brings a little warmth and joy to your table.
Related update: Warm Spinach Artichoke Dip
Related update: Roasted Butternut Squash and Sage Dip

Last Tuesday, I found myself staring into the fridge at 6 p.m. with a growling stomach and no dinner plans. You know the feeling, right? That weeknight scramble where you’re just trying to conjure up something quick yet satisfying. Lucky for me, an almost forgotten can of tuna and some leftover boiled eggs saved the day. Enter these deliciously simple Tuna Stuffed Hard-Boiled Eggs—a perfect blend of creamy and tangy, ready in a flash and impressive enough that you might actually look forward to making them again. Whether you’re crafting a light lunch or a snack for a spontaneous get-together, these little bites are exactly what you need.
Jump to Recipe
What You’ll Need
The beauty here is that you probably have all these ingredients lounging in your kitchen. It’s a simple yet delightful list that packs a punch.
- 6 hard-boiled eggs
- 1 can of tuna, drained
- 1/4 cup finely chopped onion
- 1/4 cup grated carrot
- 2 tablespoons chopped parsley
- 1 tablespoon fresh lemon juice
- 1/4 cup corn kernels for garnish
How to Make Tuna Stuffed Hard-Boiled Eggs
- Start by peeling those perfectly boiled eggs and slicing them in half lengthwise. Scoop the yolks into a bowl and place the whites on a plate.
- In the bowl with the yolks, add the drained tuna, chopped onion, grated carrot, parsley, and a squeeze of fresh lemon juice. Mash everything together with a fork until it’s well combined and creamy.
- Spoon or pipe the tuna mixture back into the egg whites, filling each hollow generously. You’ll want the filling to have a slightly mounded look.
- To finish, sprinkle the tops with corn kernels. They add a sweet pop and a dash of color—plus, who doesn’t love a little crunch?
Cook’s Notes
If you’re boiling the eggs specifically for this recipe, a 9-minute boil should give you that perfect firm yolk. To prevent overcooking them (nobody likes a green-tinged yolk!), immediately plunge them into an ice bath after boiling.
- For a smoother filling, try blending the mixture in a food processor. It’s not necessary, but it adds a touch of elegance.
- You can make the filling a day ahead—just store it in an airtight container in the fridge. Stuff the eggs just before serving for the freshest result.
- Leftovers can be stored in the fridge for up to 2 days, but honestly, they’re so good, you probably won’t have any!
Make It Your Own
- Swap the tuna for canned salmon or even shredded chicken for a different flavor profile.
- Love a bit of heat? Add a spoonful of sriracha or a pinch of cayenne pepper to the tuna mixture for a spicy kick.
- If you’re a fan of herbs, try swapping parsley for dill or basil for a fresh twist.
- For added creaminess, mix in a tablespoon of mayo or Greek yogurt with the tuna filling.
If you try this, I’d love to hear how it turns out—drop a comment or tag me! These eggs might just become your new go-to when you’re in a pinch. Happy cooking!
Related update: Tuna Stuffed Hard-Boiled Eggs
Related update: Warm Spinach Artichoke Dip
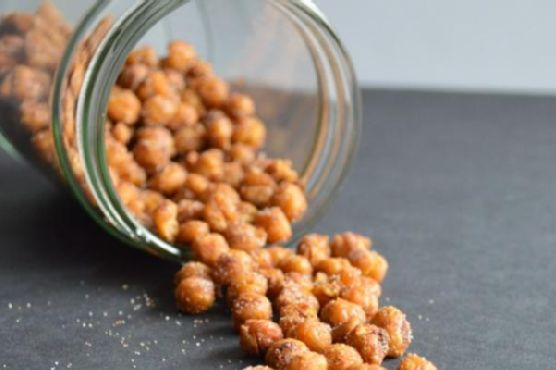
Picture this: It’s a breezy Sunday afternoon, my playlist is on shuffle, and I’m craving something snacky yet a little indulgent. I open the pantry, and there they are, my trusty canned chickpeas staring back at me like they know they’re about to be transformed. Last week, I had a major kitchen mishap with a new bread recipe that turned out more like a weapon than a loaf, so today I’m sticking to something foolproof and fabulous—Cinnamon & Sugar Roasted Chickpeas. These little morsels are not only super easy to whip up, but they also bring that sweet, crunchy magic that’s like a hug for your taste buds, without any of the guilt. Plus, they make my whole kitchen smell like a cinnamon wonderland, which is a win-win for everyone involved.
Jump to Recipe
What You’ll Need
What’s great about this recipe is that you likely already have most of these gems hanging around in your kitchen. We’re talking pantry staples with a sweet twist!
- 1 can of garbanzo beans (aka chickpeas)
- 1 tablespoon olive oil
- 1 tablespoon maple syrup
- 1 teaspoon cinnamon
- 1 tablespoon cane sugar
How to Make Cinnamon & Sugar Roasted Chickpeas
- First things first, preheat your oven to 425°F. Trust me, having it nice and hot is key for the perfect crunch.
- Line a baking sheet with parchment paper or a silicone mat. It makes cleanup super easy and keeps the chickpeas from sticking.
- Drain and rinse the chickpeas thoroughly. This is your chance to say goodbye to that canning liquid!
- Take two sheets of paper towels, lay one down, spread the chickpeas out, and use the other to gently pat them dry. You want them as dry as possible to achieve that crispy texture.
- While you’re drying, pick out any skins that have come loose. It’s not a big deal if you can’t get them all—just do your best!
- In a small bowl, mix the dried chickpeas with olive oil, maple syrup, and cinnamon until every little bean is well-coated and looking scrumptious.
- Spread the chickpeas on your prepared baking sheet in a single layer. Bake for 15 minutes, enjoy a dance break or clean up the kitchen.
- After 15 minutes, stir the chickpeas to ensure even baking. Return them to the oven, baking in 3-4 minute increments until they’re beautifully browned and dried to your liking. Remember, the longer they roast, the crunchier they’ll get, but keep an eye out to prevent burning.
- Once out of the oven, let them cool for a bit. Then, sprinkle the cane sugar over them while they’re still warm but not hot. Toss them gently to coat.
- Now, dig in and enjoy these delightful nuggets of crunchy sweetness!
Cook’s Notes
If you’re anything like me, you’ll want to store these in an airtight container if they last longer than a day (spoiler: they might not!). They generally stay fresh and crunchy for a couple of days, but after that, they tend to soften up. No worries though—they’re still tasty! For the impatient snackers, remember the necessity of drying the chickpeas; moisture is the enemy of crunch. Also, I wouldn’t recommend skipping the parchment paper unless you want a sticky mess on your hands.
Make It Your Own
- Feeling spicy? Add a pinch of cayenne pepper to the mix for a sweet and spicy combo that’ll keep you on your toes.
- Swap the maple syrup for honey if you’re after a deeper, richer sweetness.
- Use coconut oil instead of olive oil for a subtle tropical twist that pairs beautifully with the cinnamon.
- For a festive flair, sprinkle a bit of nutmeg or pumpkin pie spice into the mix. Hello, holiday vibes!
If you try this, I’d love to hear how it turns out—drop a comment or tag me in your snack-tastic creations! Your oven and chickpeas await, my friend. Snack on!
Related update: Cinnamon & Sugar Roasted Chickpeas
Related update: Tuna Stuffed Hard-Boiled Eggs
So there I was, staring at the contents of my fridge, wondering how I could whip up something that felt more like a brunch celebration and less like a “what’s-left-in-the-fridge” scramble. It was one of those days when you crave something cozy yet impressive, especially when your best friend calls and says she’s popping over in half an hour. Enter: Mini Spinach and Feta Quiches. They’re this magical combination of simplicity and elegance, bursting with savory flavors and just the right amount of cheese. Plus, they bake up quickly, so you can spend more time chatting and less time cooking. Trust me, these little quiches are worth every moment spent waiting for them to puff up in the oven. Perfect for a casual get-together or a solo treat with a cup of coffee.
Jump to Recipe
What You’ll Need
What’s great about these quiches is that they’re made with ingredients you probably have on hand or are easy to grab on a quick grocery run. Here’s the lineup:
- Eggs – because what is a quiche without eggs?
- Half-and-half – for that creamy, luscious texture.
- Garlic – a subtle kick with lots of flavor.
- Frozen spinach – convenient and just right for this dish.
- Onion – for a touch of sweetness and depth.
- Basil – fresh and aromatic, a lovely herbaceous note.
- Low-fat shredded cheddar cheese – because cheese is life.
- Feta cheese – tangy, crumbly, and oh-so-delicious.
- Salt and pepper – essential for balancing flavors.
How to Make Mini Spinach and Feta Quiches
- Preheat your oven to 375°F (190°C). This is your time to collect your thoughts and maybe sip on some coffee, knowing deliciousness is coming soon.
- Set a large skillet over medium heat and coat it well with olive oil spray. Wait until the oil shimmers like a little lake under the sun.
- Add the garlic. Stir it around for about 30 seconds, just until it releases that irresistible aroma. No burnt garlic here!
- Add the chopped onion with a sprinkle of salt and pepper. Turn the heat up slightly to medium-high and cook, stirring often, until the onion turns a light golden brown.
- Now, fold in the spinach, chopped basil, and another pinch of salt and pepper. Lower the heat to medium and let it all mingle for about 10 to 15 minutes, stirring occasionally. Taste and adjust the seasoning if needed.
- Meanwhile, in a large bowl, whisk together the eggs, feta cheese, half-and-half, some more salt and pepper. Make sure it’s well blended, like a team of flavors ready to win.
- Spray your mini muffin pans generously with more olive oil spray. You don’t want any quiches sticking around here when it’s time to serve.
- Distribute the spinach mixture evenly among the muffin cups, about a tablespoon each. Follow this up with a tablespoon of the egg mixture in each cup.
- Bake in your preheated oven for 15 minutes, until the edges start to set and the tops look a little puffy.
- Pull out the pans and sprinkle each quiche with a touch of reserved shredded cheddar. Pop them back in the oven for about 5 more minutes, until the cheese on top is a beautiful golden brown.
- Let them cool slightly before serving. They’re delightful warm or at room temperature, with the flavors singing together perfectly.
Cook’s Notes
These quiches are ultra flexible, which is what I love most about them. You can make them a day ahead if you’re planning for a brunch or party. Just store them in an airtight container in the fridge and reheat gently in the oven or microwave. They stay good for about 3 days, though they rarely last that long at my house!
- Don’t overfill the muffin cups. The filling puffs up a bit during baking, so leave a little space to avoid spillage.
- If you’re chopping onions and they make you cry, try chilling them in the fridge for a bit beforehand. It helps, promise!
Make It Your Own
- Protein Punch: Swap out the spinach for sautéed mushrooms and add some cooked, crumbled bacon for a heartier bite.
- Spice it Up: Sprinkle a little smoked paprika or cayenne into the egg mixture for an unexpected kick.
- Go Green: Use kale or Swiss chard instead of spinach for a different leafy green vibe.
- Cheese Swap: Try sharp cheddar or even a nutty Gruyère if you’re out of feta. It’ll change the flavor profile in the best way.
If you try this, I’d absolutely love to hear how it turns out — drop a comment or tag me! May your kitchen be filled with the aroma of baking goodness and the satisfaction of a job deliciously done. 🍴✨
Related update: Mini Spinach and Feta Quiches

Picture this: It’s a blustery Tuesday evening, and I’ve just come home from work, craving something warm and savory to take the chill off. The kind of dish that fills the house with tantalizing aromas and makes you feel like you’re getting a hug from the inside. Enter my baked Indian samosas — golden, flaky, and just spicy enough to keep things interesting. These little parcels of joy are surprisingly easy to whip up, even on a weeknight, thanks to the magic of puff pastry. And trust me, your taste buds won’t know what hit them. Plus, they’re baked, not fried, so we can feel a little virtuous, right? These samosas have become my go-to comfort food, especially when I want to impress without too much hassle. Jump to Recipe
What You’ll Need
The ingredient list is refreshingly straightforward, and chances are you already have most of this in your pantry.
- Puff pastry
- 1 egg
- Water
- 1 russet potato, peeled and diced
- Salt
- 2 bay leaves
- 1 teaspoon coriander seeds, divided
- 1 teaspoon black peppercorns
- 1 teaspoon red chili flakes
- 1 skinless boneless chicken breast
- 1/2 cup diced mango
- 1/4 cup peas
- Juice of 1 lime
- 2 tablespoons chipotle sauce
- 1 teaspoon cumin seeds
- 1/4 cup chopped cilantro leaves
- Black salt and pepper, to taste
How to Make Baked Indian Samosas
- Preheat your oven to 425 degrees F. This is your golden ticket to perfectly baked samosas.
- In a small saucepan, combine the diced potato and enough cold water to cover. Add a generous pinch of salt. Bring it to a boil over medium heat, then reduce to a simmer until the potato is tender, about 12 to 15 minutes.
- In another pot, bring 4 cups of water to a simmer. Toss in a pinch of salt, the bay leaves, 1 teaspoon of coriander seeds, peppercorns, chili flakes, and the chicken breast. Let it simmer until the chicken is cooked through, about 8 to 10 minutes.
- Drain the cooked potato and mash it until smooth. Shred the chicken finely. Combine both in a large mixing bowl.
- Add the peas, diced mango, lime juice, chipotle sauce, remaining coriander seeds, cumin, cilantro, and salt and pepper to the bowl. Mix everything together until well incorporated, using a spoon or your hands. Taste and adjust the seasoning as needed.
- Roll out the puff pastry slightly to flatten the seams. Use a paring knife to cut the dough into 8 (7-inch wide) rounds. Cut each round into 2 semicircles.
- Place a tablespoon of filling in the center of each semicircle. Keep a small bowl of water nearby. Dip your finger in the water and run it along the edges of the dough.
- Fold the left corner over the filling in a triangular motion, landing the corner on the bottom right. Repeat with the other corner, then squeeze the bottom shut. Seal with water and press with a fork for good measure.
- Arrange the samosas on a lightly greased baking sheet. In a small bowl, whisk together the egg with 1 teaspoon of water. Brush the tops of the samosas with this egg wash.
- Bake for 15 minutes at 425 degrees F, then lower the heat to 375 degrees F and bake for another 10 minutes. If you’re feeling adventurous, flip them just before turning the heat down.
- Serve warm with your favorite chutney and bask in the deliciousness.
Cook’s Notes
The magic of these samosas is in their versatility. You can make the filling a day in advance, which makes assembly a breeze on a busy day. Just keep it chilled in an airtight container. As for leftovers, if there are any, you can store them in the fridge for up to three days. Reheat them in the oven to restore their crispness — microwaving makes them soggy, and nobody wants that. One common mistake is overfilling the samosas, which can lead to leaks. Less is more here, trust me.
Make It Your Own
- Swap the chicken breast for crispy tofu for a vegetarian version that’s equally satisfying.
- Replace the mango with diced apples for a subtly sweet twist.
- Add a handful of chopped spinach to sneak in some greens.
- For a spicier kick, mix in some diced jalapeños with the filling.
If you try this, I’d love to hear how it turns out — drop a comment or tag me! Nothing makes my day like seeing your kitchen adventures. Enjoy your samosa-making journey!
Related update: Baked Indian Samosas